 WooDWorkeR
 davedarko
 Aleksandar Bradic
 deʃhipu
 coon
coon-
The 0.70 € STM8 Board
08/17/2016 at 09:56 • 3 commentsThe 0.70 € Board
So you ordered your super cheap stm8 dev board from aliexpress oder eBay and now you want to do at least a blinking LED, then this Mini Tutorial is exactly for you
Hardware
The STM8S103F3 dev board
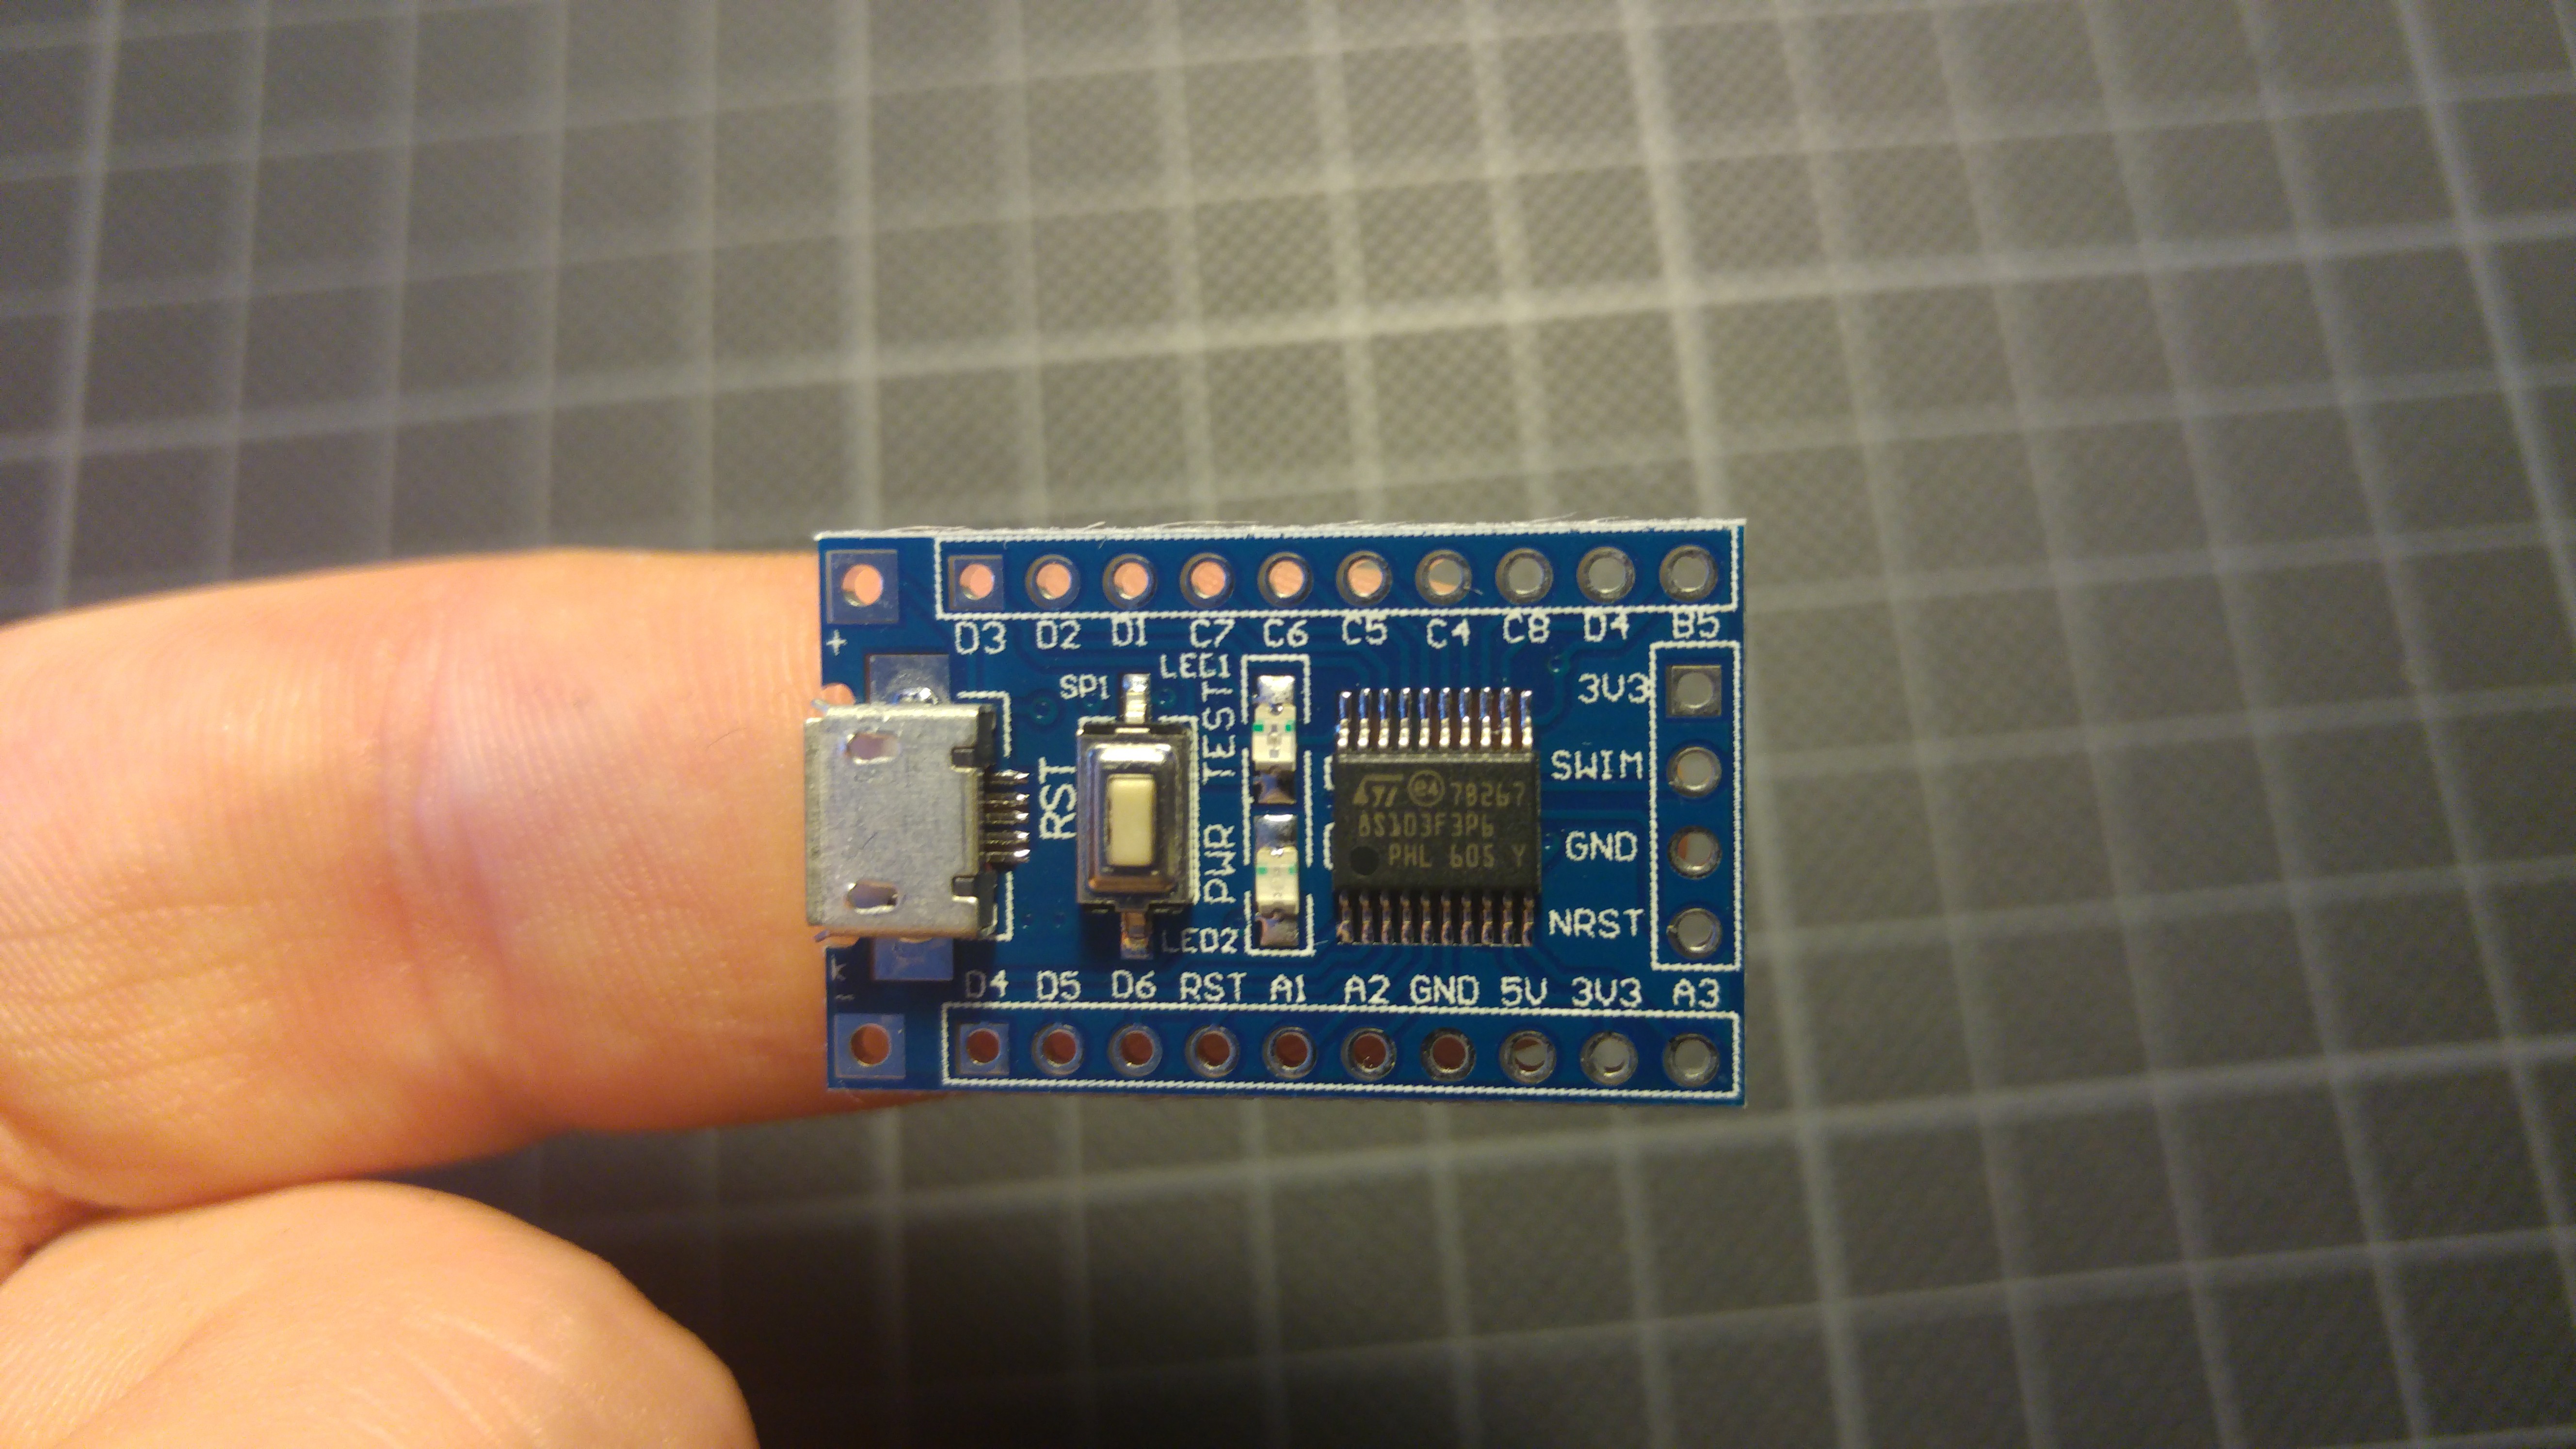
Just in case you do not have your board yet, search for "STM8S103F3 board" on you favorite china shopping page. You should see a plethora of listings from anything between 70 cents and 10 EUR, if some of them say ARM do not let them confuse you as the STM8 is very far away from an ARM cpu.
And yes they all show a MicroUSB port on them, but this is for nothing more then to power this board. For Programming you need something called an STLink
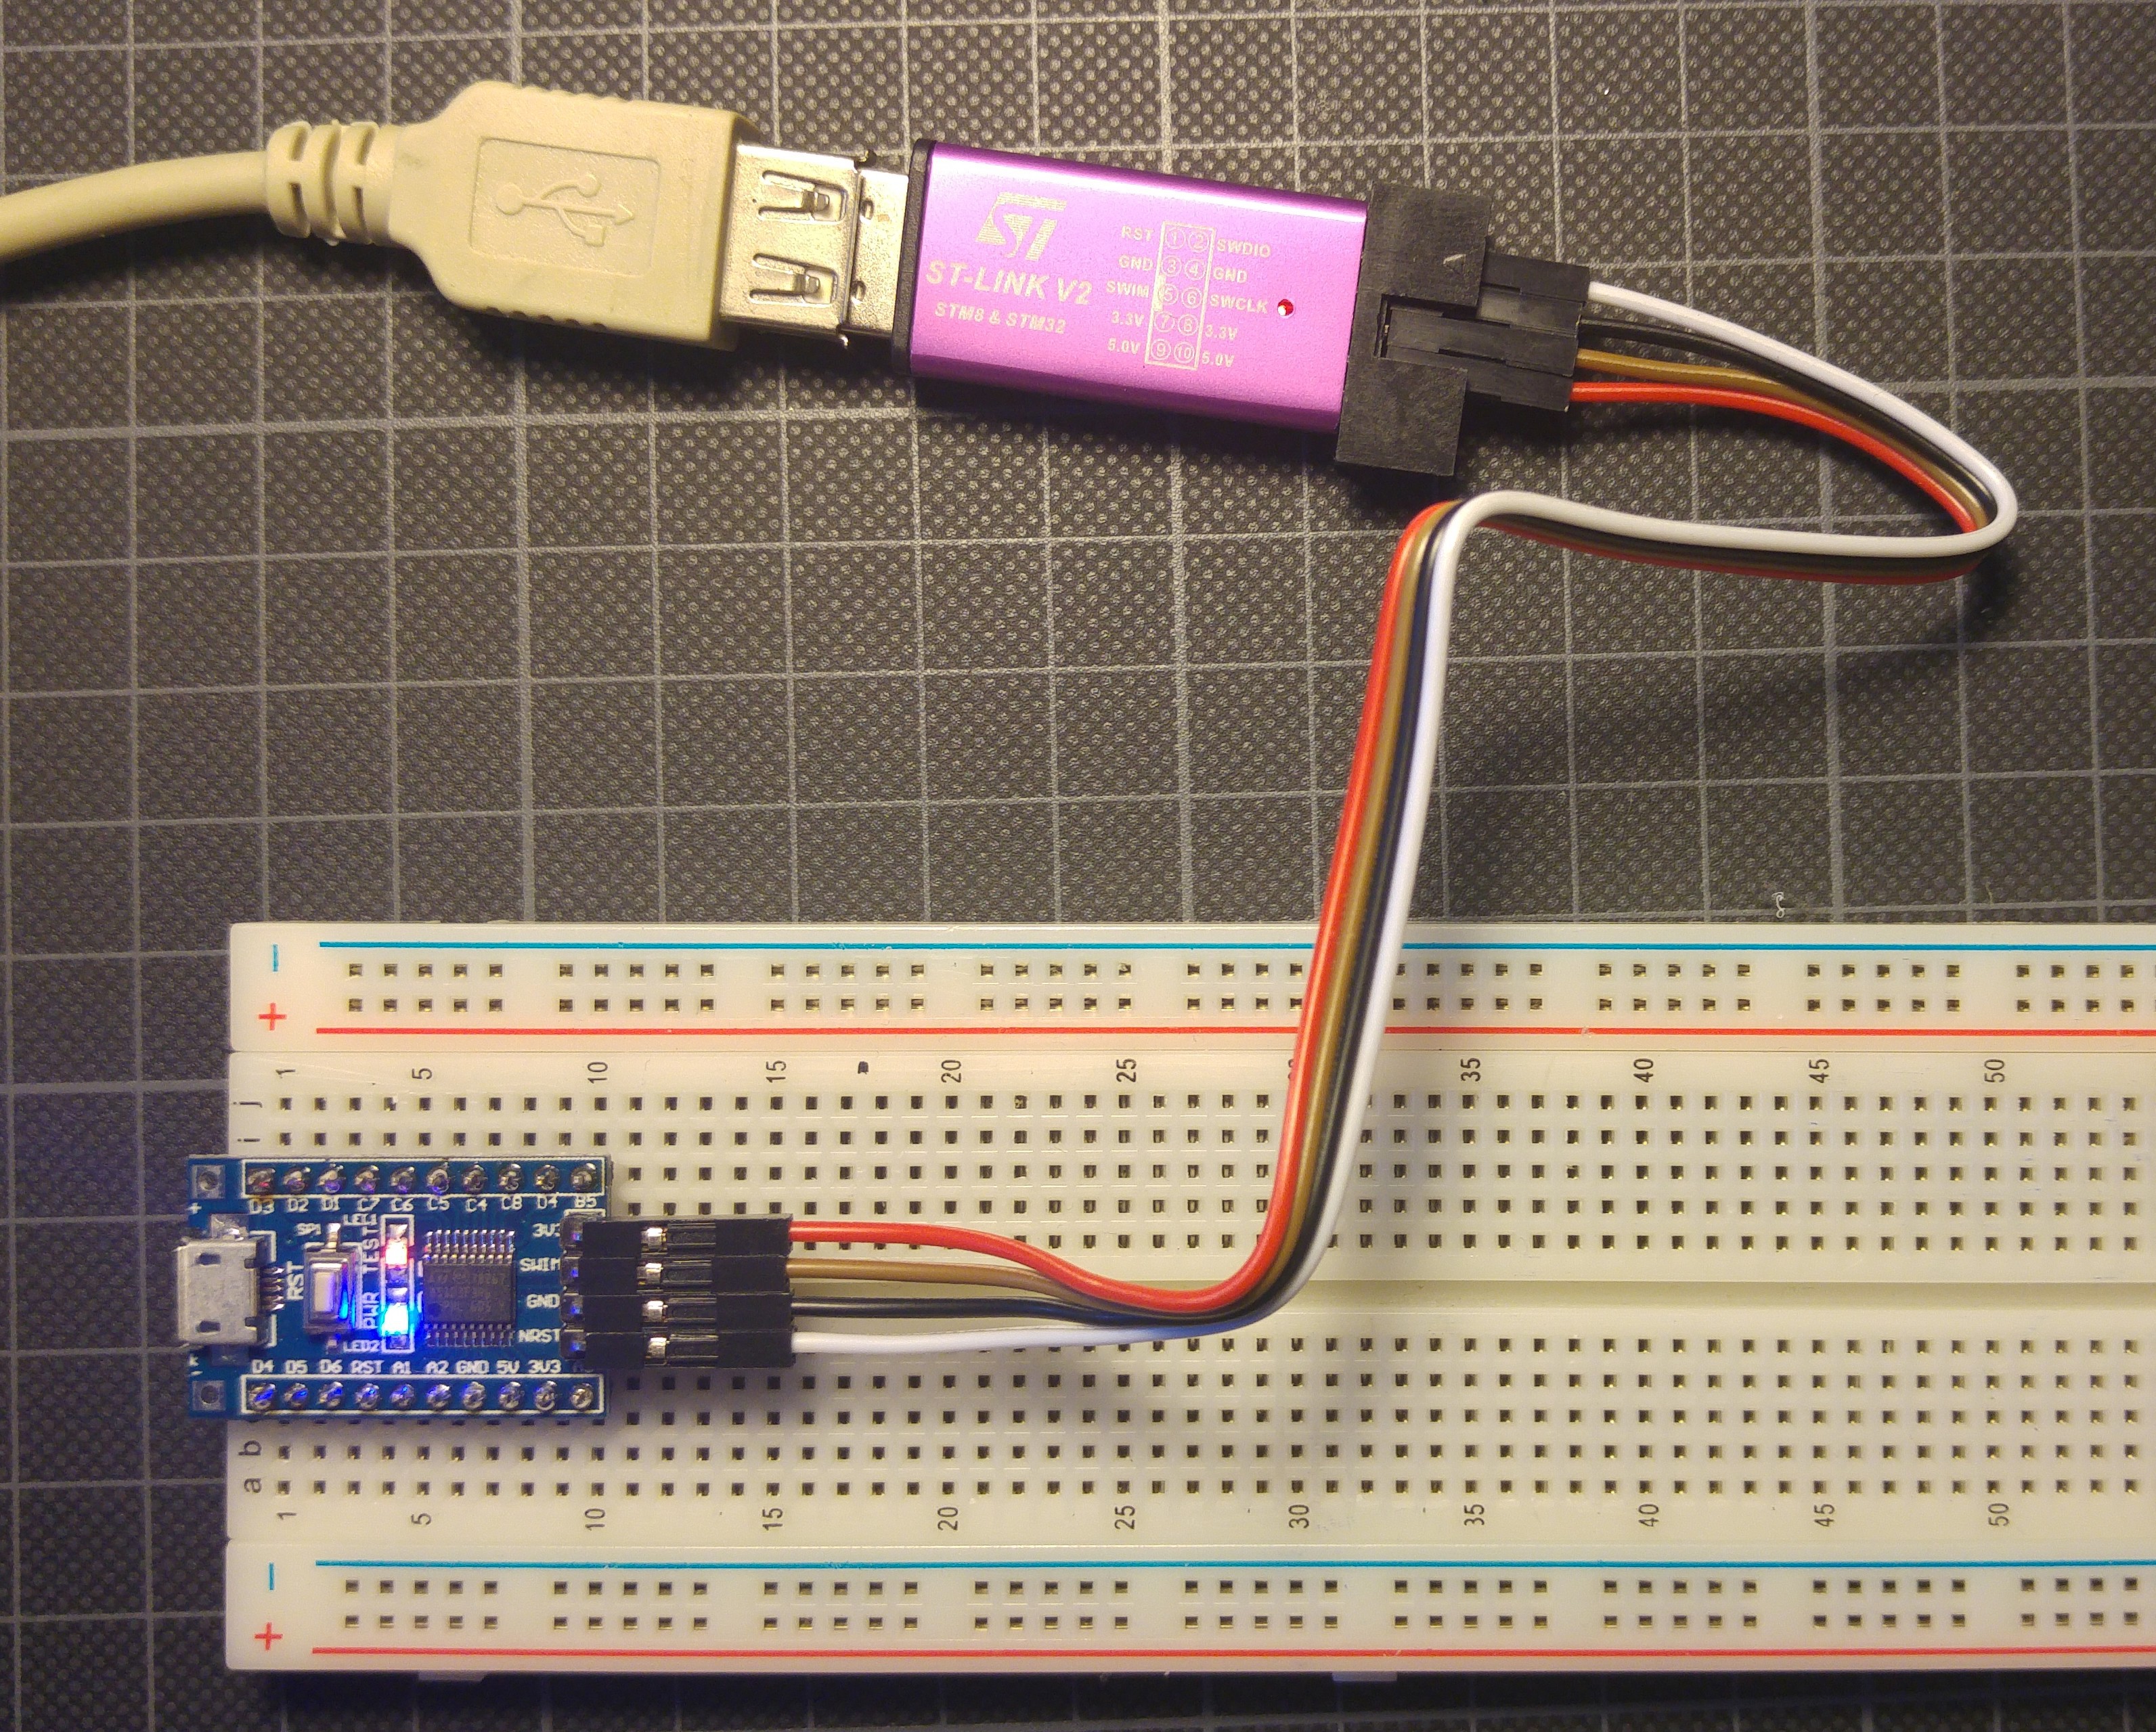
The STLink v2
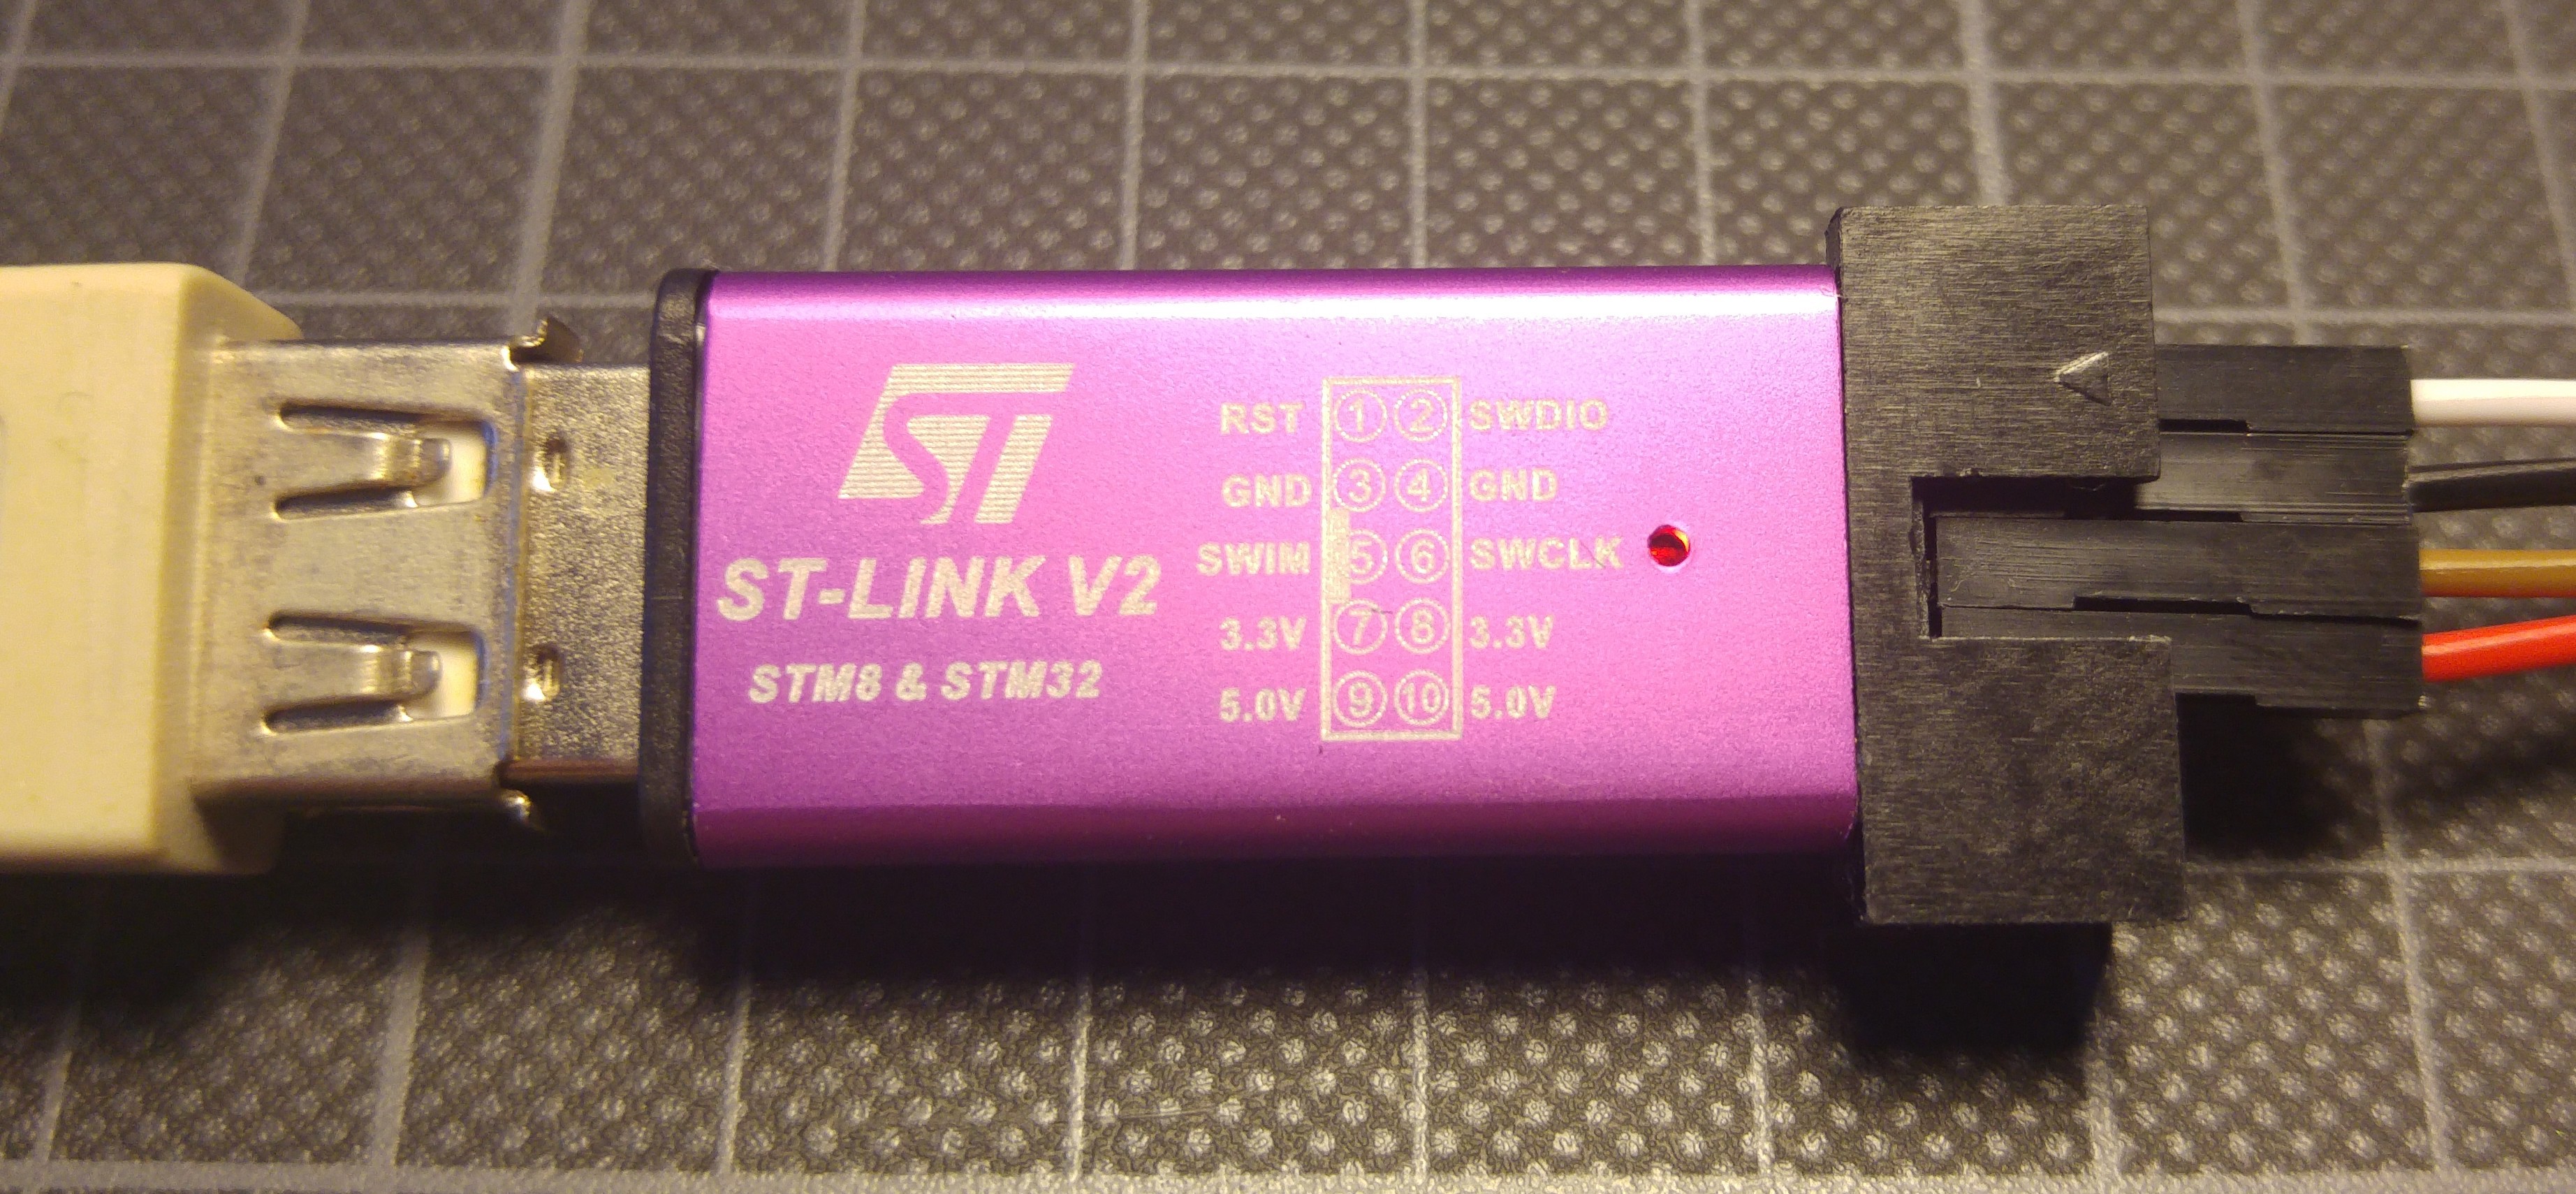
The STLink v2 is a small stm32 based Programmer for STM8 and also STM32, they are all based on the Reference design by ST but way cheaper. And as the Design and Firmware was made opensource china created these cheap USB Sticks so you do not need to buy a 50 EUR STLink Original.
Again, if you don't have one search for "stlink v2" and you should see listings starting at 2 EUR.
Software
sdcc
First you need some software, on a Ubuntu >=15.04 you just need to install sdcc, the small device c compiler, a compiler that supports the old 8051, zilog z80, PIC16, a lot more and for this tutorial most important the STM8
sudo apt-get install sdccJust to be sure that your installed version of sdcc supports the stm8 you can check the version string which should contain stm8
sdcc --version
 SDCC : mcs51/z80/z180/r2k/r3ka/gbz80/tlcs90/ds390/TININative/ds400/hc08/s08/stm8 3.4.0 #8981 (Jul 12 2014) (Linux)
published under GNU General Public License (GPL)
stm8flash
The next software you need is the stm8flash software that you need to fetch from github
git clone https://github.com/vdudouyt/stm8flash.git
cd stm8flash
make
If you want to install the stm8flash software globally to you system just run "sudo make install" after make finished. This will save you from typing the full path to stm8flash over and over again.
The first steps (and what you will most probably stumble upon)
When you get your fresh STM8S103F3 Board from China, they are most probably in a "locked mode" This will show up when you want to program them as an error message
Is it locked?
sudo stm8flash -c stlinkv2 -p "stm8s103f3" -w blinky.ihx
 Determine FLASH area
 Writing Intel hex file 182 bytes at 0x8000... Tries exceeded
There is a pretty simple fix for this found in the stm8flash issues Thos who are interested in what all the 00 and ff mean, can go to the datasheet page 45 and read about the "option bytes"
echo "00 00 ff 00 ff 00 ff 00 ff 00 ff" | xxd -r -p > factory_defaults.bin
stm8flash -c stlinkv2 -p stm8s103f3 -s opt -w factory_defaults.bin
Blink the LED
And now the minimal code needed to blink an LED on your super cheap development board. The LED is connected to Pin B5, which means Port B, pin 5
ledblink.c
// Port B data output latch register, for setting pins HIGH or LOW) #define PB_ODR *(unsigned char*)0x5005 // Port B data direction register, for setting pins as INPUT or OUTPUT #define PB_DDR *(unsigned char*)0x5007 // Port B control register 1 #define PB_CR1 *(unsigned char*)0x5008 int main() { int d; // Configure pins PB_DDR = 0x20; // 0x20(00100000) pin 5 set to 1 -> setting it as OUTPUT PB_CR1 = 0x20; // 0x20(00100000) pin 5 set to 1 -> setting it as PUSH-PULL Mode (only when configured as output) // Loop do { PB_ODR ^= 0x20; // 0x20(00100000) pin 5 XOR/toggle between HIGH and LOW for(d = 0; d < 29000; d++) {} } while(1); }Now we need to compile this file
sdcc -lstm8 -mstm8 --out-fmt-ihx ledblink.cSDCC has now compiled our C code into a "ledblink.ihx" file that can be uploaded to our devboard.
sudo stm8flash -c stlinkv2 -p stm8s103f3 -w ledblink.ihx
 Determine FLASH area
 Writing Intel hex file 189 bytes at 0x8000... OK
 Bytes written: 189
Tada, now you have a blinking LED on your STM8 dev board.

Links
Read more »
My Pages
Projects I Like & Follow
 arturo182
 Jasper Sikken
 Lutetium
 Frank Buss
 Grant Giesbrecht
 matseng
 Nick Matantsev
 Martin Held
 svofski
 Tillo
Tillo Elliot Williams
Share this profile
ShareBits


Good afternoon WooDWorkeR and thank you for liking my Cardboard Relay project :-)

Thanks for liking #DINternet mate!
Check out #Flask Jukebox and #Digibone if you haven't already ;-)

"Now on Hackaday.io: WooDWorkeR has added a new log"
Very punny, hrhr

Thanks for following! :)
The #c-base protothing is pretty neat, one question though: Can it also be used as a beer coaster? ;P

i'm working on rev-C, after that is rev-c_ then C_, cc, cC, CC :D

Thank you for following my project https://hackaday.io/project/159139-tiny-solar-energy-module-tsem.