My question was, how to generate a cheap continious full abolute 360° resistive encode and I came up with a nice hack; using a dual potentiometer (<1€ per piece, aliexpress).
When opening it, you see the base components of a single potentiometer. There are basically two simple steps to apply:
You can easily bend the rotation stop back, so the axis can rotate by 360°
You can mount the top white pick up (with the springs) by 180°. To do so, you need to cut of a little bit of the white plastic that the pokayoke pin fits in oposite direction.
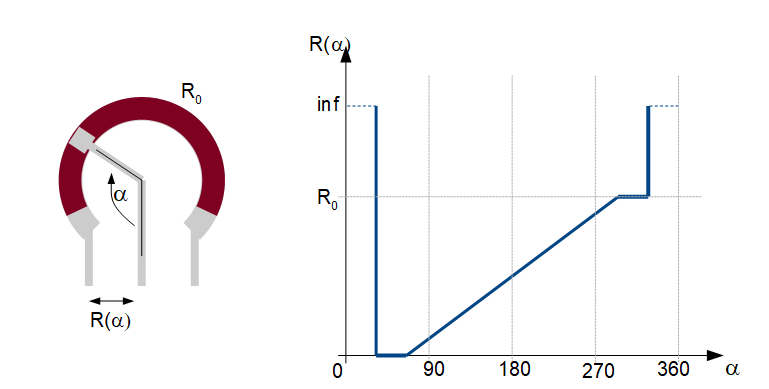
Then put everything back togeter and you have synchronized dual potentiometers with 180° phase shift. A single potentiometer has the following behavior without the rotation blocker:
When the center tap does not touch the outer tap, the resistance between the left and middle tap is infinity.
As soon as the center tap hits the metalization of the left tap, the resitance goes instantaniously to zero and starts to increase as soon as the center tap reaches the resistive area.
During the last part where the center tap touches the metallic connection at the end of the resistive layer, the resistance stays constant
Finally, the resistance goes to infinity again.
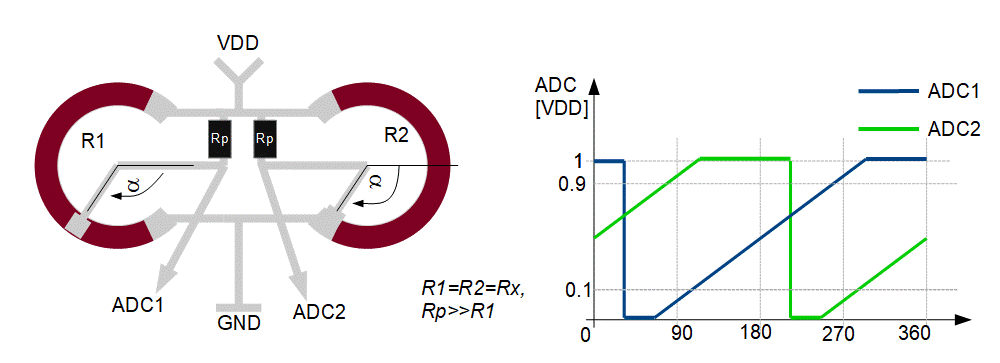
To get a 360° rotational postion, the easiest way is two use two ADC converters and two pull up resistors as shown in the next figure. If the ADCx voltage is between 0.1 and 0.9 VDD for example, the measurement can be taken to calculate the rotation angle. There will be at lease one of these measurements for each angle and in several cases both ADCs will show a valid measurement and both values can be averaged to increase the performance.
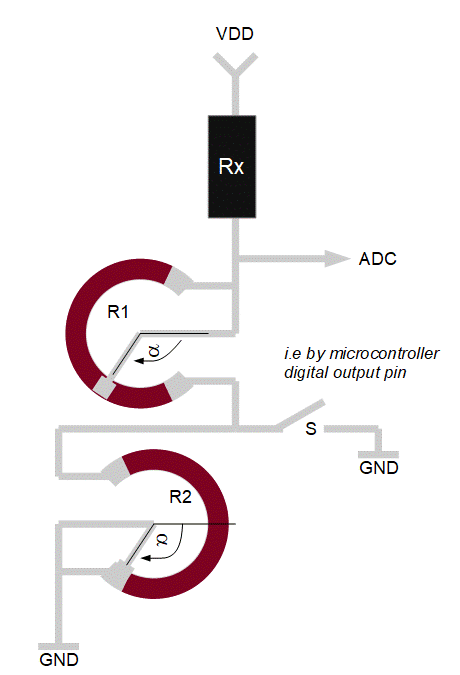
I was thinking a lot if one could find an easy circuit which could achieve this with a single ADC measurement (without using further ICs like an opamp). The only thing I come up was using a digital output switching from high impedance to ground and a single channel ADC. With the following setup only one ADC channel would be needed with two measurements to get the absolute anlge. It involves a (float) division in software.
So far I have not tested it with real software, but this is to come. Any ideas of an even more elegant readout are welcome!
Setting up a macvlan in docker has an irritating fact that the host cannot be reached from the container and the host itself cannot reach the container.
Most people propose to add a second macvlan to the ethernet interface to allow routing between docker container and host. The drawback is, that this setup involves manual work for the container user.
I think I came up with an elegant solution (at least for me) to solve this;
a) add a second (default bridge) network to the container (see A & B) b) add a routing rule inside the container to route trafic to the host via this second interface -> allow container to host traffic (see C) c) As usual, expose ports on this default interface -> allows host to container traffic
Benefits: - Can be configured completely inside a container (i.e. startup script) and with a docker compse file ==> easy for users!
Example / proof of concept for a host at 192.168.0.22 hosting a docker container:
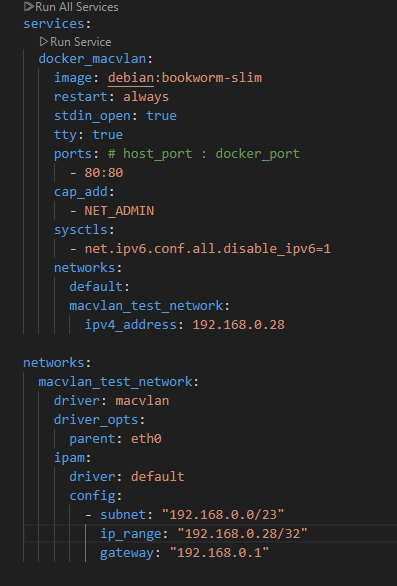
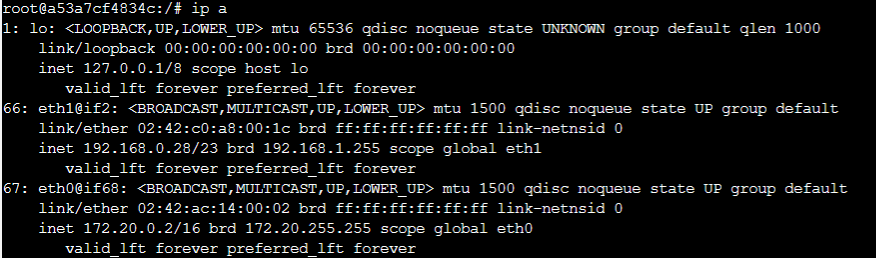
A) docker-compose with a macvlan network at 192.168.0.28: B) The resulting network configurationC) Non reachable host and ip-route setting in the container to reach host again
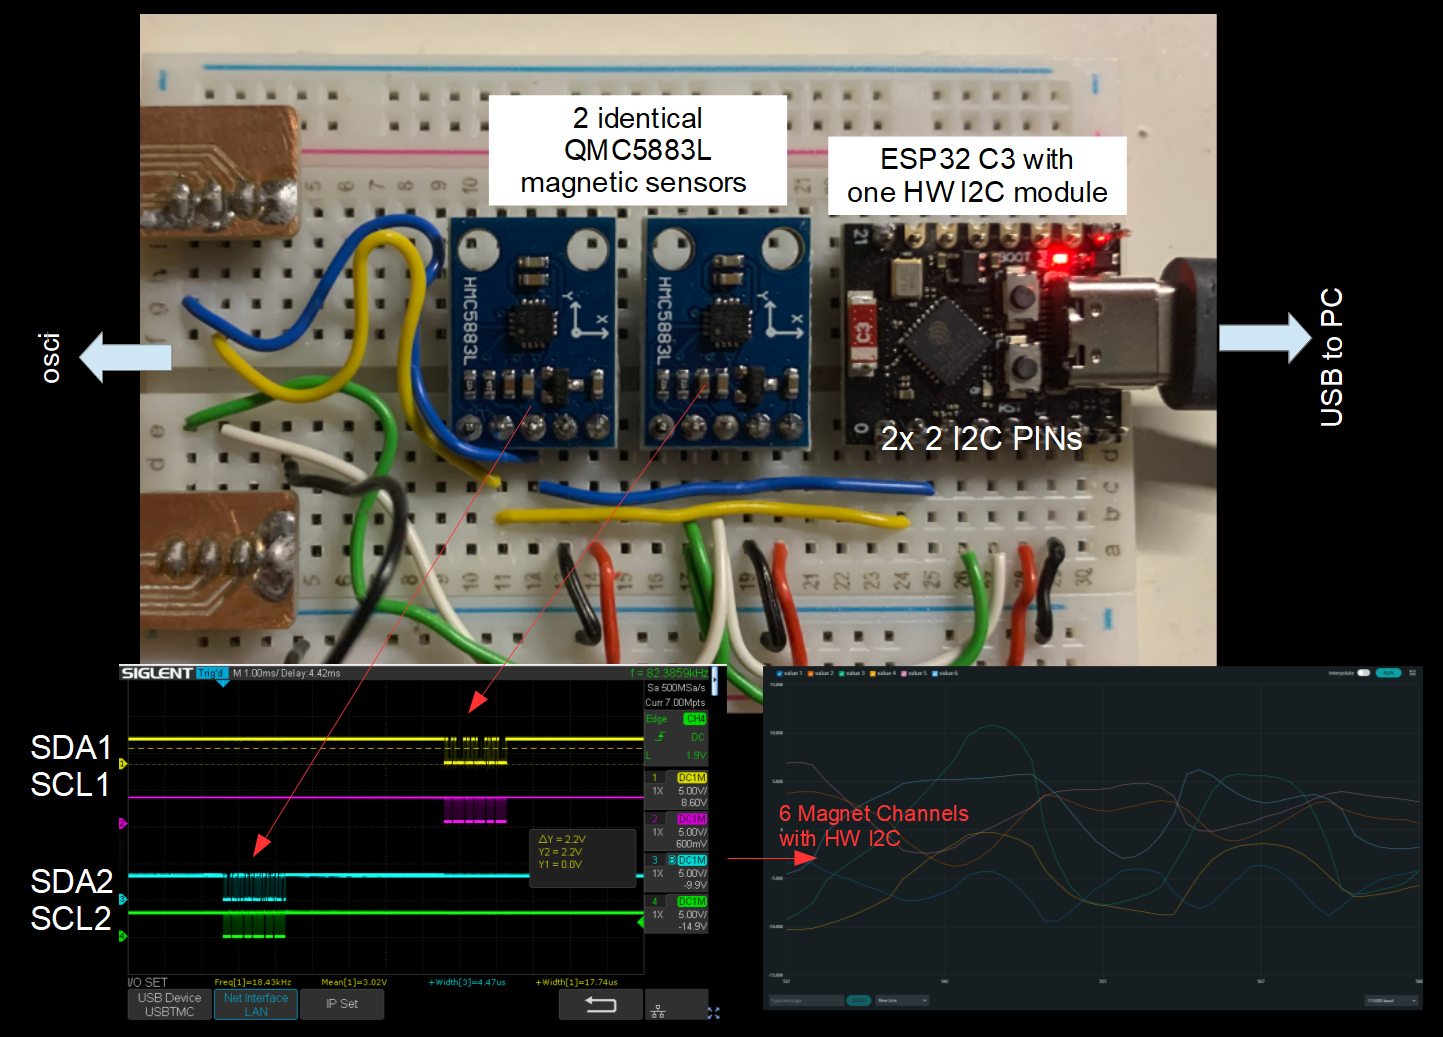
This was a short proof of concept to use the IO_MUX capability of the ESP32 to change online the PINs used for the I2C communication. Basically, the I2C hardware module can be connected to nearly every pin ofd the ESP32 and this switch can be done on the fly. I was not sure how good this work but a fast breadboard build and software sketch showed that it works like charme! See the picture and the code snippet below. Combining this with this nice hack to use only one SCL or SDA for multiple devices (link), this could be even more advantagous in several cases and save costs/space for an I2C multiplexer!
 BastelBaus
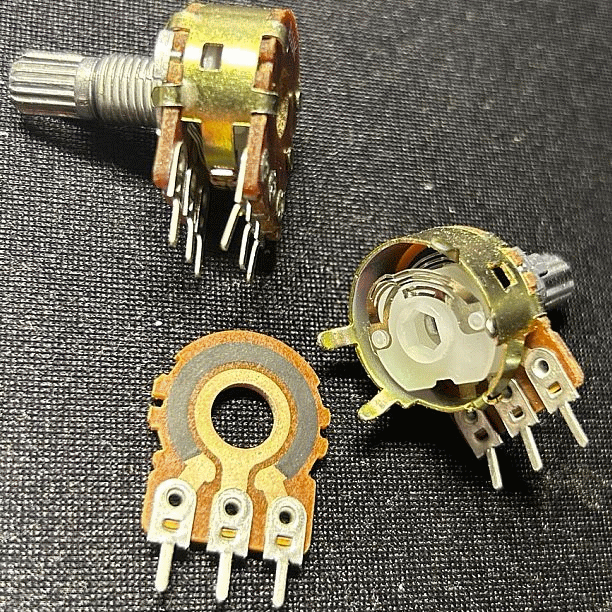
 C) Non reachable host and ip-route setting in the container to reach host again
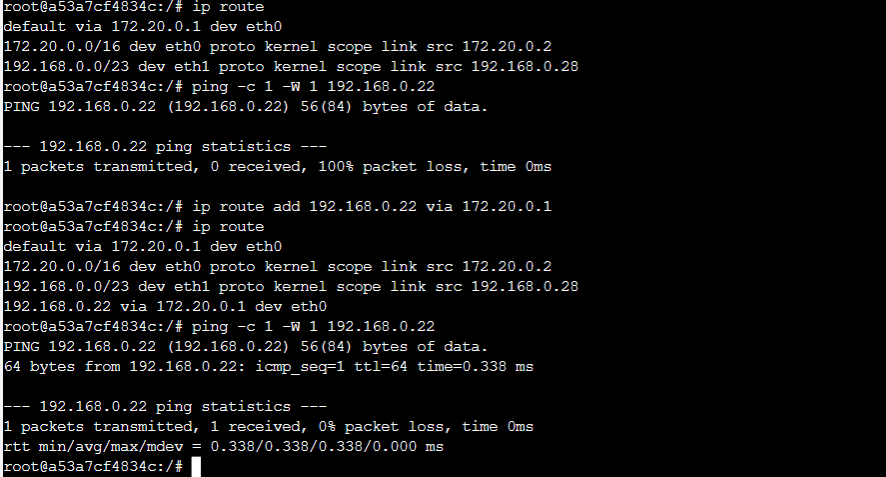
 colton.baldridge
 JP Gleyzes
 Jan Neumann
 Sophia
 Andy Piper
 Fiberpunk
 Elbert
 Vedran
 potblitd
 Steve Dearden
 Rupin Chheda
 mugur
mugur Ai-Thinker
 Josh Kallus
 madhead
thanks for following #Long Range Weather Station (65€)