Why buying an expensive cyclone vacuum cleaner when you can build yourself one?
To make the experience fit your profile, pick a username and tell us what interests you.
We found and based on your interests.
DIYsonV2 design.zipSolidworks filesx-zip-compressed - 41.55 MB - 05/08/2020 at 15:39 |
|
|
EDF50_holder.STL(For DIYson V1)Standard Tesselated Geometry - 535.04 kB - 05/23/2019 at 09:19 |
|
|
Coperchio1.STL(For DIYson V1)Standard Tesselated Geometry - 287.09 kB - 05/23/2019 at 09:19 |
|
|
ThreadedConnector_Tube.STL(For DIYson V1)Standard Tesselated Geometry - 329.57 kB - 05/23/2019 at 09:19 |
|
|
TriggerGear.STL(For DIYson V1)Standard Tesselated Geometry - 115.32 kB - 05/23/2019 at 09:19 |
|
I had to clean the working area of my CNC after a quite long plexiglass milling. The DIYson V2 did quite a good job!
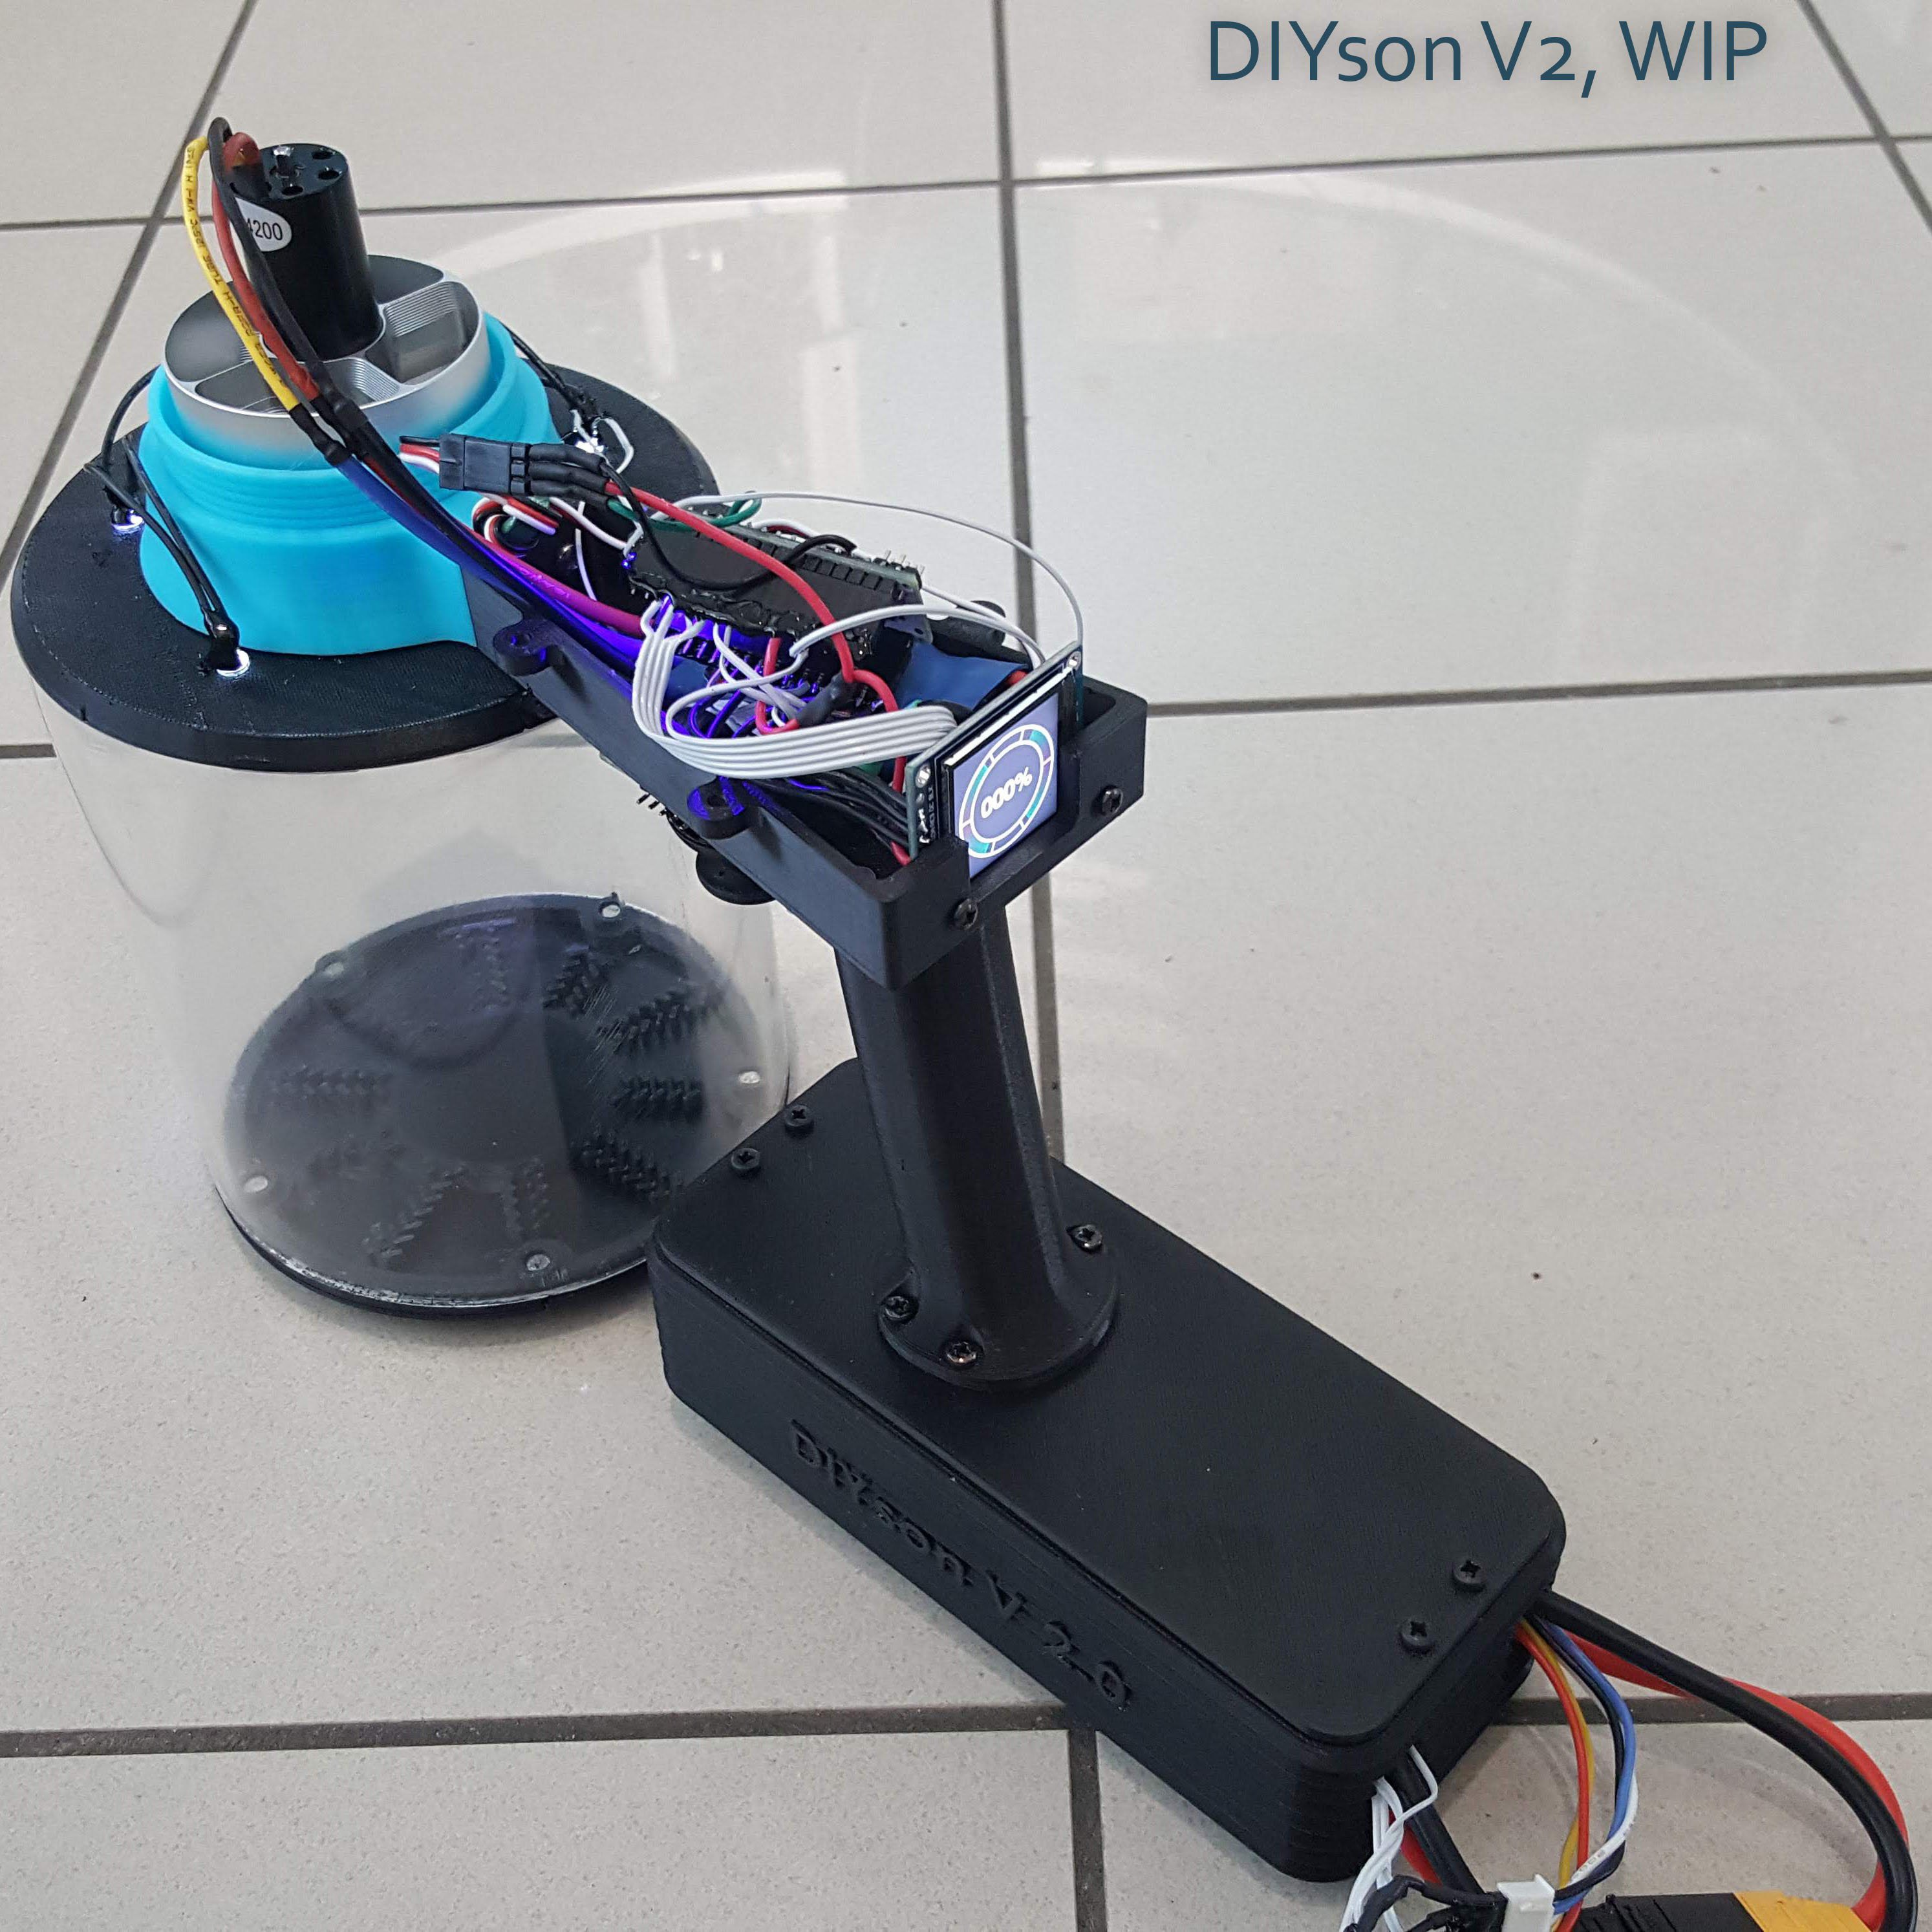
The latest version (V2) is now assembled and tested. Some improvements are still possible, but for now I am happy with the results. Video has been recorded with the battery almost empty, normally it has mouch more power!
For future upgrades, I will design and 3d print some adaptors so the DIYson can also work as a leaf blower, and maybe other functions too. I also plan to add post motor Hepa filter, the top part has a thread so I can easily add it later.
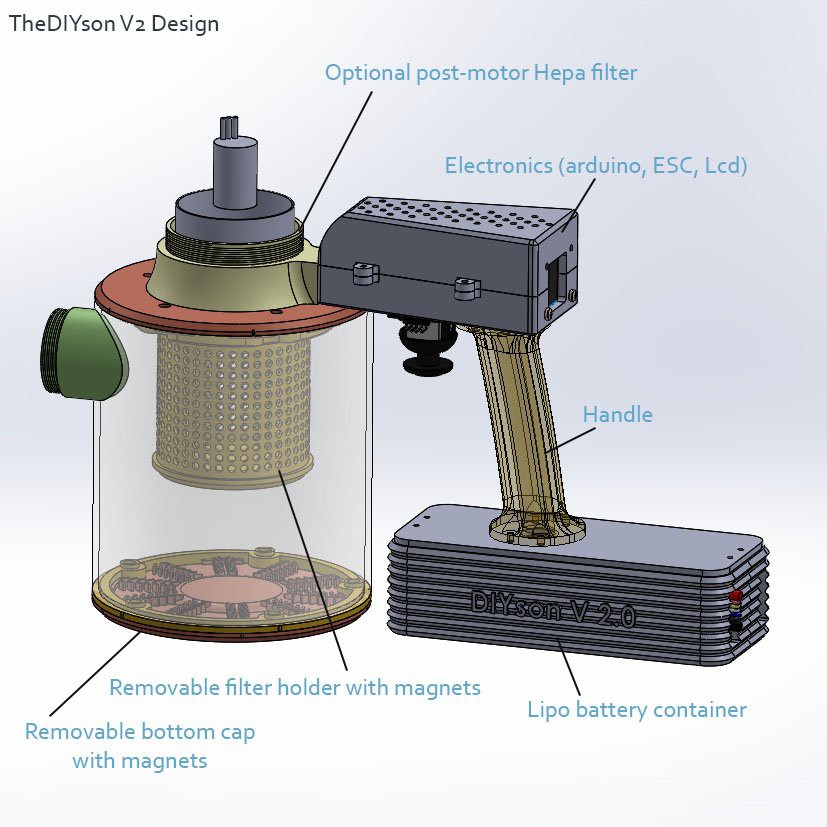
I finished the design for the DIYson V2. The old one will be still available, so you can decide to build the V1 (simpler, cheaper) or the new V2. Cost is slightly higher (better battery, added electronics, some components like the plexiglass tube) but you will have the new improved version.
Main updates from V1 to V2:
The new design is now being assembled.
The first step in the design of the DIYson 2.0 is optimizing the performances. It turned out that the first EDF I had choosen was expected to run with 4S Lipos. The battery I had been using was just 2S, so it was not providing enough power. Now I have just received the new Lipo: 5000mah, 4S, 40-50C (that is also another important value, it is not recommended to go below 40C), and the difference is huge!
https://hobbyking.com/en_us/hobby-king-60a-esc-4a-sbec.html
https://hobbyking.com/en_us/hobbyking-64mm-alloy-edf-4000kv-850w-4s-outrunner-version.html
https://hobbyking.com/en_us/turnigy-nano-tech-6000mah-2s2p-65-130c-hardcase-lipo-pack.html
I have selected the parts for version 2.0: (Still from Hobbyking, they have good prices and a lot of choice, still figuring out how to contact them and ask if they could sponsor in some way the project).
A more powerful EDF and battery should give a good suction power. The cyclone design will be improved thanks to your hints and tips! Hepa filter on top also, and transparent container for the dust.
Design for V2 is started!
Slightly bigger container, maybe transparent, better design of the cyclone path and placement of air outlet, thanks to your suggestions! Hepa filter on outlet too, and improved hand grip and trigger, are just some of the features. Maybe small display of battery left and integrated charging...
It works! There are still a lot of improvements to the design that can be added, as some of you pointed out, but for this first version, I think we are happy how it works. Probably next version I should use a slightly bigger EDF with 1kg thrust instead of 0.5Kg, price is more or less similar.
Battery lasts more or less 20 minutes.
It works! Now is time to 3d print the remaining parts. The whole system is designed to be modular, so I can focus on the multi stage design, air filtration where the air exits, best design for the air intake later.
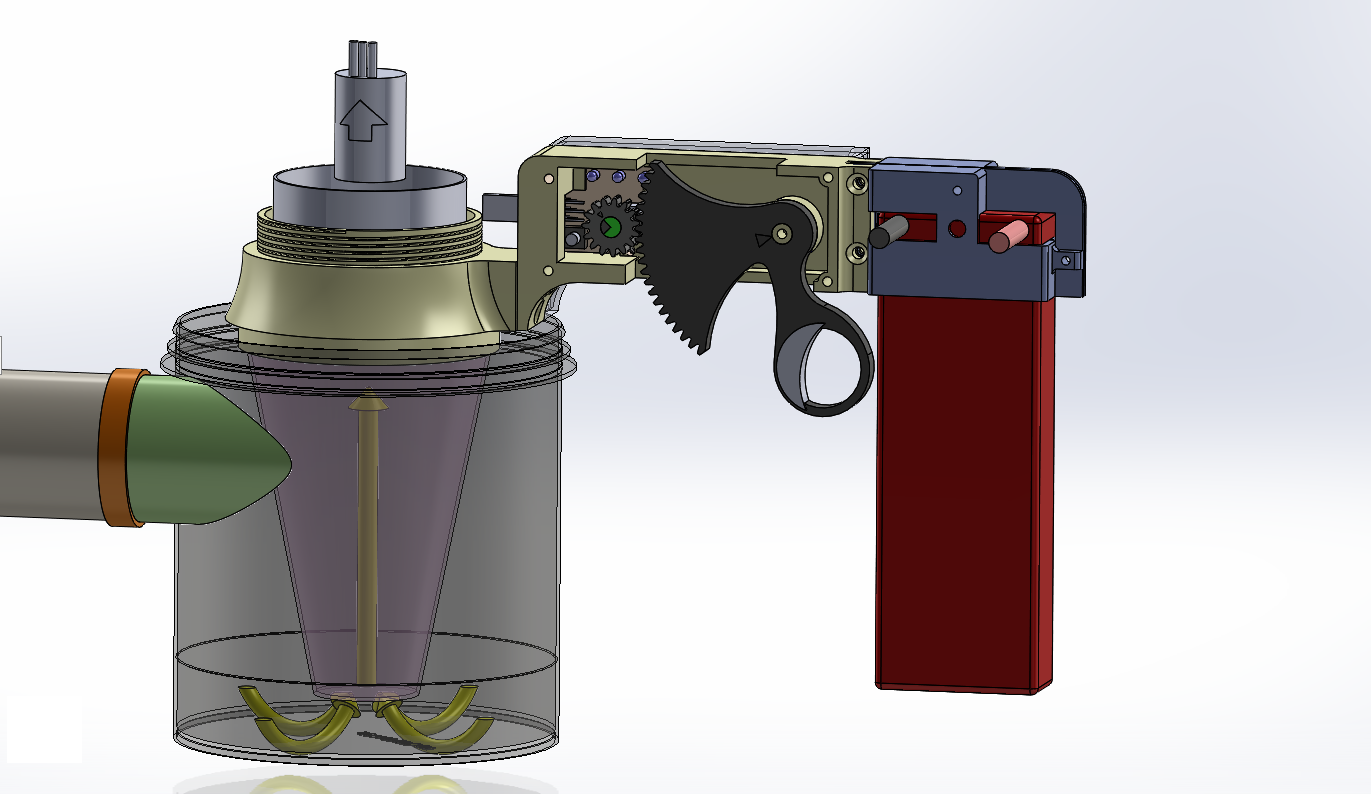
Pulling the trigger rotates the trimmer on the servo tester. The gears ratio has been designed so that pulling the trigger (a movement of about 25mm) is converted into 270 degrees of rotation of the trimmer.
To get it work on first try, I measured the PCB and size of all the components of the servo tester. Then I created a 3d model in Solidworks of the servo tester. I downloaded the Step files of some gears with the correct ratio from SDP/SI, then modified them to fit.
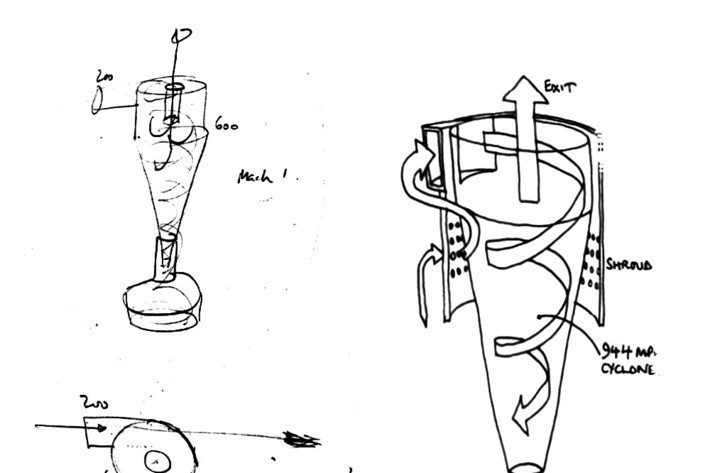
This picture shows the design that I made for the first iteration. Some prior decisions were made before starting to sketch:
Order the Lipo battery, EDF fan, ESC, servo tester if you also want to test the EDF before your controlling circuit is ready. Maybe also a lipo battery tester so you can double check if your circuit works as intended. Don't forget to order Lipo charger, XT 60 or XT 90 adapters (male and female), so you don't have to order other things in a separate order after you received all the things, and notice you have missed something! (as I did)
I did not do this step, but it is really recommended to reduce noise and improve performances and battery duration.
Download the 3d STL files. They have been printed on a Zortrax M200, but any filament machine should work.
Create an account to leave a comment. Already have an account? Log In.
home:re:make - I had the idea of one good multi-cooker when I wanted to try sous-vide & found even the cheapest ones were expensive. So I made one from a deep-fat fryer (cheapest heated pot) & a PID for about £25. The thing is, it's the exact same components for a slow-cooker, rice-cooker, air-fryer etc. Add a presure-sealed lid & you've got about a dozen-in-one.
Anybody can find complete product ion ali for around 100$) But for enthusiasts it is interesting, I think)
You are right, a similar product can be found withnin that range of price.
The goal of the overall project is to create the “Maker version” of many household appliances, using modern components with the best value for money, to understand, compared to the commercial version of the same product, the areas of improvement and the cases in which the economic value and the technical characteristics are more distant. The home:re:make project can also send a signal to companies, to encourage improving the repairability andfunctionality of their products, knowing that there is someone who analyzes their products and reproduces them, maybe even better, publishing all the results with the open source formula.
I think Dyson is the cutting edge technology product and it is not possible to create DIY product with the same characteristics, because of high complexity. But never to late to try)
I like the grin on the user's face. Watch out dust, I'm coming for you!
Looks like the cost of the plexiglass tube increases the price a fair amount.
With 50 euros you can have 7 plexiglass tubes, already cut. Yes, it is more expensive than the Isiplast vat. You can build the DIYson V1 that has a cheaper BOM or the new DIYson that has better performances and refined design, with a BOM slightly more expensive. :)
So looking at the video vs. the component list, is the plexiglass tube necessary or did you just use a roll from paper towels?
The ISIplast vat (black) is replaced in the DIYson V2 by a plexiglass tube.
I don't see the need for a 40C battery. At 5Ah that would be 200Amps or with 4s about 3kW - way too much power. And that would only mean about 1minute of run time, that's way too less. I own a 4s 5Ah 20C battery which I used to start my car when it's battery was down due to e fault in the electrical system - no problem at all for about 10 to 15 times.
I have a Dyson, I think it has a 5s battery and run time is about 20min on low setting (65W) and 7 min on high (150W). I always use the high setting and the time is mostly sufficient.
So I would opt for a little more power like 300W to 400W (20A or 4C in your case) but with 3kW you can probably fly yourself :-)
Great project and something I'd like to add to my own Ardusaw project (on thingiverse) as a dust collector ! FWIW, you can use the Ardusaw arduino driver for the ESC rather than using a servo tester - it forms the same function, but overcomes the ESC safety timing bootup issue - just use a regular switch rather than faff about with triggers :-)) I really do like the name too - very original :-)))))))))
Hi, do you have a link at you Ardusaw? I was not able to find it on Thingiverse
I had a look at the ardusaw, it seems I can replace the servo tester with an arduino, and it can be programmed to send impulses to control the speed also?
It's amazing to see another fellow Italian make such an interesting project entry!
I can't wait to see your development updates and I would really be interested in helping on this project if possible. I have experience in creating electric circuits, 3d printing, cad modeling and so on. Let me know if there's an opportunity to help out :)
Thanks! I have posted STLs on thingiverse and on this page too. Later I will post Step files too. If you want to help improving the design, feel free to edit them, or suggest modifications too!
I think RC hobby brought very high quality motors, ESC, and batteries onto the scene and now we get a bunch of clever hacks that is them in different ways like this. Love it! Also, DIYson is a brilliant name :-D
Good name for your project,plus wonder how the whole vacuum works and looking forward to more specific information about it , plz keep updating.
:-)
Become a member to follow this project and never miss any updates
Yes this is looking very impressive project I like this vacuum cleaner. I am also working on vacuum guide project that is very similar to it.