WalkerDev
-
Something big coming
07/10/2024 at 23:55 • 0 commentsHey guys, apologies for the radio silence! I've been AFK for a while but i've been working on something new almost daily for a while and it's almost ready to show!
Won't say what yet but to all my VR DIYers something nice is coming very soon, I have not abandoned XR (and won't) and I can show one of the cards in my deck very, very soon ; )
P.S. I'm gonna start signing these posts with ASCII art
-
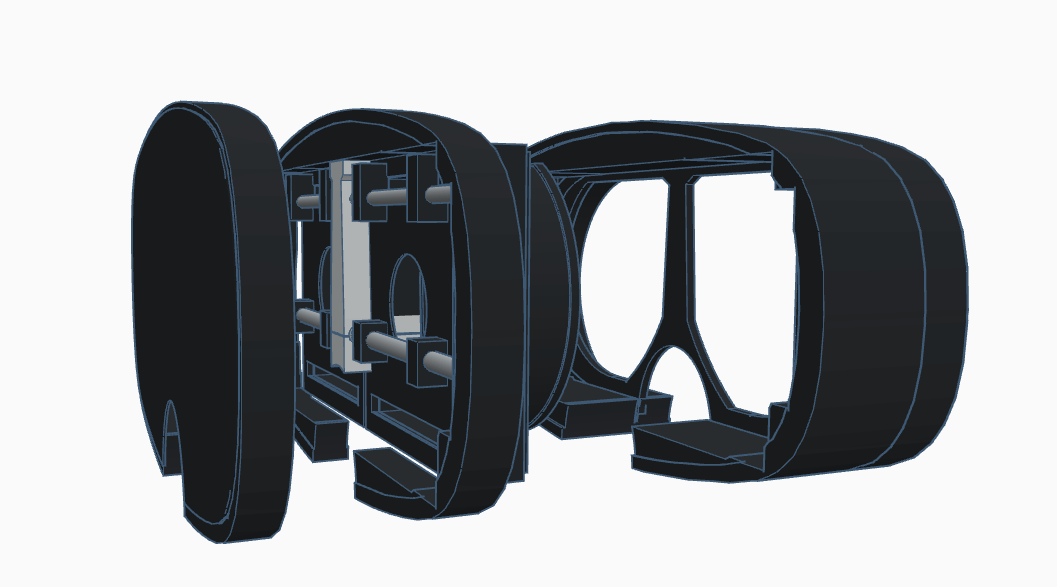
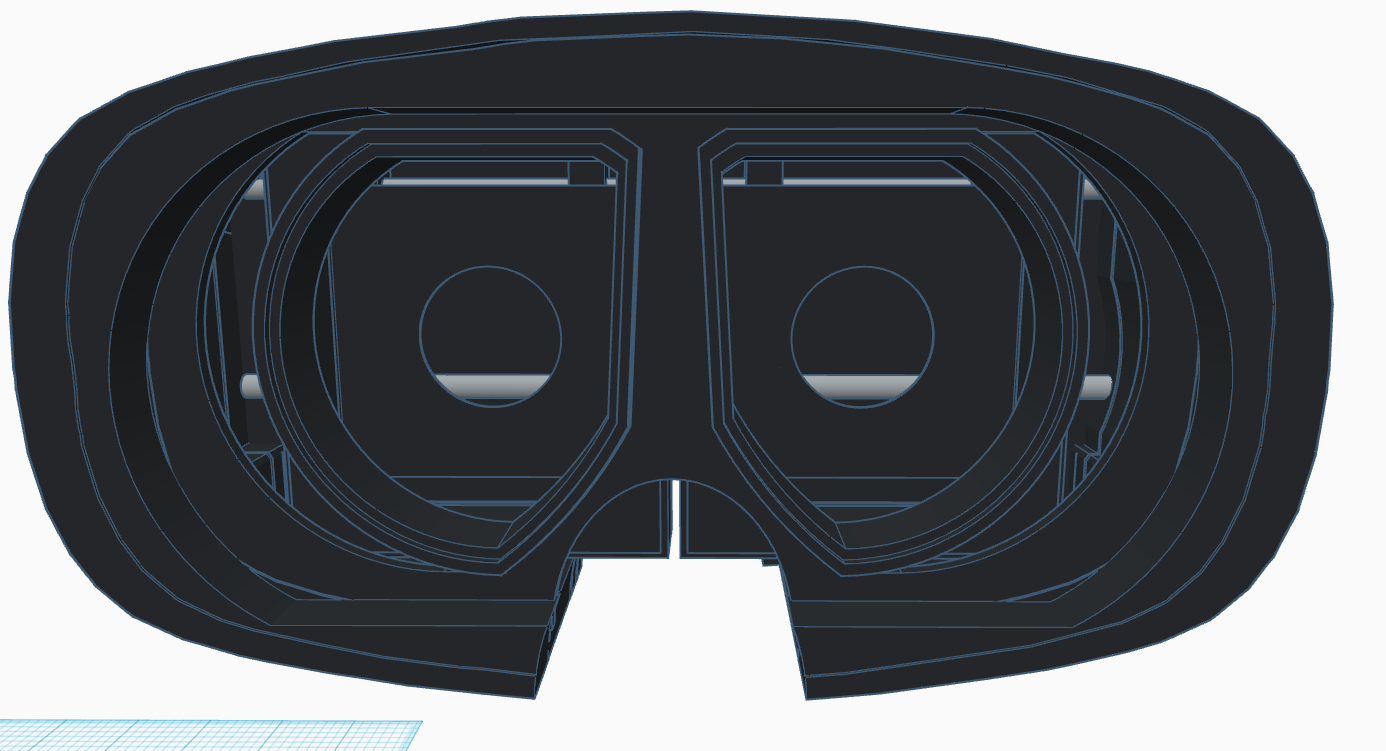
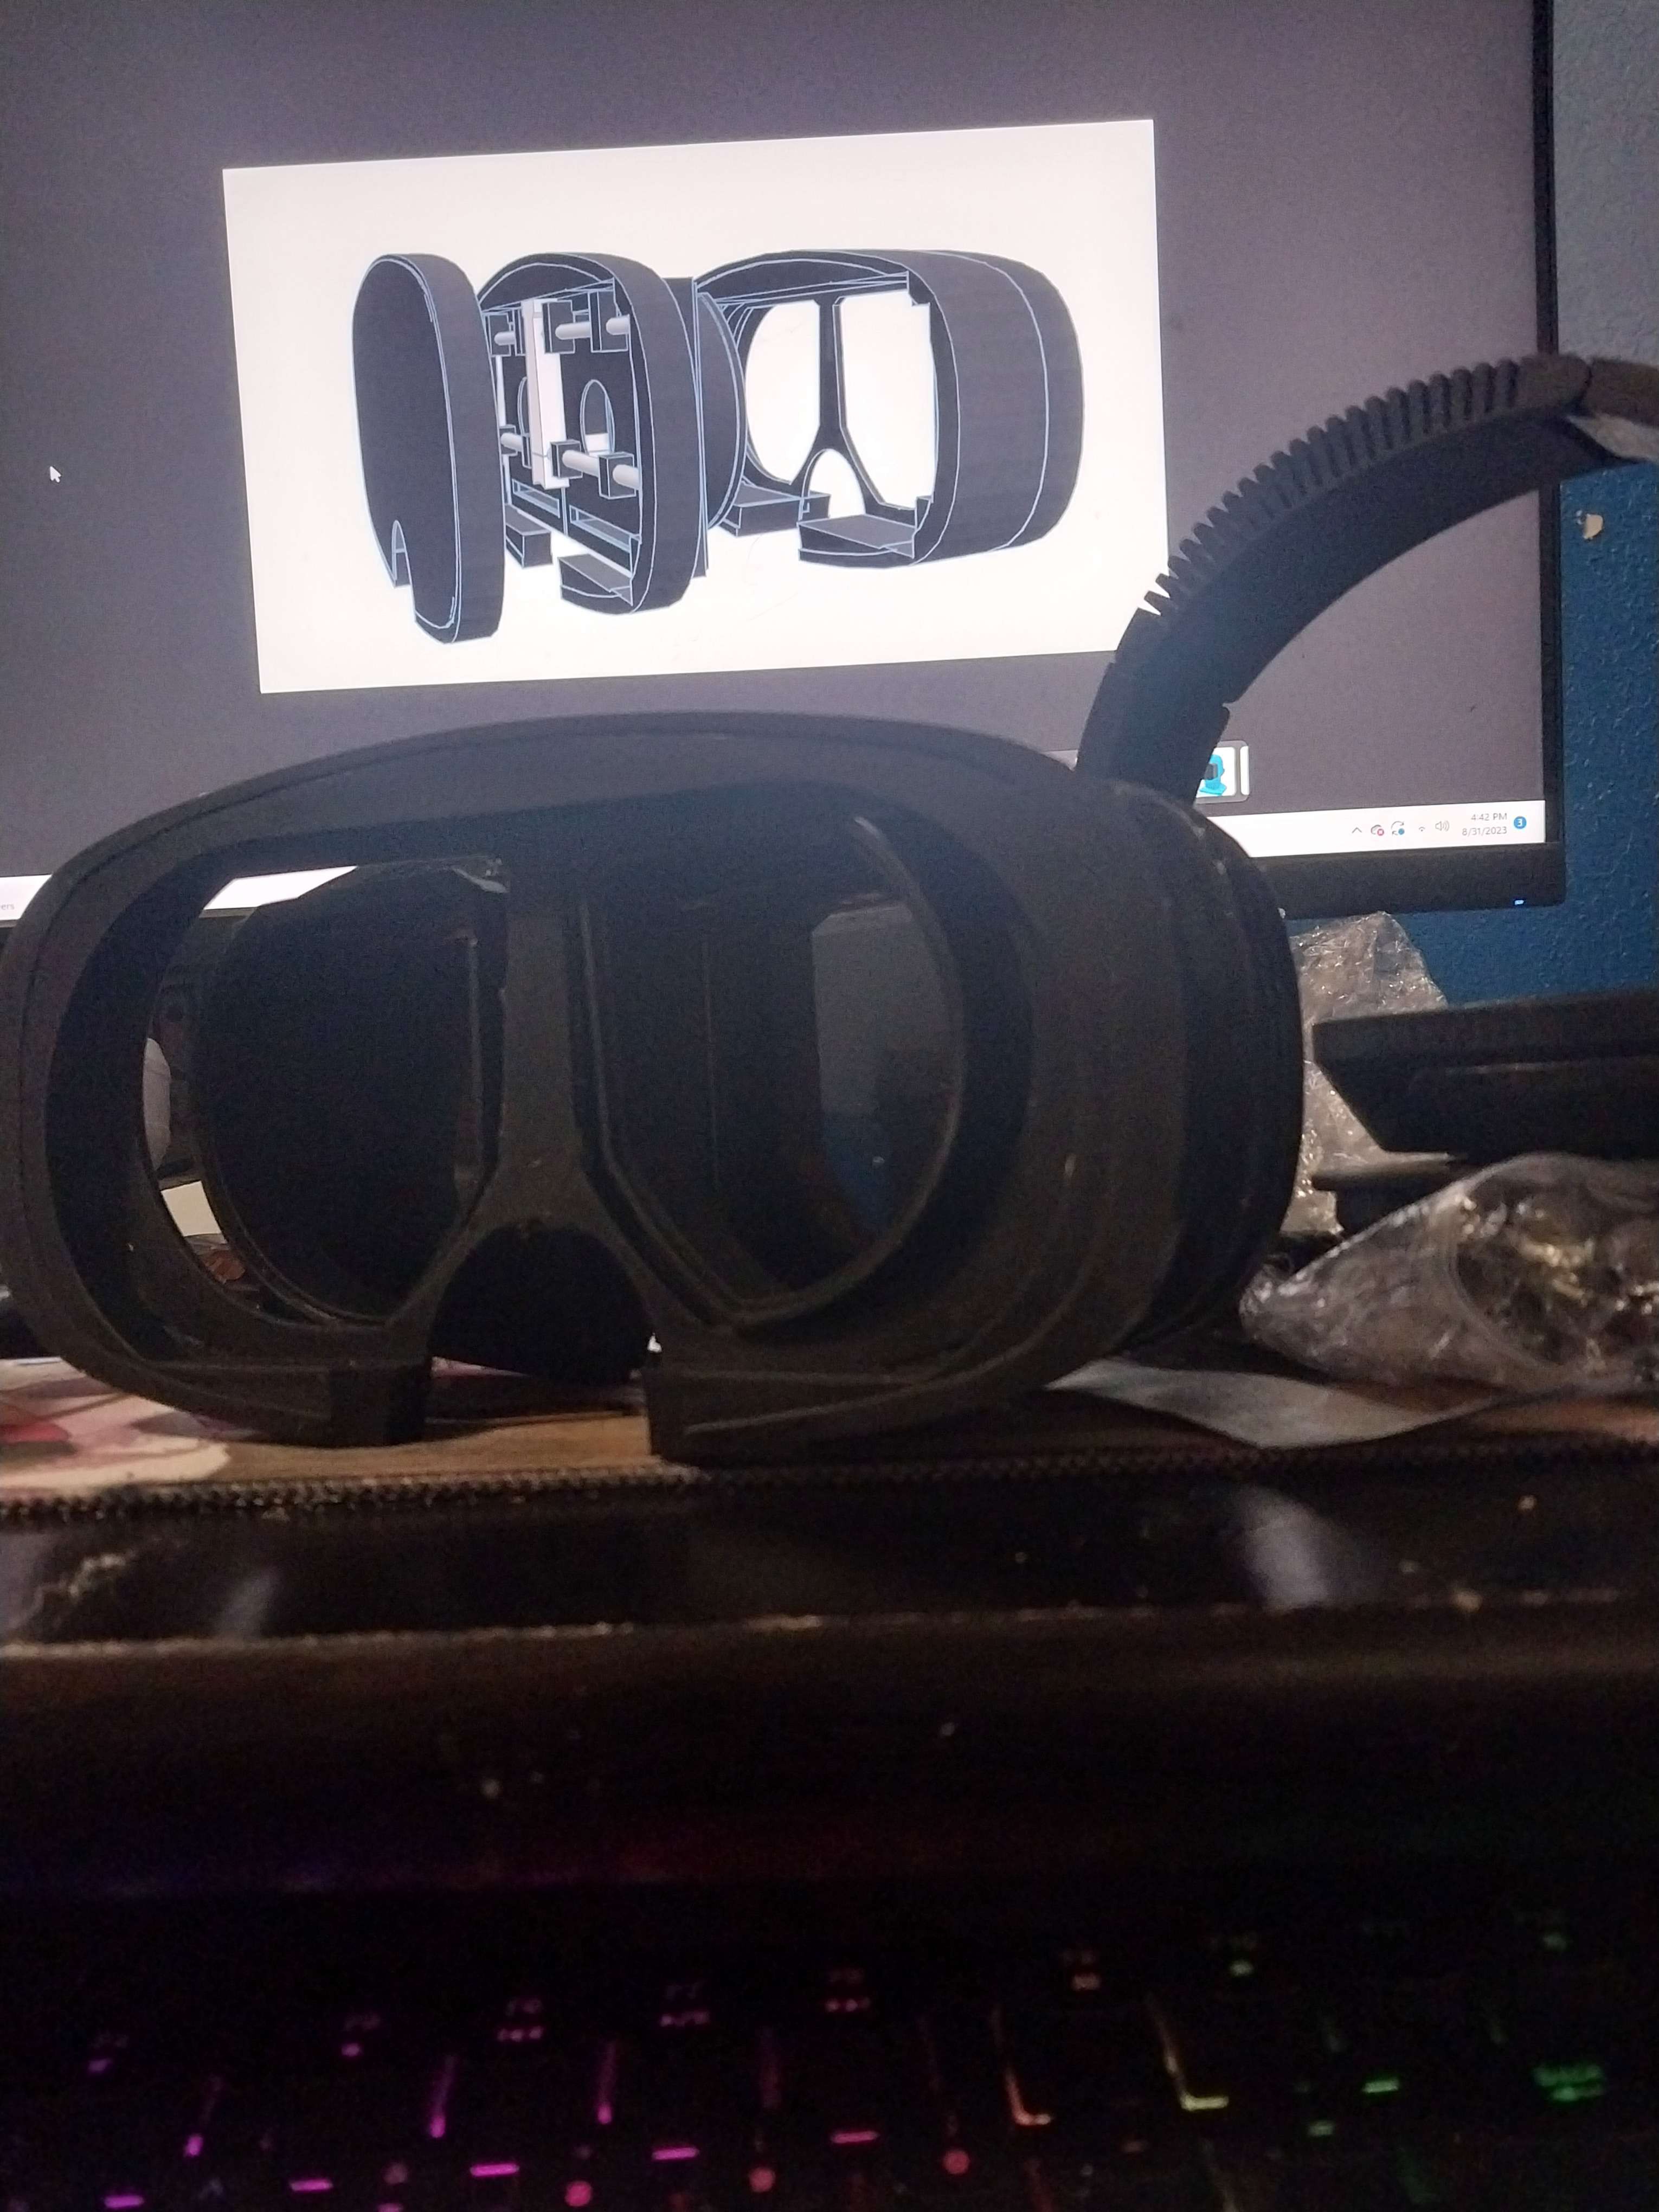
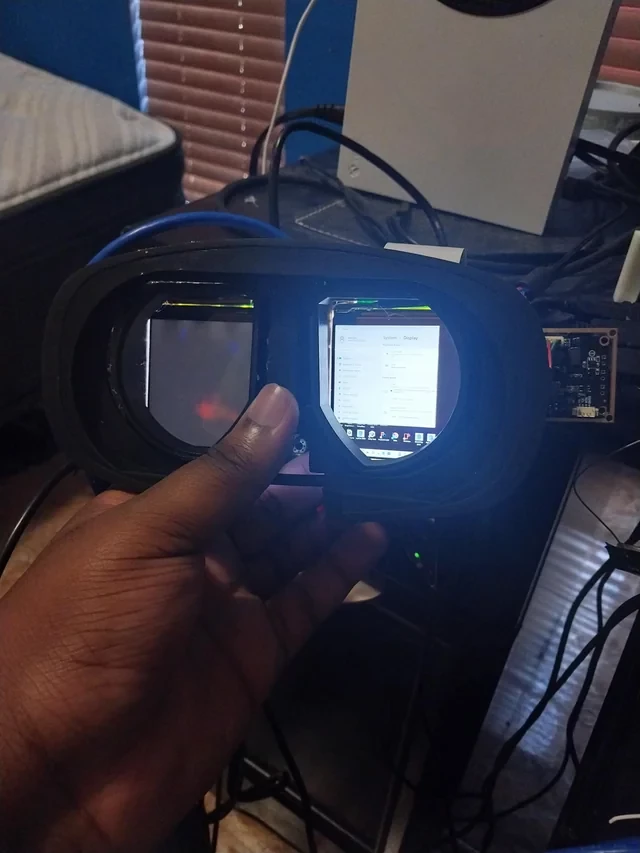
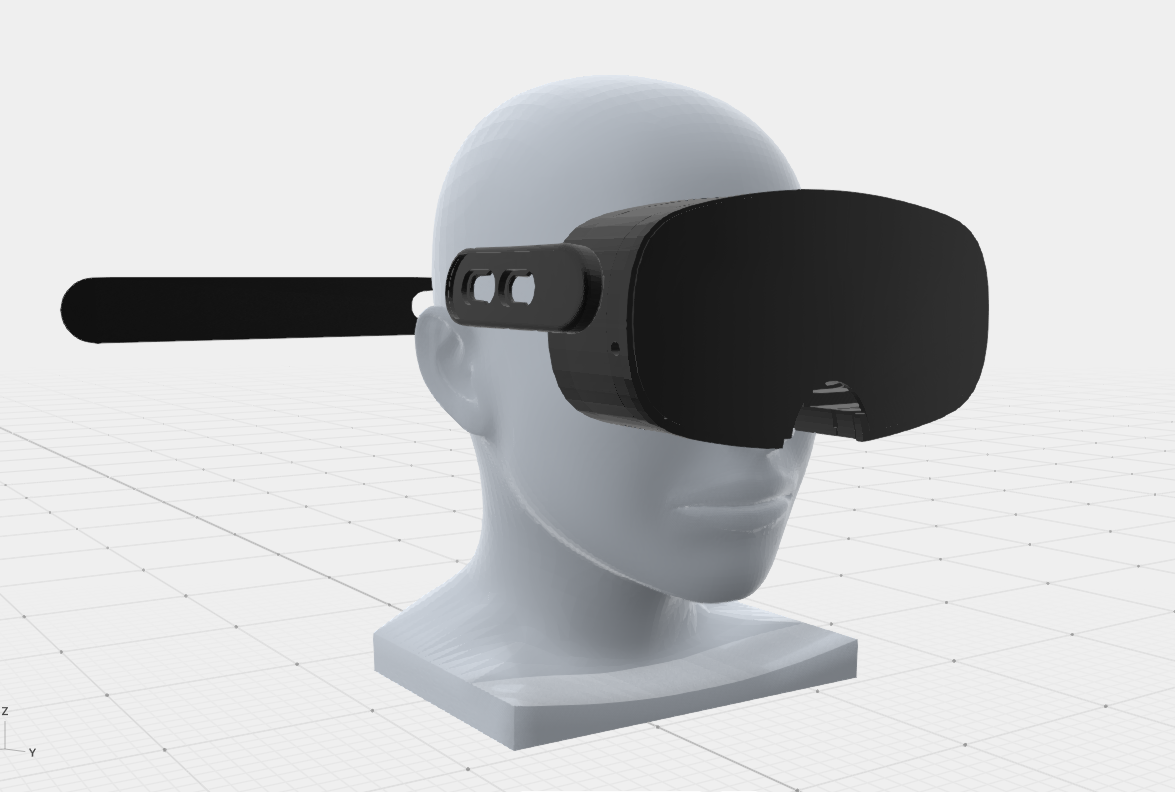
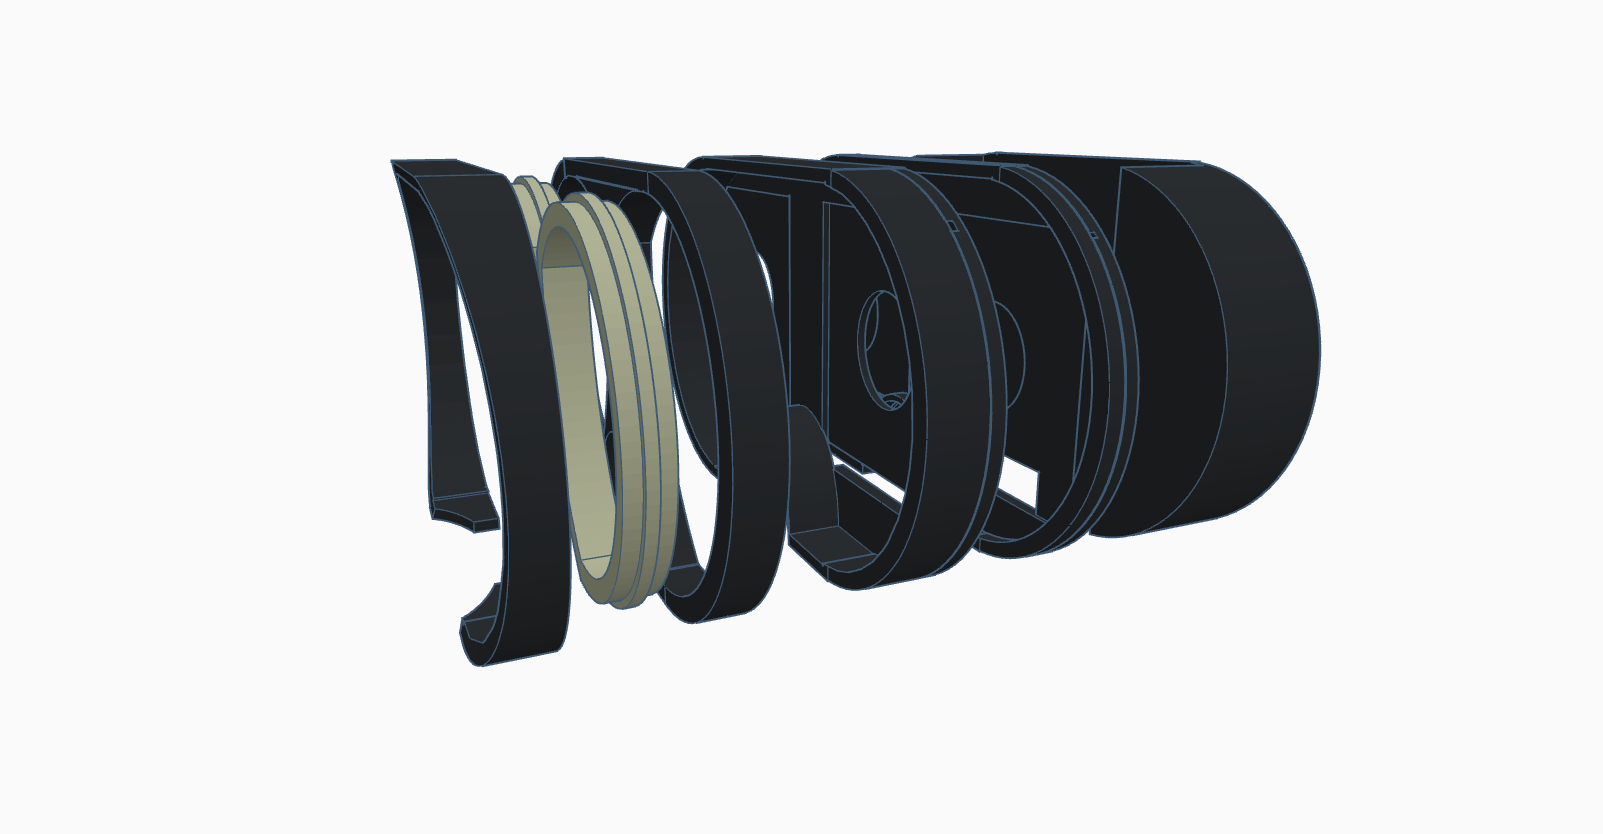
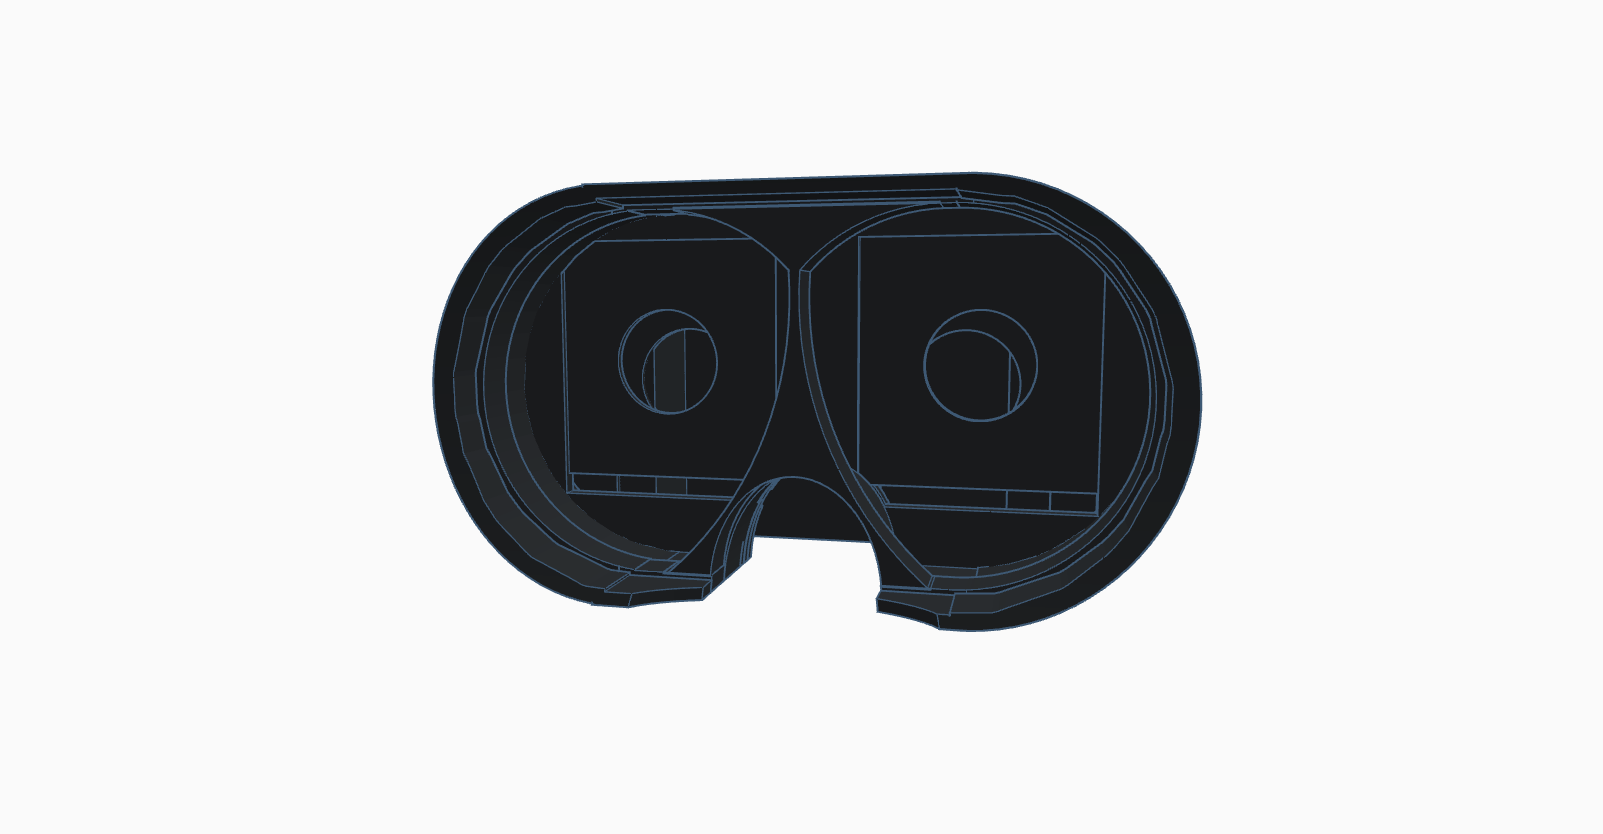
Product Log 9: SAY HELLO TO HEADSET 2.0
02/27/2024 at 21:19 • 0 commentsSo, you guys remember when I said that the headset was getting some new updates?
HERE THEY ARE
Introducing Psuedopancake Headset 2.0; Autonomy
![]()
![]()
![]()
There are a few upgrades made within this design! Let's go over a few;
- Thanks to Summer (Who is also working on something you guys will see soon), the lens module now uses M2 screws instead of any epoxies or glues! The lens also pop in instead of needing to be glued in!
- The rod system now has a knob (Even though I am realizing upon texting that it is within the wrong rod, fix coming soon
- Actual side pieces (Which you should place on the headset within your own 3D stuff)
- The design is now cleaner, having proper curvature and being built on Fusion instead of Tinkercad
- Everything overall fits more snug
- The headset size has been reduced slightly
Now I will be honest, there are still a few problems here and there with the design but once the rod pieces are fixed, it is ensured that nothing is blocking it and the side pieces are properly placed it should not be anything which permanently stops you.
I am actively working on fixing those and they should be good by next week.
Aside from that, I am still working on fixing the LCD borders being visible while adding eye tracking (powered by ETVR) and mouth tracking (Powered by Babble). The new test lens have yet to appear but I also have a polarizer which should increase the already very good image quality!
Once done, I expect the FOV to be around 100 degrees +
Of course, the printable file is on the files area as PsuedoPancake Headset Template v2 Opened.stl and PsuedoPancake Headset Template v2 v2.f3d! The stl is for 3D printing (Although you need to ensure ground alignment) and the f3d is the Fusion file itself with the sketches and all the blemishes! Love it or roast it, the design still arrives >:)
The file for the lens is still "PsuedoPancakes v2.svg" but please buy the lenses from here from now on!
https://www.aliexpress.us/item/3256805118558000.html?spm=a2g0o.order_detail.order_detail_item.7.41e3f19cmT6DrP&gatewayAdapt=glo2usaFinally, you can get the file printed here;
https://www.pcbway.com/project/shareproject/The_PsuedoPancakes_v2_WE_MUST_GO_HIGHER_6503651f.html
And donate to my Patreon (I'm lowkey going broke working on these);https://www.patreon.com/user?u=98752242
I look forward to seeing what you guys come up with! Please feel free to message me with your designs so I can share images of them on updates! More on the way like eye tracking, LCD Slime Trackers, gloves and Silicon batteries! This is the second to last update this project will get before I release a full on headset (Inside Out SteamVR Tracking, Peripheral LEDs, Etc.) and open source ALL of it!
-
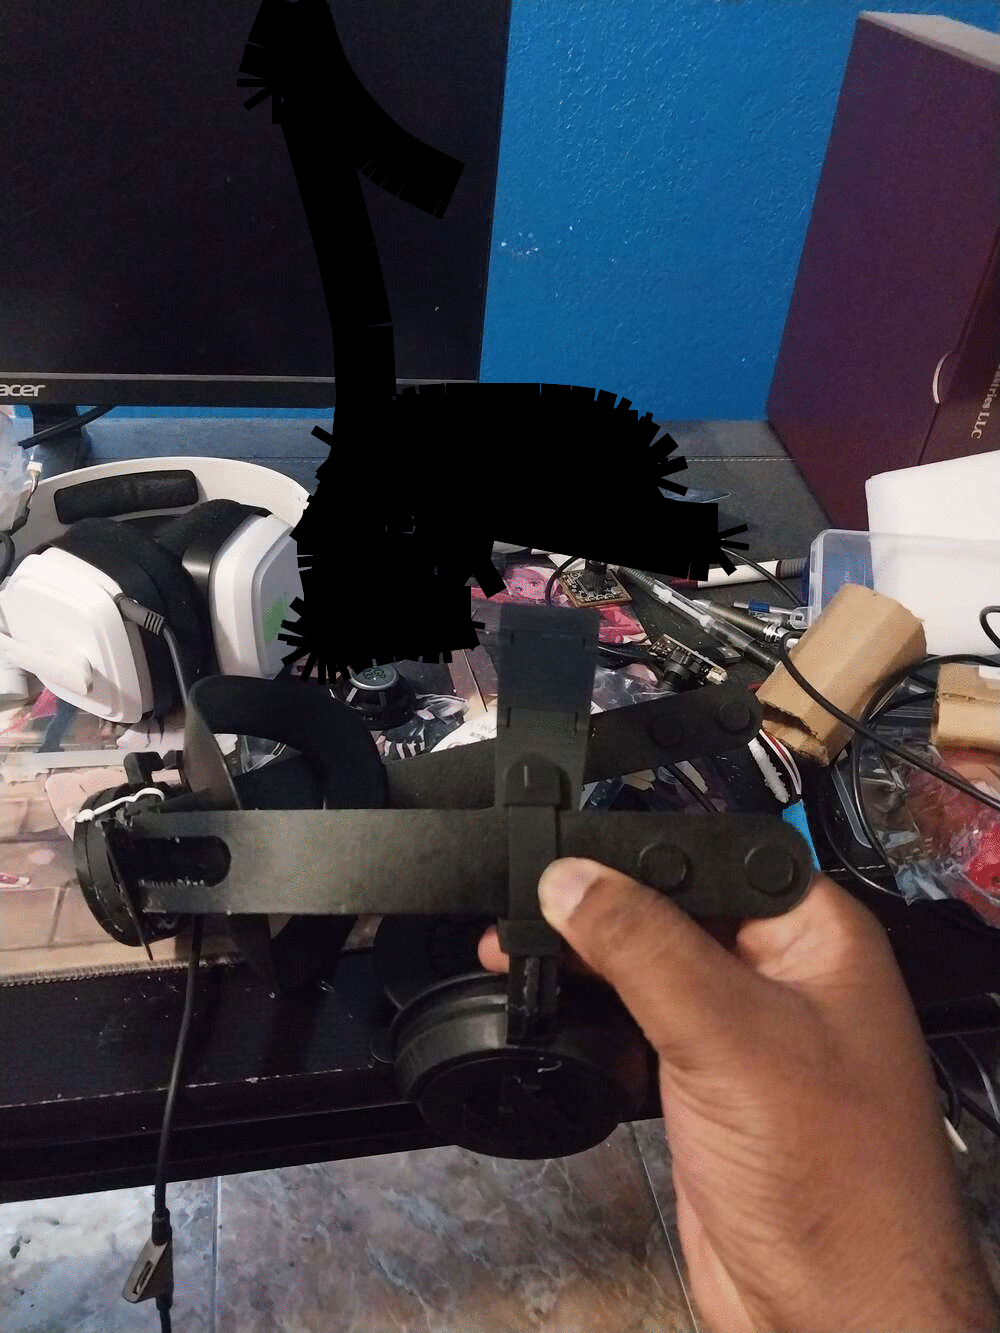
Project Log 8: Major Updates Coming Soon!
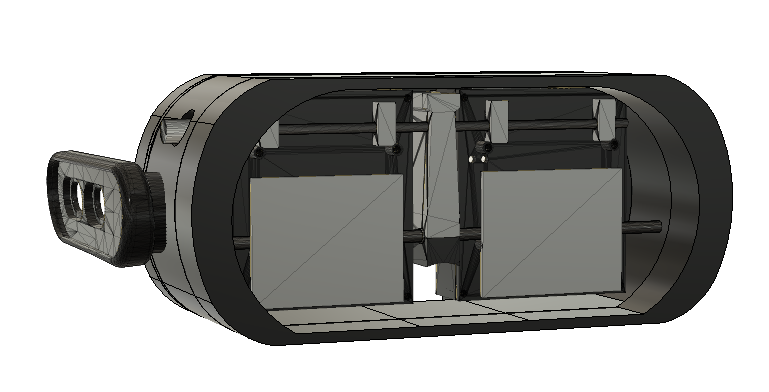
02/12/2024 at 00:01 • 0 commentsYou all may think that I am done by now! However, that is not the case!
There are a few problems I've been focusing on fixing without reducing FOV or visual quality! One of my employees (Summer, AKA the GOAT helping carry a lot of development with the headset's software) was able to make a few fixes to the design! In particular this includes adding the ability for everything to be snapped together instead of needing any epoxy!
Updates are still maybe a month out but they overall include things such as
- Better focal lengths so the entire image is taken up
- A rig that allows you to figure out the optimal focal lengths and distances for your own design
- A video explanation of how I go about creating lens designs
- A new shell design that is cleaner, smaller in dimensions and easier to put together (A v3 is in progress which will be the best of all and completely smooth) and
- A second, more minimal design WIP!
More coming soon!
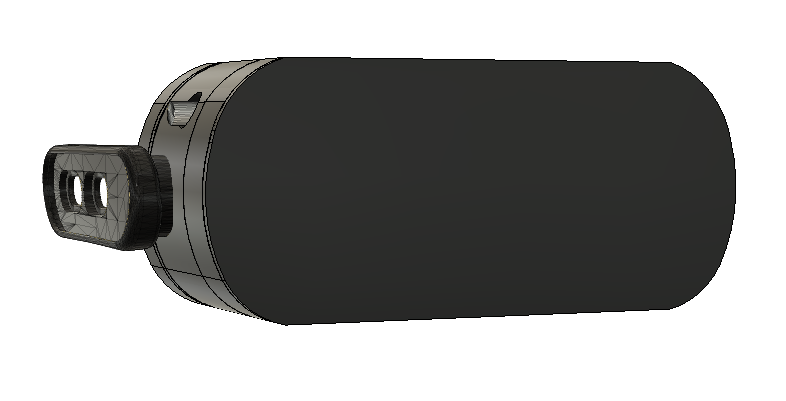
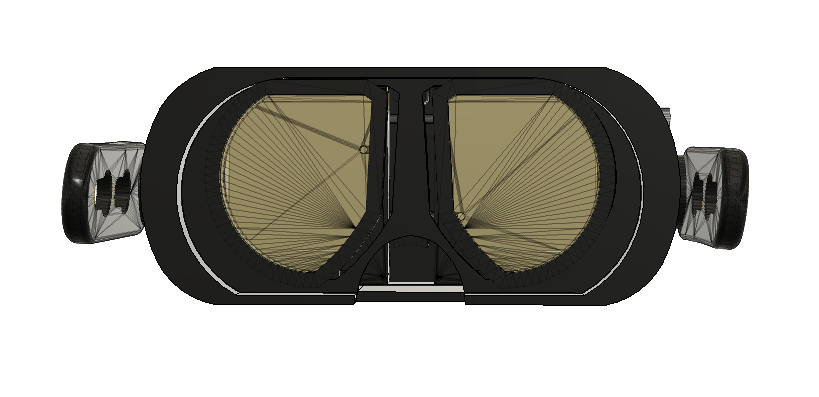
![Image]() (As big as it looks, this design is actually 7 x 2 5/8 x 3 inches, a bit smaller than the Quest 3!)
(As big as it looks, this design is actually 7 x 2 5/8 x 3 inches, a bit smaller than the Quest 3!) -
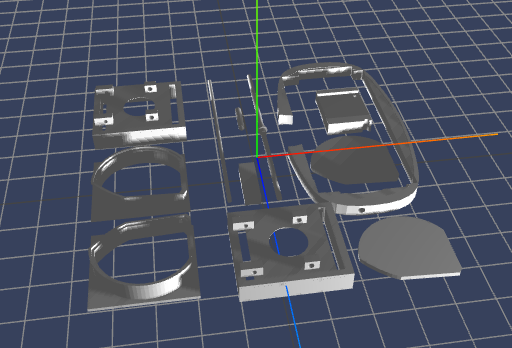
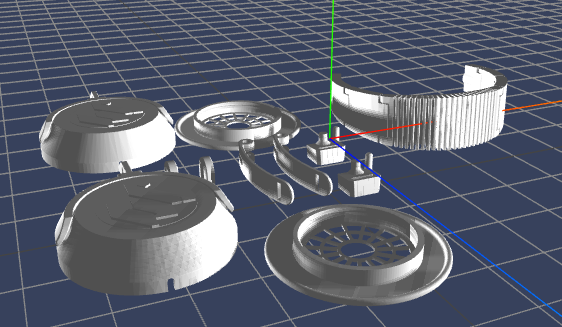
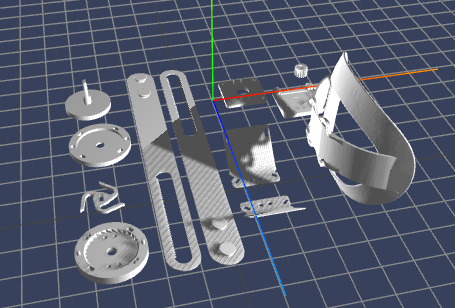
Project Log 8: BASE OPEN SOURCED
10/26/2023 at 22:32 • 0 commentsEDIT: USE PsuedoPancakev2b.obj FOR THE LENS, IT IS A FIXED VERSION THAT FIXES THE LENS DISTANCE AND LCD WALL THICKNESS
An 8th log was made but I have no clue why it didn't upload!
I am open sourcing the base headpiece right now, meaning you can build around it and make your own dream headset! This is the bases needed for an IPD system, faceplate and lens! I need to make fixes though, such as a better coupler design, actual screws and making the design more smooth (which i've done but haven't shared)
For the rods, the top should be an aluminum rod and the bottom a threaded rod! Links below:
Top Rod: https://www.lowes.com/pd/Hillman-Aluminum-Aluminum-Rod/3478231
Bottom Rod (Buy Two) https://www.lowes.com/pd/Hillman-Steel-Threaded-Rod/3127735
As for the lens, here is where I have mines cut from! If you ask for the Pancake v2, they will know which ones you mean!
Lens (Buy Two 60mm and Two 70mm) https://www.aliexpress.us/item/3256805118558000.html?spm=a2g0o.order_list.order_list_main.84.27ee1802j5aETi&gatewayAdapt=glo2usa
Display (Hopefully I can share the 90hz ones soon!): https://www.aliexpress.us/item/3256803484049959.html?gatewayAdapt=glo2usa4itemAdapt
Remember to have the lens smooth side facing the eye and put a 60mm and 70mm on each side! Order doesn't matter!
Finally for those without a printer, feel free to use this PCBWay! You can also donate to me and help me work on this and other tech for a living or download the model here as well (soon)!
This is under the Hackaday page as Boson Skeleton (Assembly Reference), Boson Print (Easy Printing) and PsuedoPancakes v2! I have to make some tiny changes (making the wall thicker for the display, although for my use a bendy one helped) and
Do keep in mind the LCD piece needs a small fix (the screen should be a little further back) and that this was a rough model made with Tinkercad!
Final note, the lens design might look empty but it's using a 0.001m line thickness! If you use an editor and change the stroke value, you will see it!
General Assembly
![]()
![]()
-
Project Log 7: IPDs, Lenses and Sponsorships
09/07/2023 at 23:04 • 0 commentsSo I FINALLY have an update on the progress of things over at my side! While there is a bit of bad news, there is a lot of good!
Let's get over the bad aspects. Sadly, I was not able to get the PsuedoPancakes v2 to test because the company I brought from temporarily shut down. No problem, I already had a replacement ready! The only difference is it will take longer since I have to buy them again. Now that that's out of the way, let's get to the good.
First off, SPONSORSHIP!!! PCBWay has helped me by allowing me to test out my 3D models with higher quality materials and processes. Before we continue, it's important to know that there is a new project coming soon; an open source VR headset for $270! There are permutations of this headset as well which can do even PCVR in a standalone fashion but that's for later!
The headset design below was made by me! Now being honest, this needs a LOT of cleaning, but more on that for later! For now happy thoughts.
Being serious, there are a few things to keep in mind when looking at this:
- This uses dual 2160x2160 displays
- The eye module uses the psuedopancake design, keeping the lens and display the perfect distance away to work. In another revision I might make something for focal distance but this is honestly unlikely
- The outside of the headset would use a padded piece to both act as a shadowbox and comfort
- There is a simple IPD system in there designed based off of the Valve Index, using two threaded rods at opposing directions to the bottom and a third smooth one at the top. The top acts as a guide whereas the ones to the bottom ensure the display will move the lens without the rod actually going in or out.
- The front layer was the most unknown aspect, given I had much hardware to put within.
- There is a headstrap and headphones as well, edited.
- Headstrap: https://www.thingiverse.com/thing:5337076
- Headphones: https://dedesigned.com/project/3d-printed-headphones/
- The eye module looks like it would go into the nose but because of proportions and the nose curve it doesn't.
![]()
![]()
Now to get it working, I went to PCBWay and uploaded my model! From there, I spoke to an engineer who helped me by notifying me of errors in the model and some small fixes I could take structurally. Be sure to know how many parts you want to have printed! I was also able to work on my puck model too.
![]()
![]()
![]()
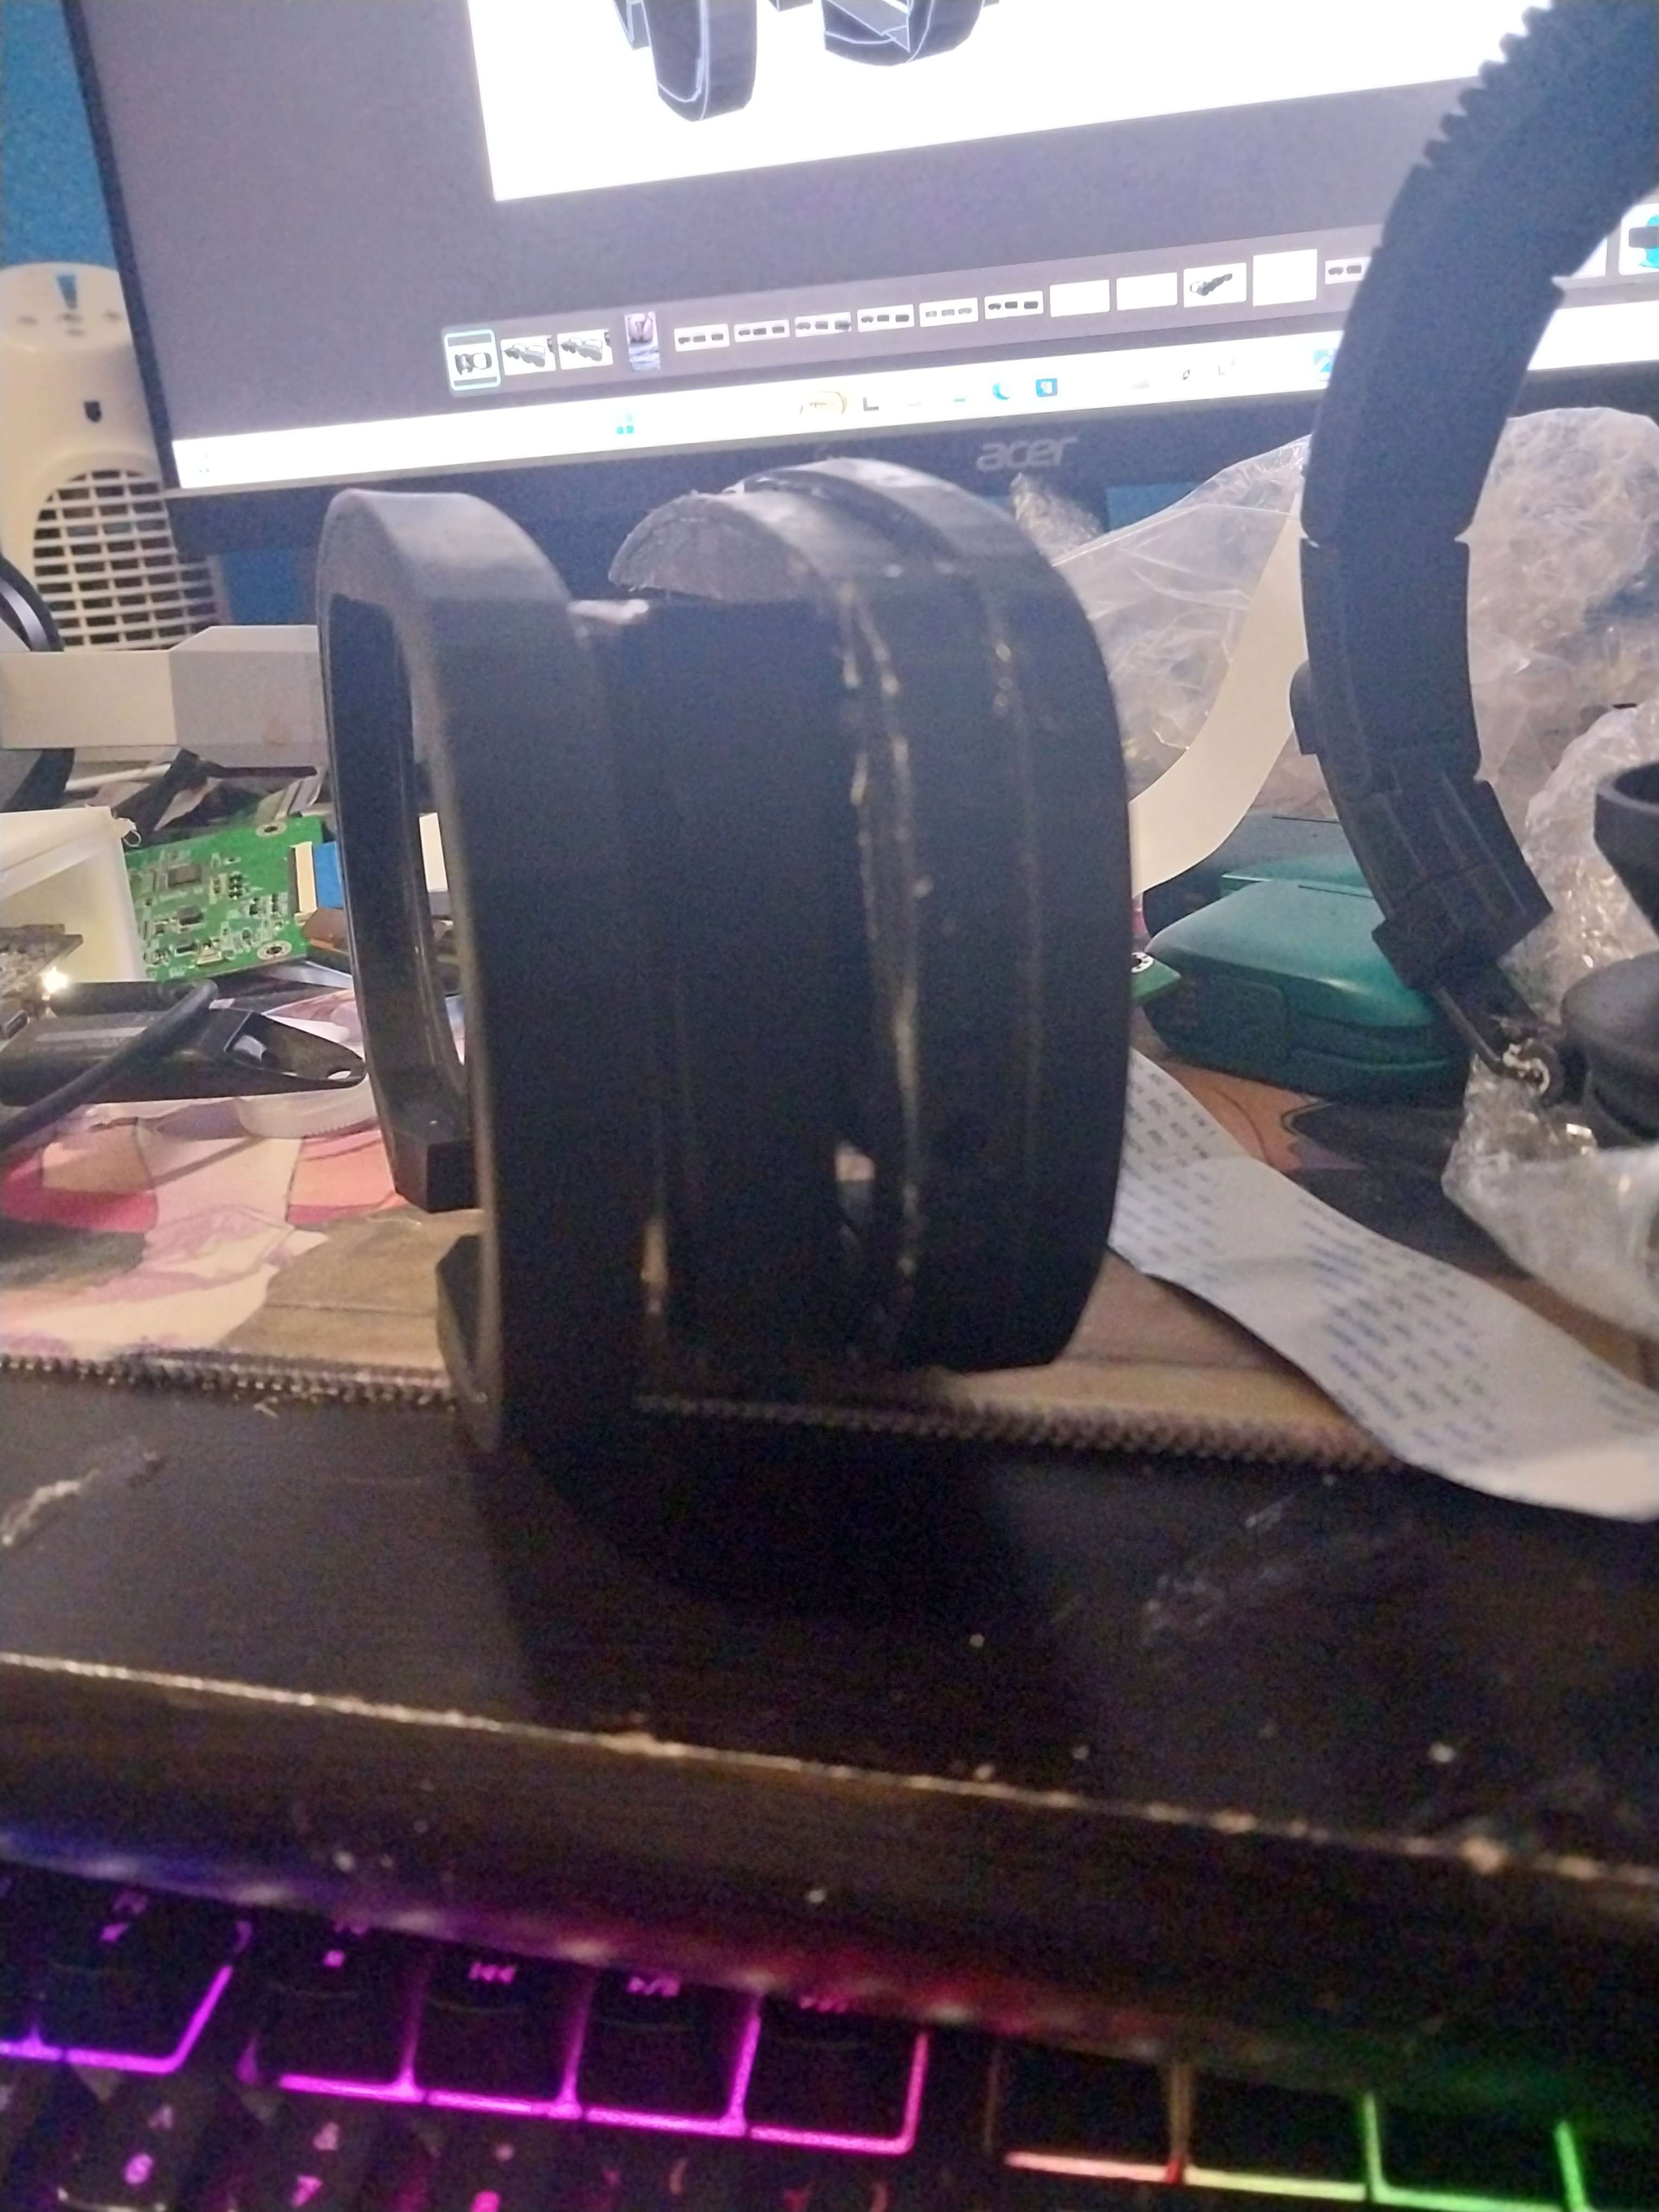
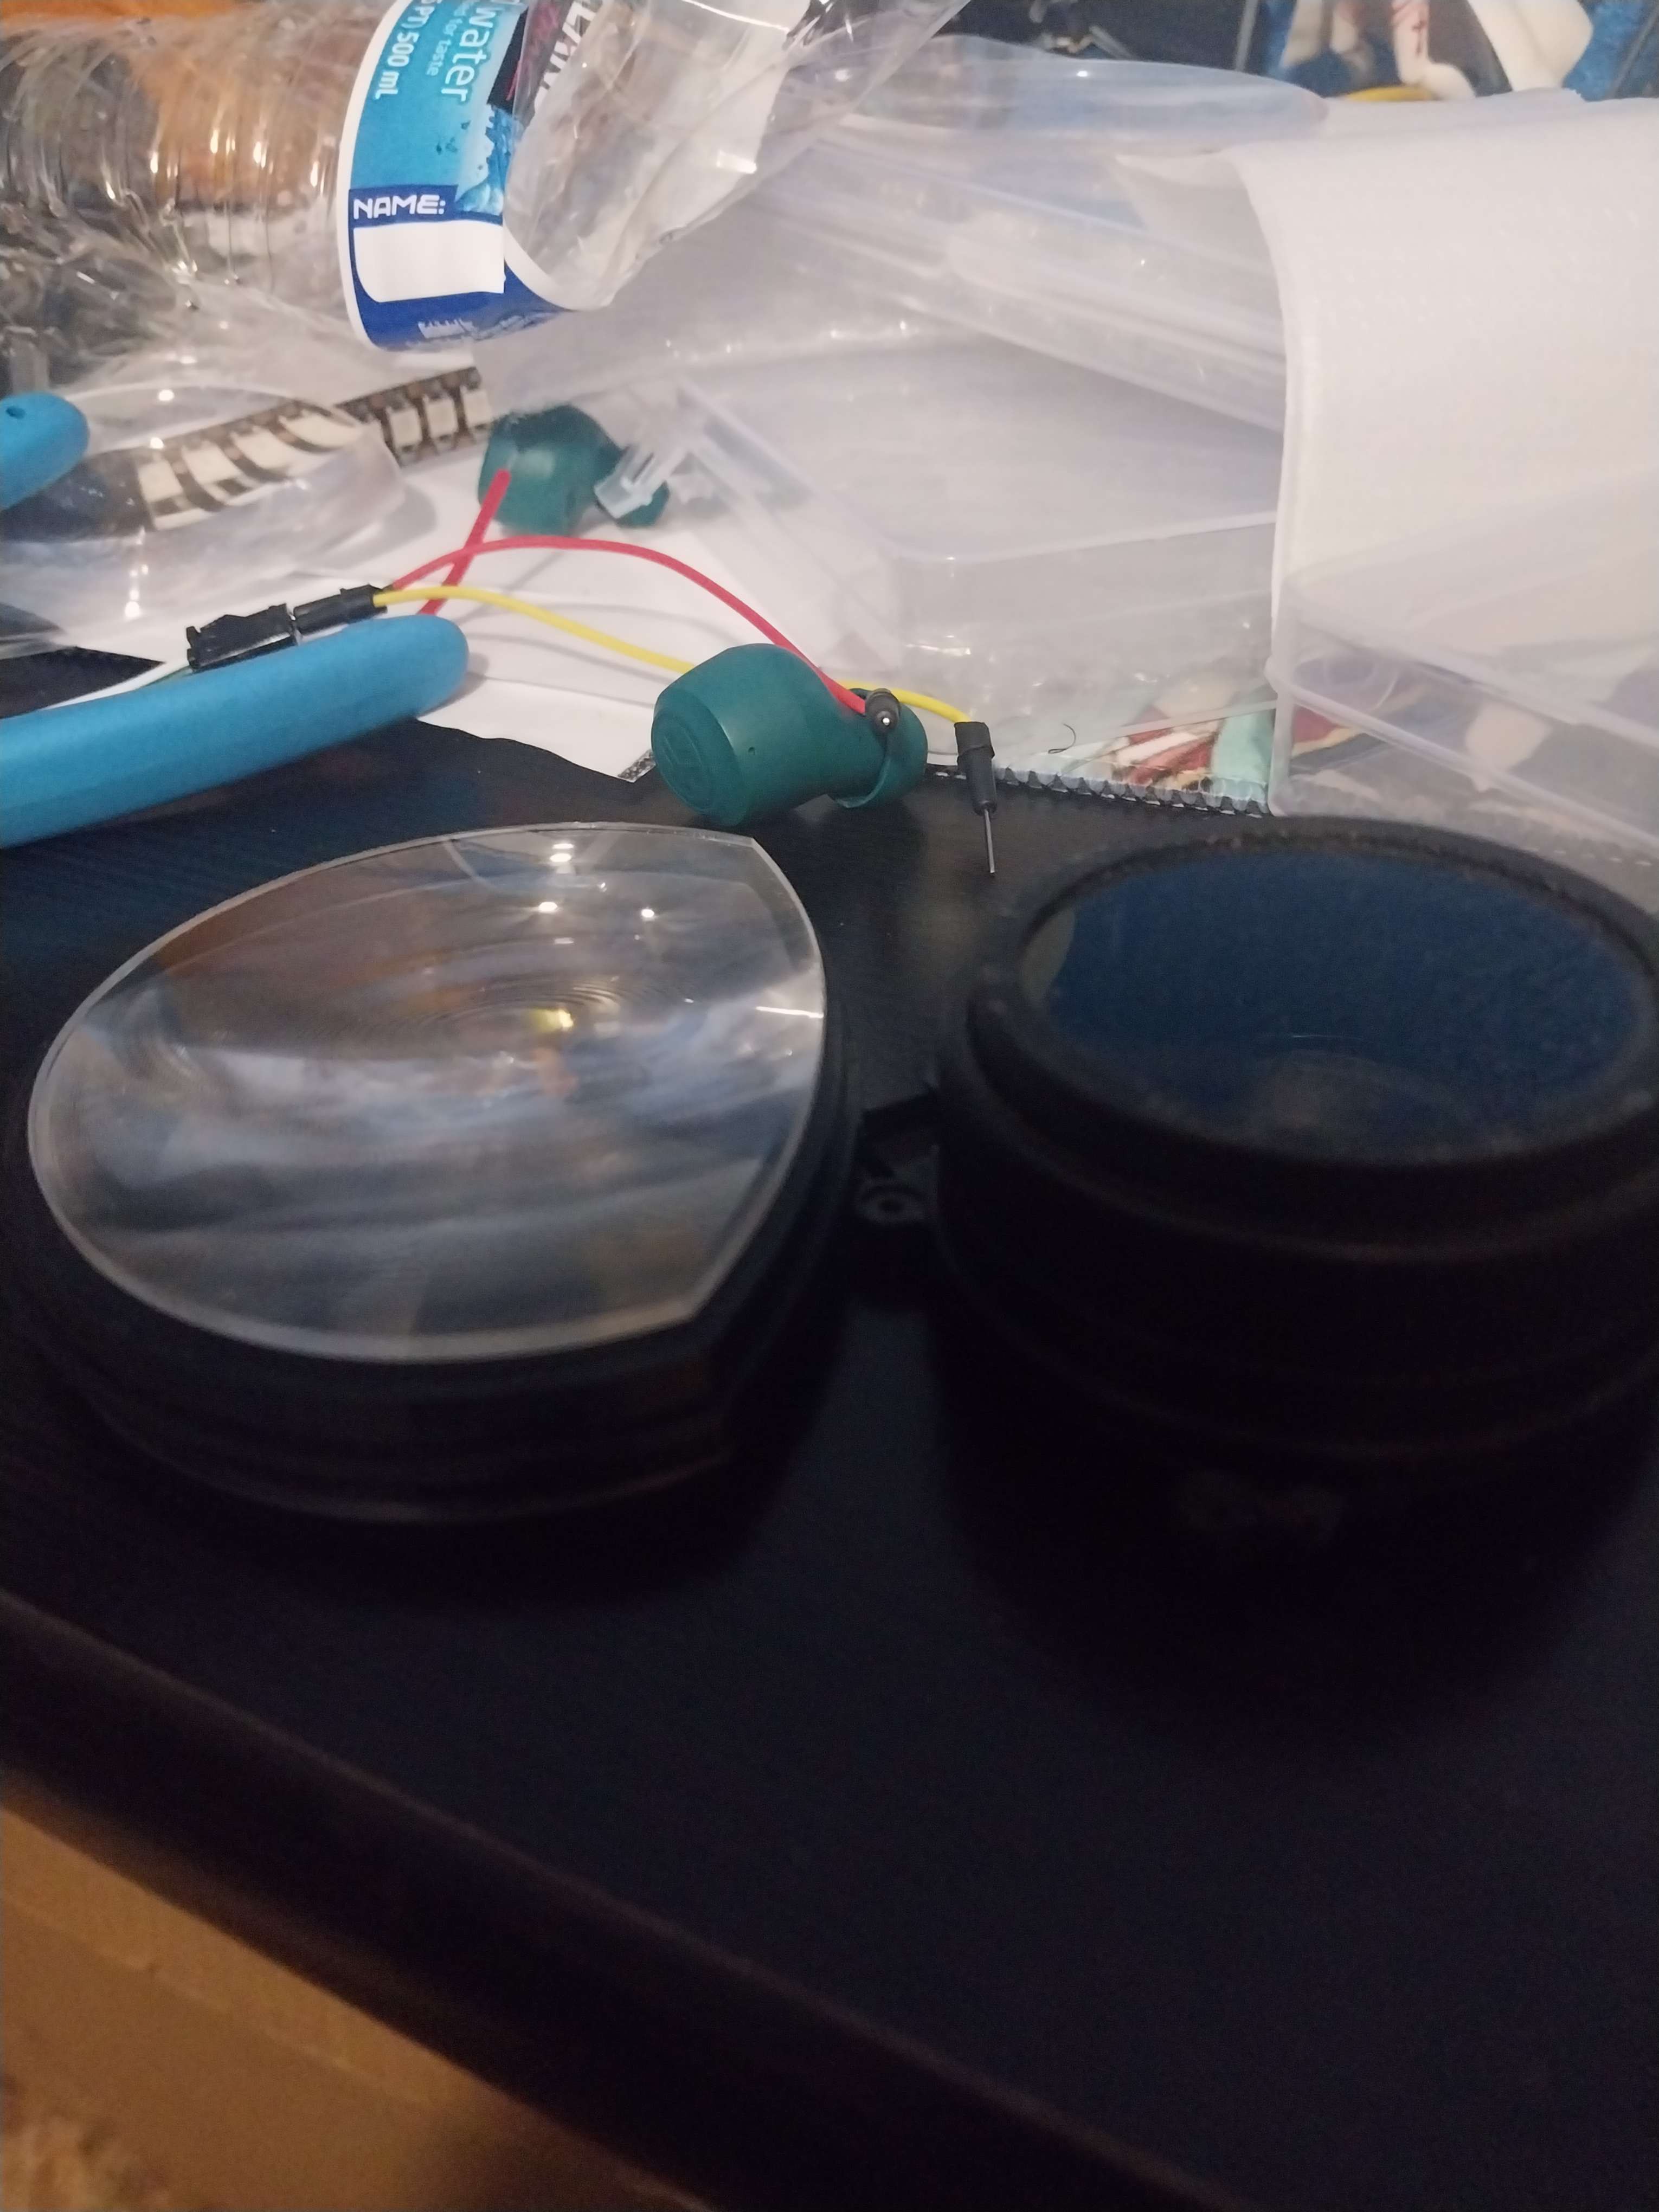
Now, the parts arrives and PCBWay did a great job! There are blemishes and the like but those are from me messing up with an adhesive lol. Let's take a look at what has been done with the IPD and eye module system before dealing with the rest!
![]()
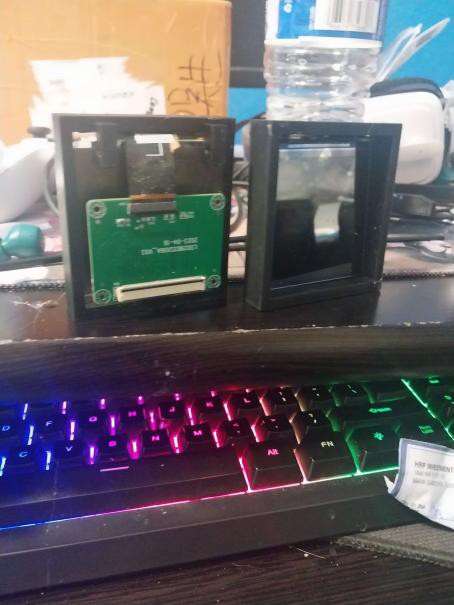
As you can see, the eye module requires pretty simple setting up! I am going to increase the thickness of the material the plate is on and make two snapped together so you can easily replace screens instead of permanently putting it there! I didn't realize it while modeling but it turns out the first board for the system fits nicely! I will likely add a smaller extra part for wires to go through for cameras, peripheral LED, etc.
![]()
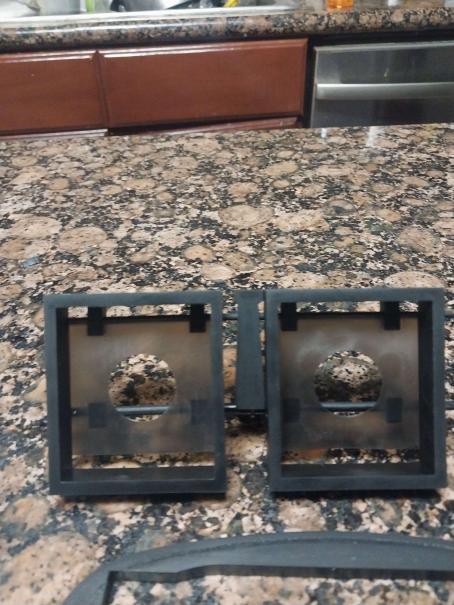
The IPD system still needs some work but it functions! I ended up making the holes too small for the top and realized it's best to use threads which can be set for the lower area! Thankfully made a 3D model of the estimated size so I could put in without effort! It looks like it works without needing a fancy gear system so this will be my default!
Overall, I am going to make changes to these systems and ensure the v2 works before I put the files here!
First up is the headset! Let's take a good look at how the system looks
![]()
*My favorite shot, I will overuse it in the future
![]()
*Headset from the side
*A closer look at
![]()
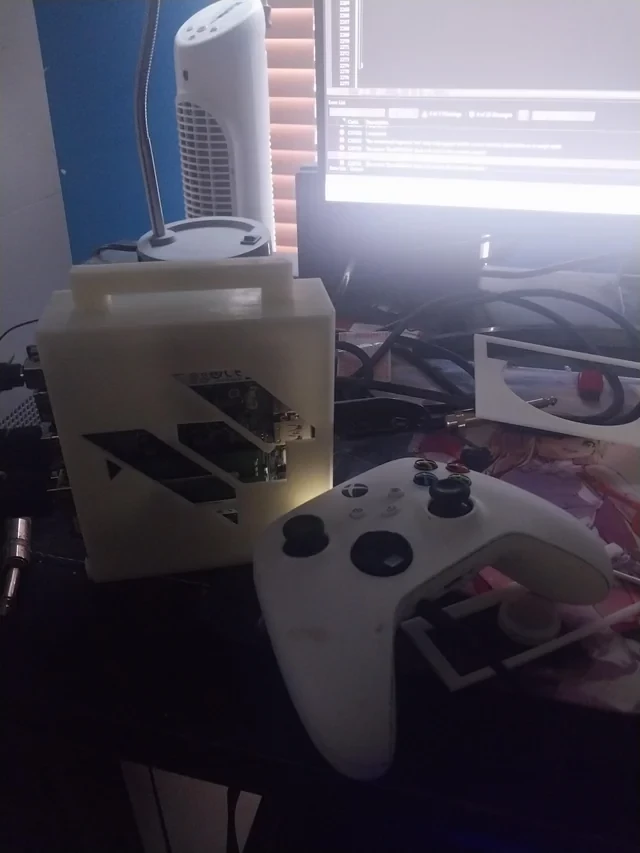
*The puck, housing a Ryzen system. More work to do here! Someone said it was like a little Gman suit
![]()
*Where the psuedopancake should be and the display, with the increased focal distance it should be all good
![]()
*Found out I can hold this together and make it a singular part of the eye module instead of needing to take care of it specially
![]()
*Here the hardware is hotglued so I can know where everything will generally go, in the next version it will be part of the headset
![]()
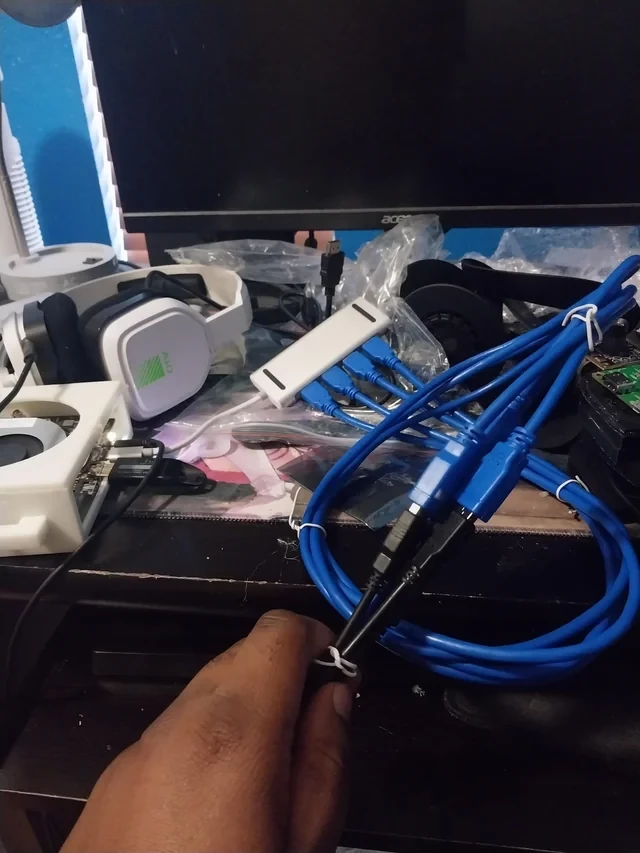
*The cabling needed for this to work, I will turn it into a singular larger one after the end and make a 3D printed part so the USB part can't easily be disconnected.
![]()
*The headset turned on, however I ended up messing up the cable to the left display and need to replace it. It's fine, i'll keep it here though and take care of it in the next permutation
![]()
*The headstrap, when finished it will look like you're wearing headphones but you can remove the lower part for your own headphones! Had to black out some parts because I had personal documents out like an idiot.
Results from testing:
- There are some gaps which must be filled, as an example at the lower sides of the front of the headset. I might use this to my advantage however and have two foam pieces cushioned together, so there is minimal light going through while wires for the camera can easily be added and removed.
- The nosegap works perfectly , I will add more curvature to the nose bridge but the eye module going through is no problem.
- I can better optimize how parts are connected. Instead of having it in layers like above, I can have layers interact with each other to increase structural rigidity.
- I NEED to redo the outer side of the headset, one piece failed because it wasn't connected and I didn't notice.
- I can add a wiremesh over the parts of the puck to look better, and use a layer within it for the battery power.
- The side needs to be increased by the face, so the peripheral LEDs will fit better! I can add a grove to make it fit better!
- The left side of the headset needs a hole at the side so the cables can go out of there. However, all cables will move through the top side.
- I need to add space for the cameras while adding them in a way which doesn't make it feel like there are cameras constantly looking at you
Overall pretty good, I can make the next model with all electronics inside and a lot of changes in mind! The next model will be easier to put together and likely have things screwed instead of simply being there!
I will also be making a second project for the entire headset instead of just the IPD system, going more indepth with the electronics and sourcing side. I hope to make most of everything easily able to be snapped and screwed together instead of having to use any type of epoxy but at the same time ensuring that the headset is easily able to be put together.
Until next time
-Walker Dev
-
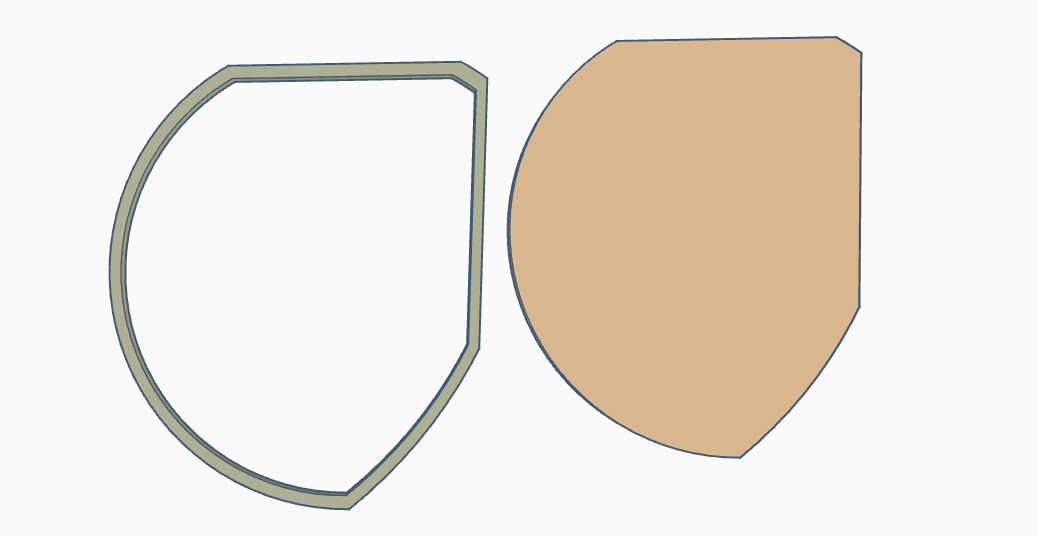
Log 6: Upgrading The Lens Design and Making More Of A Real Headset
08/06/2023 at 17:31 • 0 commentsA few small upgrades have happened from the last update to now! For example, let's start off by looking at the new lens design!
![]()
Some pros of this design includes
- Cuts off part of the vertical FOV but only at an area which makes not much of a real difference
- Upper inner side fits eye peripherals better, meaning even better inner FOV view
- Lower nose area now accounted for, covers 52mm to 72mm IPD
- Outer side and lower side still same for higher FOV
Also it will have about all of the 2.9 inch display visible without the borders, but still will 120mm focal length lens! As a reference, I made a scale drawing of the lens and put the original design atop it! I then shaded the part which was removed in black!
When we put a lens over, let's see how much of the black is visible!
![]()
As you can see, the area in black is not visible mainly due to the fact that the area can't usually be seen by the user anyways! Going to test as the design is coming, as soon as it's done and it works, i'll share the design here! I also am heavily considering putting it on Tindie and/or Alibaba as my own store, given how well these work!
Aside from that, more sneak peek of the headset! This will be under it's own project given the extent I will go with this, but I will also open source it and possibly put it on TIndie!![]()
-
Log 5: 3D Models and Enclosures
07/25/2023 at 03:08 • 0 commentsSoooo, I was supposed to send this yesterday but am holding back since I want to check the lens within a full model first!
![]()
![]()
As you can see, I designed a simple enclosure for testing the lens! This version will hold two 2.9 inch LCDs, the drivers for it, an IMU and Arduino! I might also add in a Raxda for some simple PCVR experience with 6DOF!
From this, I am going to make a test headset and open source it (probably under a new project) and go onto an AR headset version!
In particular, I know I have to switch the 70mm focal length lens with 100 - 120mm to cover the entire image! I also am going to change the lens design to have an IPD system!
With this, I will print the headset parts down to the knob adjustment system as a way to see what changes might need to happen!
-
Log 4: Housing Test :3333
07/23/2023 at 01:26 • 0 commentsFinally more work on my headset, particularly the pancake lenses are almost done!
I am going to increase the focal distance on the front lens so the display edges can't be seen. Tried and it worked with 3 lenses but because of 3, image quality dropped. I am aiming for 100 to 120mm to work hopefully, else I will just reduce the size of the lenses.
I also am considering not adding an IPD system because the sweet spot is HUGE, if I did I also would make a small edit to the lens, allowing IPD from around 47 to 75mm. Dimensions so far are 6 x 0.75 x 3 0.75 inches, with the motherboard and eye tracking it will likely only change in depth to 2.5 inches.
Tomorrow I will add in the display, peripheral LEDs and the part to cover the eye section. That part will snap on since in final it will be connected to padding, for easy cleaning. Then I can add in the x86 mobo, eye tracking and an IMU before moving to the cameras and finally the headstrap. I will open source those parts too, albeit later since the complete headset is actually for a product! I will however be dropping the models here with a few notes tomorrow with a few notes in an update!
![]()
-
Log 3: IPD Systems, Displays and XR
06/22/2023 at 19:47 • 0 commentsHey, some notes on progress!
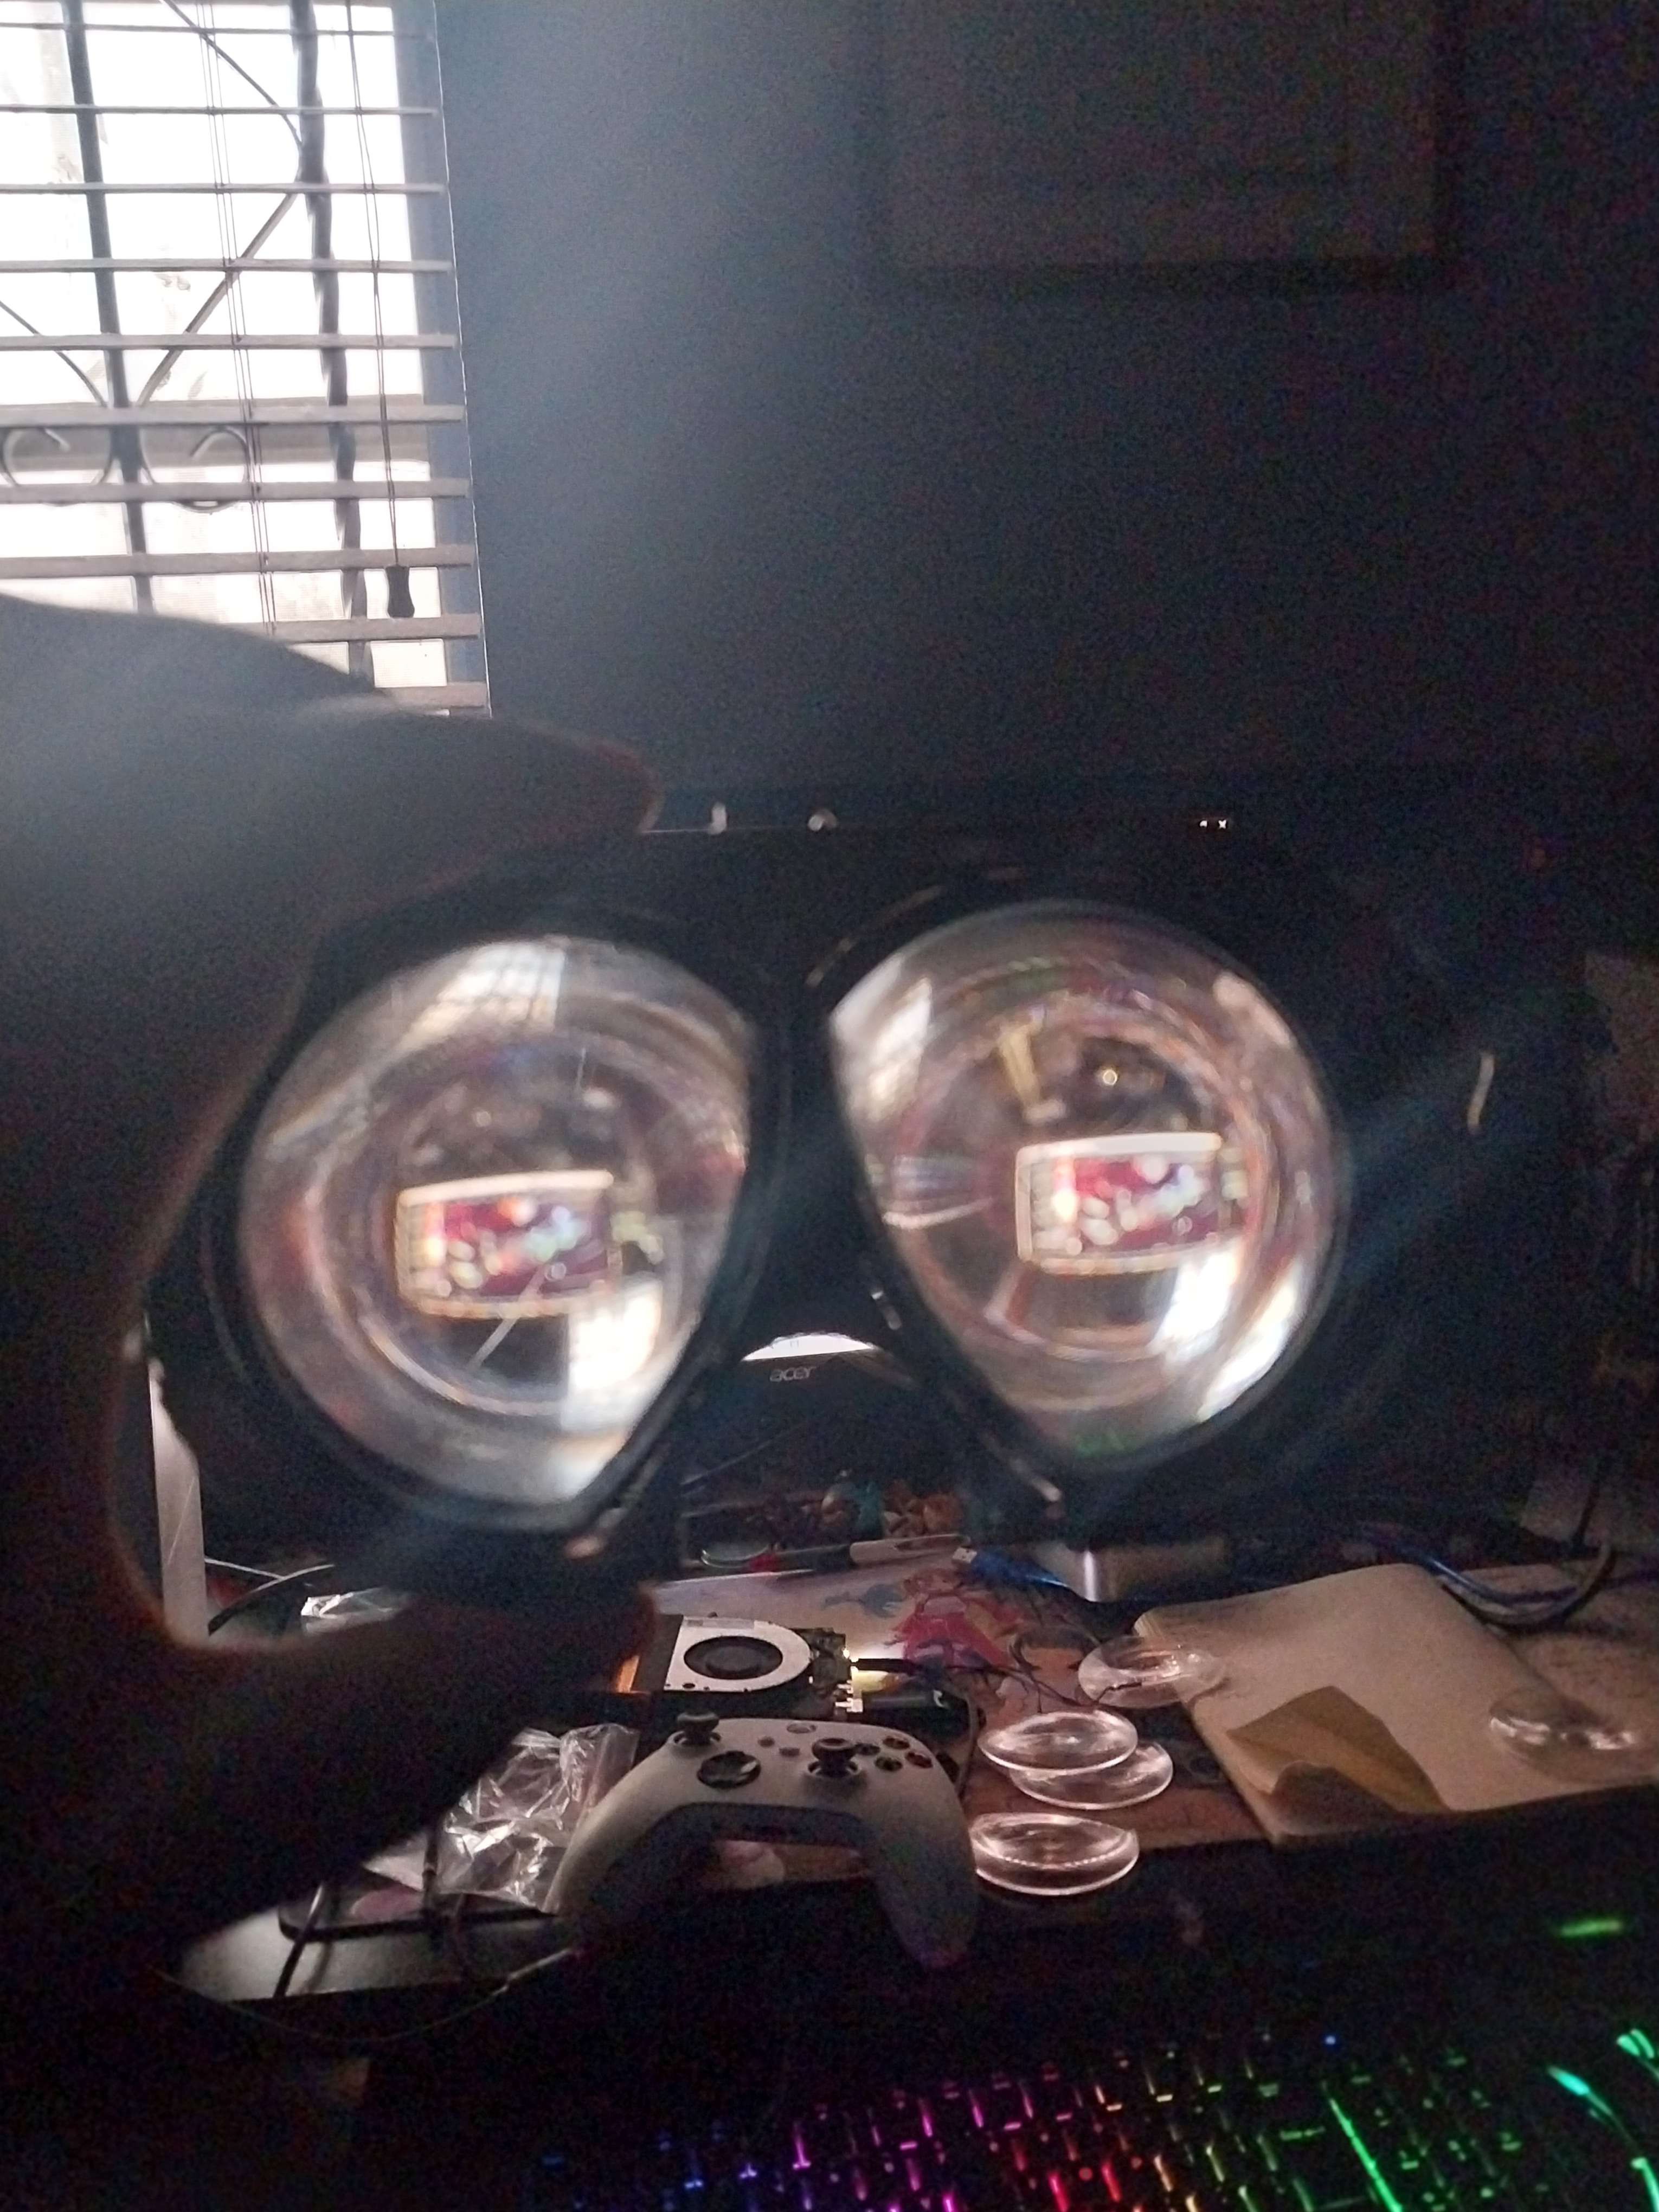
THE LENS FINALLY HAVE A HOUSING!
![]()
This is a scale show against another optical module! Mines is larger for a better FOV, while also being designed in a way where you can view a full image with the nose in mind (which a circle design does not account for)!
I tried to take some photos with the lens but was using a phone so the images came out distorted! I will show two anyways.
![]()
I used a 2.9 inch 2160x2160 display instead of my phone, although the lens can easily be scaled for other headsets! Soon, I will make a tutorial showing exactly how to do this!
![]()
![]()
It's a bit hard to tell through these, but there are no RGB lines (which seemed to happen because of phone), god rays are almost nonexistent and the display is a small distance away from the lens, at 0.75 inches! With the lens system being around 0375 inches, this puts the entire system at around 1.2 inches! This matches the Kopin P95 pancakes, which boasts 2.6kx2.6k at a 1.3 inch form factor, however mines having a wider FOV, being more ergonomic and literally costing %1 the cost.
More updates to come, working on a next gen lens system to make the FOV as wide as possible!
I will drop the model once I have the next part working!
More on this soon.
![]()
-
Lens Cut + Files (THE LENS ARRIVED ^^ )
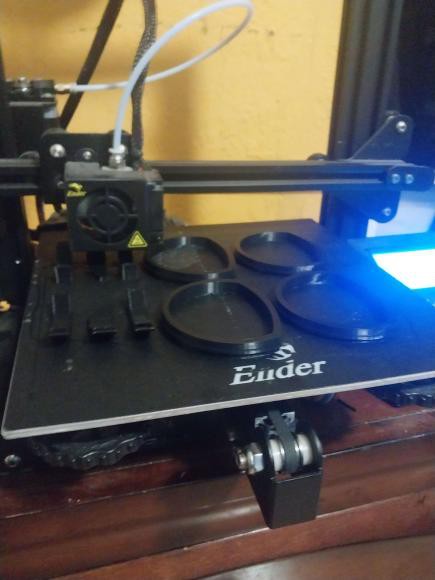
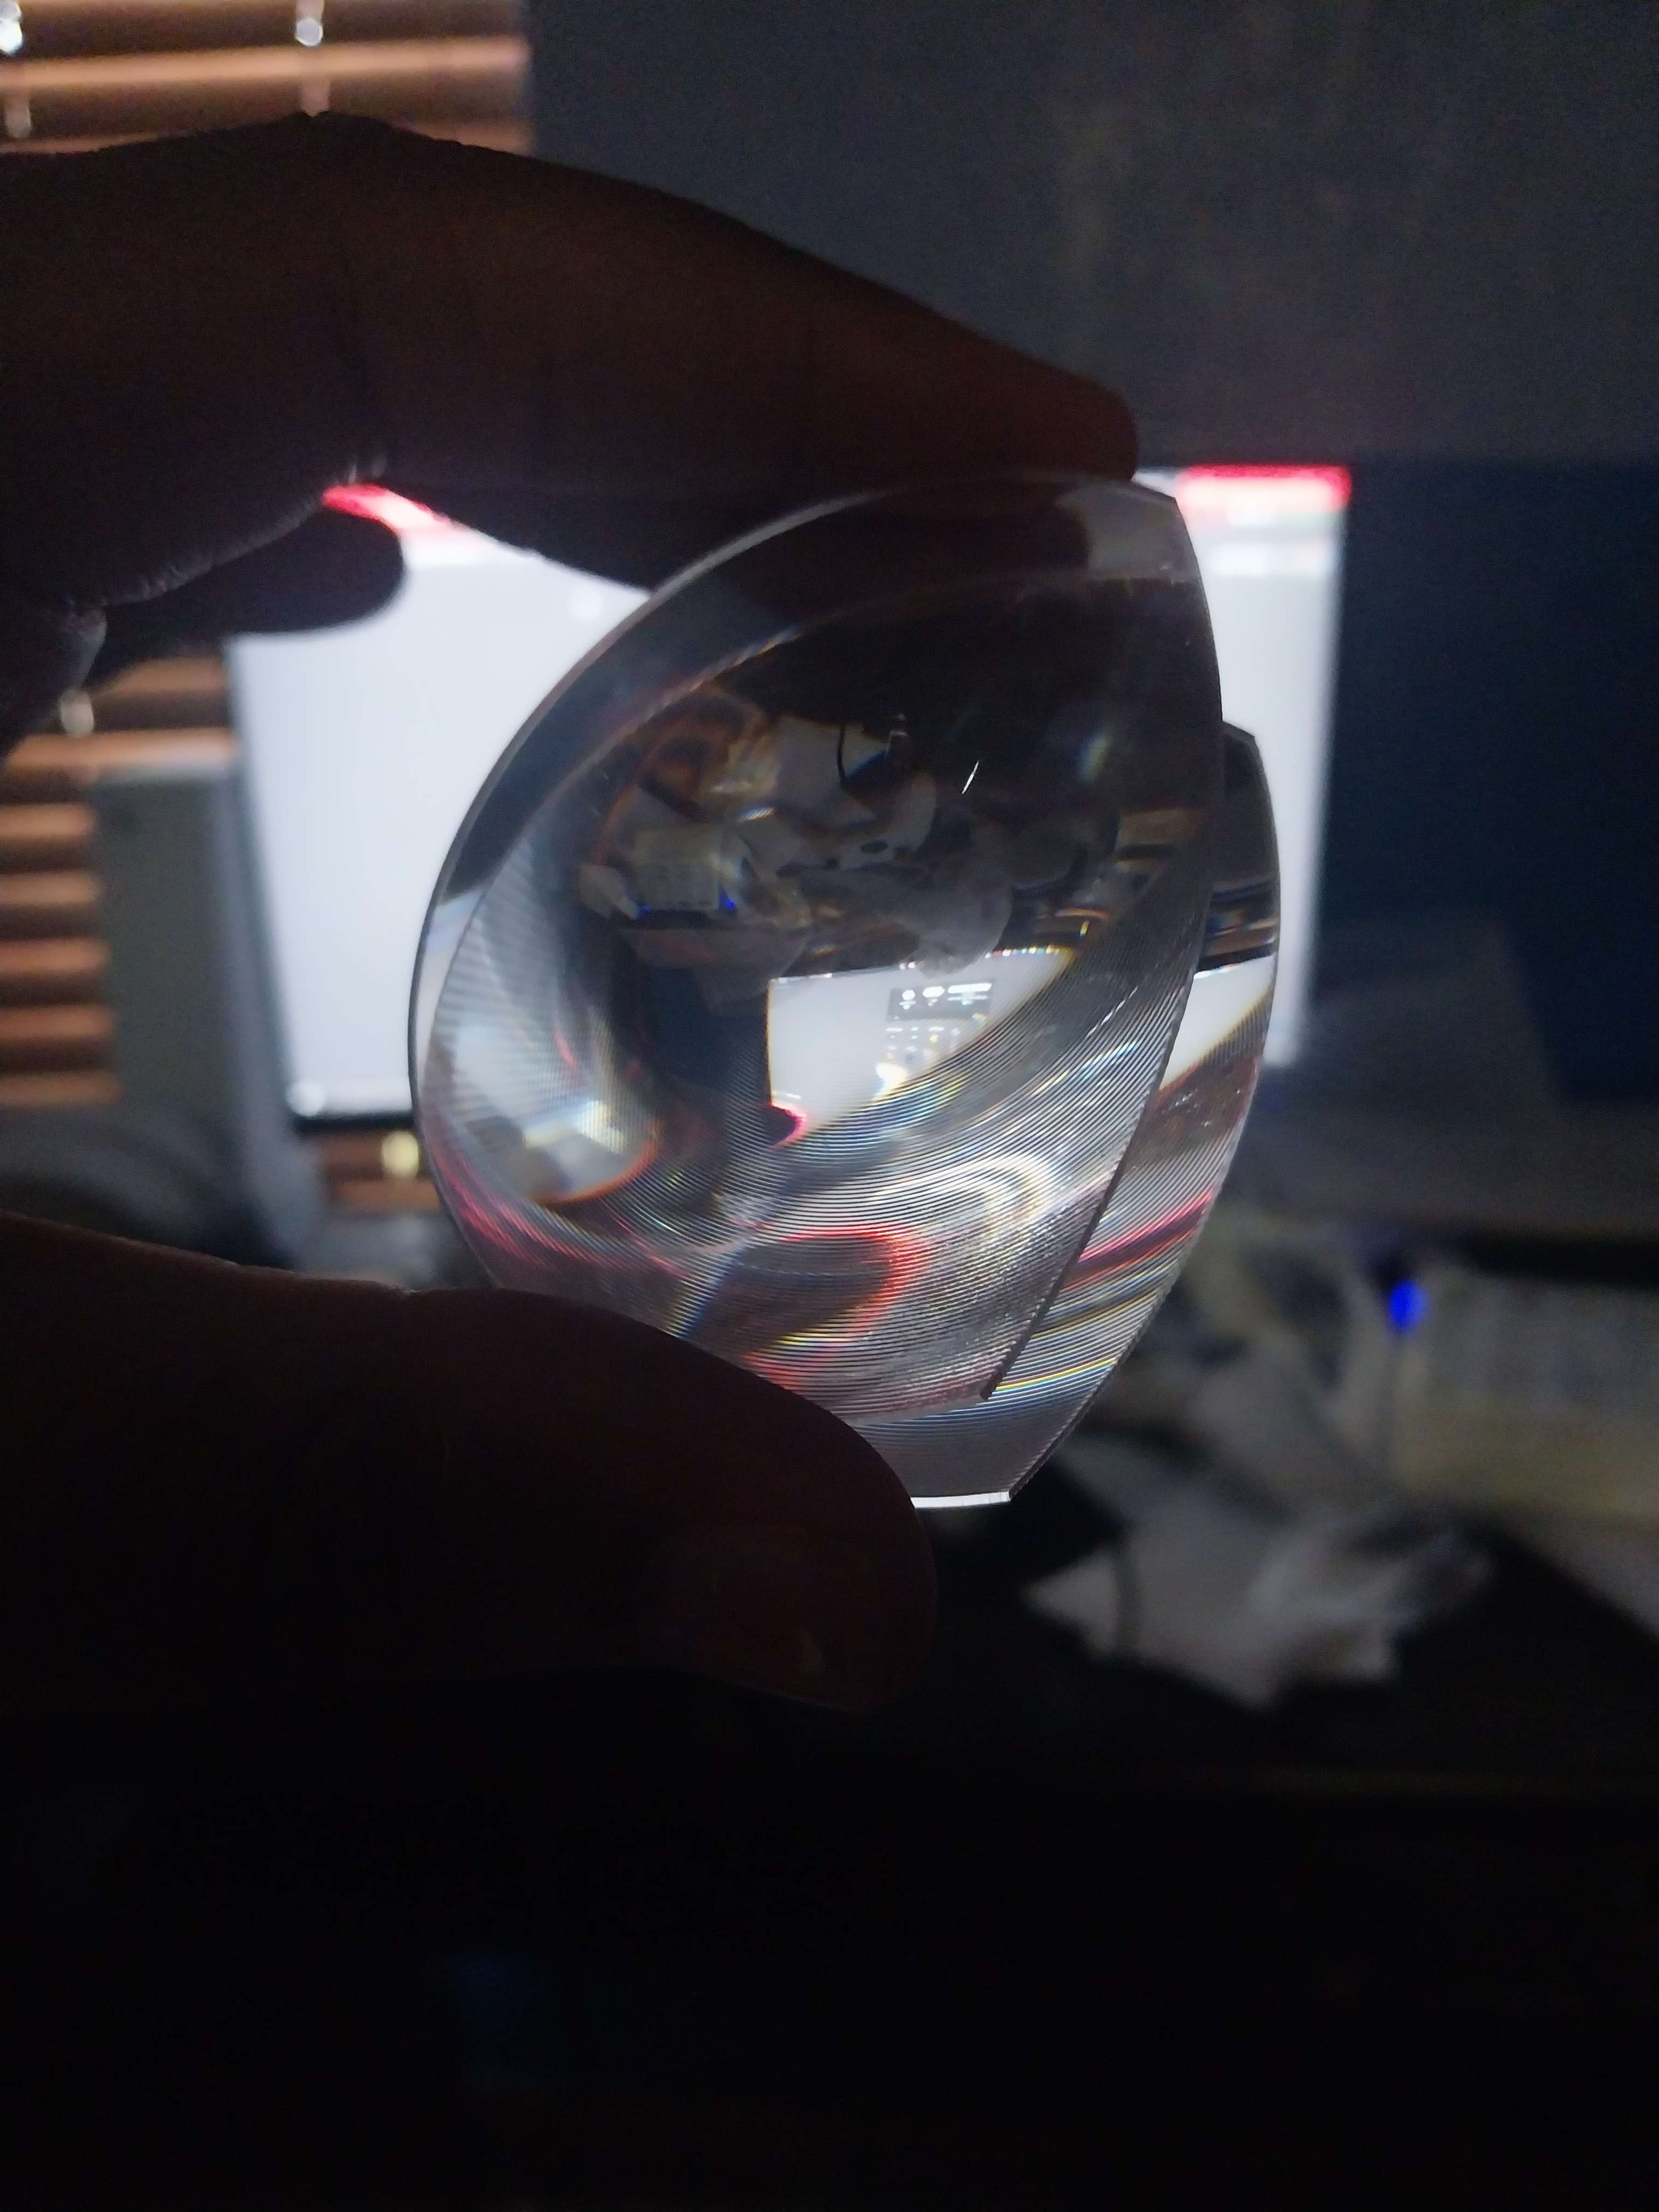
04/19/2023 at 00:07 • 0 commentsThe cut design has finally arrived and I have managed to test it with great success!
![]()
Overall, the lens are a success! The FOV vertically is wide to the point where I have to strain my eye to see the top and bottom of the lens! I am working on extending the horizontal FOV as it is comparable to the Quest 2, but WE MUST GO BETTER! In the next cut, I will make the lens bigger!
Currently, the images are extremely clear and do not require an extremely bright screen! However, there is an obvious chromatic abbreviation and some God Rays, which I can fix with a hot mirror! The entire lens is clear and there is no sweet spot, as the entire lens is completely clear instead of there being a blur effect from what i've seen! It is a little hard to see very small text, but that is probably because i'm testing VIA my phone, where I can see the pixels in some images! Warping also is not very present!
I am not sure about the chromatic abbreviation since I used my phone and the proper VR display before, and while the chromatic abbreviation and godrays were present in the phone test, it was not in the display test!
I use two lens here, a 60mm and 70mm focal length design, both lens being cut from a 70mm diameter! I used the following:
If you ask them to cut WalkerDev's design, they will know to cut the v1 for now!
This costed me around $16 to make enough for a headset! That currently is 0.8 percent of the cost I was given when I requested a pancake lens originally! have 4 pairs but have kept the others closed while I work on a cardboard design to test it!
In the files section of the project, i've attached both an STL and DWG of it for use! You have to play with the distance as i've yet to design the other systems like an IPD adjuster! I also attached a model of a model for a lens holder!
Feel free to make it, share what you find and more in the Discord Server here!
In the next update I will upgrade the horizontal FOV and possibly attempt to add a hot mirror to help with the chromatic abbreviation problem! Or maybe test the lens on a proper display and check if the chromatic abbreviation exists then!
Please adhere to the license guidelines at the bio!(I will put the measurements of spacing for the eyes to lens later within the week)
Easy "Pancake Lenses"
Because paying $2k for a piece of plastic is BS. IPD system included.
 (As big as it looks, this design is actually 7 x 2 5/8 x 3 inches, a bit smaller than the Quest 3!)