 Stephen Craver
-
1Installation, Step 1:
It's super easy to do the basic installation, no tools needed. Just remember that all jacks are 5-pin DIN connections.
A simplified hookup to your chair:
Chair <cord/plug> This device <cord/plug> Your chair's existing button array
The device pulls its power from your chair. No batteries or adaptors needed!
Important: If you shop around for 5-pin DIN cables, extensions, etc., note that although MIDI 5-pin cables will FIT, most will NOT work. This is a limitation of MIDI's design, not this device (or your chair).
First step, unplug your chair's button array from your chair's main controller (this connection will probably be just another 5-pin FEMALE cable that actually goes to the main controller). This will be a round 5-pin DIN connector.
-
2Step 2:
Plug your chair's MALE 5-pin DIN connector that you just unplugged into this device's "Main Controller" jack
-
3Step 3:
Plug this device’s pig-tailed MALE 5-pin DIN plug into where you unplugged your chair's button array from in step 1.
-
4Step 4:
Plug your new 2 or 4 button array controller into this device's "Logic Controller" jack.
-
5Step 5: Testing
Power up your chair by plugging in its adaptor. This device draws its power internally from your chair's power supply and takes about a second to boot up. During this boot process, you'll see the green power LED turn on and a quick self-test which cycles through all the LED's. After this short boot-up, it’s ready for testing.
Check your existing buttons to make sure they work as they used to.
Now try the new Logic Controller’s operation.
If it’s a 2-button controller, check the Left (DOWN) button by pressing it once. Your chair should start reclining for approximately 10 seconds.
Now press the right (UP) button. Your chair should start going back up for approximately 10 seconds or the “Recline Home” switch is activated, whichever occurs first.
Pressing the right (UP) button when at its home position initiates the “up ‘n out” sequence. Your chair’s UP action is activated for approximately 28 seconds which takes it to its fully raised position. It then pauses for approximately 10 seconds, followed by activating your chairs DOWN action for approximately 28 seconds or until the “Raise Home” switch is activated, whichever occurs first.
If it's a 4-button model, the lower buttons mimic your chair's buttons.
Throughout this document the term “approximately” is used. These are amounts of time that can be adjusted, down to 1/10th of a second.
-
6Building the project preface
One of my goals with this project was to build it with off-the-shelf components and limit the use of unique, obscure parts. The largest advantage of this approach is not having to design or build a printed circuit board. While it's possible to combine the power supply and relay boards with the microprocessor, I believe there is little advantage in doing so at this stage.
If this device were to be mass-produced, then of course this strategy would have to be re-evaluated. However, at this stage, it is not, so let's begin with the basics.
Before beginning, make sure you have everything you are going to need at hand. Some components are optional and not required for normal operation. For instance, the LEDs are not critical but can be helpful for setting and adjusting things like the limit switches. The optional items are clearly marked by an asterisk (*).
NOTICE Any links given are NOT endorsements or recommendations. Their use is to clearly identify the component.
The following is what you'll need:
-
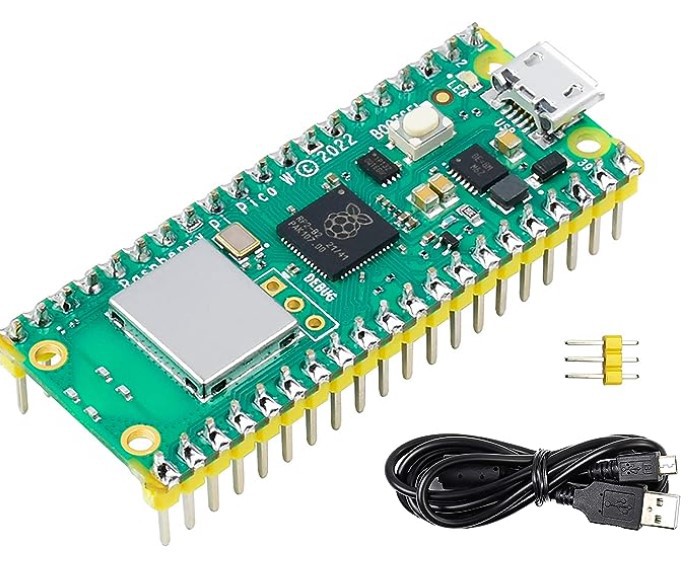
7The Microprocessor
A Raspberry PICO WH microprocessor. The “W”* is Wi-Fi, the “H” meaning soldered header.
![]() $14.90 on 9/19/2023
$14.90 on 9/19/2023 -
8Breakout board
-
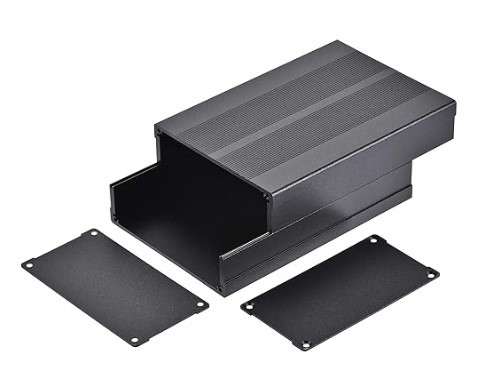
9The enclosure
A case to hold all the components. I chose a6 x 4 x 2 aluminum split case, which works nicely. It holds all components without overcrowding. Note that if you wish to venture out to use the microprocessor’s built-in Wi-Fi, using an aluminum case will greatly limit its range.
![]() $16.99 on 9/19/2023
$16.99 on 9/19/2023 -
10Power converter
A 5-48v ac/dc adjustable power converter circuit board (sold in pairs, although only one is needed).
Converts a 5 to 50 volt ac/dc input to an adjustable 4-48vdc output.
![]() $10.99 on 9/19/2023
$10.99 on 9/19/2023
A smart controller for a powered chair or bed
2023 Assistive Tech Winner! Automates the powered recliner or bed. Ideal for the mobility-challenged.
 $14.90 on 9/19/2023
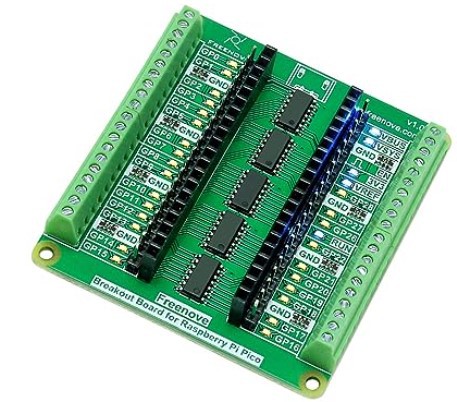
 $16.99 on 9/19/2023
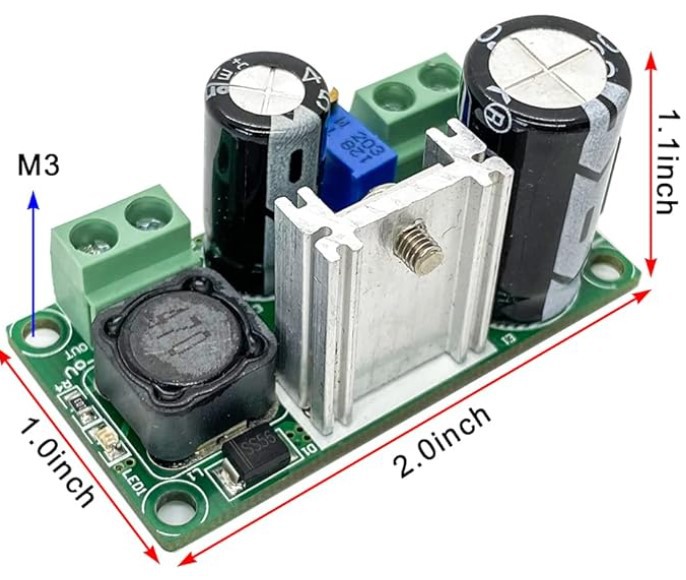 $10.99 on 9/19/2023
Discussions
Become a Hackaday.io Member
Create an account to leave a comment. Already have an account? Log In.