Beko Pharm
-
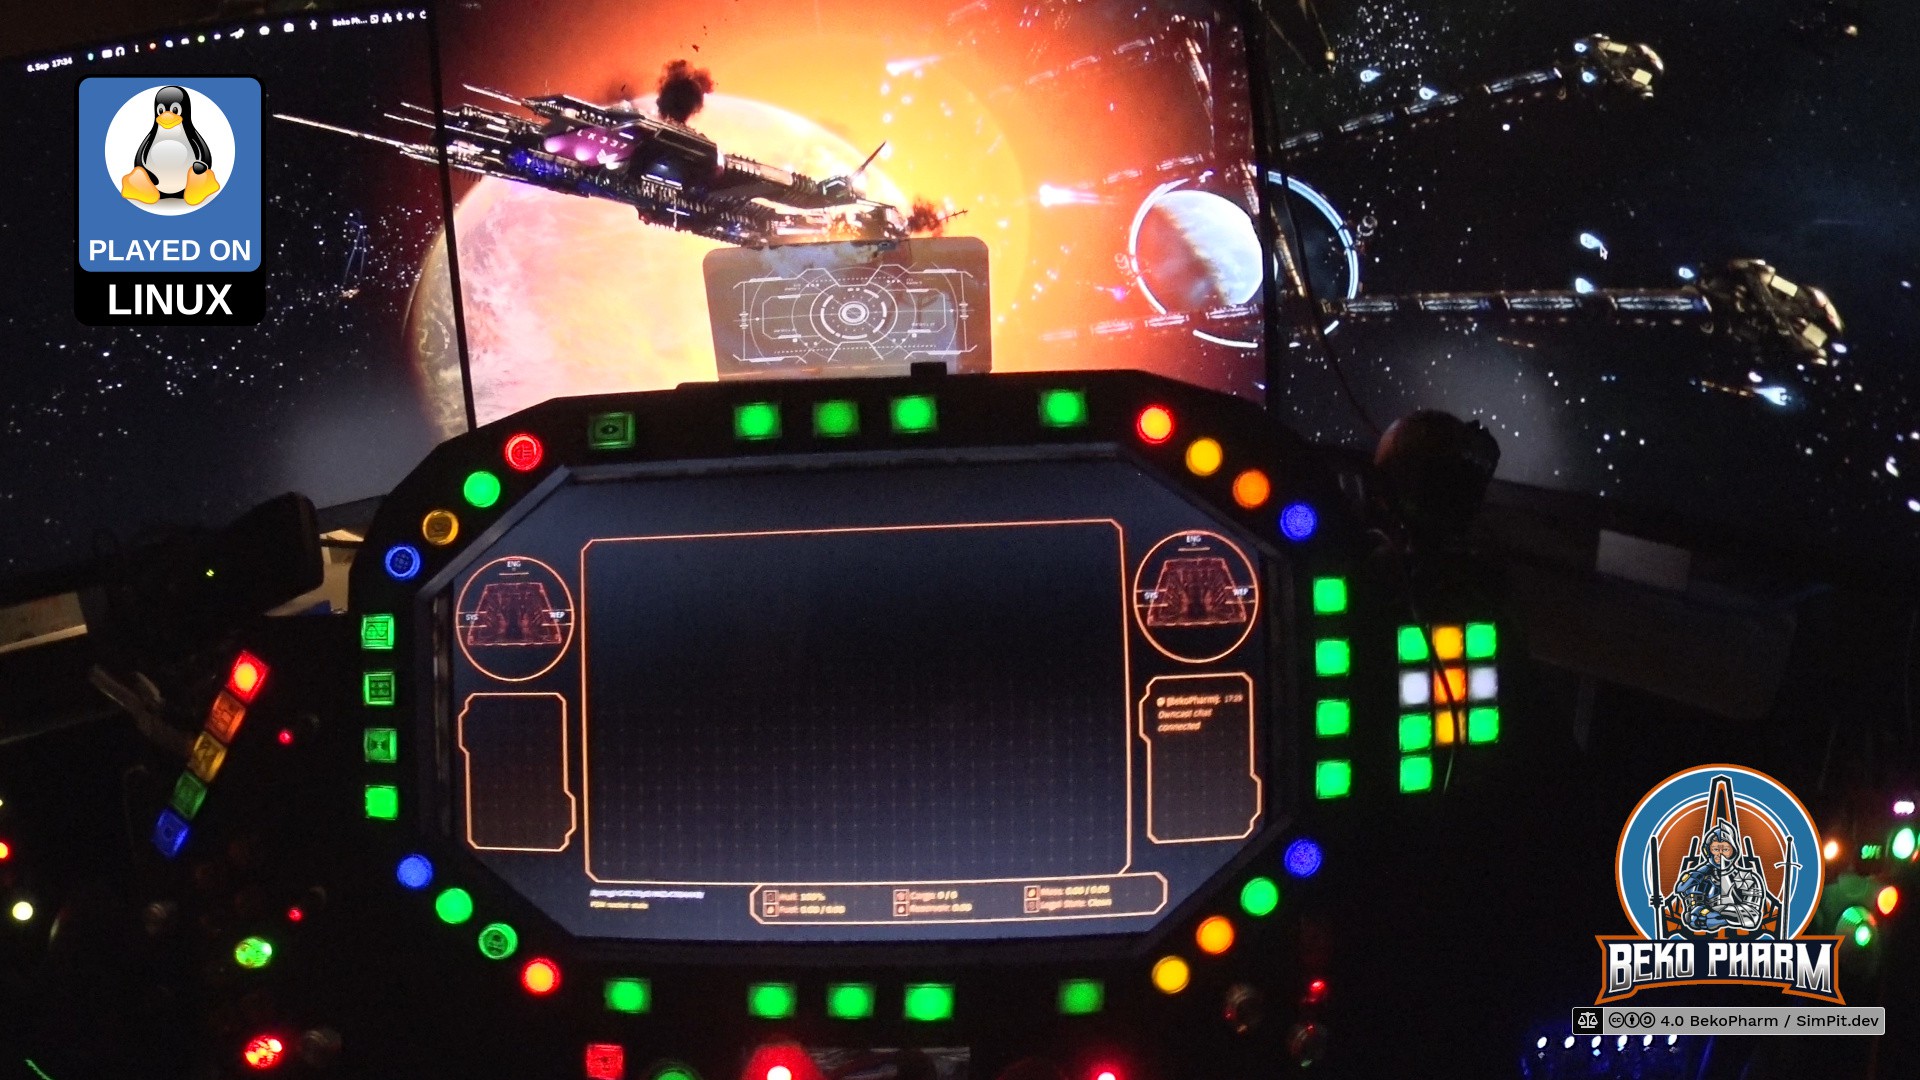
RPi display for my VF-1 inspired home cockpit panel
01/04/2025 at 18:07 • 0 commentsOk quick demo time. Got a dead cheap RPi display for the RaspberryPi (3A in this case). It has a touch screen and is even fast enough to play videos. Well, with whopping 480x320 only but that's good enough. I was always going to add a[nother] display in my "Primary Buffer Panel" 🤓 It was however not possible since the panel is still sitting on my desk and there was no space for the center part. I do have a ViperPit now though and I wonder if I can make the panels interchangeable!
-
In depth walkthrough of the Primary Buffer Panel
12/24/2024 at 11:53 • 0 commentshttps://makertube.net/w/bufv9BJv2vcXDb3KUaksB7 / https://www.youtube.com/watch?v=CpP7KS1fbrY
`@ozoned@video.thepolarbear.co.uk` interviewed me on my home cockpit on a live stream via his Owncast instance at https://stream.ozoned.net/. This is a more condensed version of the stream that is still just 1h shy. We’re going over almost every feature of my Primary Buffer Panel and I explain how everything works. I also decided to add various photos, slideshows or video snippets during the talk only sections so things don’t get too boring. Sometimes that even complements the talks 😄
Ever wondered how to start your own DIY home cockpit / SimPit on? It’s easy. Just watch this stream 🤓
Dedicated project website: https://SimPit.dev
Check out the original recording if you want to see more or the full stream with more [dirty] details: https://video.thepolarbear.co.uk/w/9zNcweVw2fxxpSrmBnaQJa
Originally noted at: https://beko.famkos.net/2024/12/18/interview-in-depth-walkthrough-of-my-primary-buffer-panel/
-
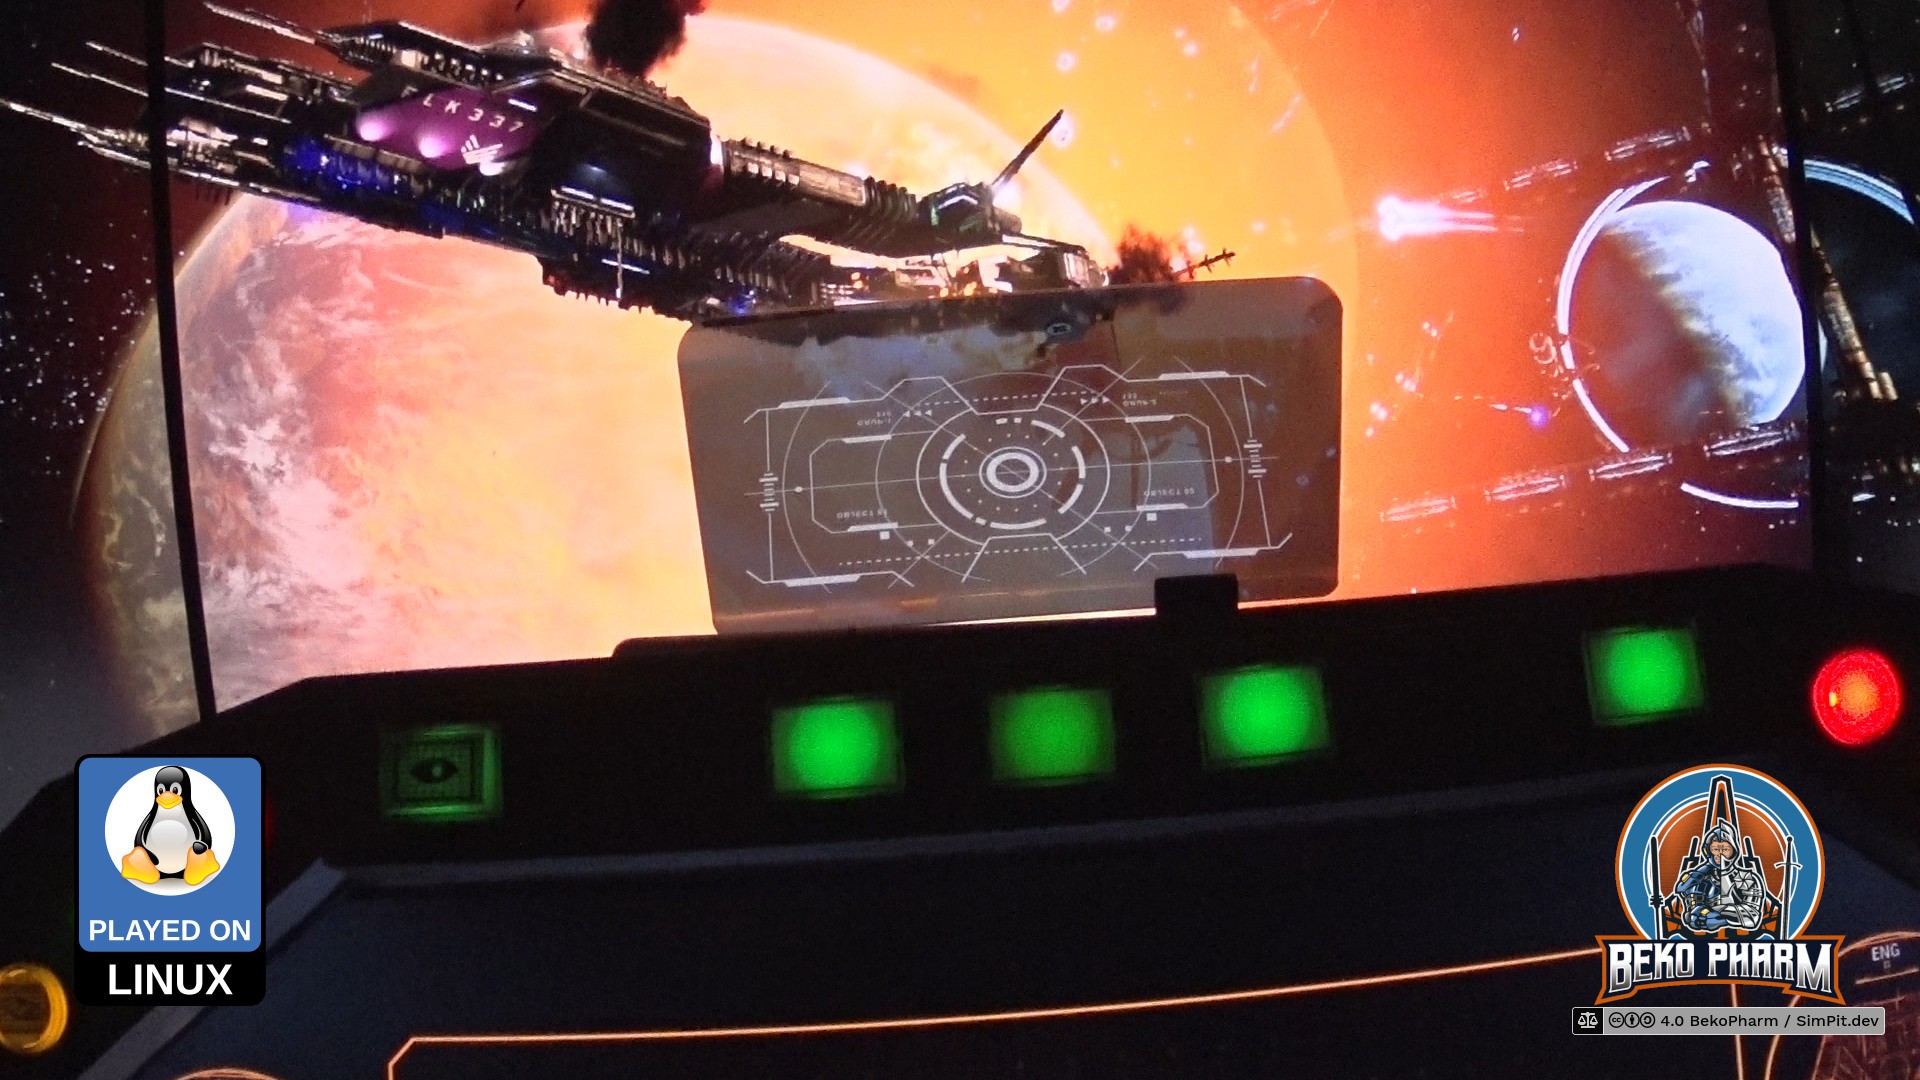
A HUD made from a dead cheap plexi beamsplitter
09/17/2024 at 13:39 • 0 commentsThis works way better than I expected. This is a static image test for a HUD on my home cockpit using a dead cheap beamsplitter made of plexiglass and a smartphone.
![]()
This works by placing a smartphone (or really any kind of fitting display) below it. The beansplitting characteristic allows some of the light to pass through and will mirror whatever is on the phone display below it. The image is inverted though so a HUD mode requires an already mirrored display mode. There are apps for this but since I use HTML for all my GUI stuff I can probably just use CSS for this task. Most of the work was finding out how to get Firefox to do fullscreen (which can be requested via JS _from a user interaction_ - so it has to be some sort of clickable element) and get it to keep the display always on.
![]()
A more advanced build would use a beamsplitter glass. This thing here is "designed" for cars and is according to the review a really bad product because it doesn't work well with day light or likes to slide around. All problems my desk does not have, of course, so I got this on a whim to see how it would look and I'm mind-blown with the result already 🤓 What do you think?
Originally noted at https://beko.famkos.net/2024/09/06/15629330/
-
Streamlined the plumbing pipeline
03/11/2024 at 10:44 • 0 commentsI did some pew pew
![]() Nothing new under the sun but this time I recorded as first person. Or as first person as it gets. Strapped the cam to my headphones (so much weight!) and killed some pirates. Managed to edit this into a half decent demo of the home cockpit in the end (I had none of v2 for ED so far):
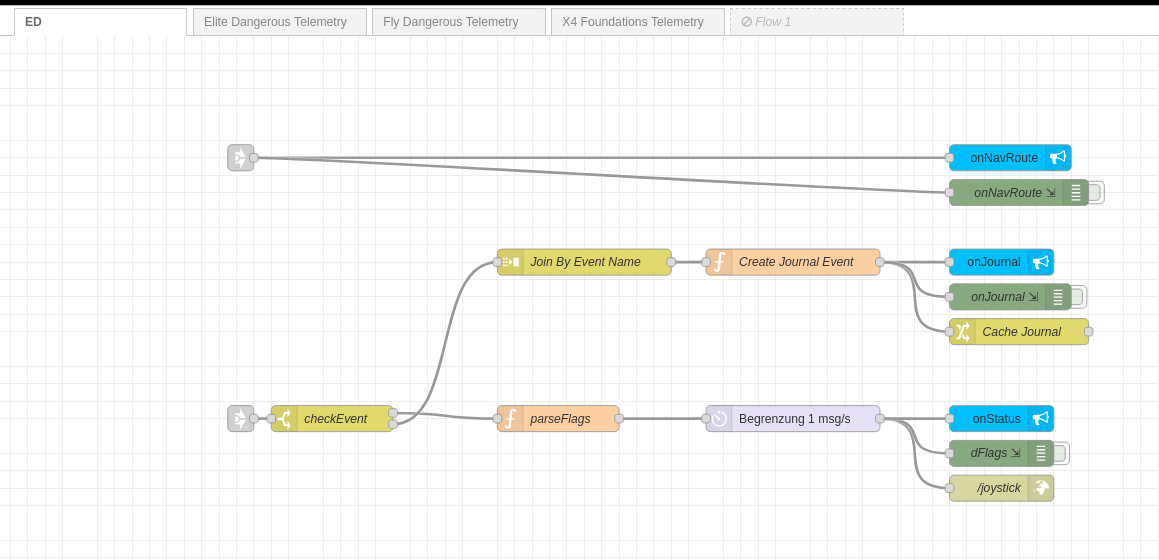
Nothing new under the sun but this time I recorded as first person. Or as first person as it gets. Strapped the cam to my headphones (so much weight!) and killed some pirates. Managed to edit this into a half decent demo of the home cockpit in the end (I had none of v2 for ED so far): I also streamlined the plumbing pipelines in Node-RED. Basically any game specific code is moved to a separated telemetry flow until the respective data can be used in the unified plumbing flow to dump everything into proper channels:
This makes things a lot more clearly arranged. I also hope to switch this to a MQTT broker eventually but no hurry on that. This way I don't have to load a specific flow for a game I'm currently playing. Just starting the Node-RED process and fire up the game I want to play. The corresponding data source will start sending telemetry once it detects a running game 🤓
-
Primary Flight Display
09/17/2023 at 19:05 • 0 commentsThe Primary Flight Display
PFDis loosely based on a modern aircraft instrument and is added to theMDFautomatically near planetary surfaces e.g. when descending on a planet inElite Dangerousor when hooning around inFly Dangerous.Not a pilot
Far from it. In fact I don’t even enjoy “real” flying. Aviation does have a certain effect on me though and I’m even sometimes found at an airfield.
And while I can crash a virtual Cessna anywhere nowadays, and even got some other virtual planes in the air, I’m not qualified for any real flying.
Please keep this in mind for everything on this page especially when I describe any flight systems of mine.
This reduces the screen space for other system messages somewhat but is totally worth it. It comes also with the proper visuals for selected airspeed, heading and altitude. The vertical speed is still missing but on my list. I went totally overboard with showing a Mach indication over 0.5 Mach as well 🤓 (Yes, yes you Mr. Smartguy over there. I know this is not 100% correct, doesn’t work for other planets and we don’t even have pressure values from a Pitot Tube. Go get yourself a juicebox. This is for a game!)
On precision
Flight instruments usually display data in realtime. This is not possible with some games like
Elite Dangerousthat drop data only after a certain threshold was reached. Other games, likeFly Dangeroushave a real hose of a data stream going and allow thus for way more precise data. In the end it’s just a game though so who cares how exact this gimmick is when we race around with speed that would leave us splattered all over the next bulkhead in reality.I’m still tweaking this while gaining more experience. It works pretty decent already though, which can be observed in this demo playing
Fly Dangerous.There is also an unlisted demo video in
4Kavailable onYouTube. It’s from an earlier development phase though and a lot more clunky so keep that in mind: https://www.youtube.com/watch?v=MC-XpirO920I’ve yet to record a better demonstration of this.
Originally posted at https://simpit.dev/systems/pfd/
-
Auto Flight System
09/17/2023 at 18:59 • 0 commentsWhile seeking through the available data in the Status JSON of
Elite DangerousI noticed that I don’t get any airspeed from Elite. That’s not so important in space but kinda interesting in planetary flight to satisfy the flight sim gamer in me as well. I noticed though that I do get timestamped latitude, longitude and altitude values so shouldn’t it be possible to “simply” calculate this, right? Right?An Auto Flight System for Elite?
This was when I dived into the rabbit hole of calculating airspeed and heading on planetary objects using a spherical coordinate system and while I didn’t nail it exactly how Elite does it the result is close enough. The game provides the required data to go crazy here – most important the radius of the current object. In theory I could start writing some primitive
AFS(Auto Flight System) routines now, which I’m totally going to explore at some point in the future just because 🤓![]()
Checking my maths – yes, altitude is added to the mix so airspeed is mostly correct as long as no rapid course changes are made.
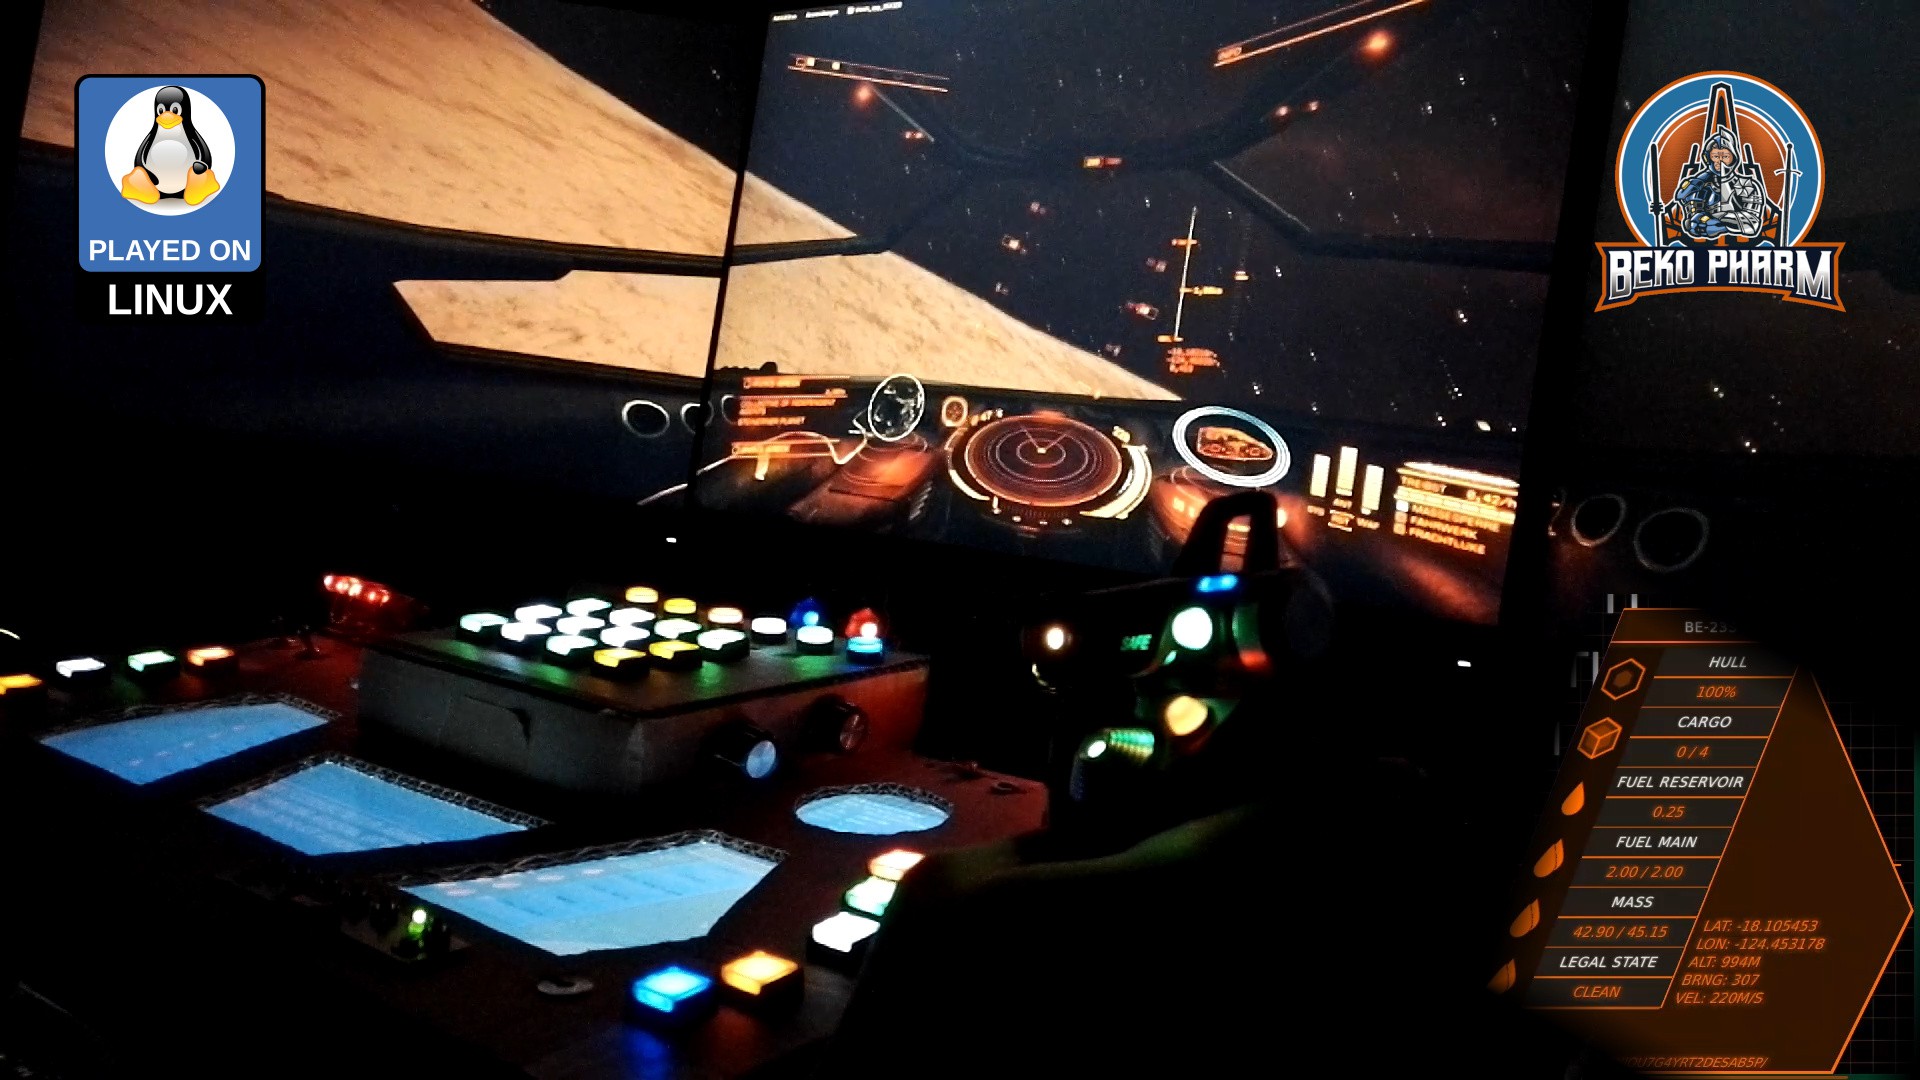
Conclusion
After spending way too much time with this and the Pythagorean theorem (Yes mum, a game made me do maths. MATHS! 🤯) I settled with some calculations and data for my current ship to the right and targeted ship data on the left. This is sort of tricky because many game events update different parts of the data so timestamps have to be kept in mind and a game specific parsing strategy is required. See the last part of the demonstration video here to get an idea how this looks.
Originally posted at https://simpit.dev/systems/afs/
-
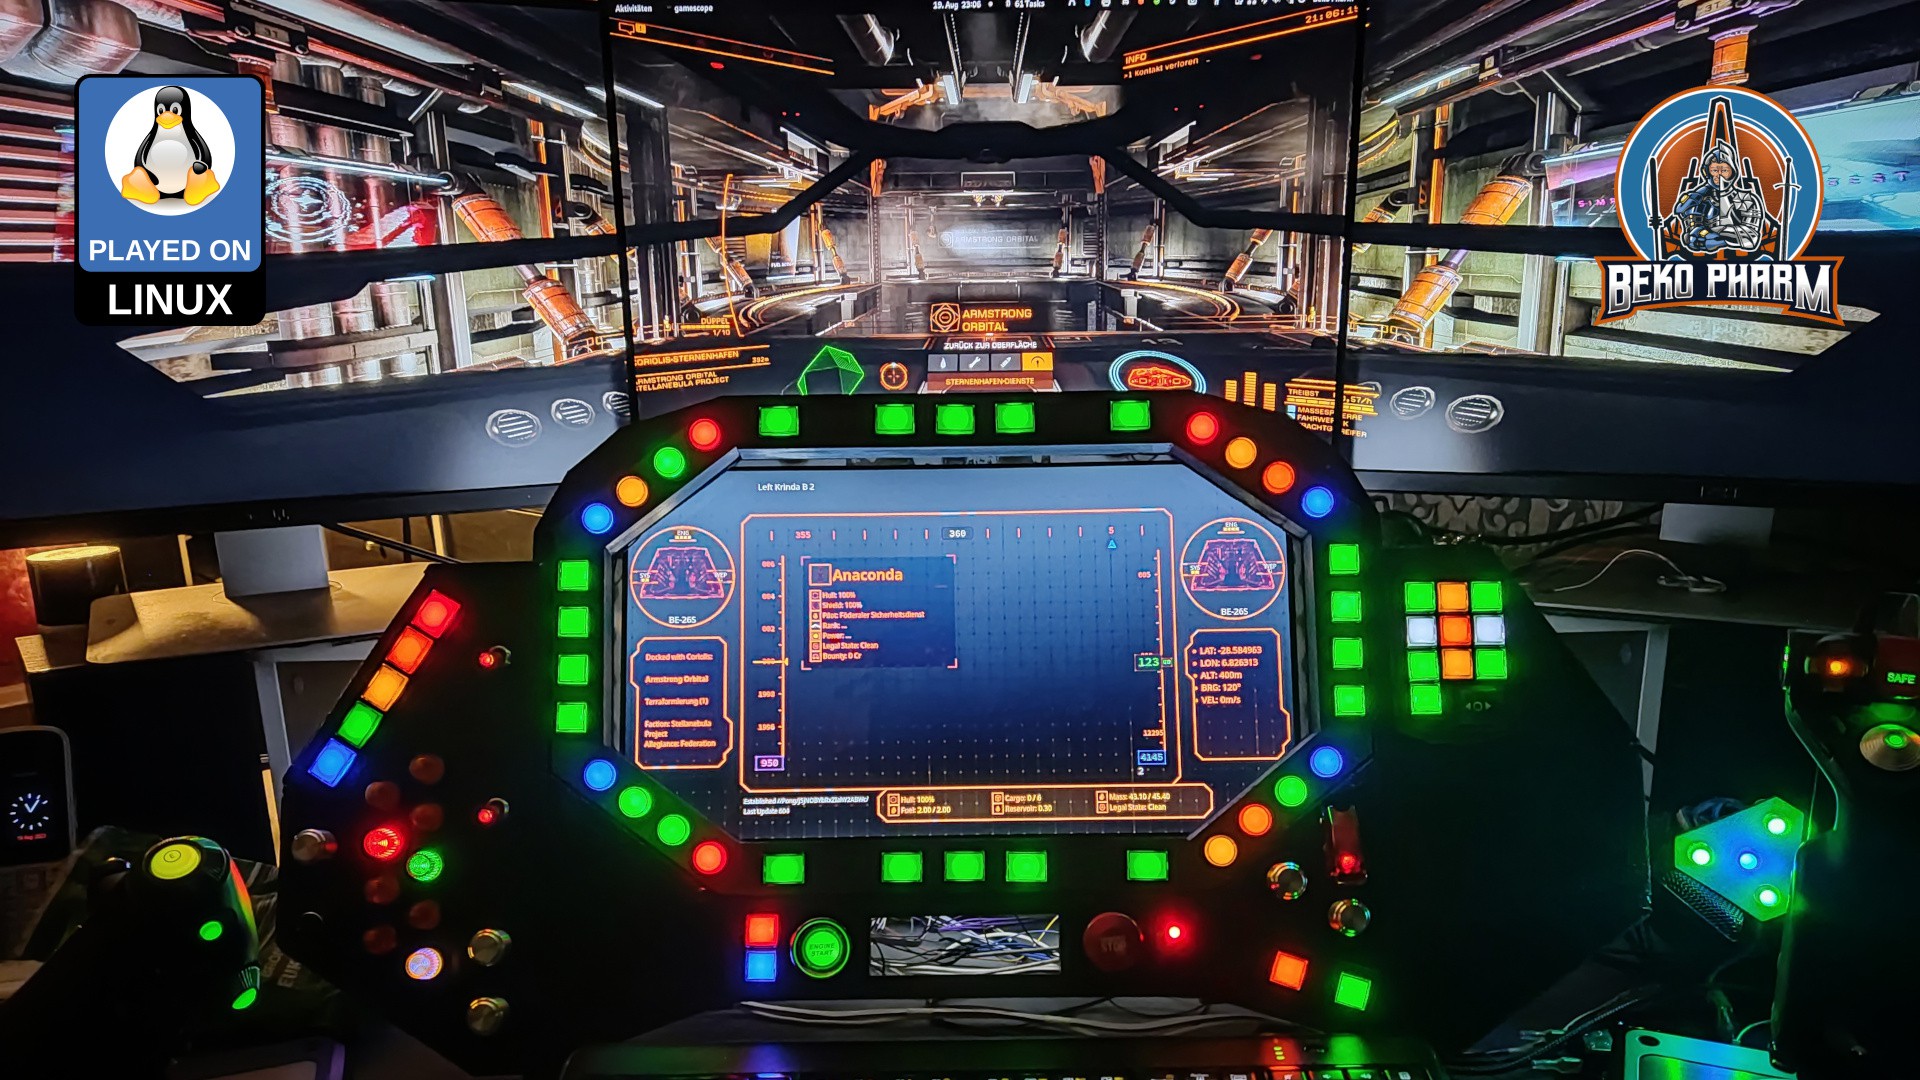
Multi-function display
09/17/2023 at 18:58 • 0 commentsThe MFD (Multi-function display) is salvaged from an old laptop. It is not running
GameGlass, like so many others SimPits out there do. Mostly because I’m not a fan of touchscreens or vendor lock-in. There is also the little detail thatGameGlassis simply not available for my operating system and does not know about all the Space Pew Pew I usually do.![]()
When I was evaluating what to use to program mine I was caught between the difficult choice to learn yet another fancy framework, like
Raylib, that would do OpenGL ES 2.0 without X11 on the Raspberry Pi, orOpenFrameworks, or simply go with something I knew already.In the end I just threw the might of my CoffeeLake at it and went with
Reactsince most of the data was already available viaNode-REDover Websockets anyway. Also…Arwesis just so cool (alpha version or not) 🤩 and I had some experience with it thanks to myStreaming Overlaythat I also wrote withArwes. Connecting it toNode-REDwas just a matter of installingSocket.IOto transport the messages. I rewrote the whole thing for version 2 though because the code for version 1 was a very hacky mess and the olderArwesversion was deprecated. The core functionality is still the same though.Originally posted at https://simpit.dev/version-2/mfd-software/
-
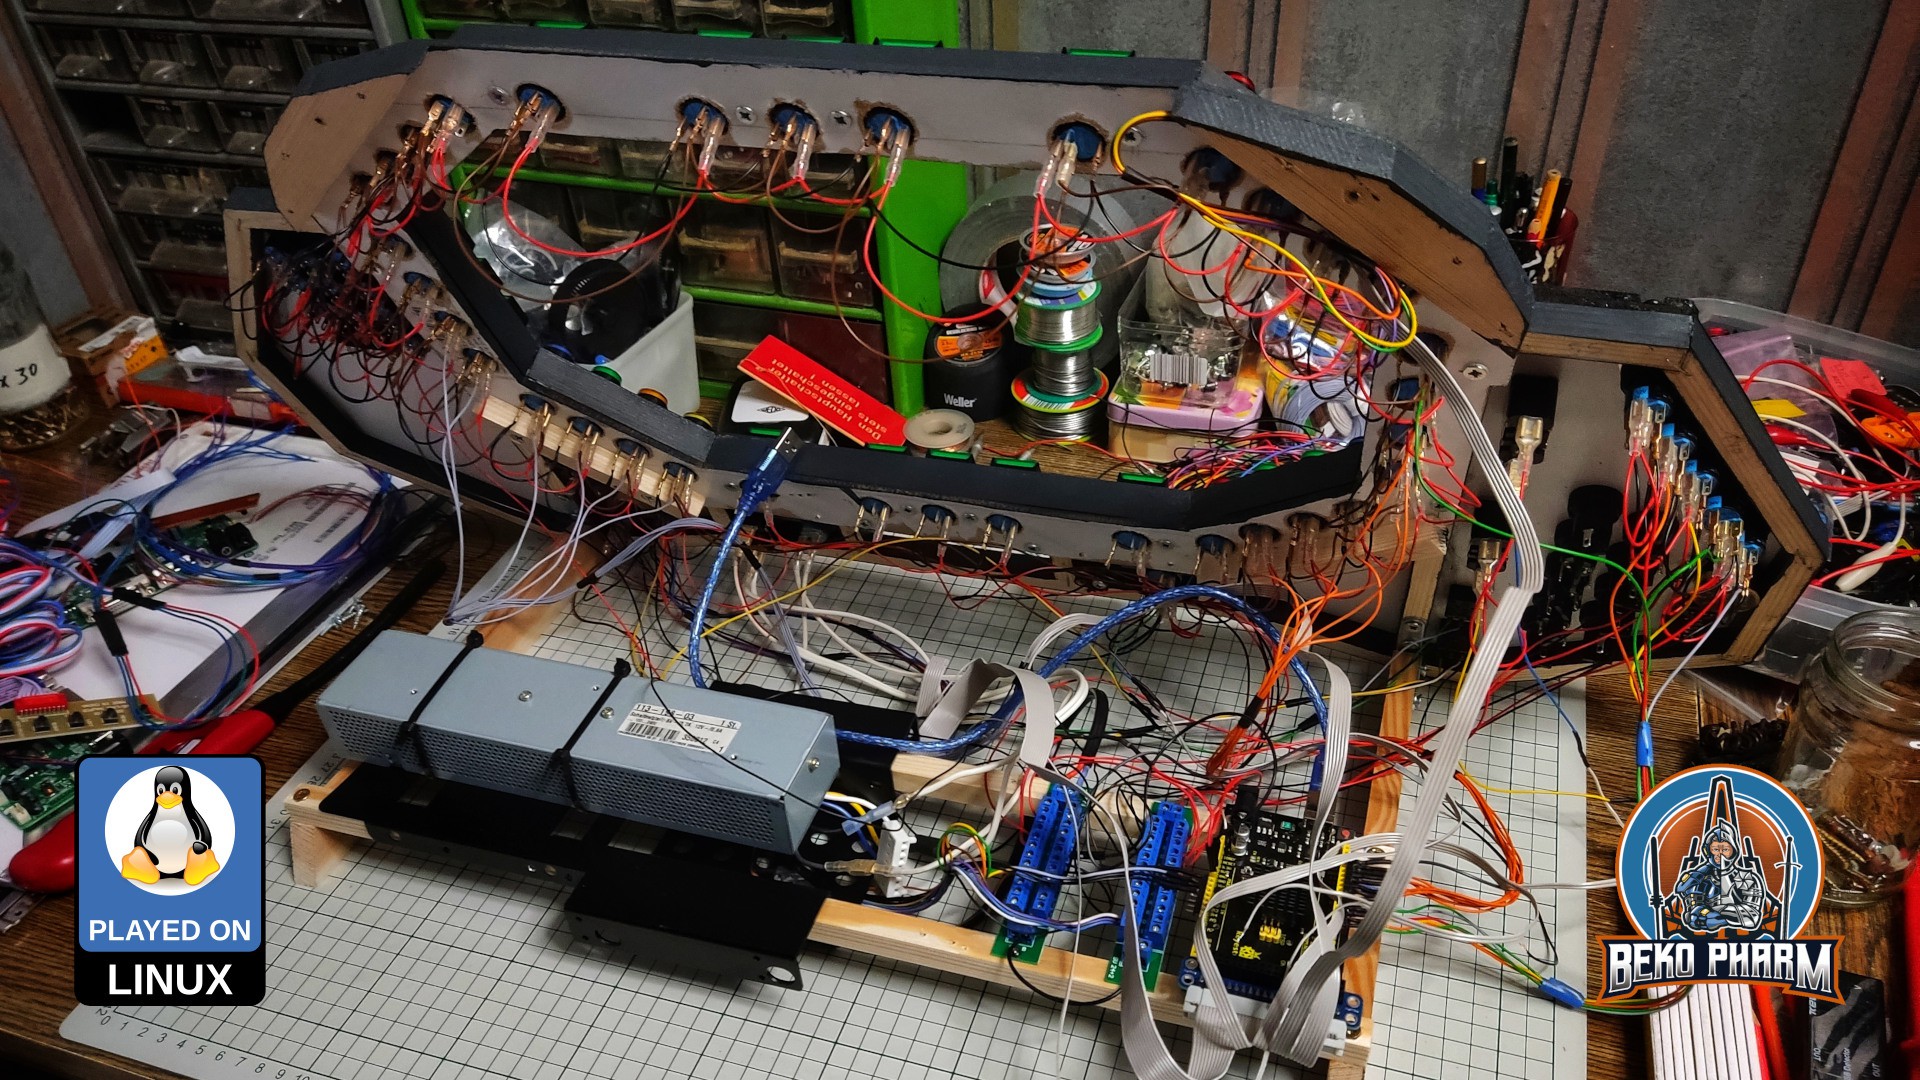
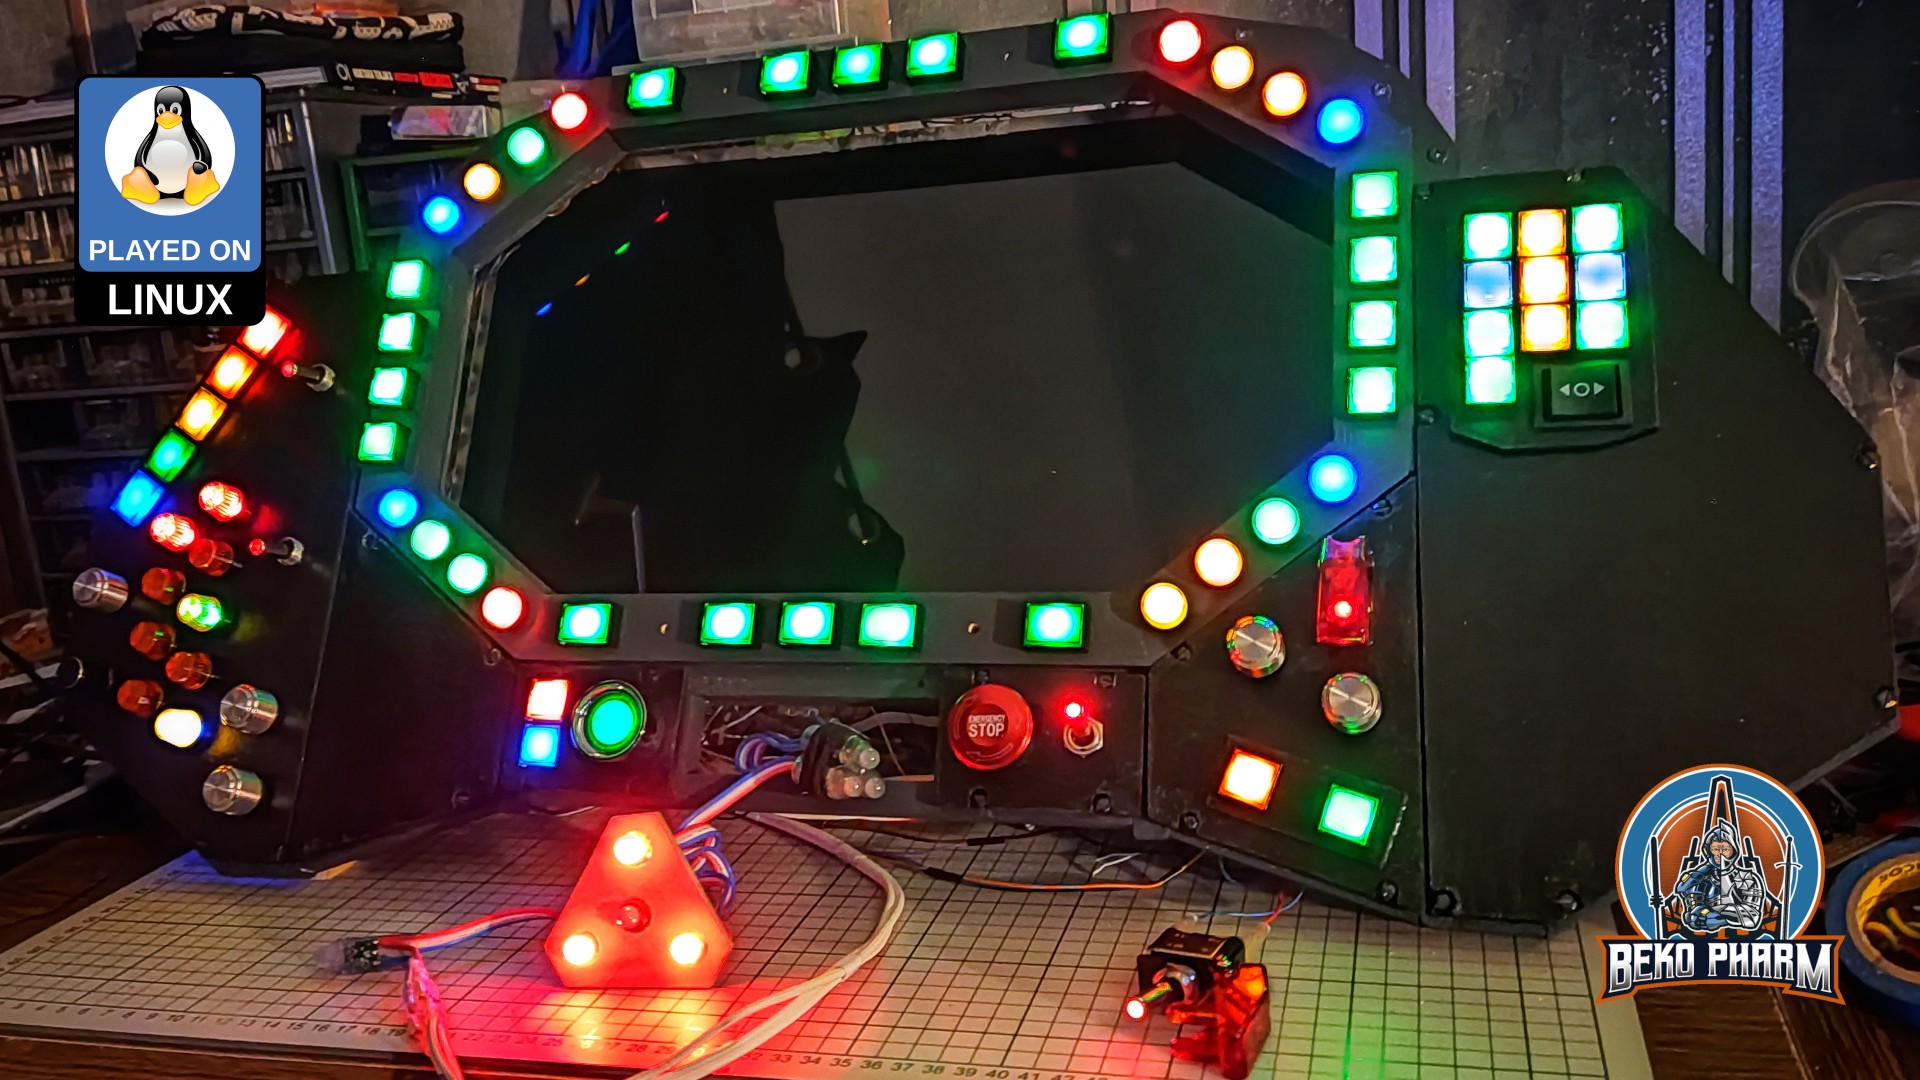
Wiring Madness
09/17/2023 at 18:56 • 0 commentsThe last step in the construction was wiring everything up. That’s roughly ~250 connectors crimped and I usually remove the isolation with my thumbnail, which is a bad habit 🤪 I purchased crimping pliers just for this and I can totally recommend using such pliers. Used some leftovers from the frame construction to create two rails where everything else was screwed on. The black parts are 3.5" to 2.5" harddisk adapters I had laying around.
![]()
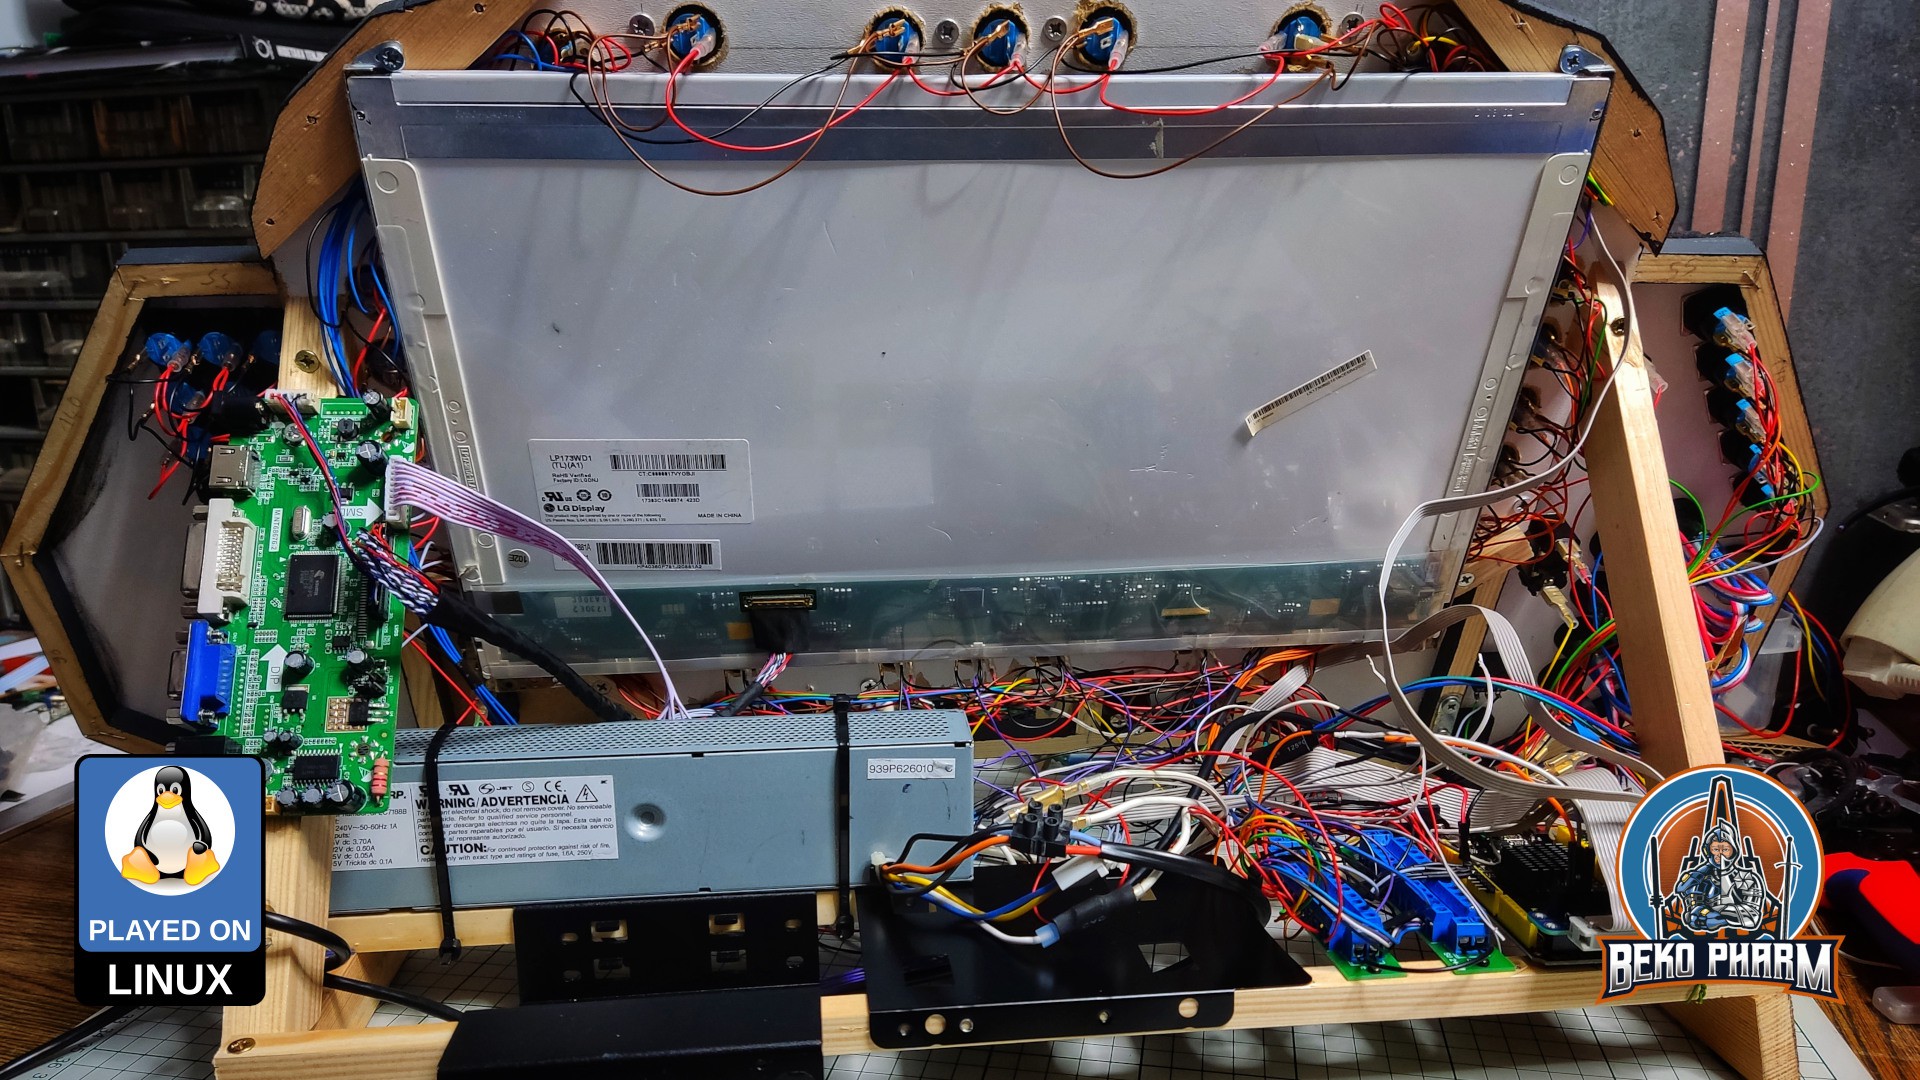
Next was connecting the
LCDand see if everything survived the transplantation from version 1. TheLCDis very bright on the backside, as you can see. The current version is still missing it’s planned glare shield that will also protect my other displays from the glare of the backside. That’s still to be done though.![]()
After that came some rewriting of the custom joystick source code for the
Arduino Mega. Many new buttons wanted to be read. I also removed the original buttons for theLCDcontroller and connected my own instead. Somewhere during connecting everything I noticed that I made an calculation error and a few buttons could not be connected because I was running out of free pins. So I’ll have to rewire some of the buttons into a button matrix (or use an IO expander - not yet sure what’s best for this).The blinken lights were next. After that it was time to fix the wobbling. My “temporary” stand was no longer temporary and it was time to add some stabilizing bars. Convincingly this added exactly the space I was missing to fix the
LCDcontroller board to the SimPit. Didn’t really plan this but with this I had all my connectors on the right side (my PC is also on my right).![]()
Not too shabby considering I was winging it at this point.
Originally posted at https://simpit.dev/version-2/wiring/
-
Blinken Lights
09/17/2023 at 18:51 • 0 commentsEvery cockpit needs blinken lights. My status indicators were realized with a
Neopixel. That’s a string of RGB LED wich indidivually addressable LED. This way only a single PIN is needed to configure all lights. It has to be a pin that can do pulse-width modulation (PWM) though so choices are limited.There are various protocols for this. Mine consists of
WS2811modules where plenty of examples exist on the internet.A dedicated connection is used for power and in theory all LED can be driven from that but in reality we have to keep ampere in mind so things don’t go up in flames. The string is also dead should one module break for good. Not really suited for a real *craft but hey, this is a toy and each string comes with plenty of
leftoversreplacement parts 🙃![]()
I went for this specific
Neopixelbecause it came with the “classic” LED design. The diffusor is 12mm in diameter and the LED did fit almost perfect in their former hexagonal housings. For version 2 I got some fancy fittings that look absolutely stunning but were designed for old lamps with filaments. So fix this I had to saw the endings off.![]()
After that I had an almost perfect fit for the LEDs. Almost, because the fitting is exactly 12mm in diameter on the inside as well but each LED has 3 tiny hooks to hold a LED in place when stuffed through a 12mm hole. A cutting knife made short work of that though.
I also prepared a small triangular panel for the landing gear. It has no housing yet and is supposed to go into the lower part of the frame but that part doesn’t exist yet.
The LEDs are controlled by
Node-REDthat does all the plumbing in the end. A customRustdaemon talks viaSerialto theArduino Megaand listens viaWebsocketfor changes fromNode-REDand translates the buttons pushed to a virtual joystick device. TheArduino Megareads changes for the status indicators and adjusts the LEDs as needed.Originally posted at https://simpit.dev/version-2/blinken-lights/
-
Buttons Controller
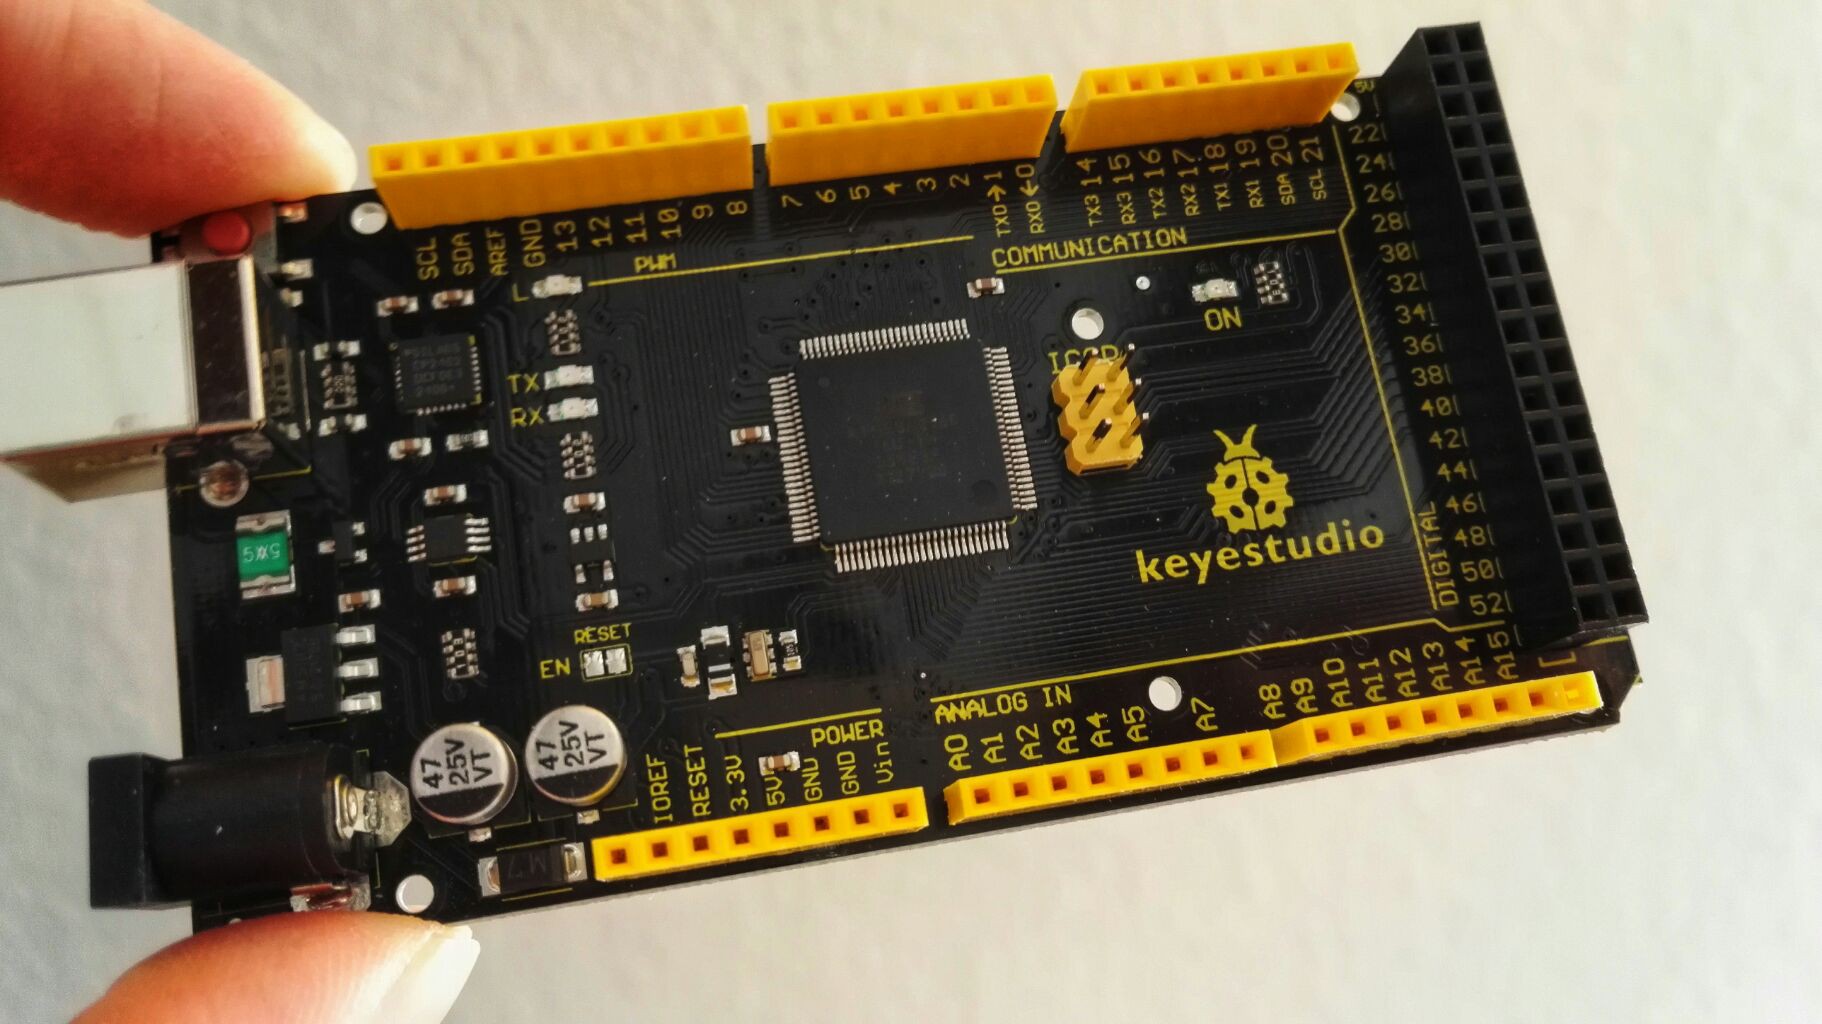
09/17/2023 at 18:49 • 0 commentsThis
Arduino Megaproved itself in version 1 already. I got it thinking I’d never run out of free pins on that. I was wrong. It’s also not aHIDbut aSerialdevice. I know that it’s bootloader can be replaced with the HoodLoader2 but I really don’t mind [any more]. There are probably cheaper clones as well but… would you just look at this beauty!![]()
The communication is managed by a
Rustdaemon. I got the idea and the initial source code for this from github.com/gwilymk/arduino-joystick by Gwilym Kuiper who describes the idea in great detail in his article about Virtual Joystick on Linux. I wrote about this in more detail on my blog as well.Windows user may either use the mentioned HoodLoader2 or adapt and work with e.g. vJoySerialFeeder but that’s really out of the scope of this article.
My extended source allowing for more buttons and rotary encoders is available at github.com/bekopharm/arduino-joystick. The snapshot there may be not up-to-date though. I’m tweaking this a lot and didn’t push any change for a while.
Originally posted at https://simpit.dev/version-2/buttons-controller/
Primary Buffer Panel v2
A glorified DIY joystick controller with an LCD (‘MFD’) and plenty of RGB.

 This makes things a lot more clearly arranged. I also hope to switch this to a MQTT broker eventually but no hurry on that. This way I don't have to load a specific flow for a game I'm currently playing. Just starting the Node-RED process and fire up the game I want to play. The corresponding data source will start sending telemetry once it detects a running game 🤓