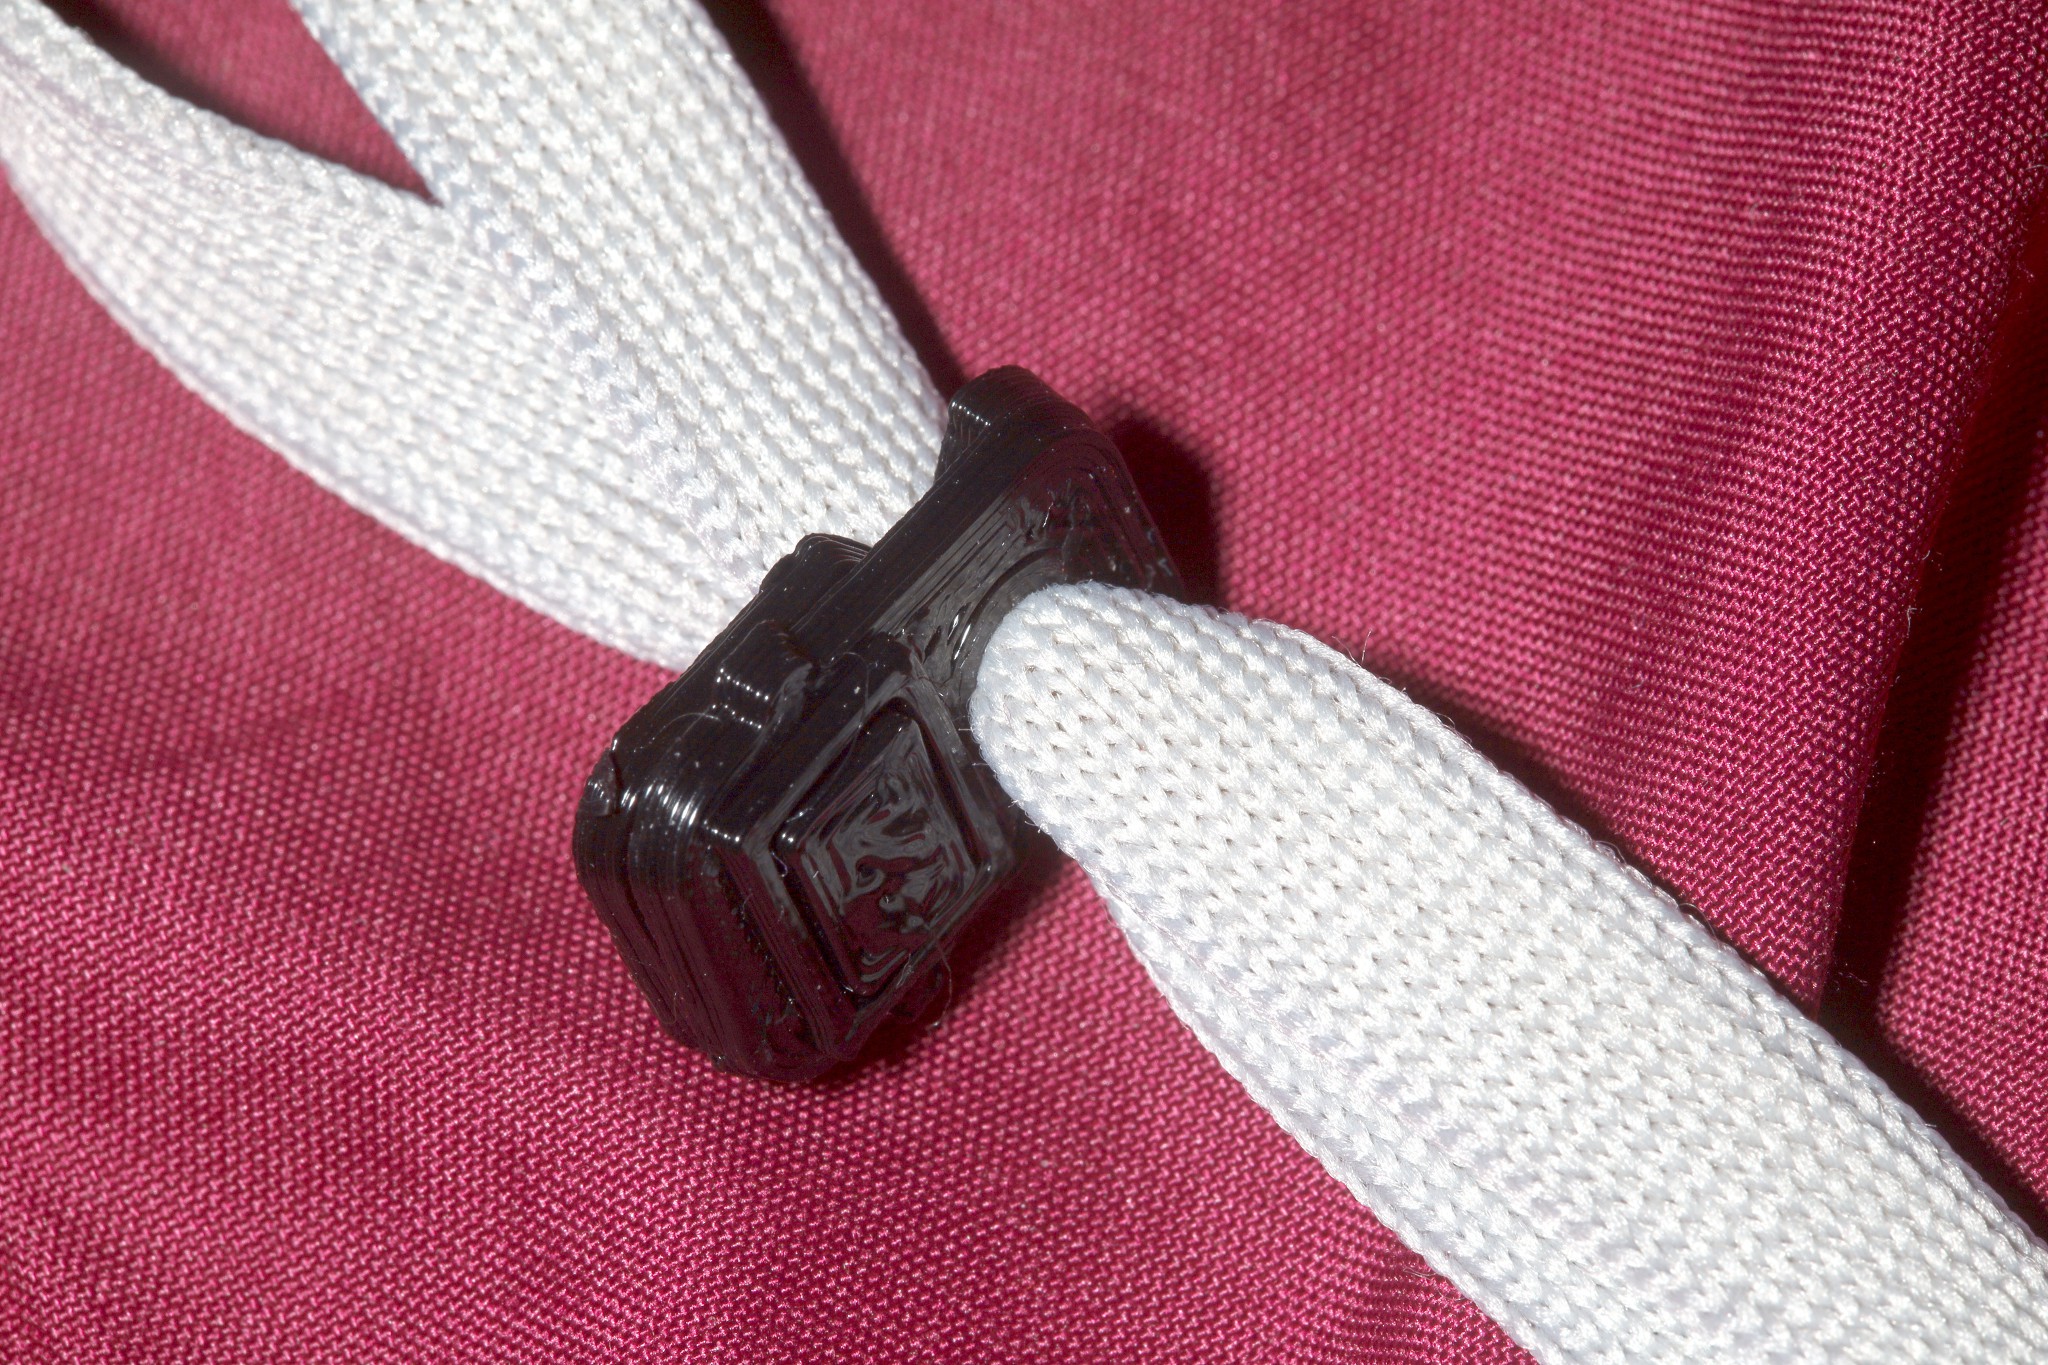
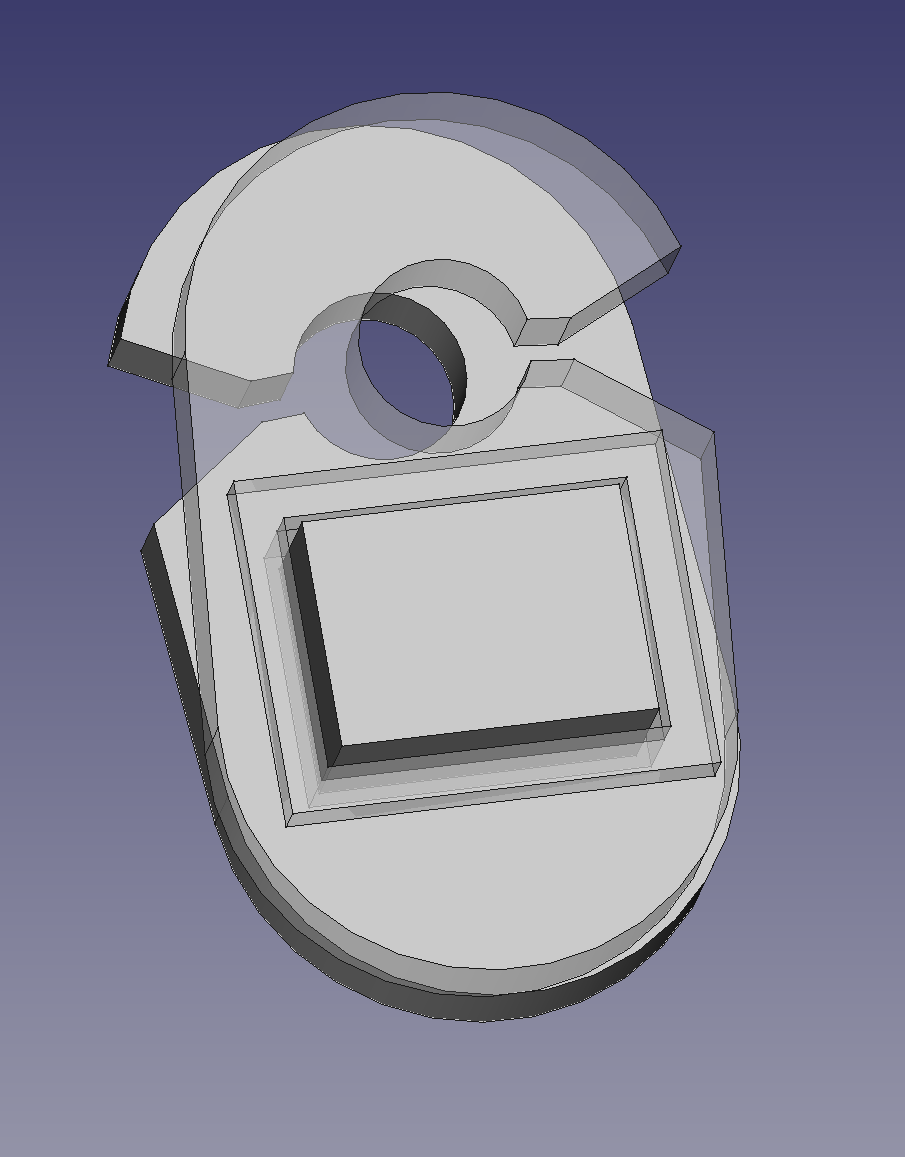
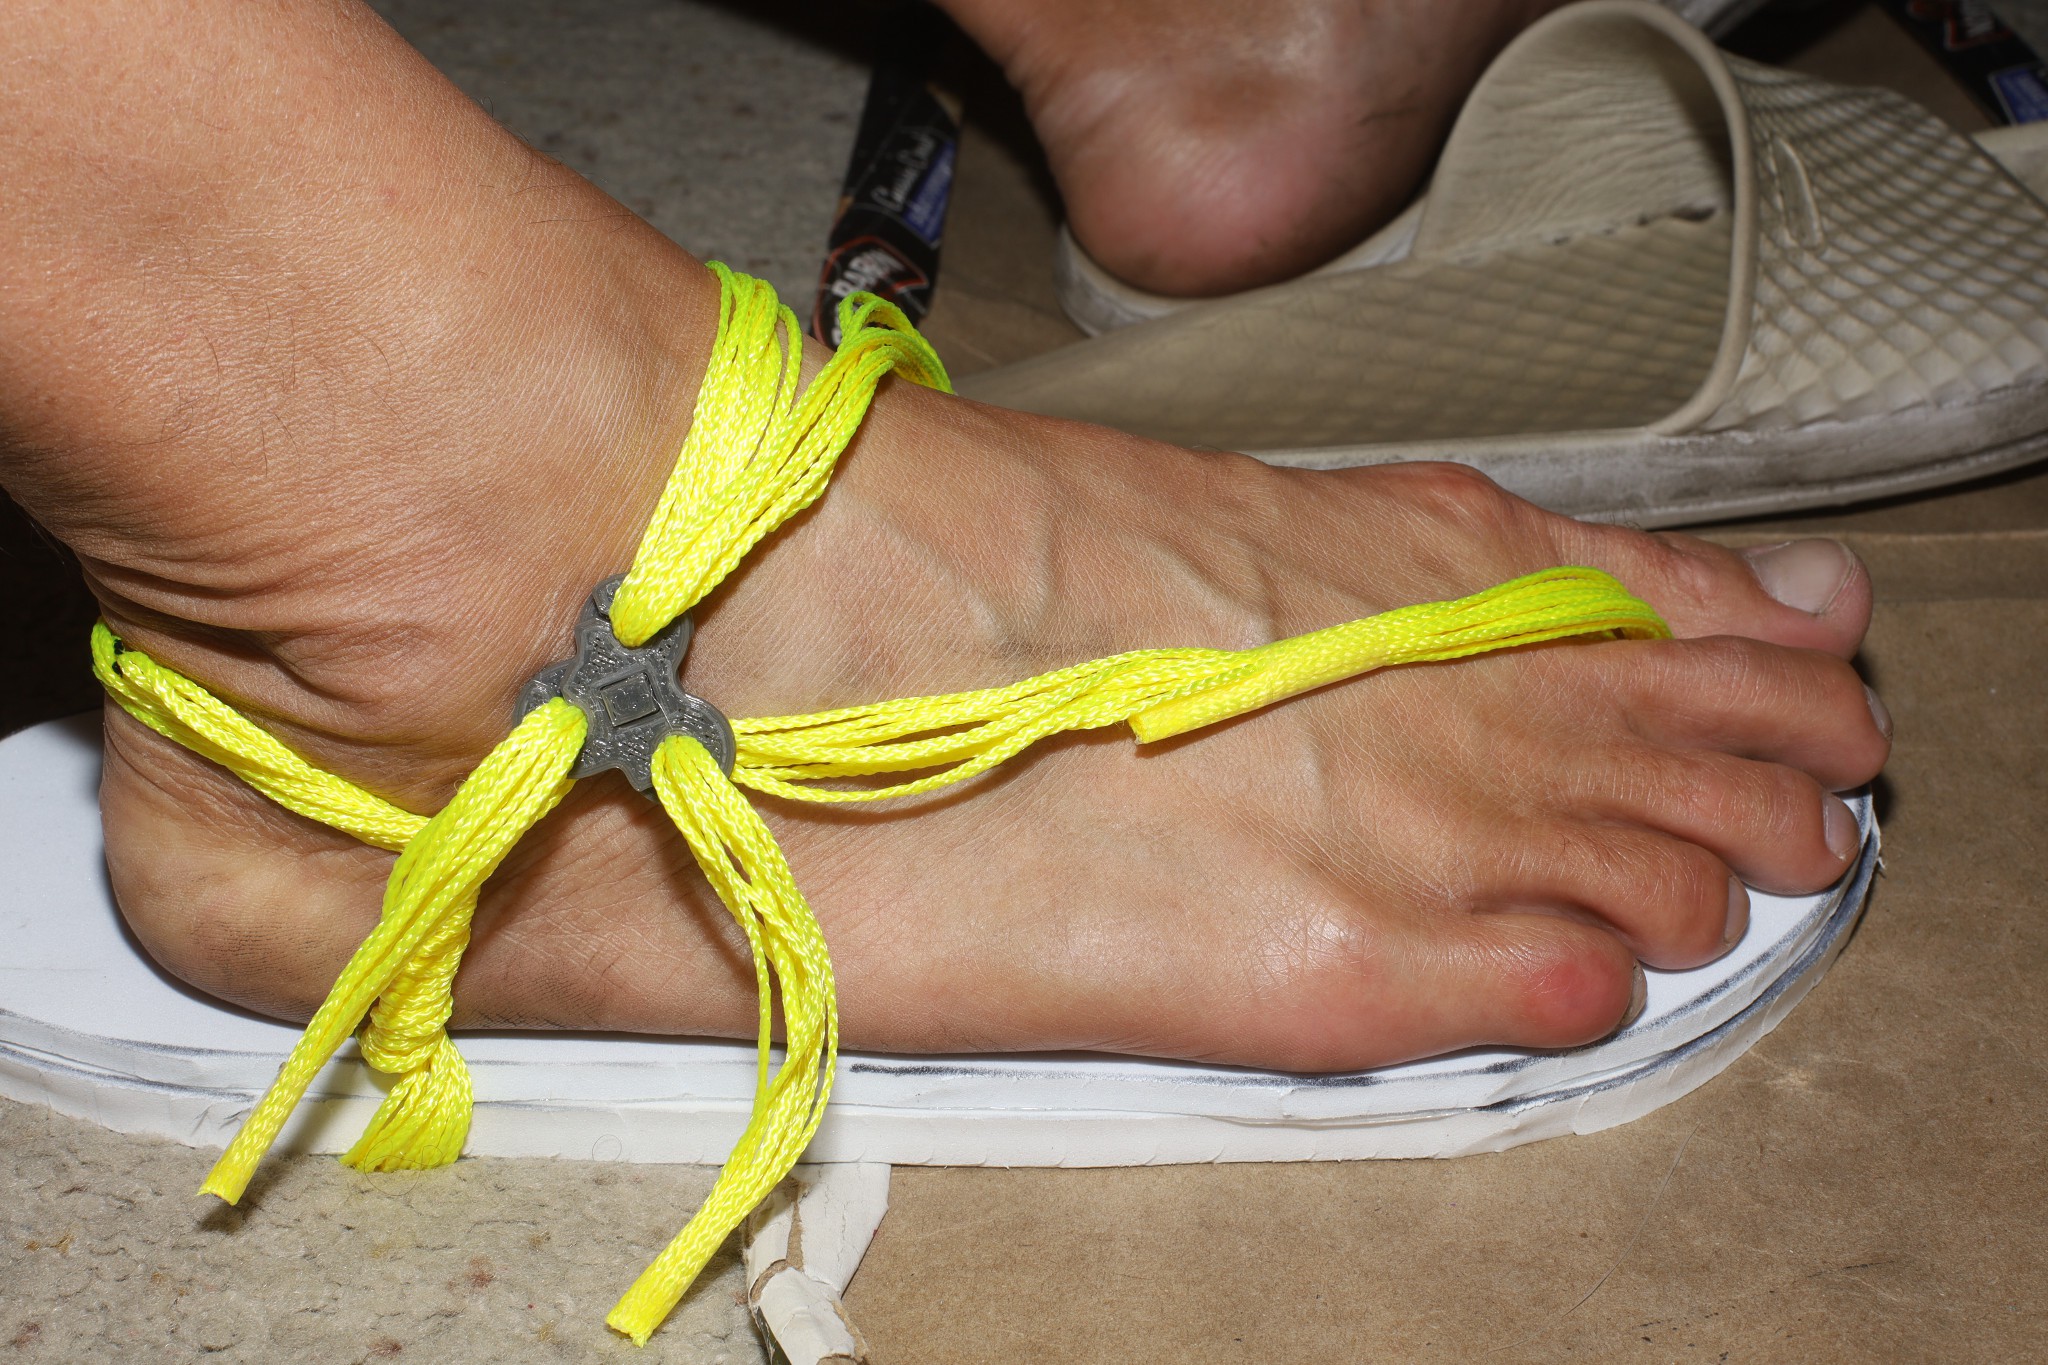
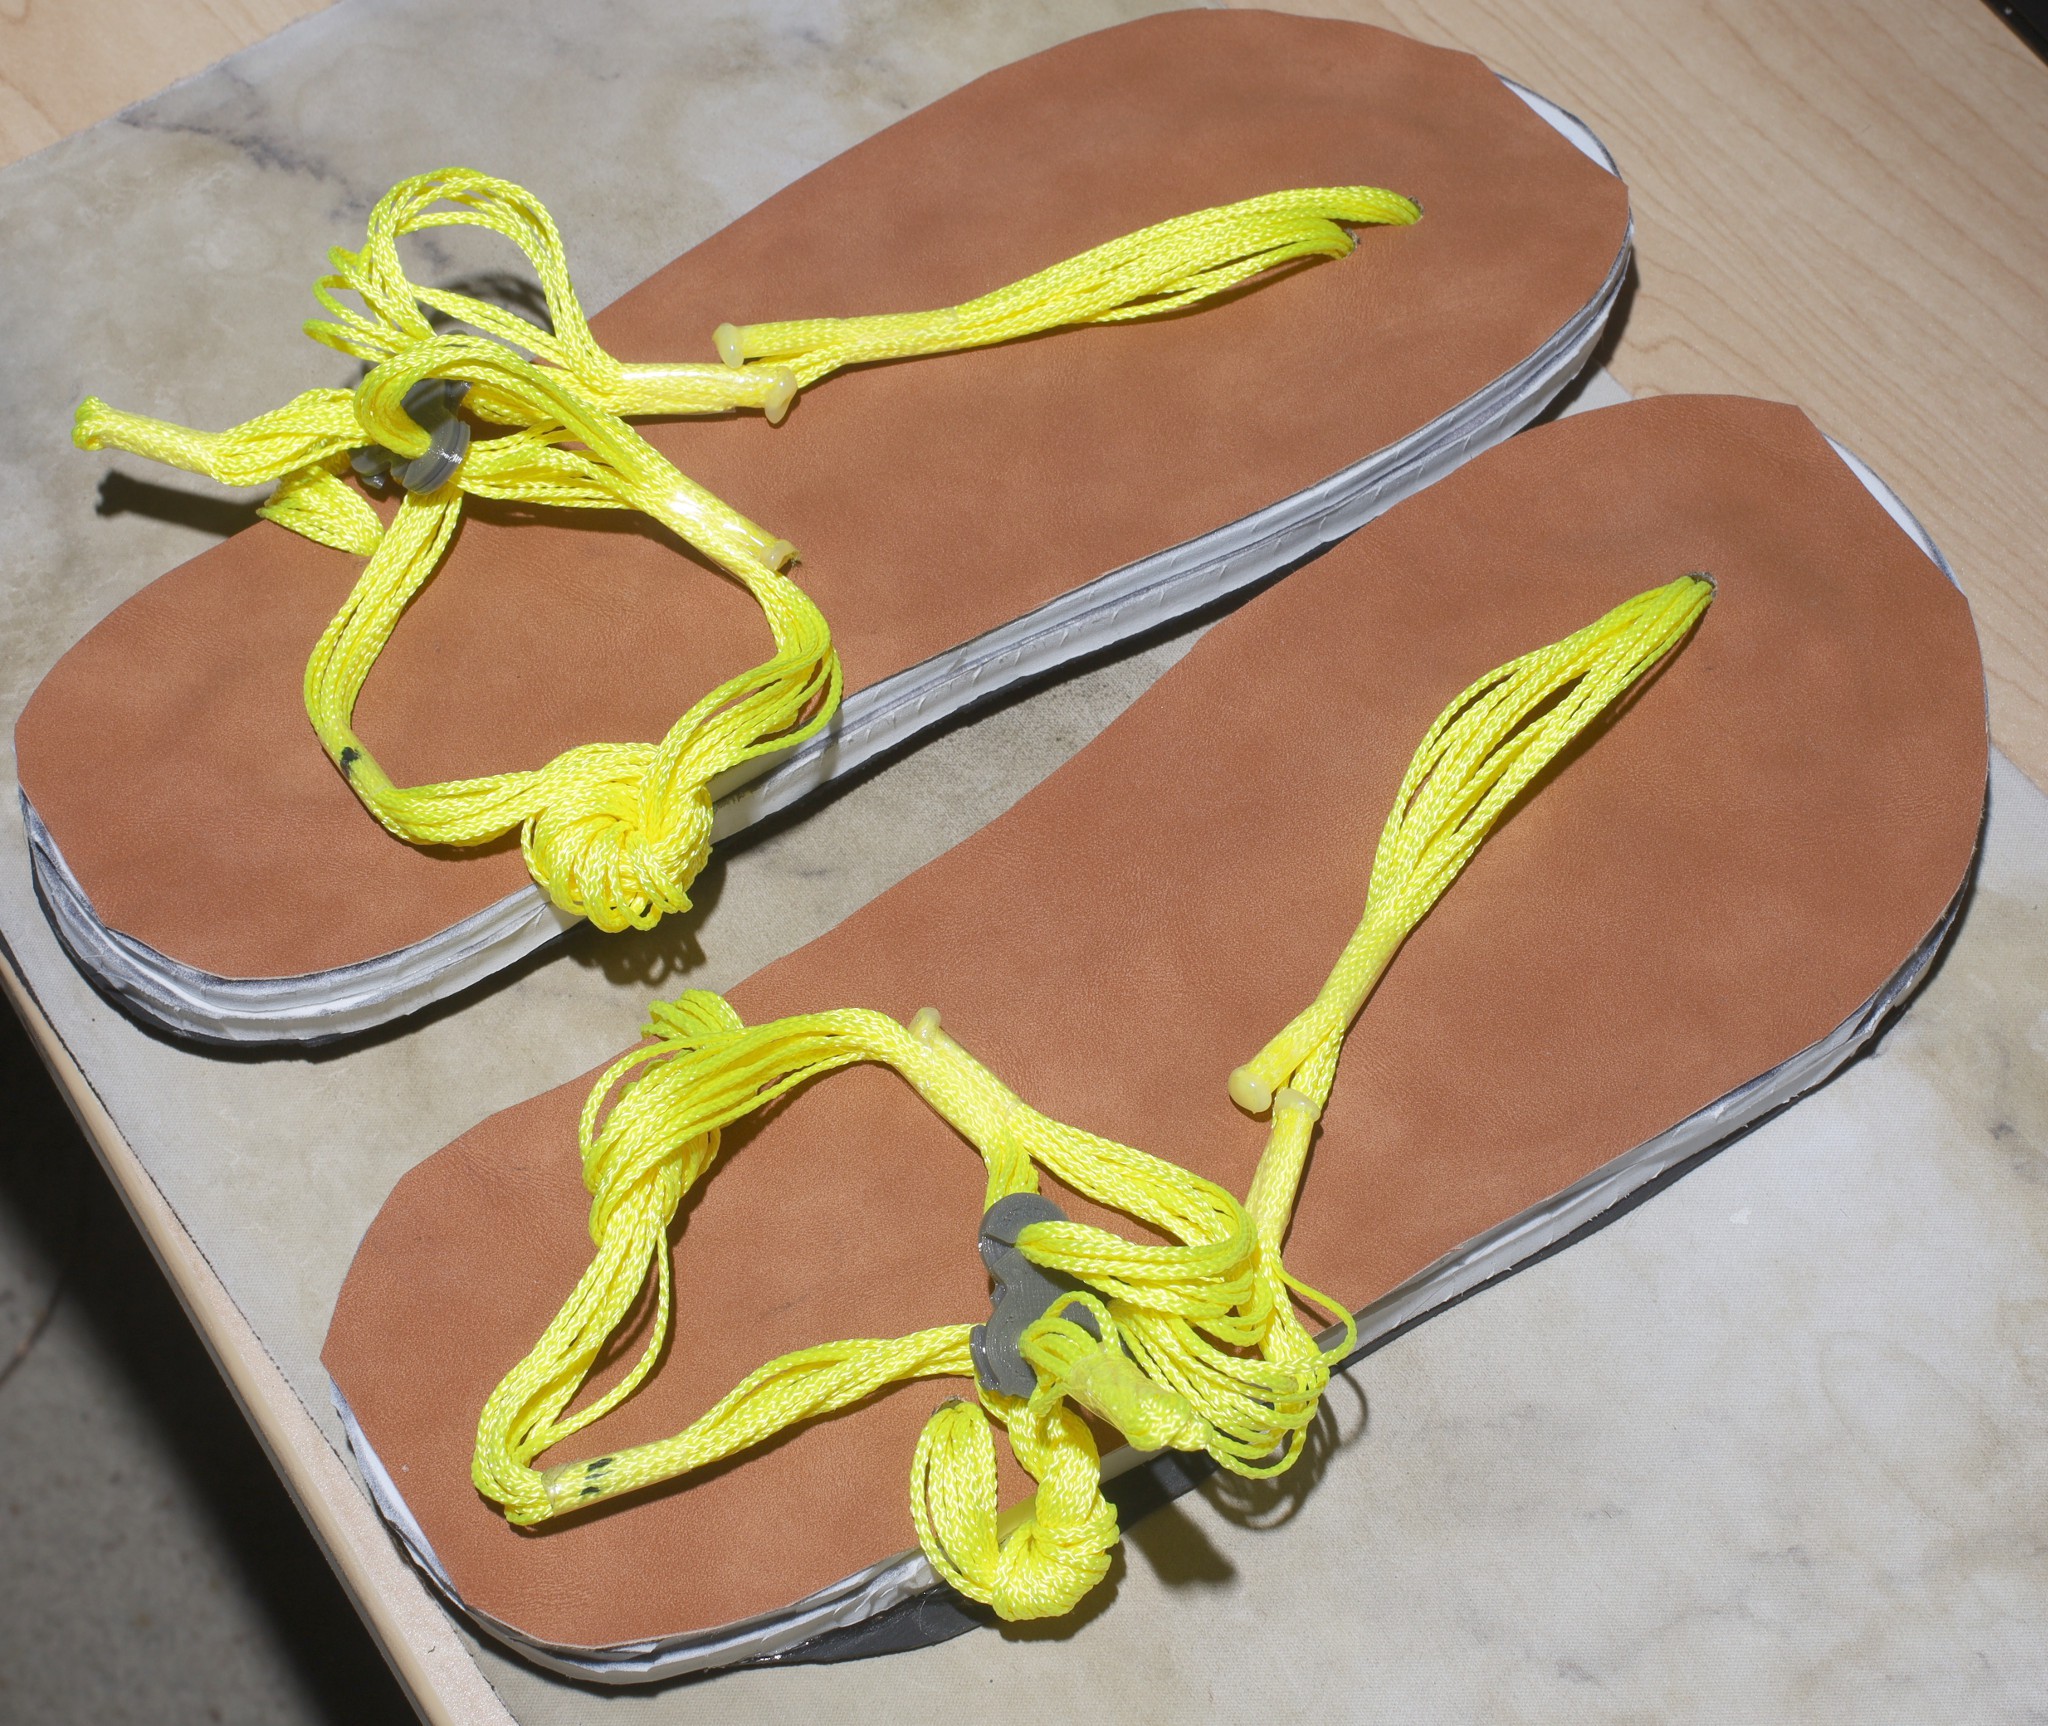
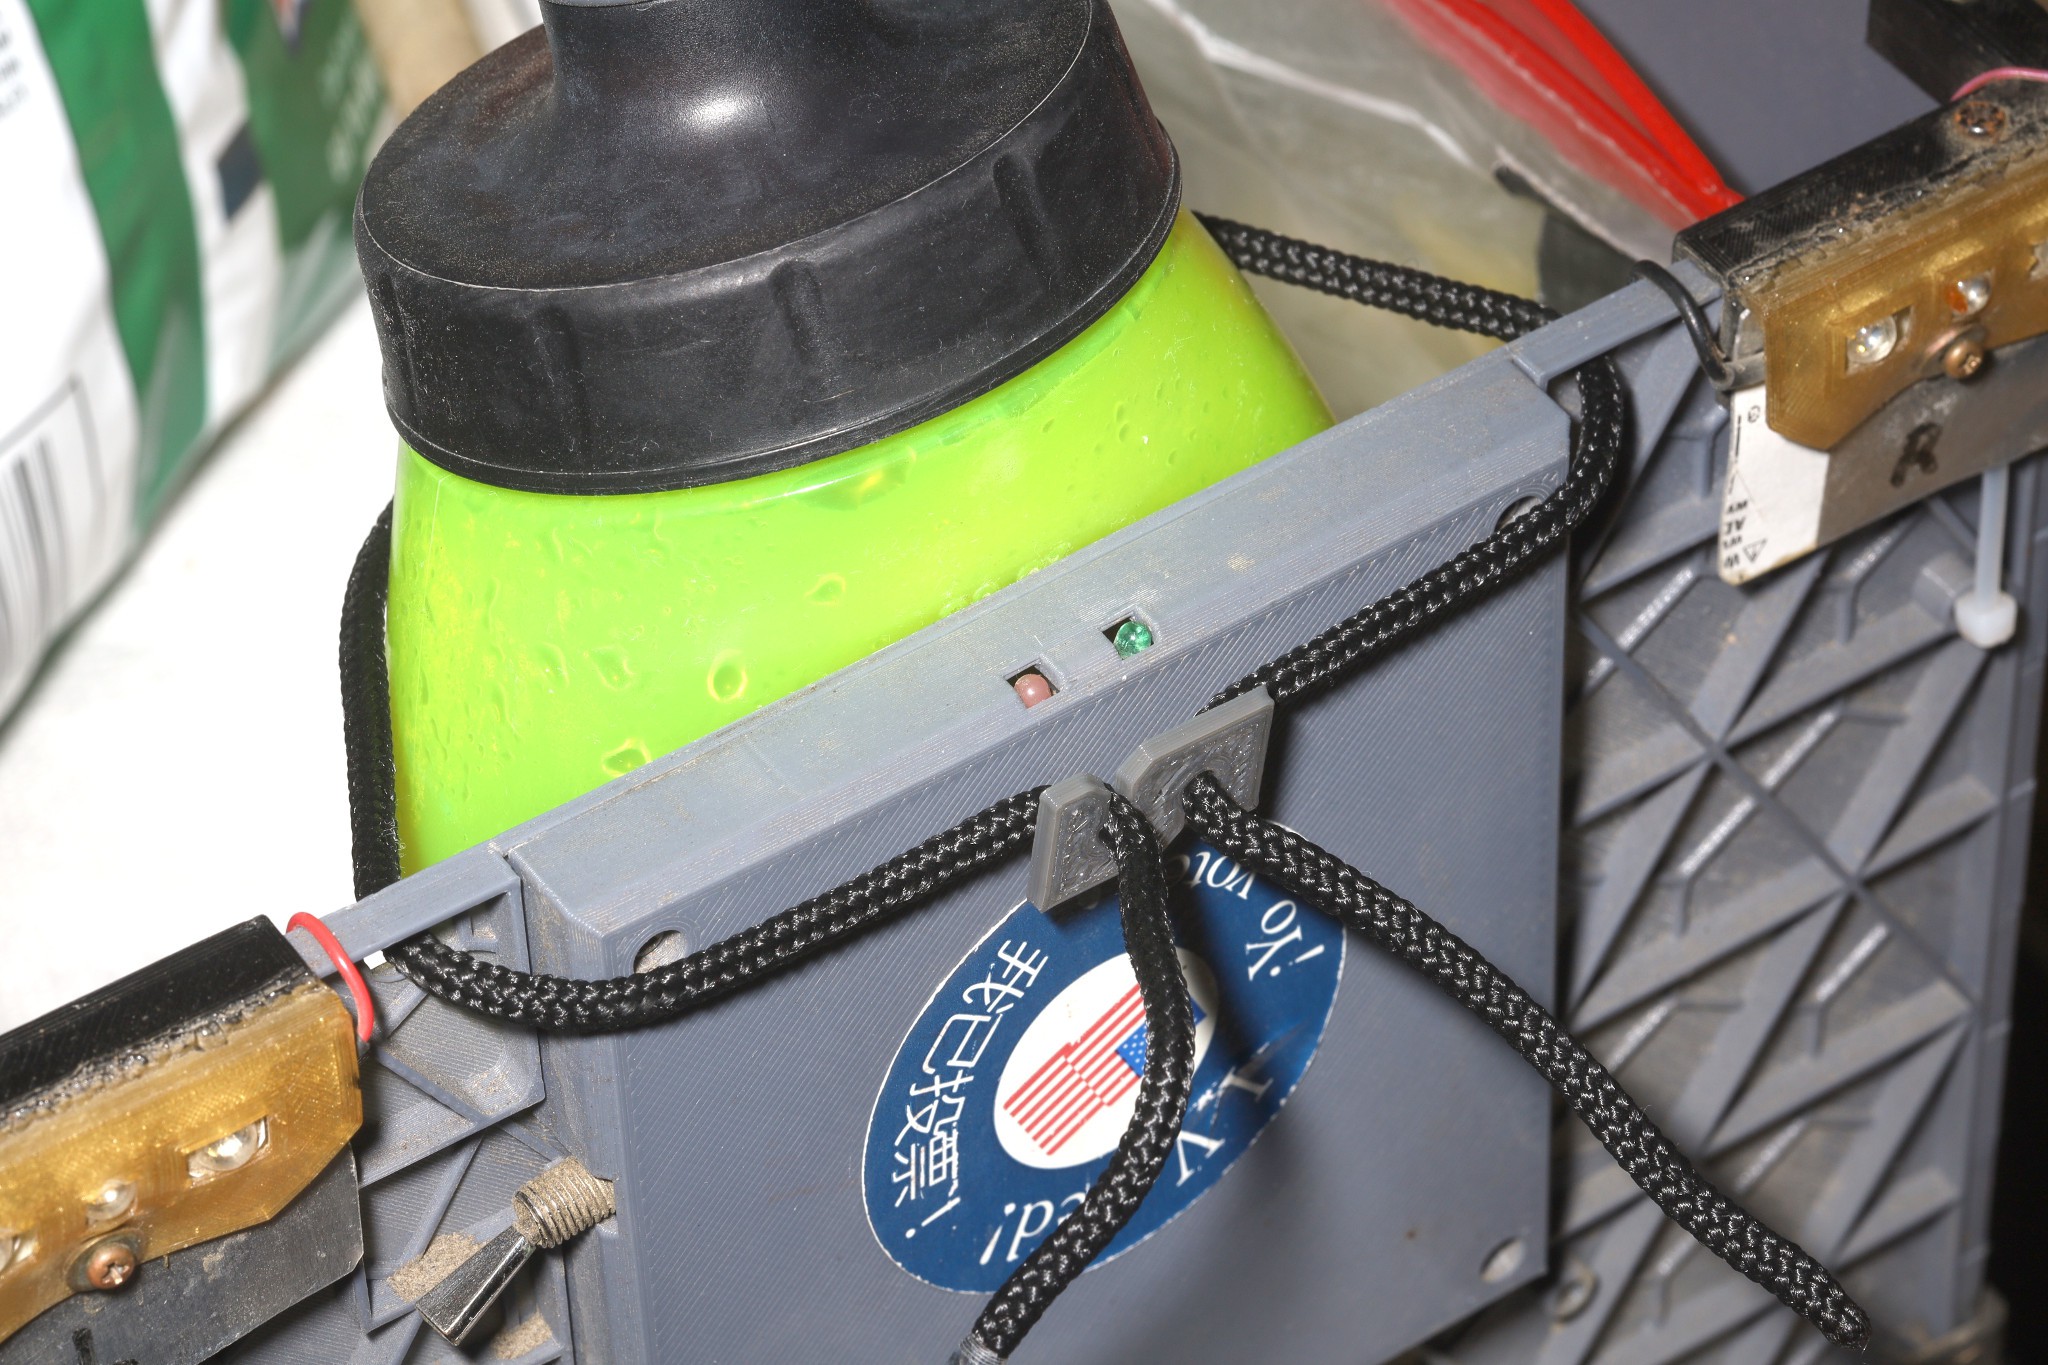
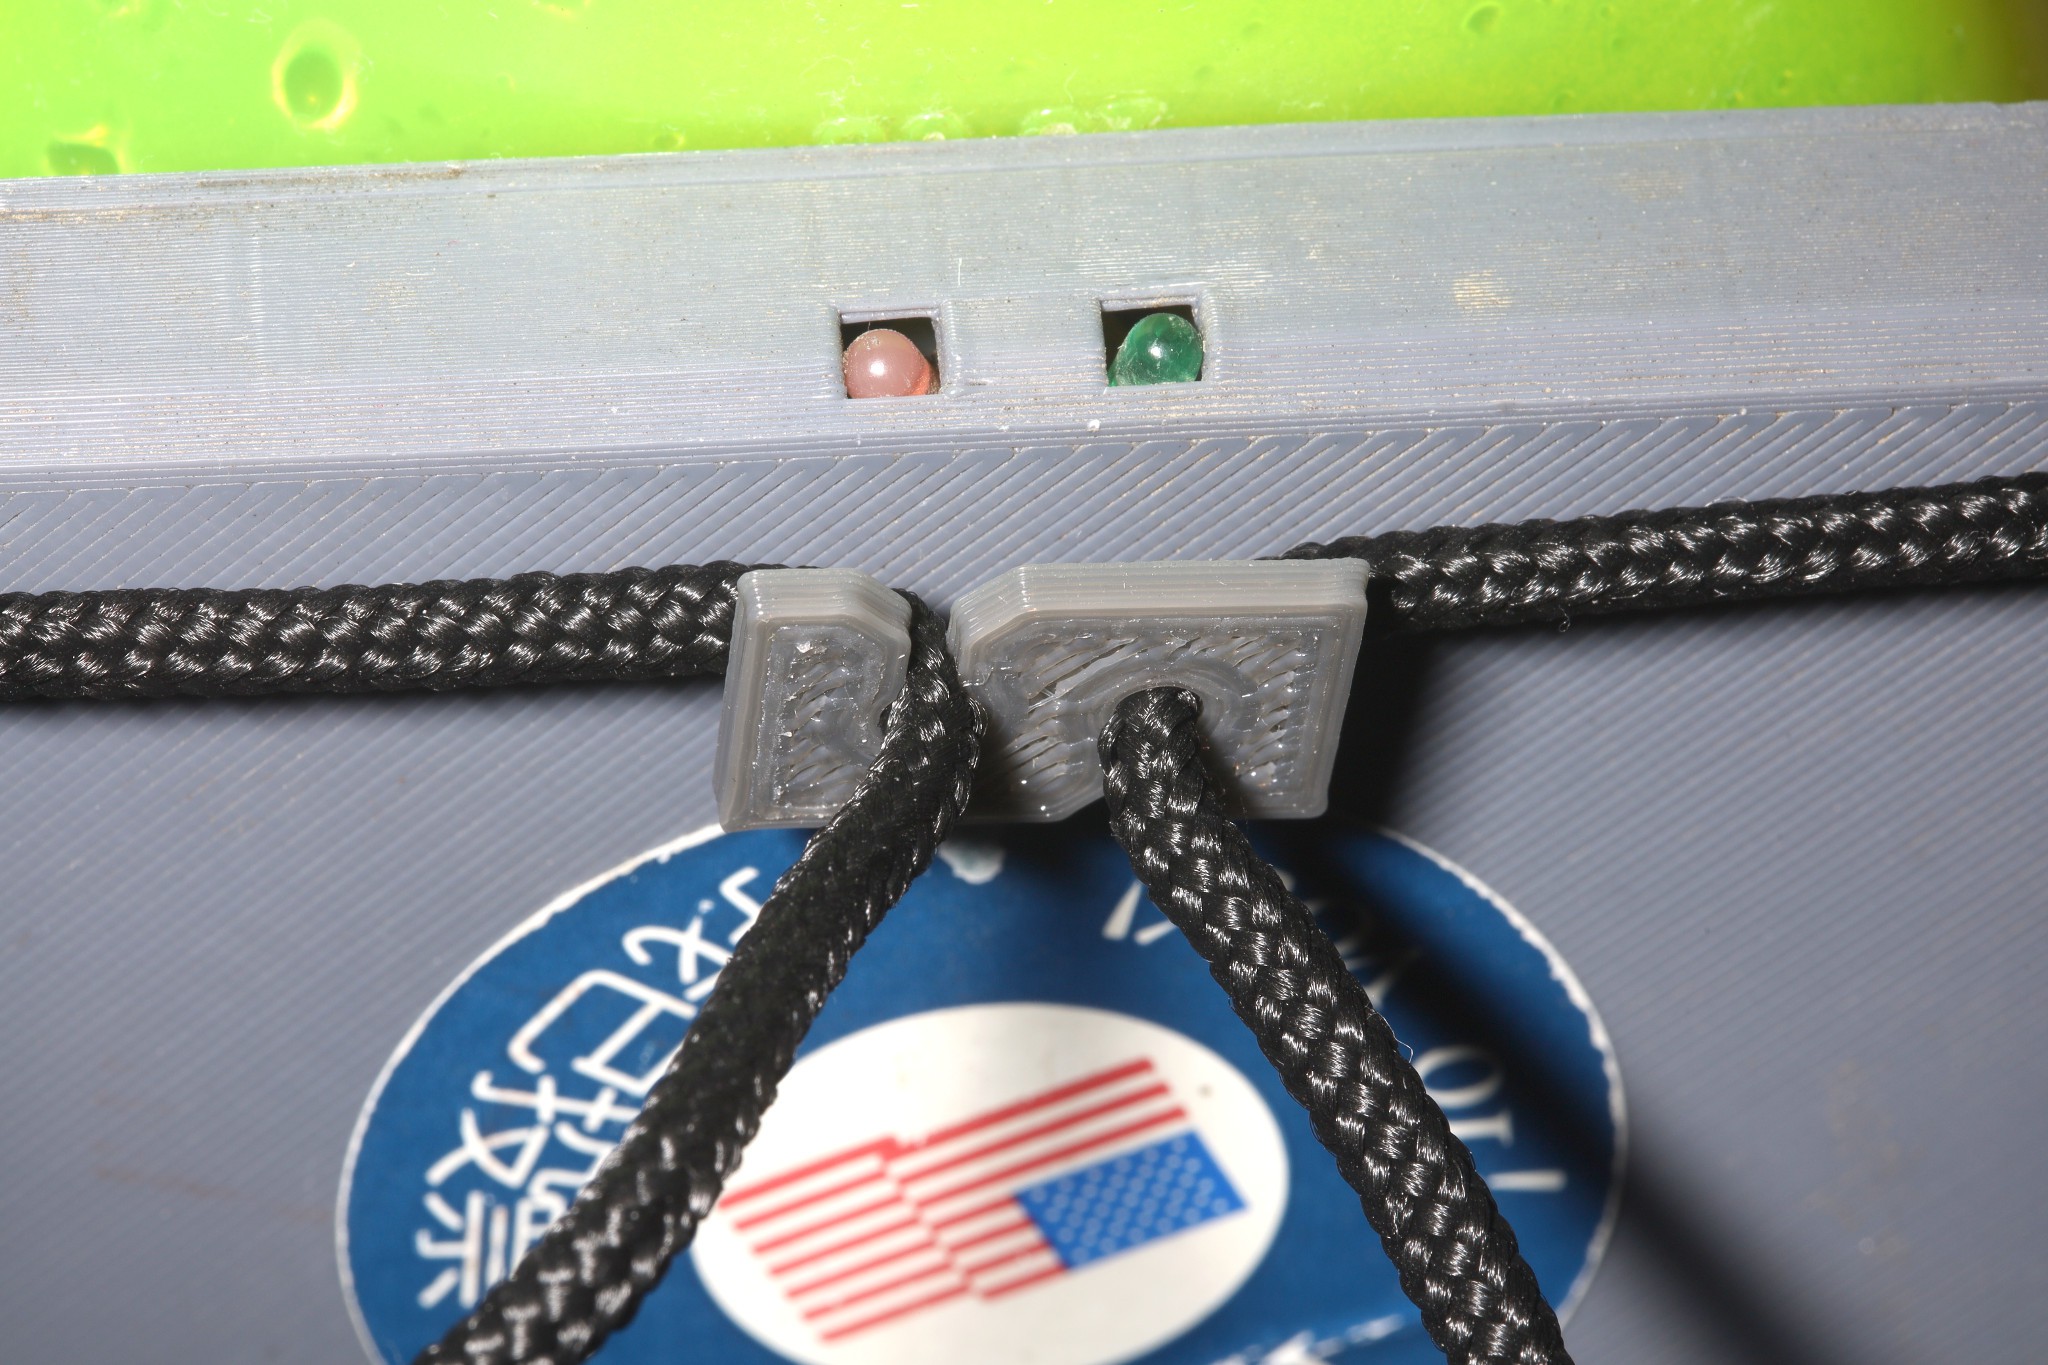
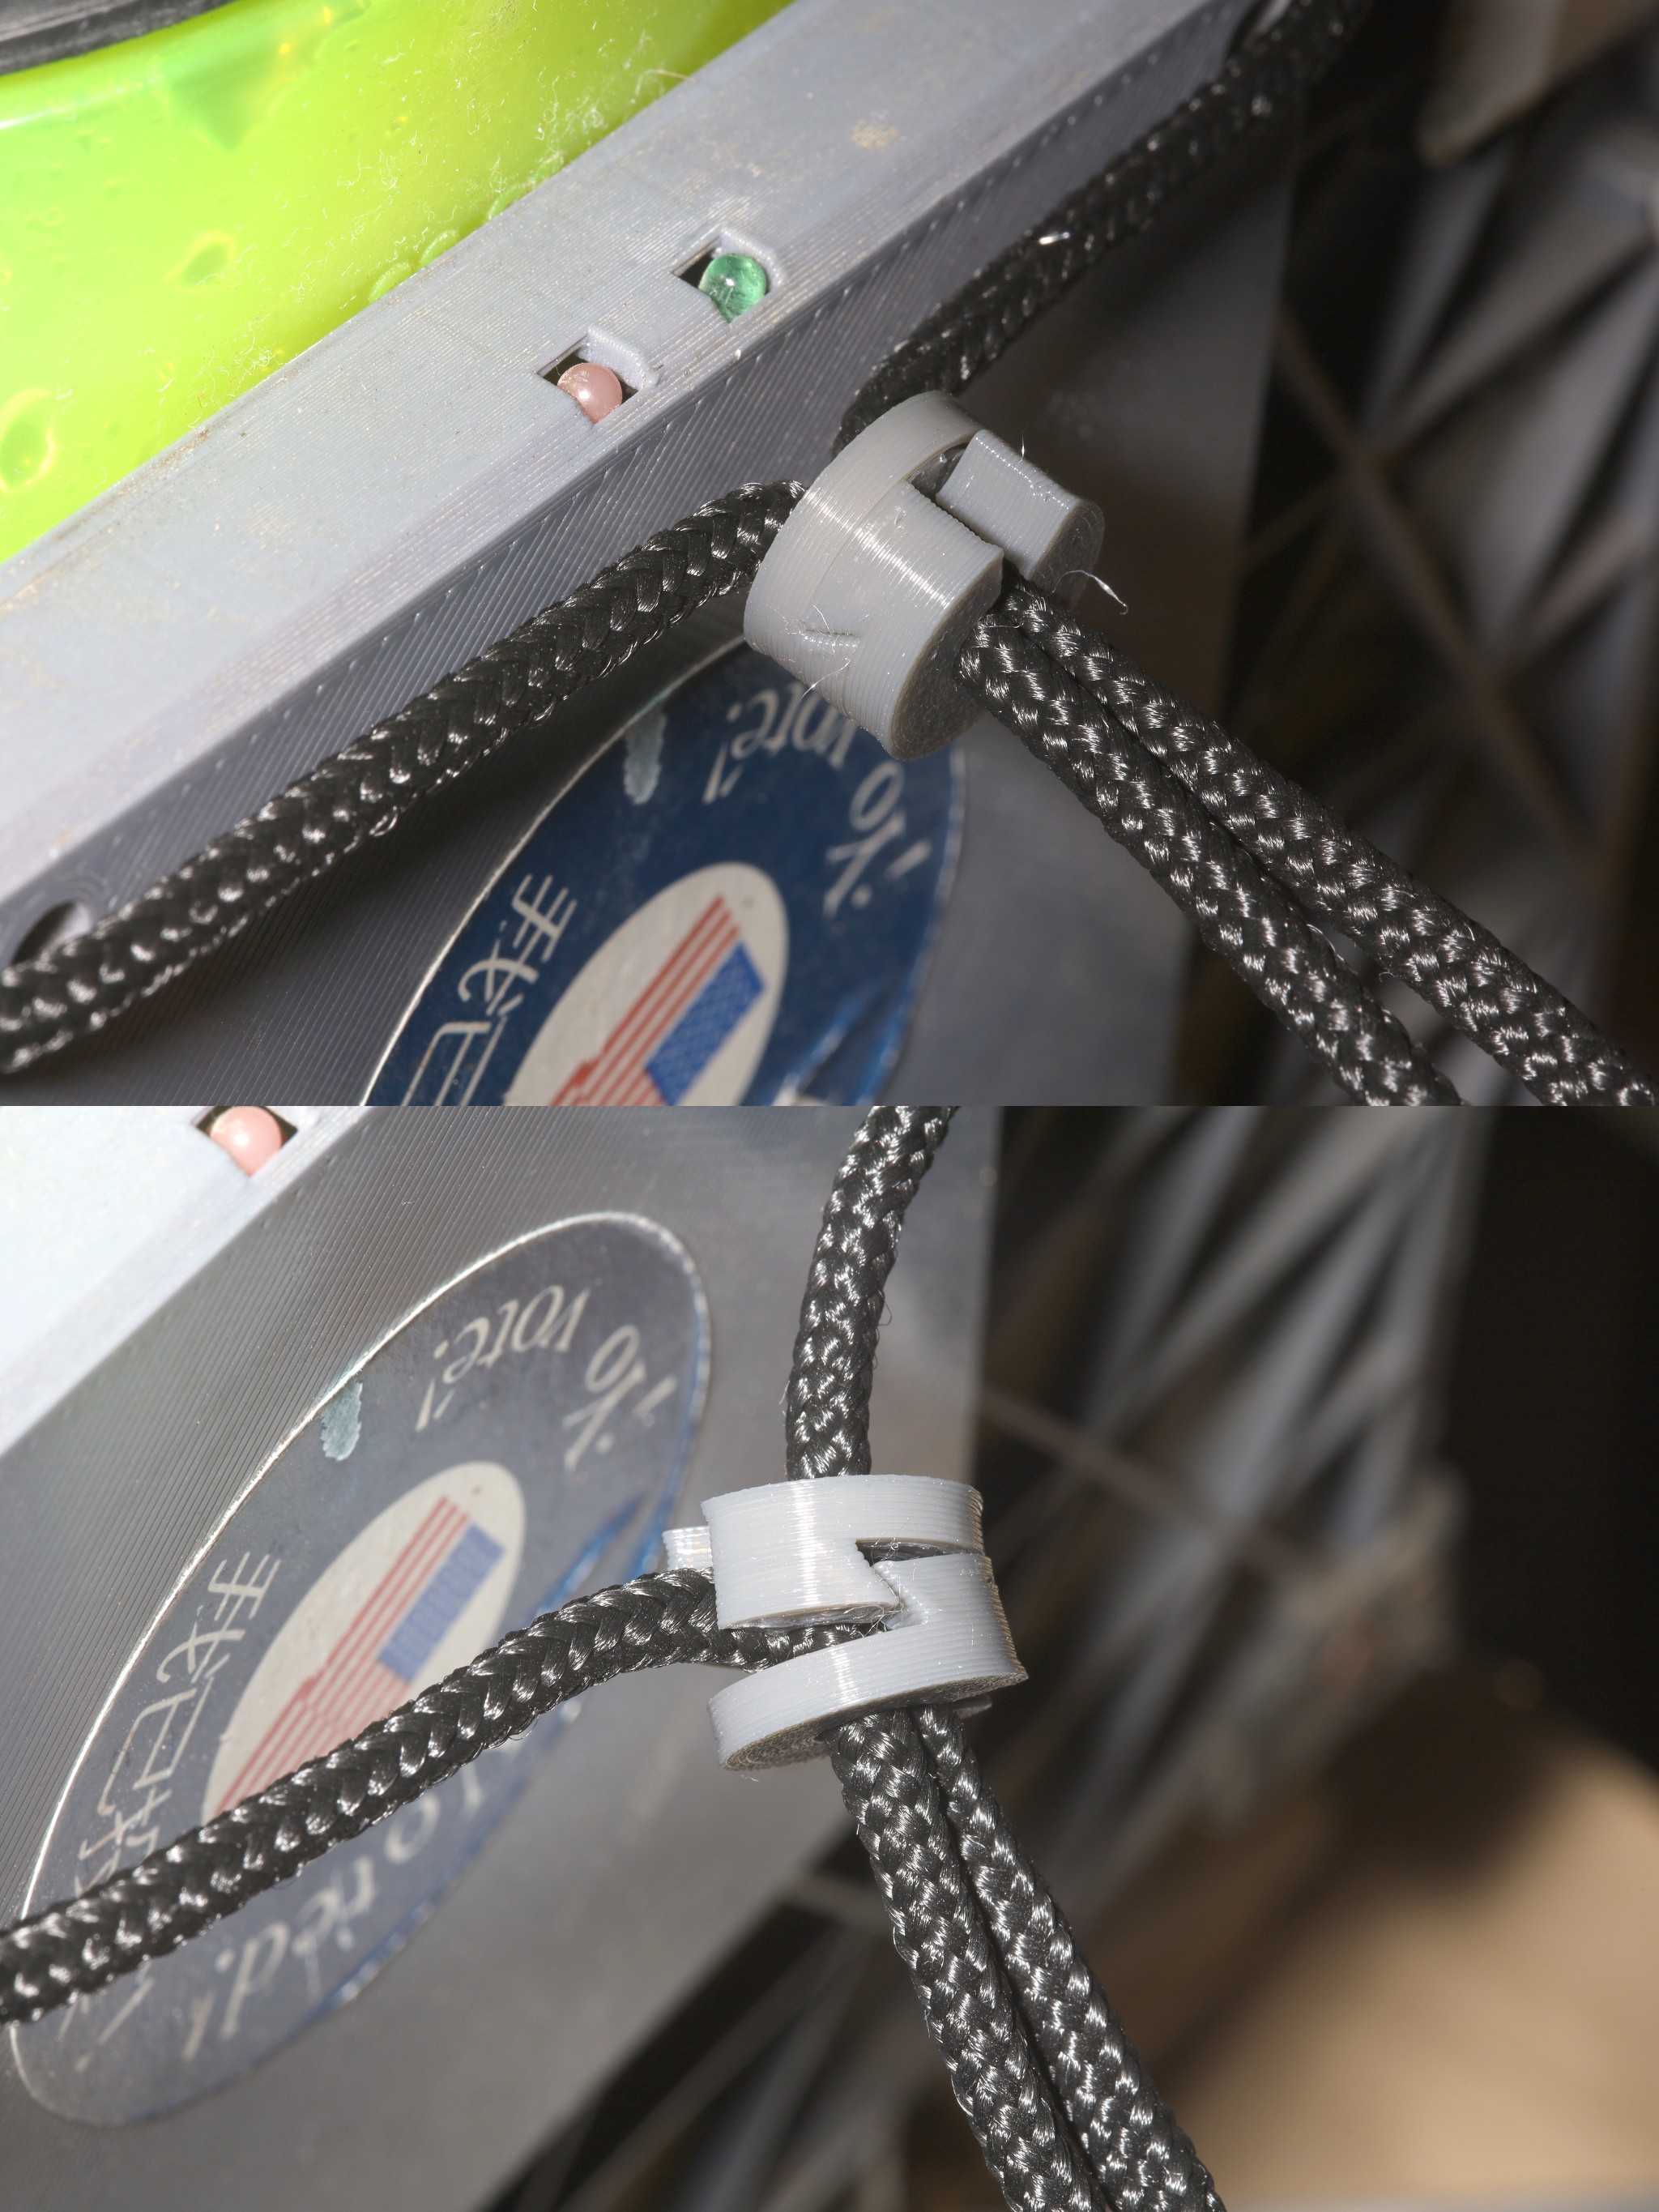
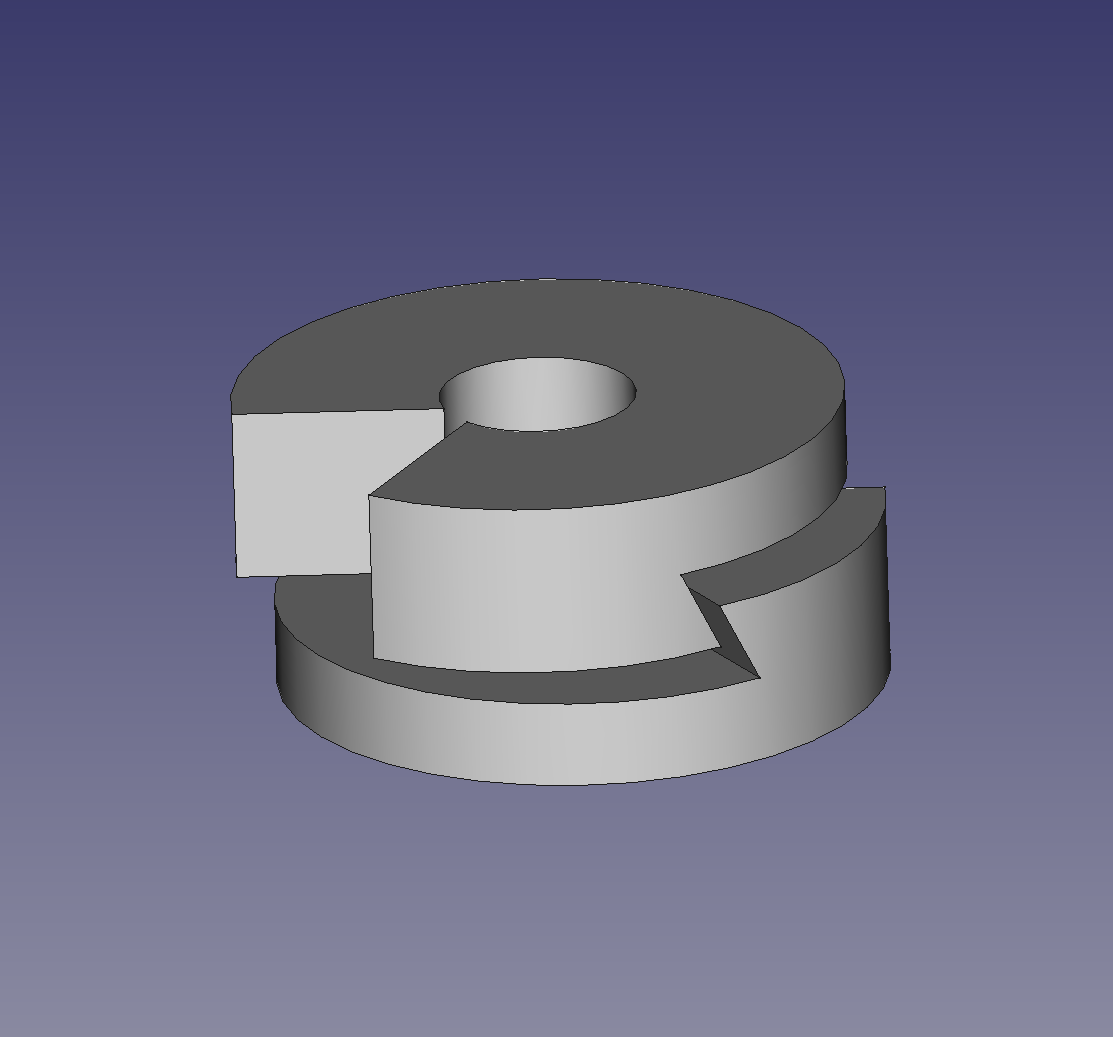
• Melted death stars

    lion mclionhead02/11/2025 at 06:03 0 comments

    PETG death stars started coming out of the drier melted.

    TPU death stars were proving more resistant to the drier, so the decision was made to try those for all clothing & weld all around the circumference.  That would solve the problem of remembering what cord lock went on what clothing.  The trick with death stars is instead of getting the inner diameter perfect, they can be welded in an offset position.

  • Chamfered TPU design

    lion mclionhead02/08/2025 at 10:36 0 comments

    Tried some chamfers to reduce the chafing & made a coffin shaped panel.  This worked well in 24 miles of running. The trick with freecad is only the part designer chamfer tool allows a variable angle & handles a combination of curves & lines.  The angle needs to be 57 to compensate for horizontal expansion.

    Also tried melting the TPU button to make it fit tighter than can be achieved by 3D printing tolerances.  The mane variable is the horizontal expansion of the 1st layer.

    Organizing the cord locks & matching them to each piece of clothing when they can't be washed is the new problem.

    The sandal cord lock evolved to a perfectly symmetrical design with a triangle button.  All the laces have to be the same size.  The triangle might keep it more aligned than a rectangle.  Sandal cord locks have proven to eventually come loose over 24 miles. 

  • Drier fails & TPU experiments

    lion mclionhead02/03/2025 at 00:14 0 comments

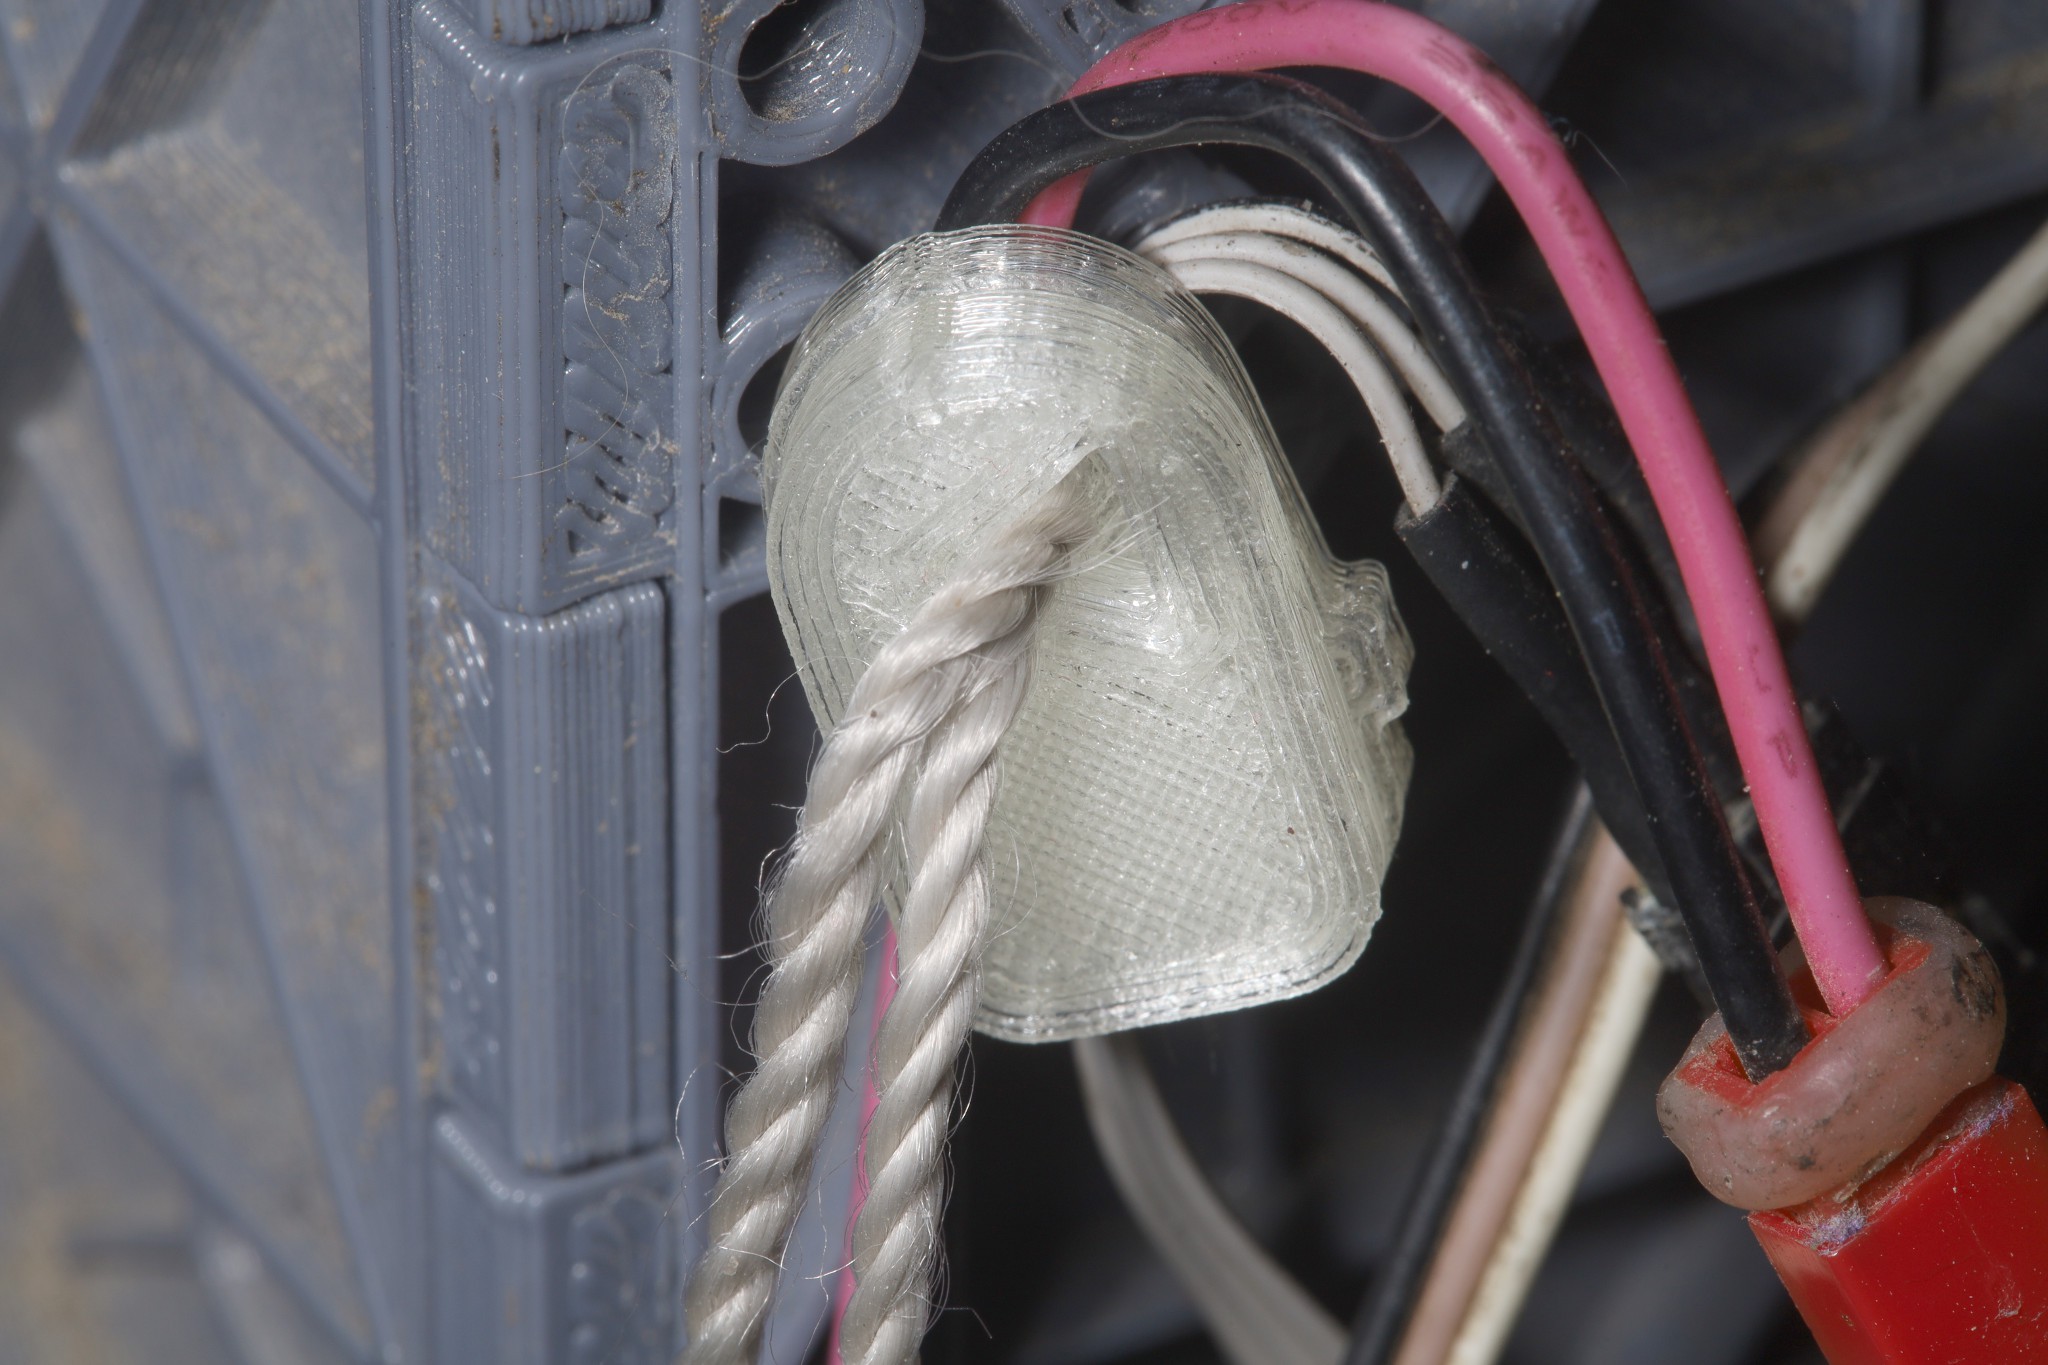
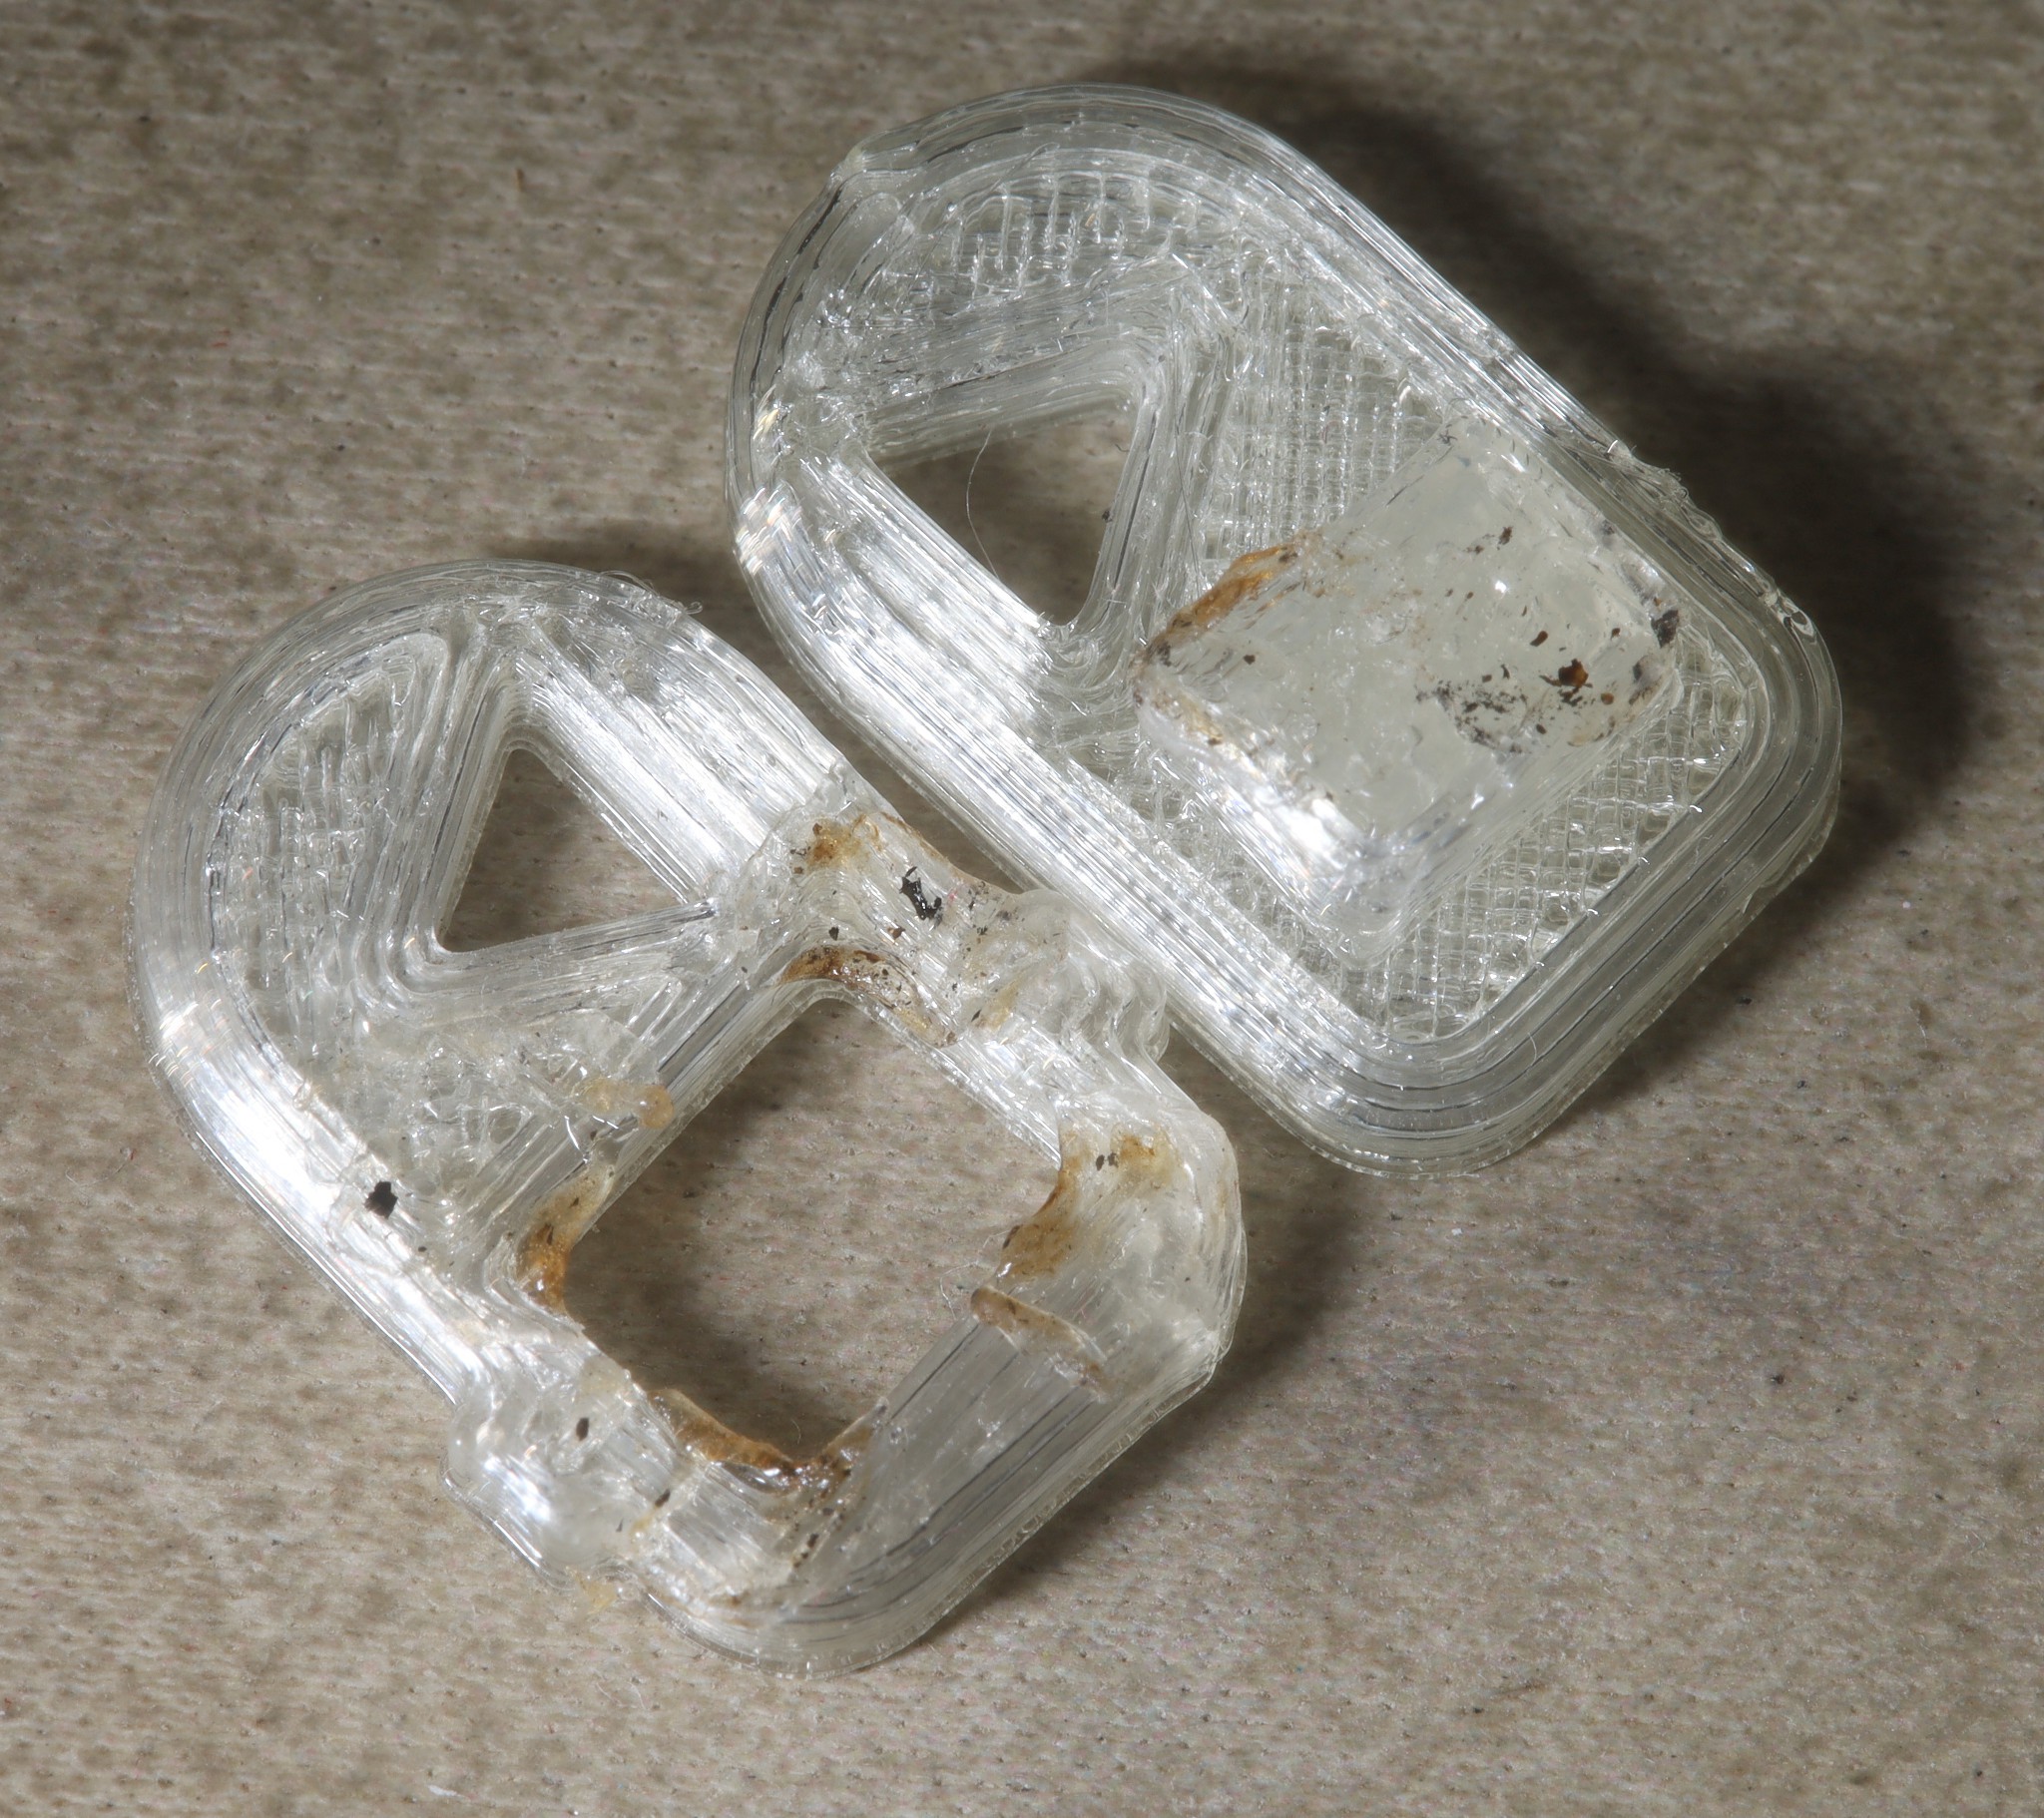
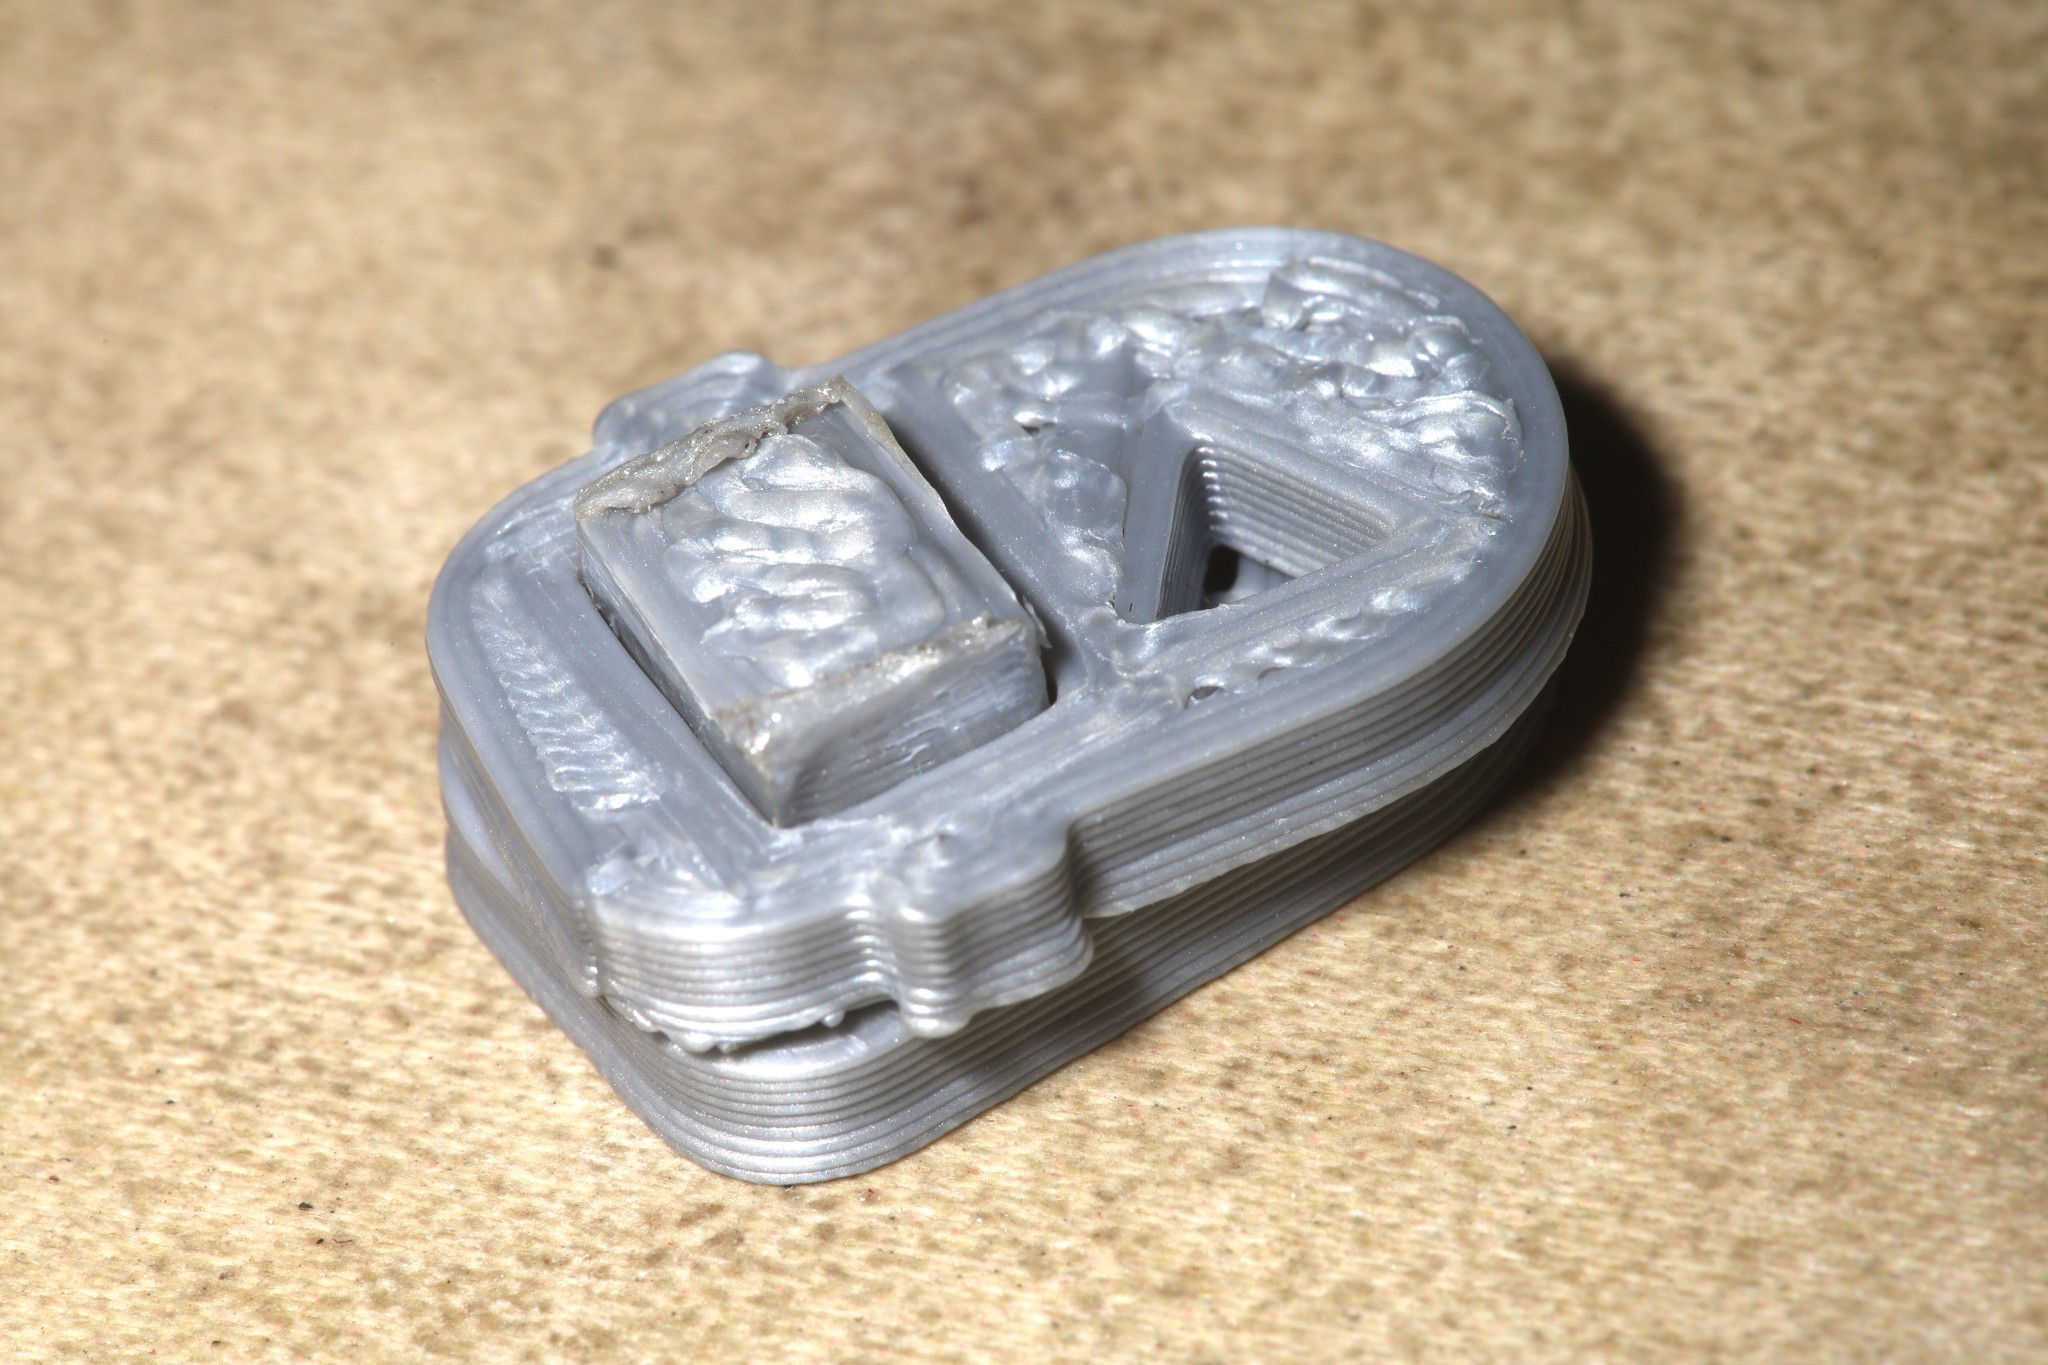
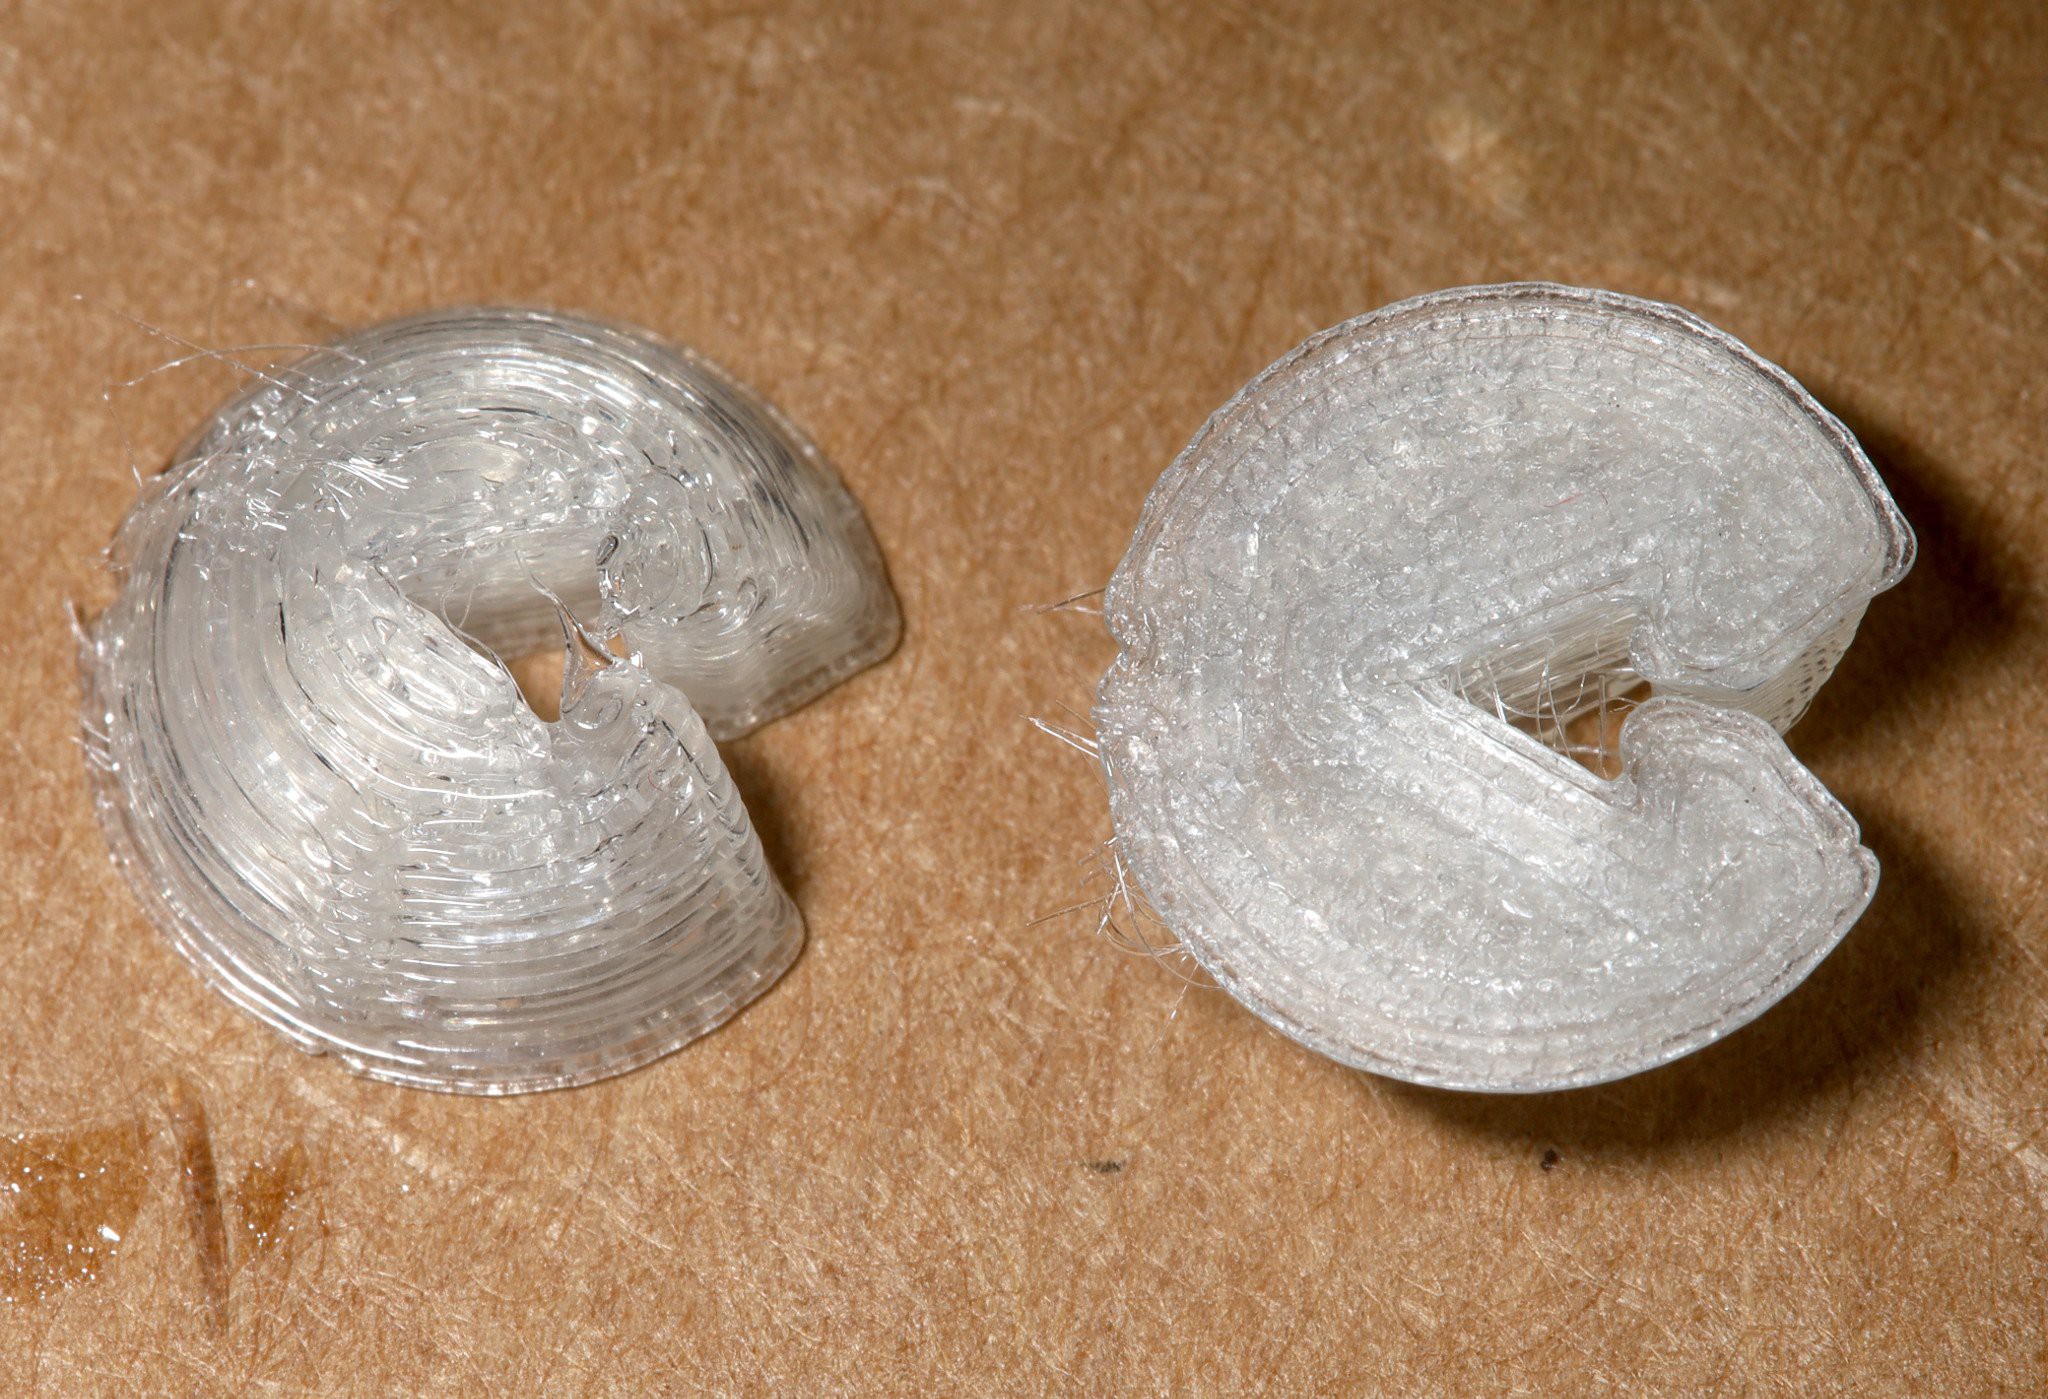
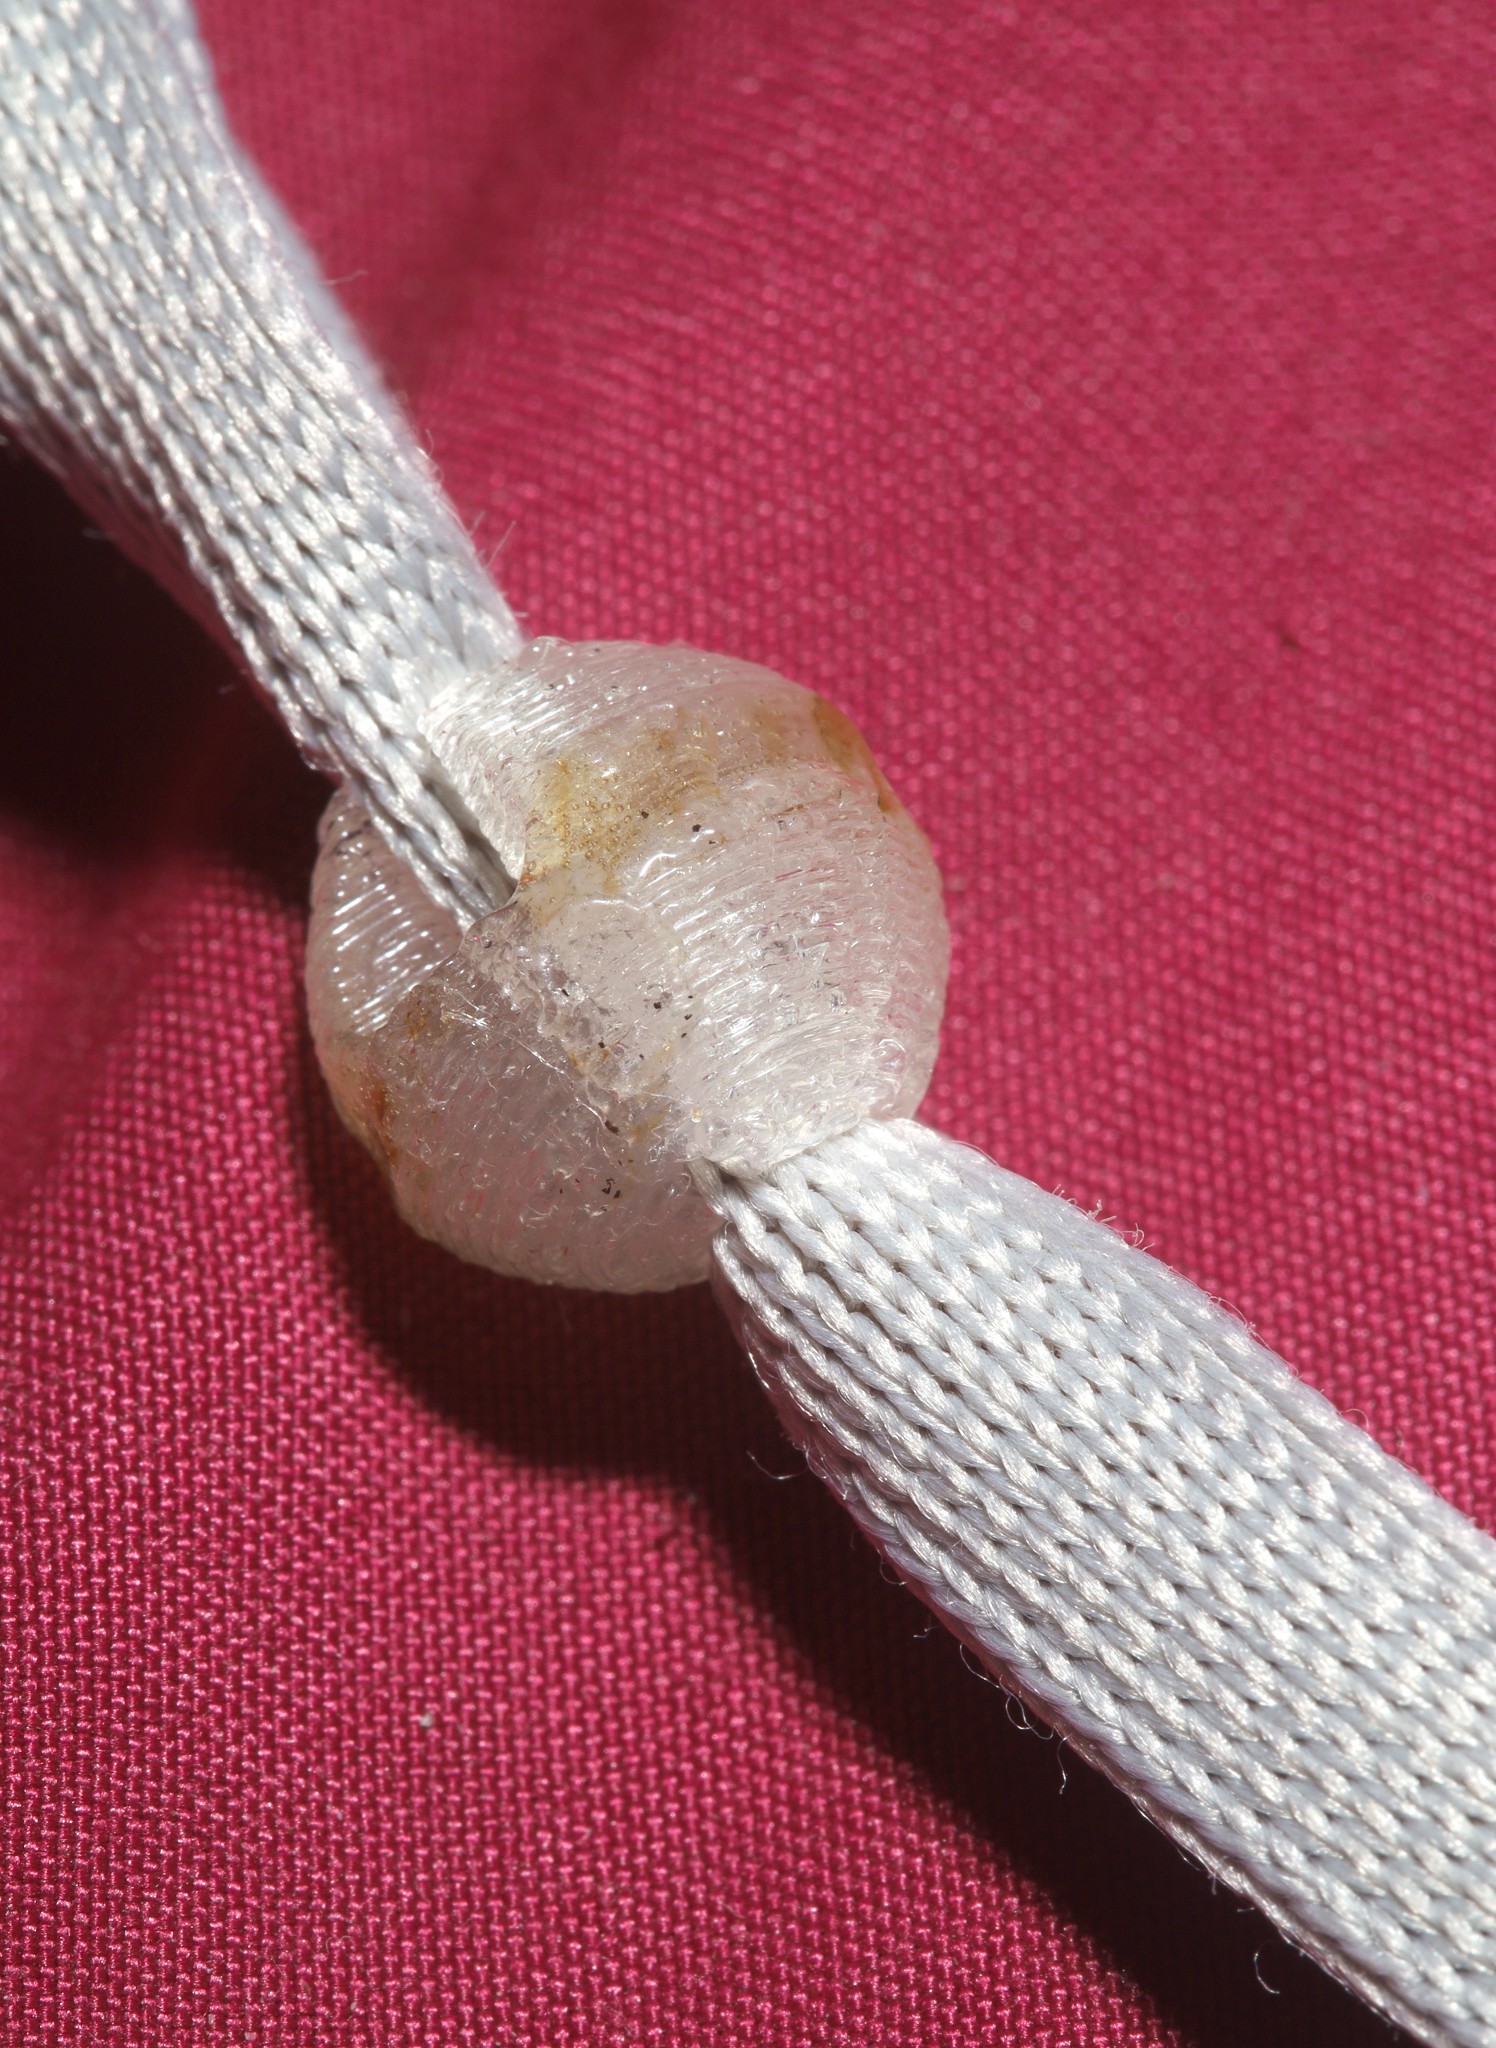
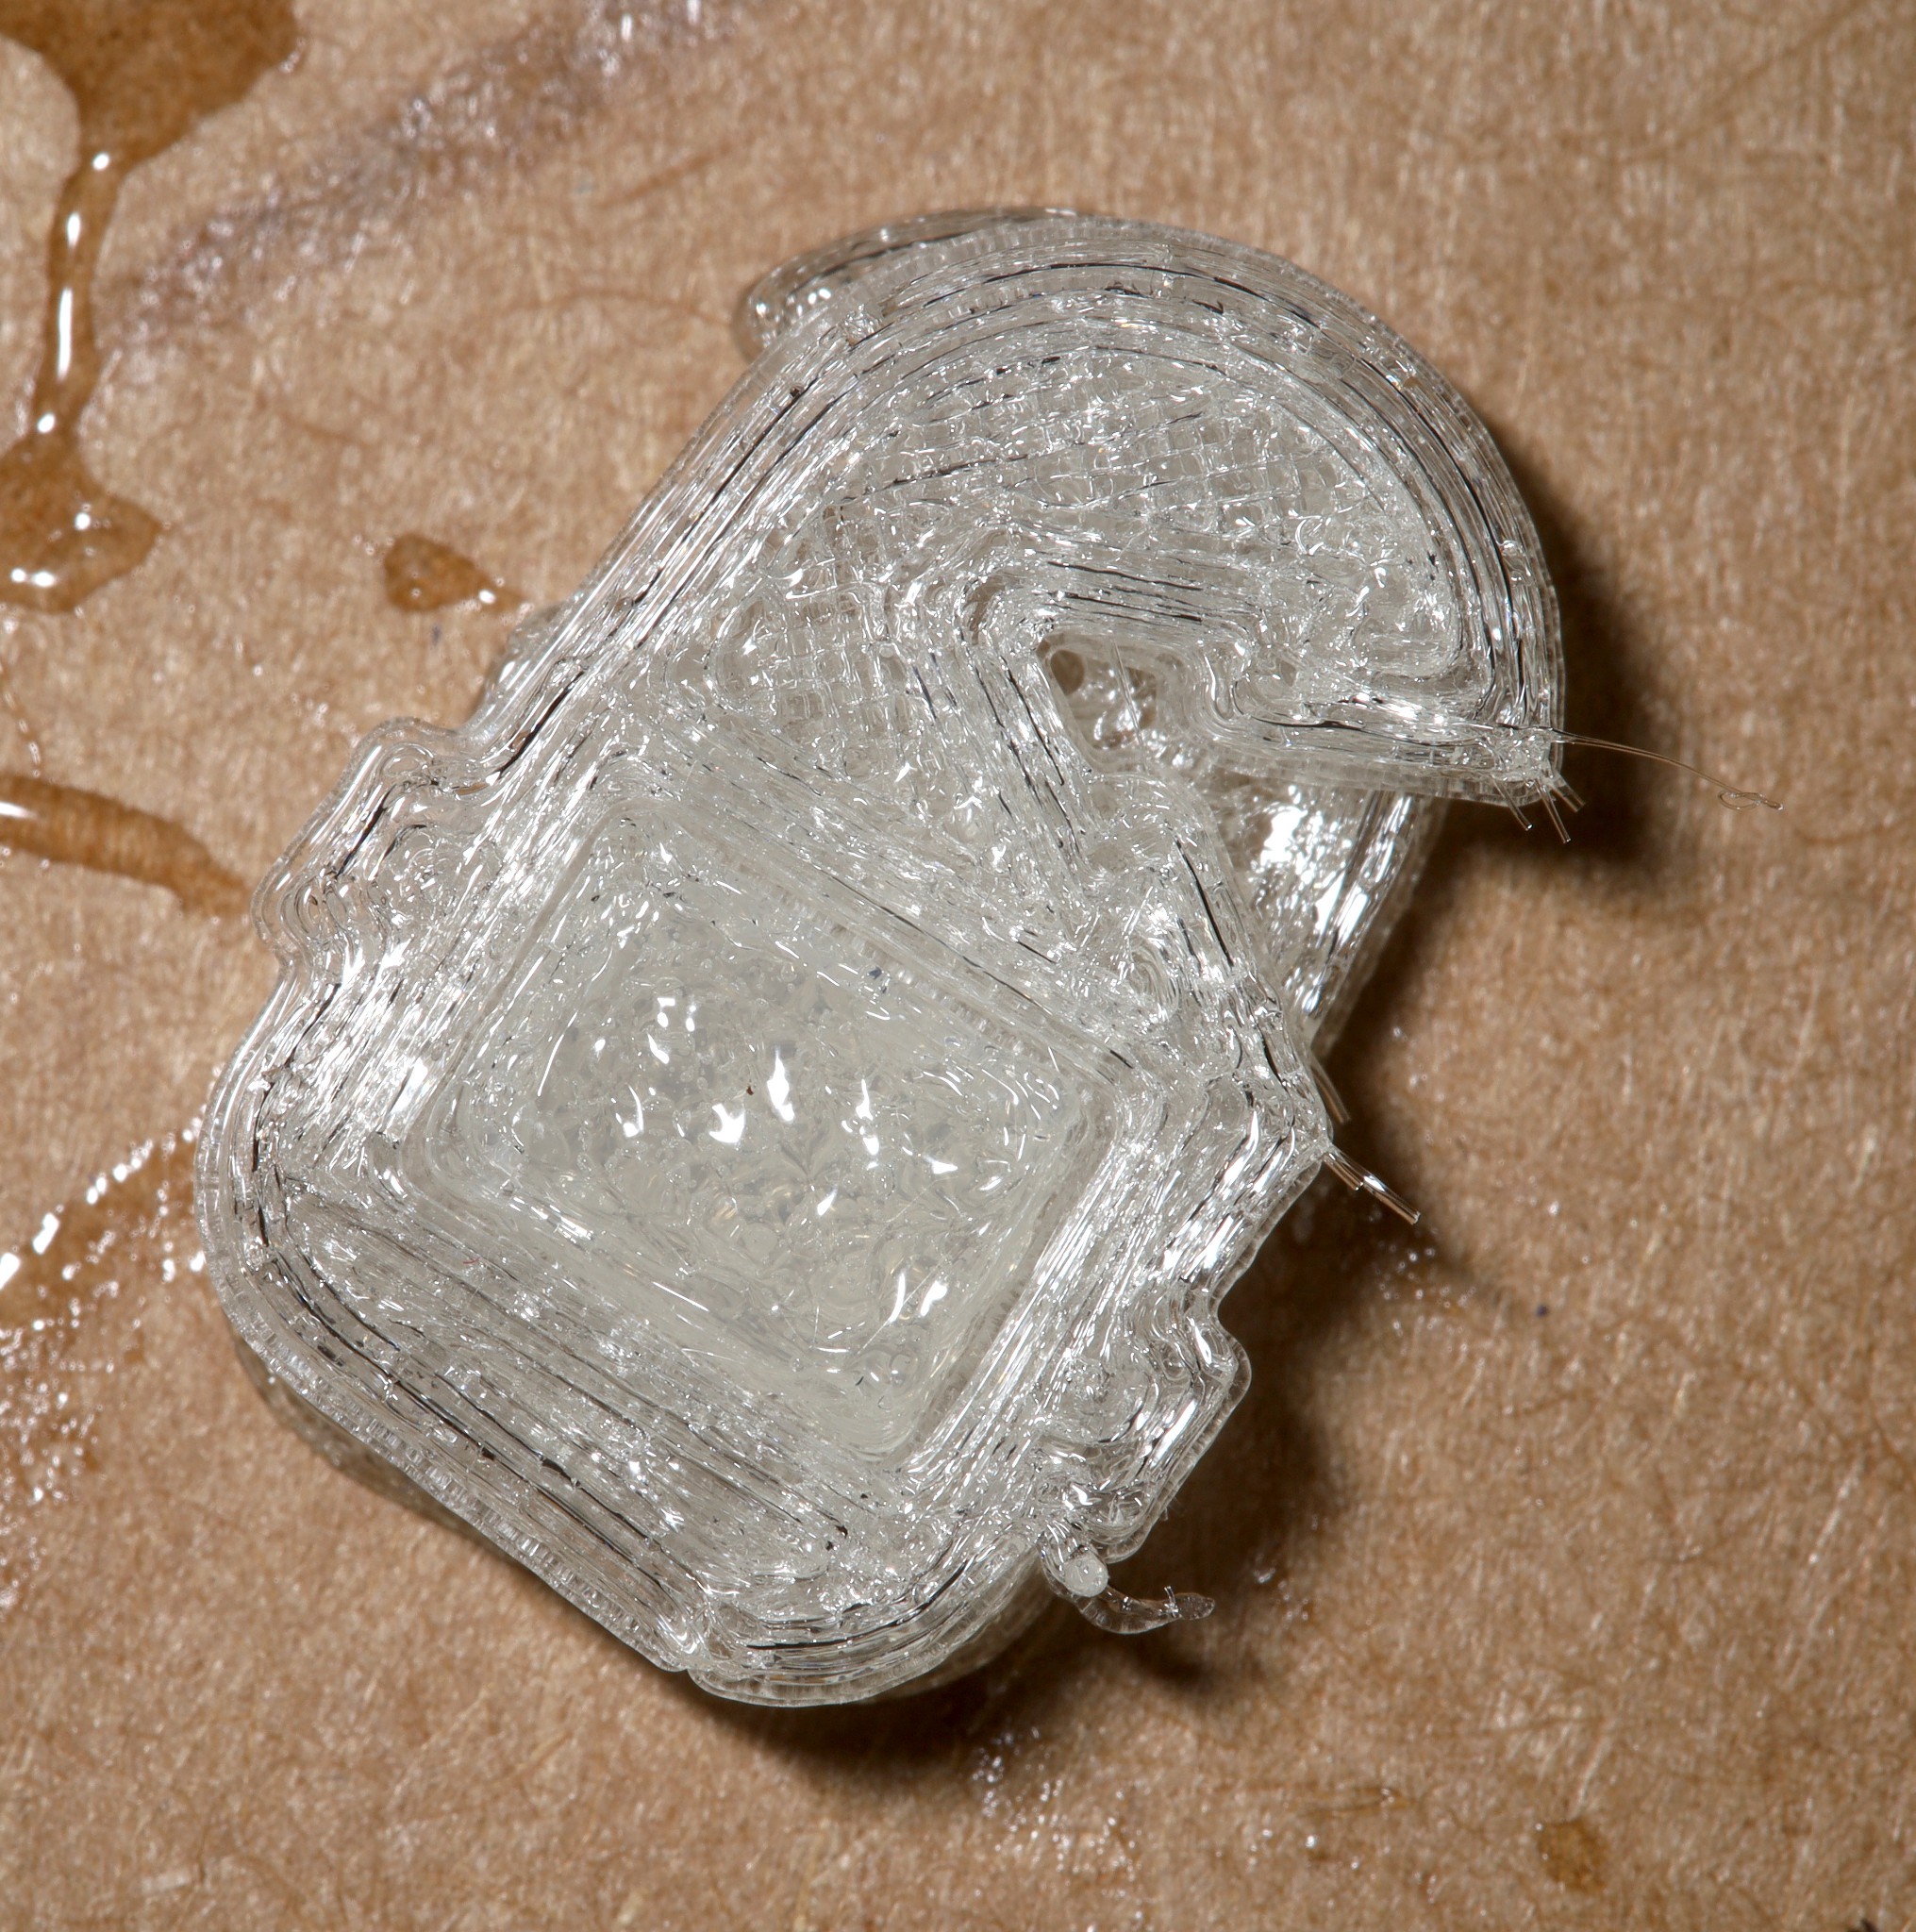
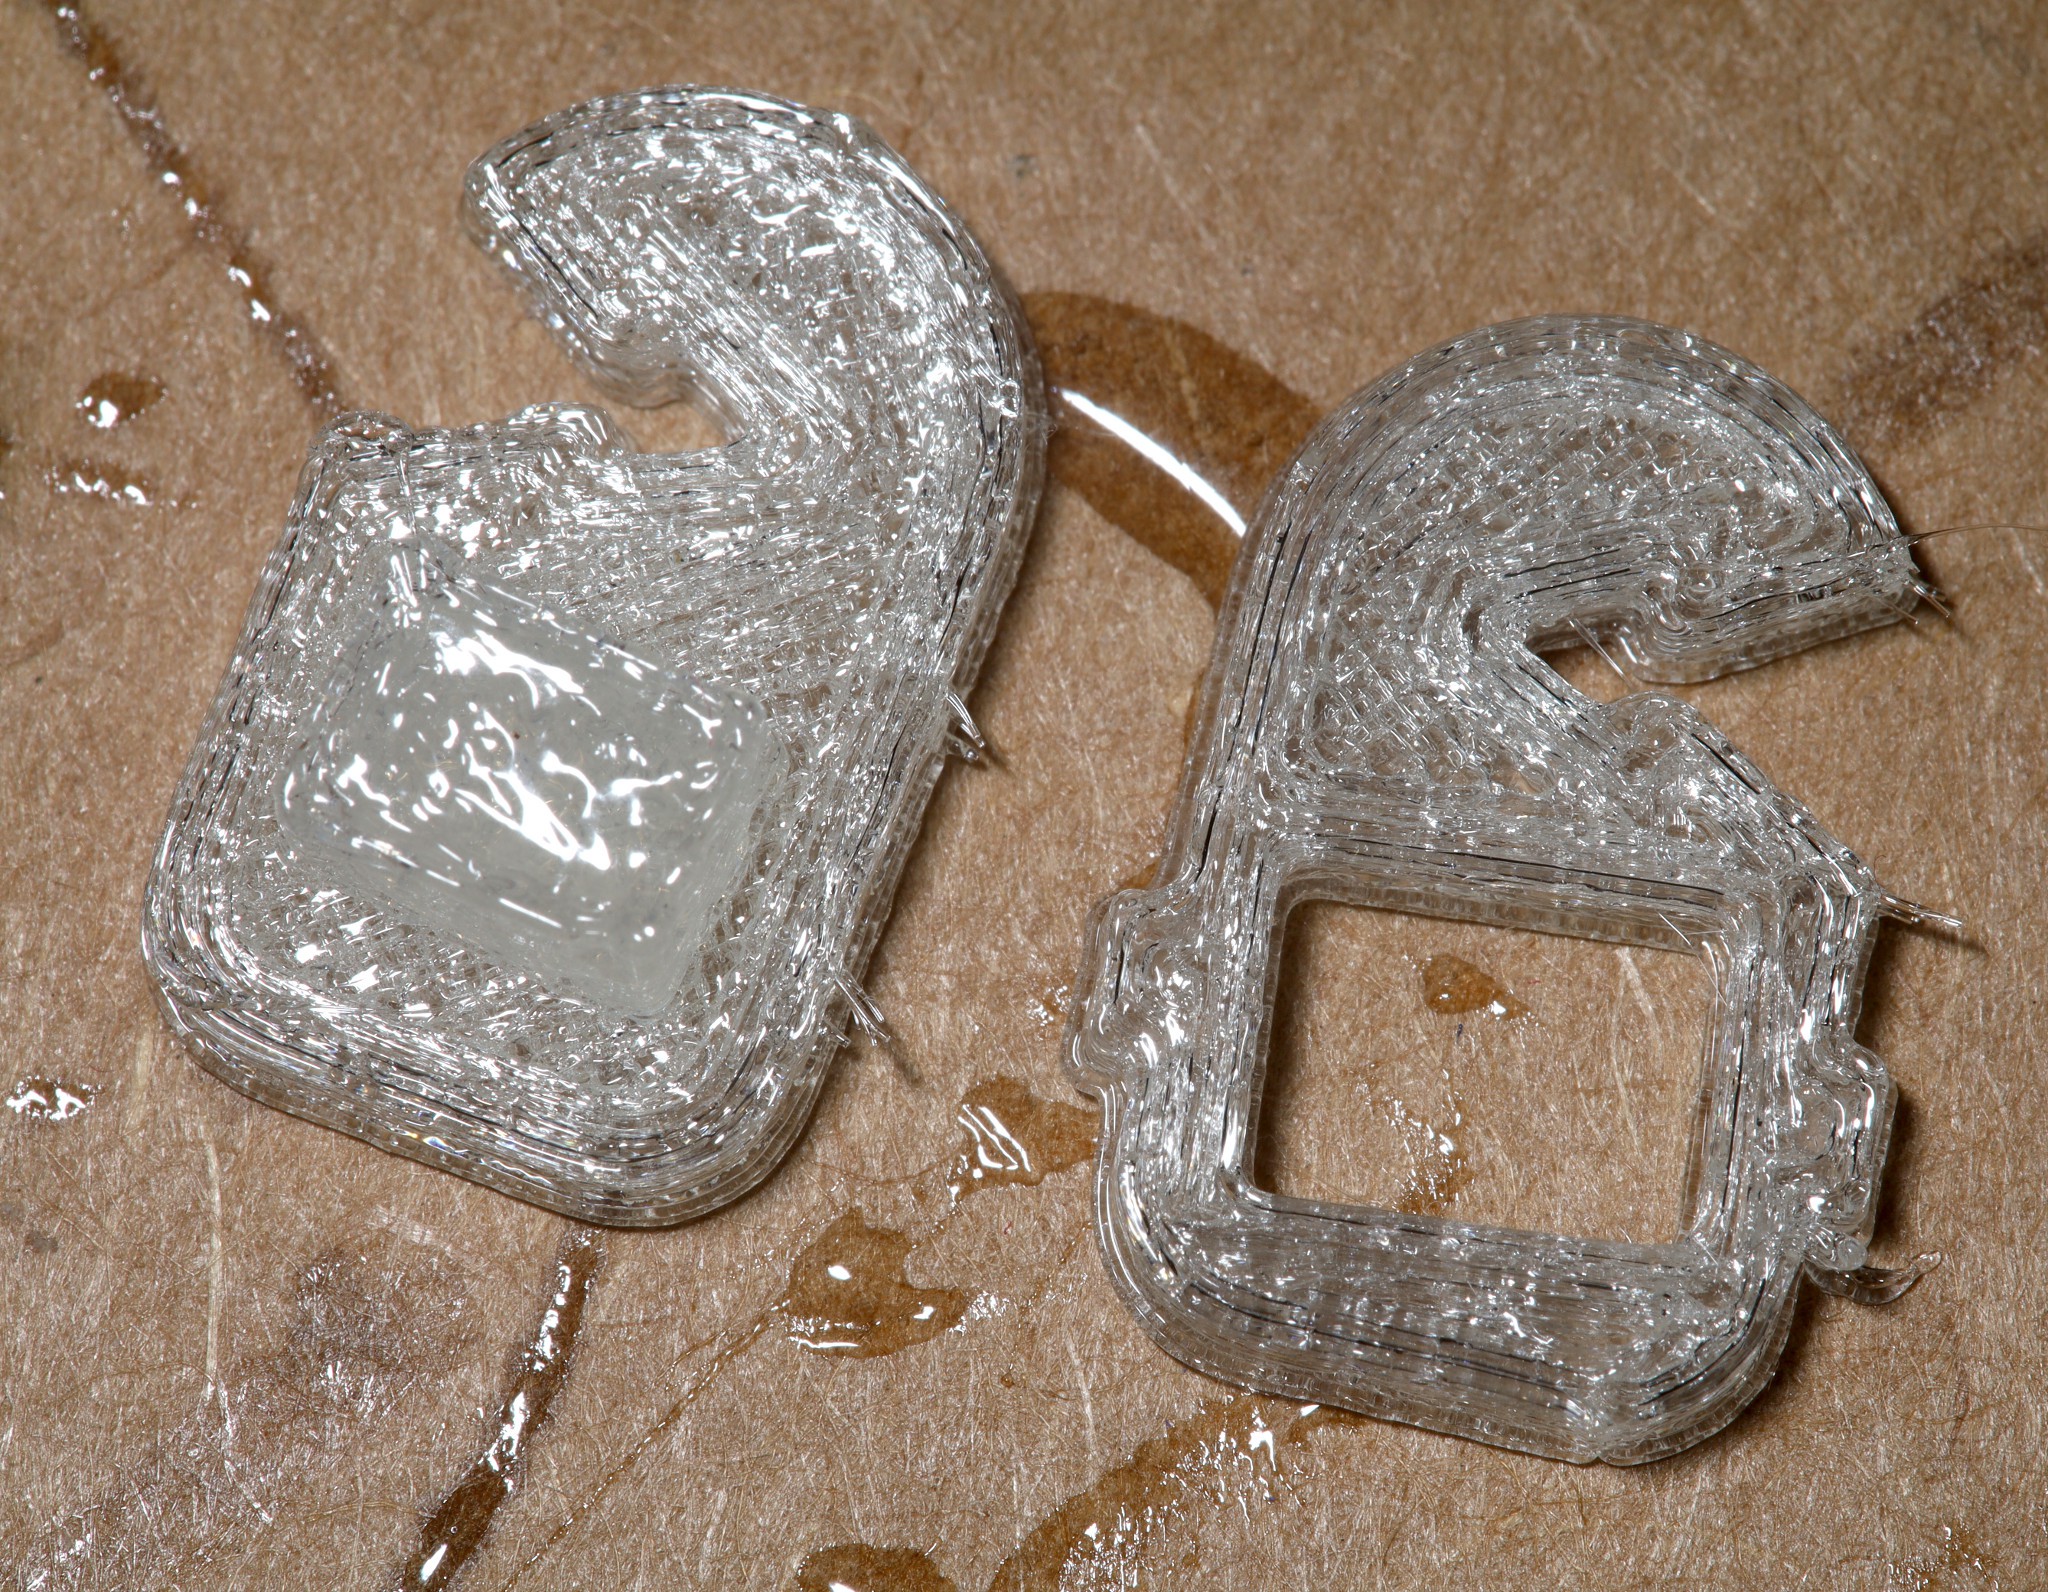
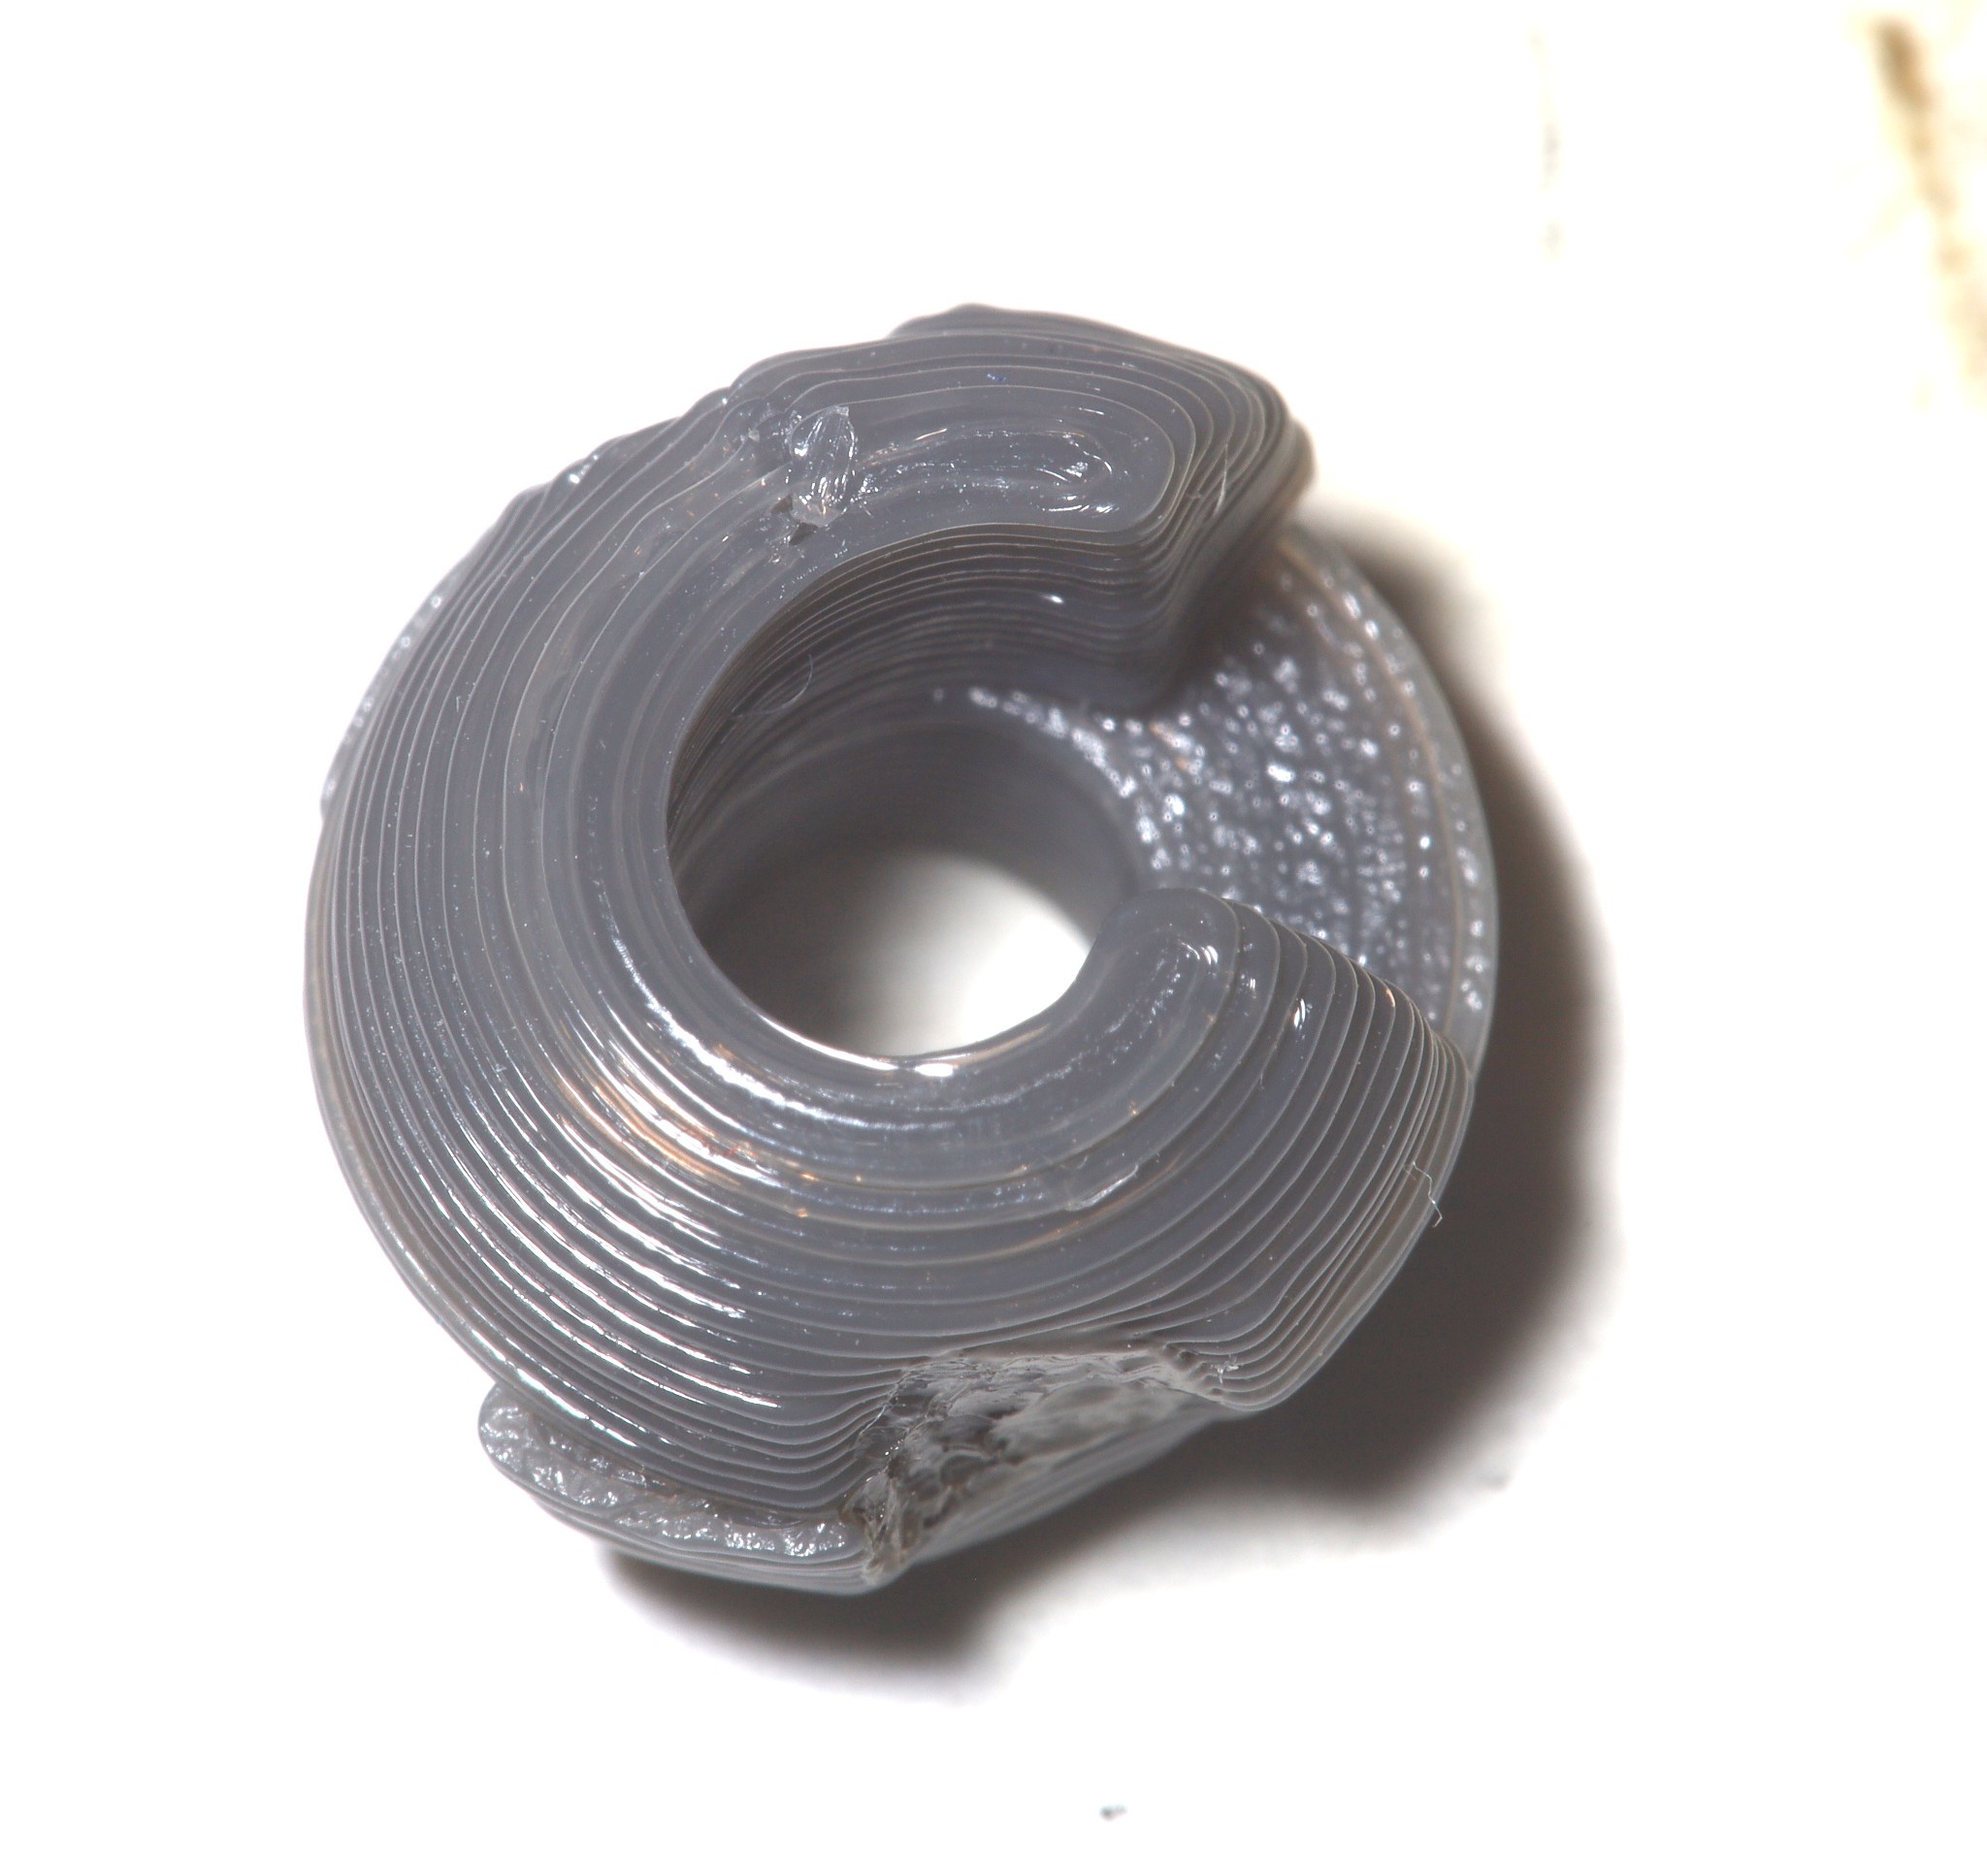
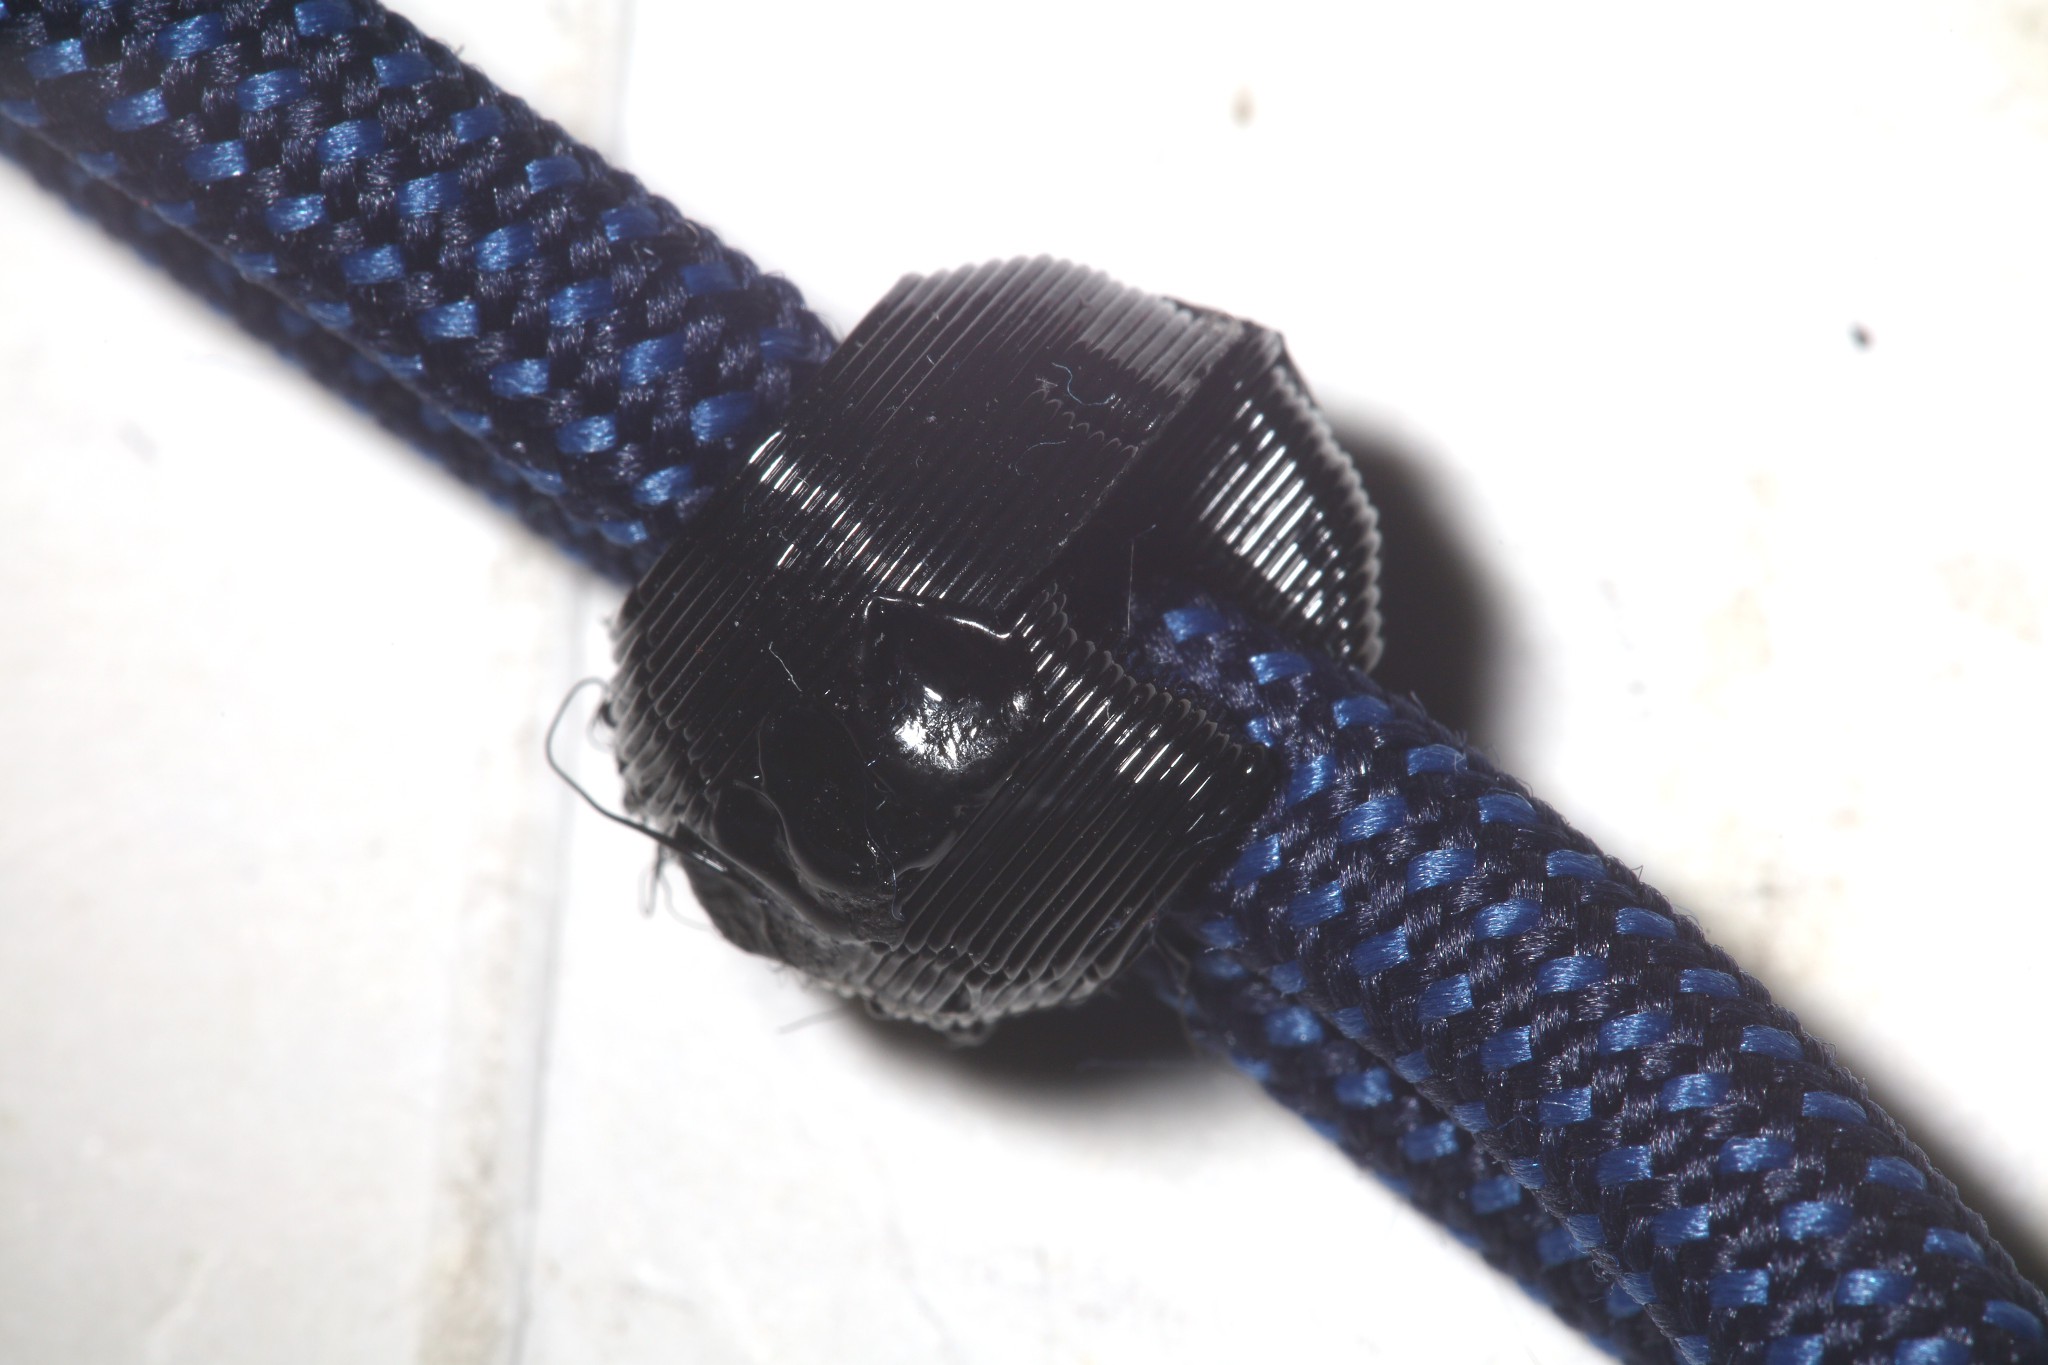
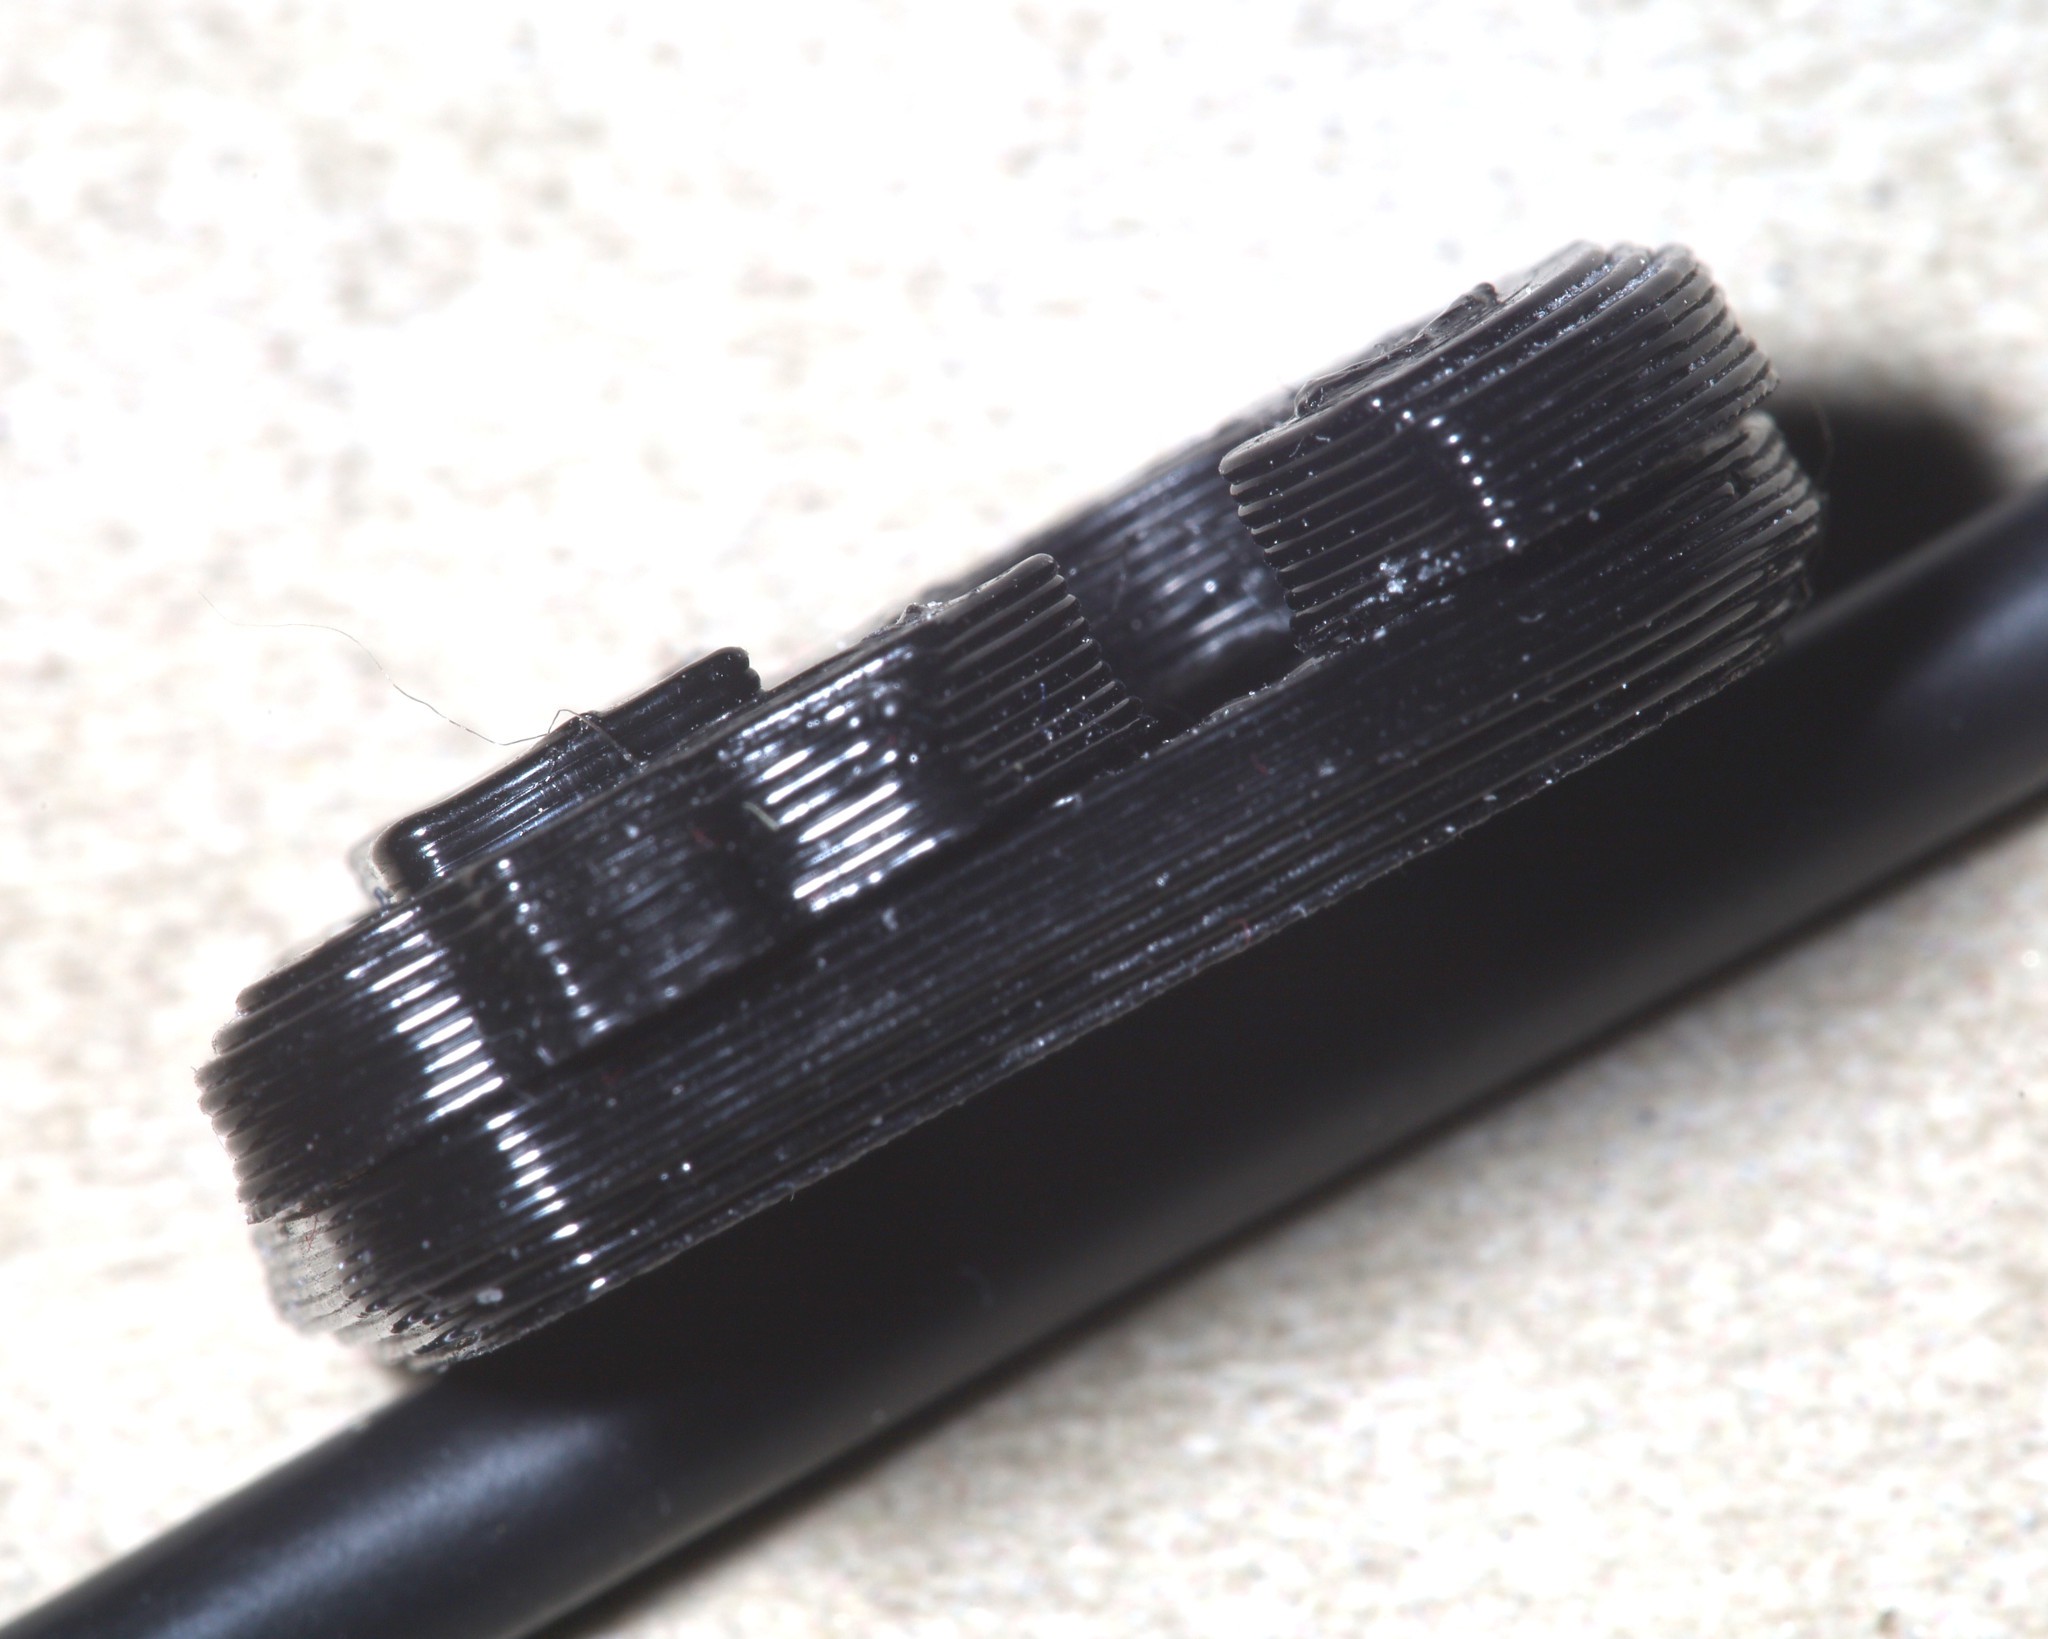
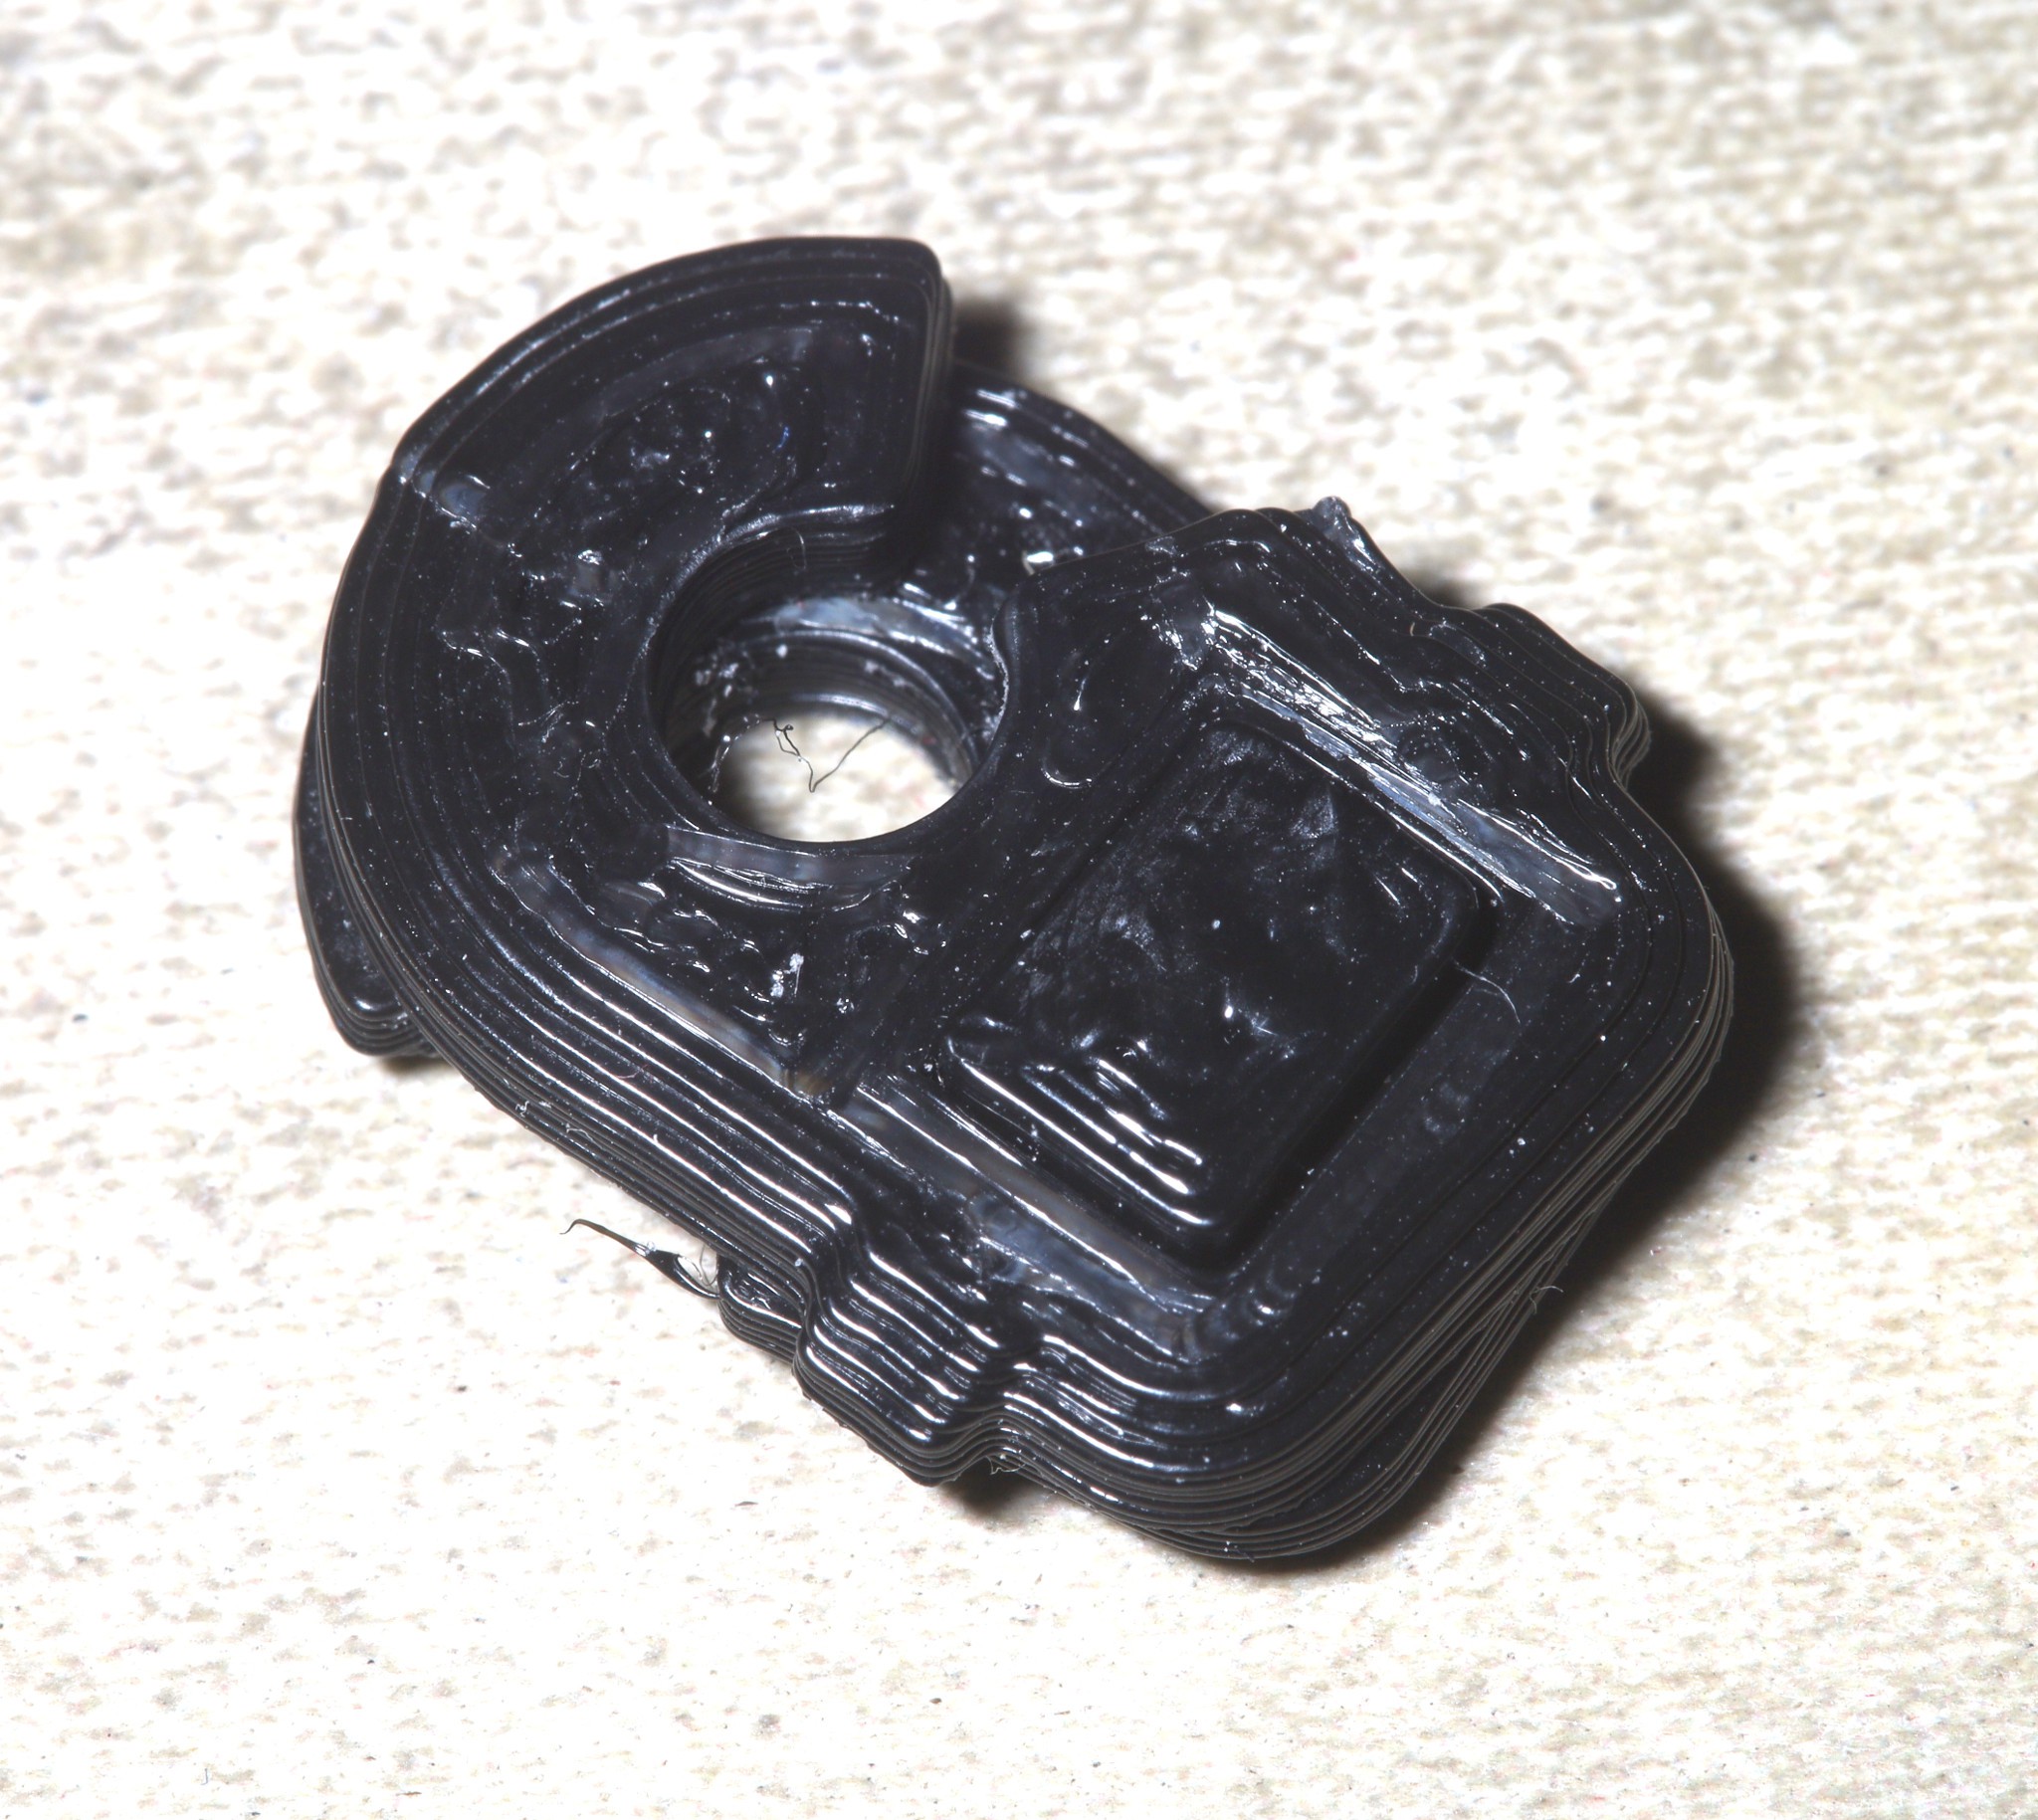
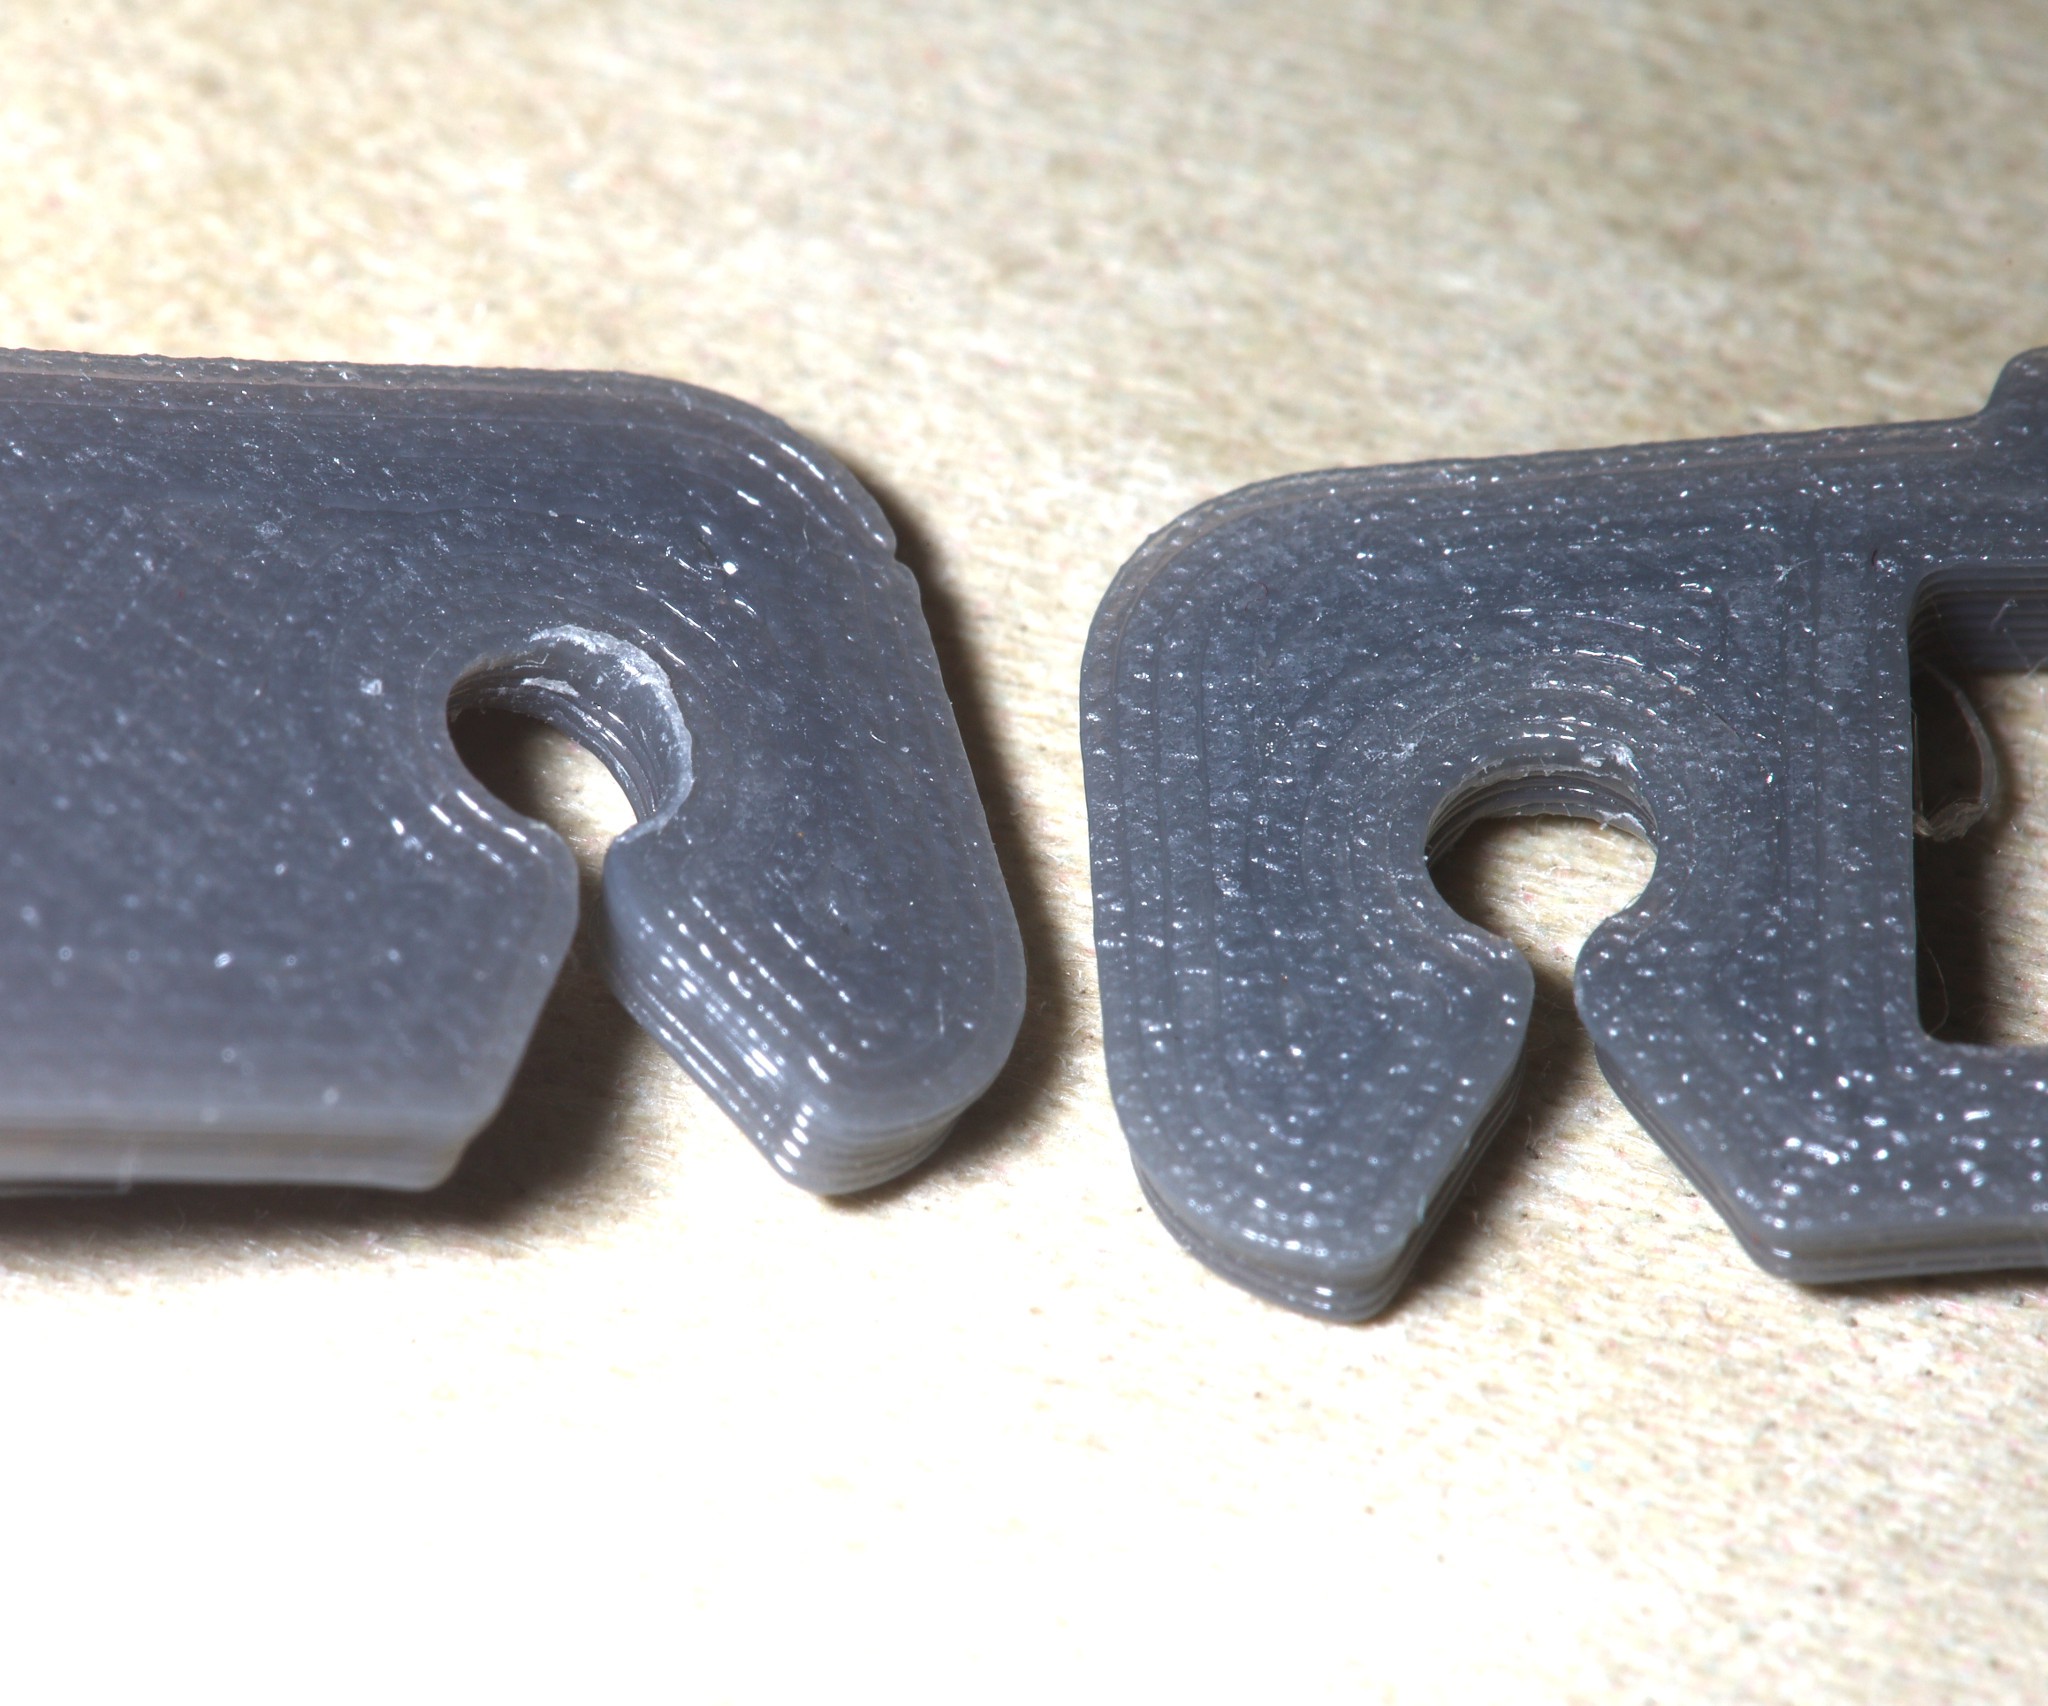
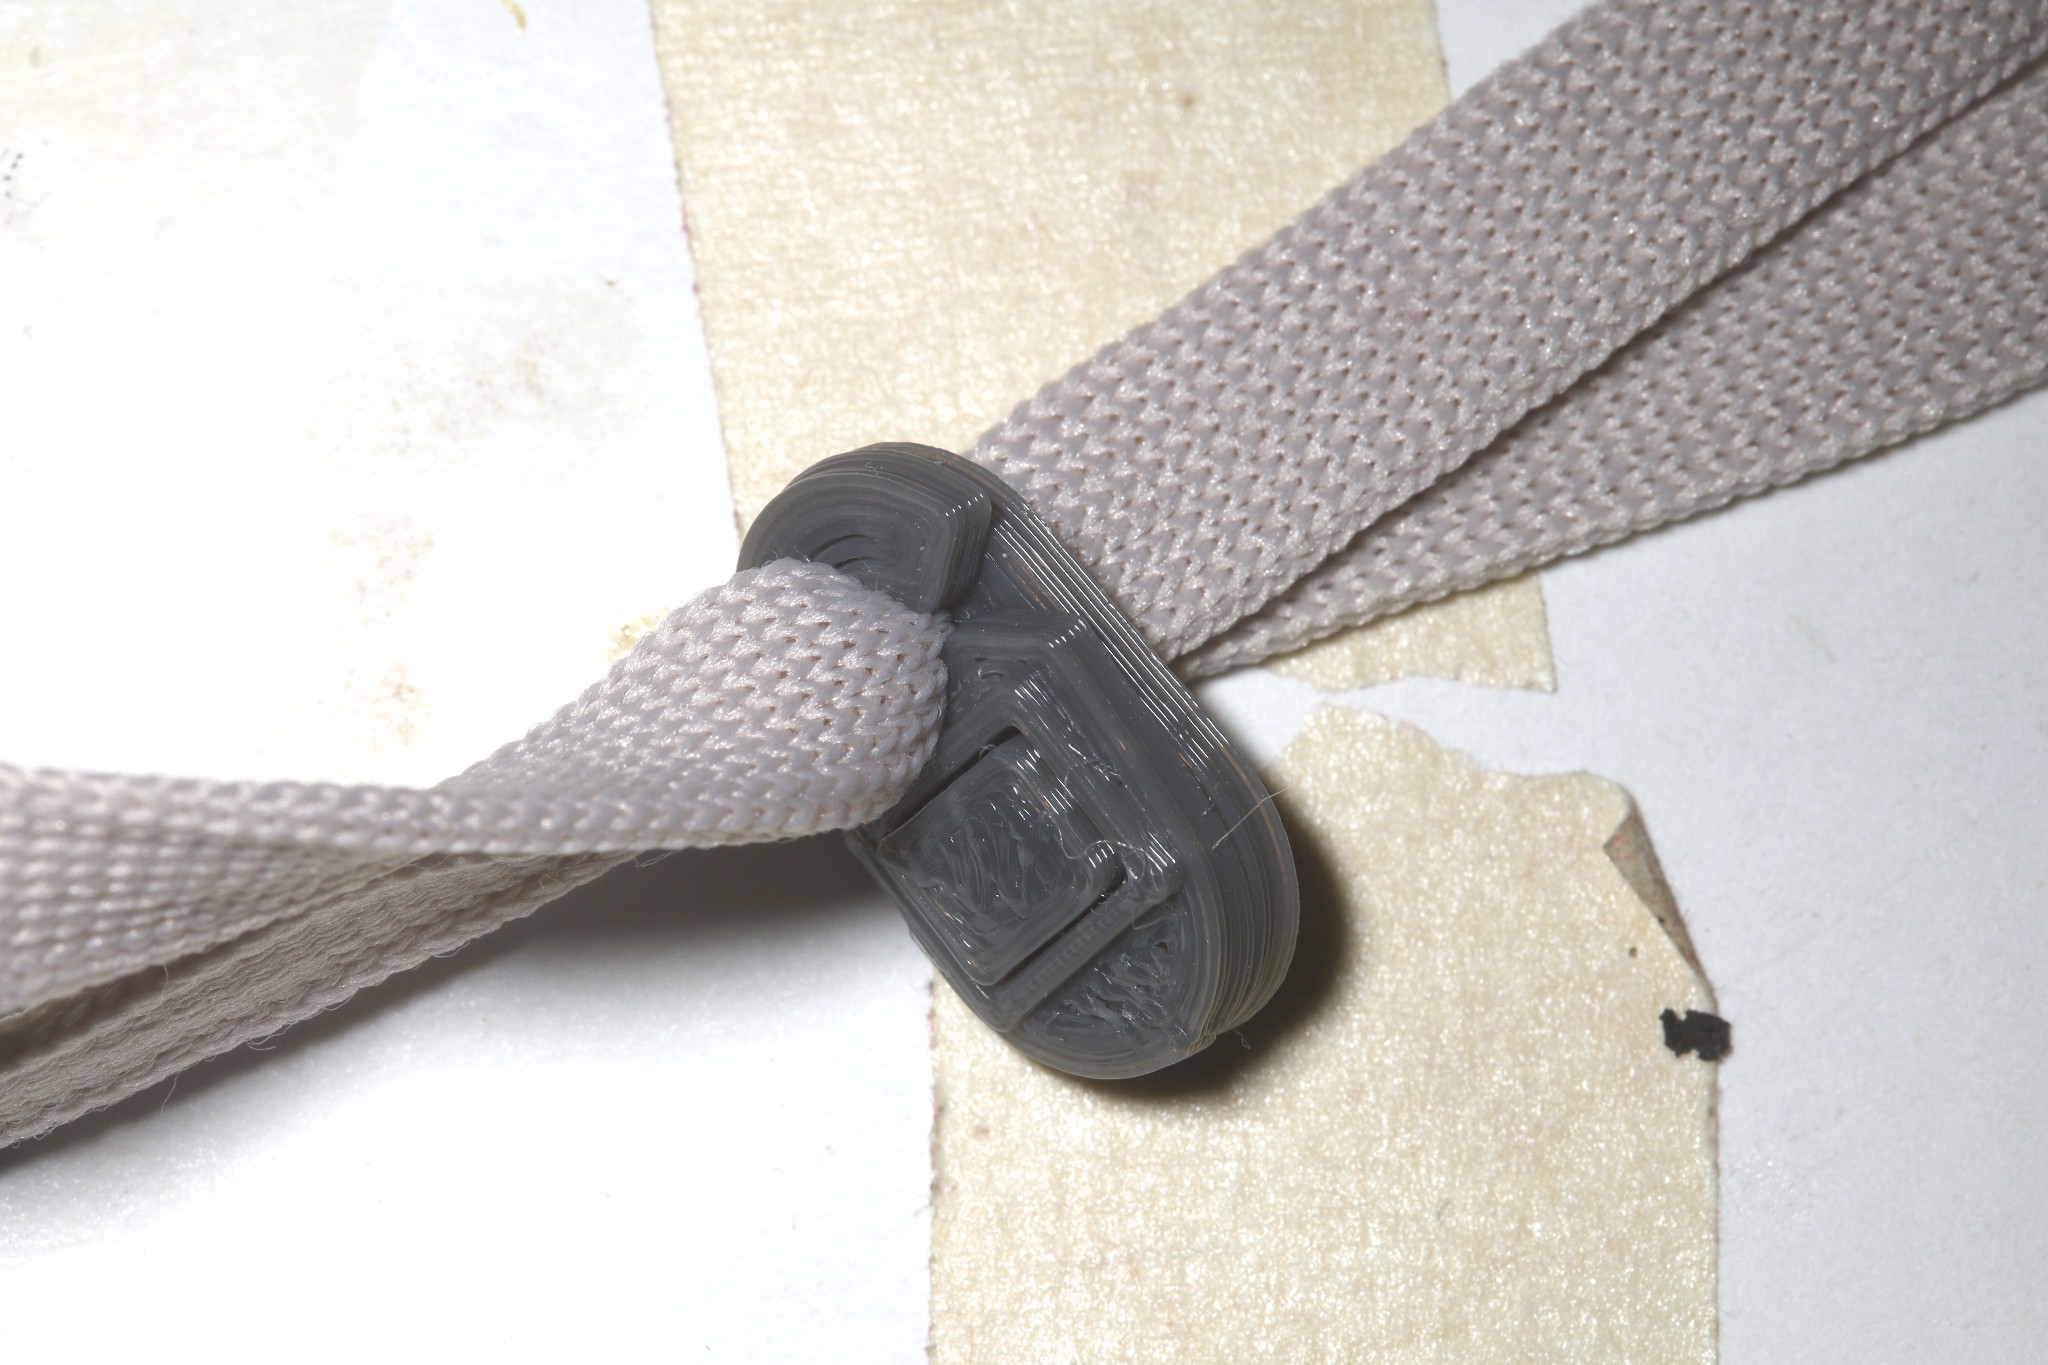
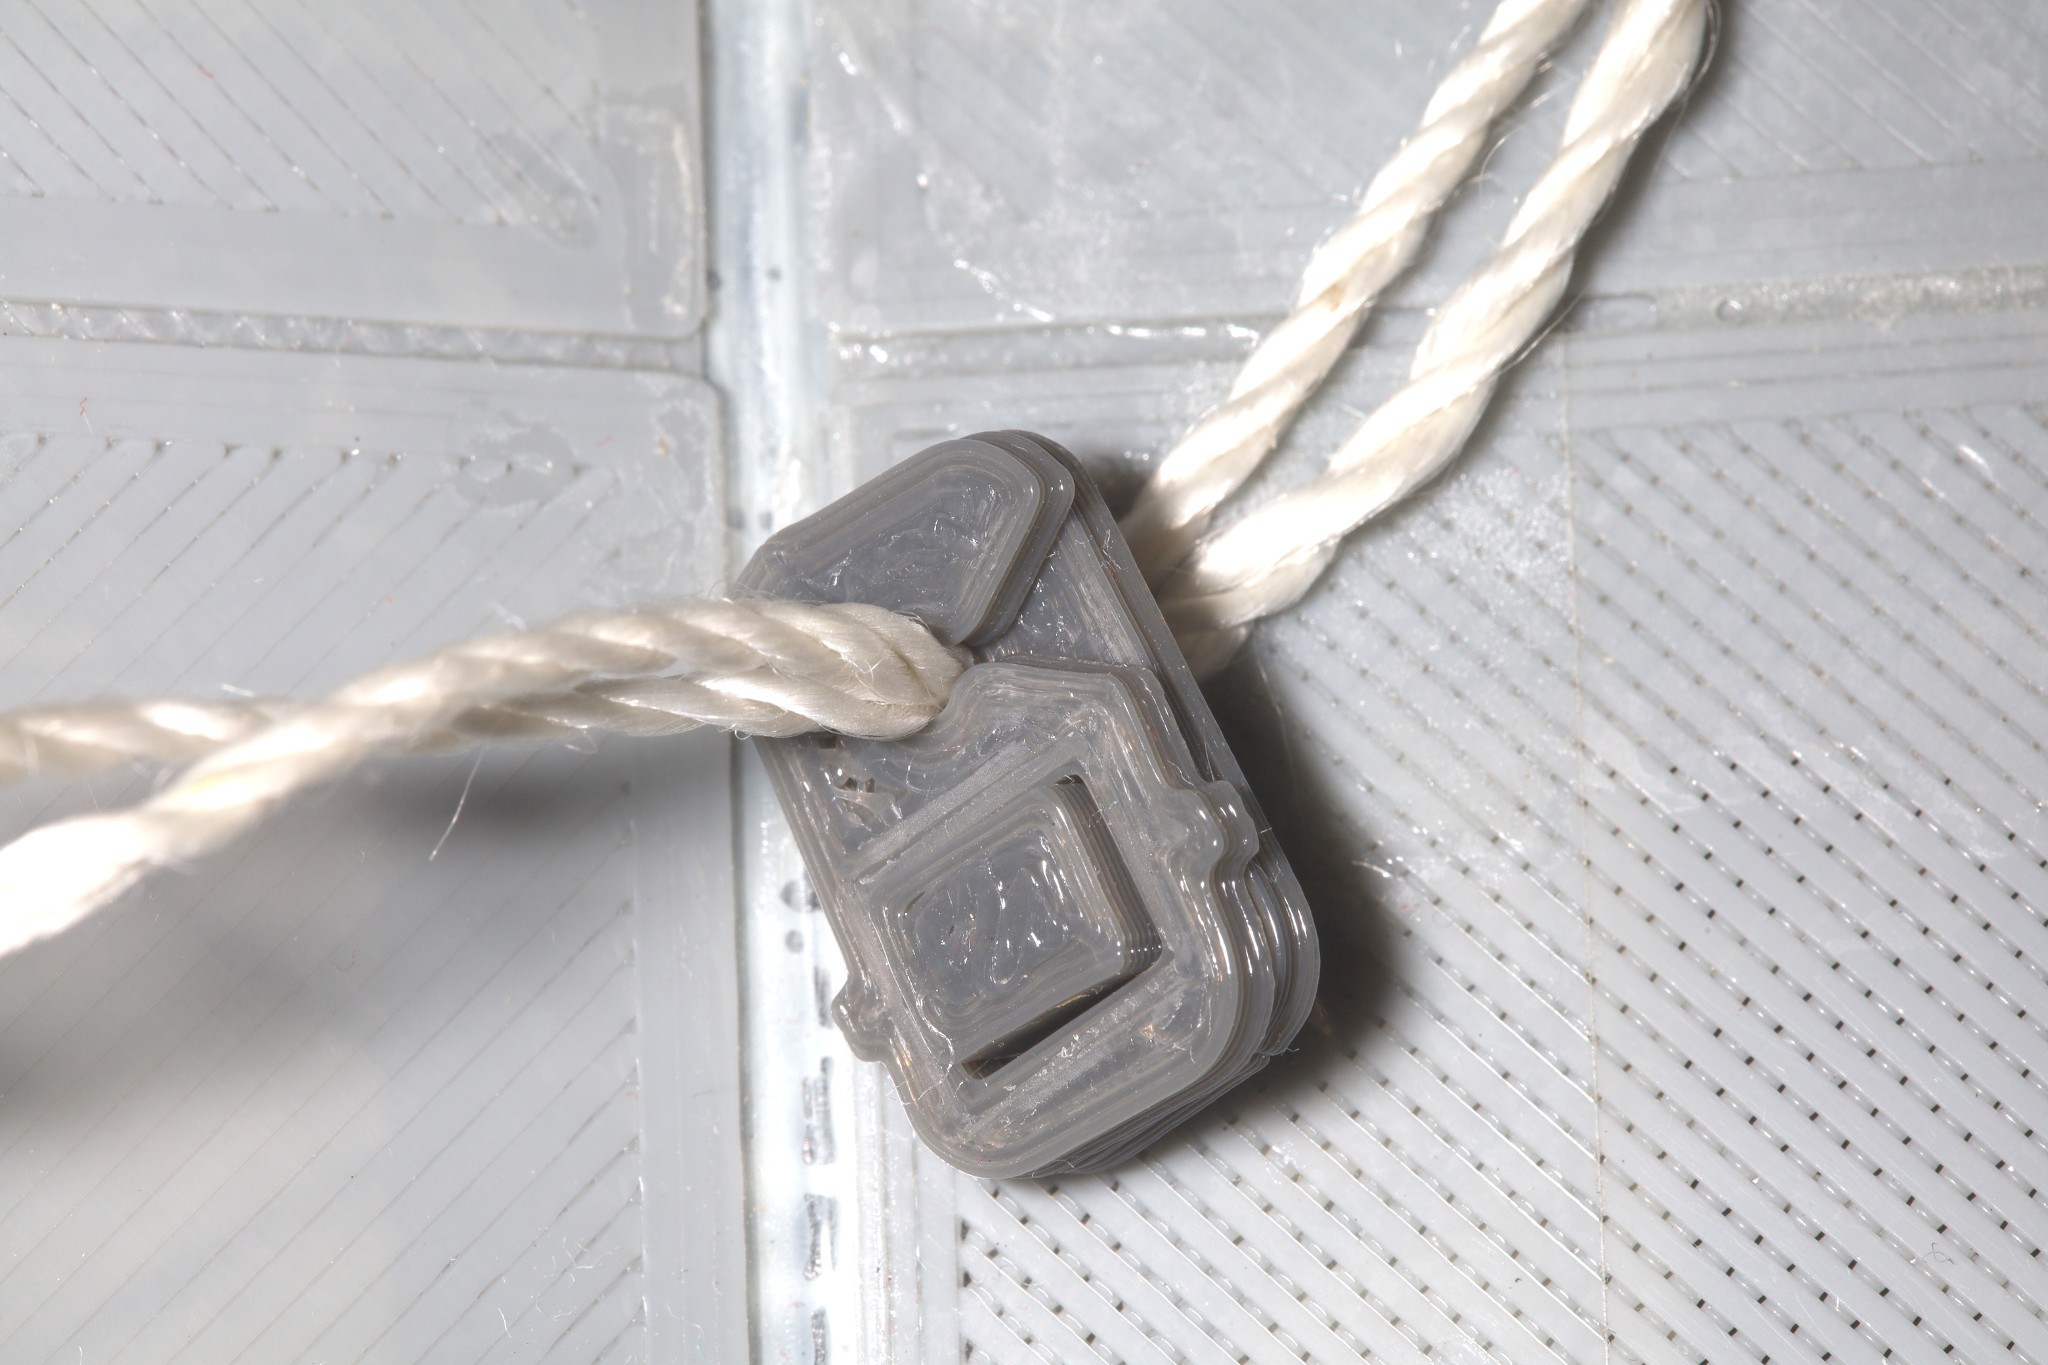
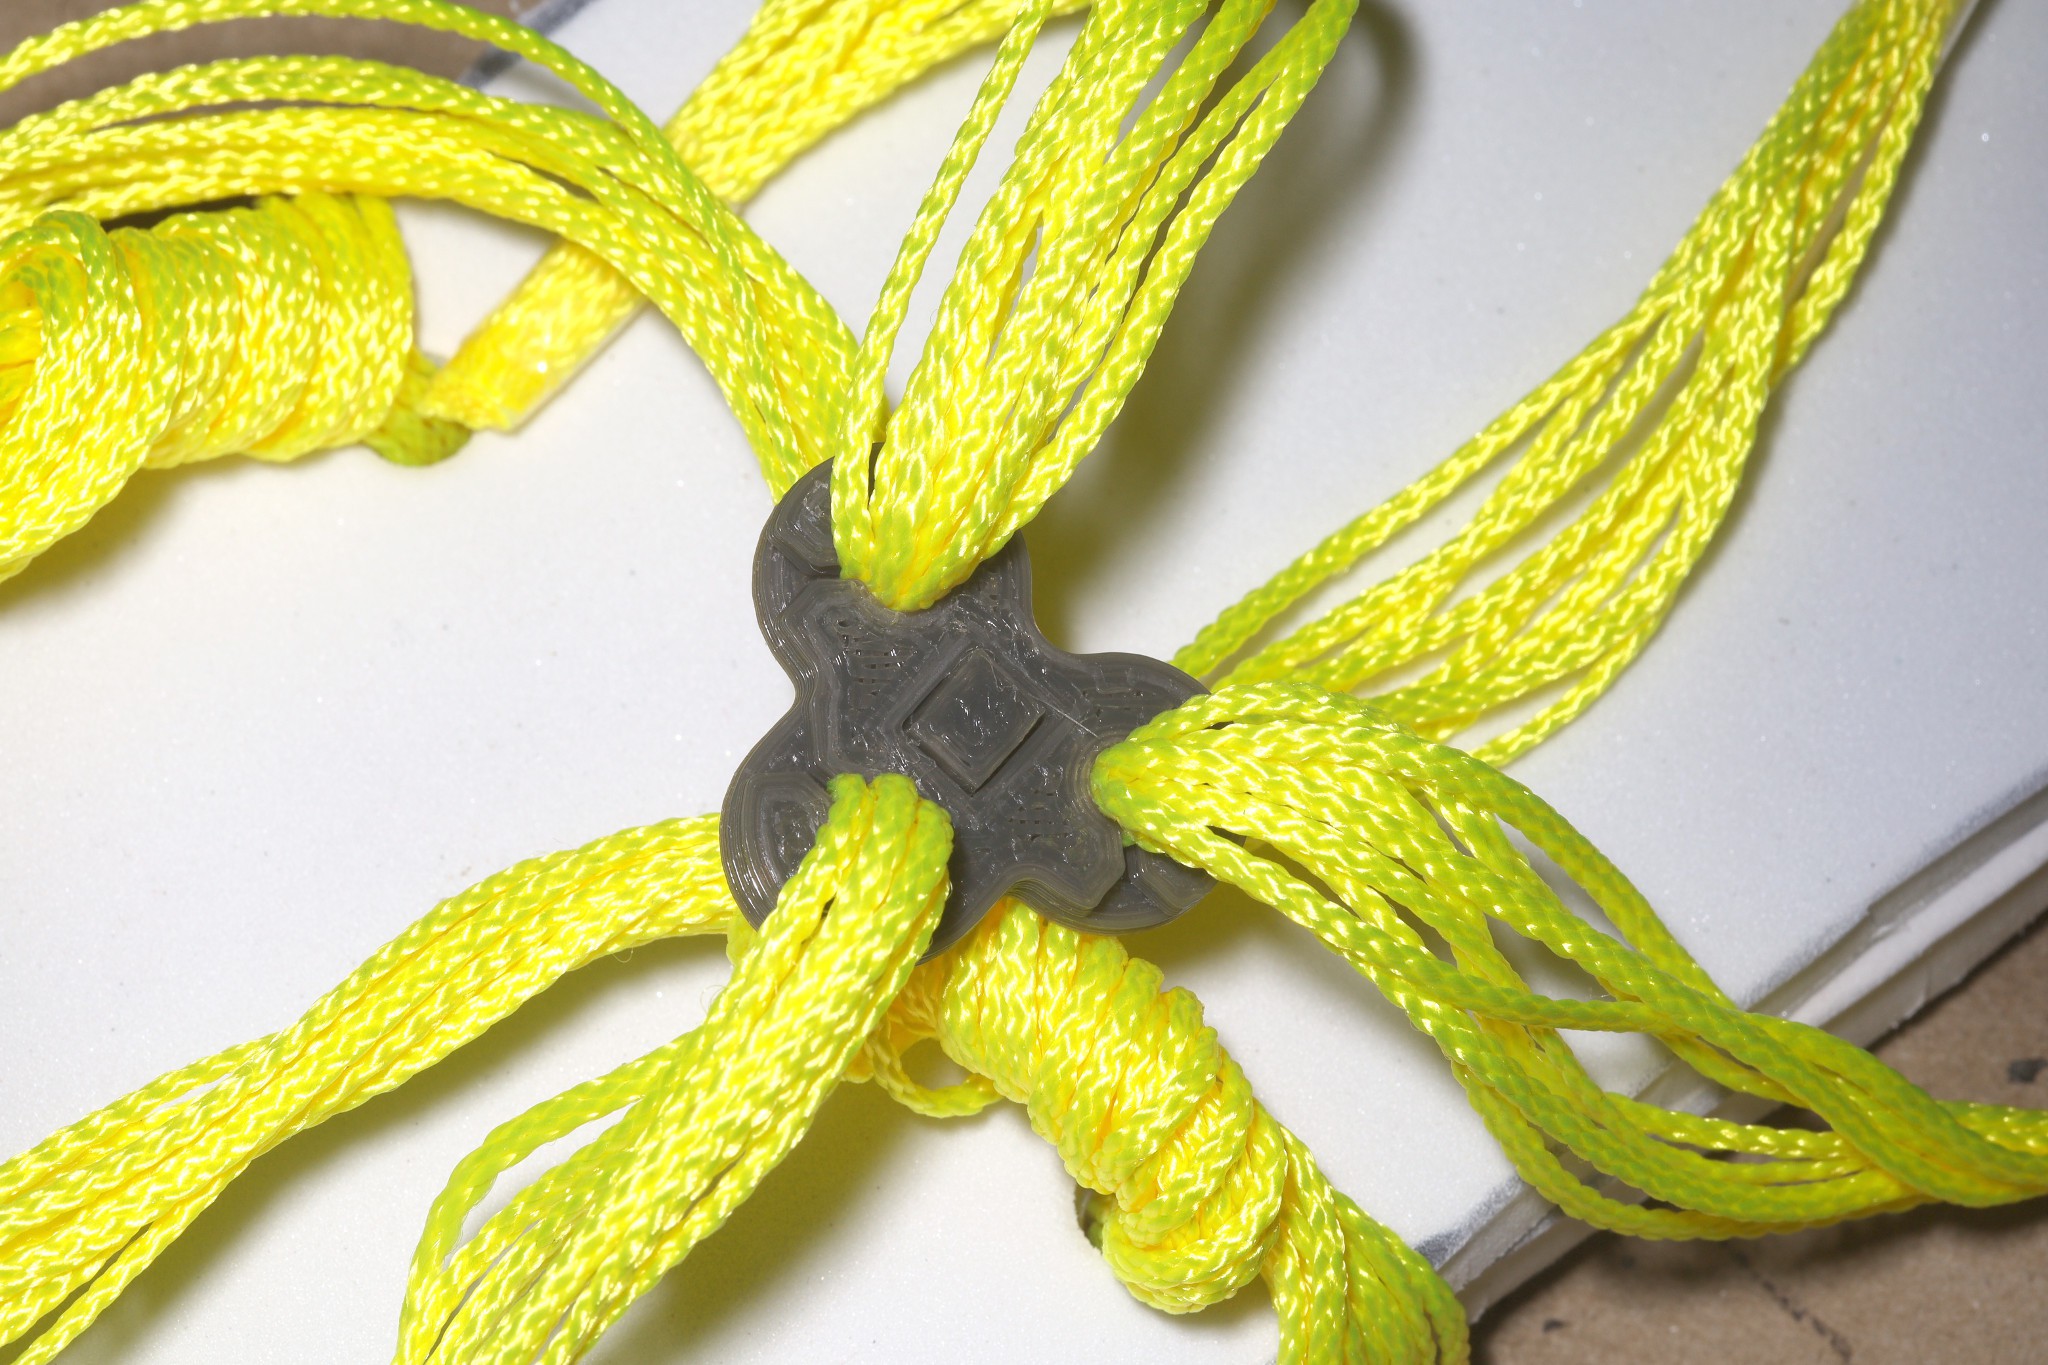
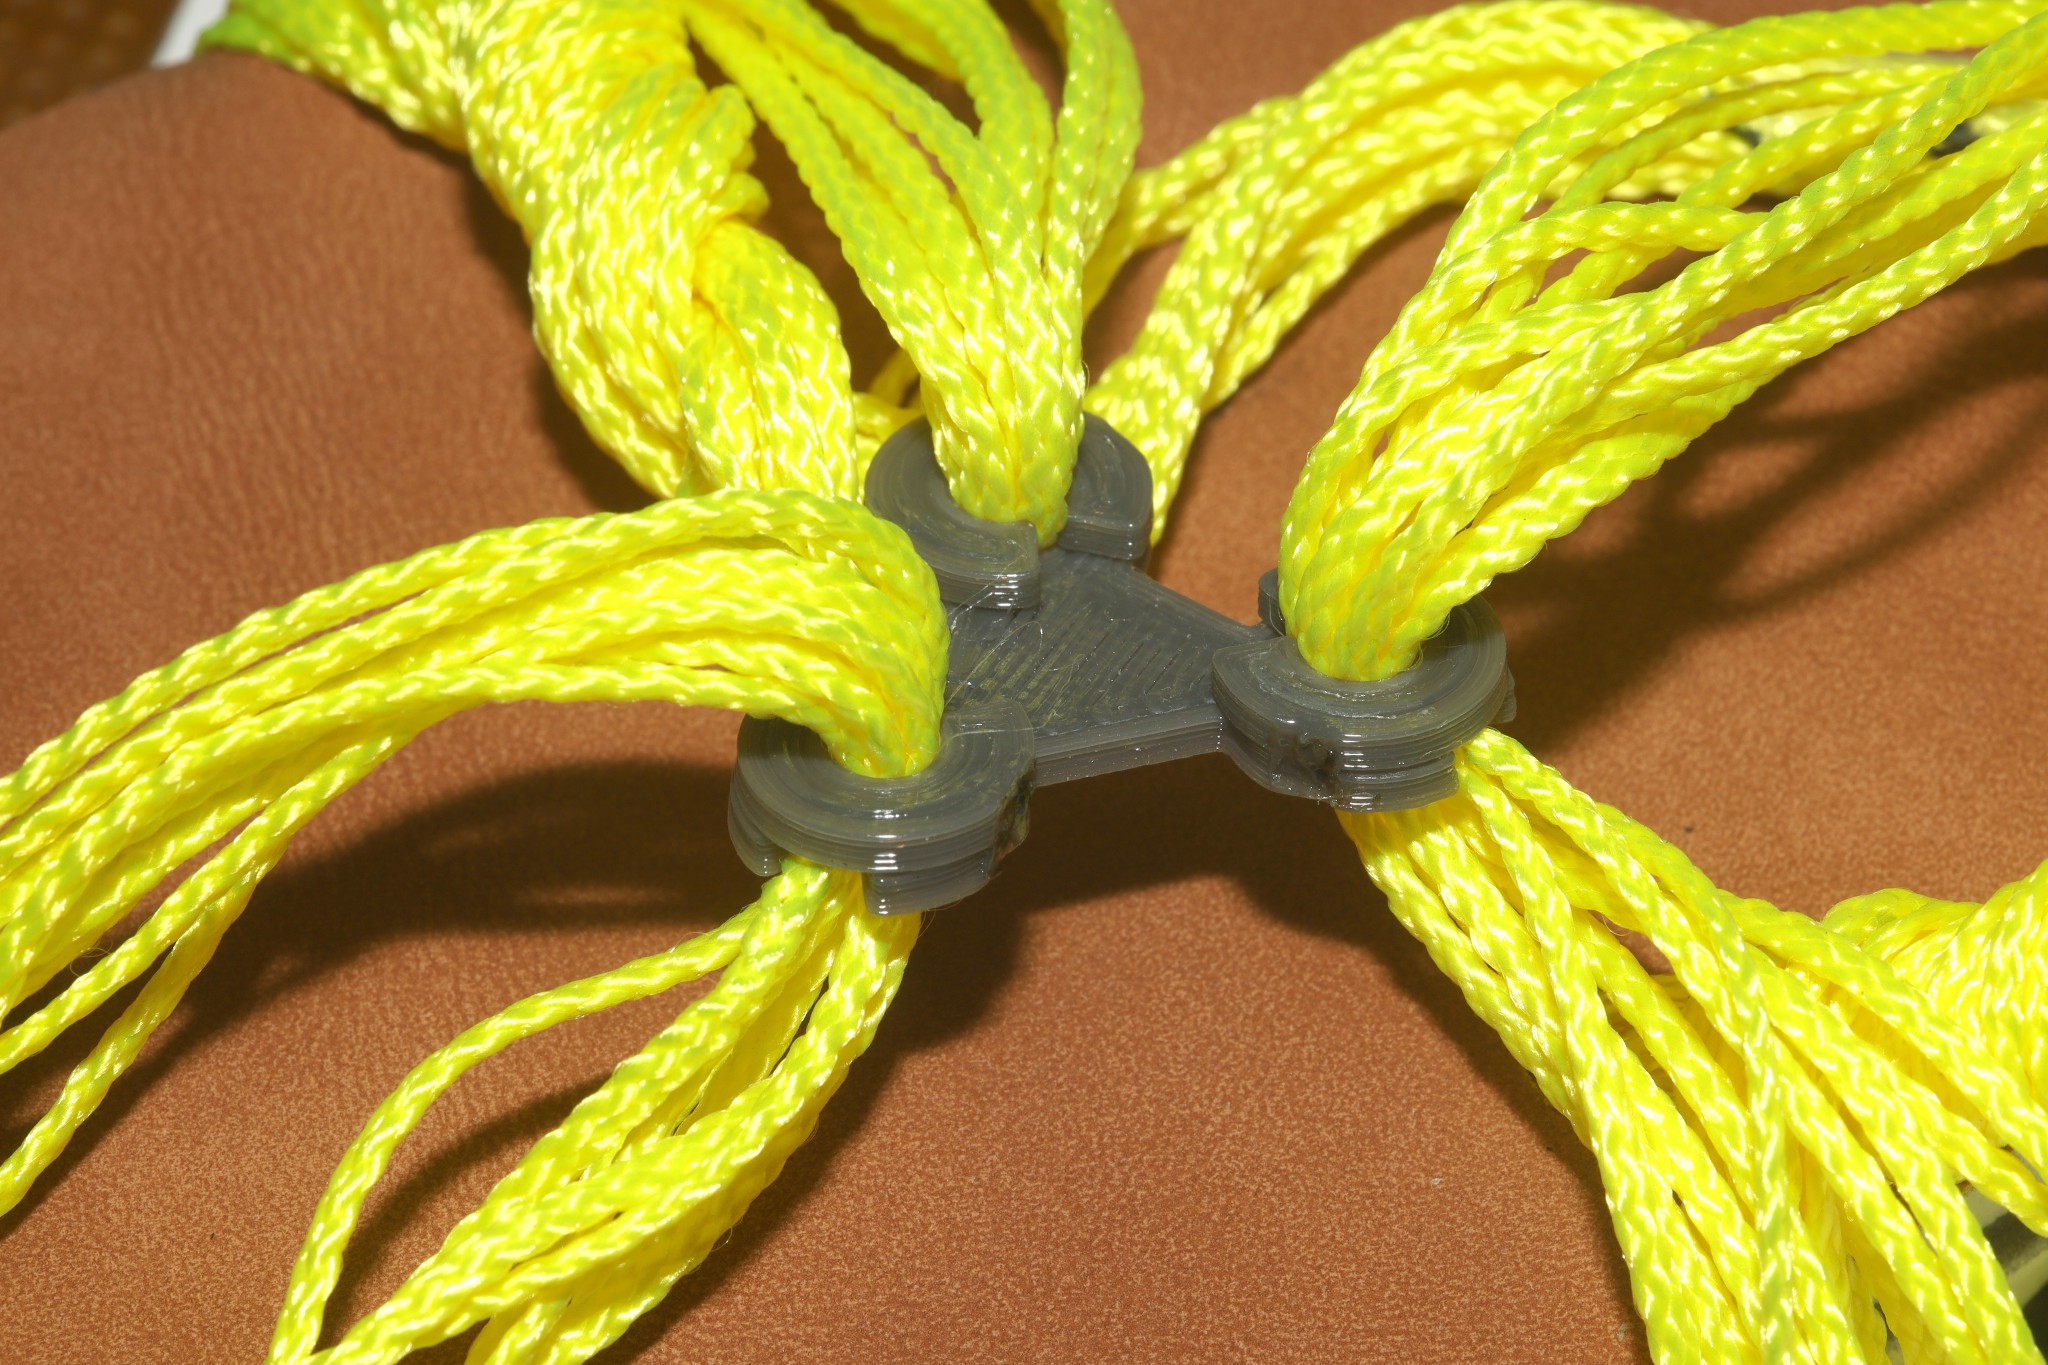
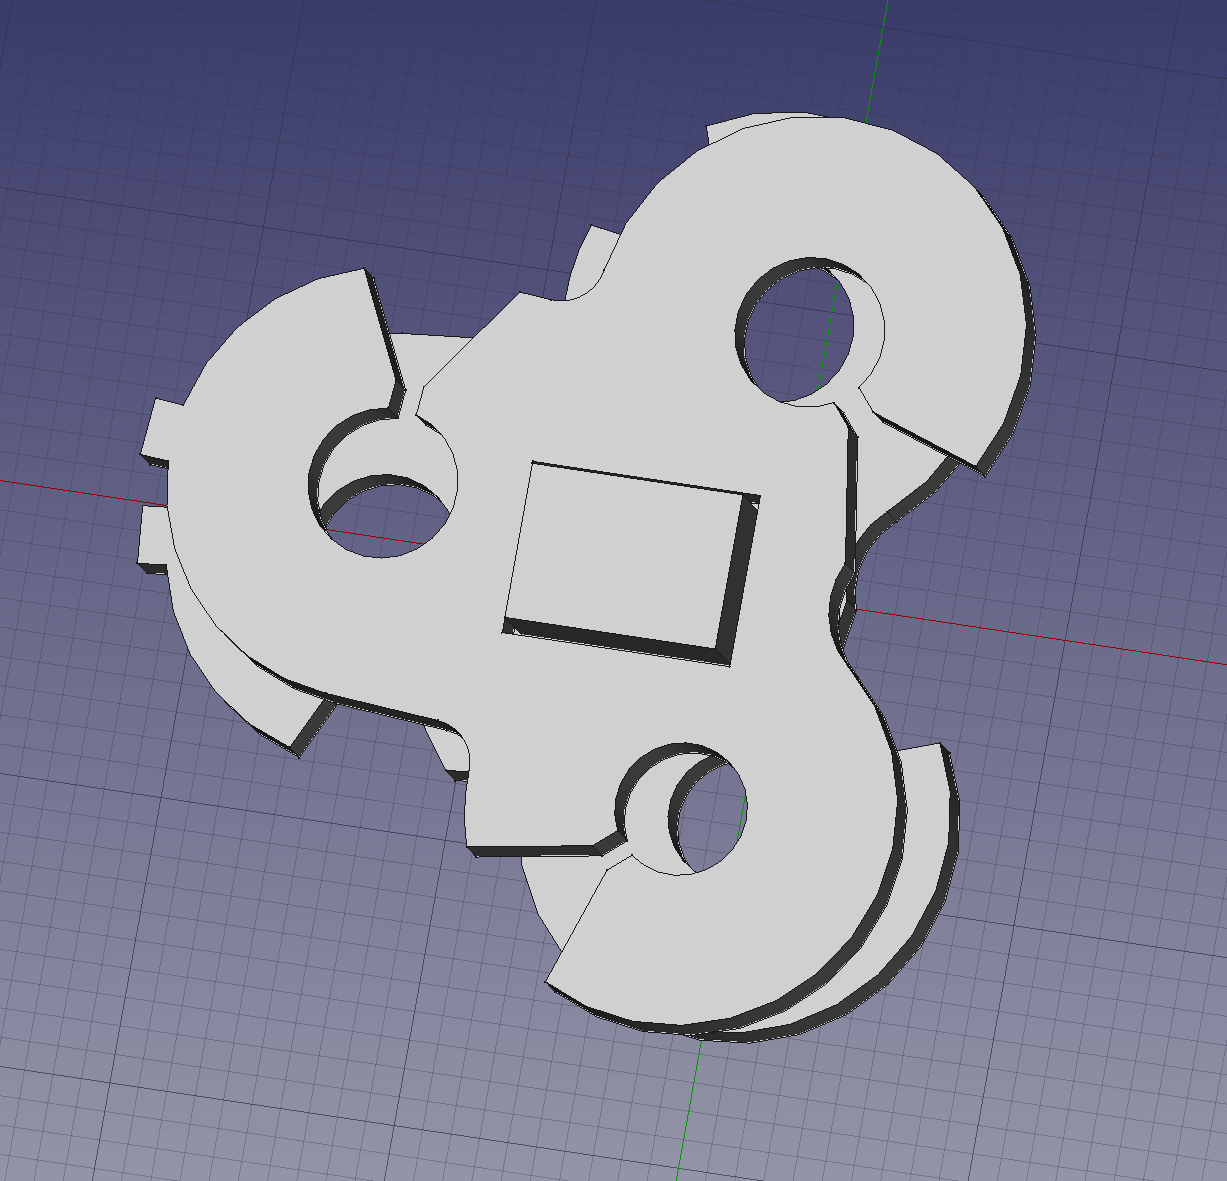
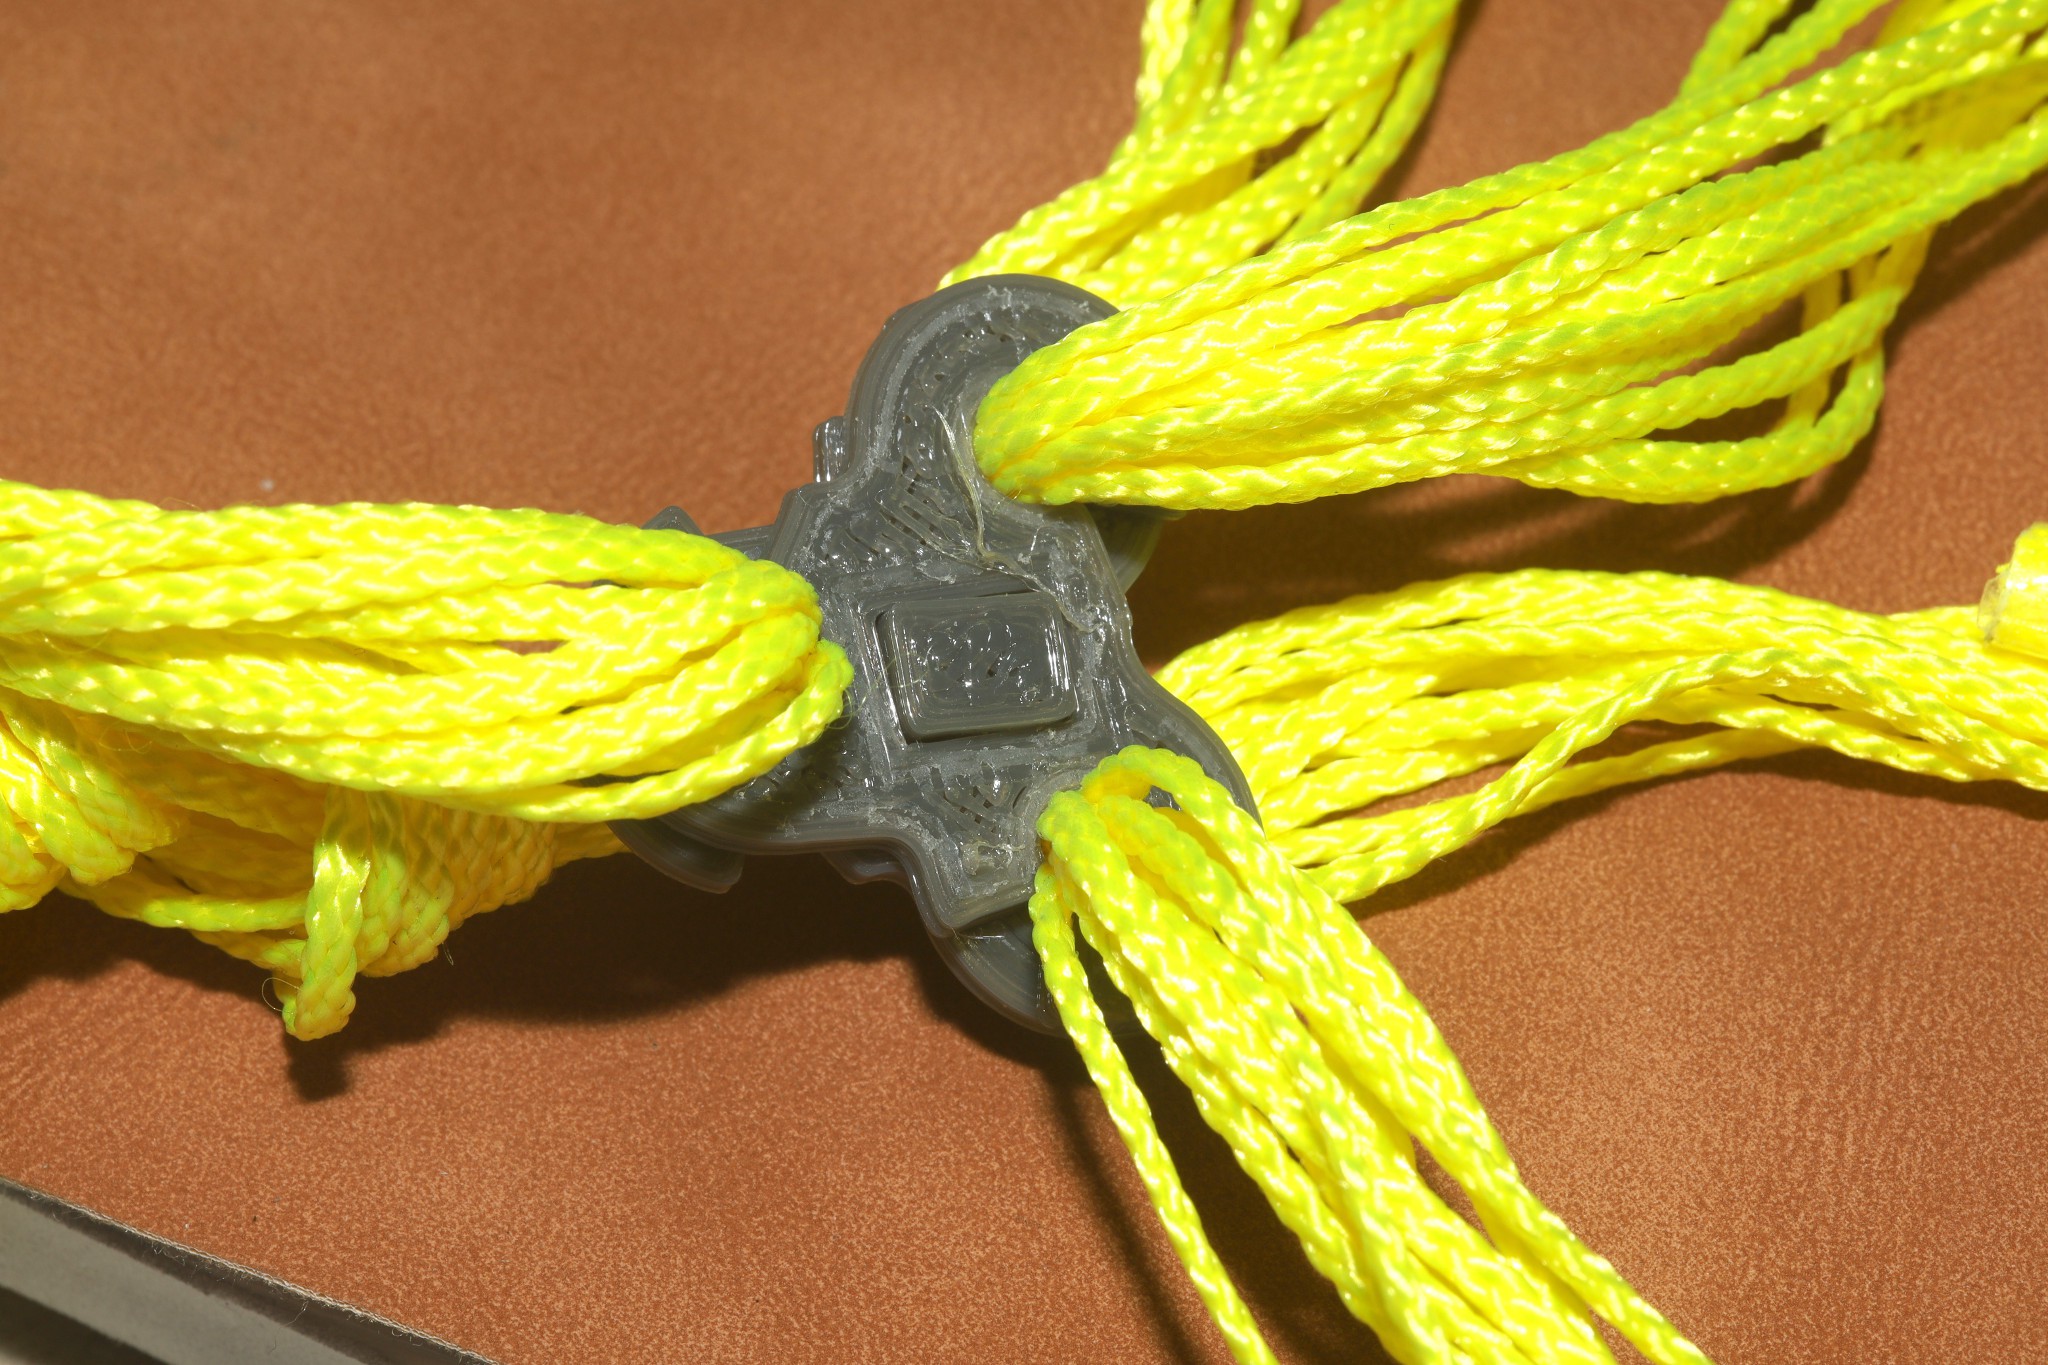
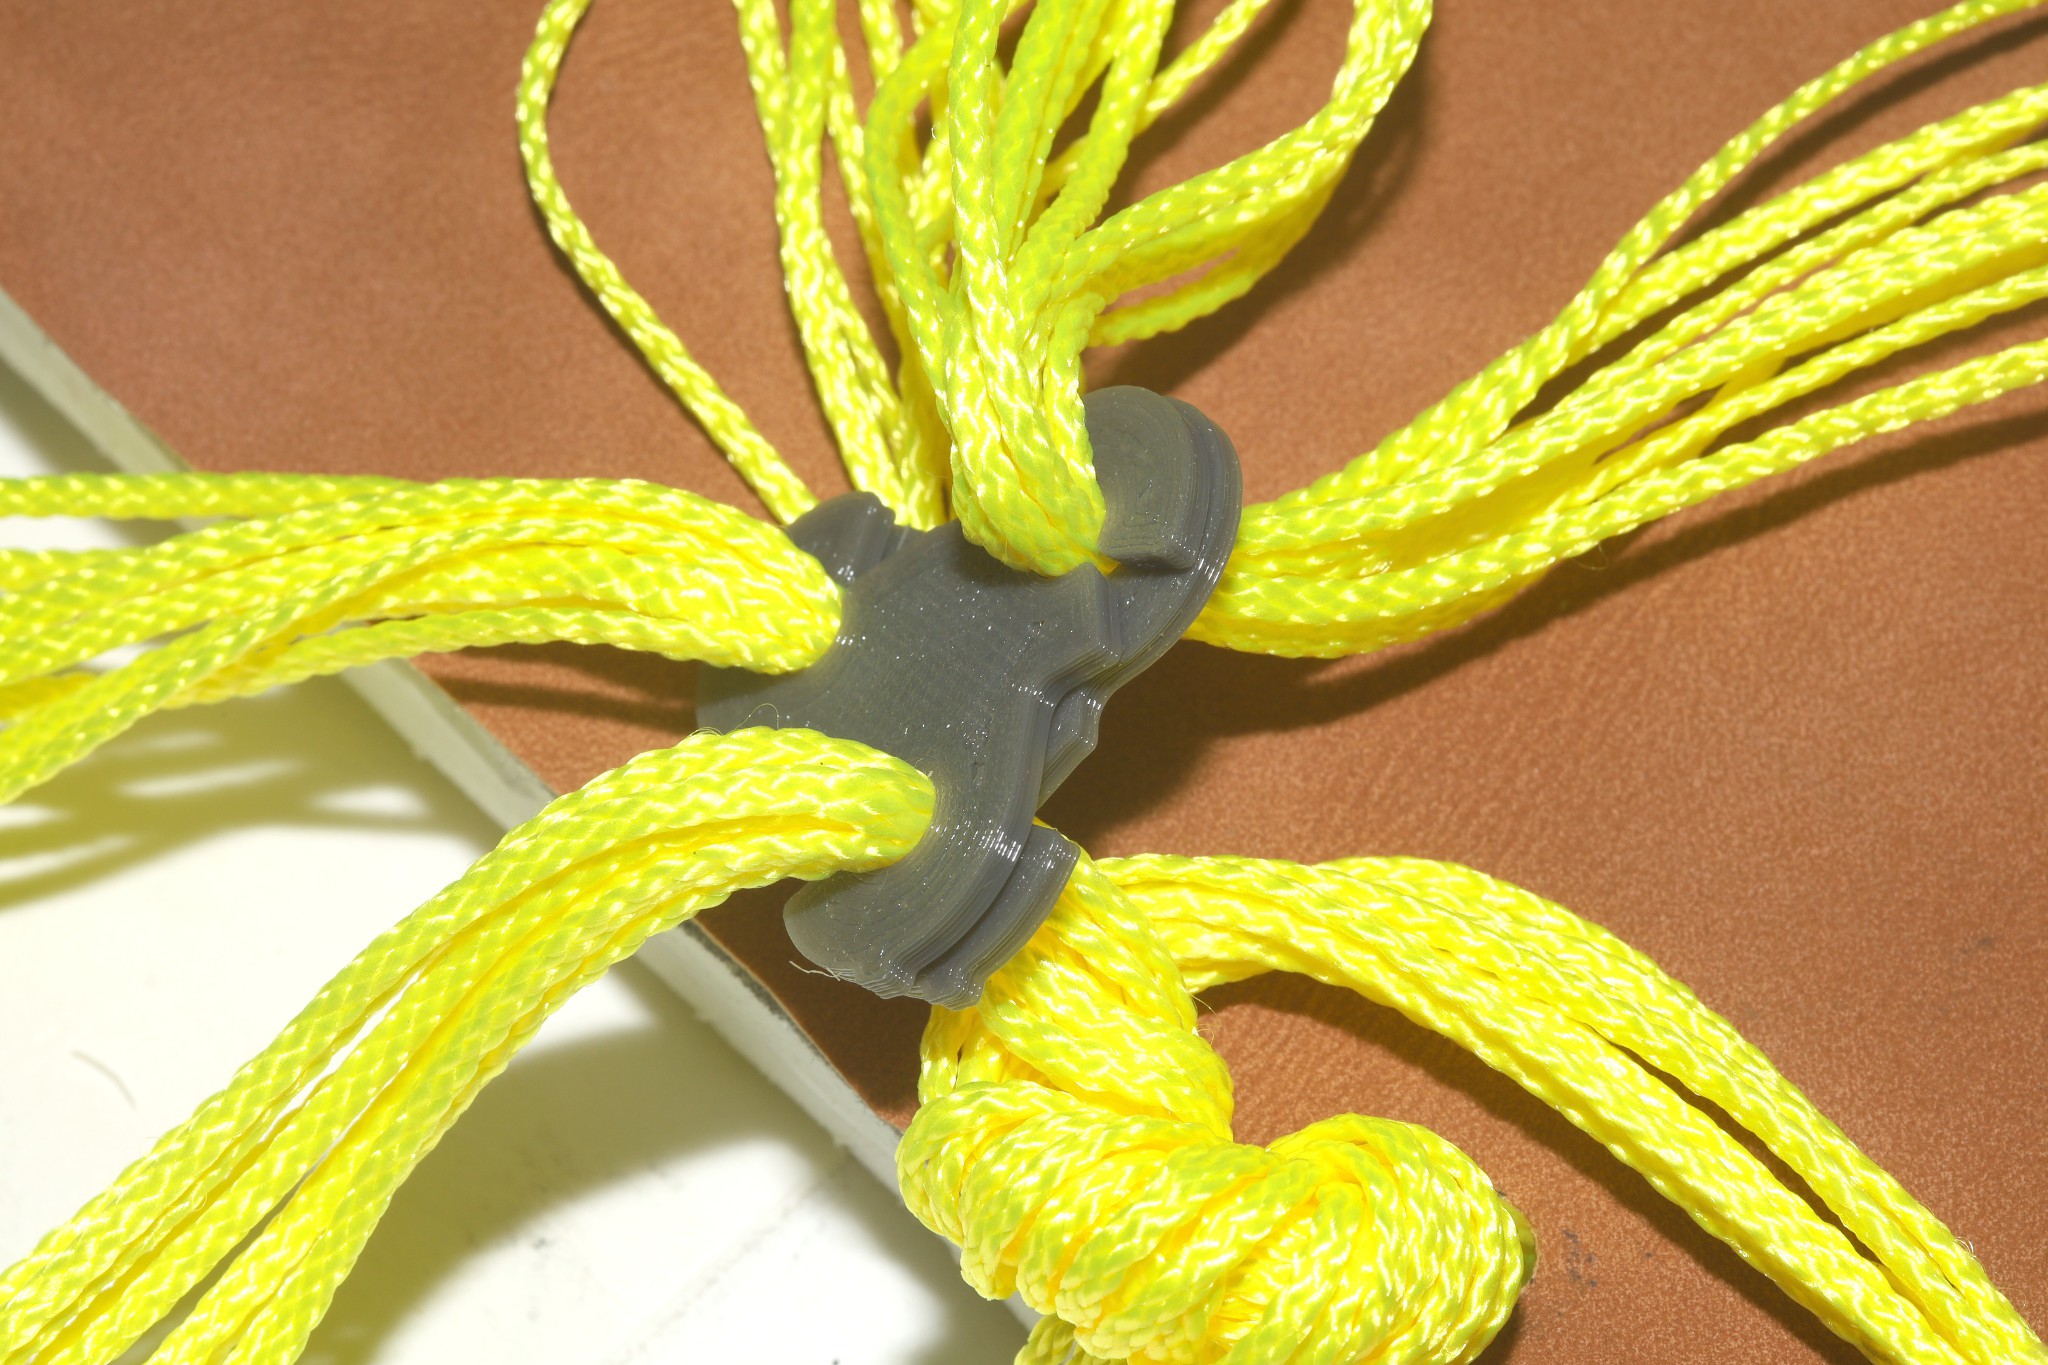
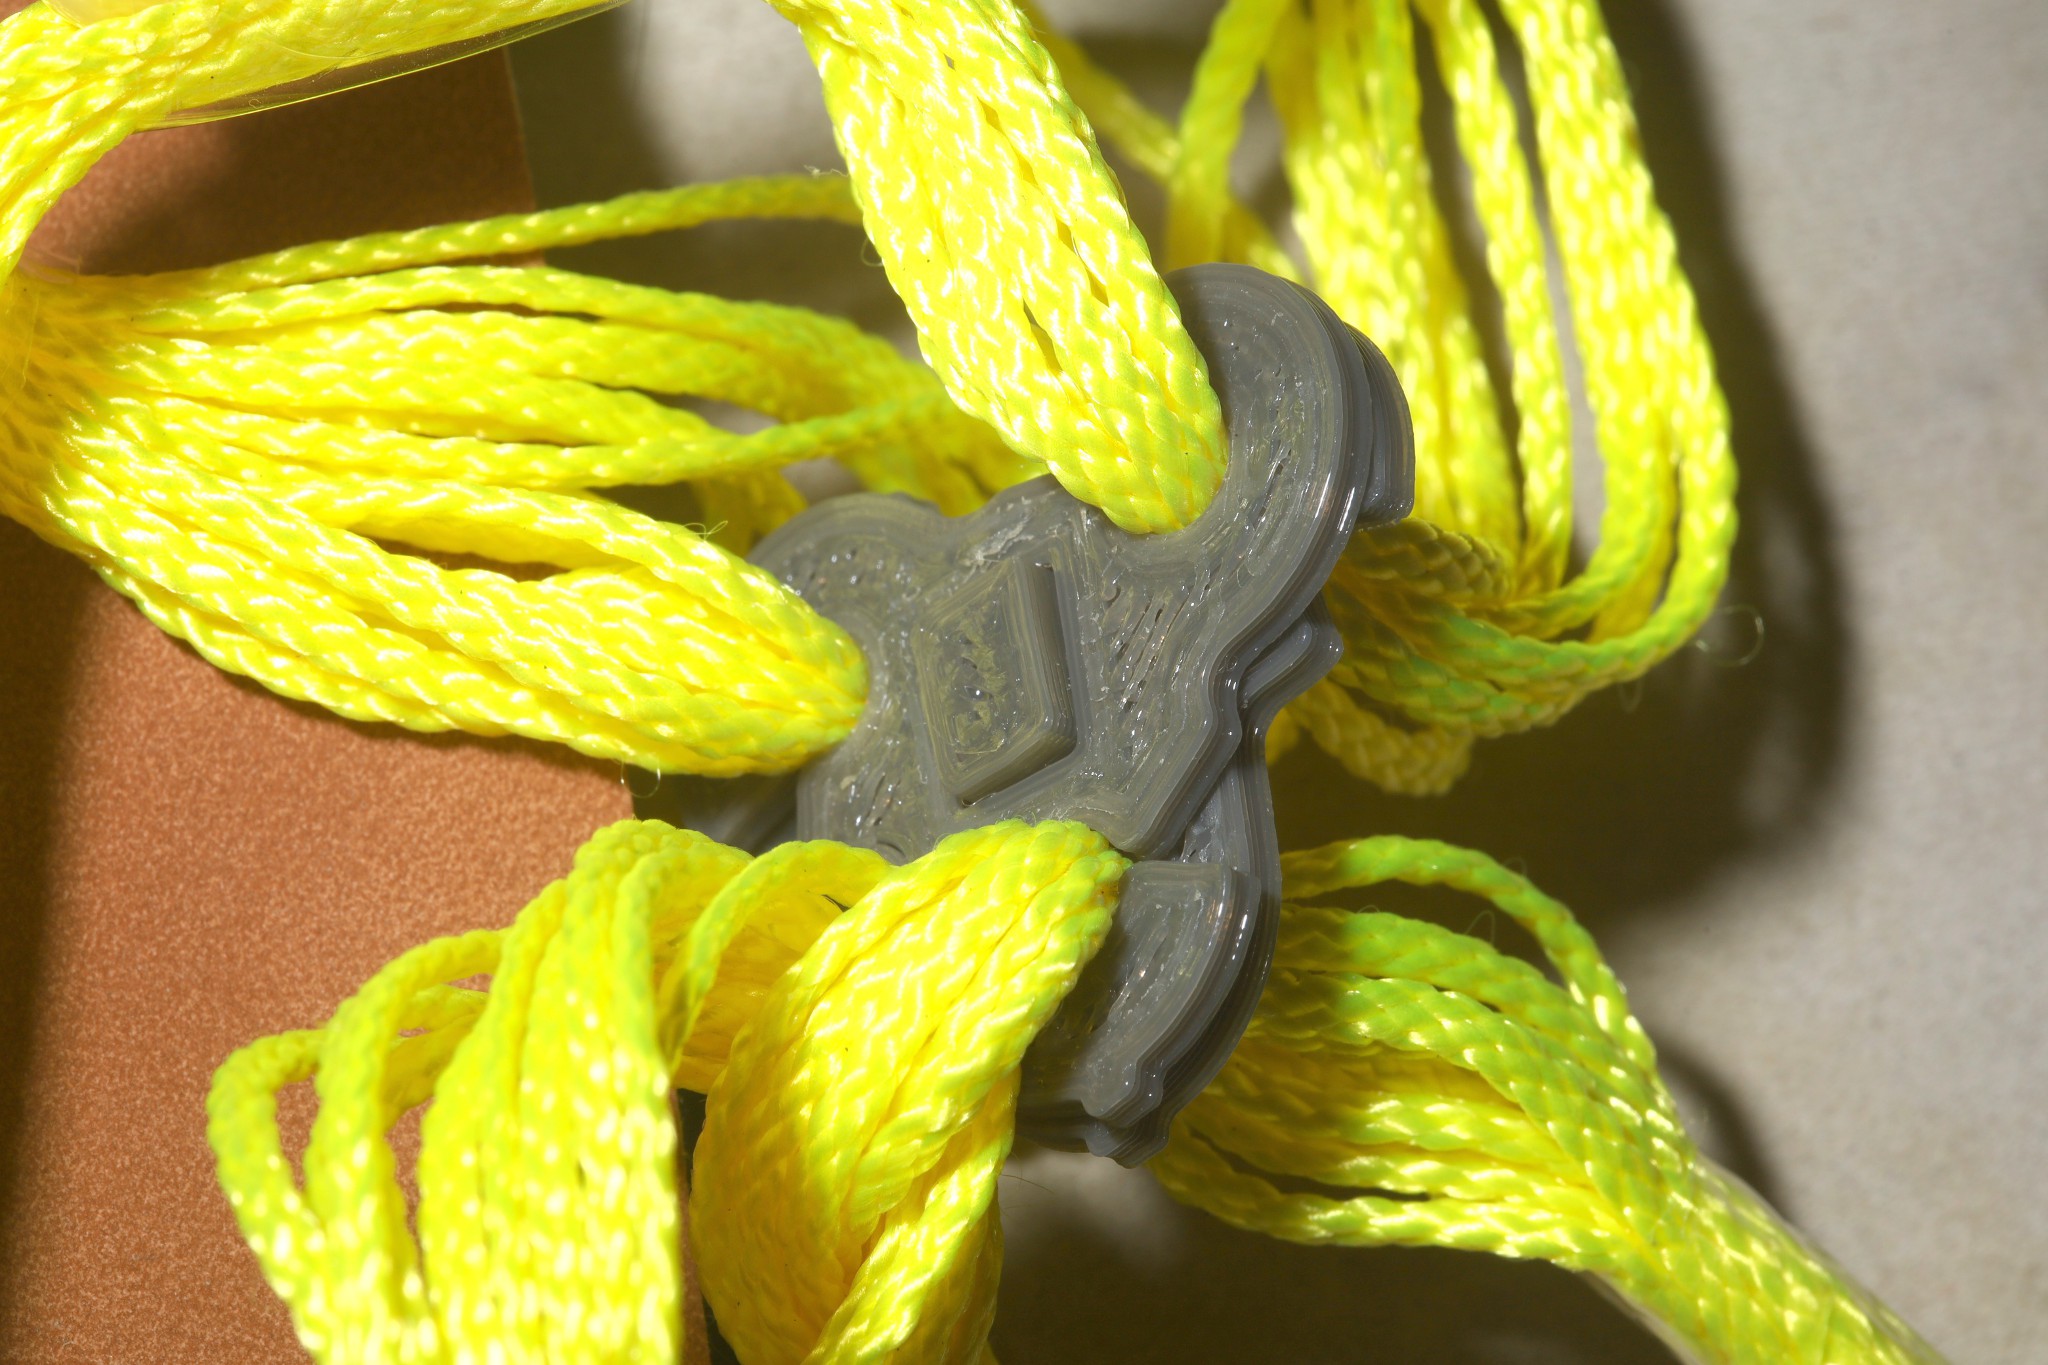
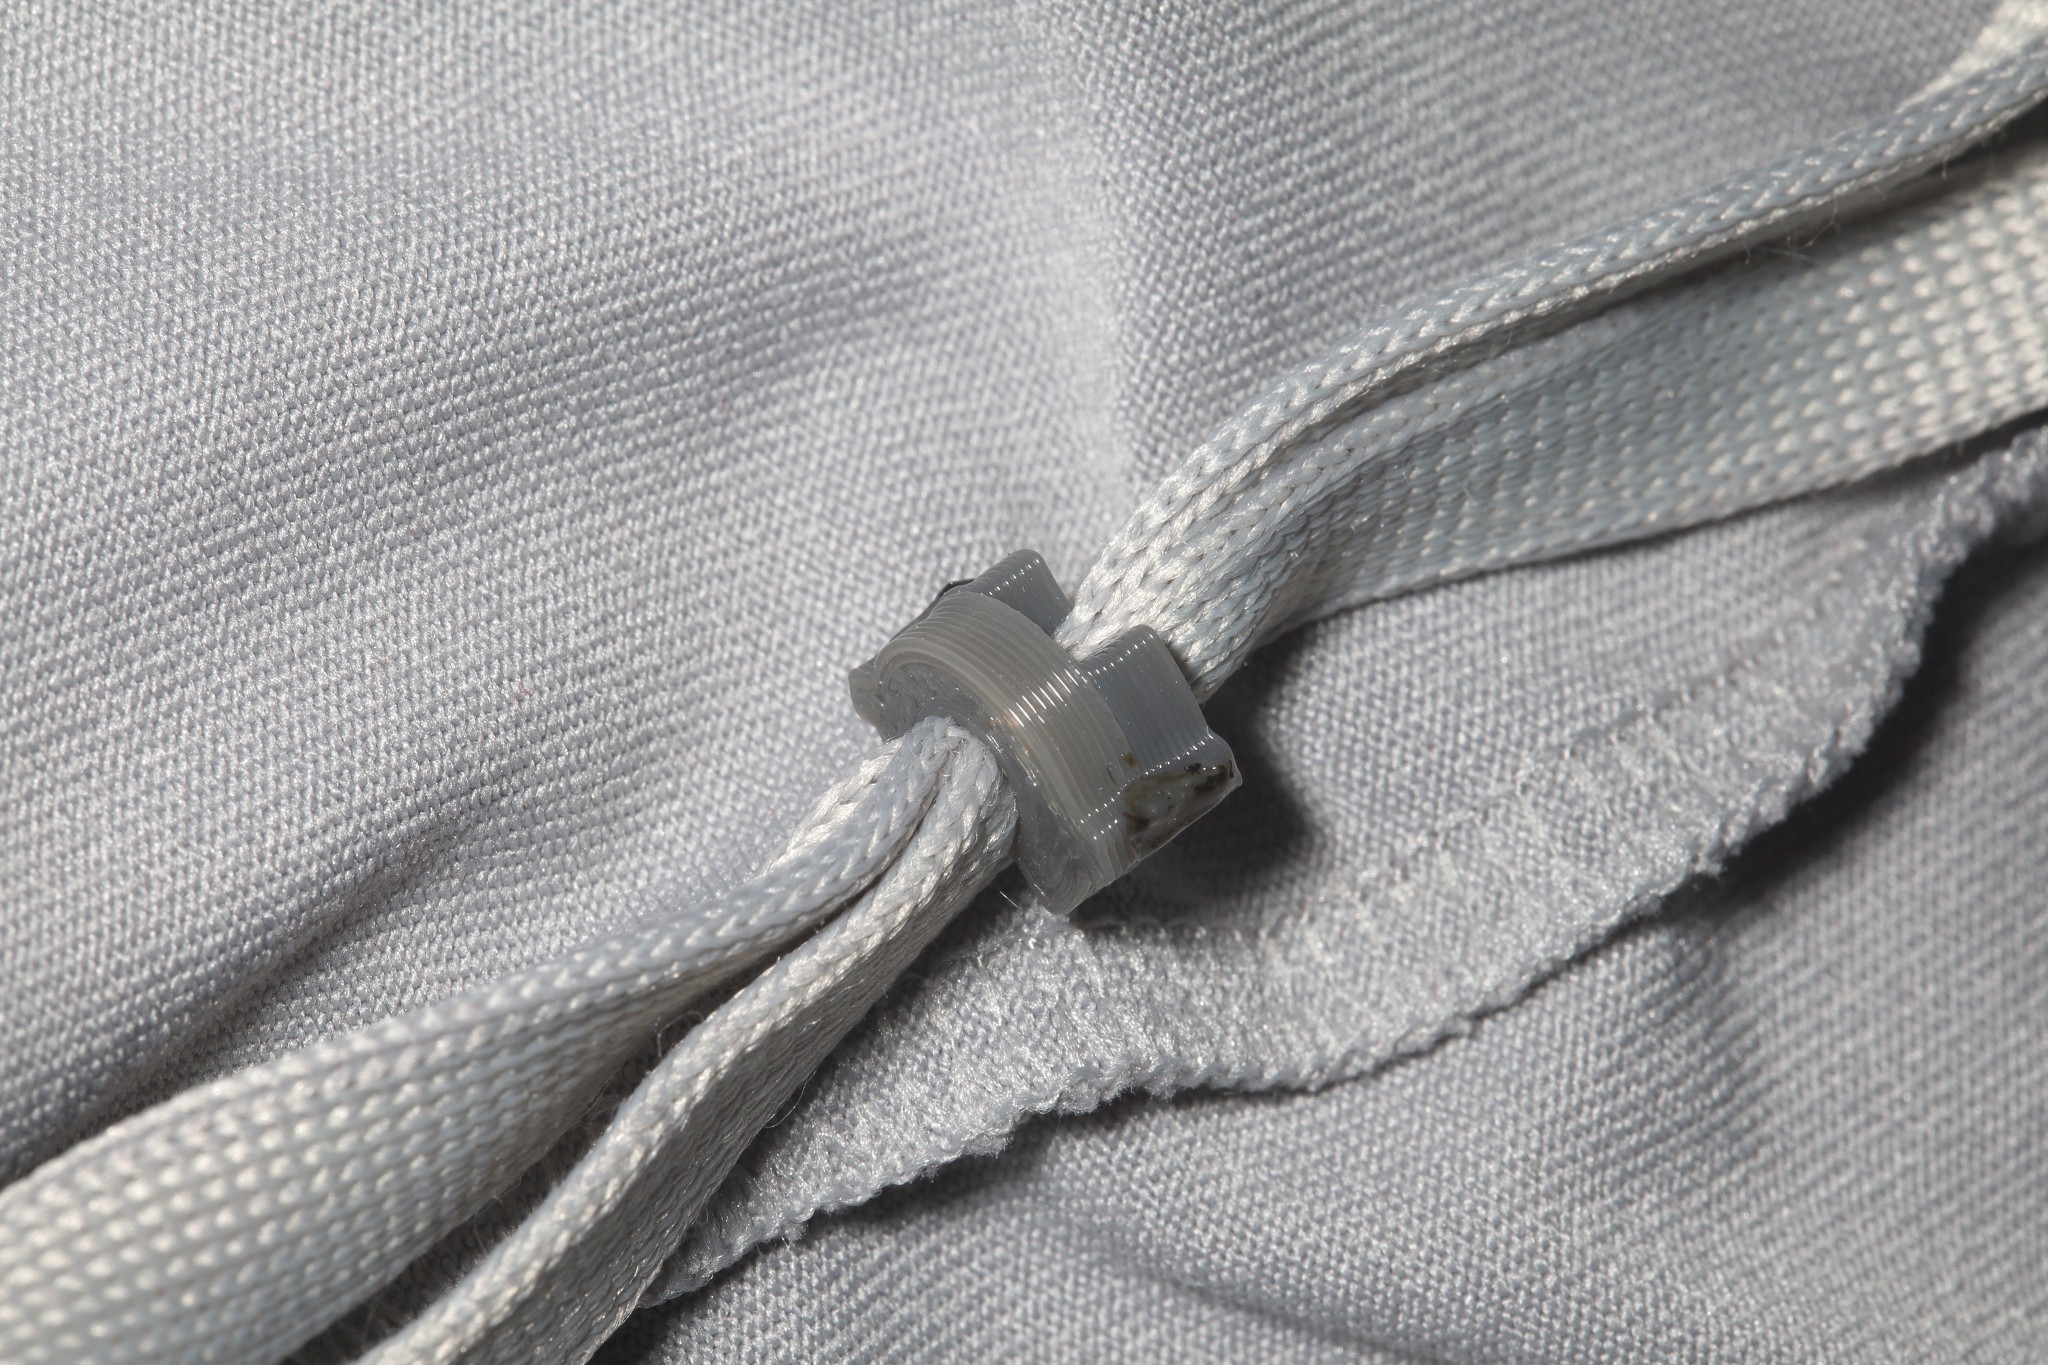
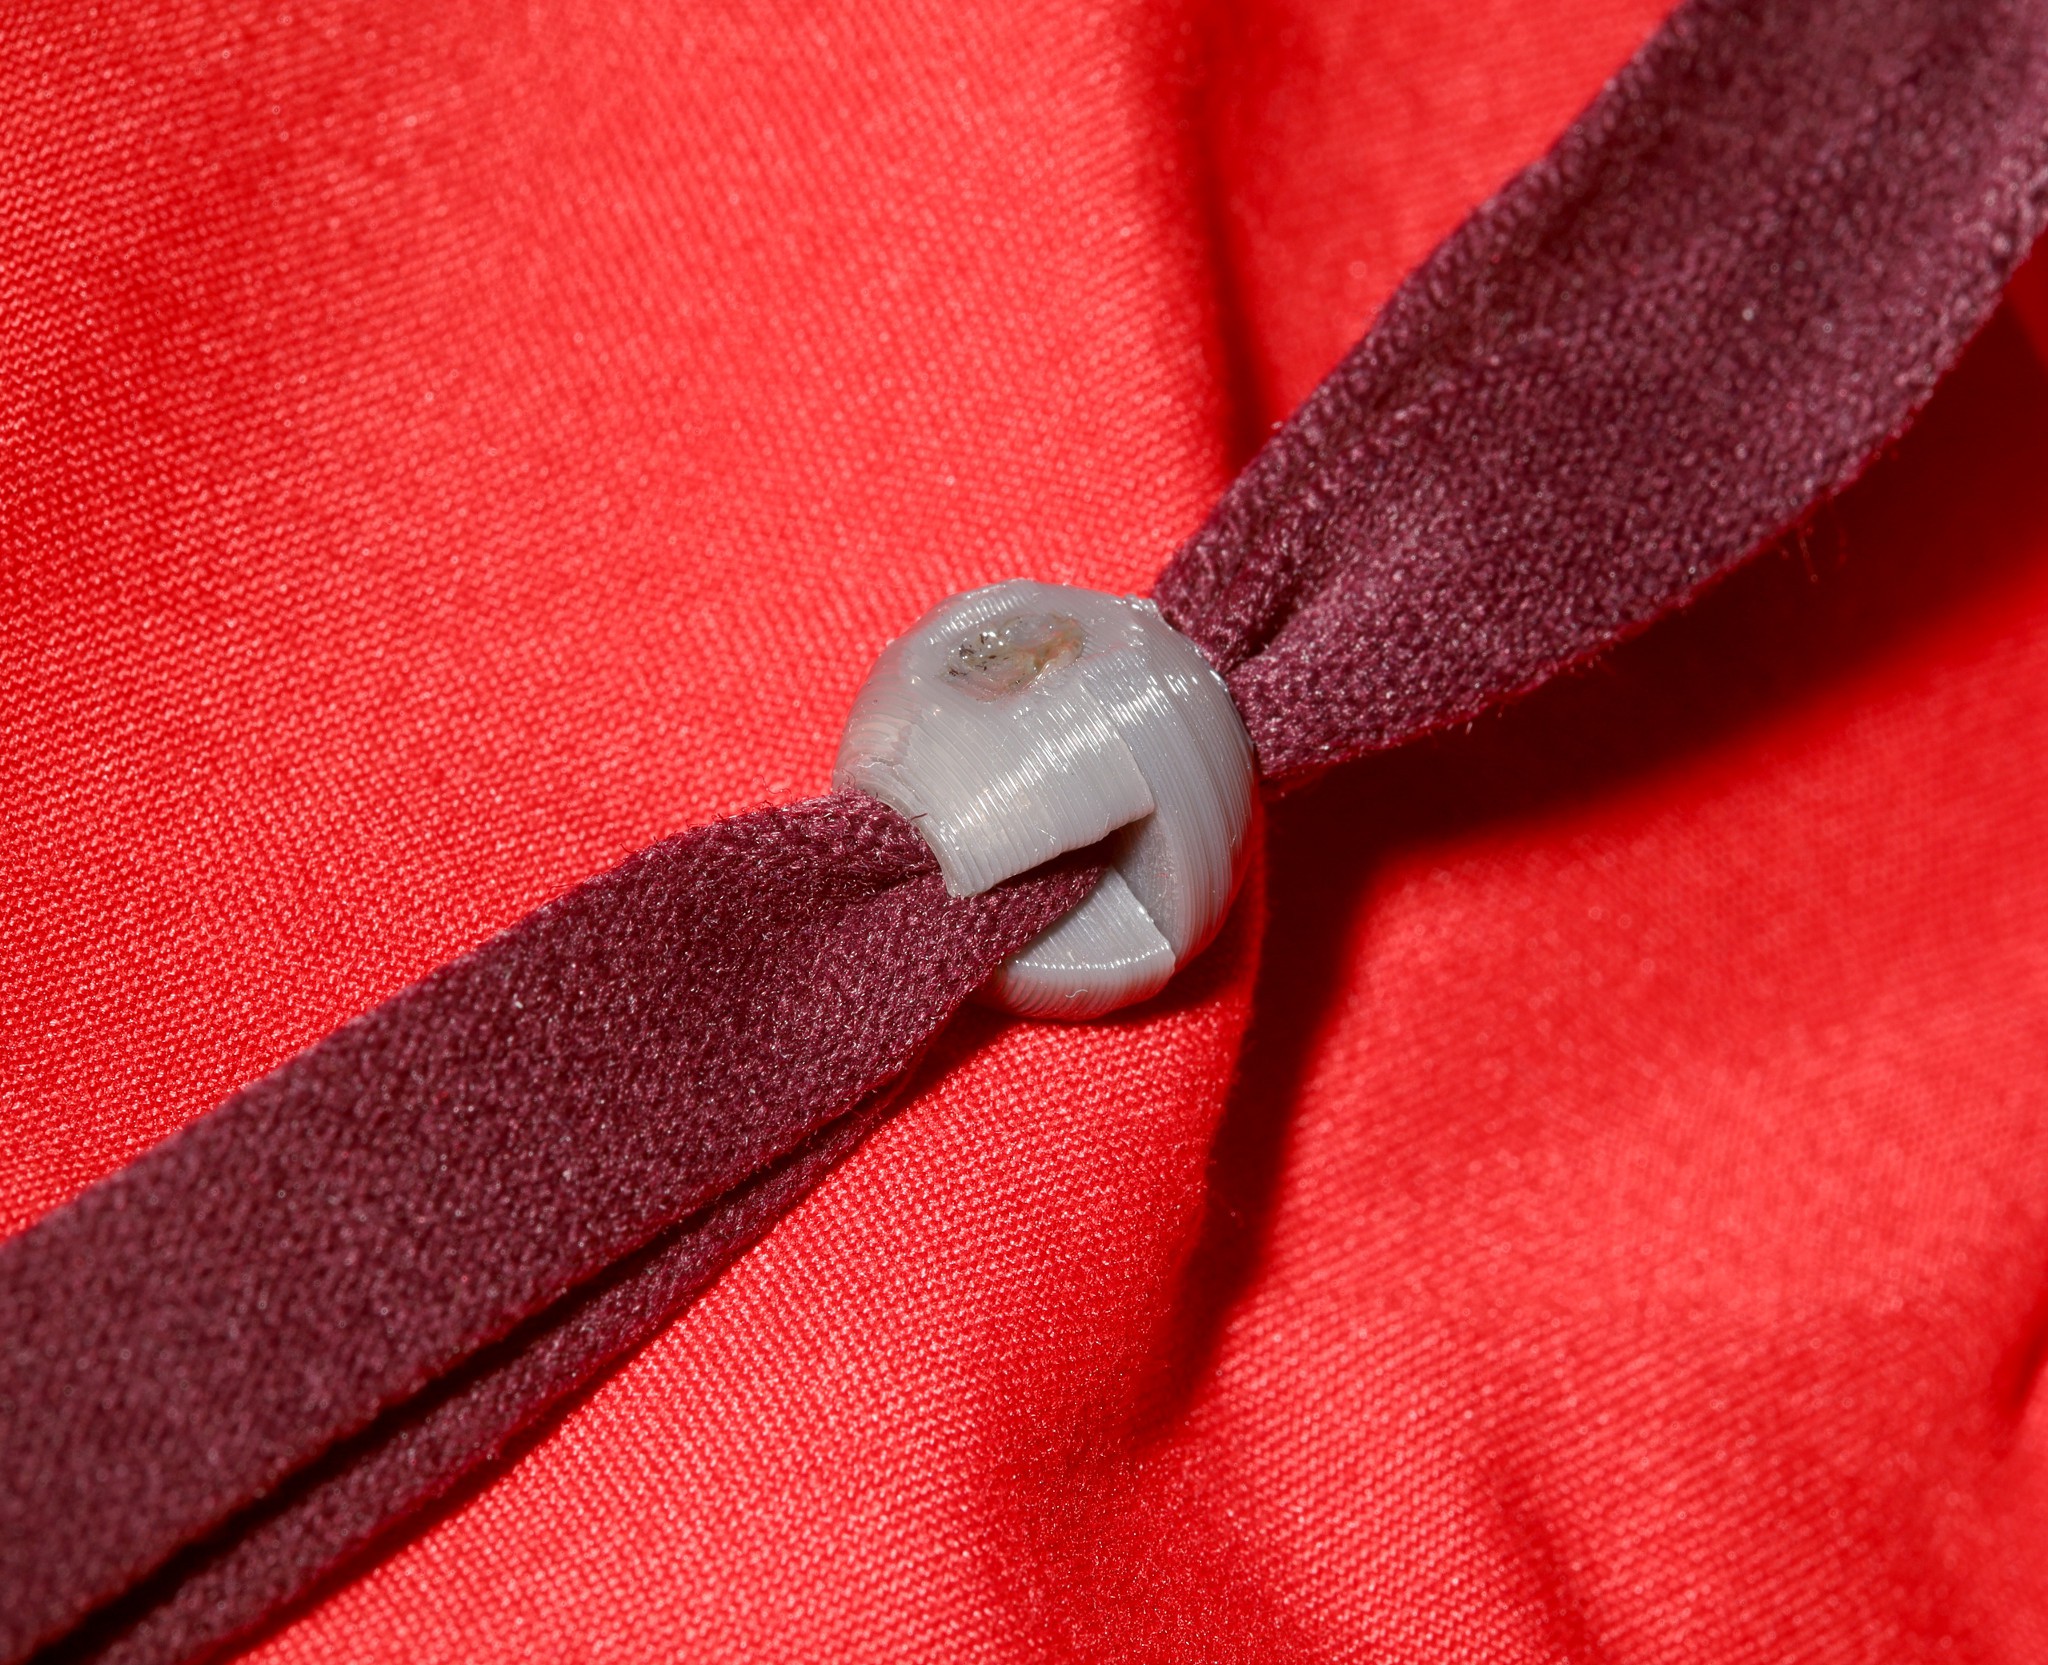
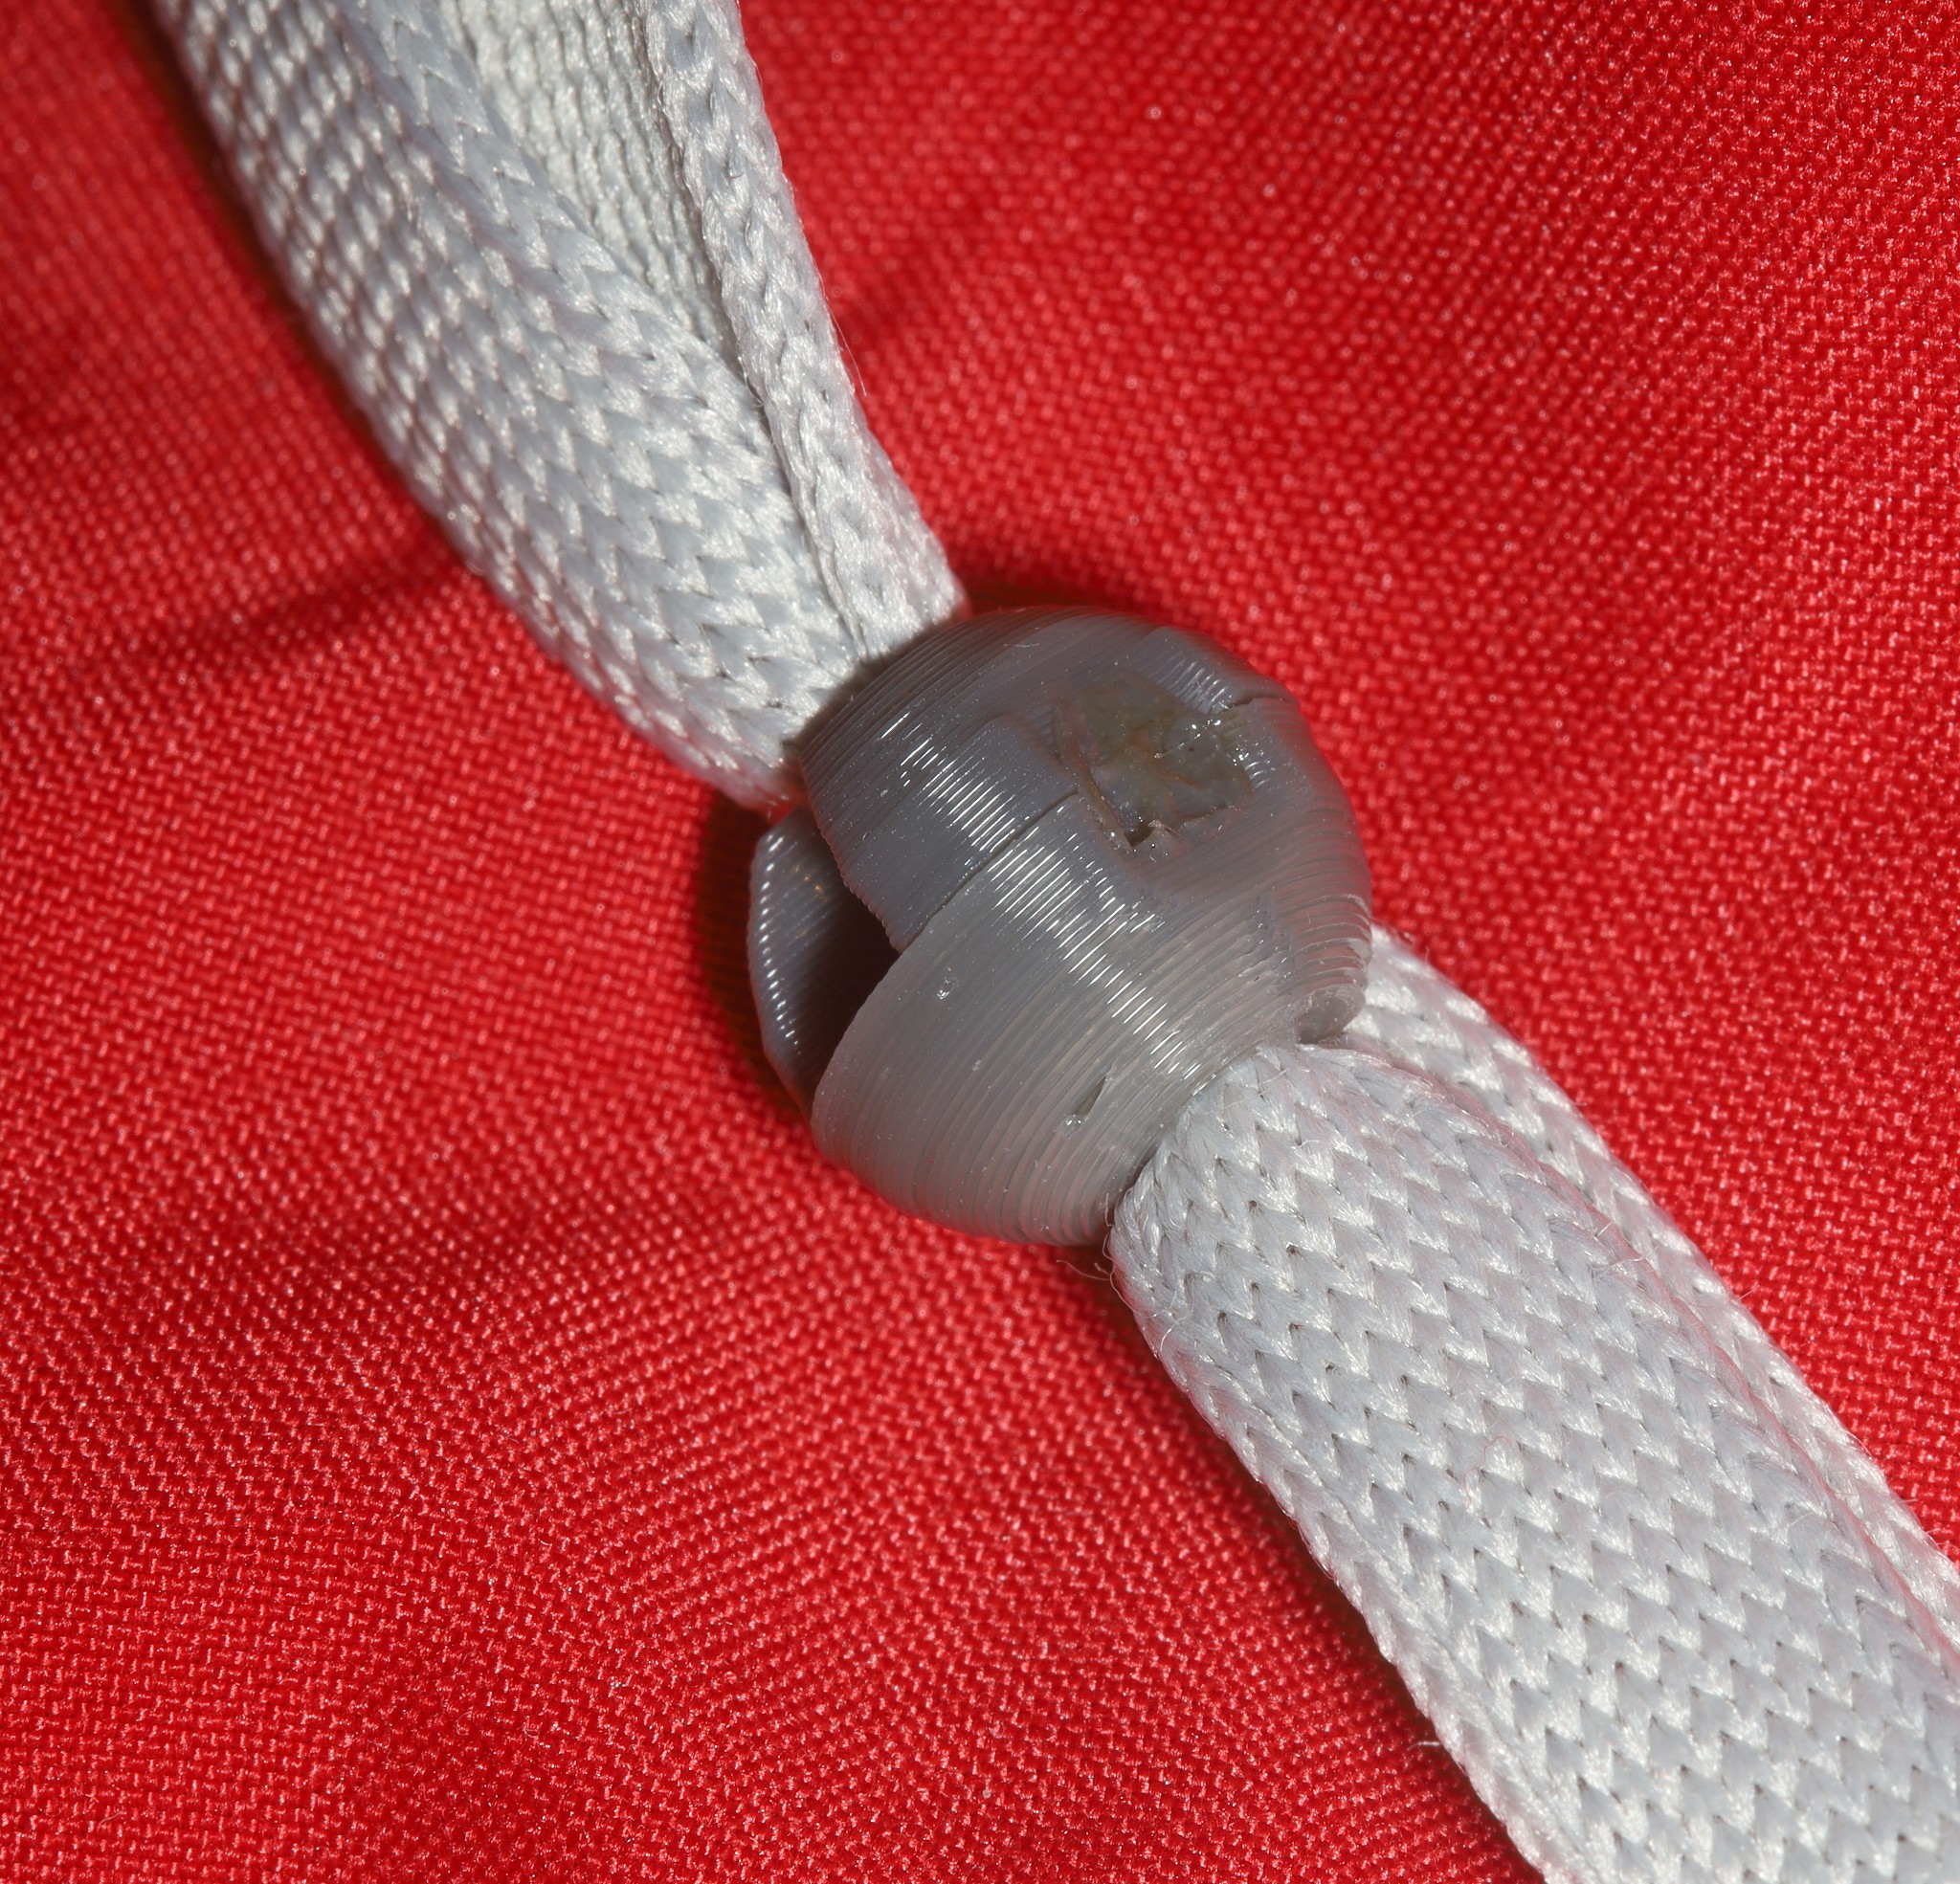
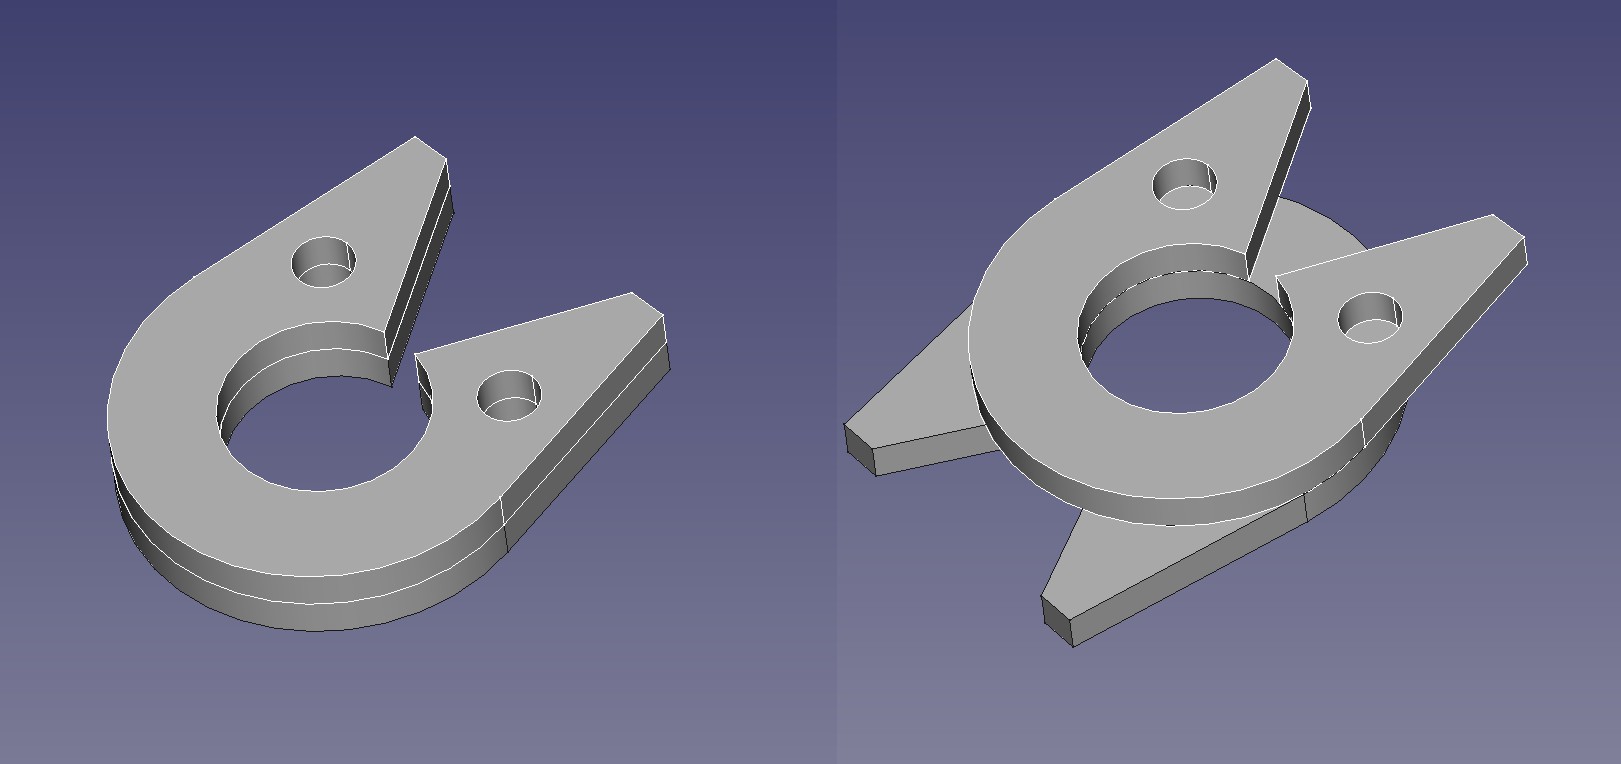
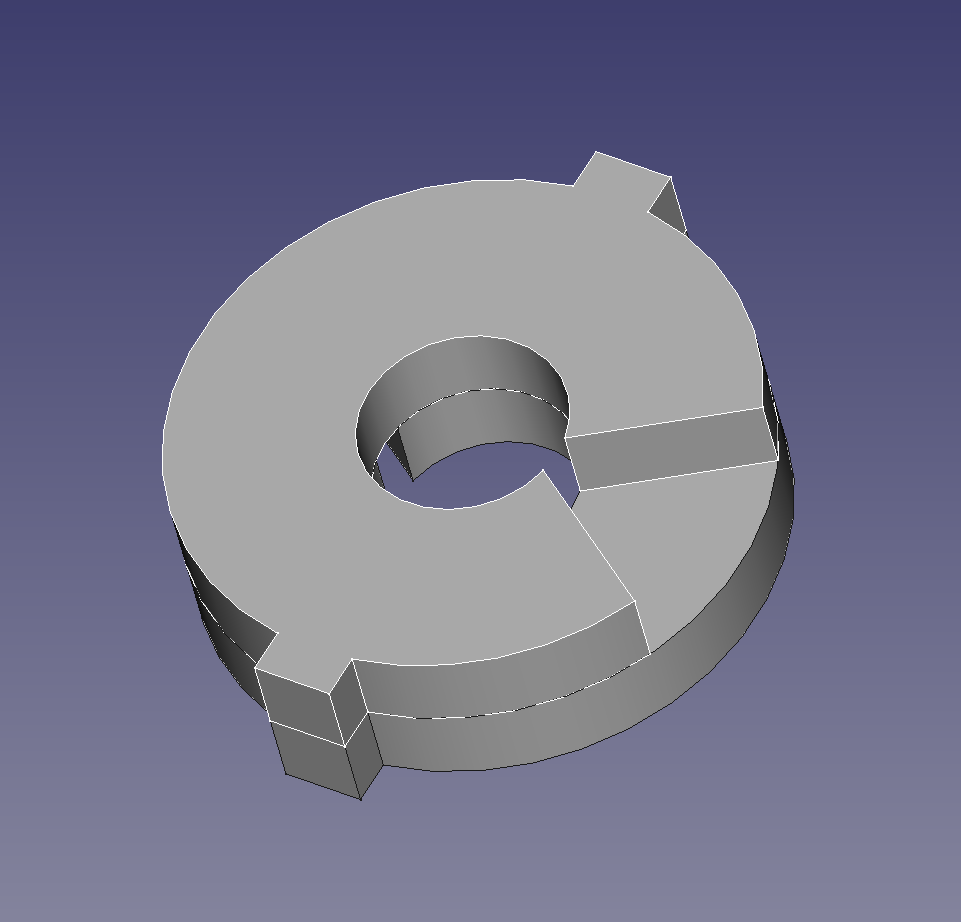
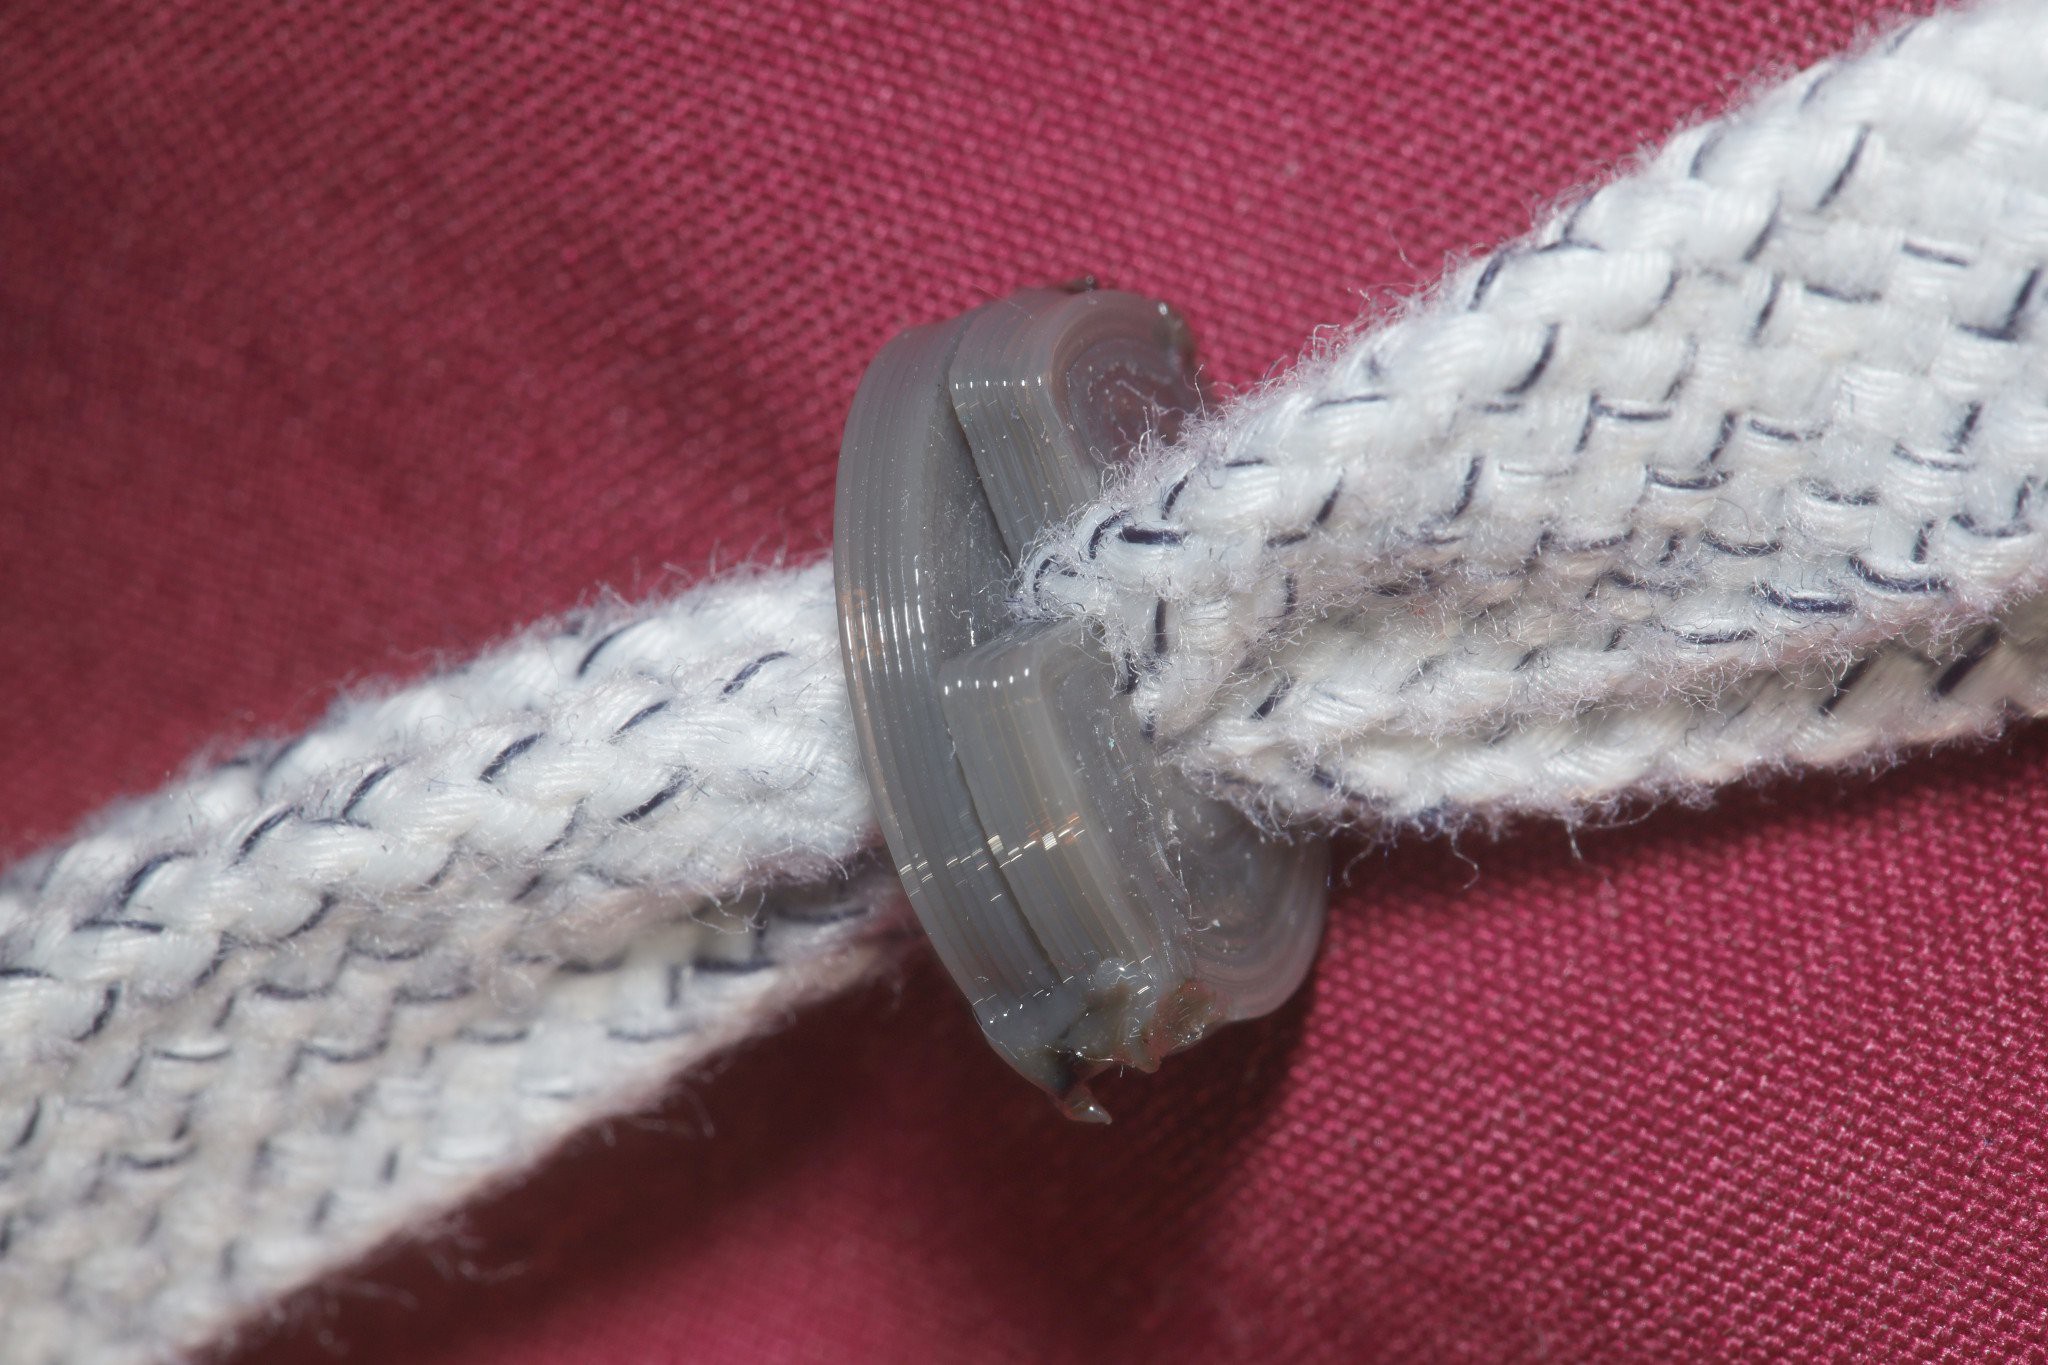
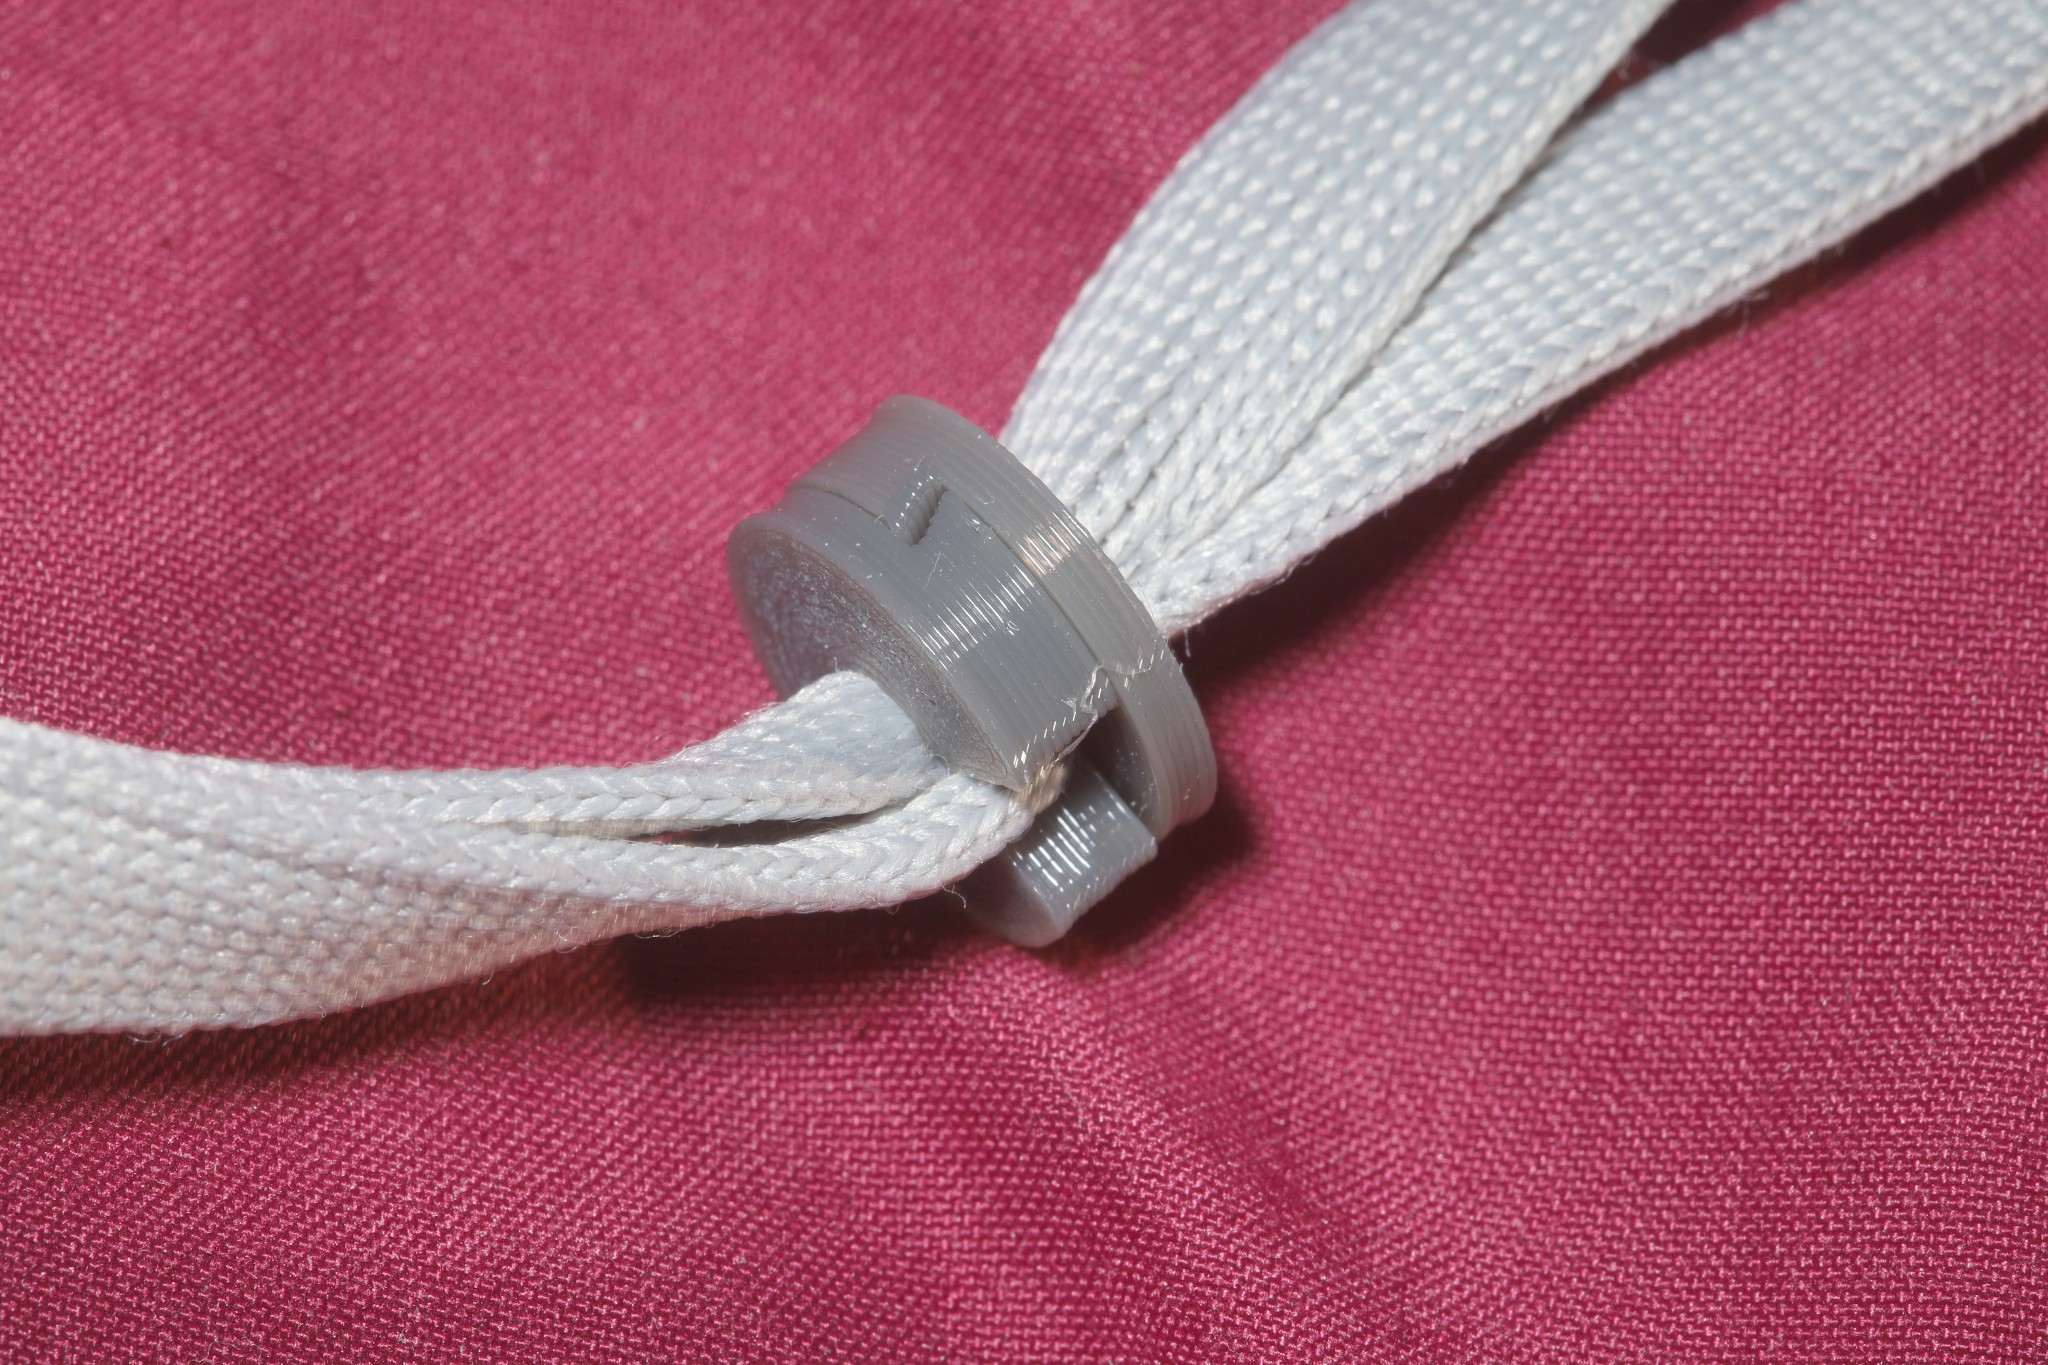
    The removable PETG design warped in the drier while the death stars so far retained their shape.  So the removable ones have to be painstakingly taken off before washing.  It's likely the death stars would deform eventually.  The trick is solving chafing with the removable ones.
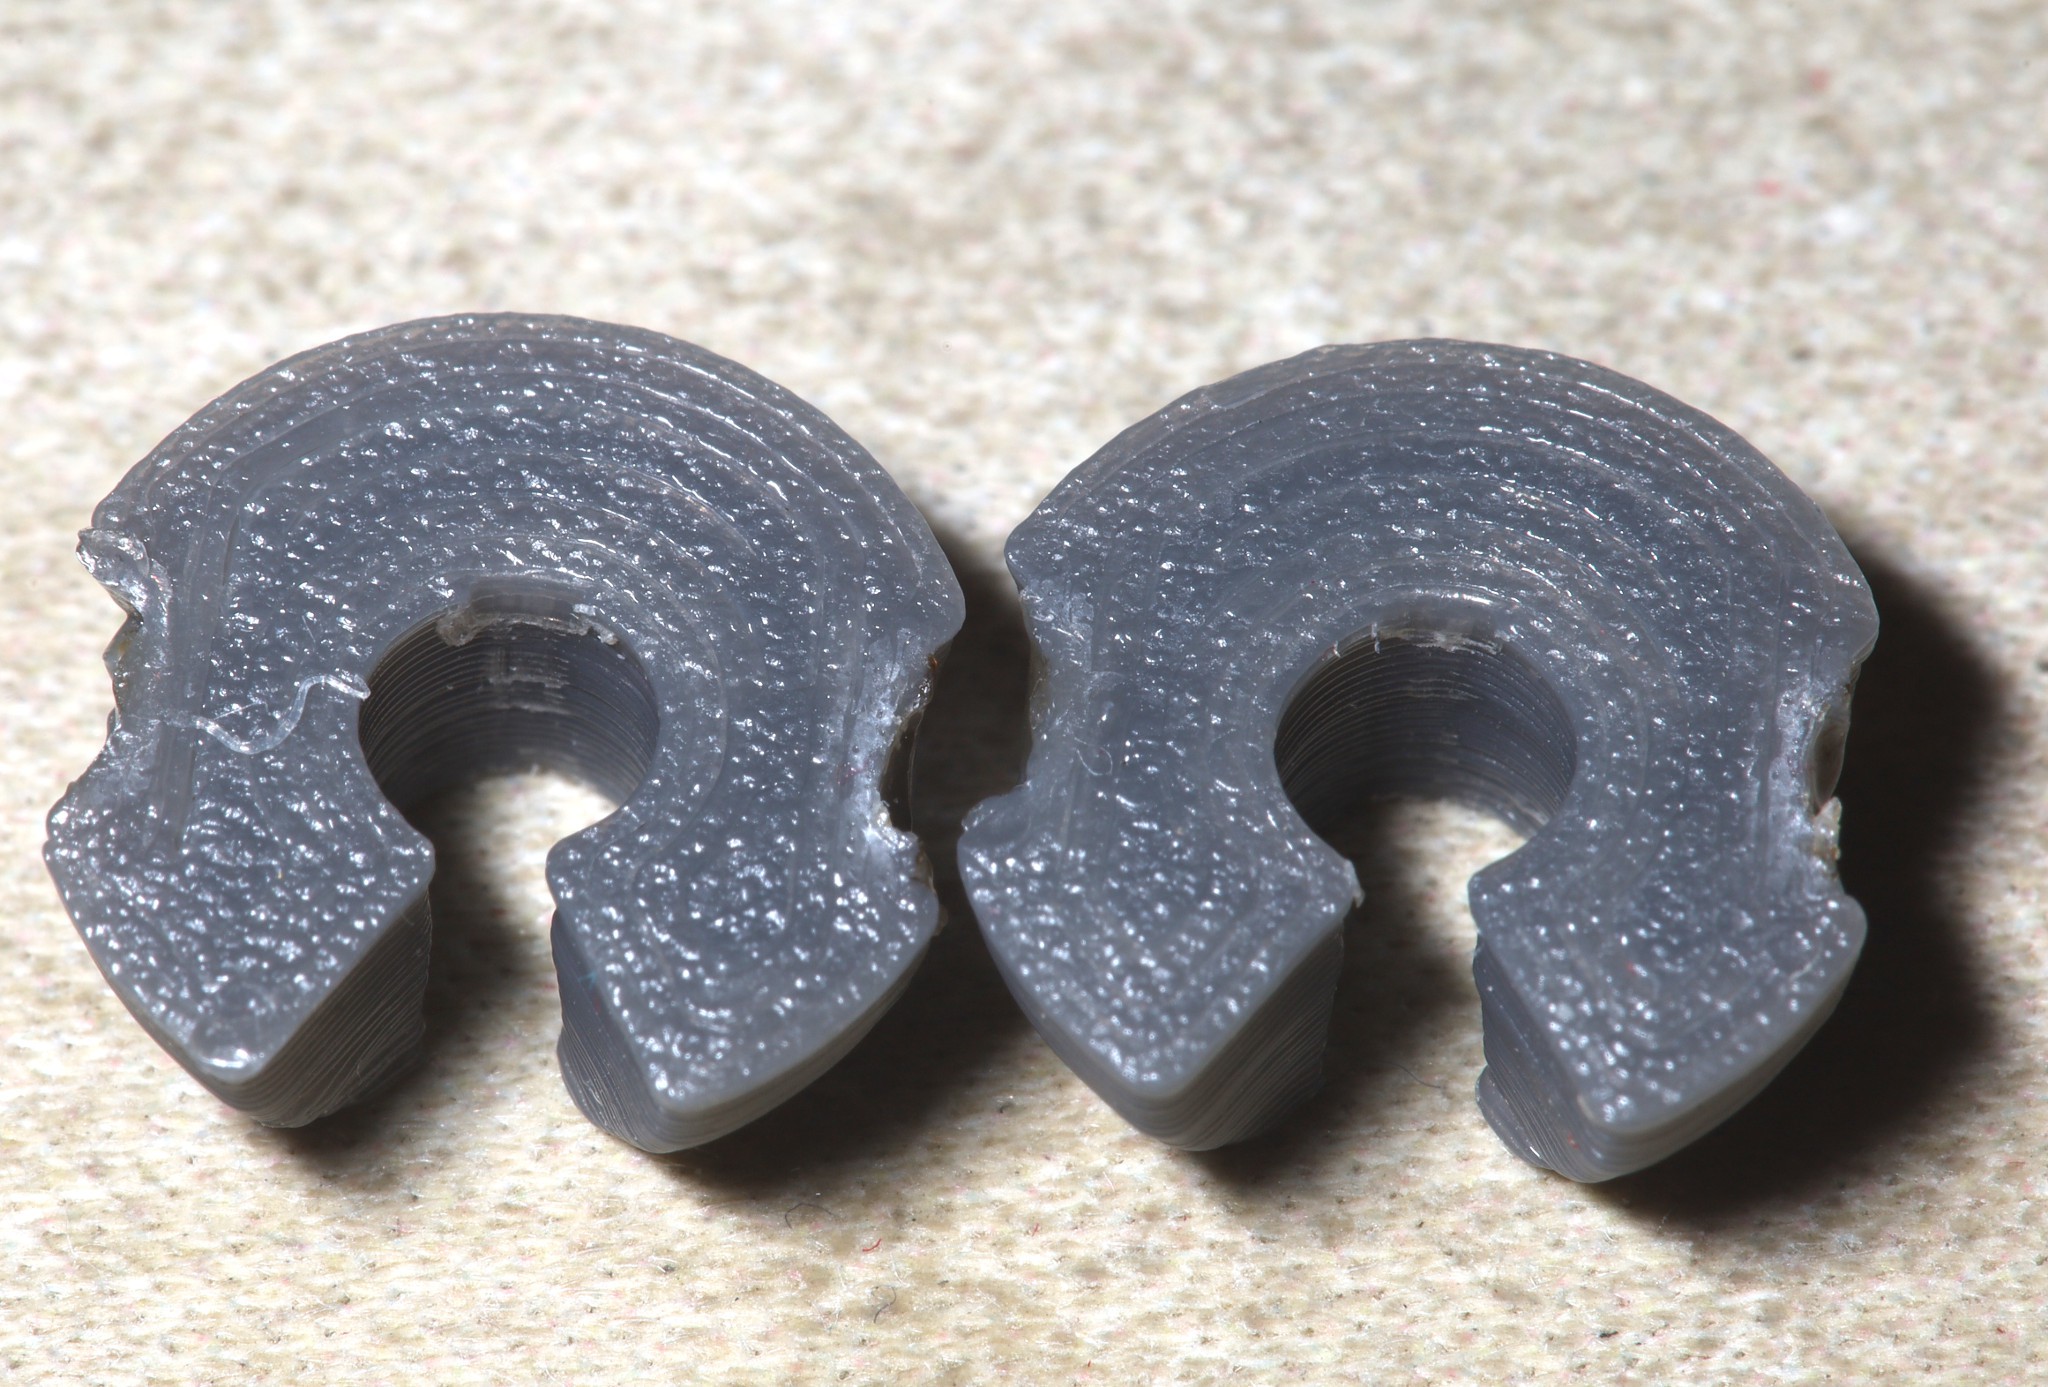
    The PETG eventually wears down.  The hope is a material will stabilize before it loses all tension.

    Testing began with a hard TPU variant.  This is going to need larger dimensions, but it might have less wear.  It still has a chafing problem & it does deform under a static pressure.

    Chafing from TPU was still bad enough to try a TPU death star.  This one had .5mm crimping offsets modeled in. .2mm offsets for crimping seem to be ideal.

    The trick with a removable death star is the semicircle either has to face the bed or it has to be welded on.

  • Removable design

    lion mclionhead01/29/2025 at 10:20 0 comments

    The sandal cord locks stayed in place without any welding, which made lions ponder if the single opening design couldn't be made removable.  The sandal cord lock uses an unwelded tab to crimp the string.  The pressure of the string & the rough laminations keep the tab in place.  

    The bed side needs to face away from the tension.  It would need a radical redesign to prevent chafing but it would already be useful for non chafing situations.

    -----------------------------------------------------------

    Noted the clothing strings compress over time & loosen because the cord locks are sized for just 1 string.  Meanwhile, the sandal strings expanded after 15 miles & became impossible to adjust.  The ability to press a button to release the cord locks would be ideal.

    This design evolved to sort of a button which can be pressed in to remove the cord lock.  It takes some fidgeting but it doesn't require tools.  It's easier with 2 paws.  There may be extra security from raising the sides of the button, but it makes it harder to press.  Even impossible mason line which would never hold a knot showed signs of being tamed.

    --------------------------------------------------------------------------------------------------------------------------------------------

    A script for creating templates came to pass.  The easiest design was a linear set of holes.  A circular template would have looked neater but not been worth the squeeze & would have taken more material. It would require more filler between the openings.  It could be done by converting the width of the linear template to a circumference, converting the circumference to a radius, then the x of each hole to an angle.

    1mm opening sizes have been the standard.  Larger openings have required trial & error despite the templates.

    Lions have found a turtle graphics metaphore to be easiest for automating CAD drawings.

    class Turtle:
        def __init__(self, x, y, angle):
            self.x = x
            self.y = y
            self.angle = angle
    
        def move(self, distance):
            self.x += distance * math.cos(self.angle)
            self.y += distance * math.sin(self.angle)
    
        def draw(self, sketch, distance):
            x2 = self.x + distance * math.cos(self.angle)
            y2 = self.y + distance * math.sin(self.angle)
            sketch.addGeometry(Part.LineSegment(App.Vector(self.x, self.y, 0.0),
                    App.Vector(x2, y2, 0.0)),
                False)
            self.x = x2
            self.y = y2
    
        def rotate(self, diff):
            self.angle -= diff


    Then you just call a bunch of simple drawing commands like the old days.

        turtle = Turtle(x, y, angle)
        turtle.rotate(toRad(90.0))
        turtle.move(-OPENING / 2)
        turtle.draw(sketch, OPENING)
        turtle.rotate(-toRad(90.0))
        turtle.draw(sketch, hole_r + 1.0)
        turtle.rotate(angle2)
        turtle.draw(sketch, distance2)
        turtle.rotate(-angle2)
        turtle.draw(sketch, 1.0)
        turtle.rotate(-toRad(90))
        turtle.draw(sketch, OPENING_W)
        turtle.rotate(-toRad(90))
        turtle.draw(sketch, 1.0)
        turtle.rotate(-angle2)
        turtle.draw(sketch, distance2)
        turtle.rotate(angle2)
        turtle.draw(sketch, hole_r + 1.0)
    

  • Sandal cord lock

    lion mclionhead01/24/2025 at 00:56 0 comments

    The big need has been a cord lock for sandals.  Lions pondered how to do it for years.  Fortunately, it doesn't have to be temporary.

    The journey began with a measuring template to determine the ID & the opening size.  That would eliminate the lengthy trial & error of printing test pieces.  Helas, there are too many combinations of opening size & ID.  Only a selection of the most common sizes is possible.  After a few tries, the right way was to make separate templates of all hole sizes for 1 opening size.  They should all be in a single row to conserve material.  2 templates could interlock to test a permanent design.

    The sandal cord lock would be 2 triangle panels, welded together.  A 1st attempt showed the template to be very approximate.   It was brutally hard & inaccurate to assemble 3 strings in a single panel.  It would be a lot easier as 6 separate pieces which got welded onto a common pin.  The problem is chafing from all those pinch points.  A stack of 6 pieces would be quite a tower.

    Another idea is using 3 separate pieces to provide grip to the strings & 1 loose fitting piece to just bind the strings together.  It would be easy to install the thing which connected to all 3 strings & hard to install the things which connected to 1 string.

    This turned out just as hard as 6 difficult attachment points.  Anything which is simultaneously connected to 3 strings is going to be hard to install, no matter what.  The multi stranded laces are also hard to install.  This still didn't provide enough grip to the thong.

    Another idea is 2 loose fitting triangles which are staggered to create grip.  There could be slits instead of holes.

    Best results were coming from this staggered design.  Installing the string was just always going to be hard & require chinese manufacturing skills.

    Best results come from printing mirror images to ensure the bed side faces out.  A lot of tweeking & printing is required to get the right grip. All that really matters is the grip beating the commercial solution.

    There's a lot to hate about it.  There isn't enough material left after cutting out the fiducial.  The rivet would be expected to deform over time.

    1st completed sandals with the printed cord lock.

    No welding was required so far.

    5 miles later, they were firing on all 33 raptors.  No chafing issues, better grip than commercial solutions, still possible to adjust in the field.  It remanes to be seen how well the sting wears.

    It takes a lot of fiddling in the CAD program to get the overlap just right.  The 3 holes should have similar amounts of overlap.

  • Temporary version

    lion mclionhead01/23/2025 at 07:41 0 comments


    The temporary cord lock rapidly converged on this panel thing. It's something we've no doubt seen forever in food packaging but never remembered. Despite its simplicity, it grips better than spring loaded ones. It works better if the elephant foot side faces away from the tension.

    Note: they work better when the string is pulled opposite of the opening, so this design would be best as a O with the 2 openings on the inside of the O.

    The mane problem is it doesn't manage the excess string. There could be a provision for tying 1 end off & letting the other end move. 1 end could be taped together.  When there's lots of excess string, it's traditionally been tied into a loop.

  • Death star version

    lion mclionhead01/22/2025 at 07:38 0 comments

    After playing with it for a while, the temporary design ended up pretty worthless.  The string comes out just the same if it's pulled towards the opening.  It might as well be a single piece if they're not welded & 2 pieces only if they're welded.

    A few more permanent pieces got painstakingly sized for clothing.  The newest cords are taking a 3.5 ID & .75 opening.  Started building up a collection of used pieces for speeding up the size tests.

    Some clothing is down to being worn only 1 more time.

    Chafing was a problem with the welding. This led to a new death star design.  The welds went inside grooves. 

    The flat design might still be useful when there's no danger of chafing.  It's harder to assemble the death stars.

  • Bread clip design

    lion mclionhead01/21/2025 at 01:02 0 comments

    Cord locks have been a key part of sandals, lion clothing & truck attachments but are too big & don't grip enough. 

    The problem with spring loaded cord locks is they don't provide enough grip.  They might as well not have a spring for the amount of grip.  It's normally not necessary to release the spring.

    Disappointment with spring loaded cord locks got lions thinking more about a permanent system.  Previous ideas centered on passing string through a TPU cylinder that was welded closed.  It would provide enough compression to keep the string in place while still allowing it to move with enough force.

    With a permanent system, it wouldn't be possible to take the string out & reinsert it.  For temporary applications, there could be a larger device.  The smallest device would be for clothing & sandals, so it could possibly be permanent.  The temporary design could be a larger thing which permanently attached to 1 end of the string & created temporary friction in the other end of the string.

    The 1st attempt was this thing with 3 identical panels.  The 3 panels slide next to each other to grip the string.  They're held in place with rivets.  This was 8x16x18mm, a bit too big.

    Cord locks began with the humble bread clip.  The bread clip was actually invented in the 1950's.  They're not optimized to keep string from sliding.  They're optimized to keep bags closed.  They're not secure enough.

    There are variations on the clothes pin which are too big.

    Confirmed a helical bread clip doesn't retain the string.

    There was the idea of a pair of bread clips which rotated to lock the string in.  Then, they're welded together.

    2 bread clips welded in opposing directions worked well.  

    It's not removable so it needs to be PETG to withstand drying.  The piece has to be big enough for the layers to adhere.  Printing at 20mm/s 260C is also necessary for PETG to adhere.  Found radius increments of .25mm to be required to get the right tension.  They need to be tight enough to stay on but loose enough to not shred the string.  It's a real pain to dial this in so it might be easier to print an assortment.

    Clothing drawstrings came in at a 2.25-2.75mm radius.

    A removable design was based on the string's own tension keeping the bread clips in place.  This requires more manual dexterity than chinese cord locks.  There seems to be a limit to how tight nylon string can get, with a finite amount of manual dexterity.  Making the cylinders longer might increase the grip.

    The idea of twisting something to loosen & tighten it appeals.