Close
0%
0%

Yeah Robotic Hand (formerly Rebelia)

A low cost robotic hand for robots and humans

Similar projects worth following
Welcome to the project page for the YEAH Hand, which was formerly developed under the name Rebelia.

This project aims to create a powerful, low-cost, and open-source robotic hand for researchers, developers, and enthusiasts.

The hand will be affordable and reliable.


It will be produced in 2 versions: robotic ( for manipulators, humanoid and service robots) and prosthetic (transradial amputees).

We believe that groundbreaking technology shouldn't be locked away in high-cost labs. It should be in the hands of developers, researchers, and makers like you.

Join the rebellion. Let's build the future, affordably.

Project Status: Version 2 (In Development)

This project page documents YEAH Robotic Hand , formerly called Rebelia Robotic Hand V2, the next iteration of our open-source robotic hand.

Our commitment to open-source hardware remains unwavering. 

The previous version, Rebelia V1, is officially certified by OSHWA (Open Source Hardware Association).

The licenses for the project are as follows:

Once Version 2's development is finalized and stable, we will submit it for a new OSHWA certification under the same set of licenses. This ensures that both versions of the project are fully recognized, compliant, and protected open-source hardware.

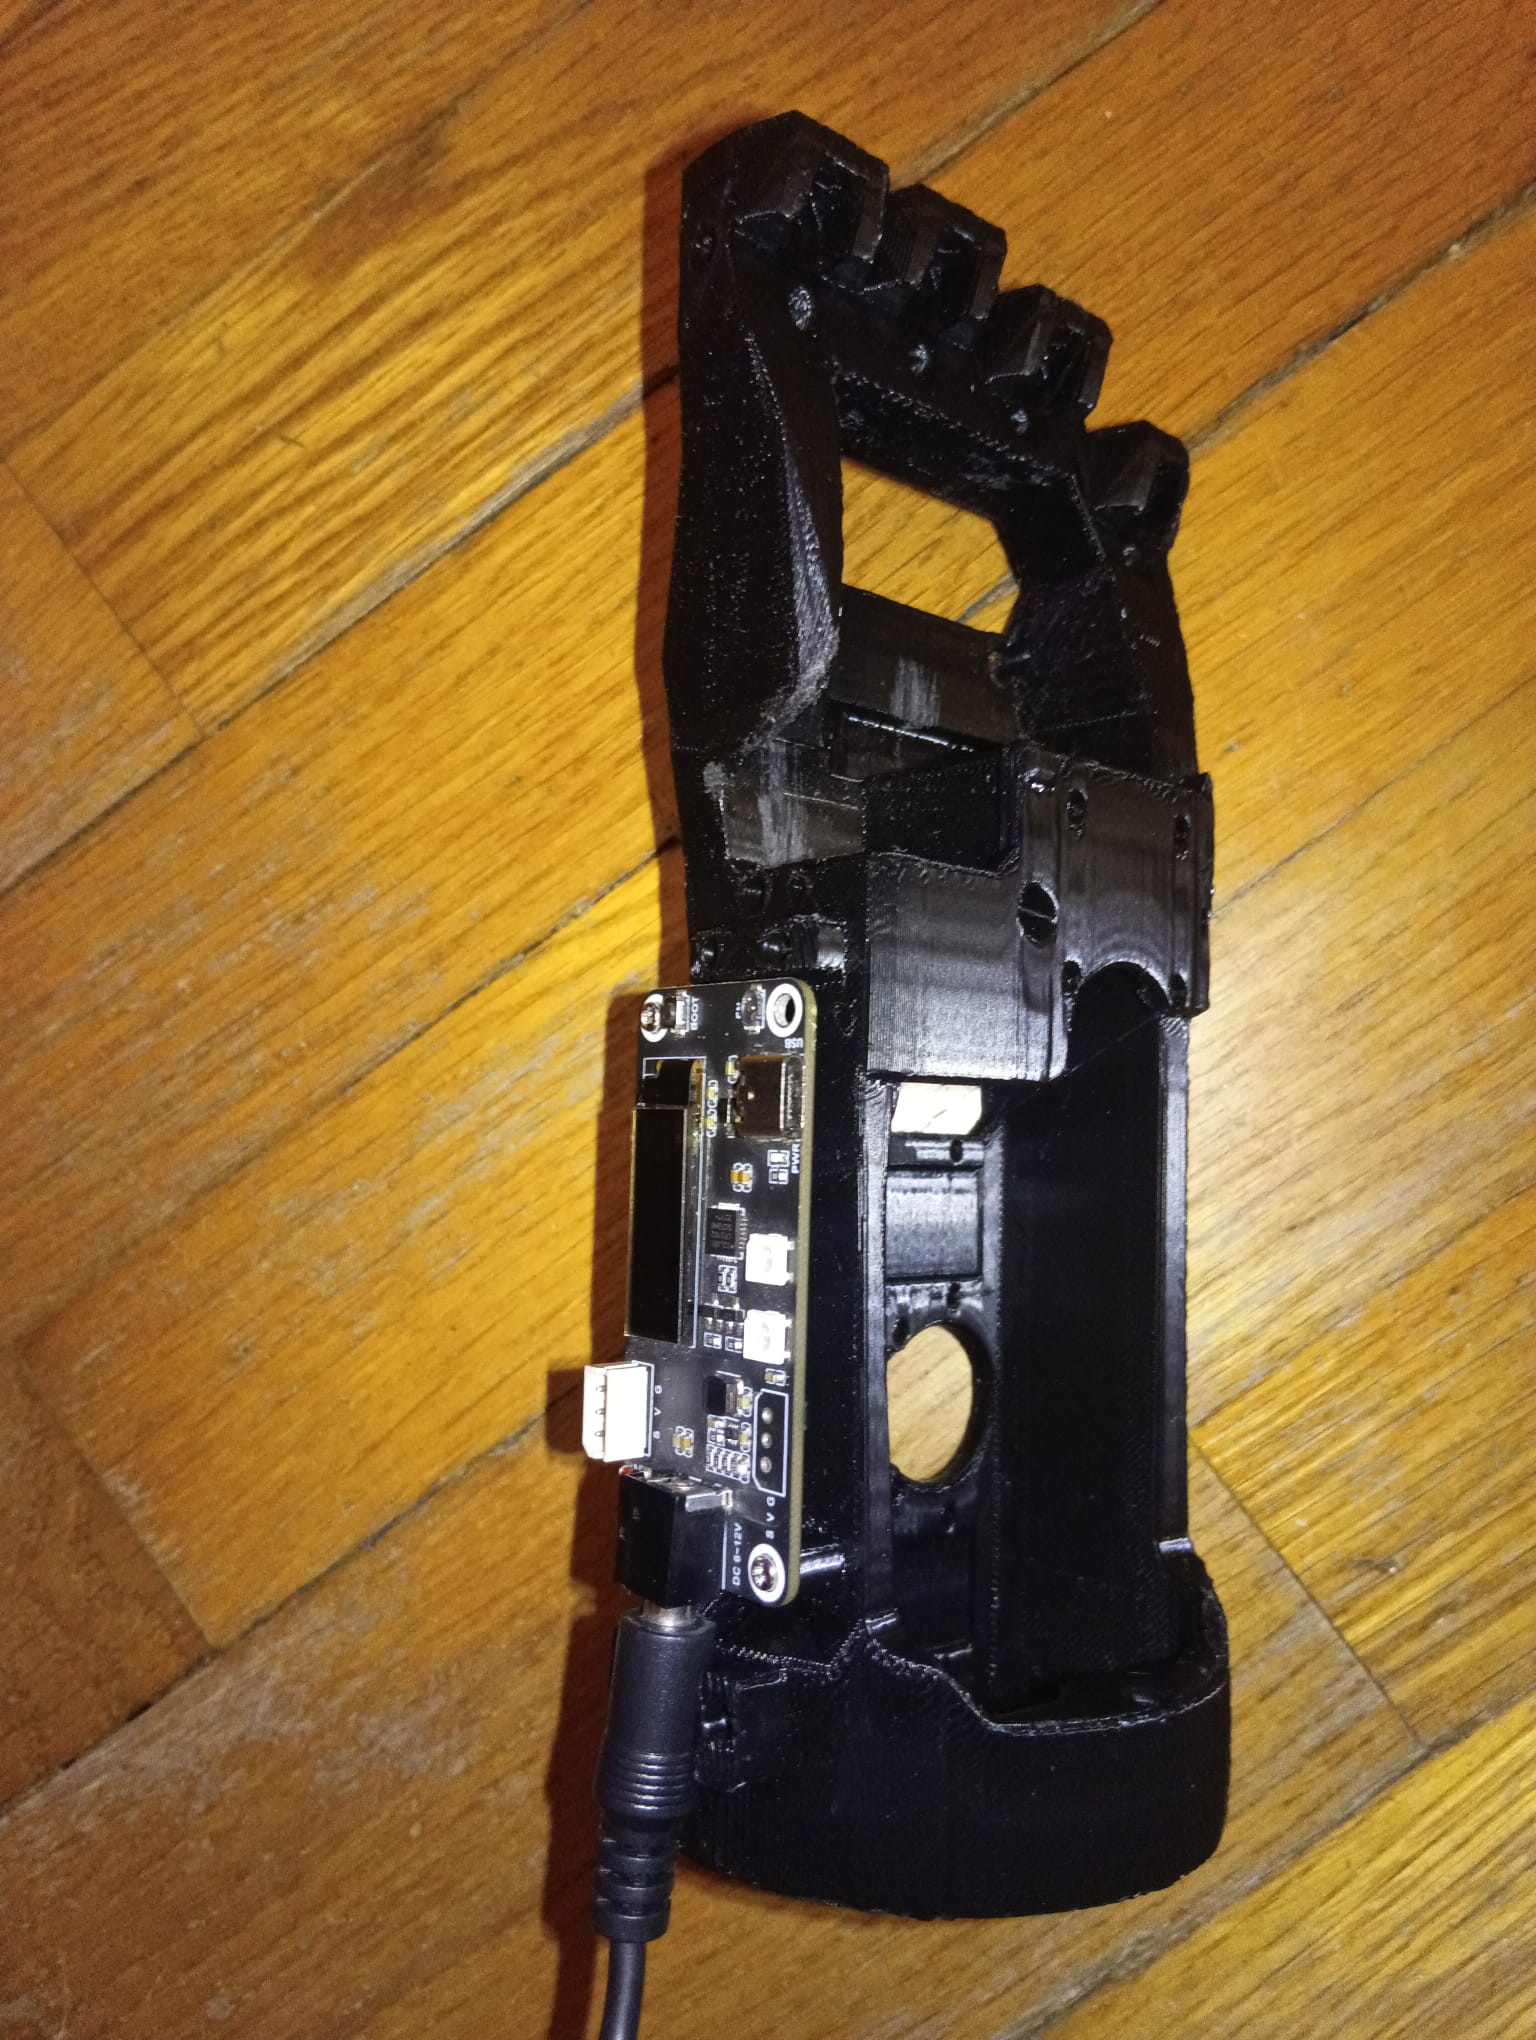
From Prototype to Product: Forging the Rebelia Robotic Hand

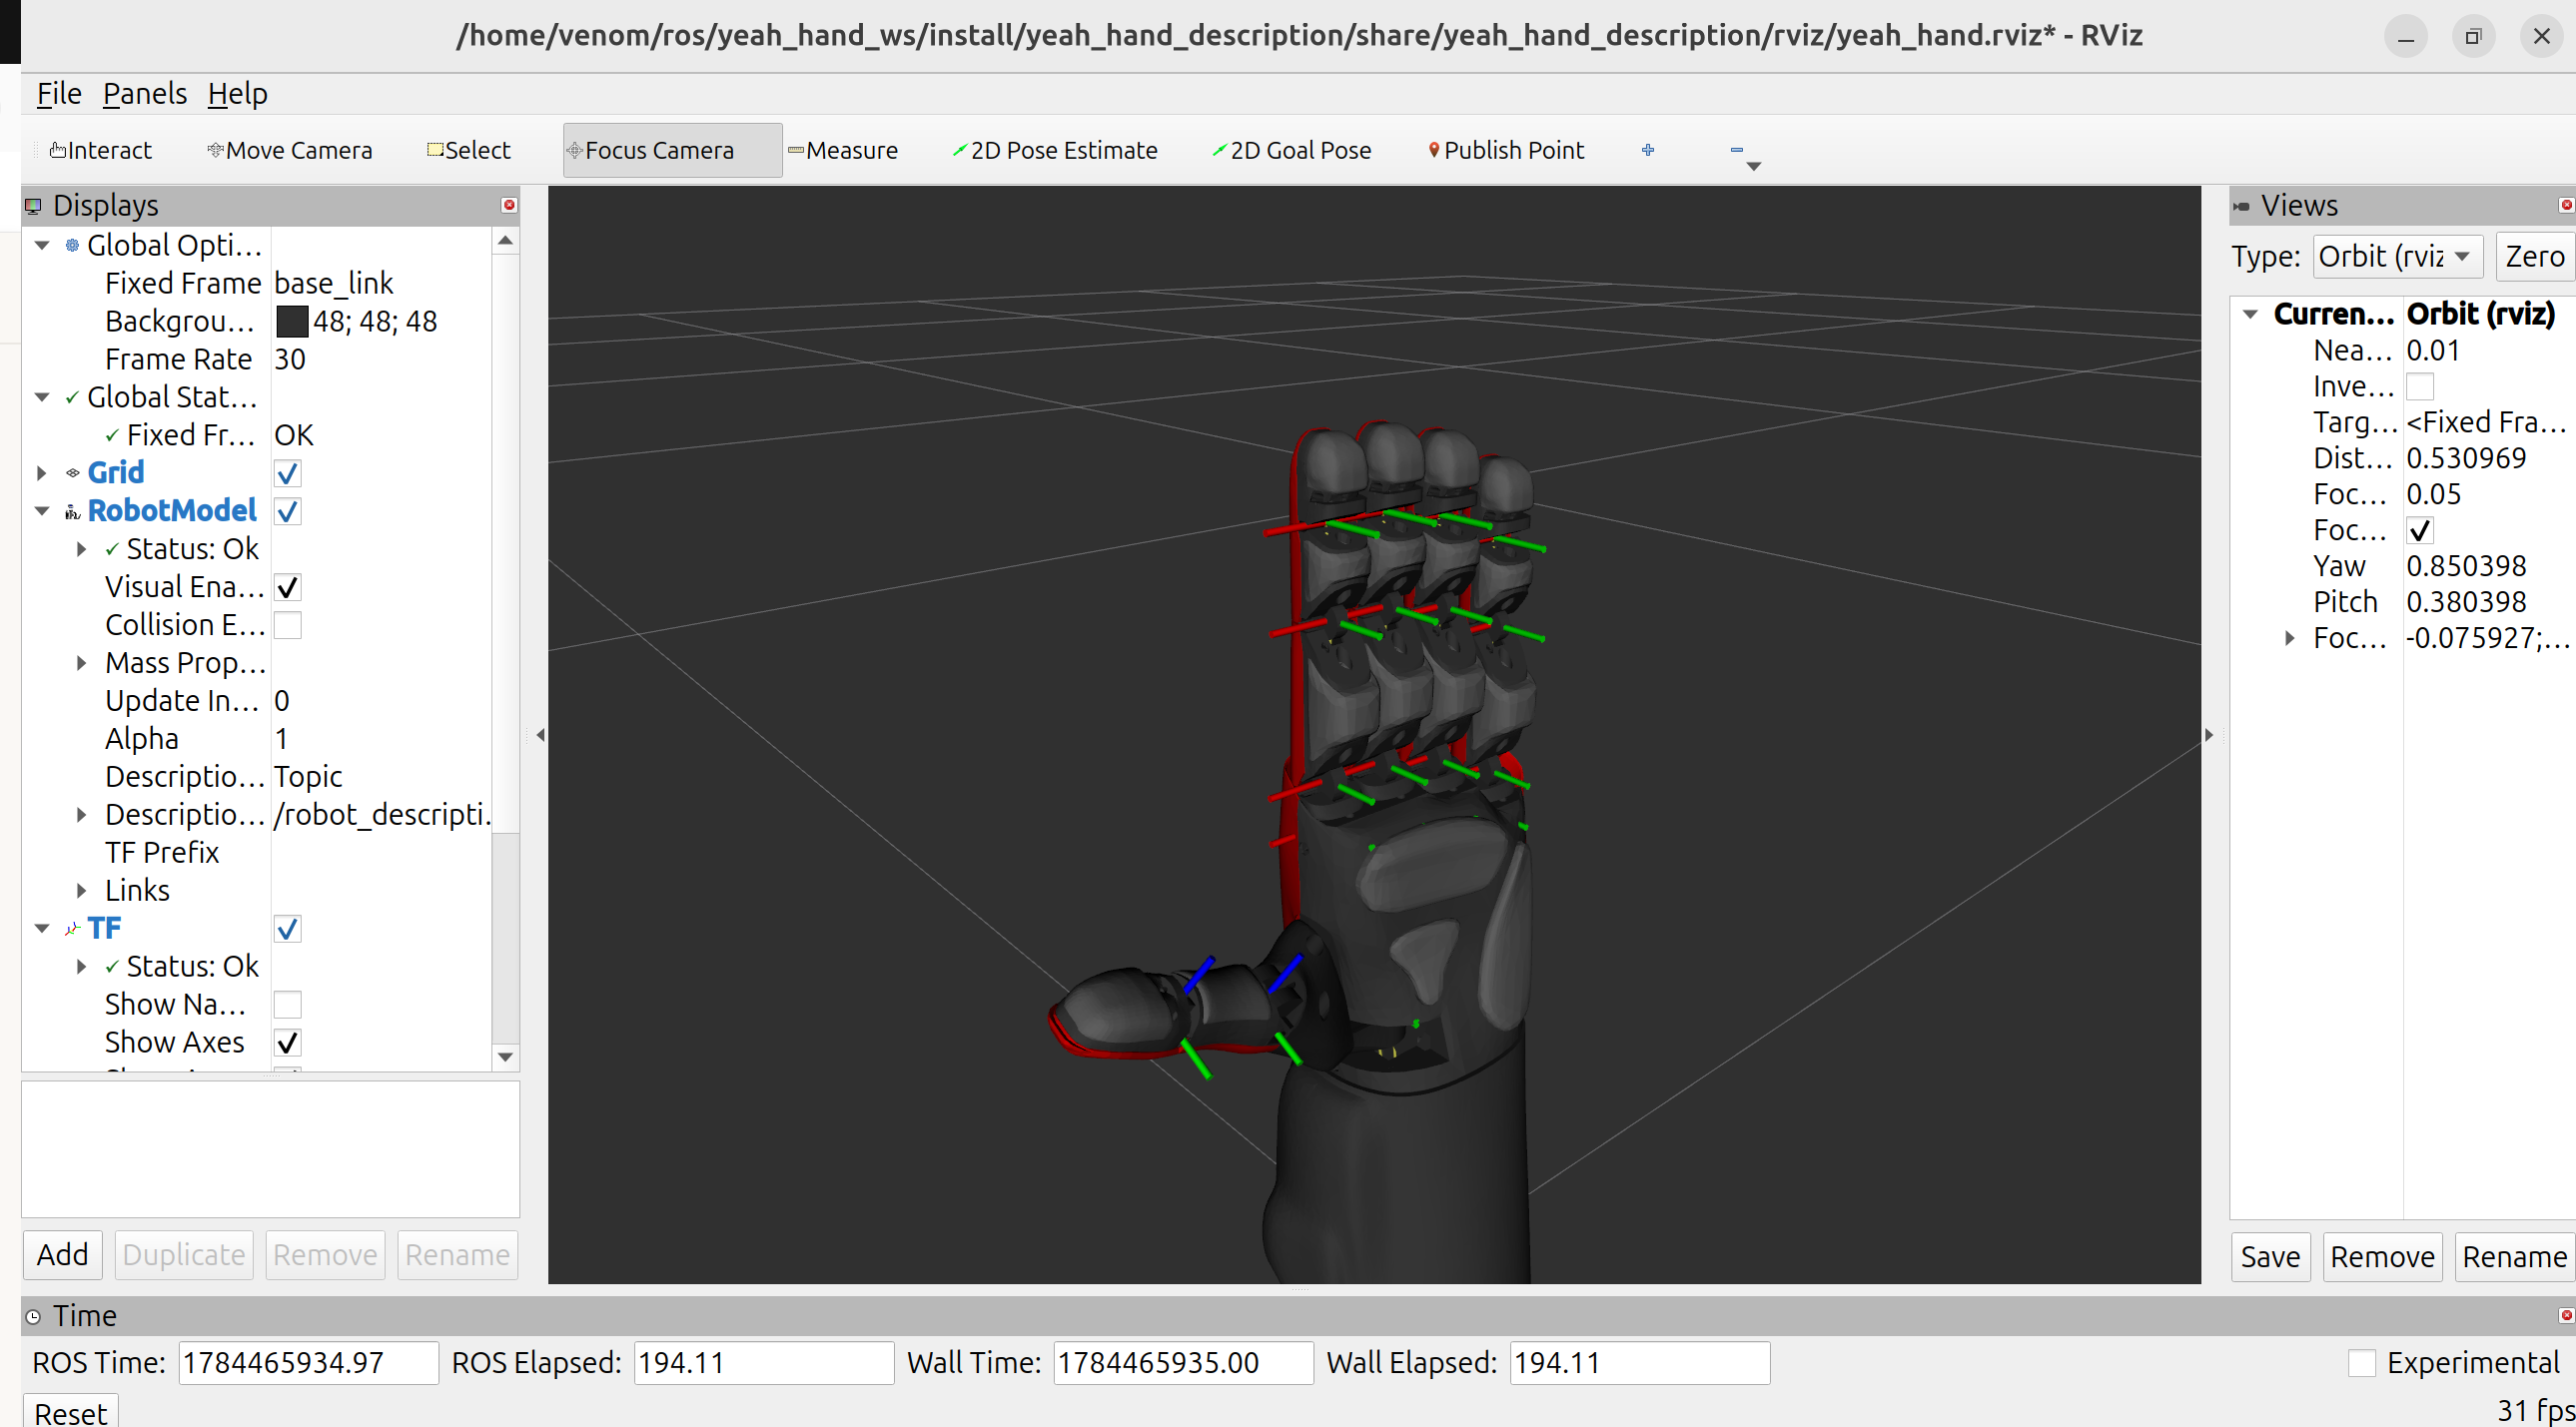
The Rebelia Robotic Hand works. 

We've moved past the concept stage and have a functional prototype that has proven its basic reliability. 

But now comes the hard part: transforming this prototype into a robust, consumer-ready product that can handle real-world tasks, and we need your help to do it.

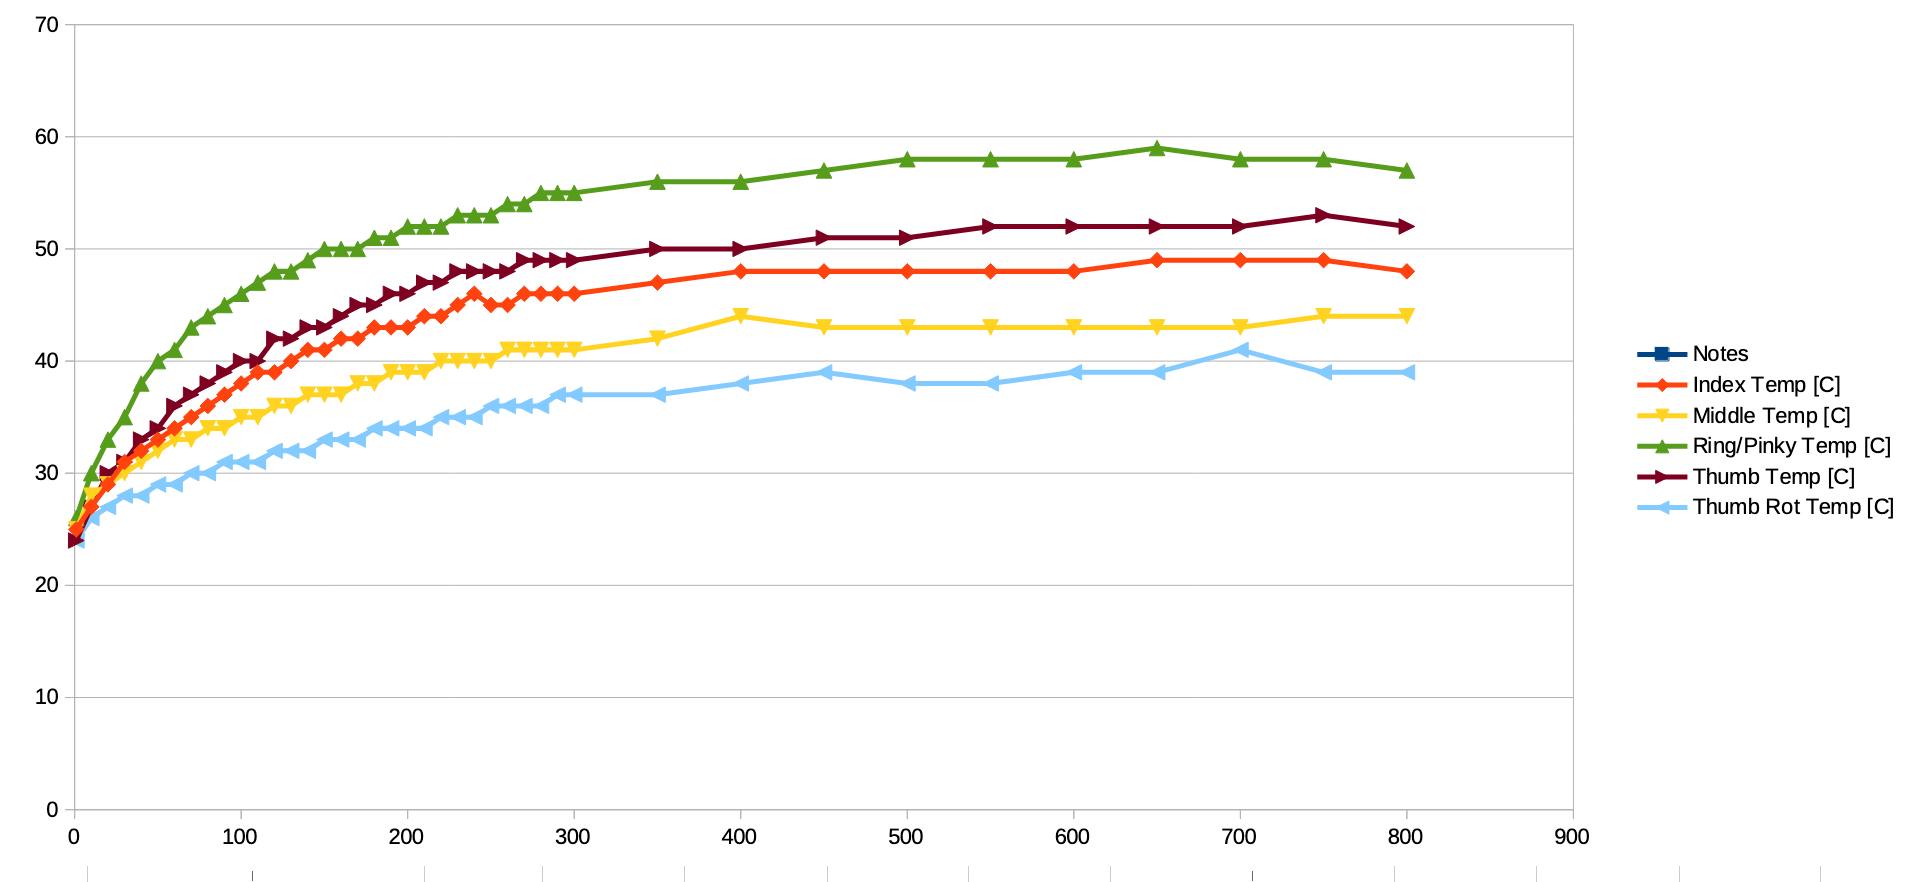
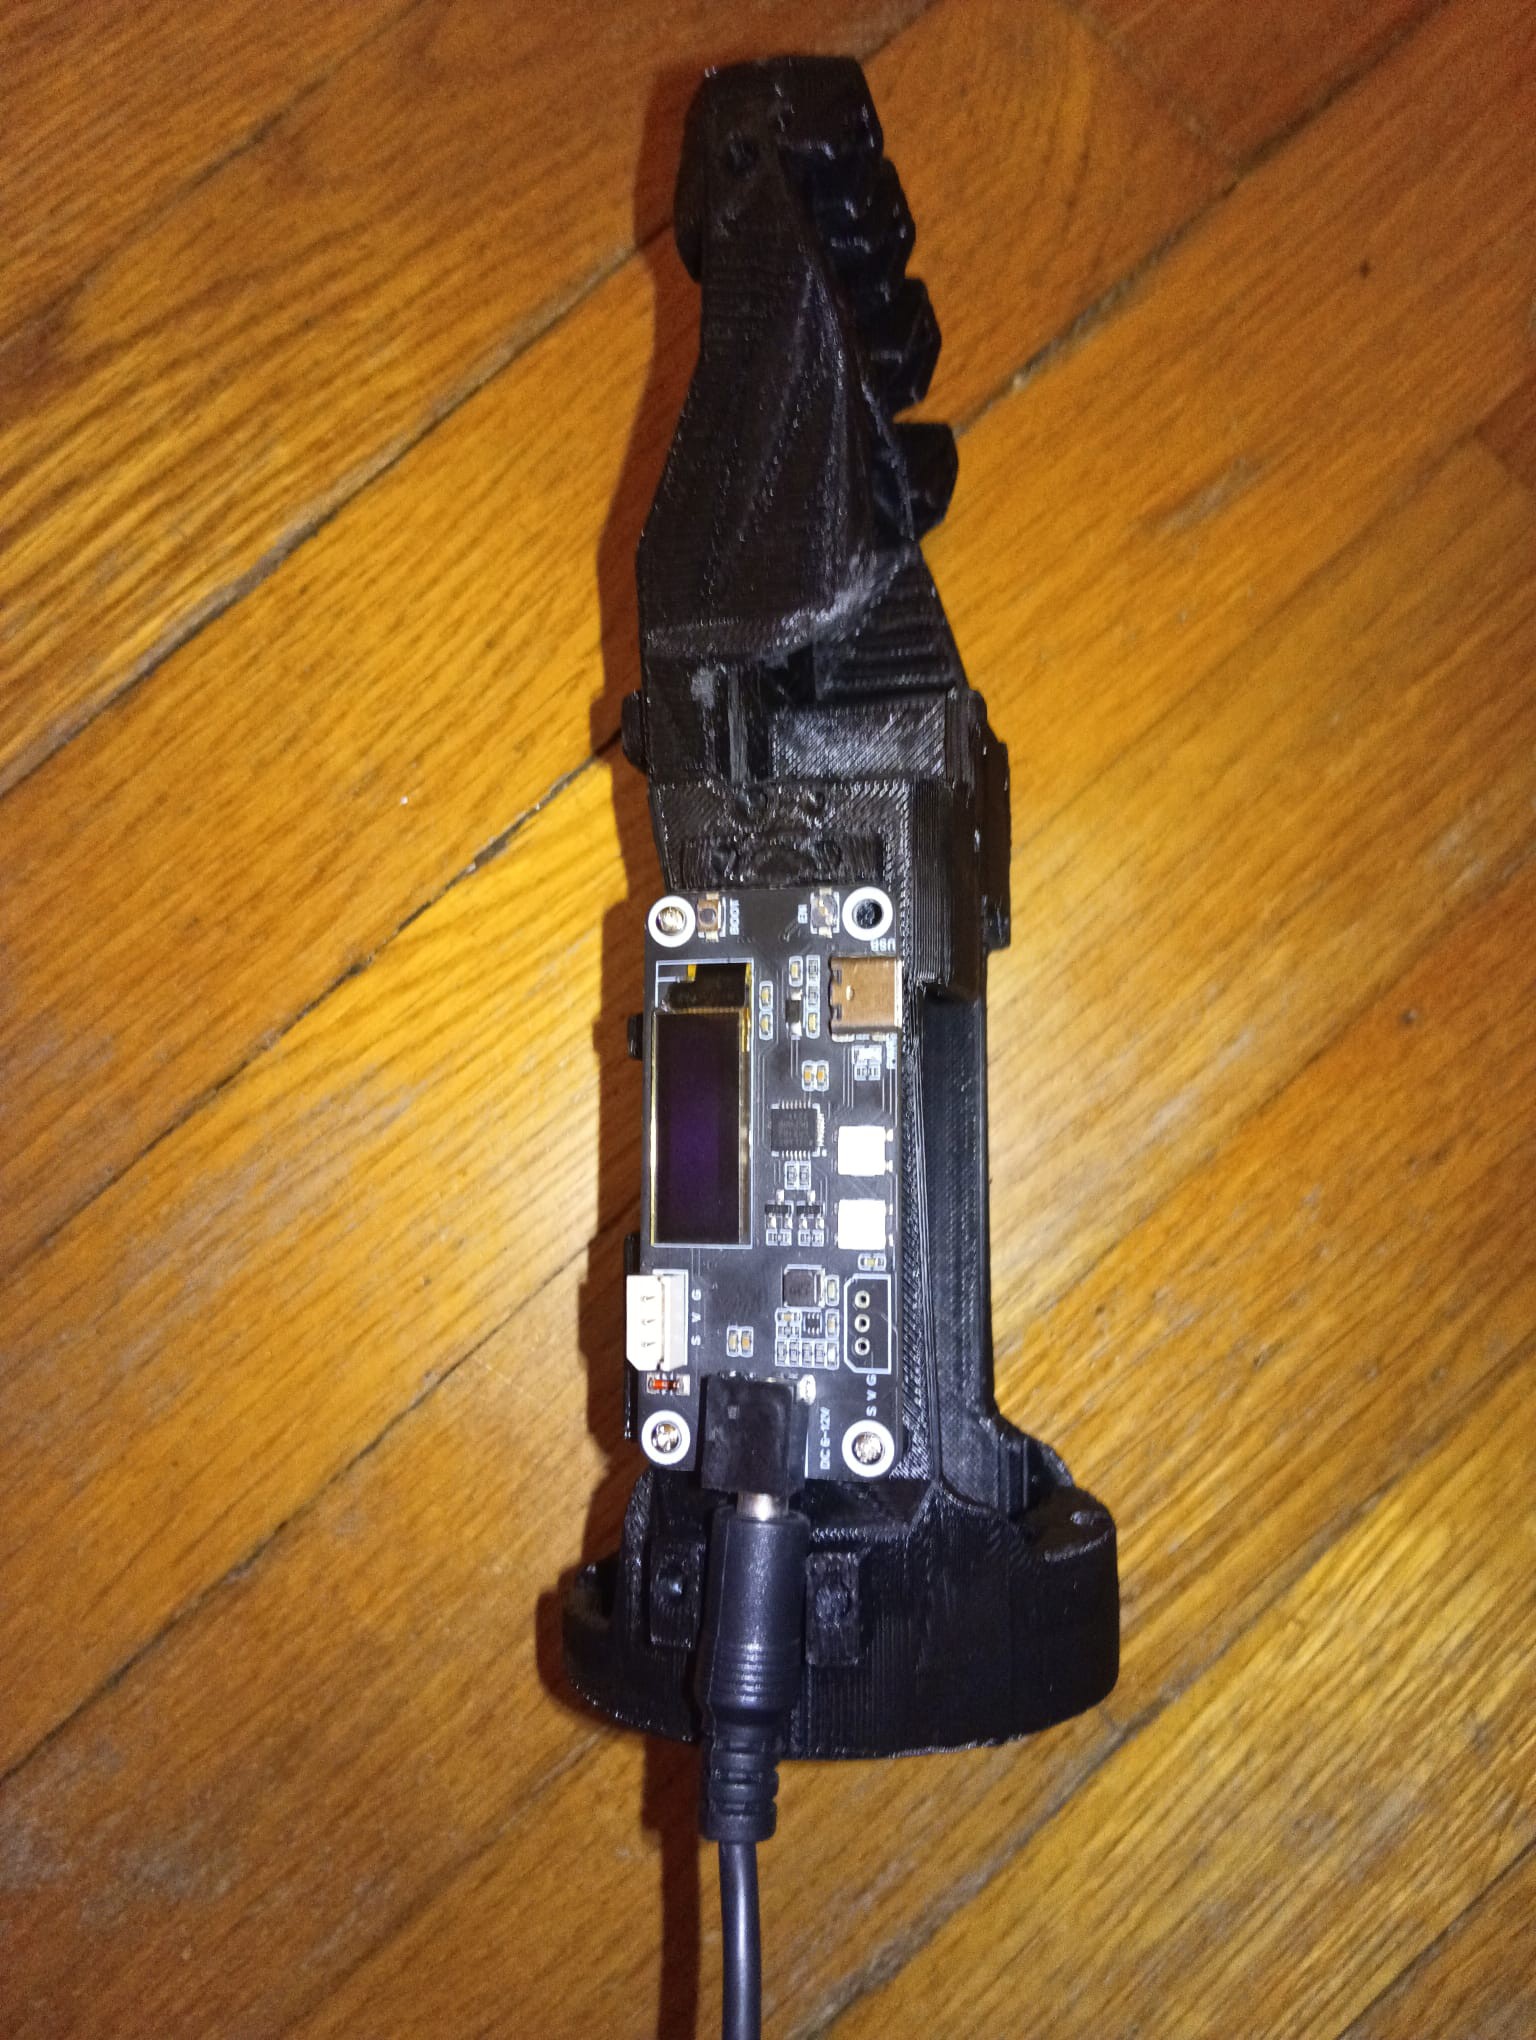
Proven Durability: It's Not Just a Demo 

Our latest stress test pushed the hand through 500 open/close cycles of all fingers with a 330 unit force limit. 

The result? 

The hottest motor stabilized at a cool 58°C. Even after 800 cycles, the temperature held steady, proving the design is stable for continuous use. 

This isn't a fragile lab toy: it's a platform ready for refinement.


The Challenge: Beyond the Basics 

A hand that can just open and close is useful, but a great hand can perform a vast range of manipulations

We've identified key use-cases it needs to master:

use-cases picture taken from here, under CC-BY-4.0

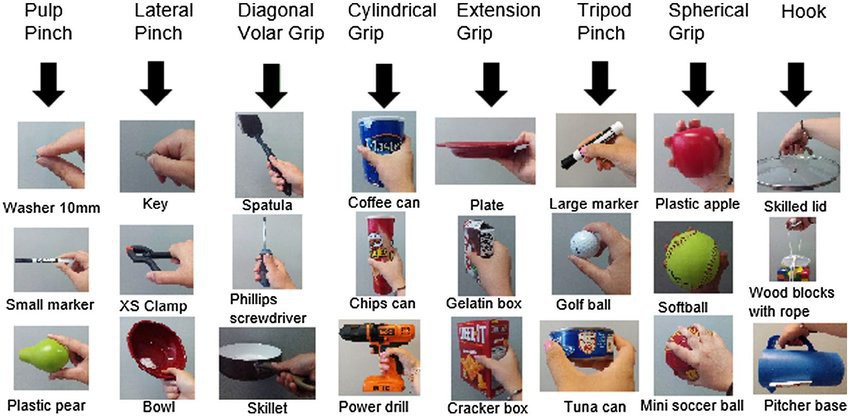
But our list isn't exhaustive. What are we missing? 

Suggest scenarios we haven't considered. Is it wielding a tool? 

Manipulating a delicate object? 

Performing a specific task in a workshop or kitchen?


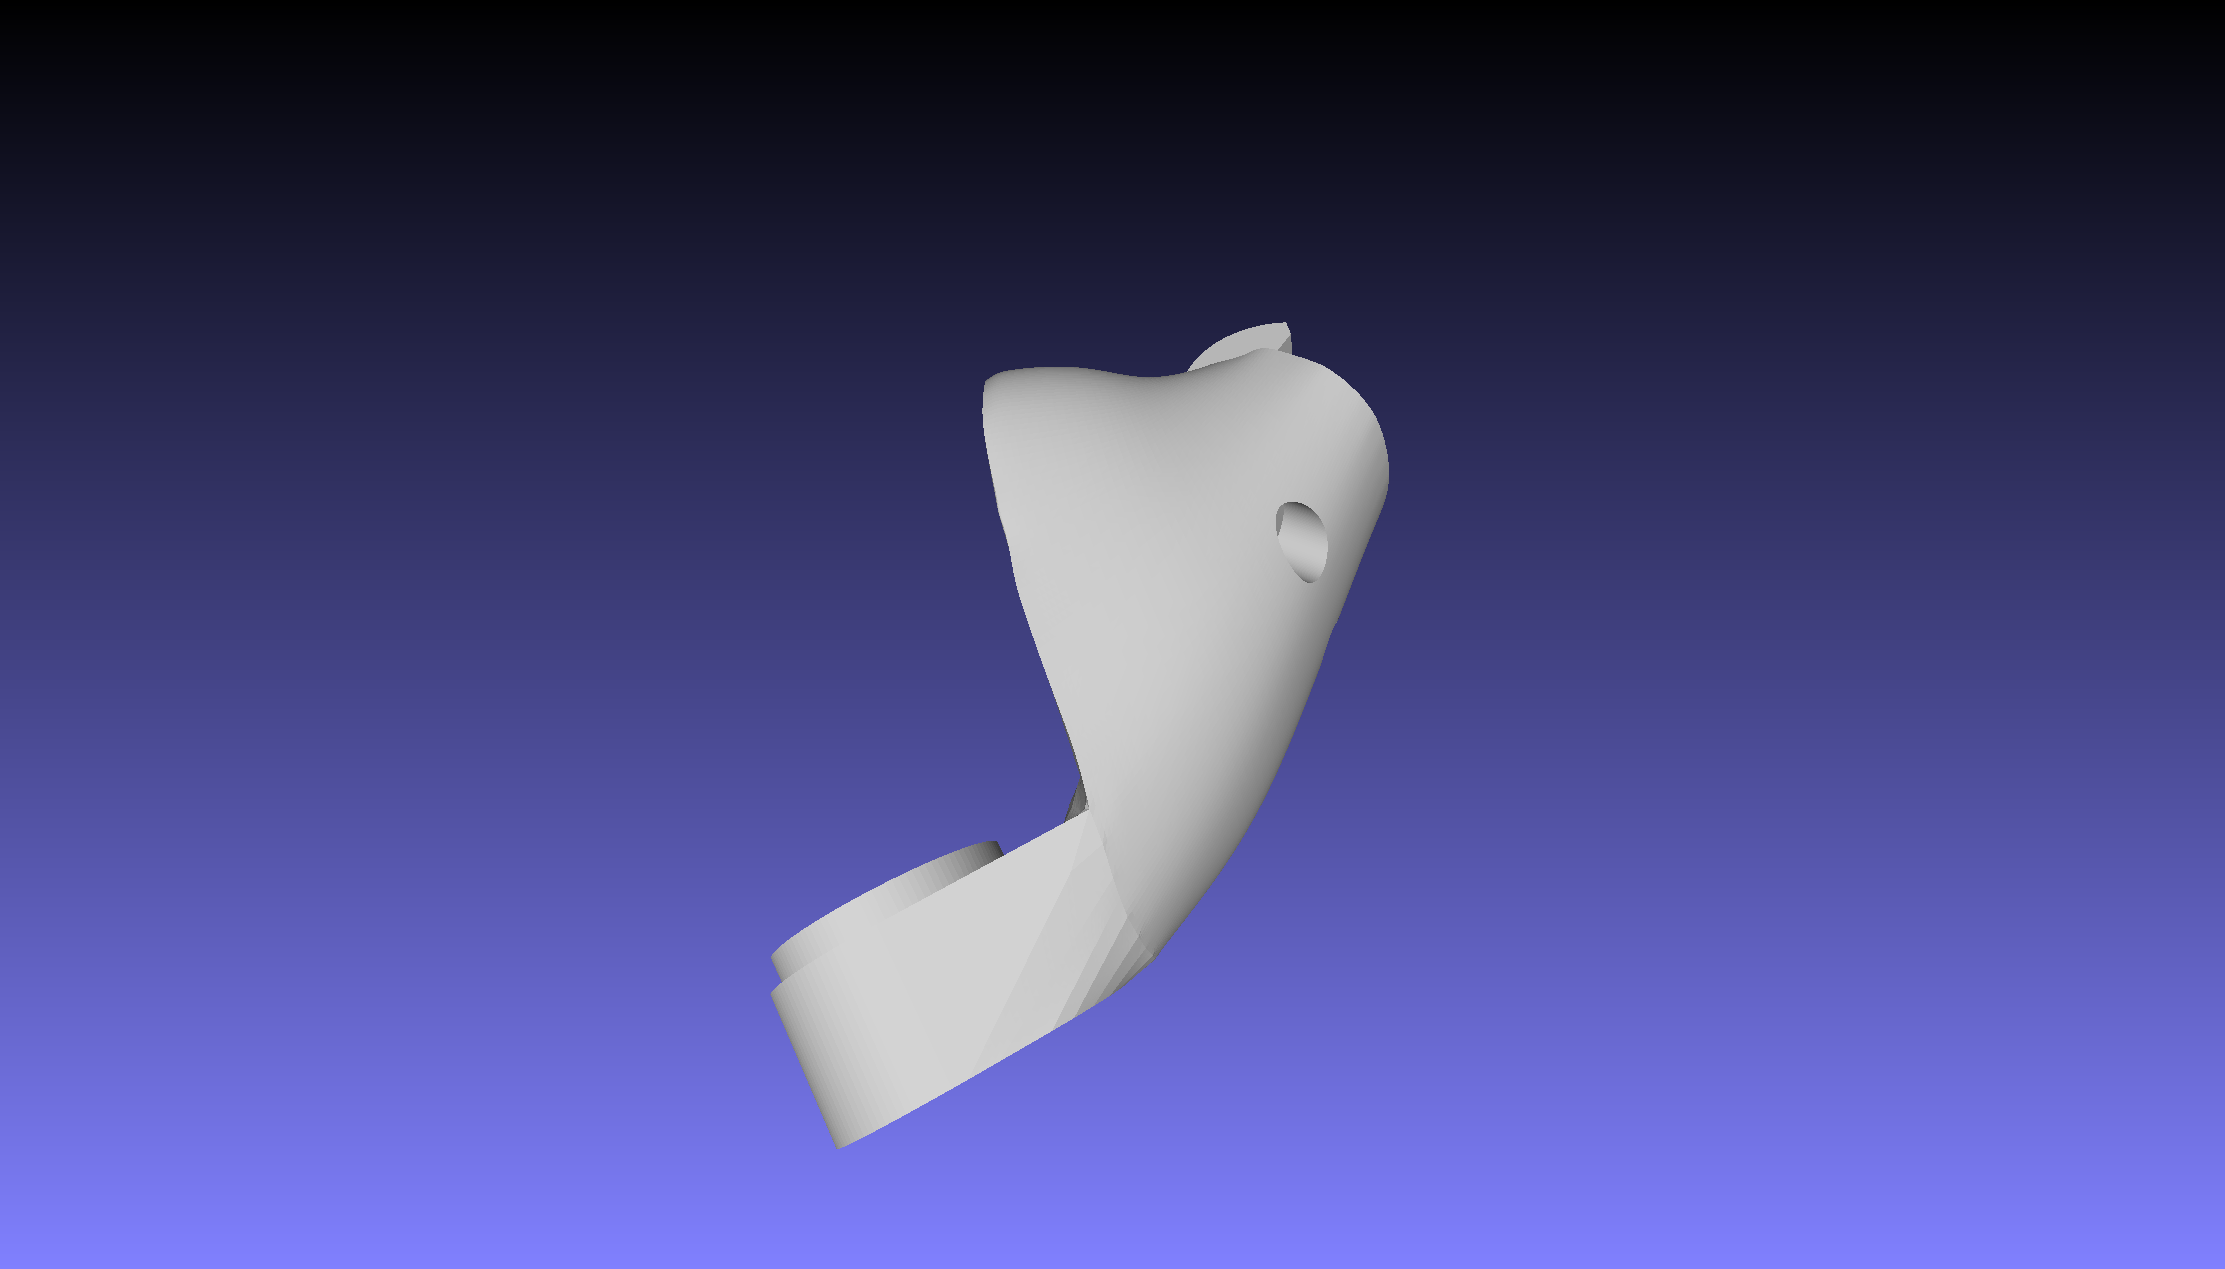
Design Files & Licensing

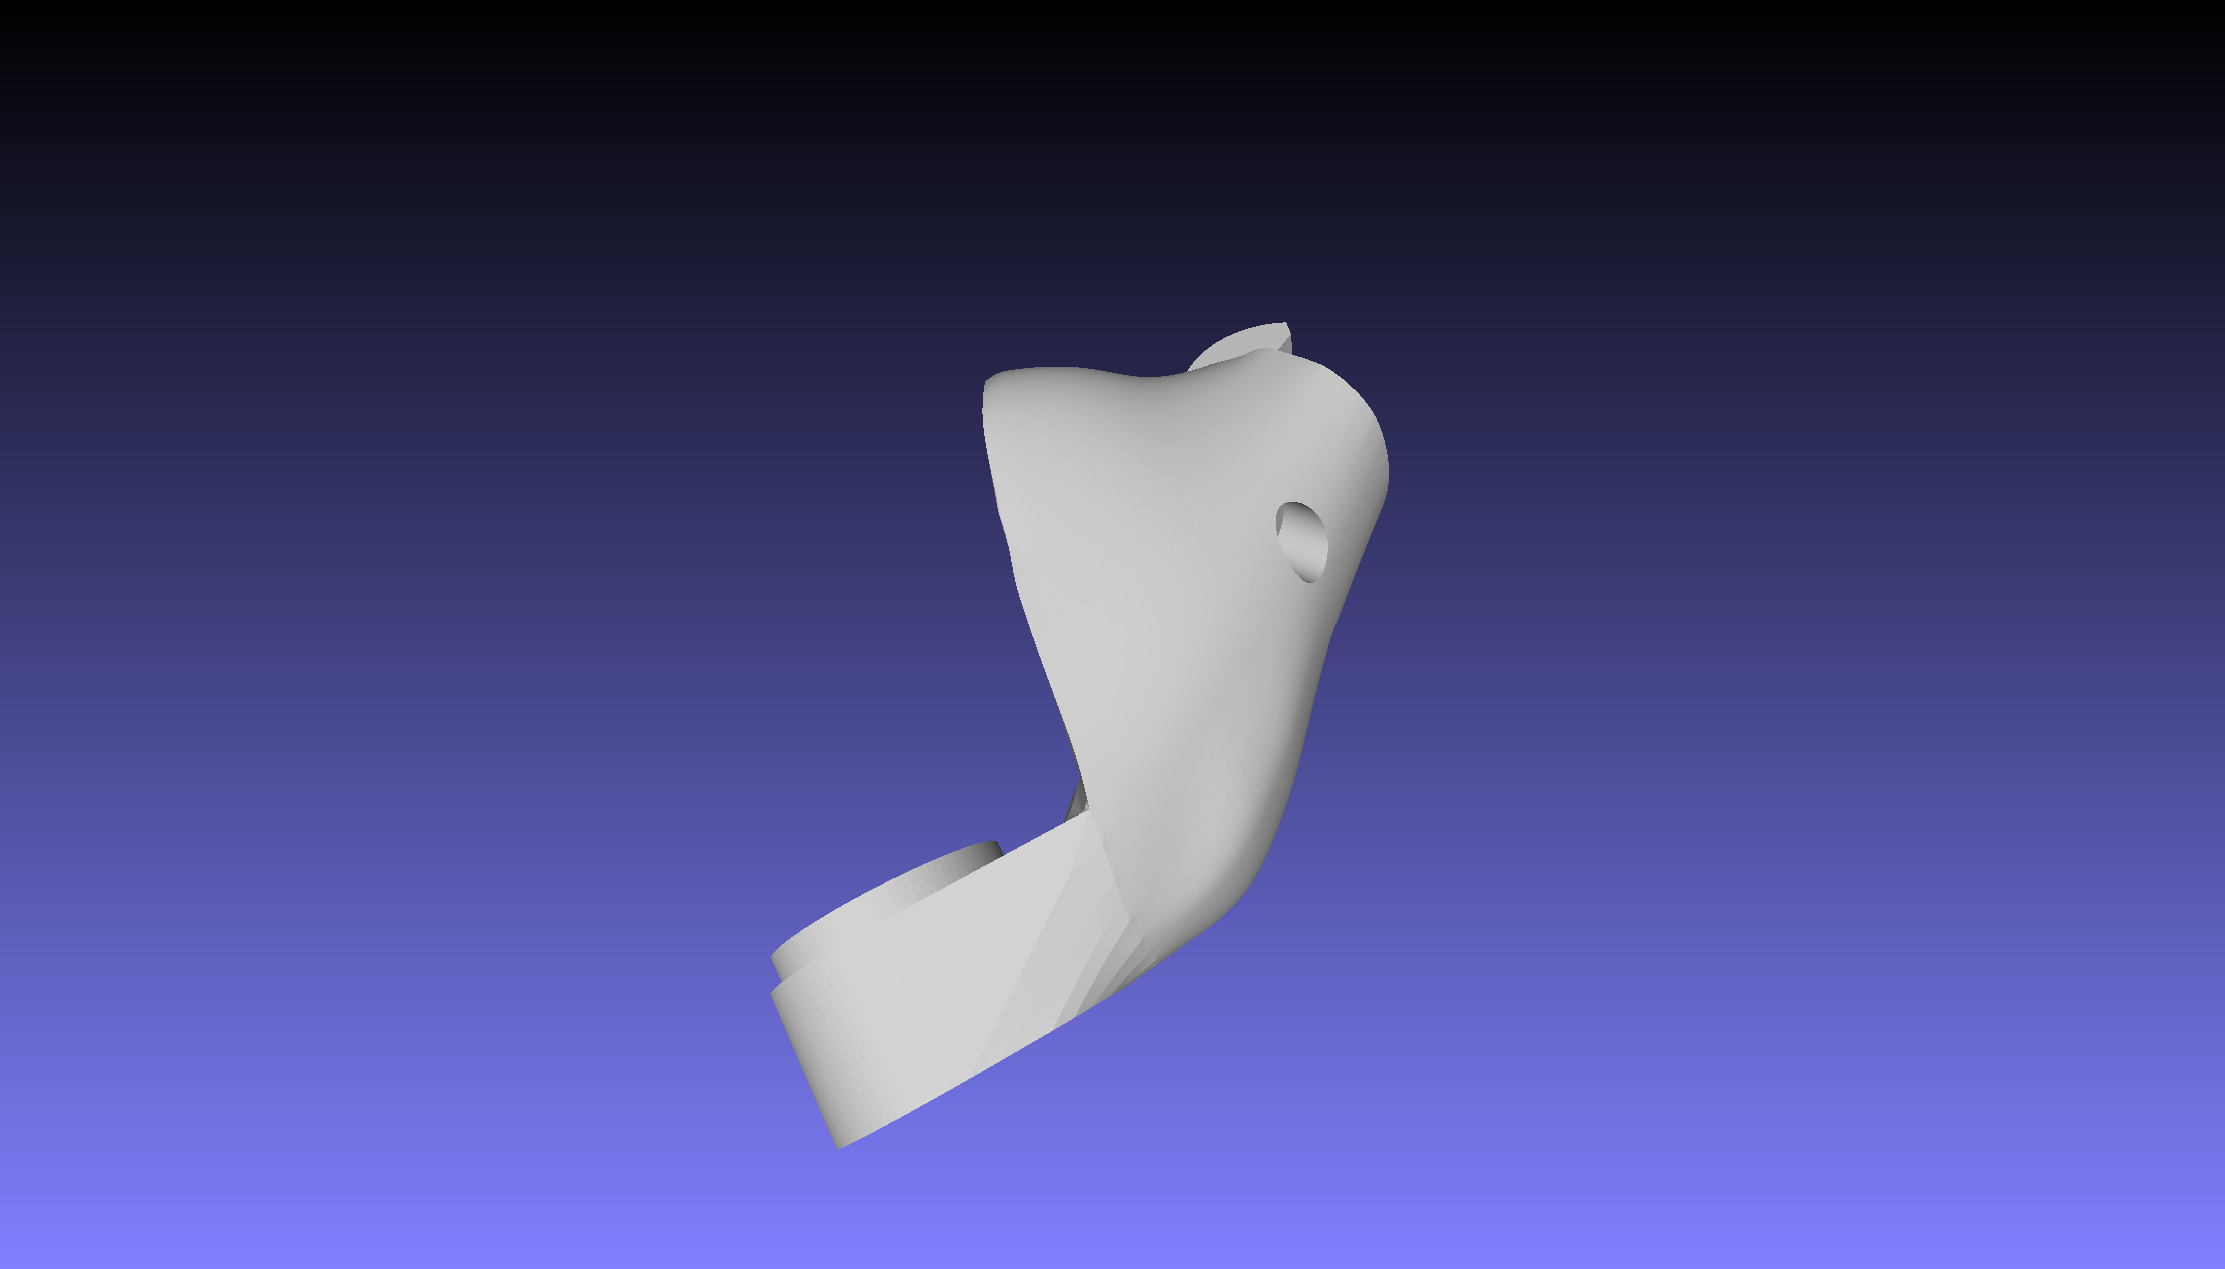
This project is designed using a parametric, modifier-based workflow in Blender. The source .blend files contain the full design history and logic, allowing for powerful non-destructive customization.

  • Source Design Files: The native and preferred source files are the .blend files, which use Blender's modifiers to drive the parametric design.
  • Production Files: The .stl files provided are exported outputs from the source, ready for 3D printing.
  • Open Hardware License: All hardware design files are released under the CERN Open Hardware Licence Version 2 - Strongly Reciprocal (CERN-OHL-S-2.0). You can find the full license text here: Link to CERN-OHL-S-2.0
  • What this means for you: You are free to use, modify, and distribute the designs. However, if you distribute any modified version (a "Adaptation" under the license), you must release the source files for your modifications under the same CERN-OHL-S-2.0 license. This ensures the project remains open and contributions are shared back.

For builders who prefer a ready-to-use solution, fully-tested kits and assembled units are available from my shop.

An Open Invitation to Collaborate 

This is a copy-left, open-source project. It belongs to all of us. 

The potential technological solutions—from novel grip-pattern algorithms and sensor fusion to new materials and actuation methods—are infinite.


We challenge you to propose solutions, and we commit to implementing and testing the best ideas.

This isn't private, closed tech.

It's an open platform, it's affordable by design, and together, we can make it the best it can be.


Let's build the future of accessible robotics, together.

Thumb Joints with Guides.stl

[TPU95A] The Thumb finger flexible joints. It must be printed together with the 'Thumb Phalanges.stl'. Please align the 2 meshes in the slicer.

Standard Tesselated Geometry - 96.27 kB - 12/16/2025 at 13:41

Download

Thumb Phalanges with Guides.stl

[PLA/ABS] The Thumb finger phalanges. It must be printed together with the 'Thumb Joints.stl'. Please align the 2 meshes in the slicer.

Standard Tesselated Geometry - 3.01 MB - 12/16/2025 at 13:41

Download

Thumb Base with Guides.stl

[ABS/PLA] The Thumb finger base. The Thumb finger will be installed on it.

Standard Tesselated Geometry - 7.93 MB - 12/16/2025 at 13:41

Download

Index Phalanges.stl

[PLA/ABS] The Index finger phalanges. It must be printed together with the 'Index Joints.stl'. Please align the 2 meshes in the slicer.

Standard Tesselated Geometry - 9.81 MB - 12/13/2025 at 15:16

Download

Index Joints.stl

[TPU95A] The Index finger flexible joints. It must be printed together with the 'Index Phalanges.stl'. Please align the 2 meshes in the slicer.

Standard Tesselated Geometry - 164.24 kB - 12/13/2025 at 15:16

Download

View all 22 files

  • 1 × Creality Hyper ABS Filament Spool Skeleton and spools
  • 1 × PolyFlex TPU 95A Filament Spool Fingers and palm
  • 1 × Raise3D Pemium PLA Filament Spool Covers, fingers
  • 5 × WaveShare ST3215HS Servomotor Tendon flexion and extension, Thumb rotation
  • 1 × WaveShare ESP32 Servo Driver Board The brain of the hand

View all 11 components

  • Thumb Nail Creation

    Vittorio Lumare18 hours ago 0 comments


    So.. we needed to pick up very tiny objects from the desk (some M2 bolts), and we realized we needed some nail ! 

  • Thumb Rotation Servo Platform

    Vittorio Lumare4 days ago 0 comments


    Added a platform to support the Thumb Rotation Servomotor, so it can be disassembled directly without having to disassemble the FULL HAND!

    This is a critical improvement, it makes the maintenance and assembly much quicker !

  • Updated Thumb and Index STL Files

    Vittorio Lumare12/13/2025 at 15:29 0 comments

    HI all!

    The Thumb Base, Thumb finger and Index finger STL files have been updated and uploaded here.

    Here you can see the photo of the new 3D printed parts:

  • Thumb PIP Joint Circular Guides

    Vittorio Lumare12/09/2025 at 12:29 1 comment

    Hi all ! A little update here...

    The new Thumb will have 2 circular guides to prevent lateral motion.

    Design made with Blender:

  • Eliminating Lateral Play

    Vittorio Lumare12/06/2025 at 22:18 0 comments

  • Improving finger joints

    Vittorio Lumare12/05/2025 at 09:29 0 comments

    The finger joints have currently a slight tendency to move laterally when performing pinch grasp on certain objects.

    This modification shall provide more stability, ensuring no lateral movement.

    It consist of 2 rigid guides that allow only circular movement of the joint, around it's virtual axis.

    Virtual since there is no axis in this tpu flexible joint. Also, the virtual axis (the center of rotation) moves slightly during the closure, so the guides cavity has been increased by 0.3mm on each side to ensure smooth movement, using the Solidify modifier in Blender.


  • Teleop Rig Ready for Hand Testing!

    Vittorio Lumare12/01/2025 at 18:21 0 comments

    The teleop rig is now complete and operational. It enables real-time control of the hand's closing factor using a glove, while the arm holder ensures smooth, intuitive movements for the operator.

    This setup is dedicated solely to hand testing—not prosthetic applications. The goal is straightforward: simplify testing procedures and produce clear demo videos showcasing the hand's features.

    Future Potential

    We envision evolving this into an open-source add-on for trajectory recording, allowing replay for robotic tasks. Upcoming upgrades include a all-fingers sensor glove, including thumb rotation, for direct raw control. Currently, predefined grasp types work efficiently with just one sensor.

    Check out this video demo of the rig in action, controlling the middle finger via glove input:

    Community feedback welcome—ideas for grasp tests or rig improvements?

  • Rapid-Prototyping a Testing Rig & Control Glove

    Vittorio Lumare11/29/2025 at 22:06 0 comments

    During pinch grasp testing today, I hit a workflow bottleneck: controlling the hand freely while it was unsupported. The solution? Two quick hardware hacks to streamline development.

    1. Stable Testing Platform: I designed and built a simple arm holder to securely mount the hand. This provides a stable base for consistent, repeatable grasp testing without needing a second person to hold it.
    2. Intuitive Control Interface: To move beyond keyboard commands, I prototyped a bend-sensor glove. This allows for direct and intuitive control of the hand's gestures by simply flexing my own fingers, making iterative testing much faster.

    The videos below show both the new stable platform and the glove controller in action. Sometimes the best way to move a project forward is to build better tools!

  • When Software Bugs Create Hardware Failures – A Spool Saga

    Vittorio Lumare11/29/2025 at 15:02 0 comments

    We experienced a classic case of software chaos leading to mechanical failure. A runaway motor torque issue caused one of our tendon spools to snap clean in half.

    The Root Cause: A software bug bypassed the safety torque limiter also causing the fingers to open and close at maximum speed in a random pattern. This quickly tangled the fingers multiple times and created extreme tension on the extensor mechanism of the index finger, resulting in a sudden failure of the 30% infill spool.

    The Fix (Two-Pronged Approach):

    1. Software: we started fixing the bug 
    2. Hardware: Increased the spool's 3D printing infill from 30% to 60% for a significant boost in strength and layer adhesion.

    The photos below tell the story:

    • Broken Spool: The result of the extreme, unexpected torque.
    • 30% Infill: The original, lighter-weight design.
    • 60% Infill: The new, more robust iteration.

    This kind of iterative failure is all part of the development process – find a weakness, understand its cause, and design a better solution!

  • Rebelia is now YEAH

    Vittorio Lumare11/28/2025 at 15:24 0 comments

    As announced, the name of the robotic hand is now YEAH.

View all 24 project logs

  • 1
    Assembly : Initial Empty Skeleton

    The names of the holes and other parts are defined in the chapter Nomenclature of Parts.

    The assemblage consists taking the hand’s skeleton and to install on it all the components following a precise sequence.

    IMPORTANT: If the sequence is not followed correctly, all components already installed will have to be dismantled till the moment the sequence was modified, in order to resume again the proper order of the sequence because there are parts that cannot be assembled after others.


    Skeleton - front view

    Skeleton - back view

  • 2
    Assembly : Servomotors Installation

    Note: each servomotors must be secured in its slot using 4 screws M2, 8mm long. TBD

    1. Install the Thumb Rotation Servomotor in the SSTR slot (Holes: MTR1, MTR, MTR3, MTR4)

      ◦ Note: Position the motor with the flange facing down. 

    2. Install the Thumb Flexion Servomotor in the SST slot (Holes: MTF1, MTF2, MTF3, MTF4)

      ◦ Note: Position the motor with the flange facing the front side of the skeleton. 

    3. Connect the servomotor in the SSTR slot to the one in the SST slot.

    4. Install the Middle Flexion Servomotor in the SSM slot (Holes: MM1, MM2, MM3, MM4)

      ◦ Note: Position the motor with the flange facing the rear side of the skeleton.

    5. Connect the servo motor in the SST slot. to the one in the SSM slot 

    6. Install the Ring Flexion Servomotor in the SSR slot (Holes: MR1, MR2, MR3, MR4)

      ◦ Note: Position the motor with the flange toward the rear side of the skeleton.

    7. Connect the servomotor in the SSM slot to the one in the SSR slot 

    8. Install the Index Flexion Servomotor in the SSI slot (Holes: MI1, MI2, MI3, MI4)

      ◦ Note: Position the motor with the flange toward the rear side of the skeleton

    9. Connect the servomotor in the SSR slot to the one in the SSI slot

    Left Hand – Servomotors Built-in – Front View


    Left Hand – Servomotors Built-in – Rear View

  • 3
    Thumb Base Installation

    1. Thumb Base on Thumb Rotation servomotor flange (4 bolts M3, 10mm long)    (Flange holes: SF1, SF2, SF3, SF4, Thumb Base holes: BT1, BT2, BT3, BT4)


View all 17 instructions

Enjoy this project?

Share

Discussions

Does this project spark your interest?

Become a member to follow this project and never miss any updates