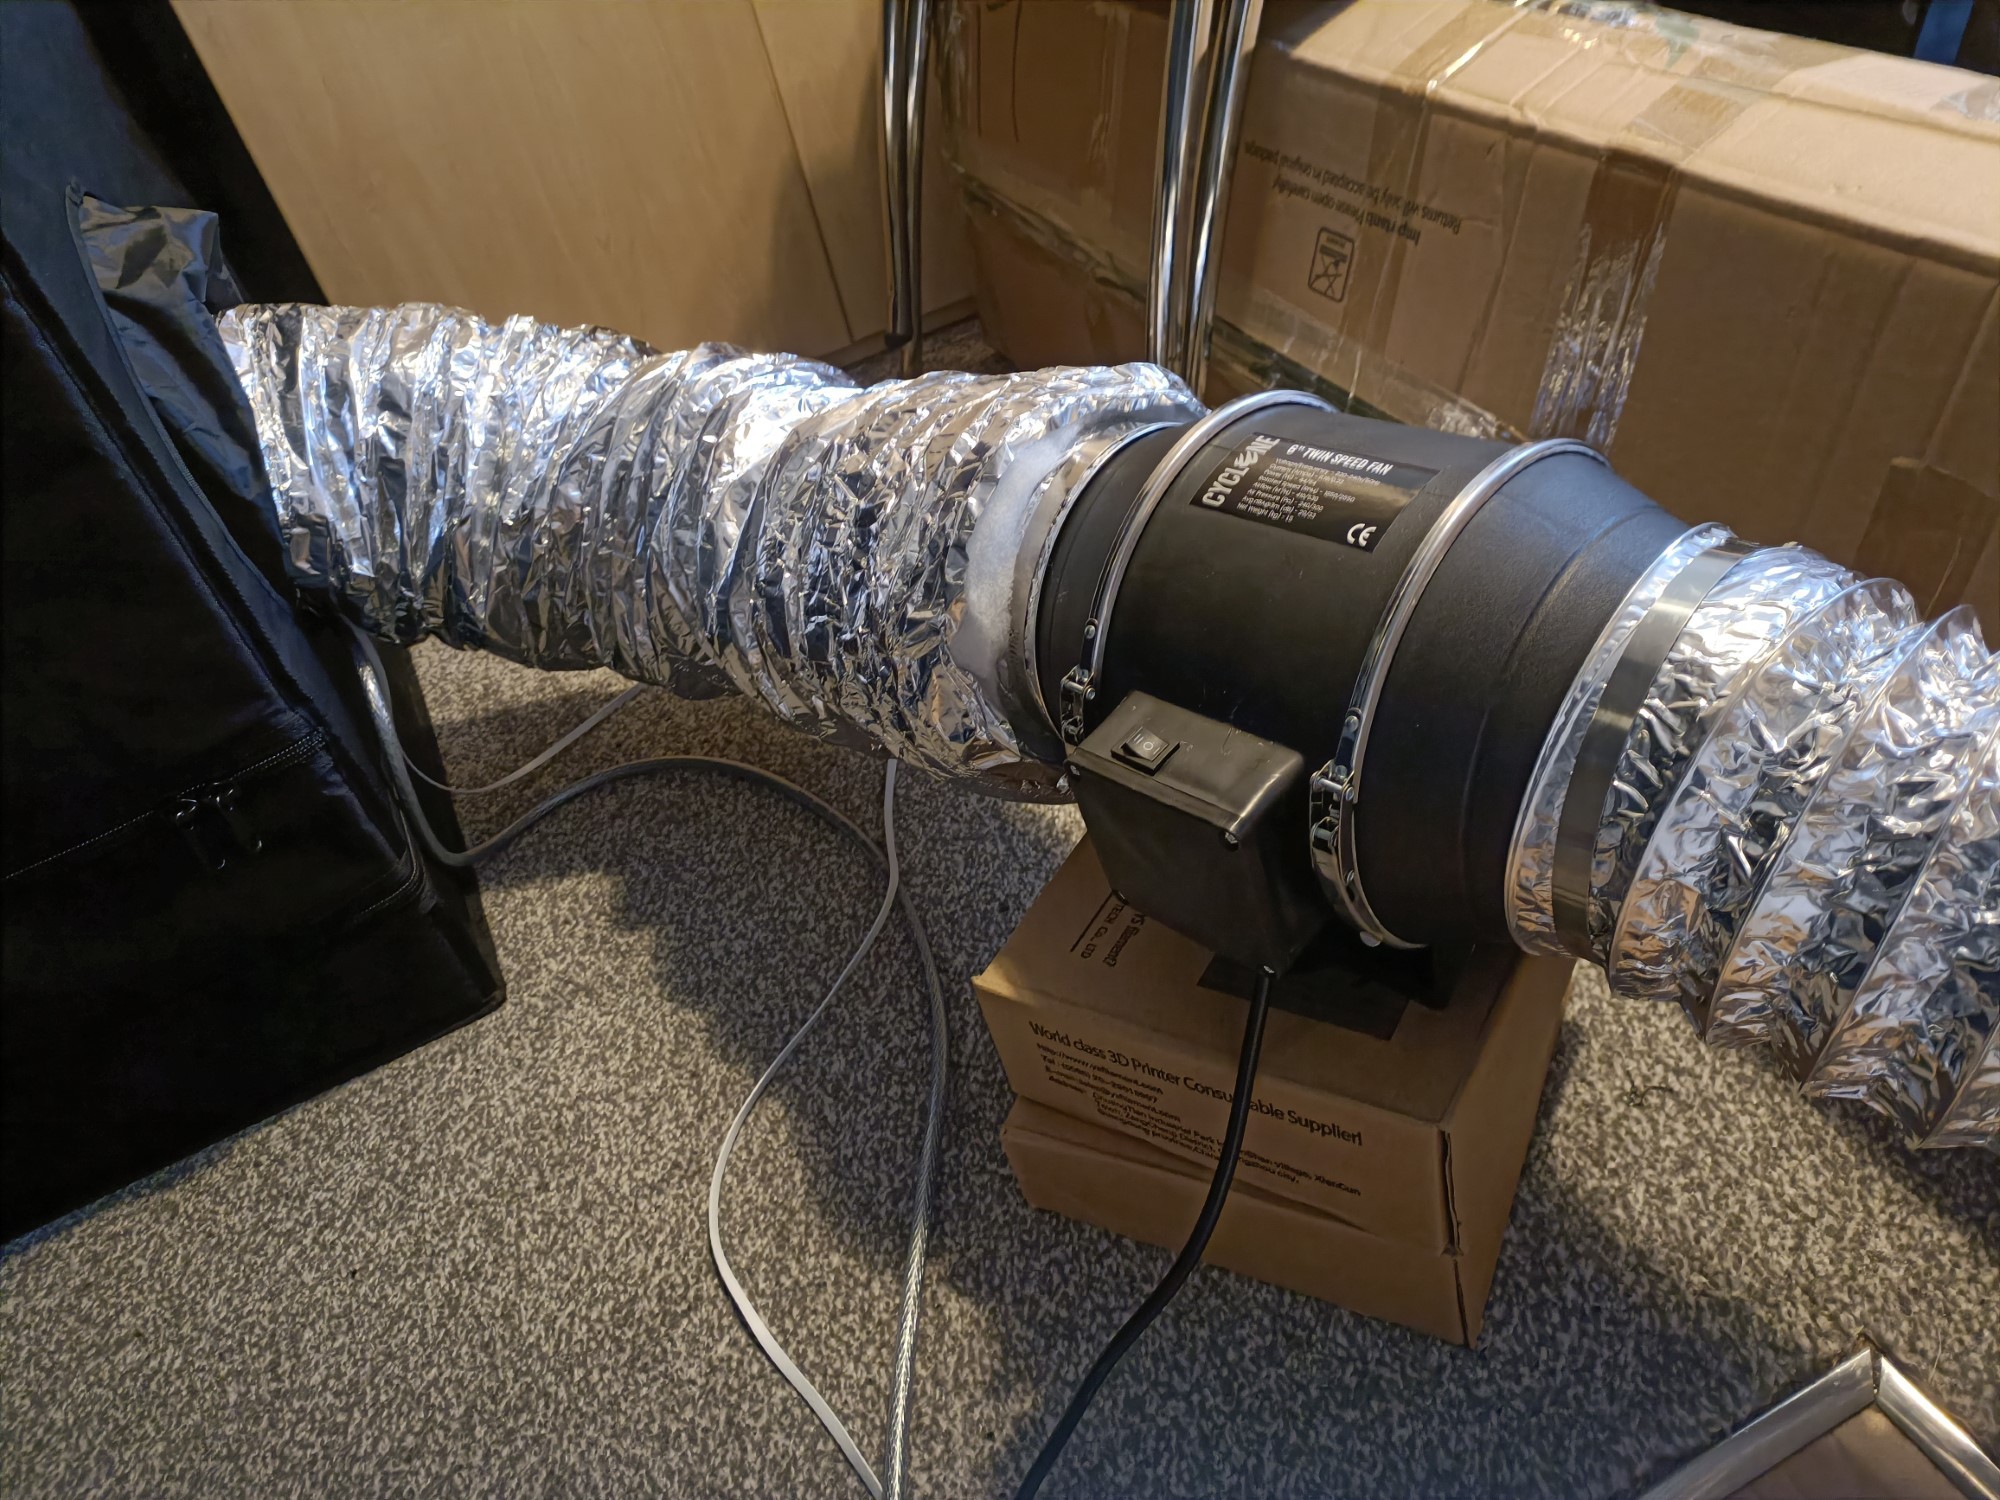
So I finally got the new fan from the seller and it worked without issues.
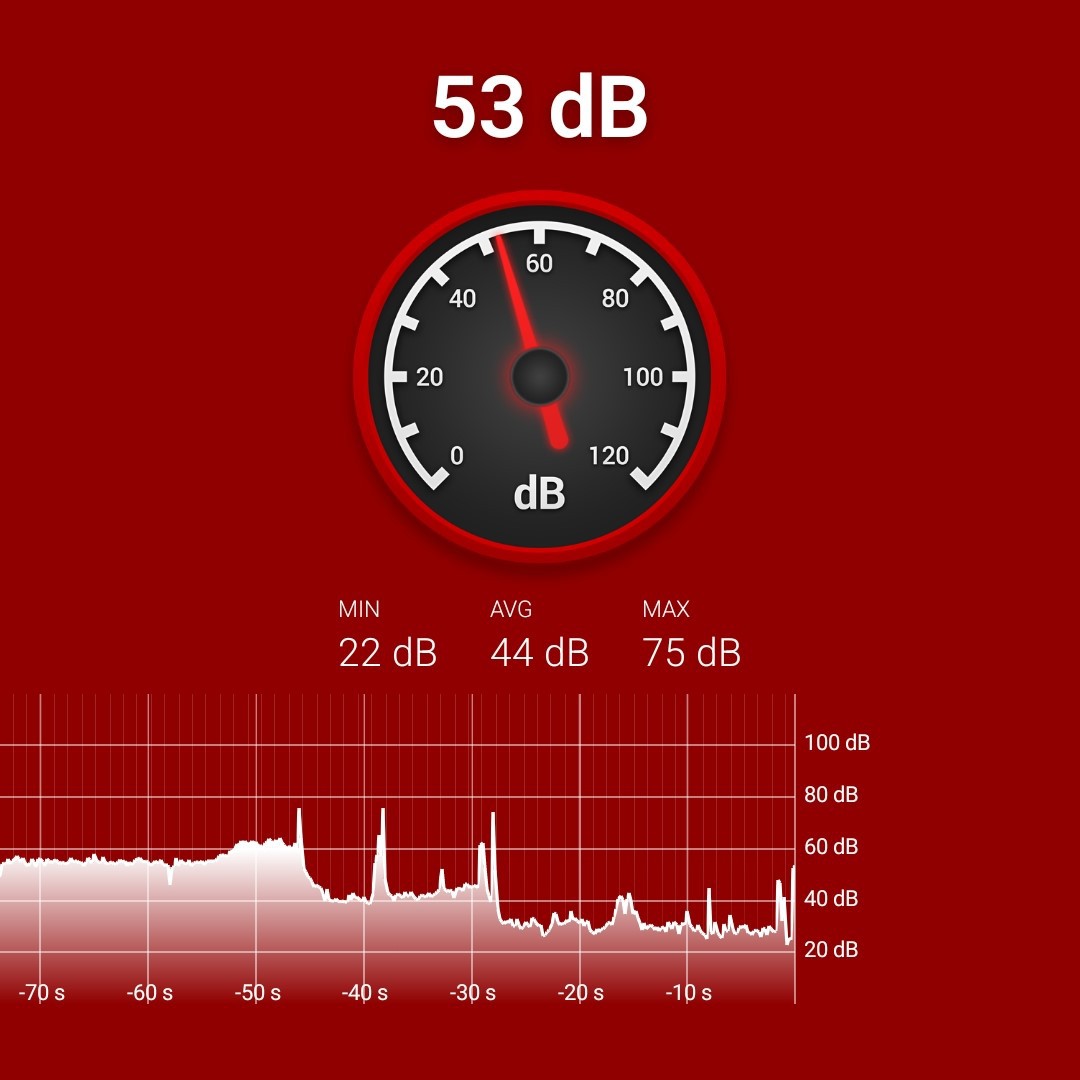
However, I wasn't getting anywhere near the 29/33dB claimed on the label. On the lowest setting, it was 56dB from 3m away and 60dB from 1m and that was with the filter and air duct installed. I got 56dB on the last one before it broke and I thought it was that loud because the duct wasn't on.
I asked the seller about this and they don't know how the manufacturer is testing this either. I know that manufacturers stretch the truth (such as laser diode sellers saying that a 5.5W output power laser is "40W") but I'm an entire 20dB out. The seller was kind enough to send me a 1m acoustic ducting, which is just what I needed to get air from the window all the way to the tent.
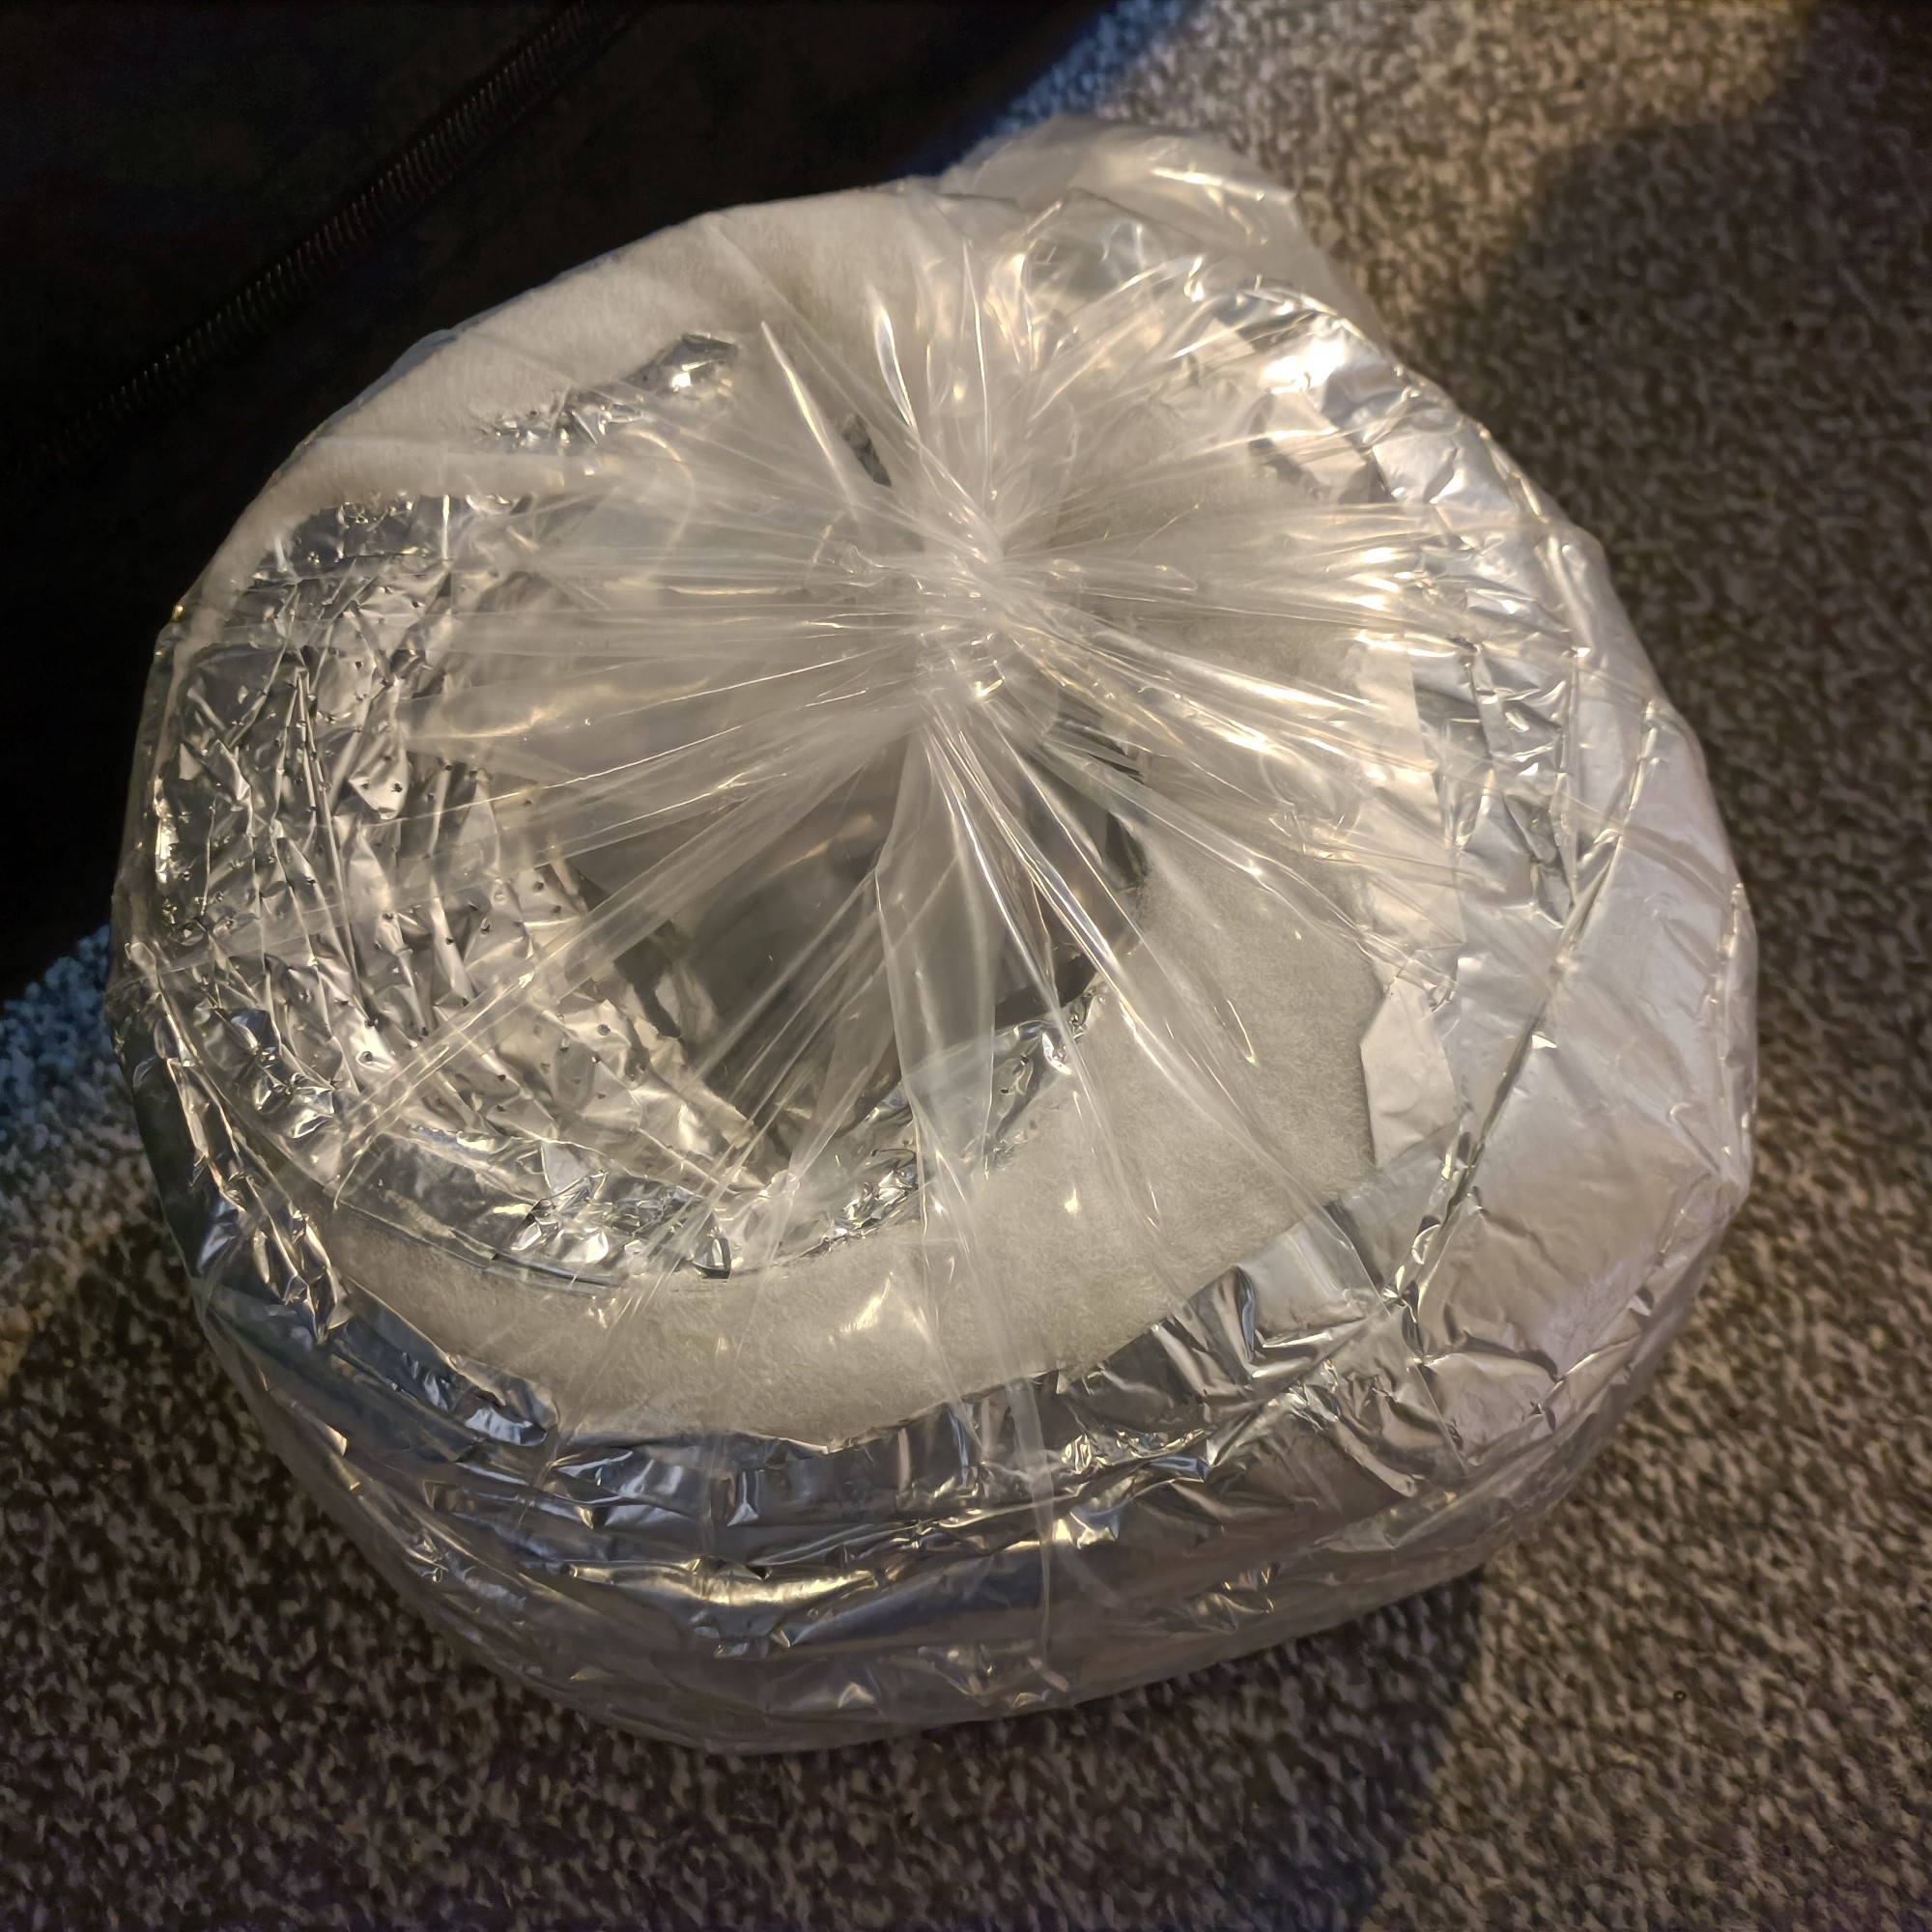
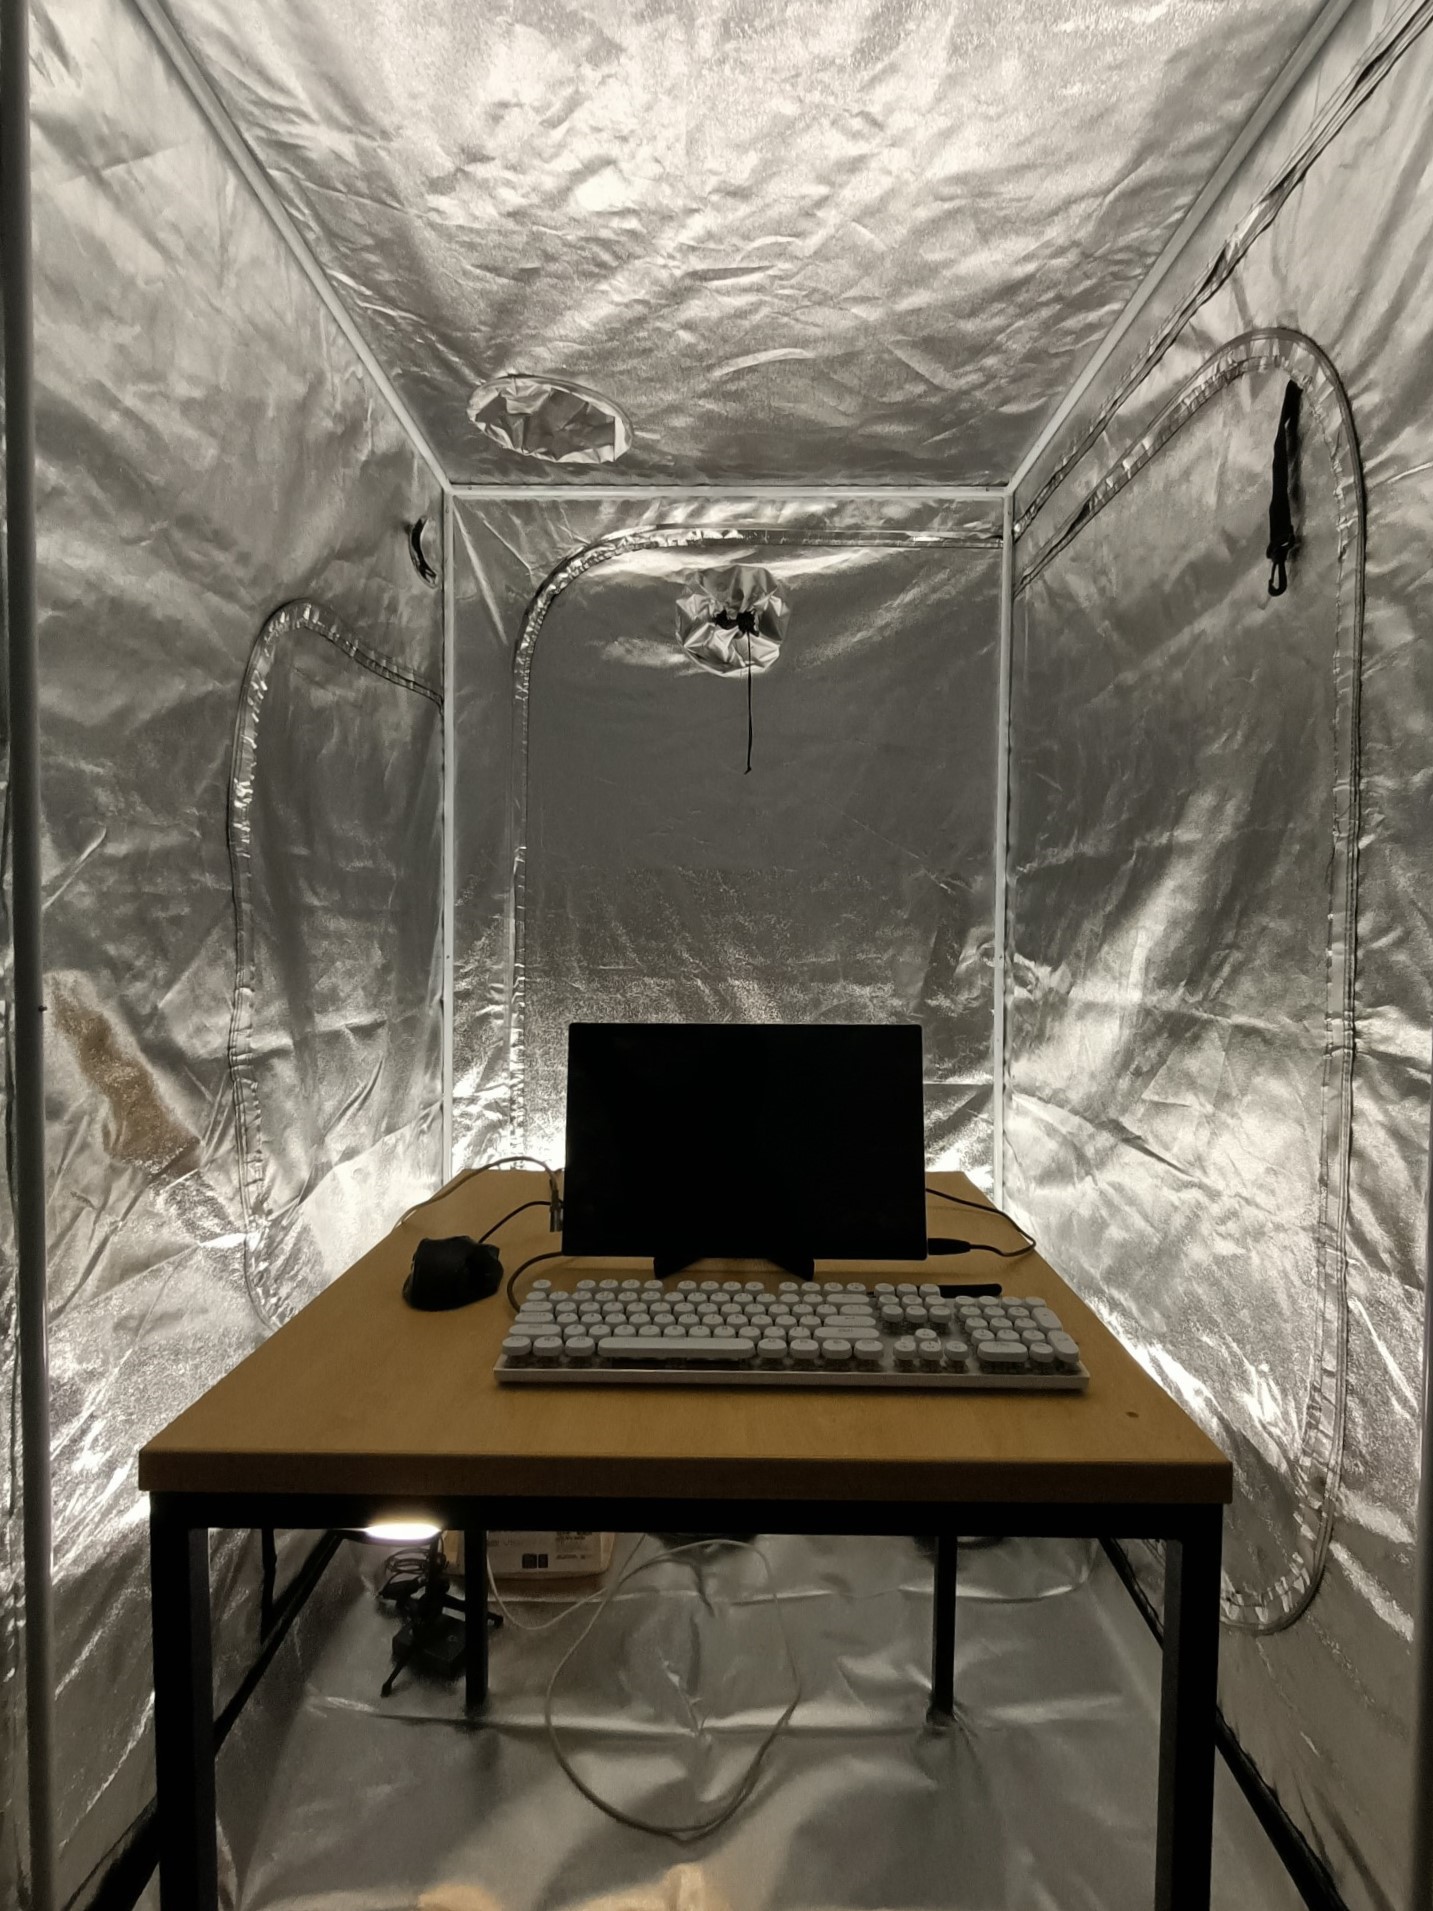
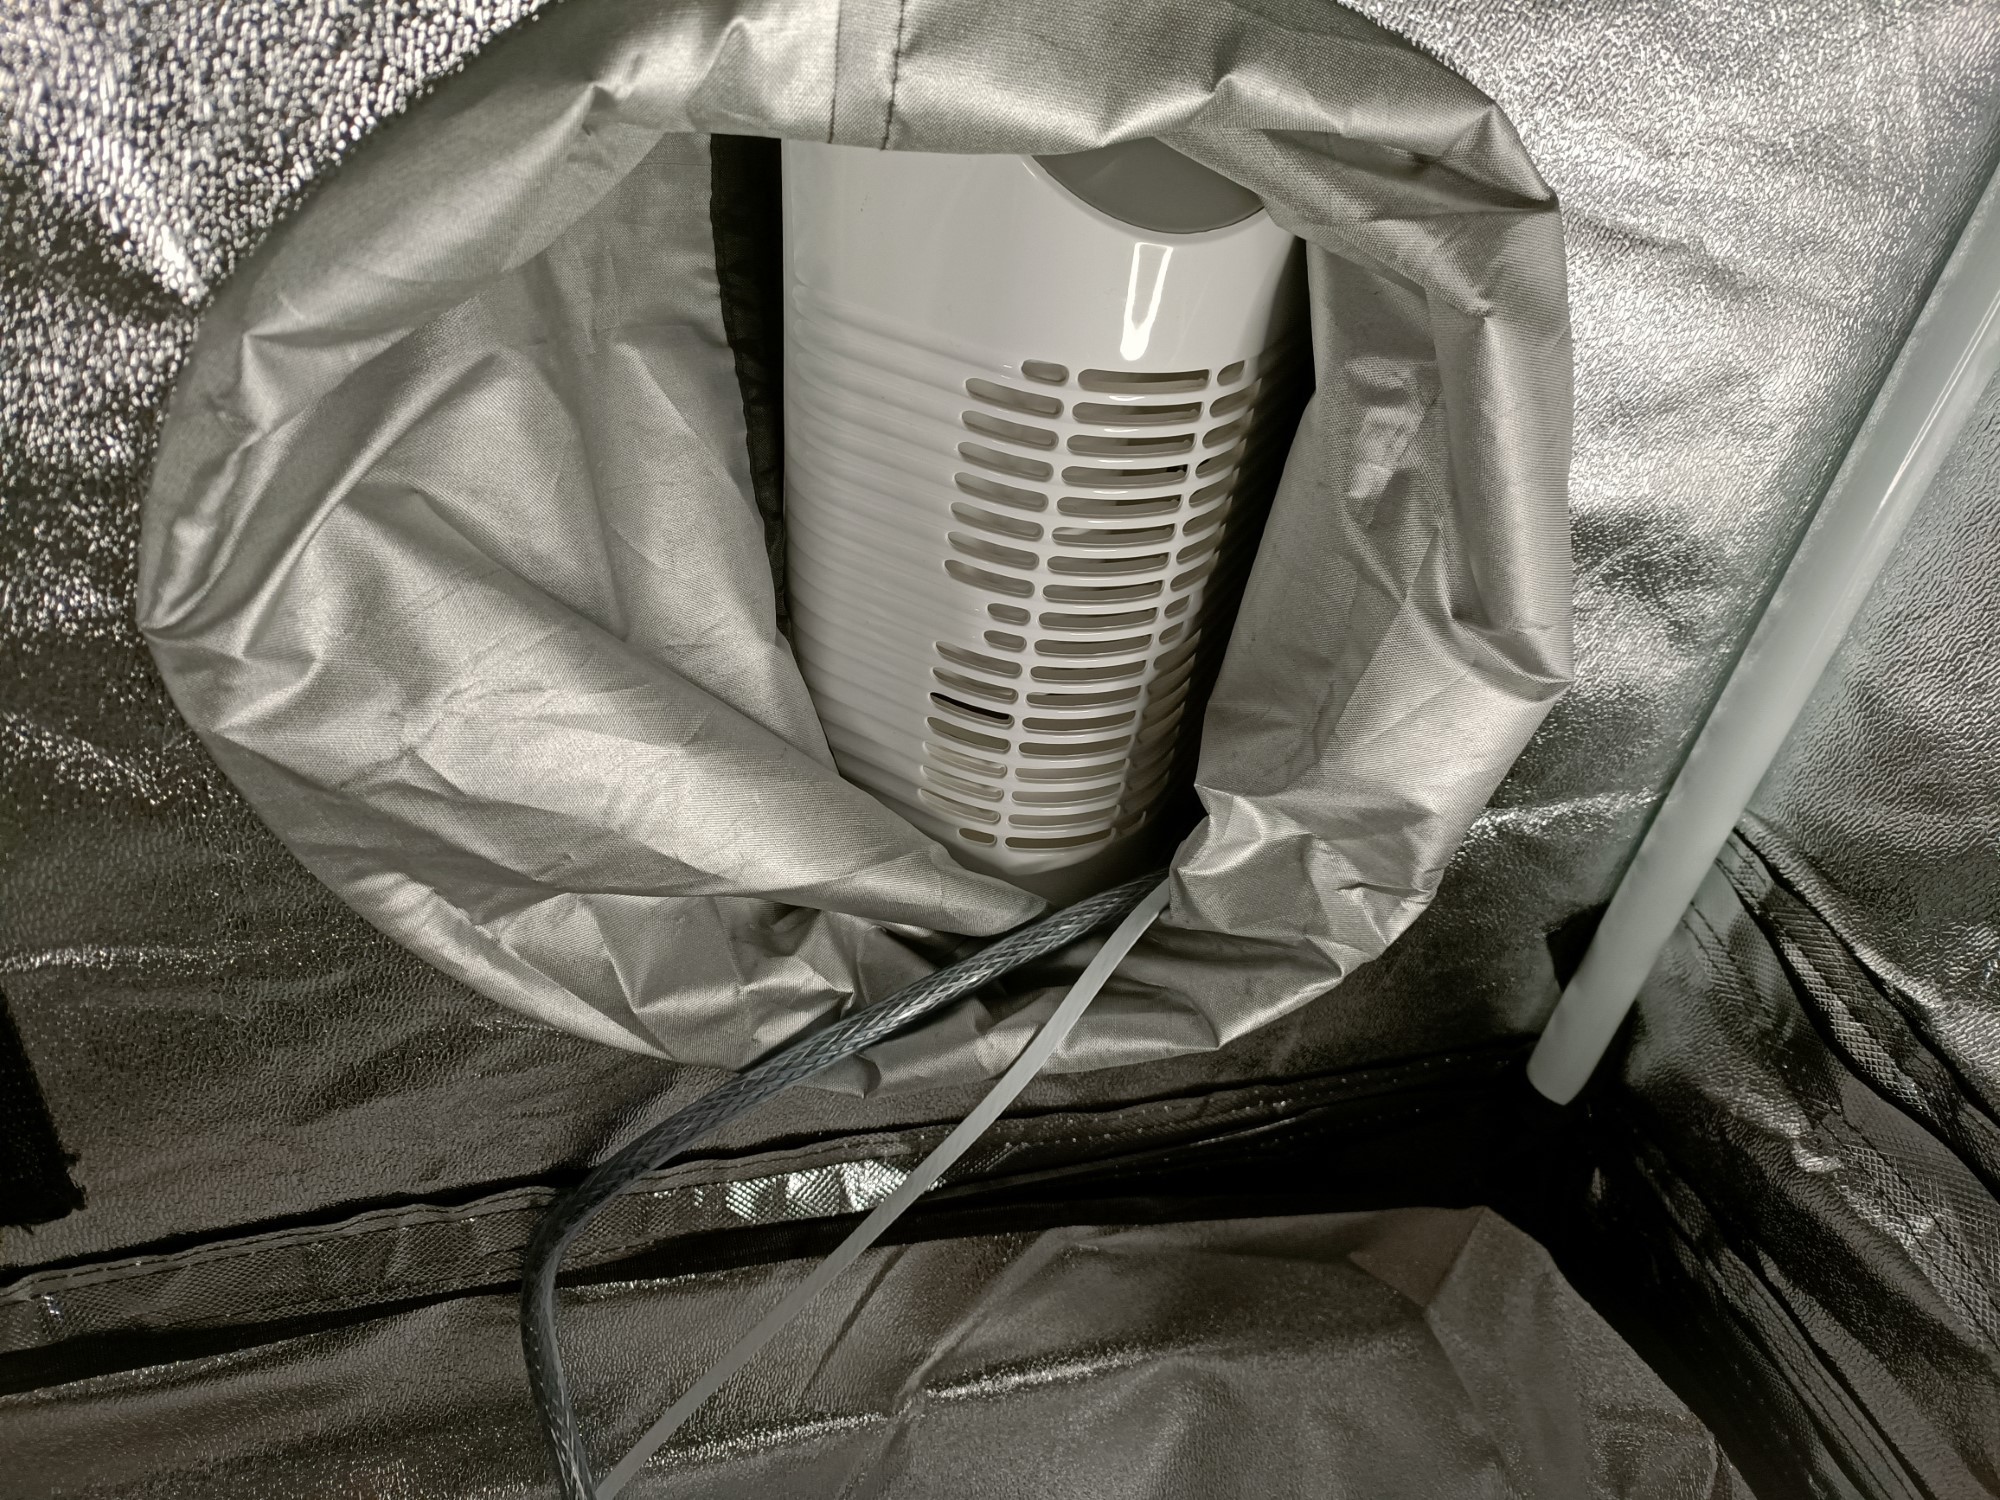
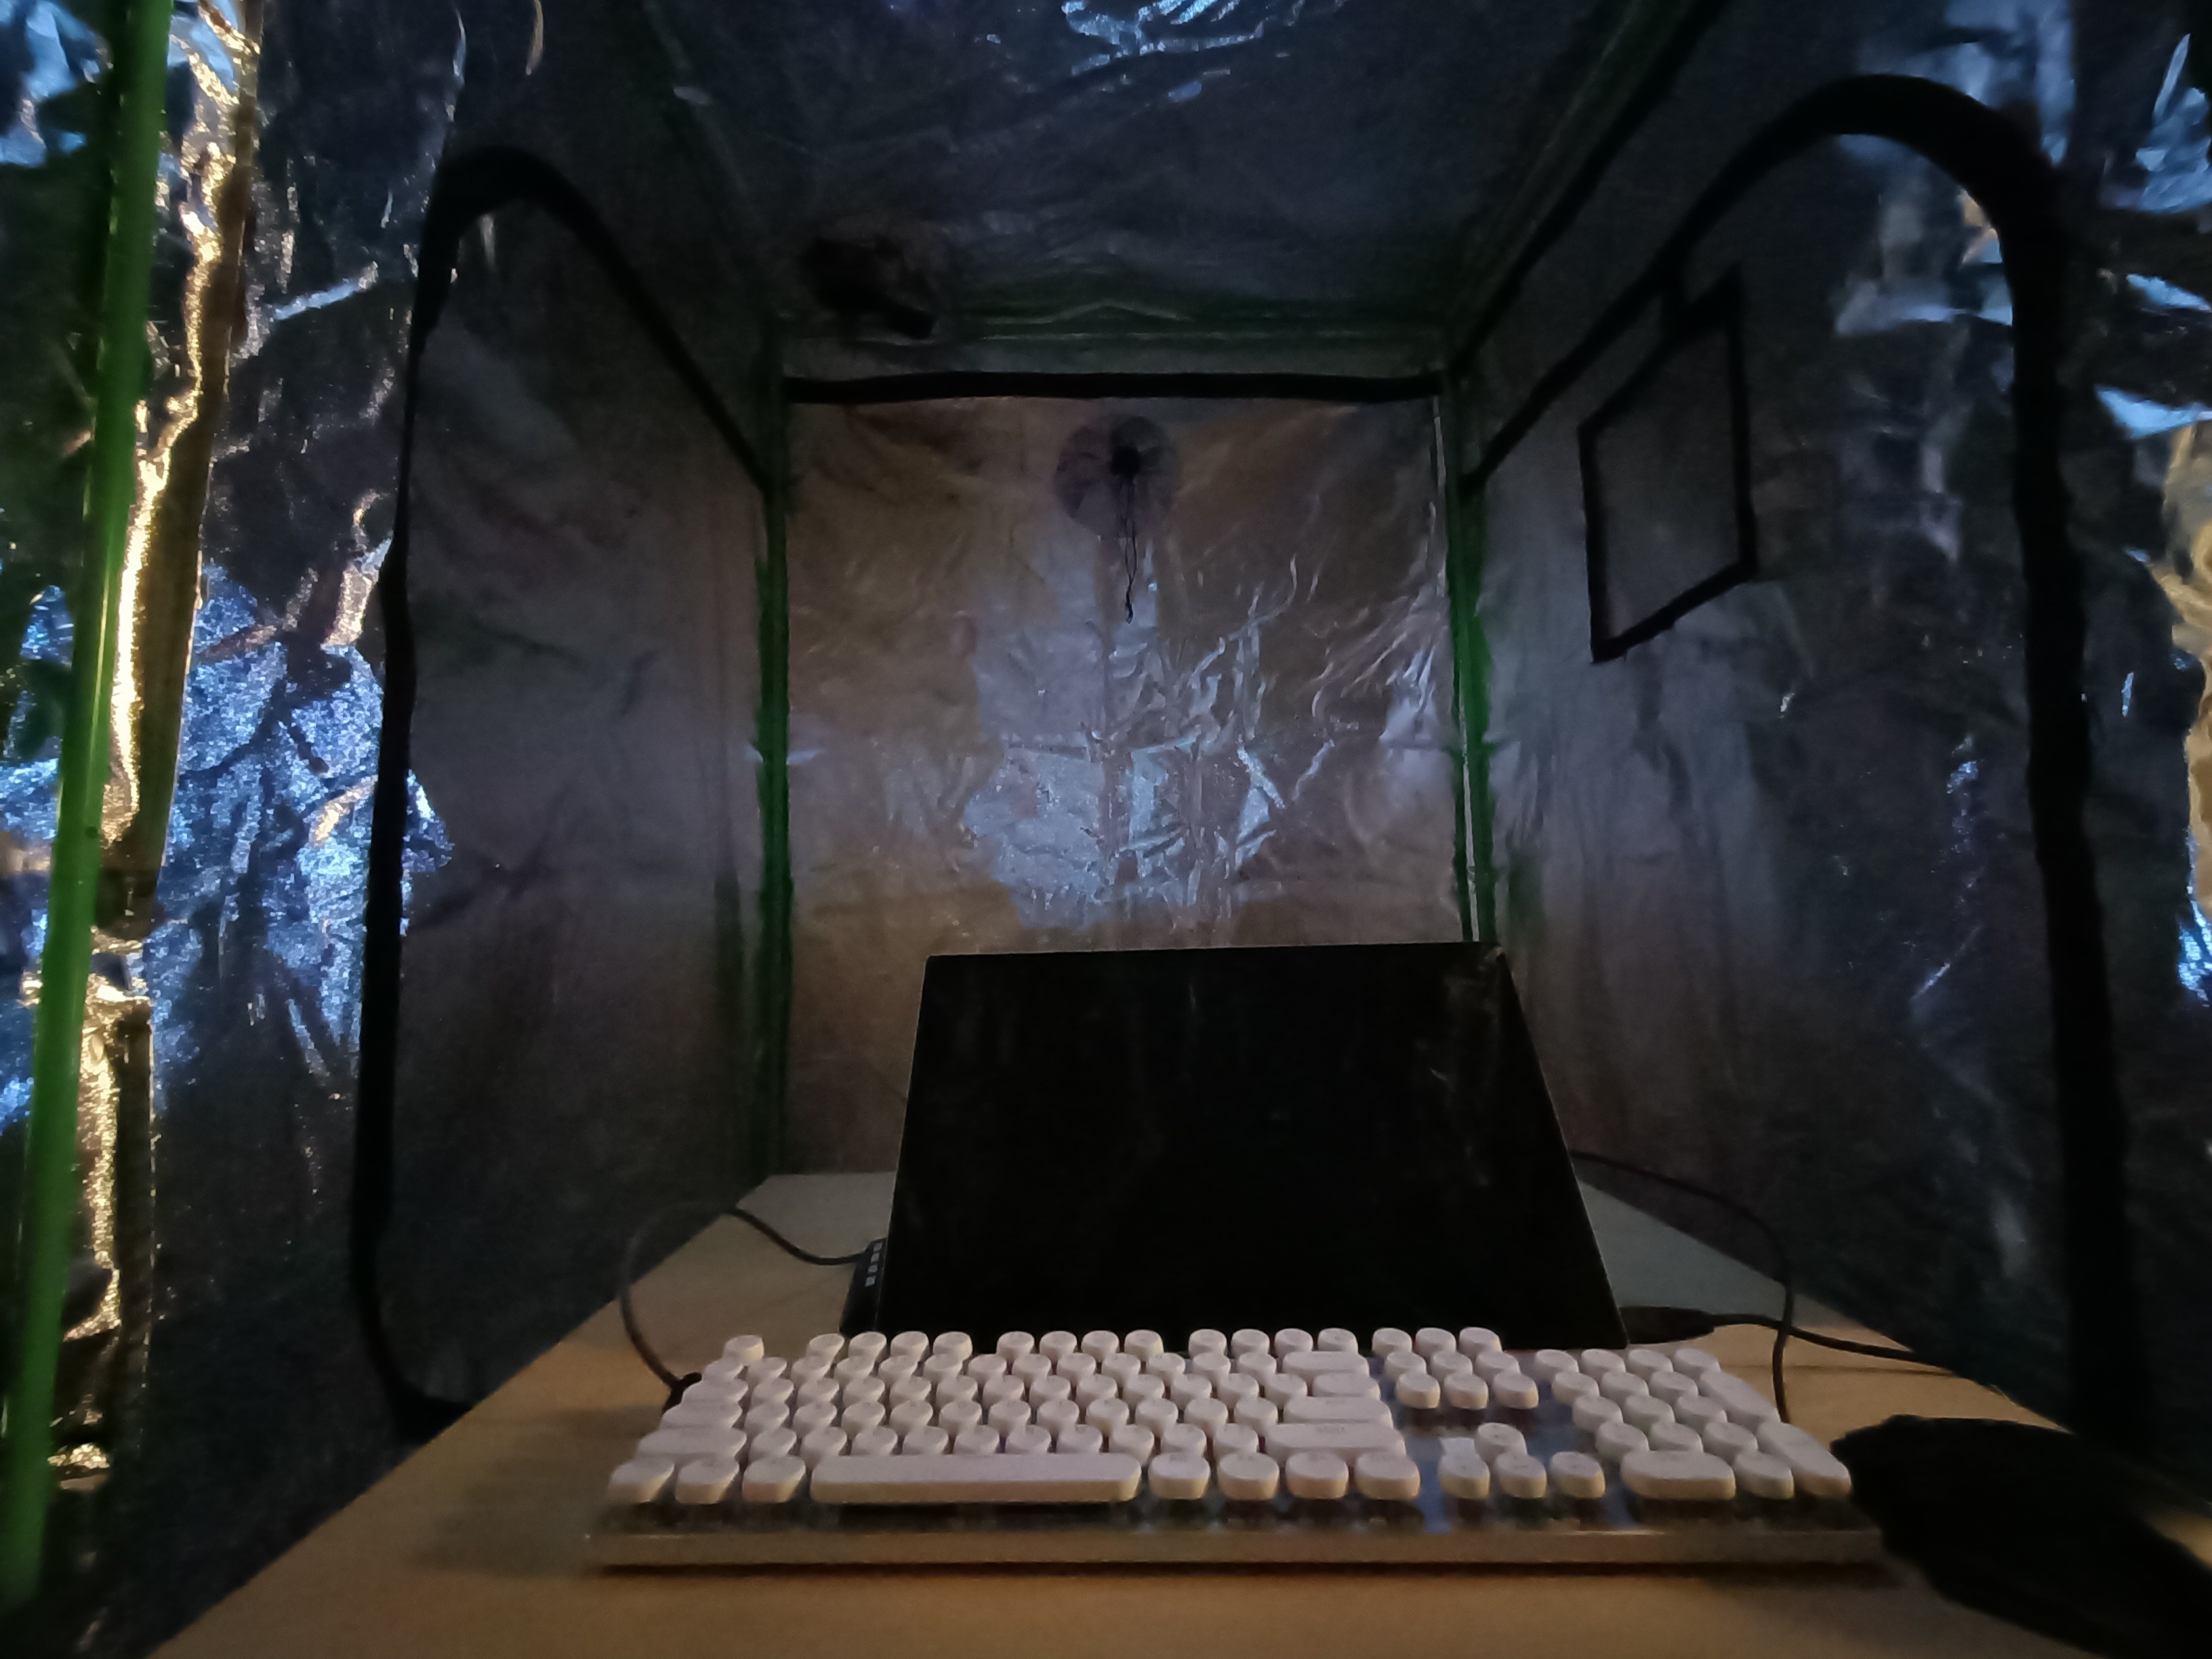
Now I've been getting some actual work done in here:Image taken from the exhaust vent
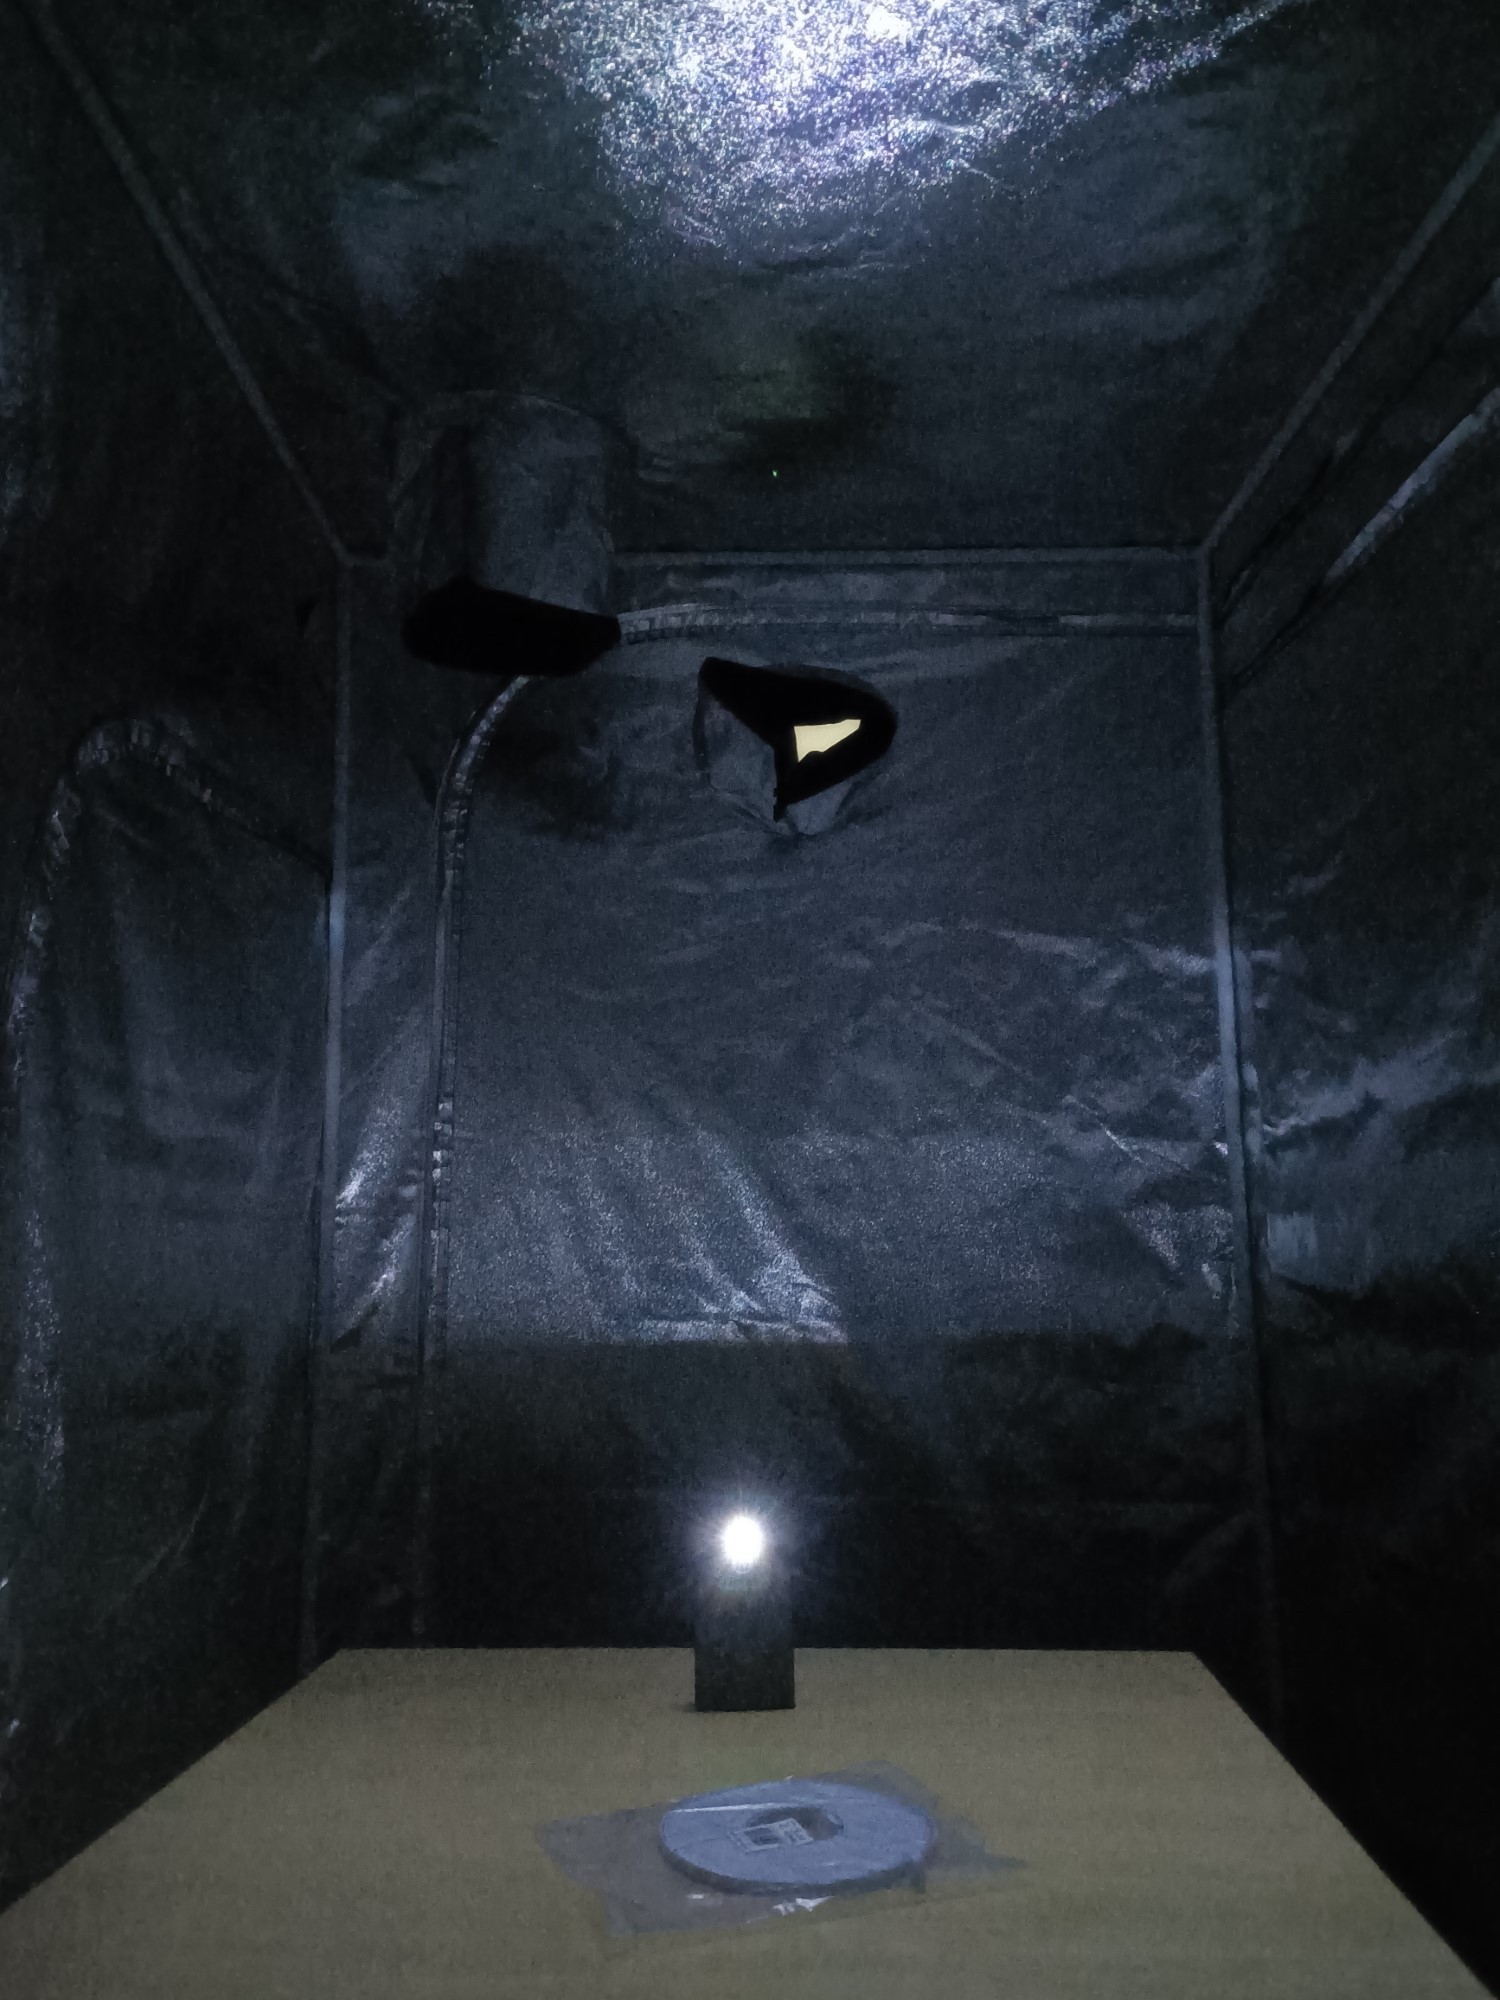
The noise floor is 45dB without the fan and still 56dB in here, though the dominant frequency is a low white noise, with the inline fan sounding like a vacuum cleaner in another room. I haven't smelled any car fumes from the road outside the window, and the air is cold like its been air conditioned. Along with the views, it makes me feel like I'm in an (underground) datacentre (or a fridge).
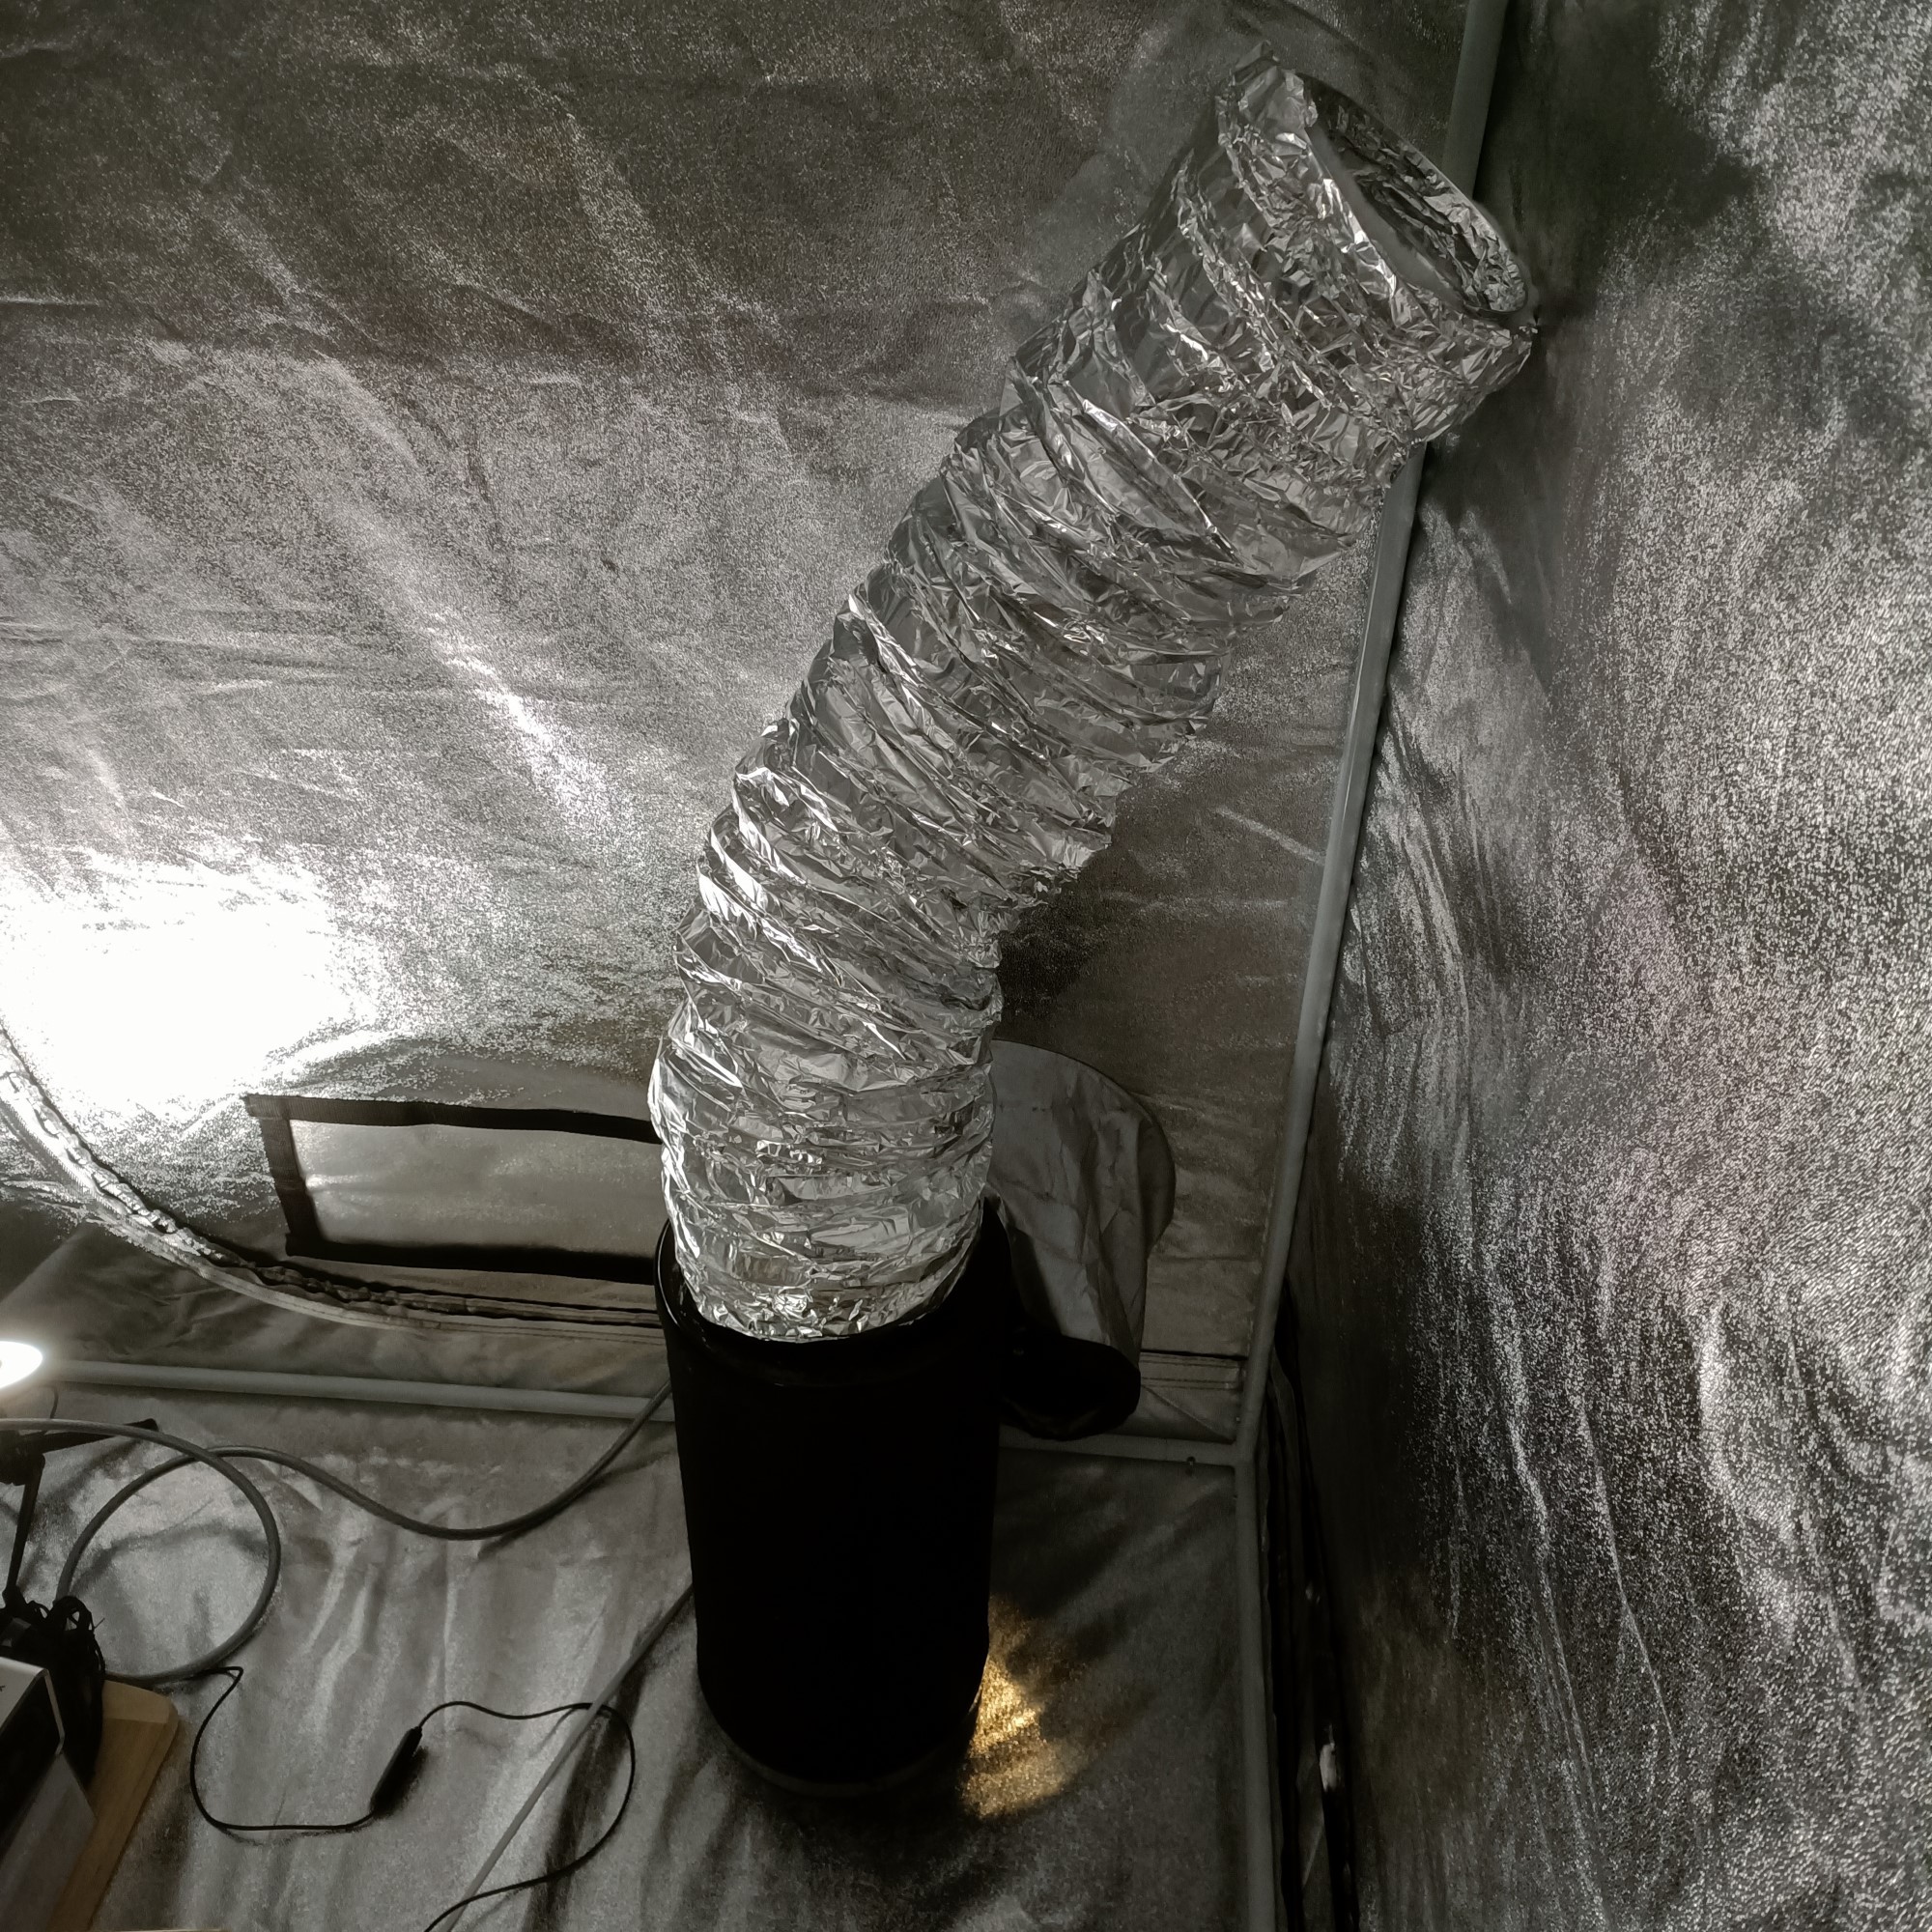
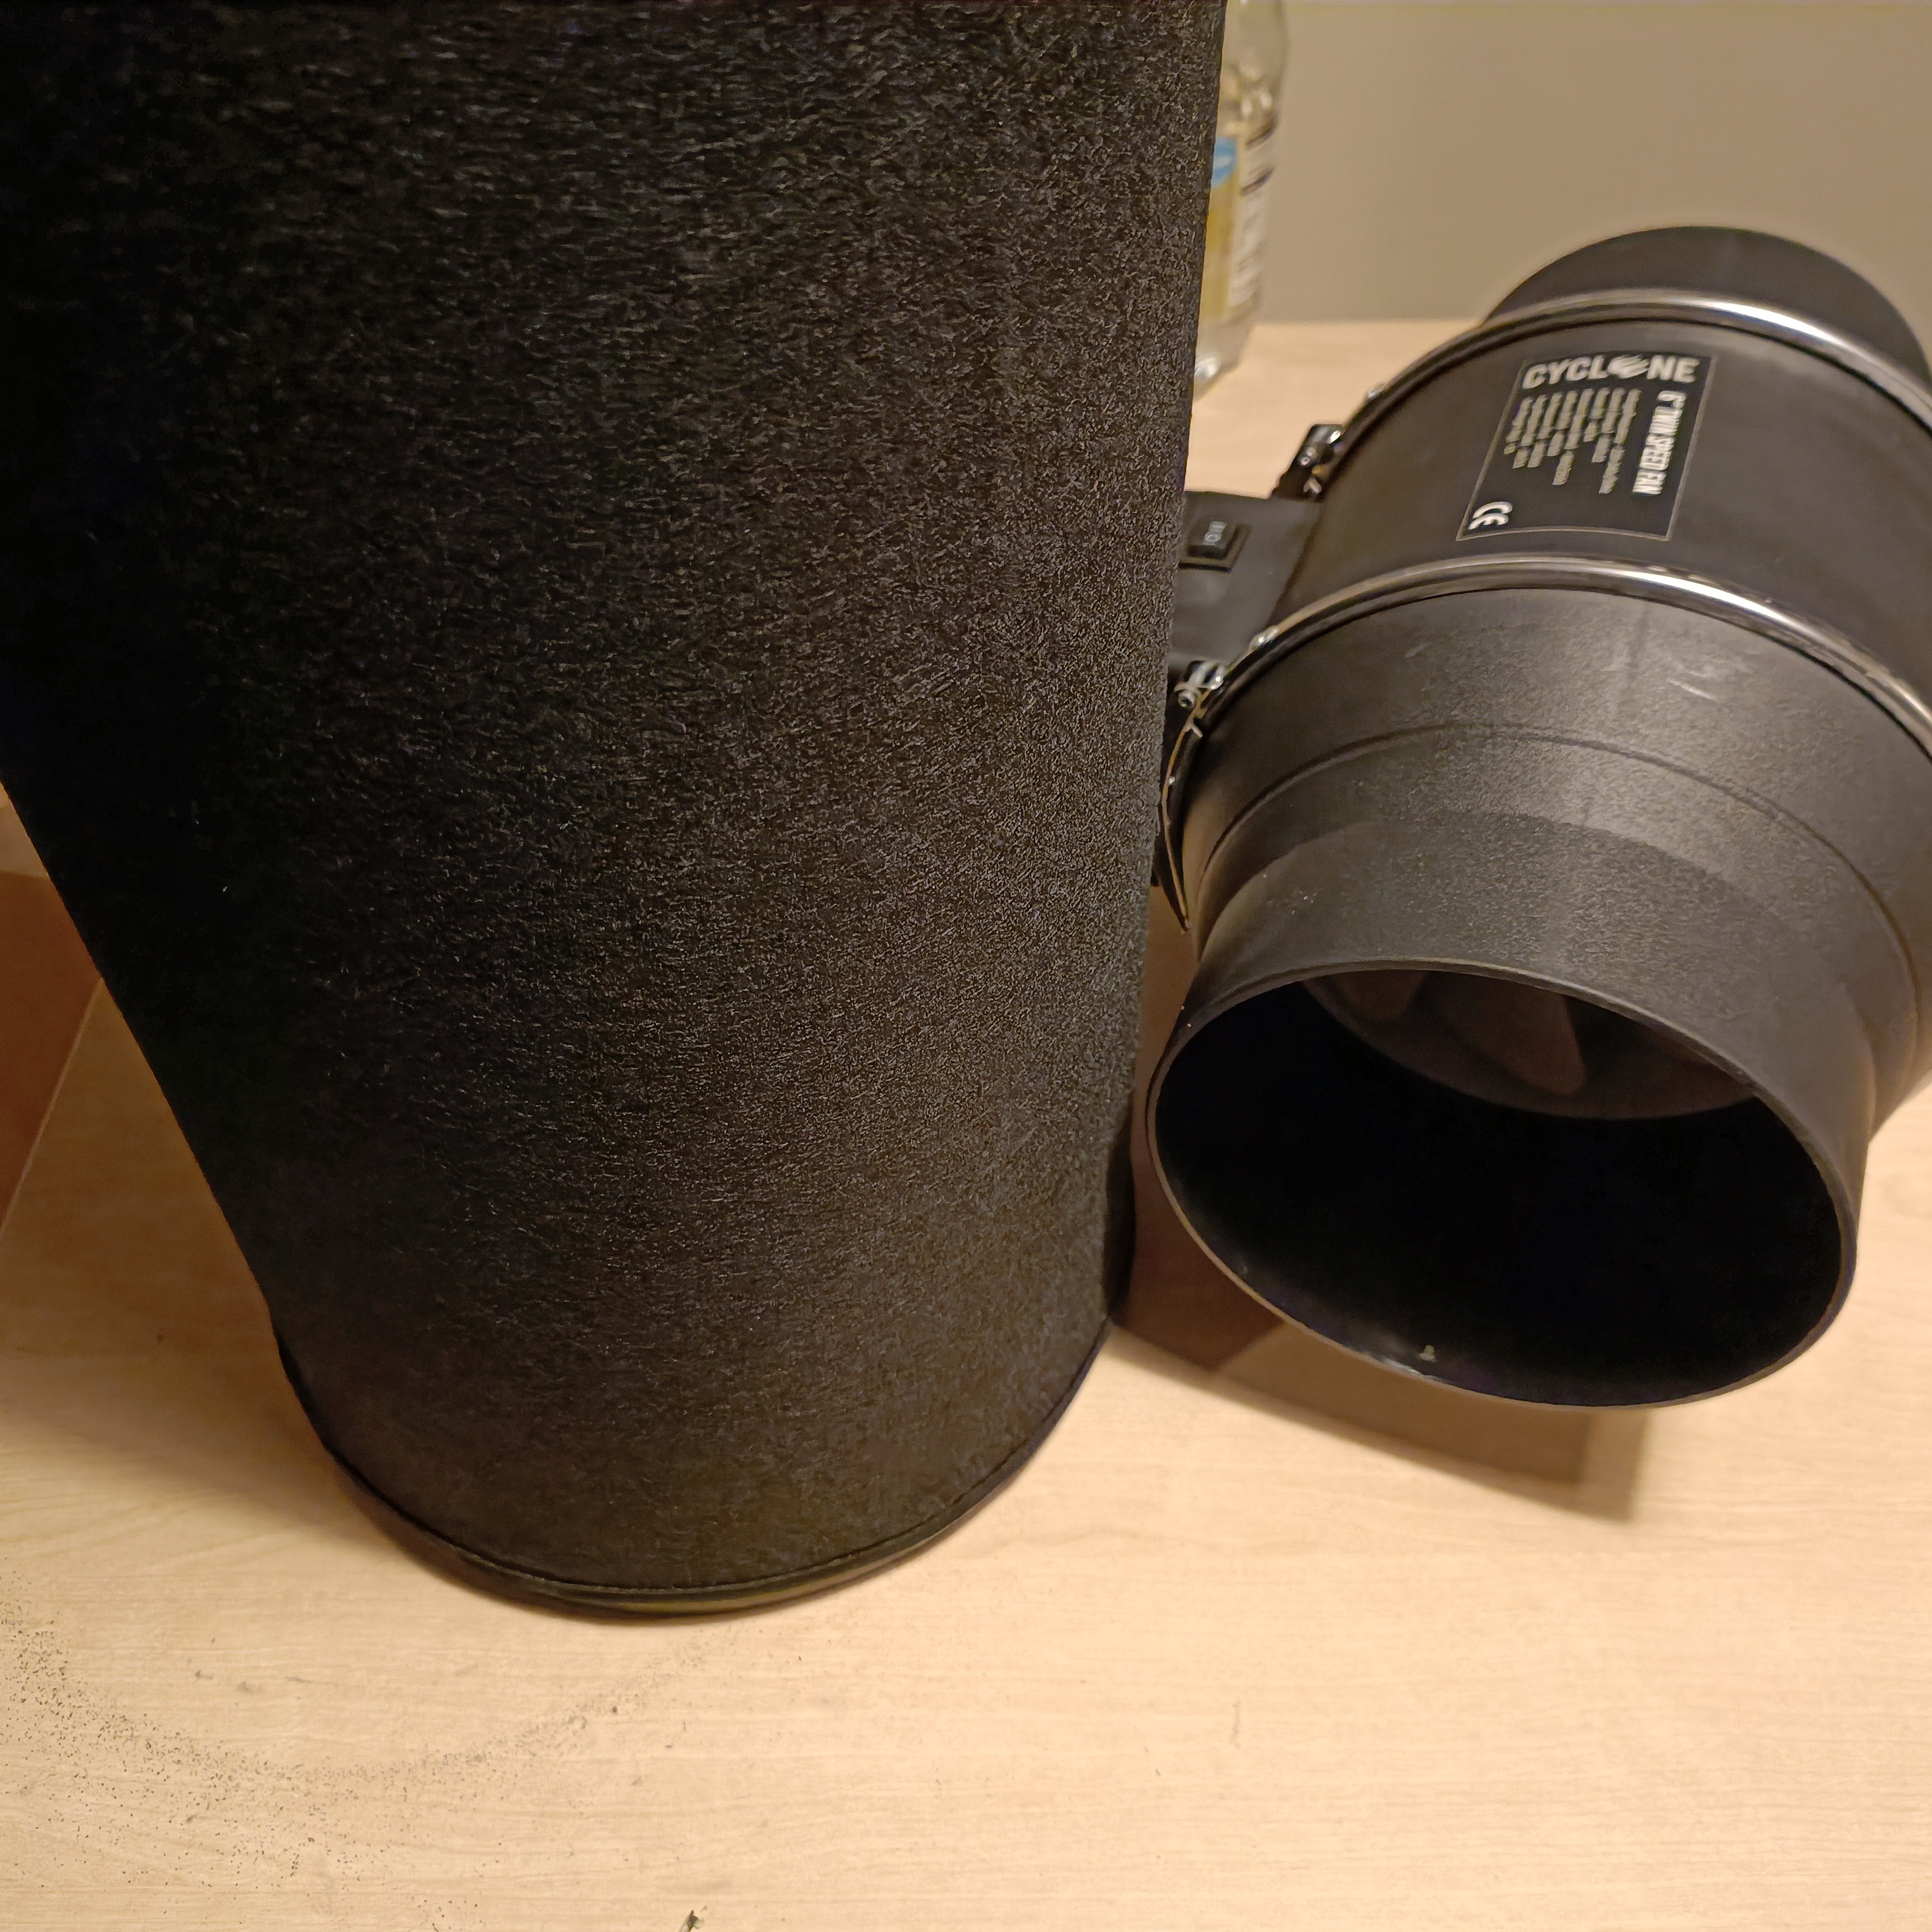
From feeling the air on the exhaust vent, I'm glad that I went with the 6 inch fan system. Speed 1 is probably the lowest I would've been okay with, and sometimes I enable the high speed to get more air going though. The actual noise output is almost the same, but the fan frequency is higher so it's more audiable.
Right now, the TrueTent TempLab has become a not-so-temporary TempLab. I should've seen this comming, but honestly I'm so swamped with workload that my itenerary is essentially:
So I might as well save the 2 hours of transit time.
[1 April] It honestly feels like air conditioning in here, almost like I'm actually in a datacenter (I hear they're cold to keep the server thermals down). I've got just the background track for this:
The plan I'm thinking of is to align all the panels in a line and hang them on the long left wall so that it's similar to the ceiling windows above. Then, I'll ideally use a microcontroller to vary the PWM signals sent to each of them so that I can simulate rolling clouds or something near the window moving in the wind, changing the light that enters the room.
I grabbed the first 8 screens in the job lot, put them in my backpack and ran over to the labs my university happens to have to see if I can actually get some artificial lighting while I wait for this inline fan RMA (it's almost been 3 weeks now... If I'd known, I'd've probably sent back the entire kit and reordered)
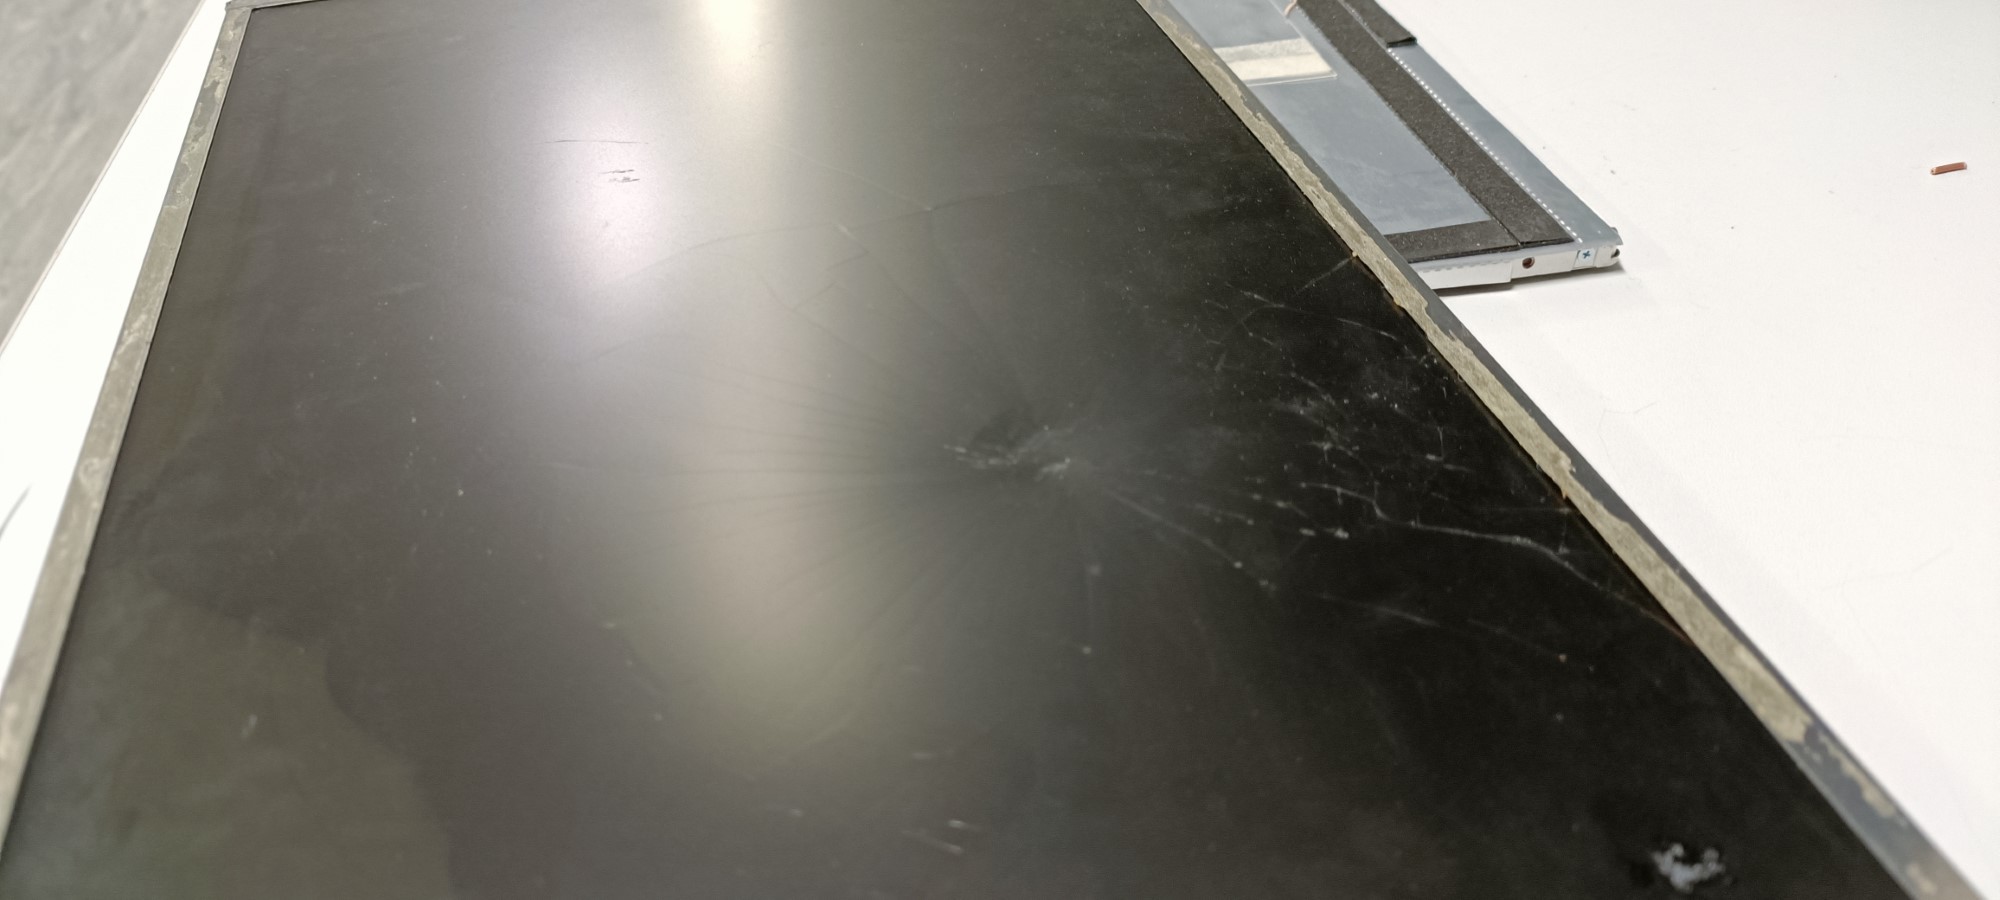
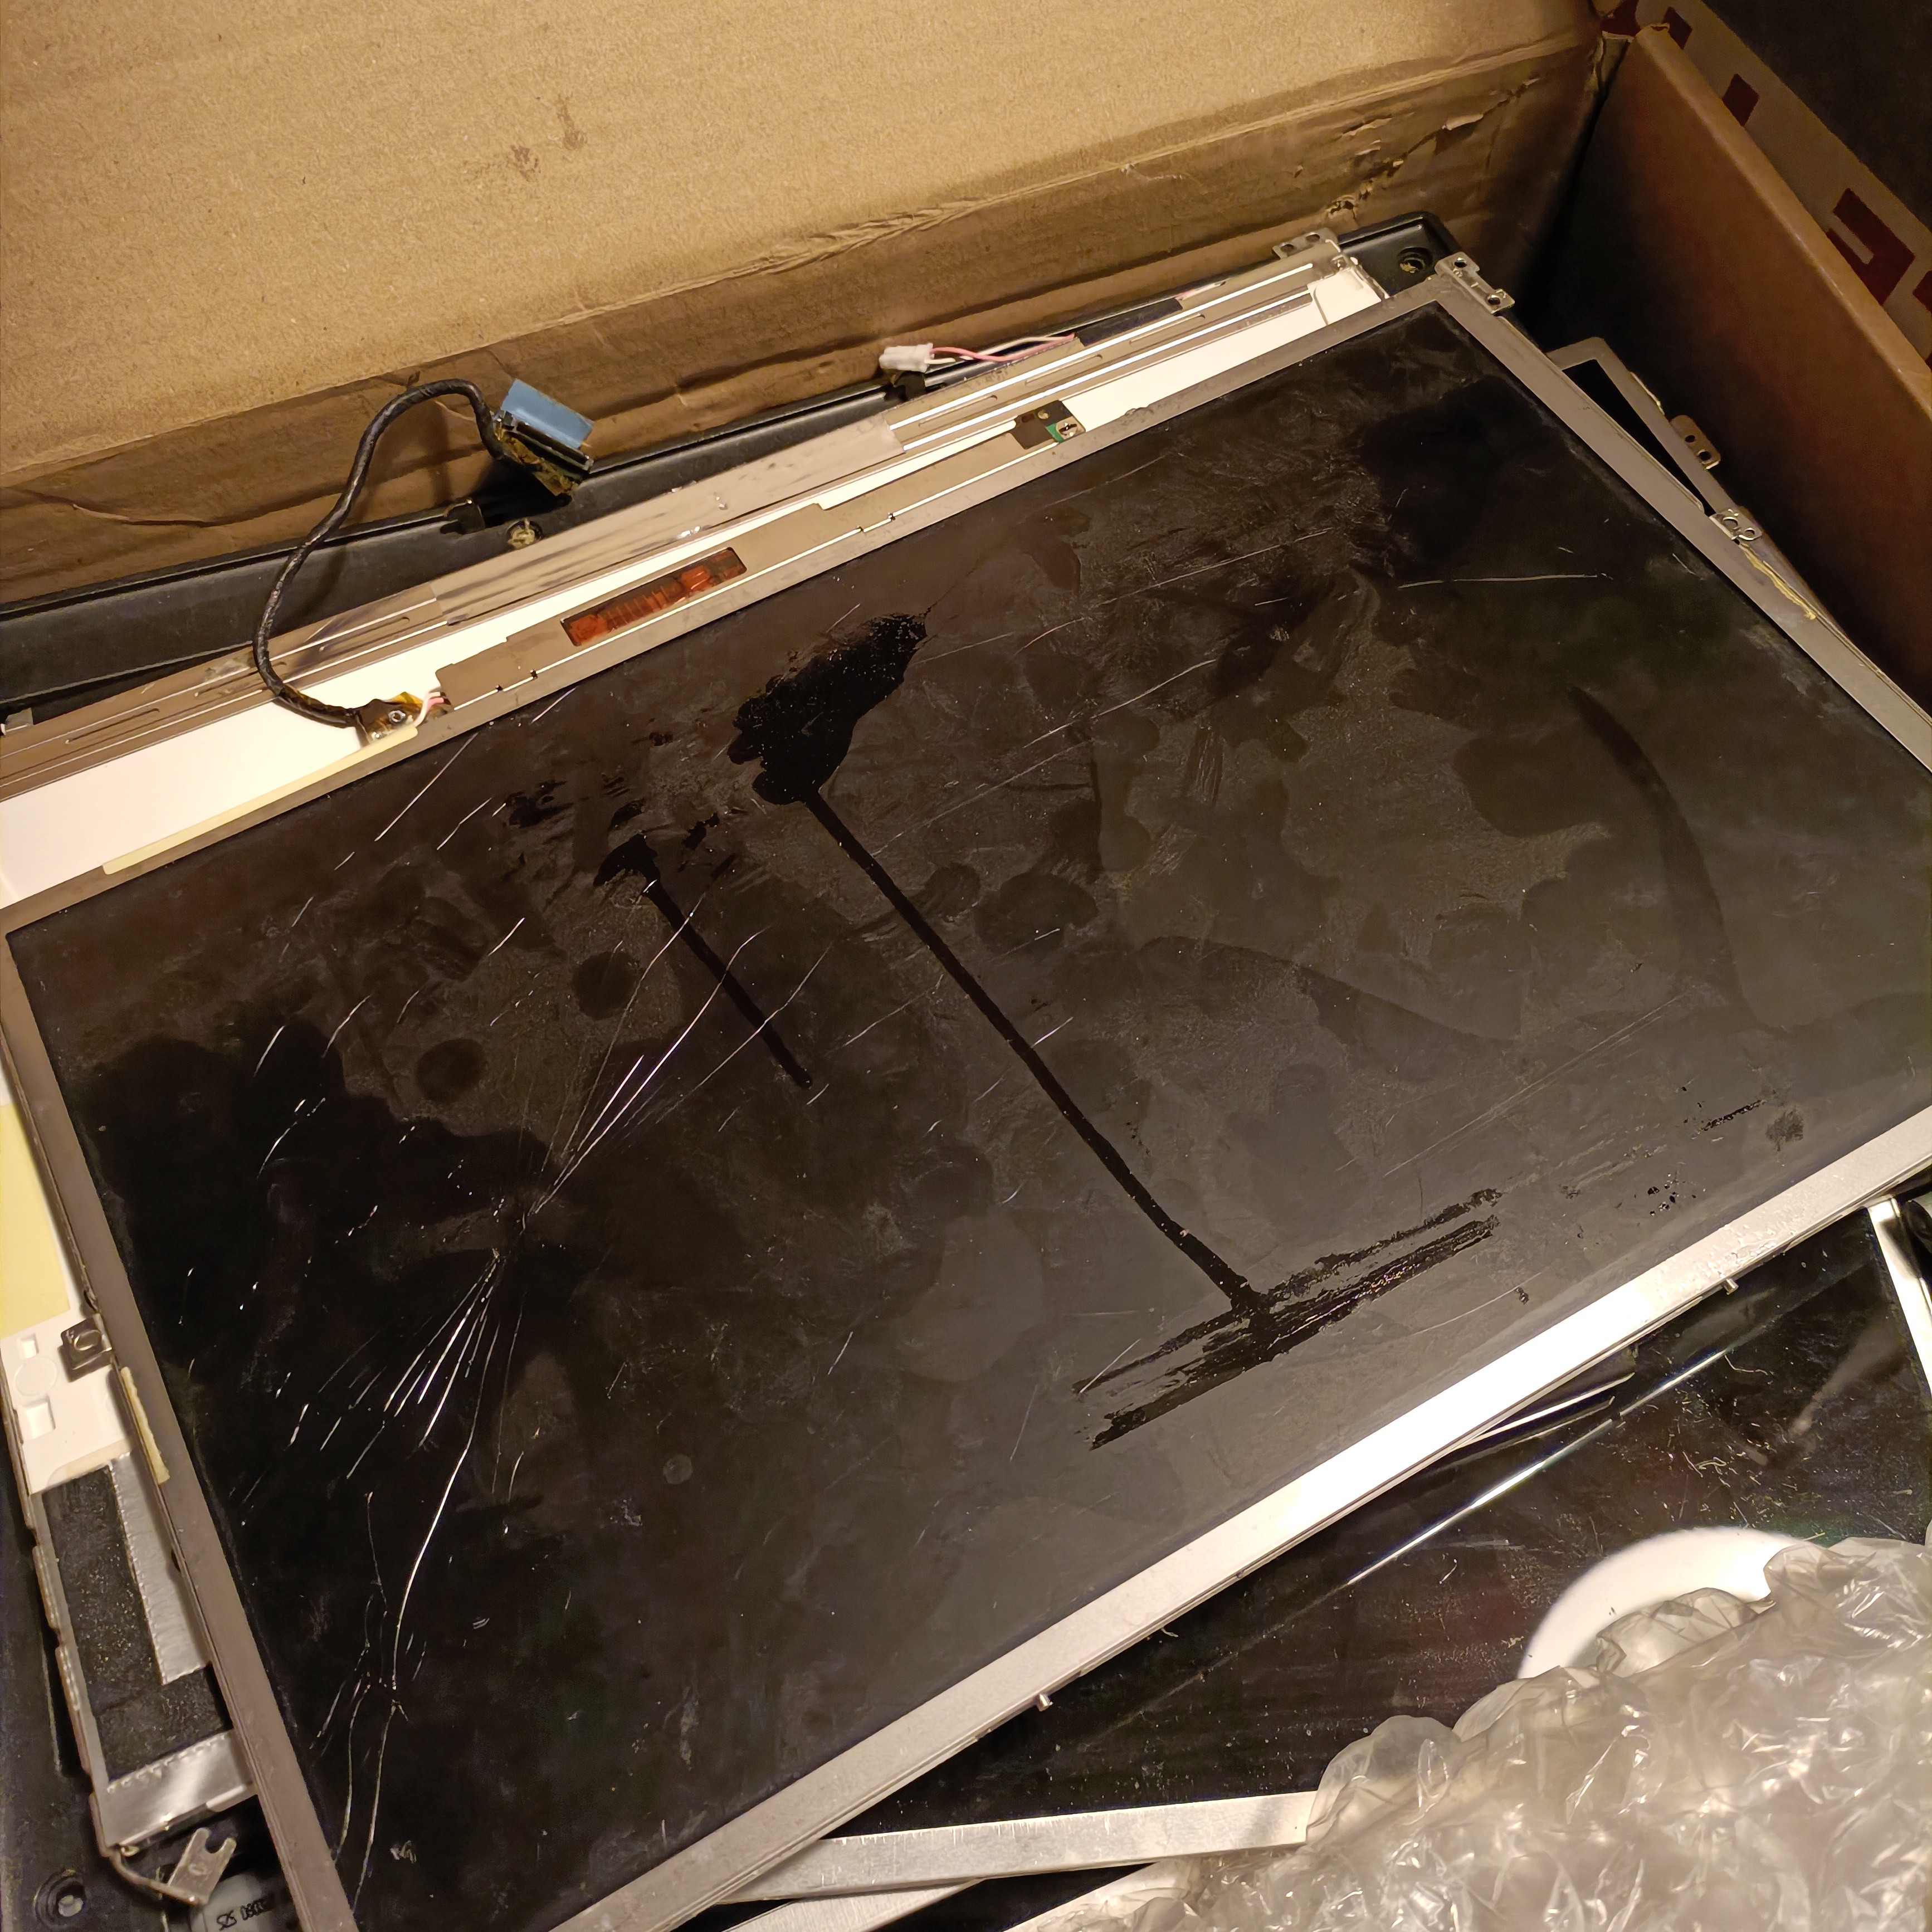
I decided to focus on the dented one, since I'd rather use the one that looks the most damaged for my First Attempt In Learning.
Hah! How convinient! Unlike some of the commentors, the panels have 2 backlight wires right here. Let's see the resistance. Wait... 2 mega-ohms?
So then I was watching one or two teardown videos and thought "Just wrip off the band-aid and get it over with" and instead started seeing what I should dissassemble first.
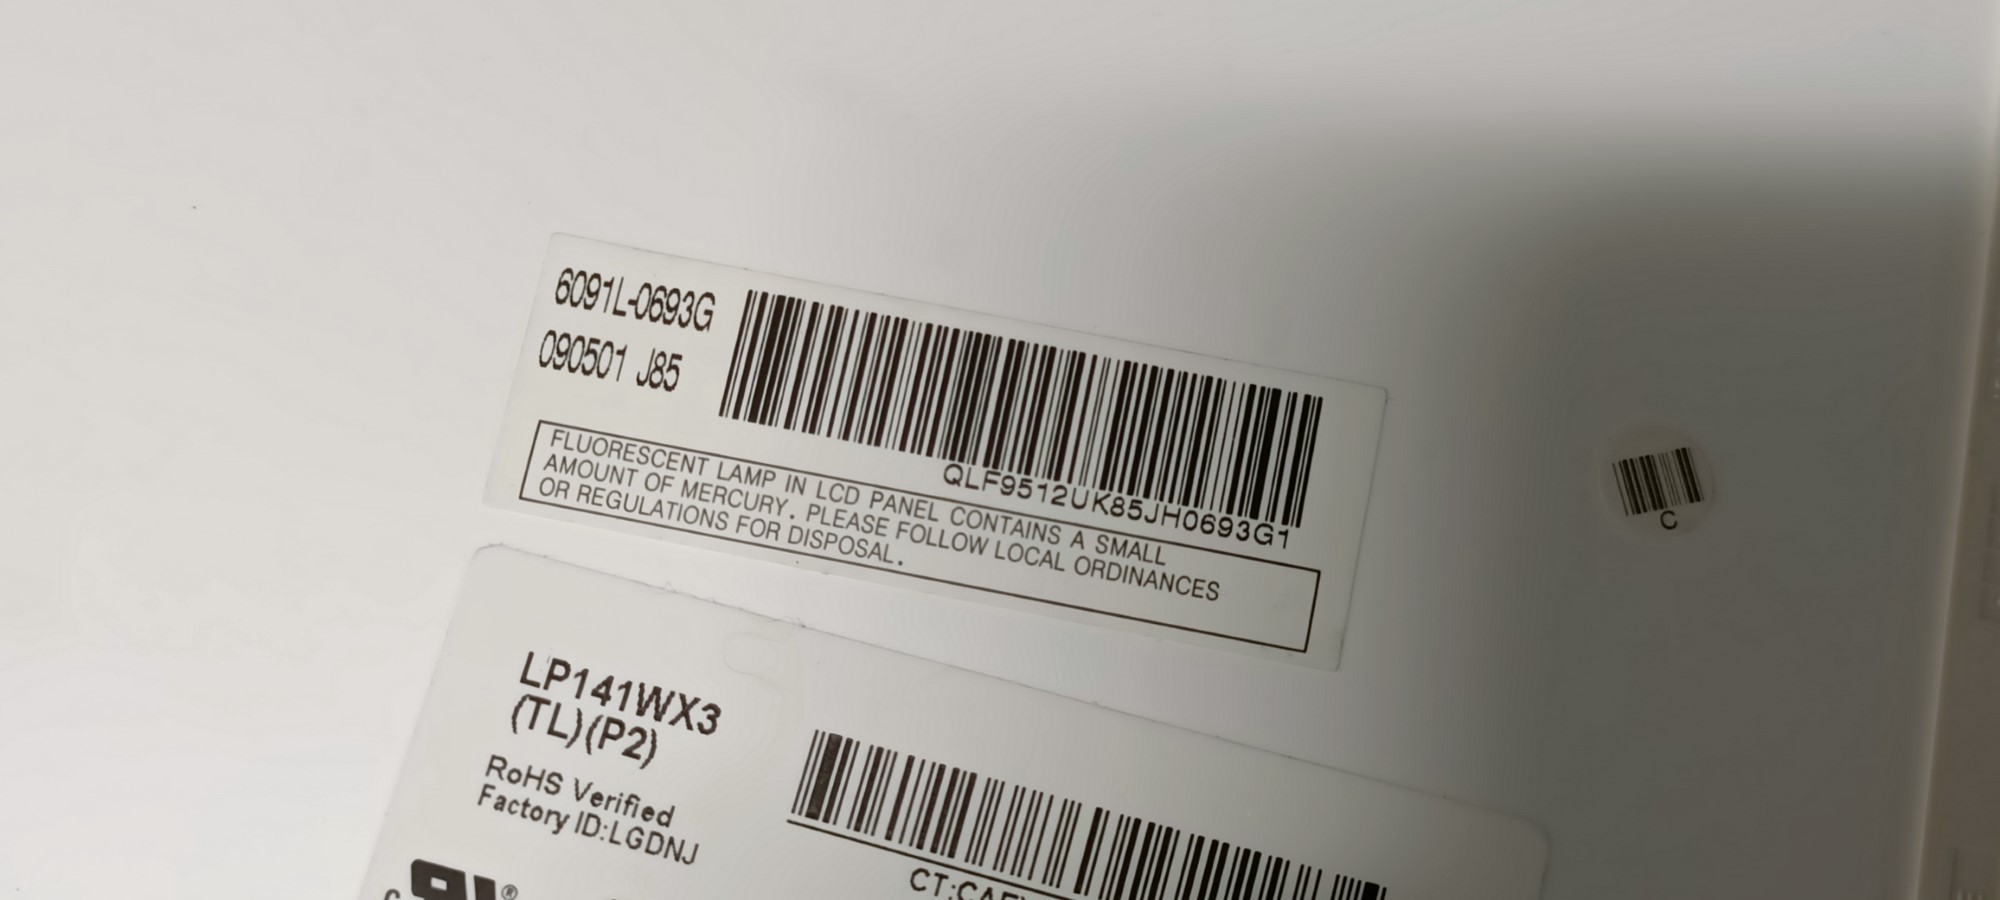
That is... until I leaned a bit closer to the screen and saw this sticker:
Alt Text: Fluorescent lamp in LCD panel contains a small amount of mercury. Please follow local ordinances or regulations for disposal.
[insert truck reversing sound effect]
I check my stash and all eight of them aren't LEDs either! So I ran back home and see exactly what's in here.
You know those 8 panels I checked to make sure they were LED backlit? They're like THE ONLY ones. For a 12KG package, probably 11kg isn't even usable.
I even had a feeling of "perhaps you should ask the seller to just send the 8 and not the rest, or perhaps a new job lot where all the LED screens are bundled together".
Now I've got to figure out how to responsibly make most of the job lot not my responsibility (i.e. safe disposal or return-to-sender), which again might have been avoided / mitigated if I wasn't as hasty as I was. Shame that nothing has gone all that smoothly at all with any of the 3 main purchases.
Moving on, I got back to the lab with those (slimy for some reason) screens and peeled off the tape on one to reveal the motherboard:
I forgot to take a picture of the other half of the board.
Well the 40-pin header (on the other half of the board) was also ground, and I was just aimlessly poking pins until I noticed that there was a square with the letter A in it, and on an empty area of the board there was another fenced off area with "A" and a bunch of names, including LED_EN. It looks like that empty area is a map for the A area, which is too dense to put the markings there.
In the near future I hope to solder some wire to test this LCD out and see if I need to get rid of all 25 screens.
If this tent doesn't work, the solution is probably a failure. Good news. I'm writing this log inside the tent.
4th March (yesterday)
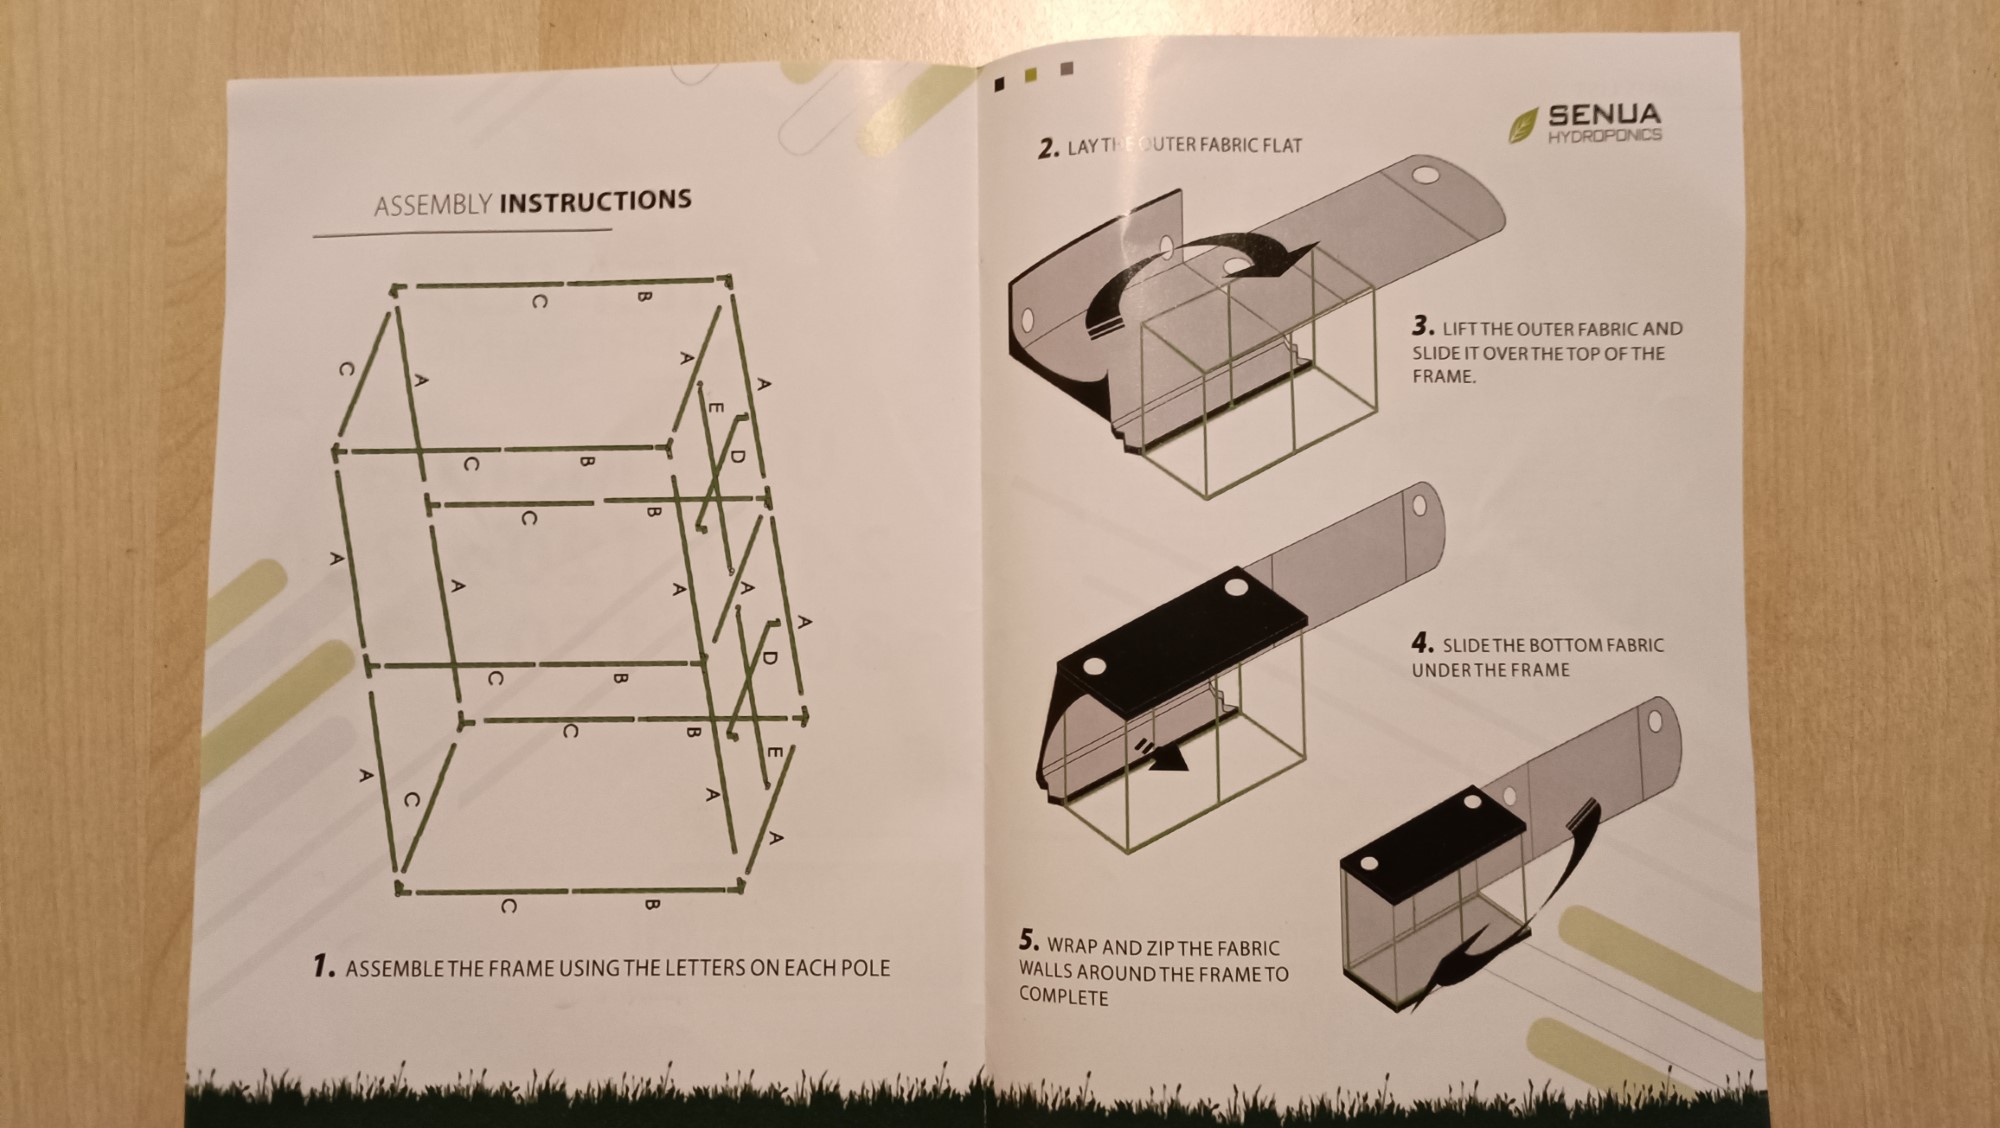
Assemby
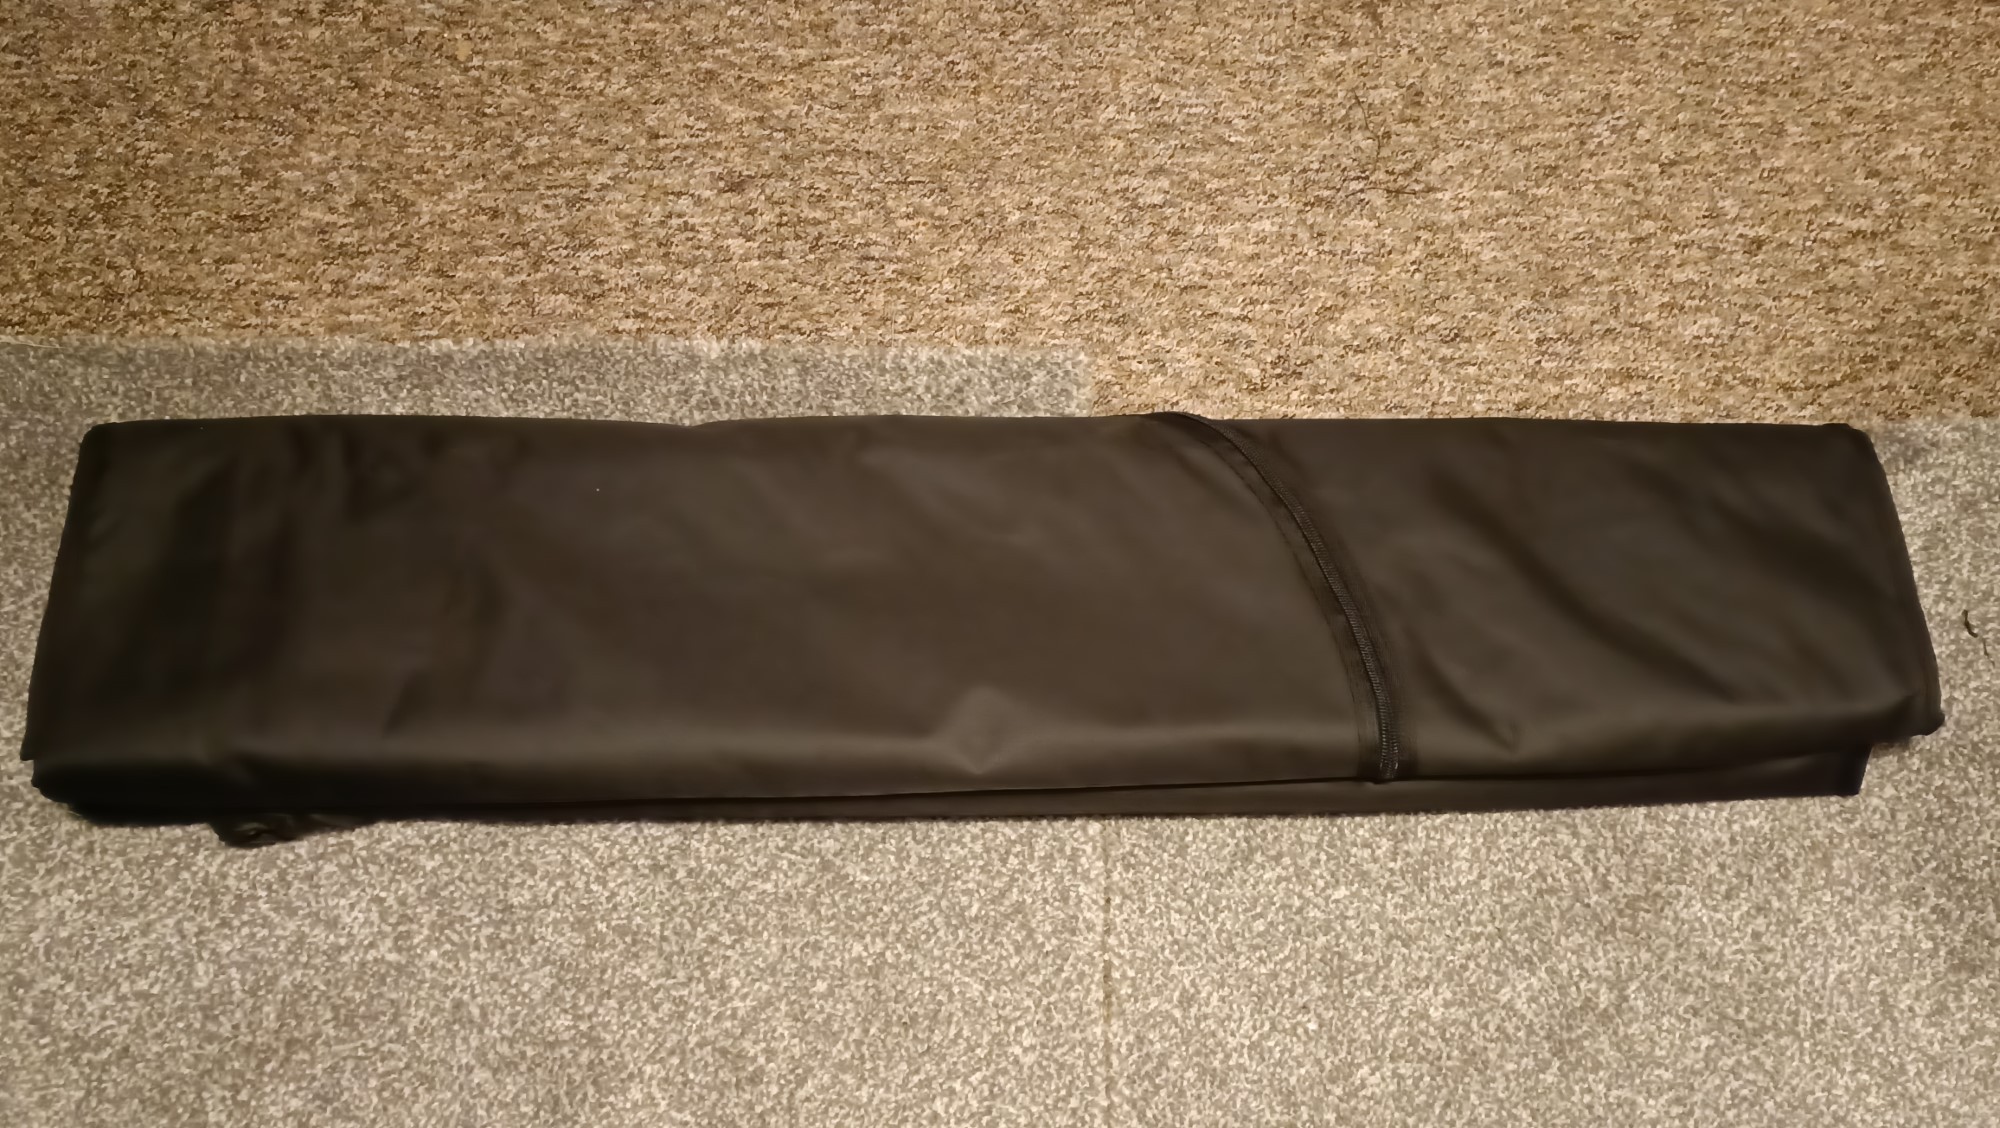
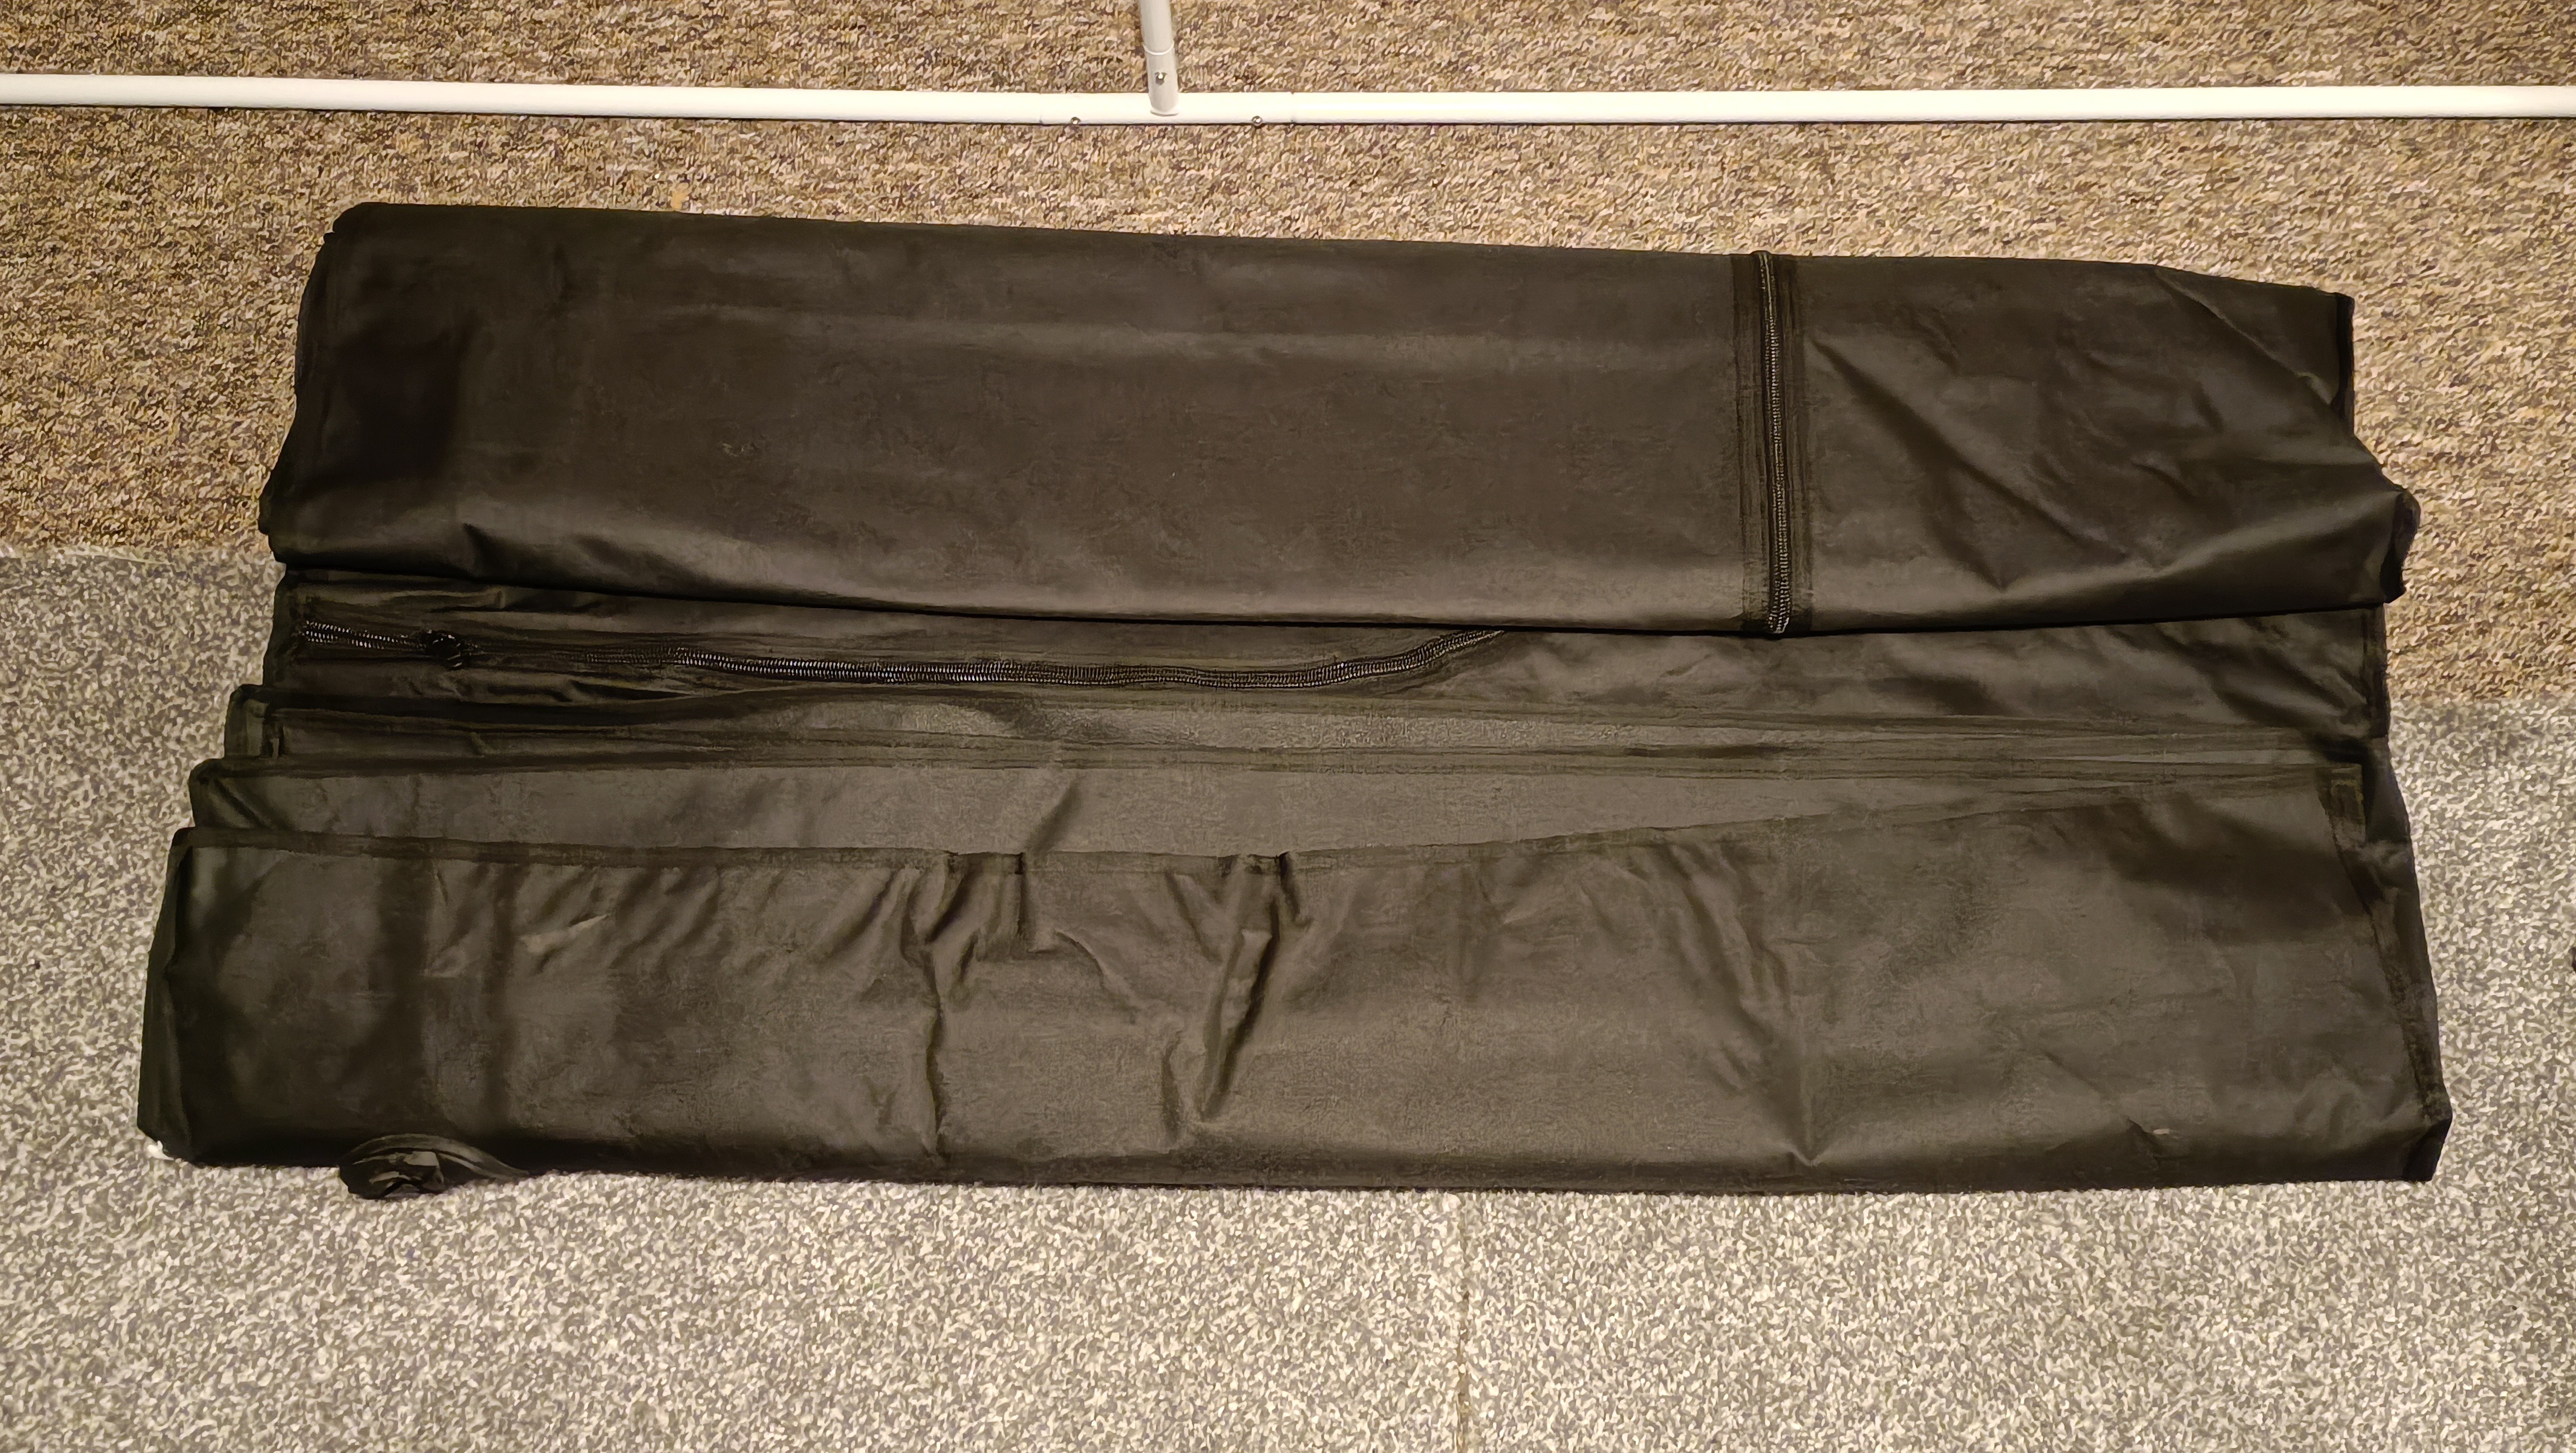
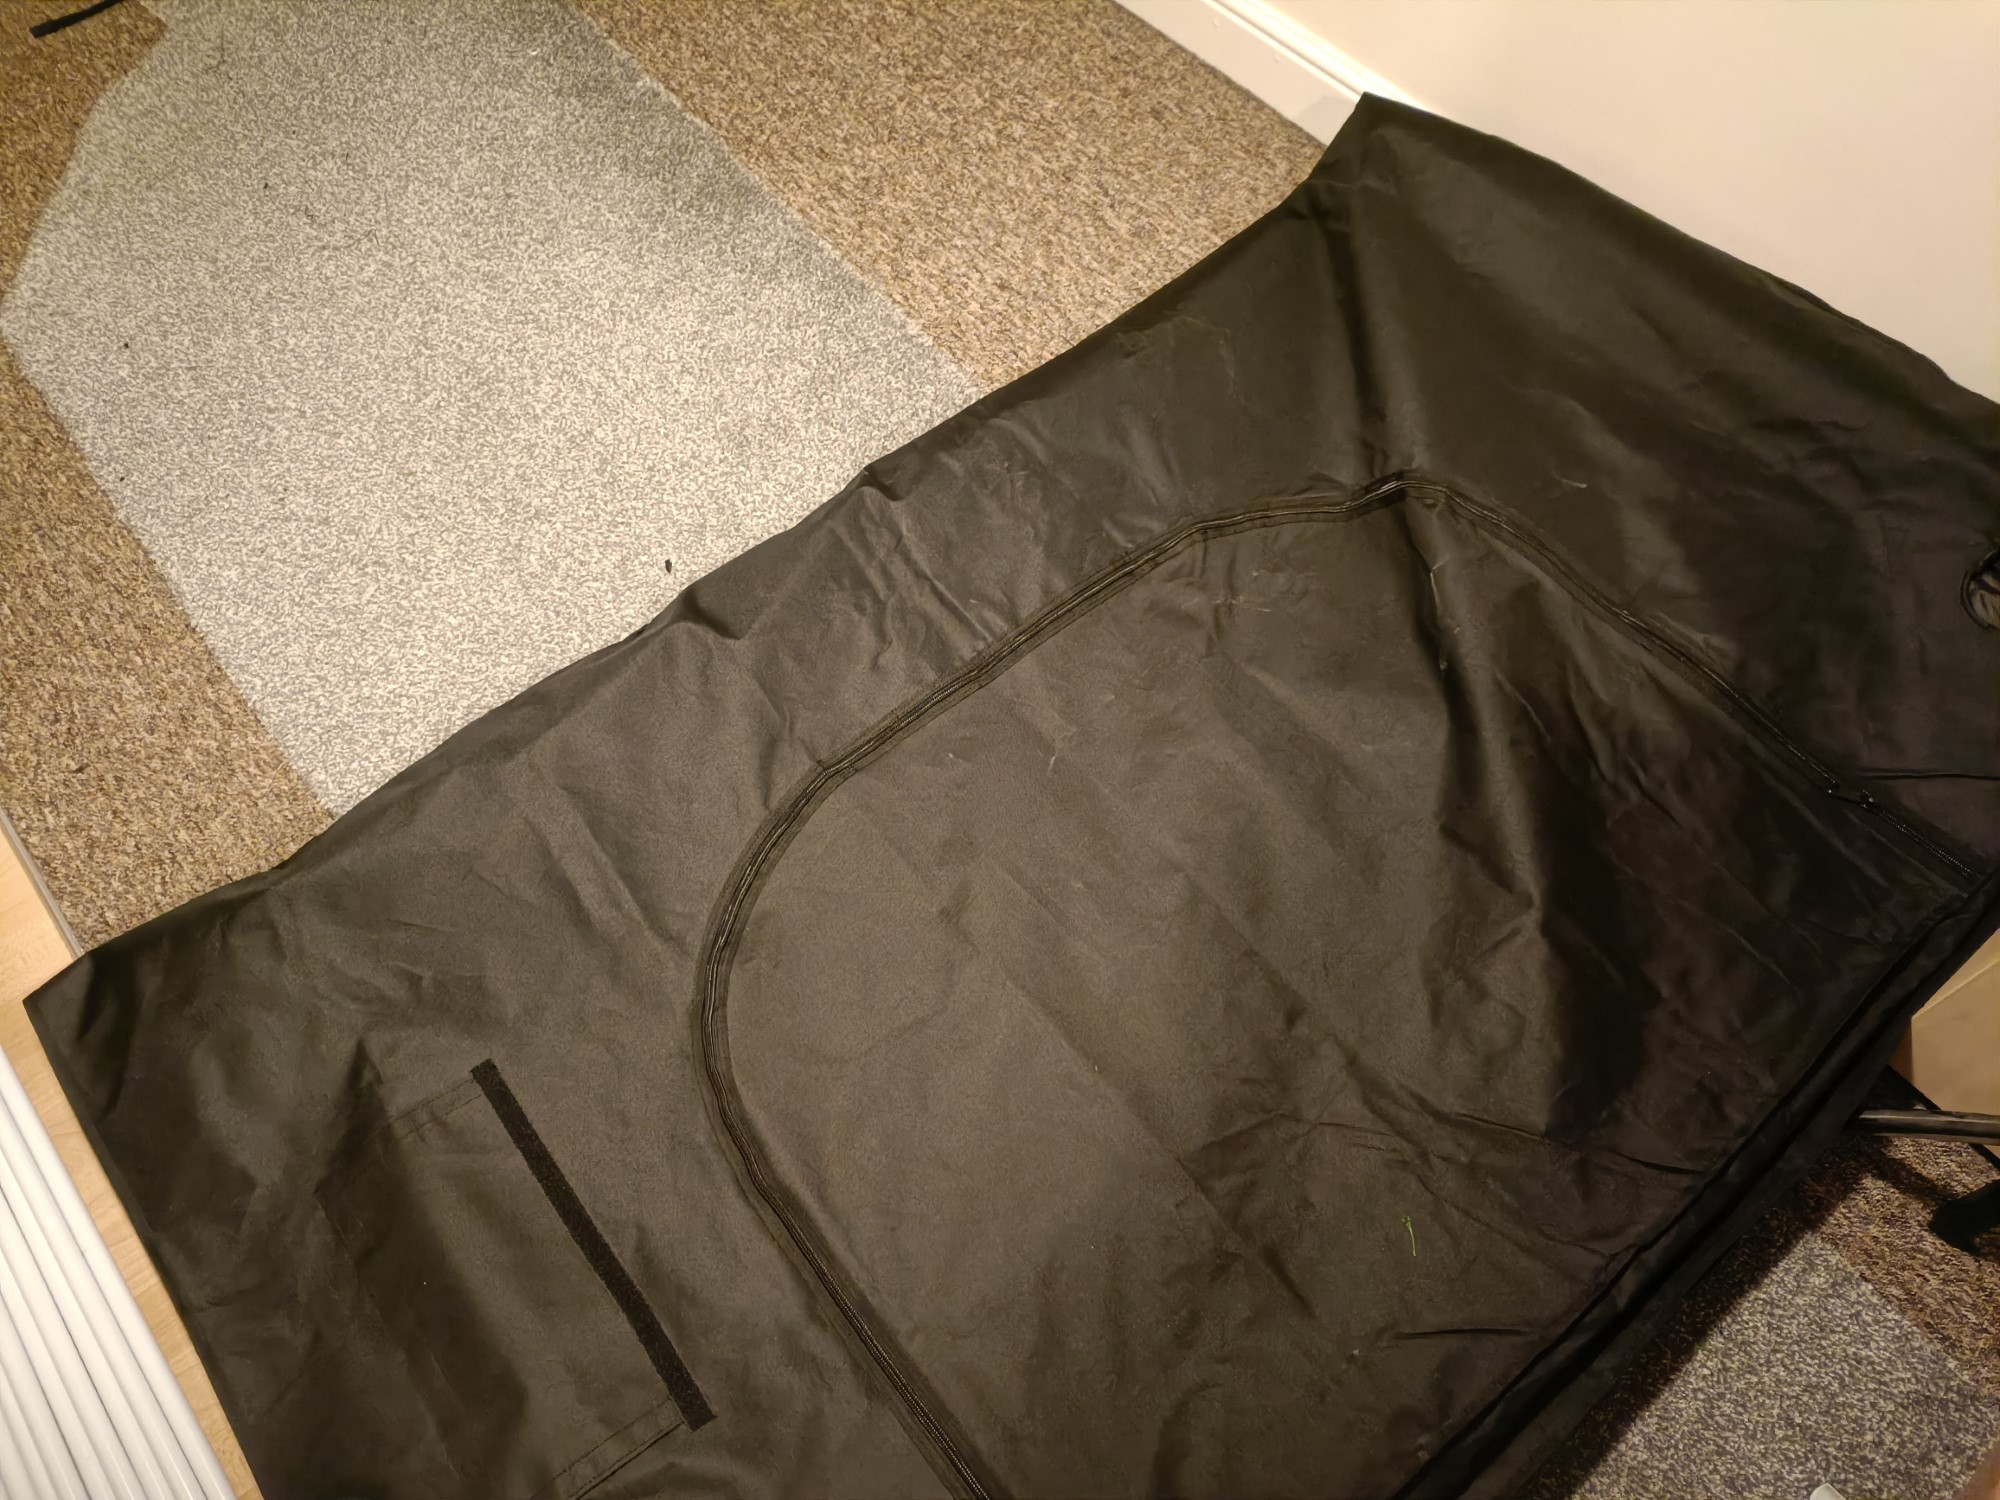
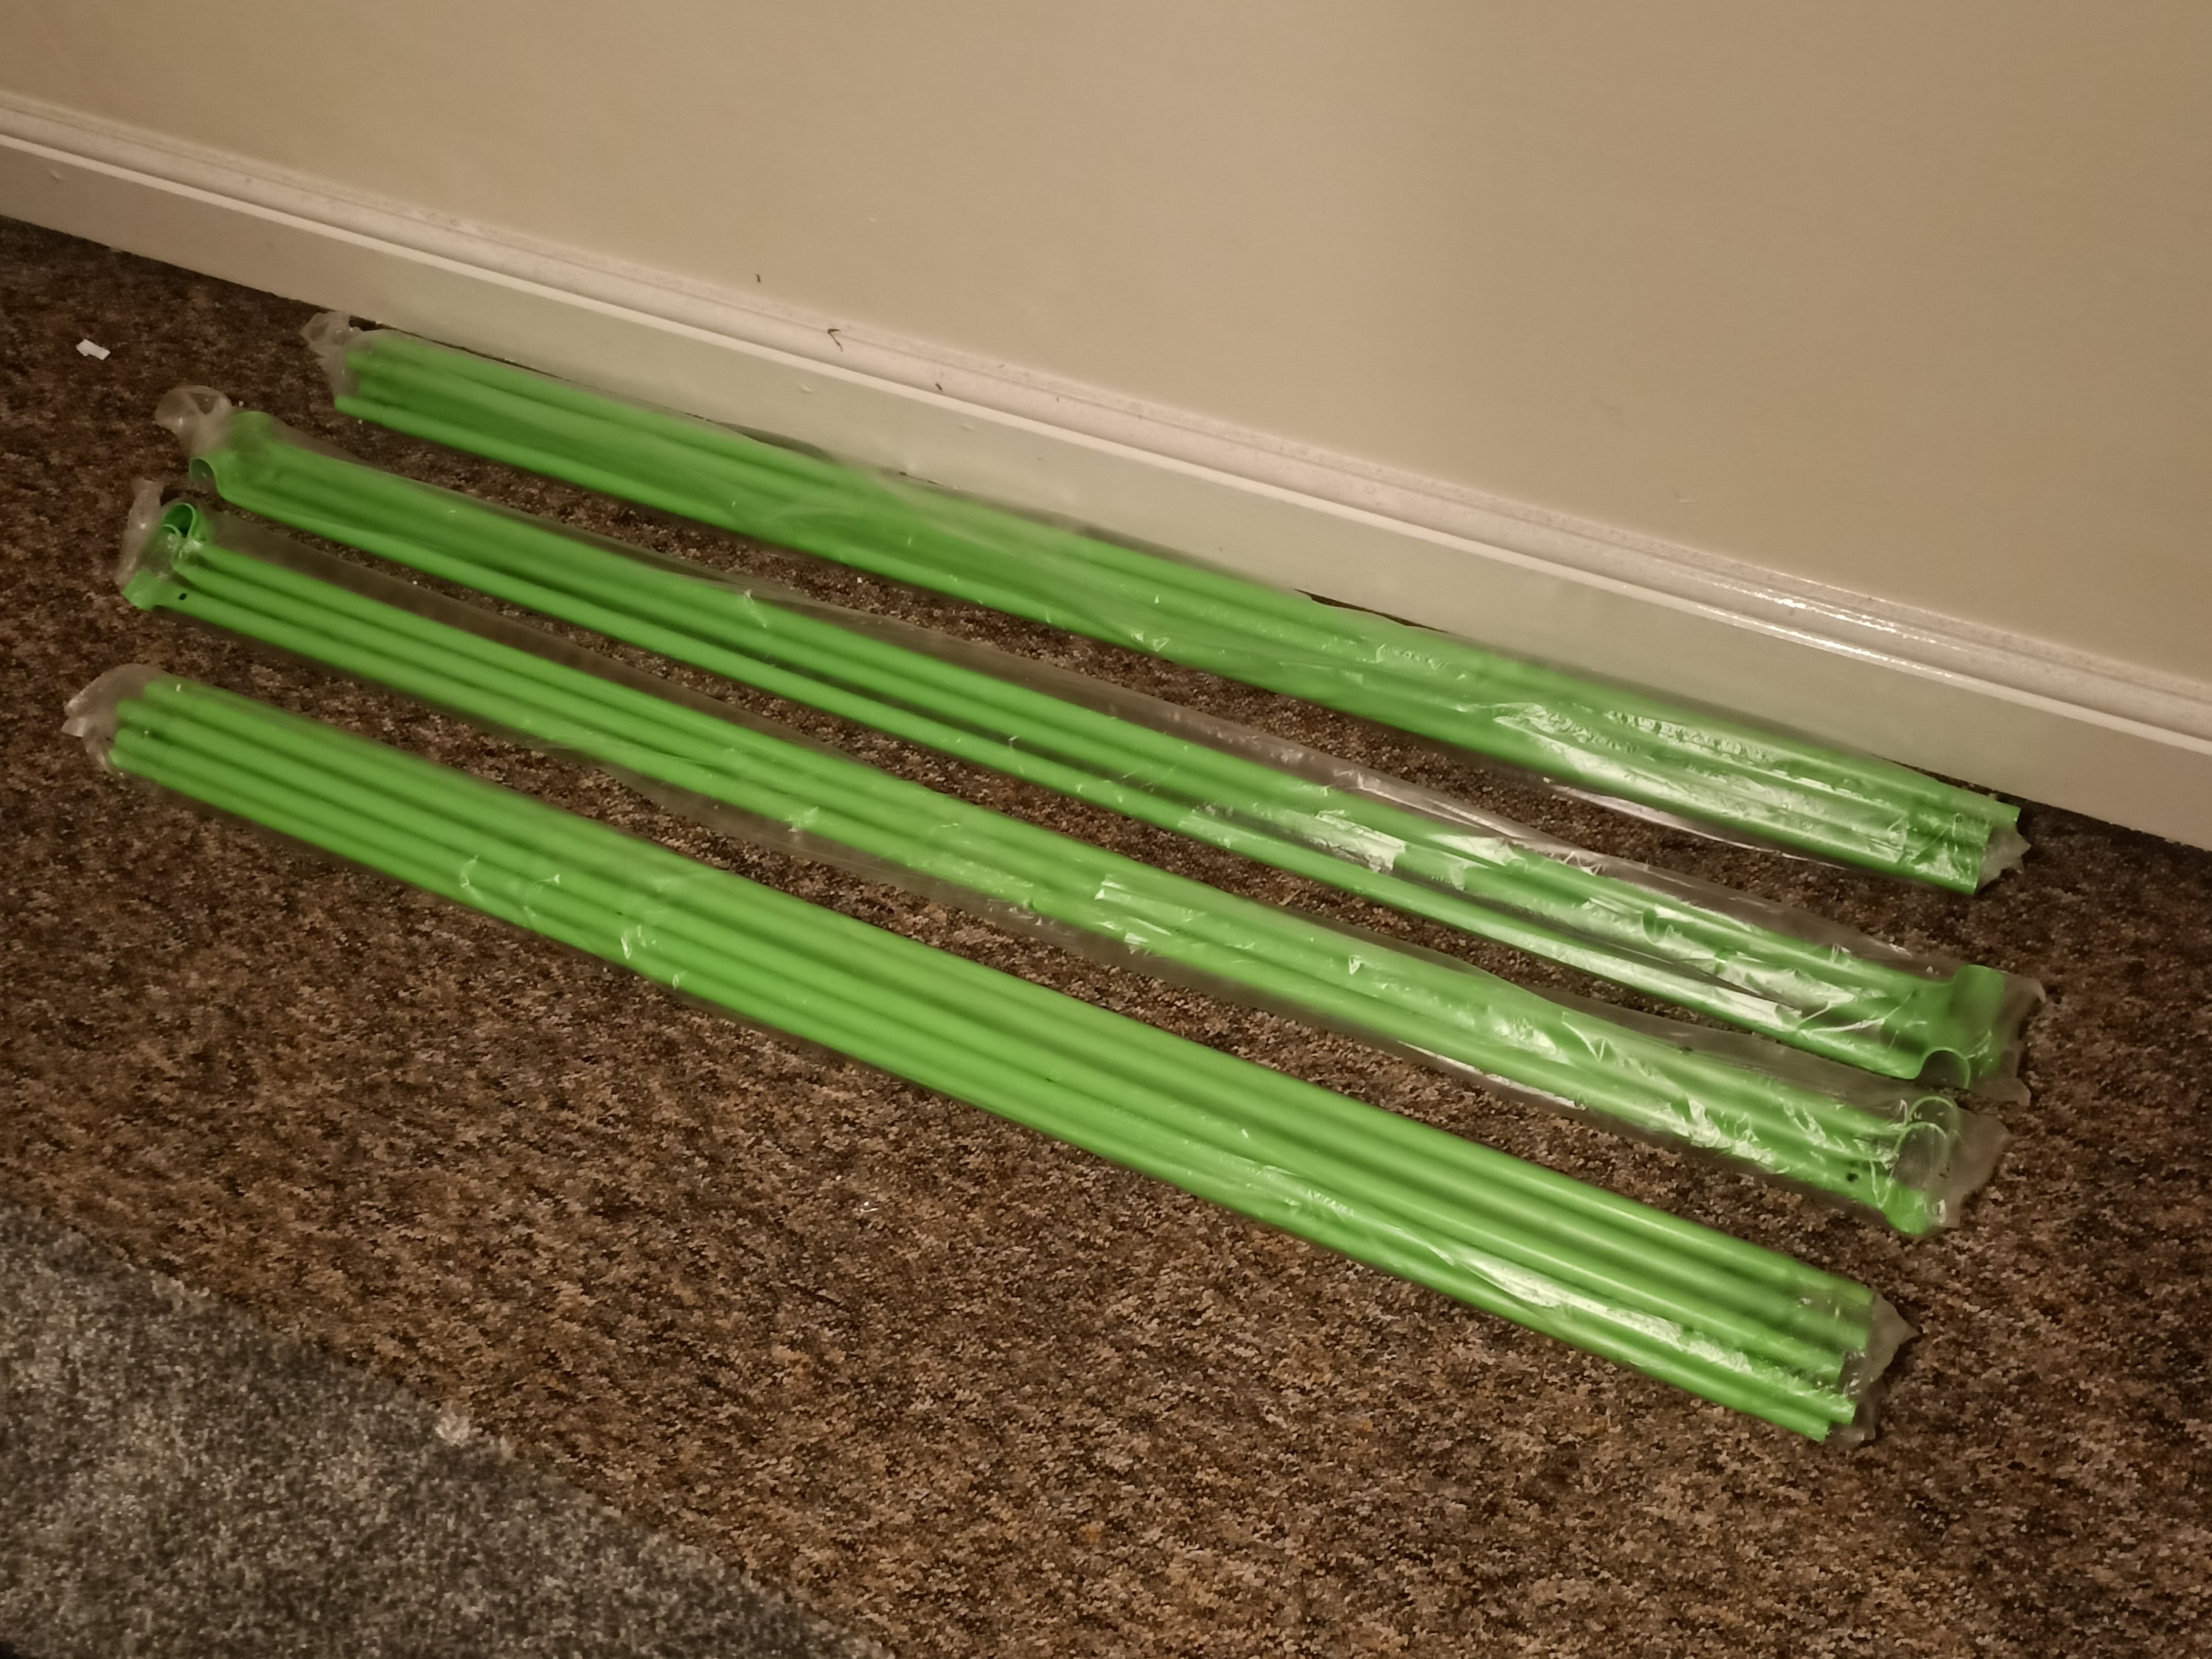
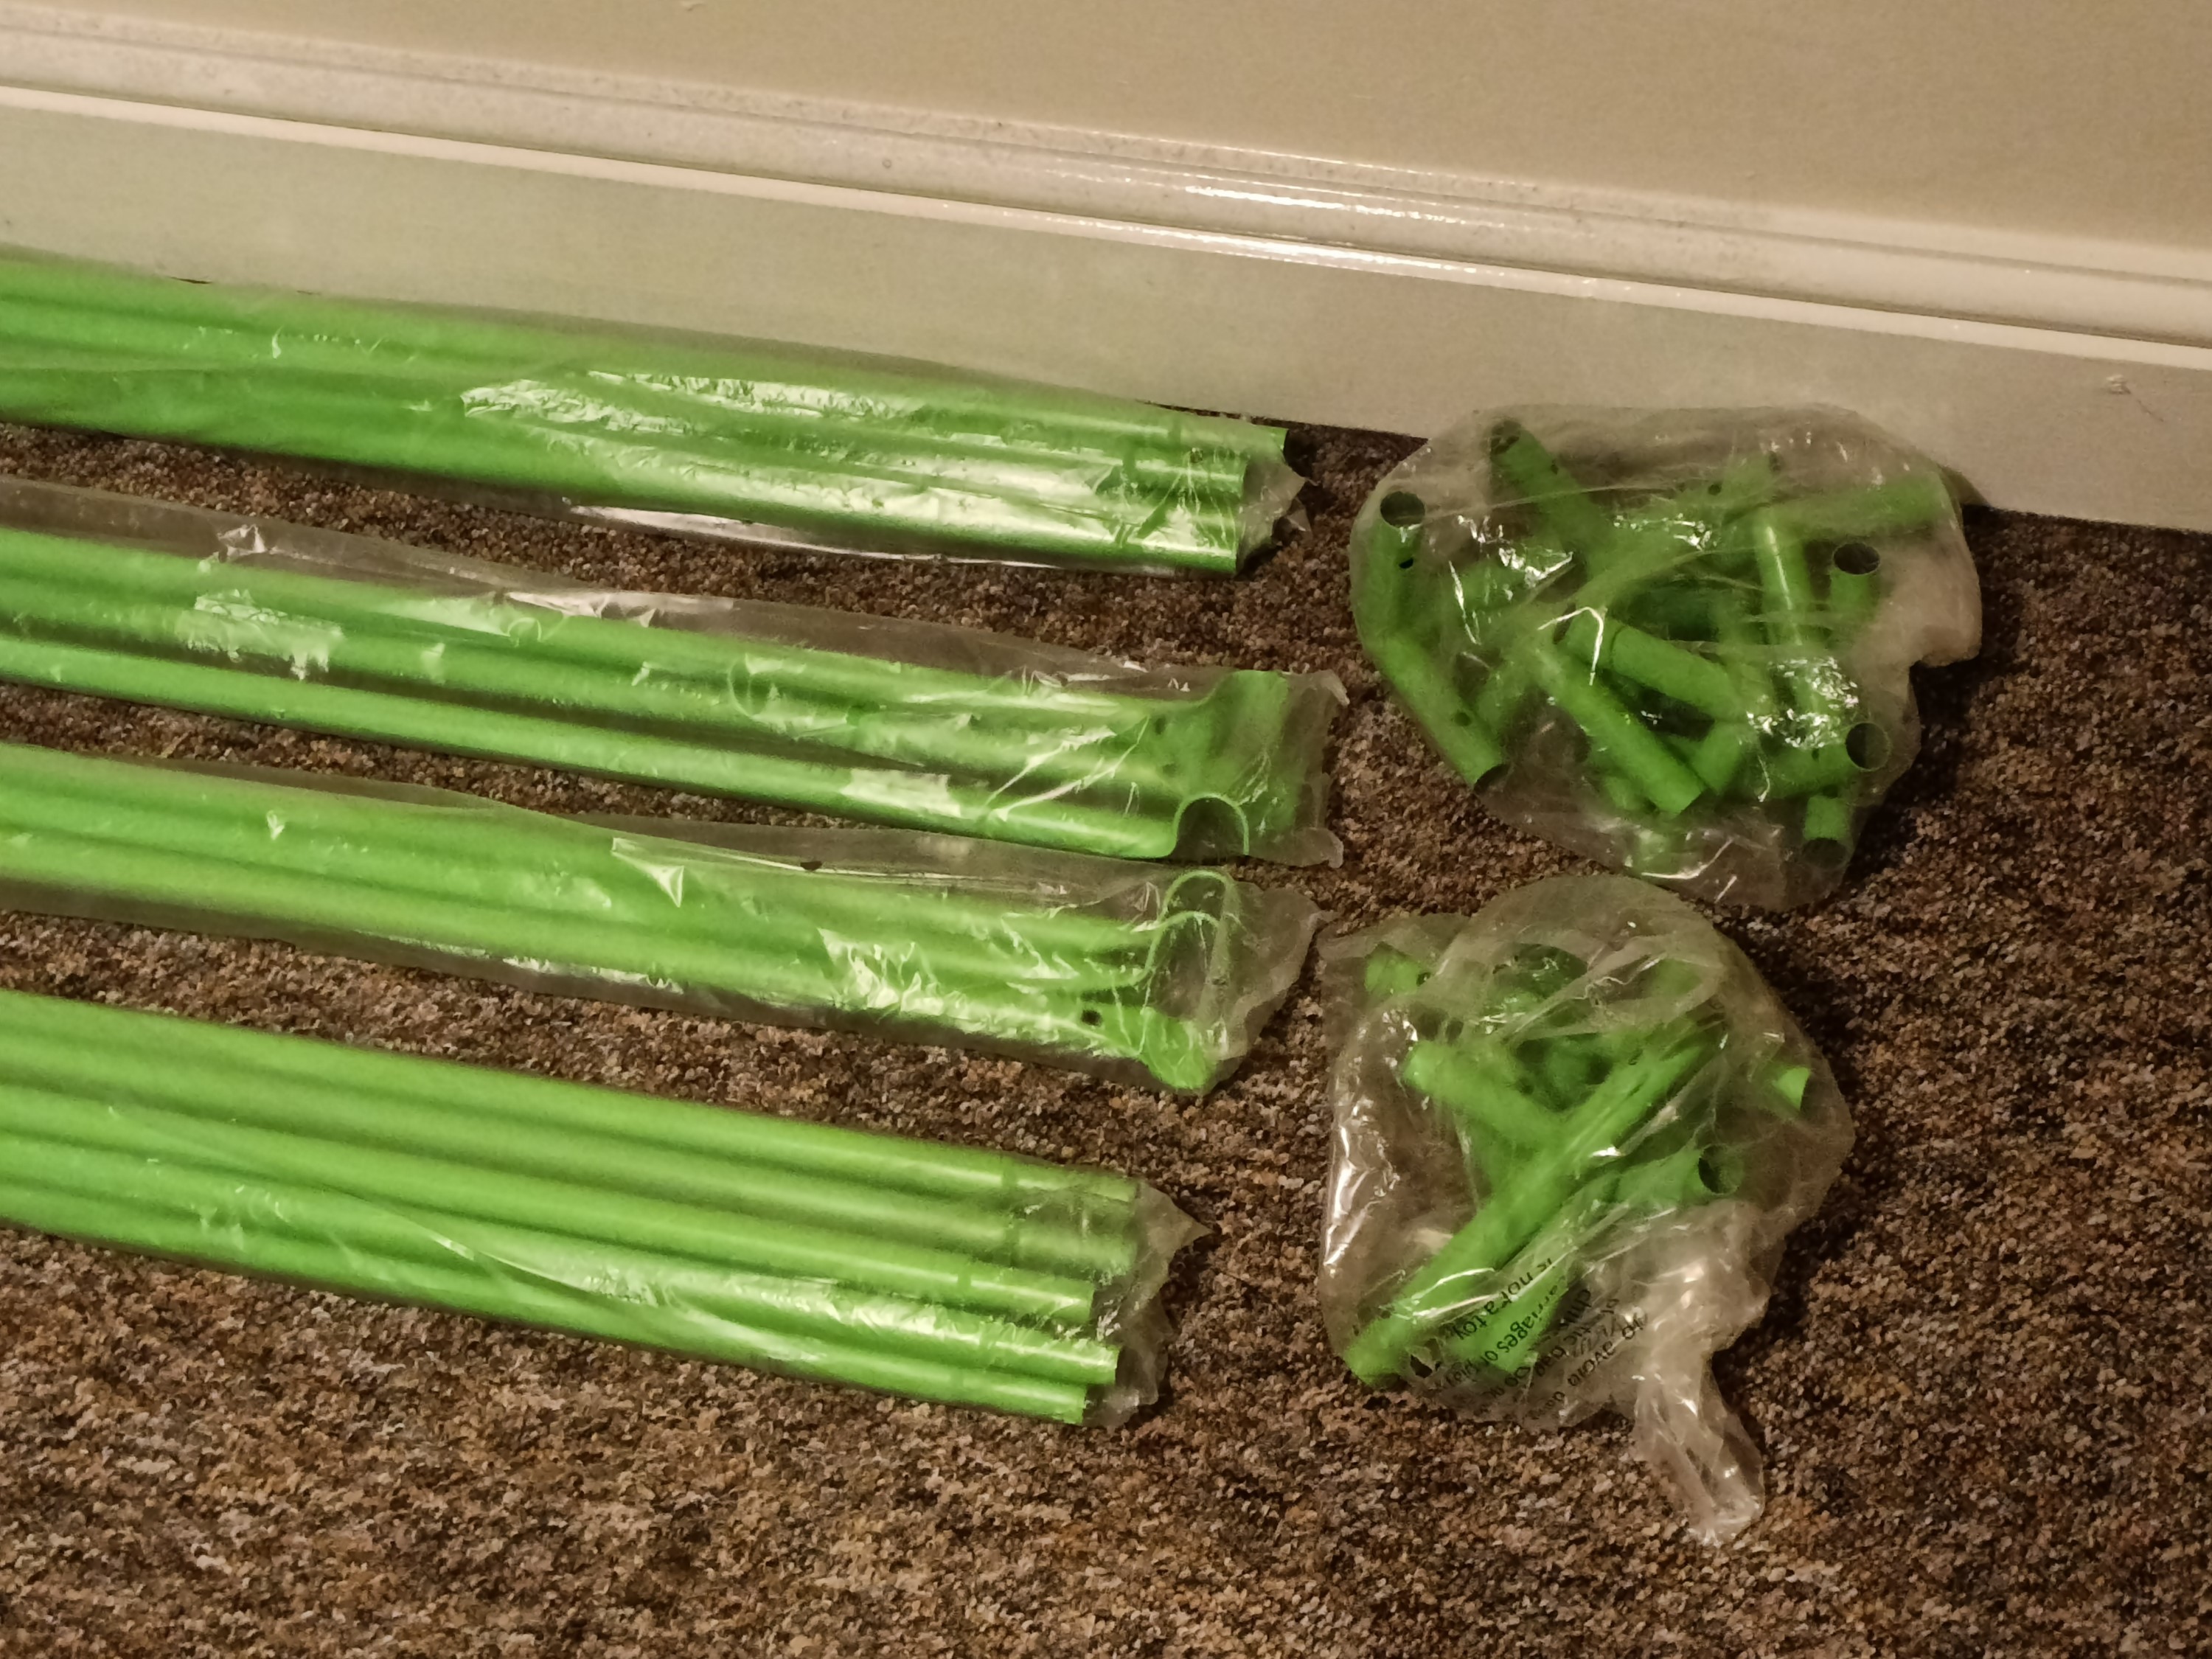
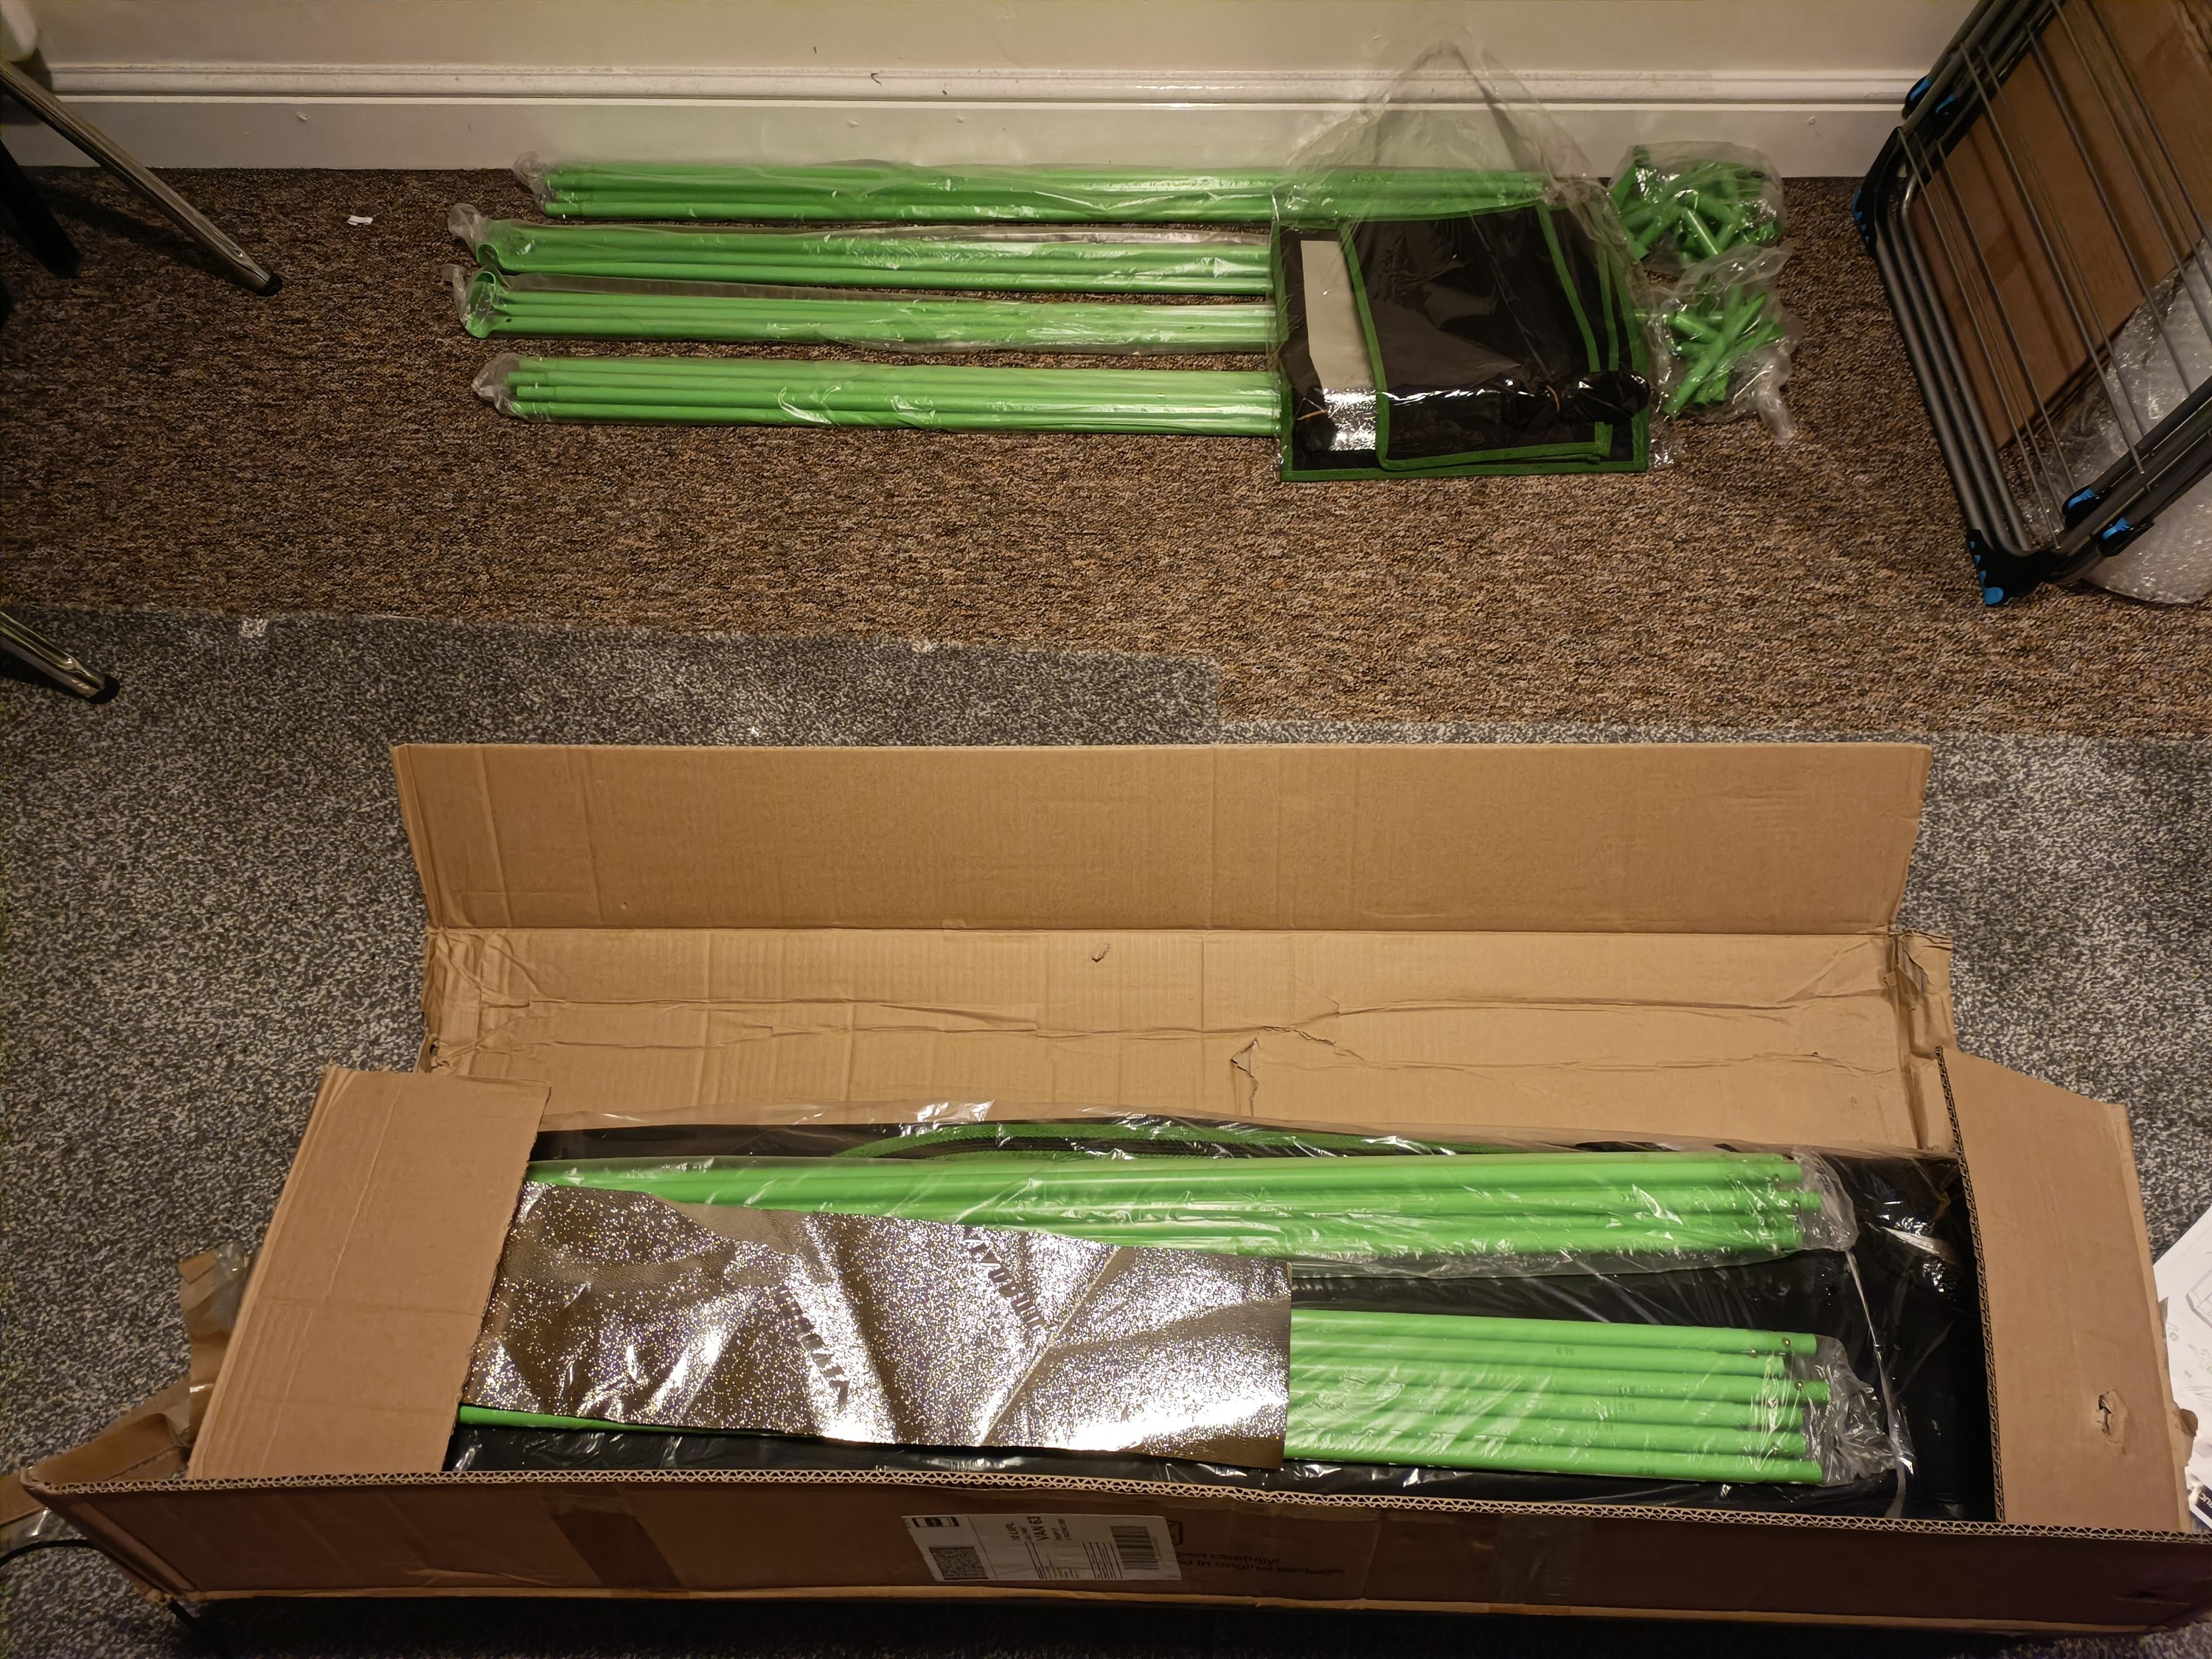
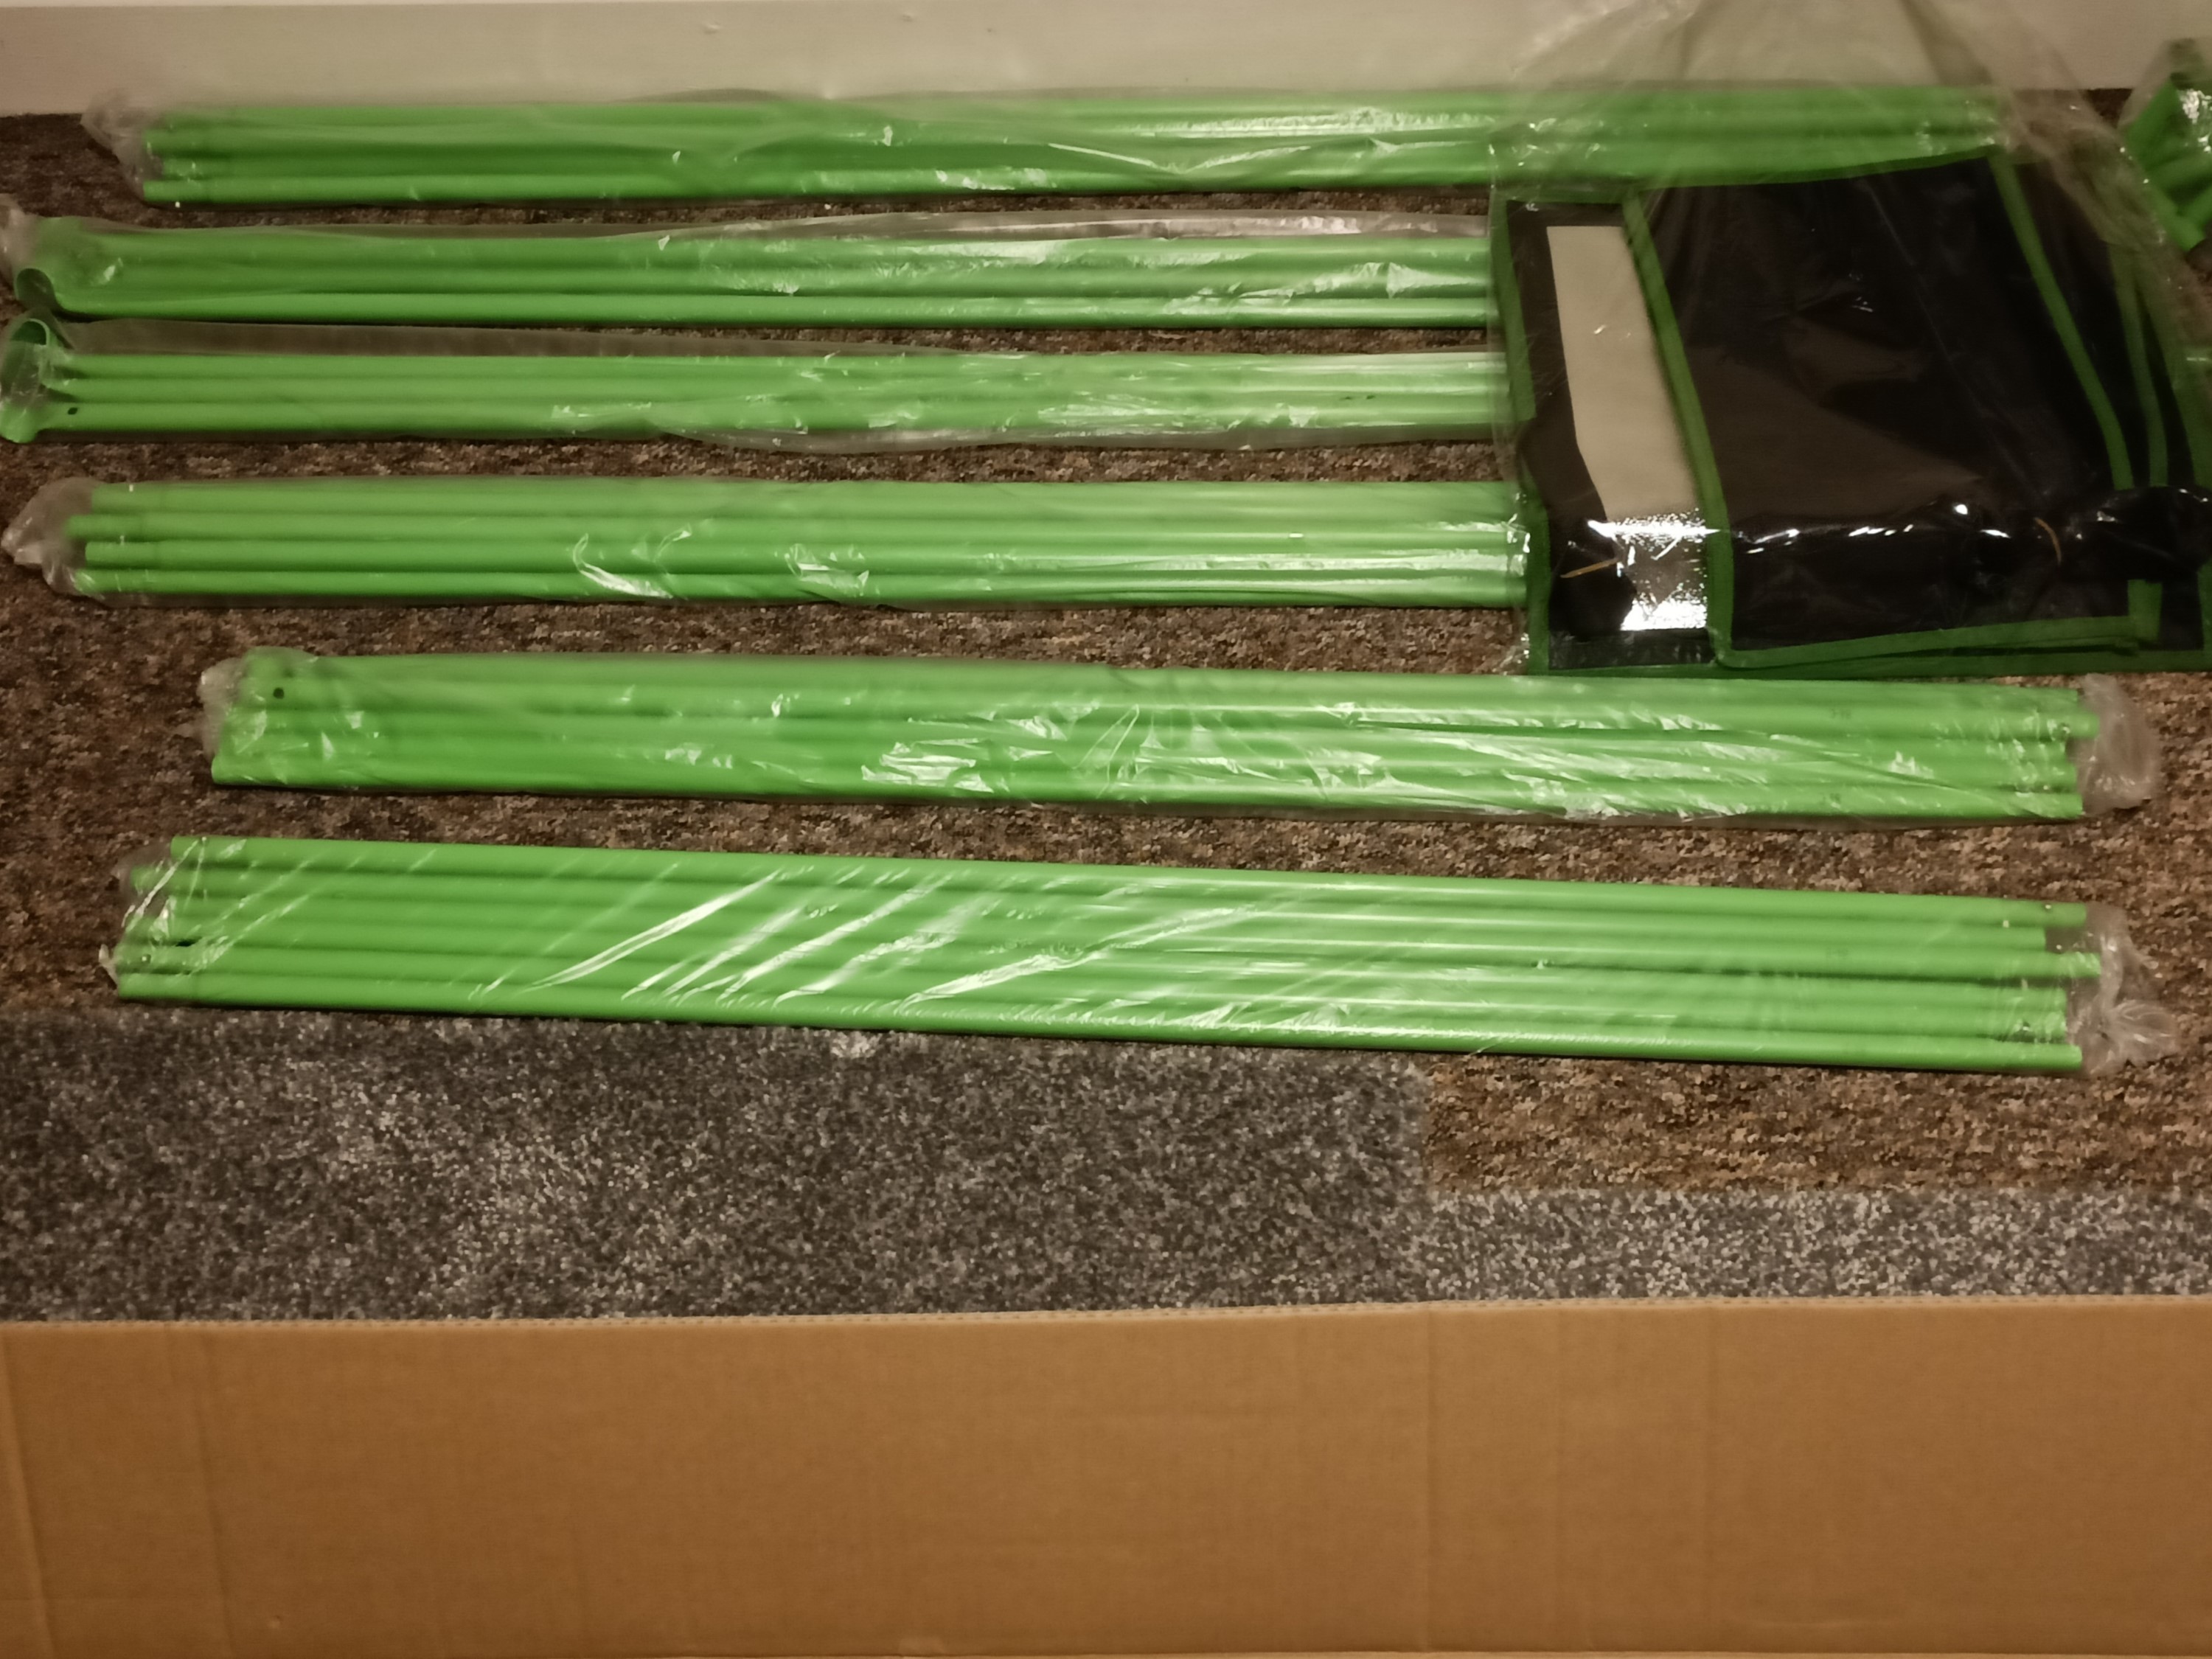
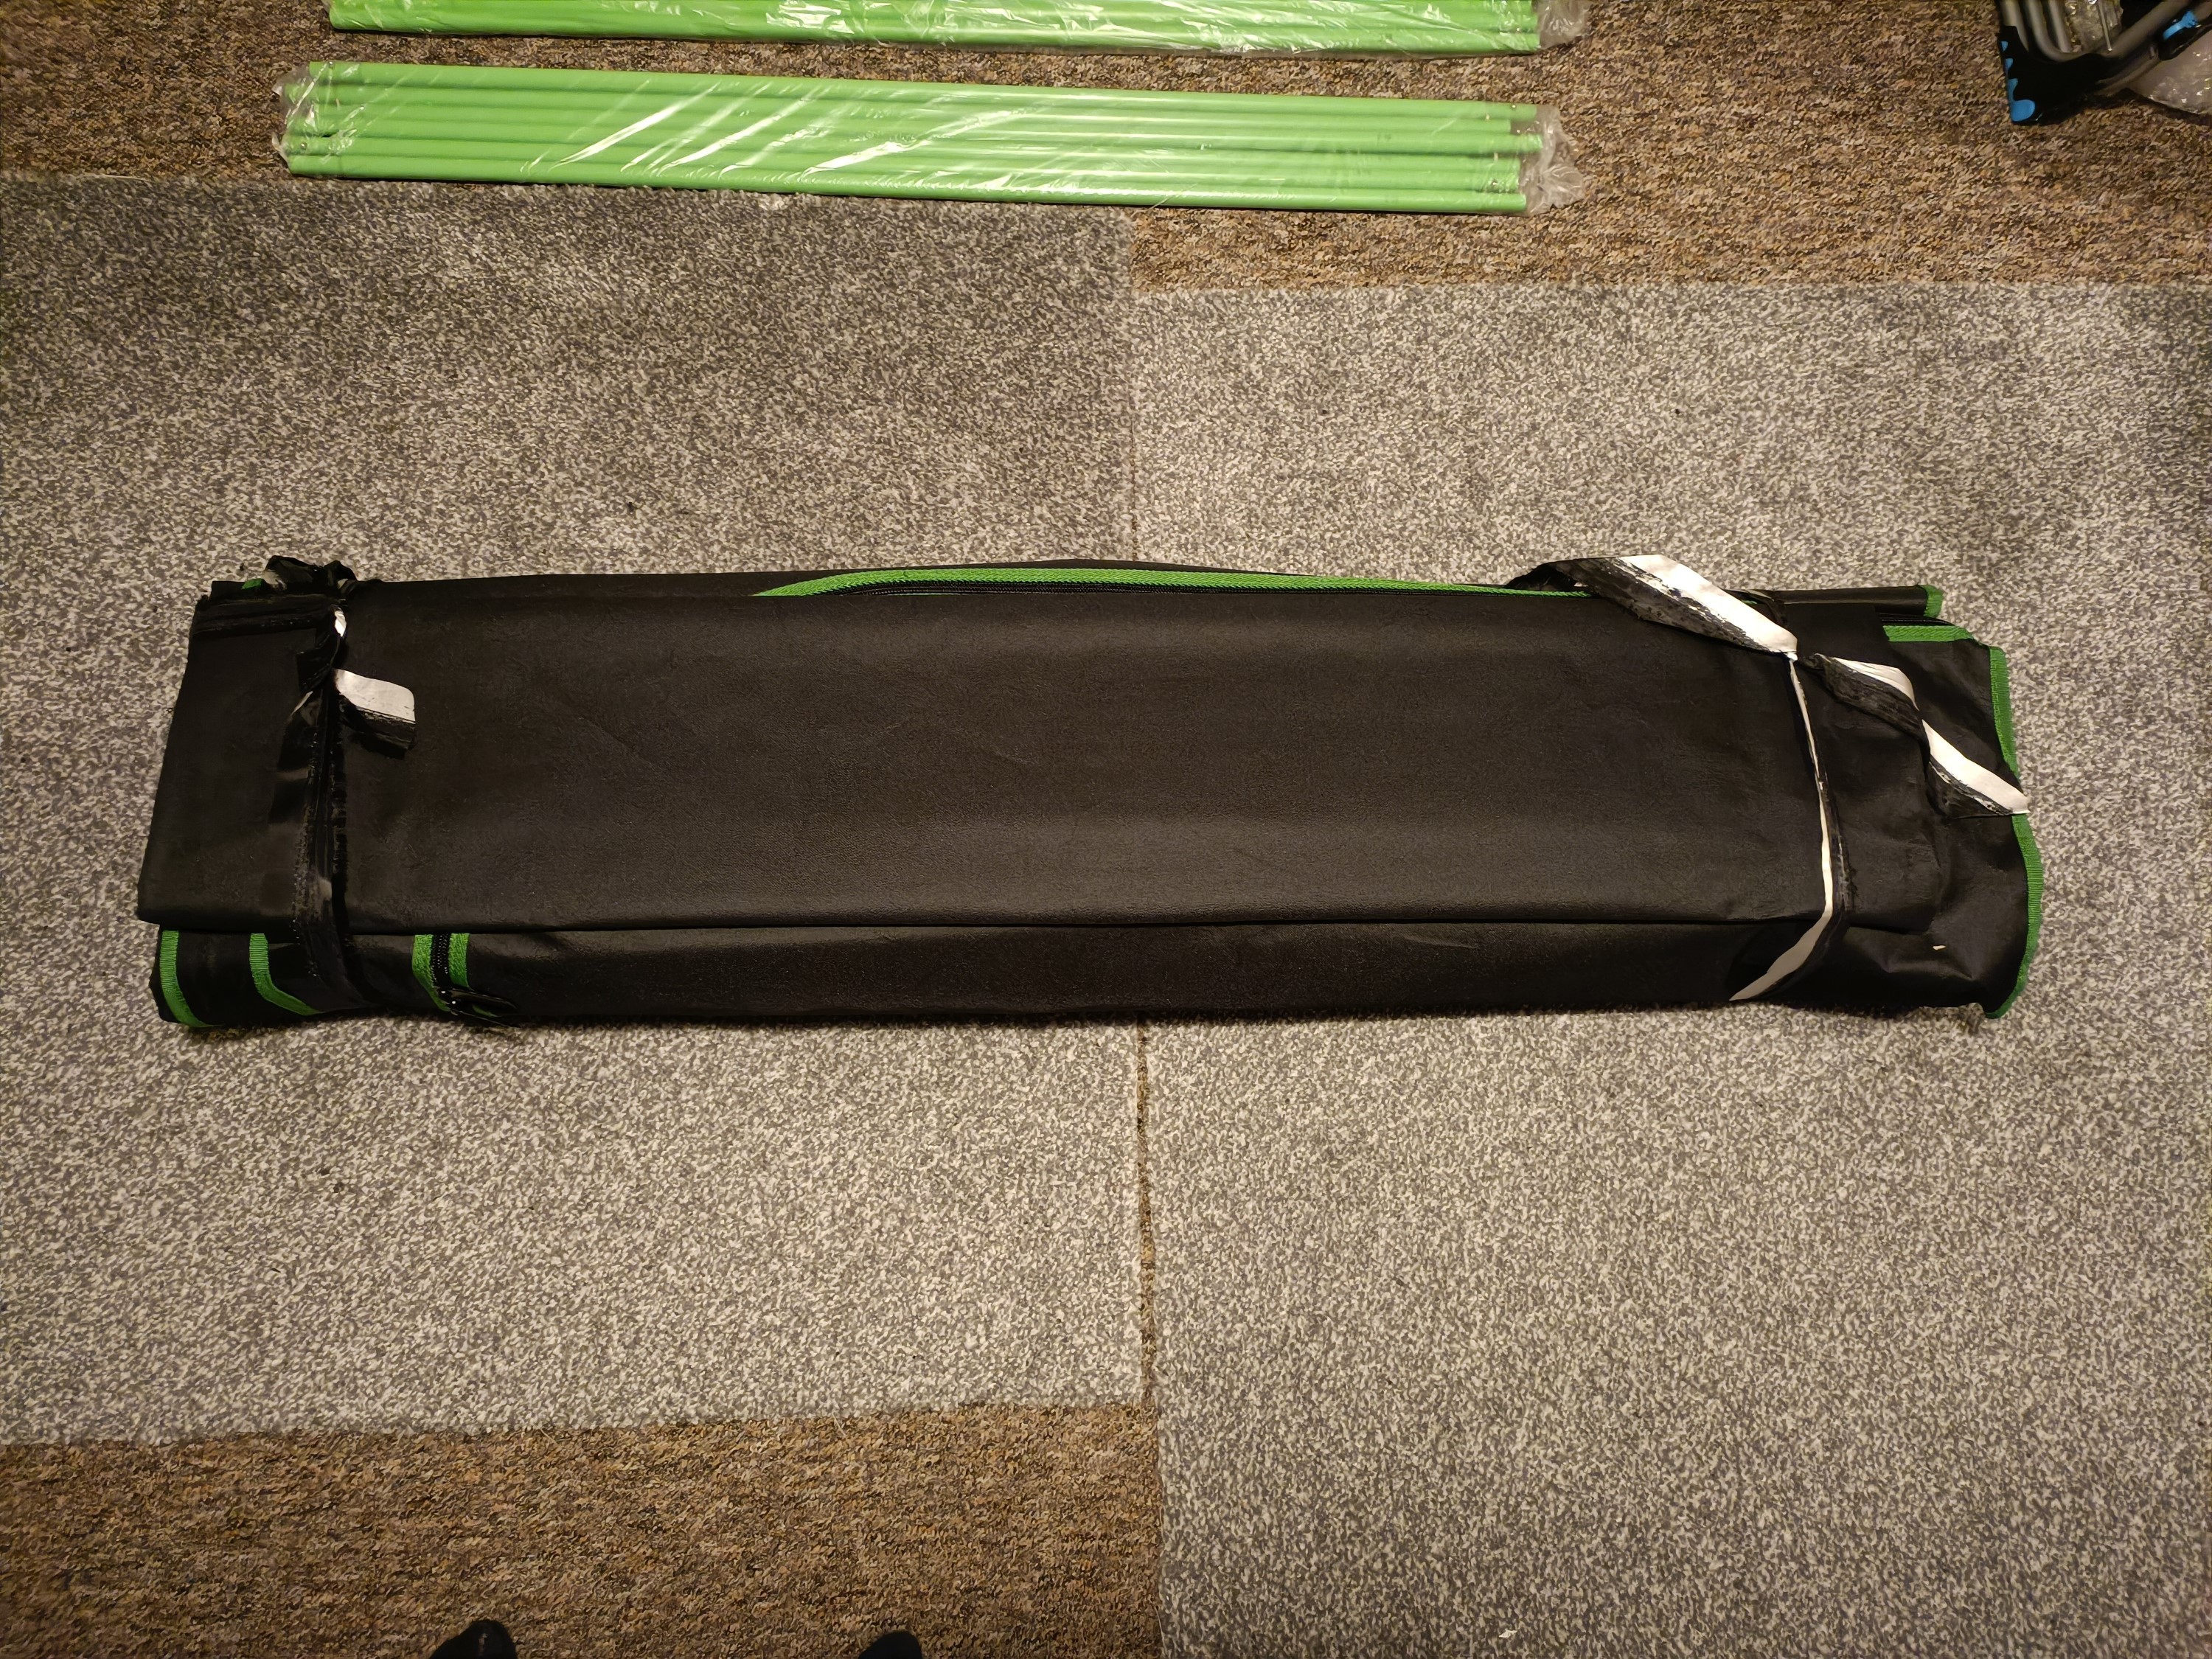
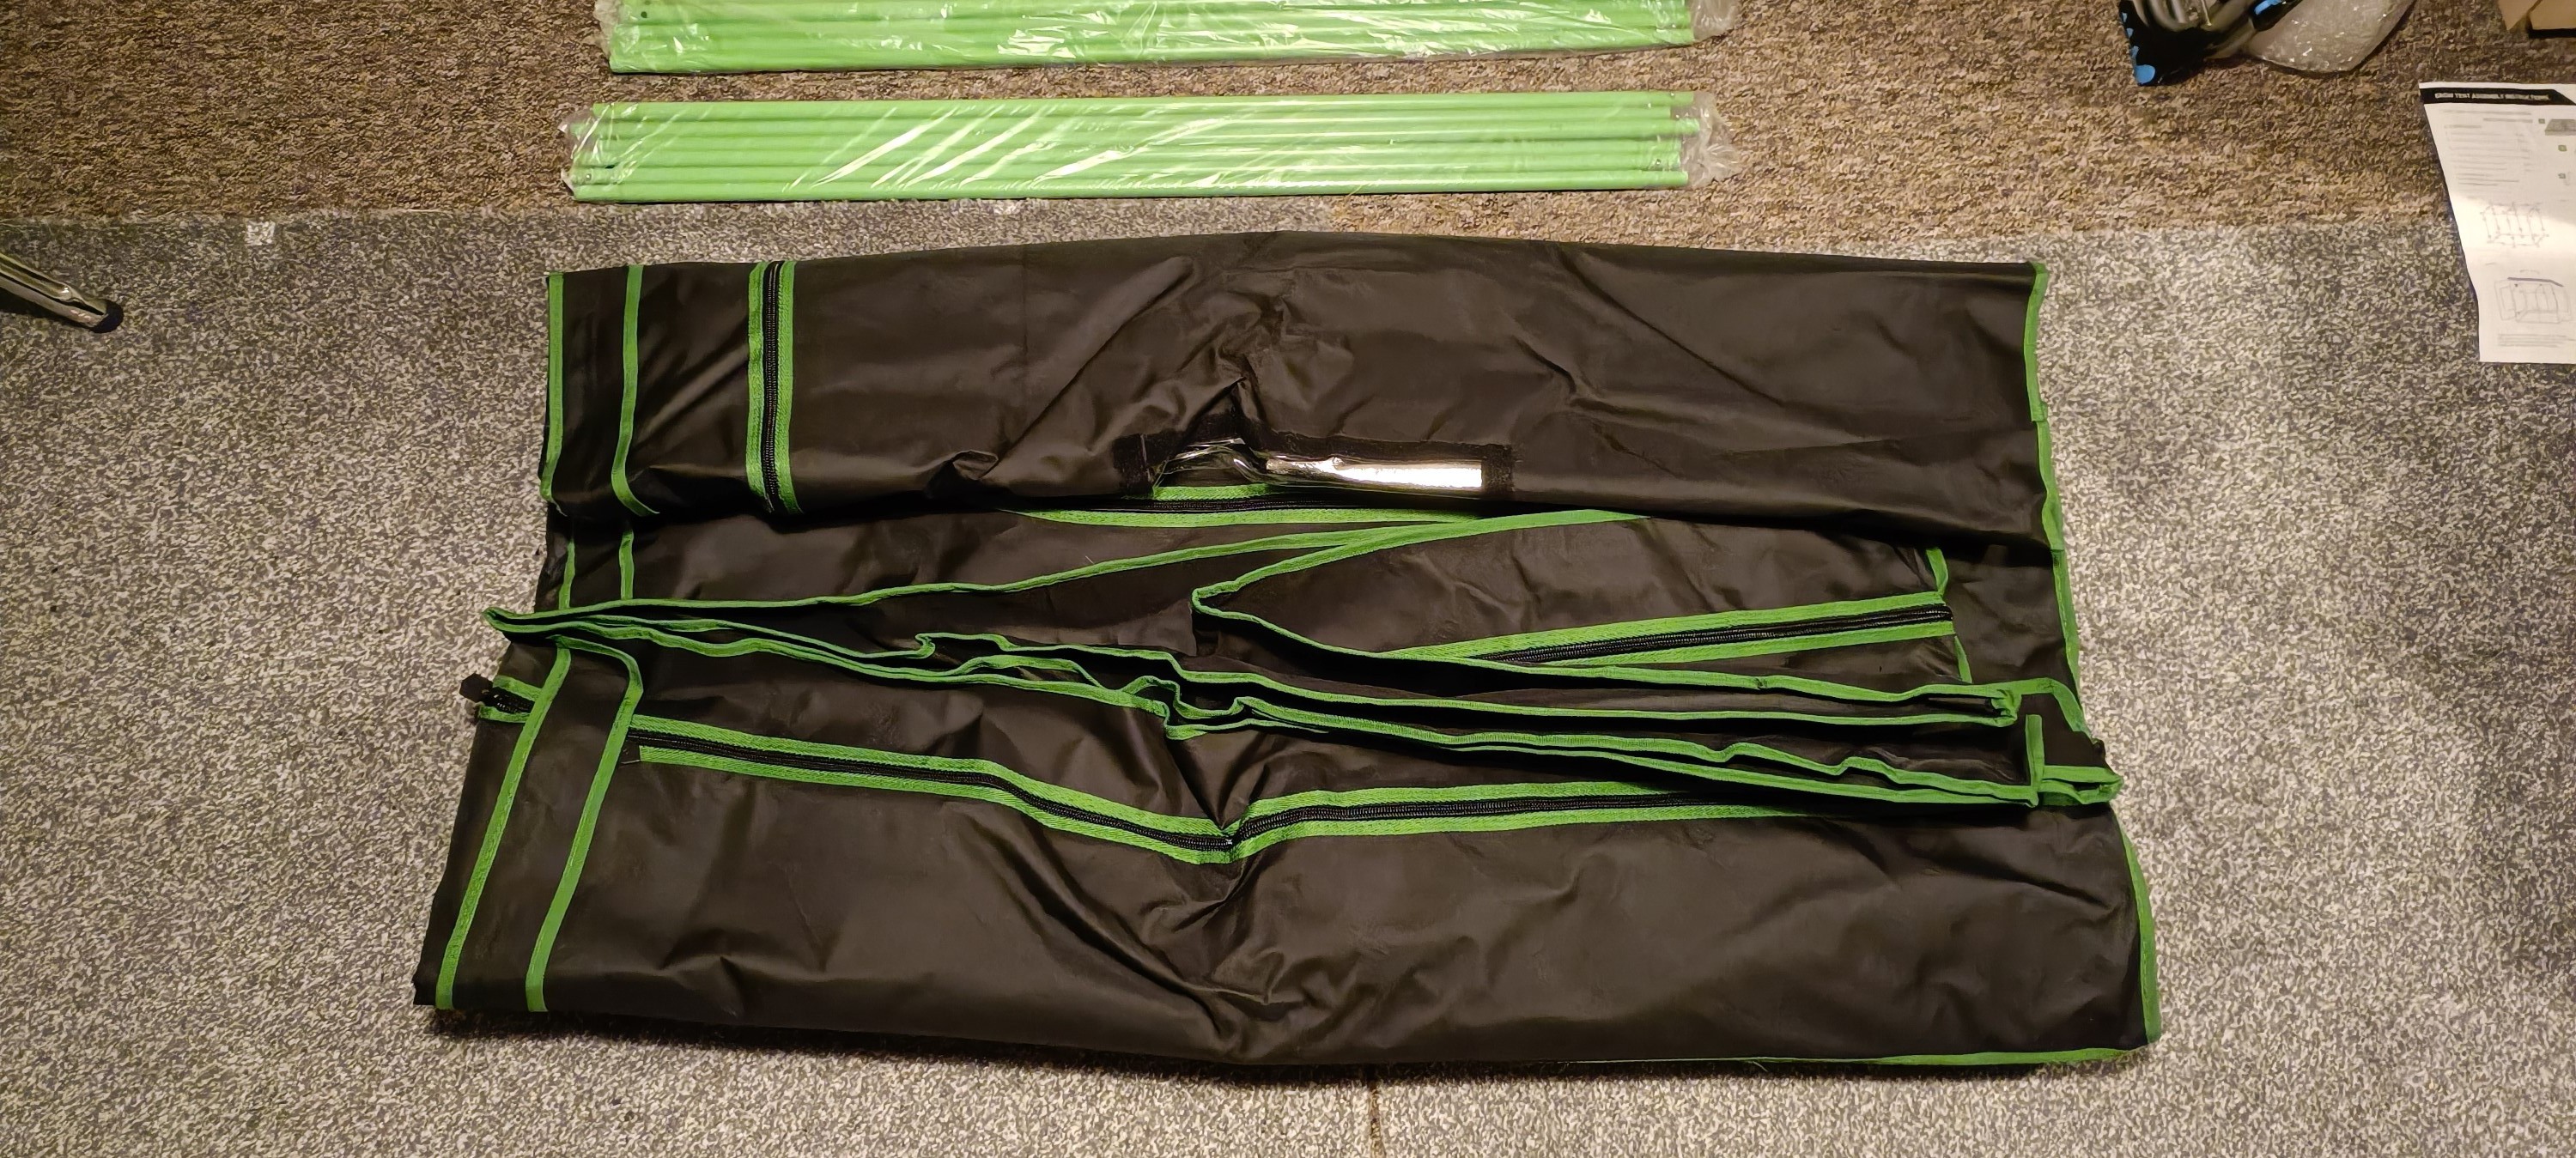
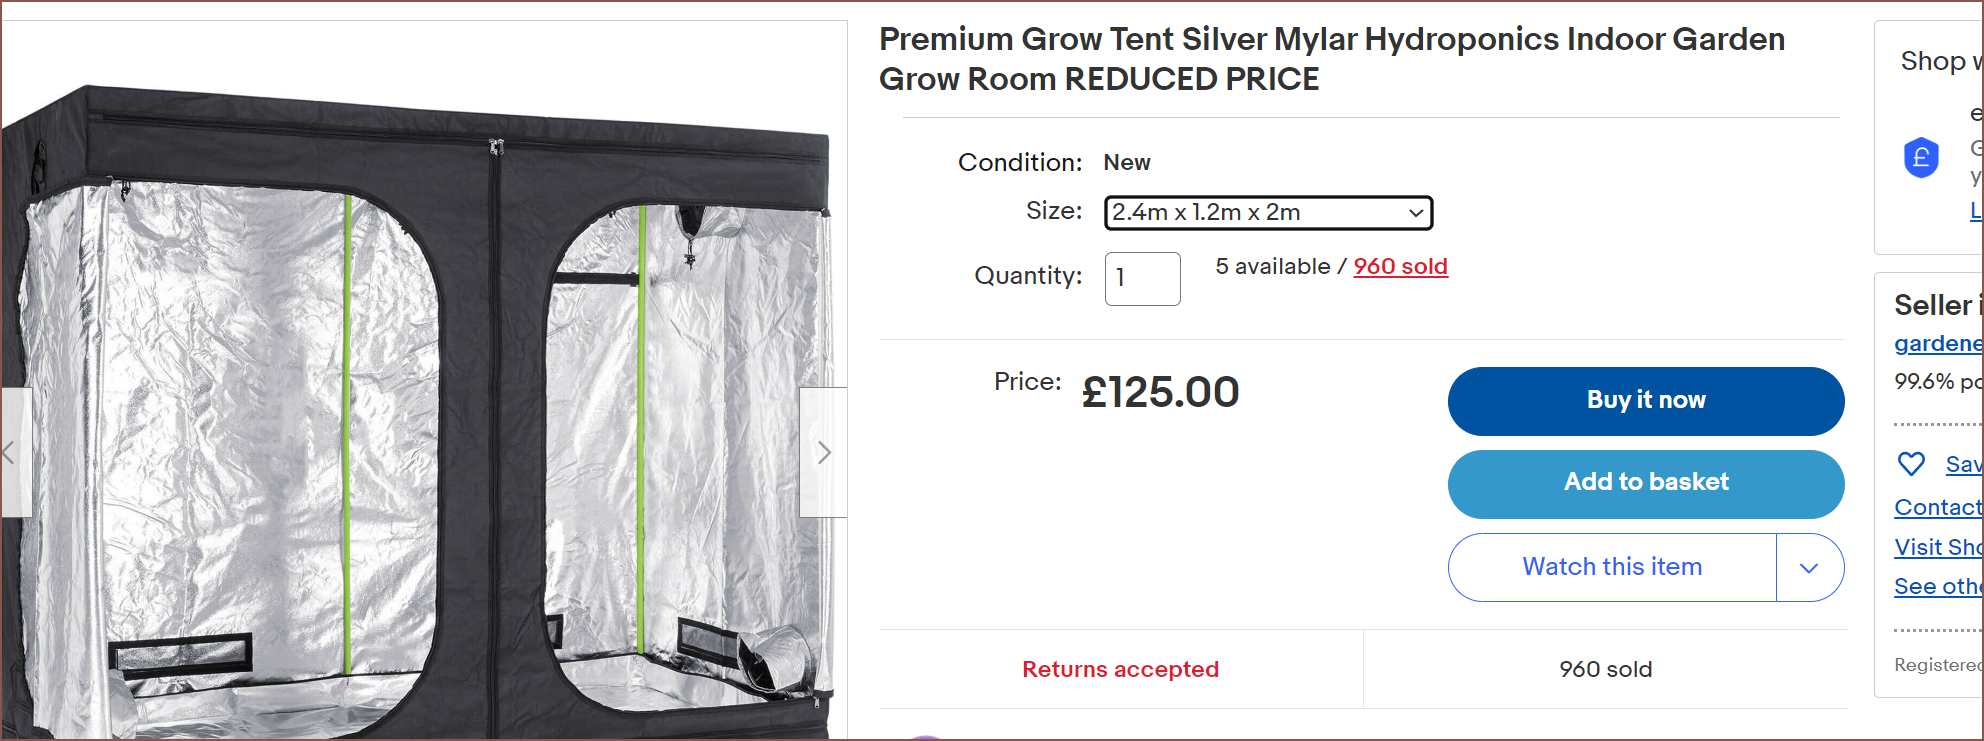
So I received the tent and put it up for the first time yesterday. Interestingly enough, the carrying case is only for the tent fabric and all the other things are just inside a plastic bag or loose inside the box. A bit of a shame, but the folded tent does have a lower Z thickness than the Vivosun edition. I haven't been able to find a 4ft long box or duffle bag, and that's one of the reasons I picked this tent over the noname £108 tent.
I was also liking the look of the white tubes already, and also like these black caps over the corners. The letters marked onto the tubes were also easier to see, since it was a white background and the font was bold and not a thin-looking Times New Roman as seen on the Vivosun.
The instructions called for sliding the tent over the top instead of the bottom of the frame. "Interesting to see if that makes a difference in ease of assemby" is what I thought.
Something I noticed was that the ceiling tubes looked quite bent on one side. I've sent an email to the seller and waiting on a response.
There was also a connector that wasn't exactly round, so required a bit more force to fit the tube in.
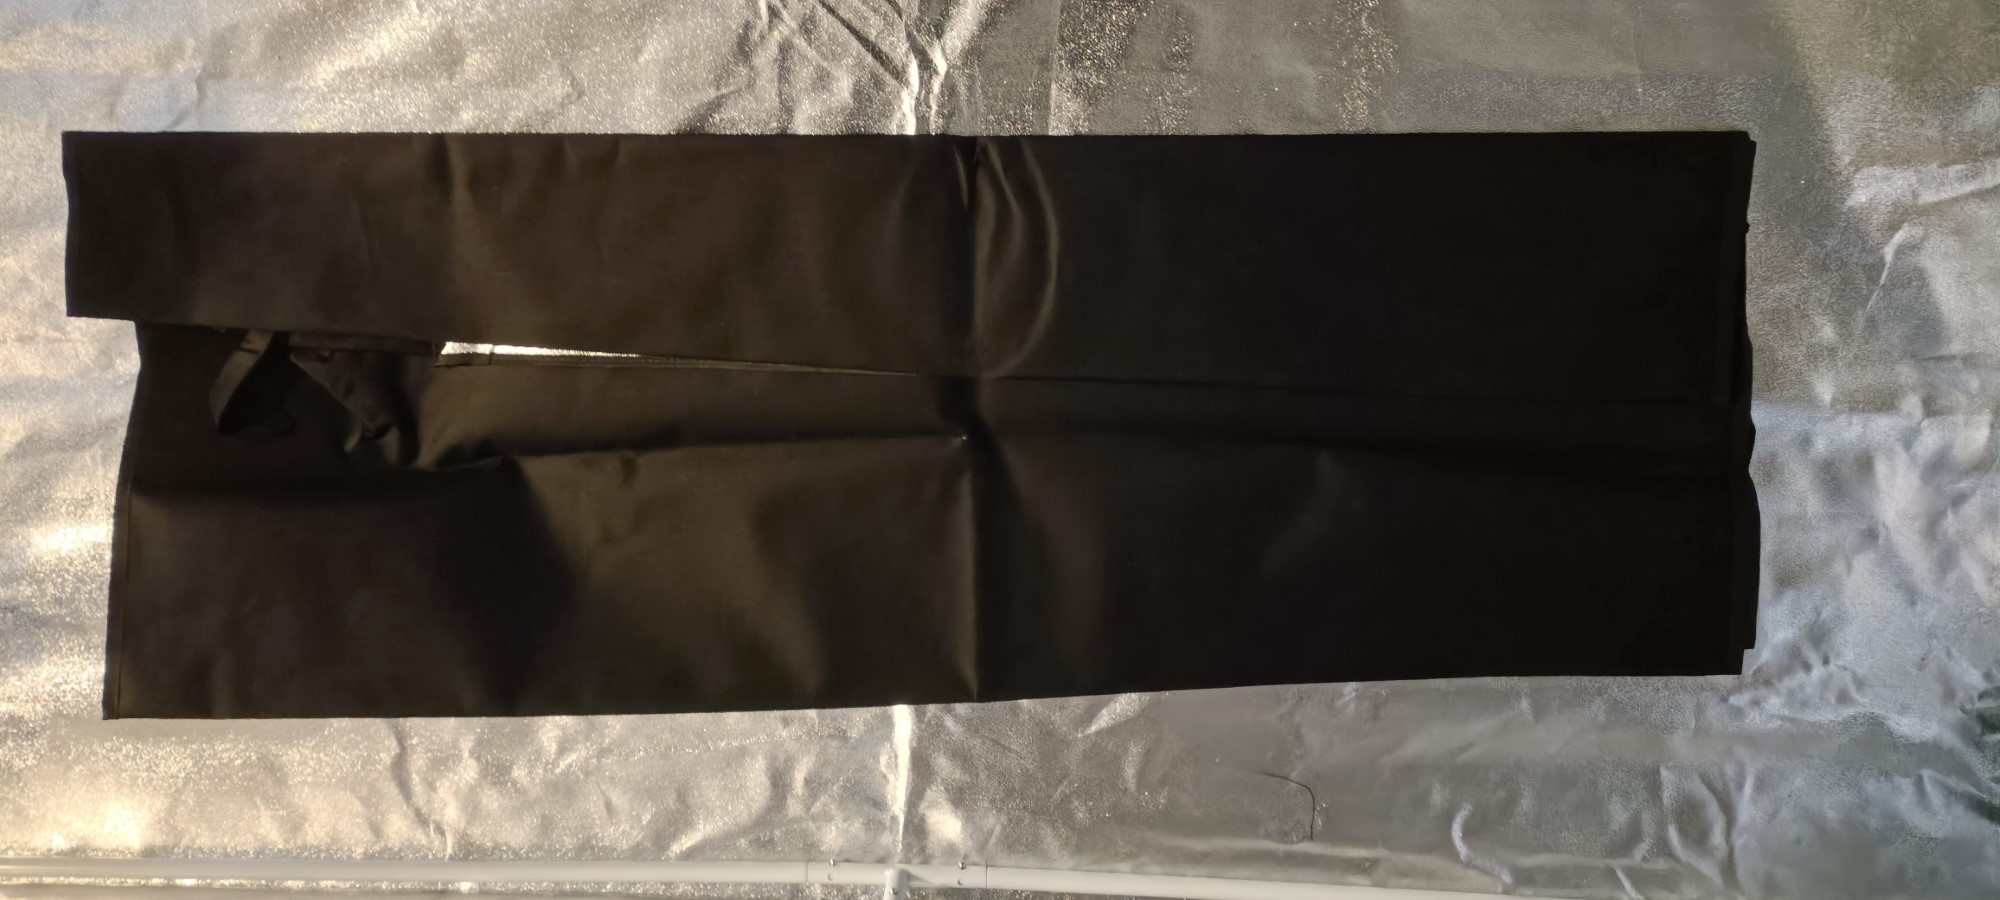
20 minutes later, the frame was made and it was time to unfold the fabric.
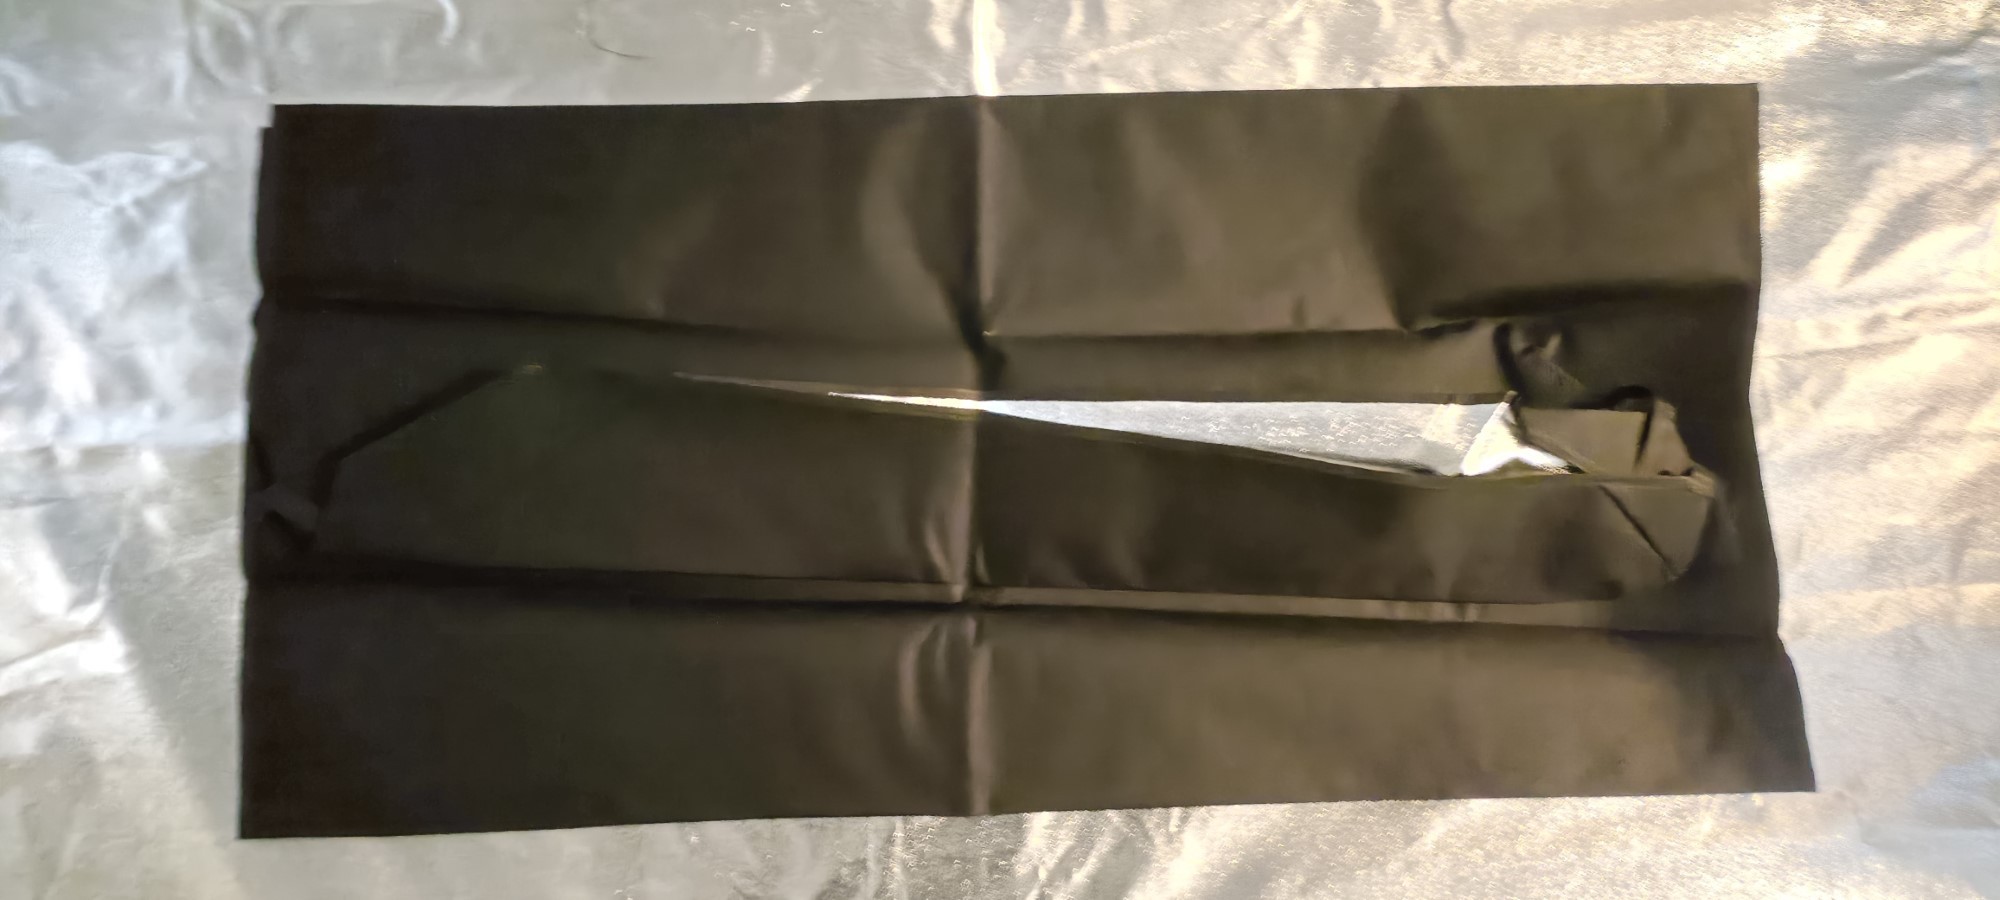
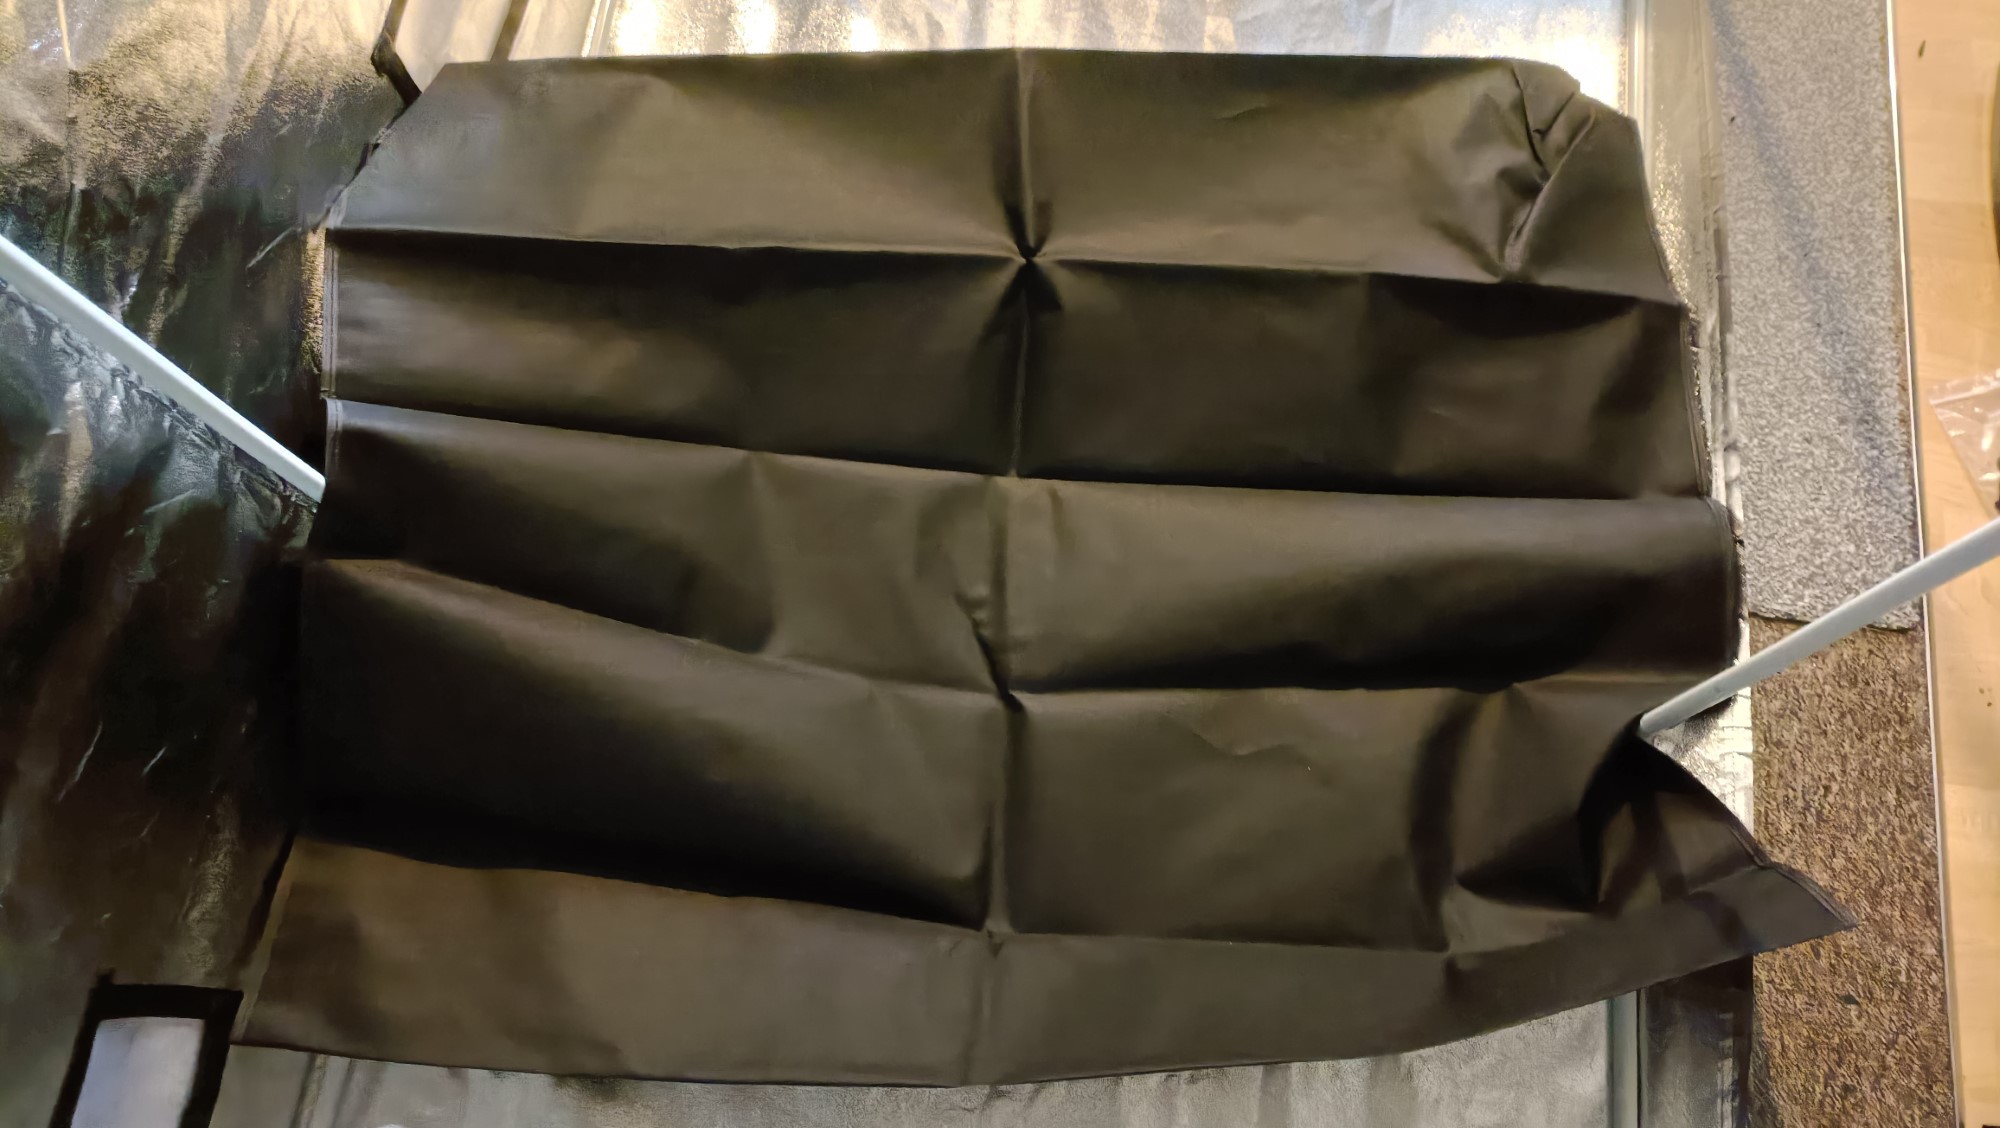
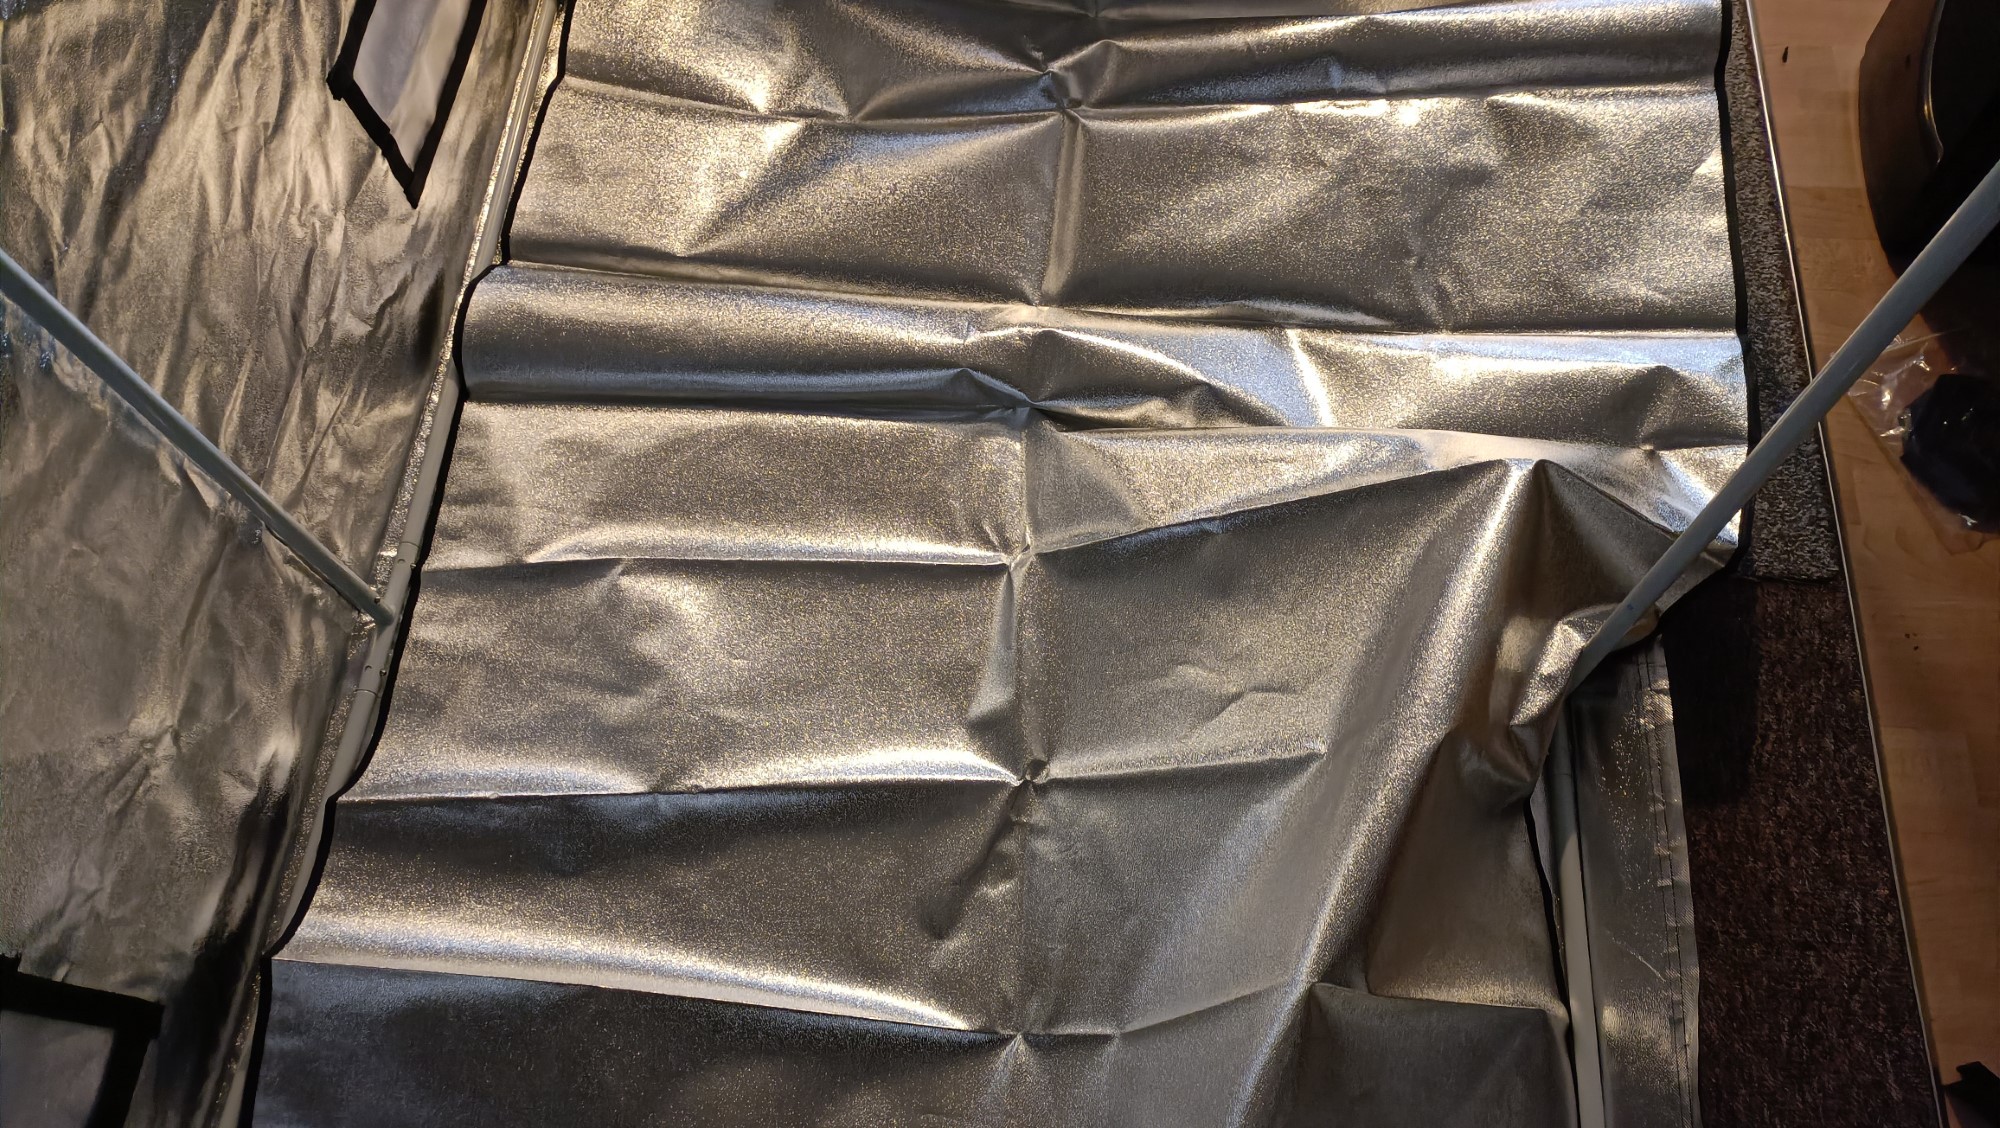
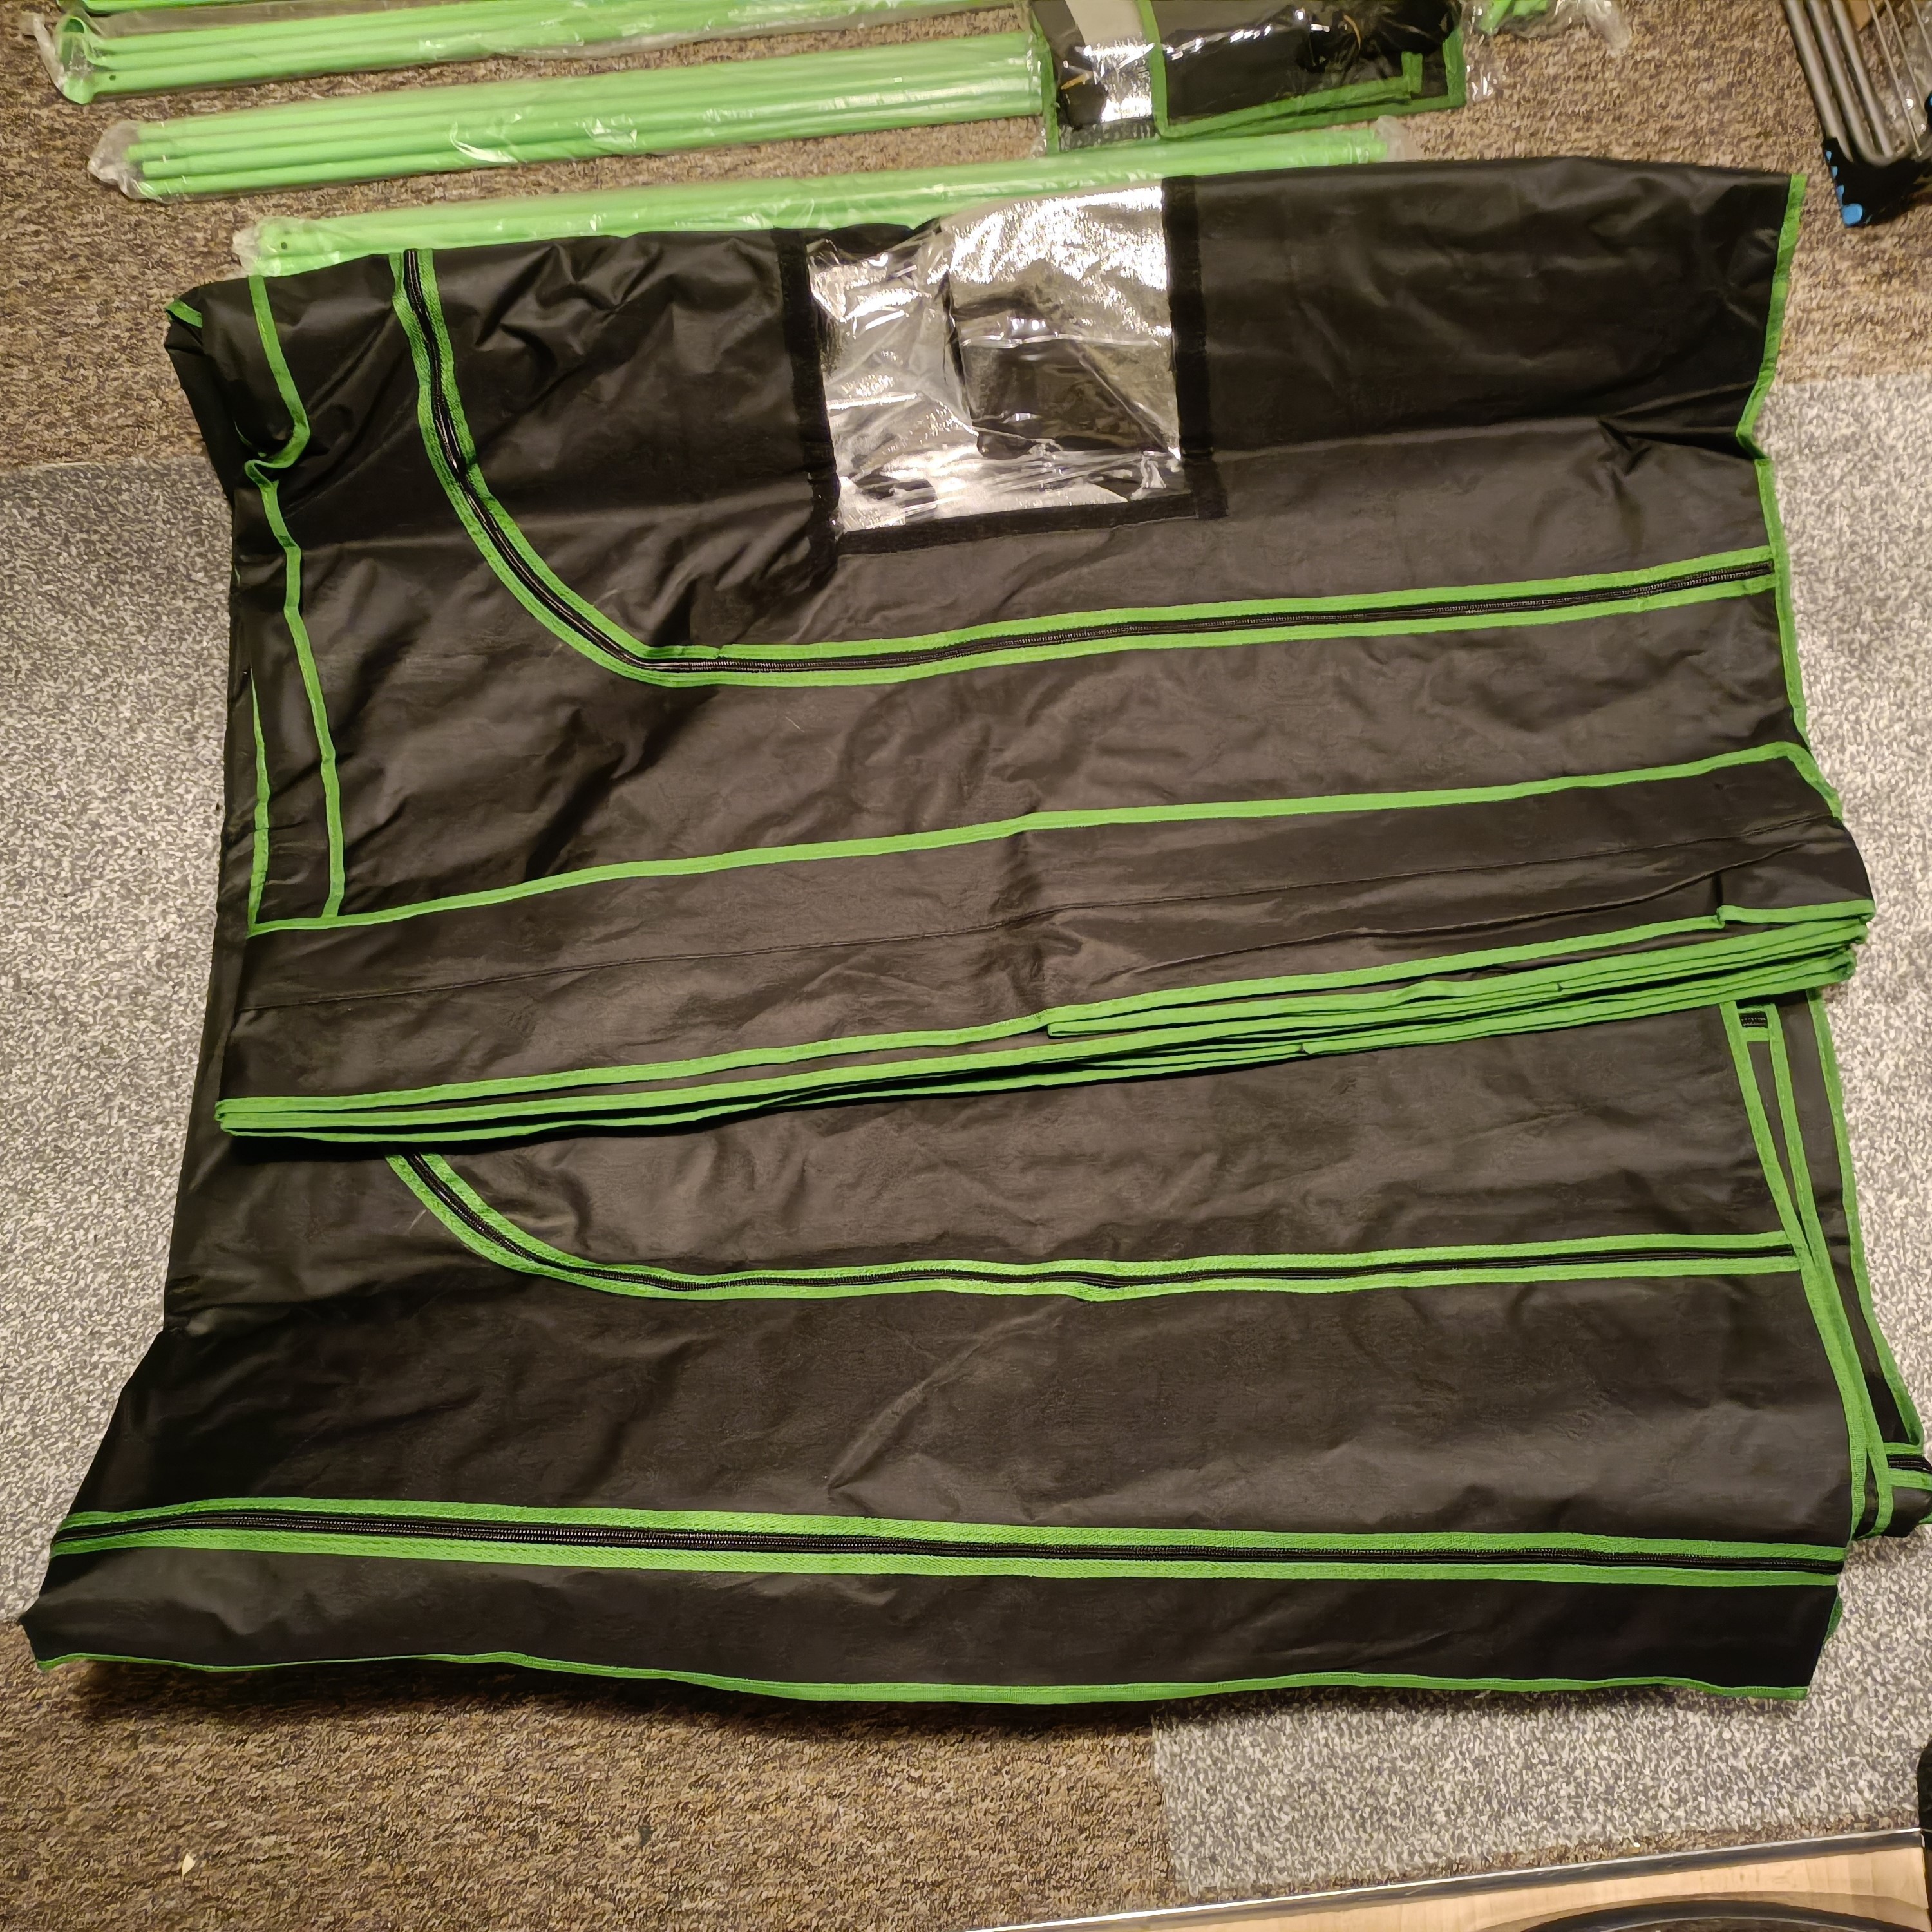
After that last image, it turned into chaos and not like the Vivosun, which just neatly folded out once more. Well, I did eventually find the top cover and slide it over the frame, but the mass and lack of crumple resistance of this 600D stuff meant that there was some resistance. Same story with the bottom, but woughe it slid on a magnitude easier than the Vivosun one. There was no mystery fold in the corners, so that could be a potential reason, but I do think hooking the top fabric first before going into the bottom made things easier. Another thing was actually moving the frame as far away from the back wall as reasonably practicable, allowing more space for the fabric to get over any creases.
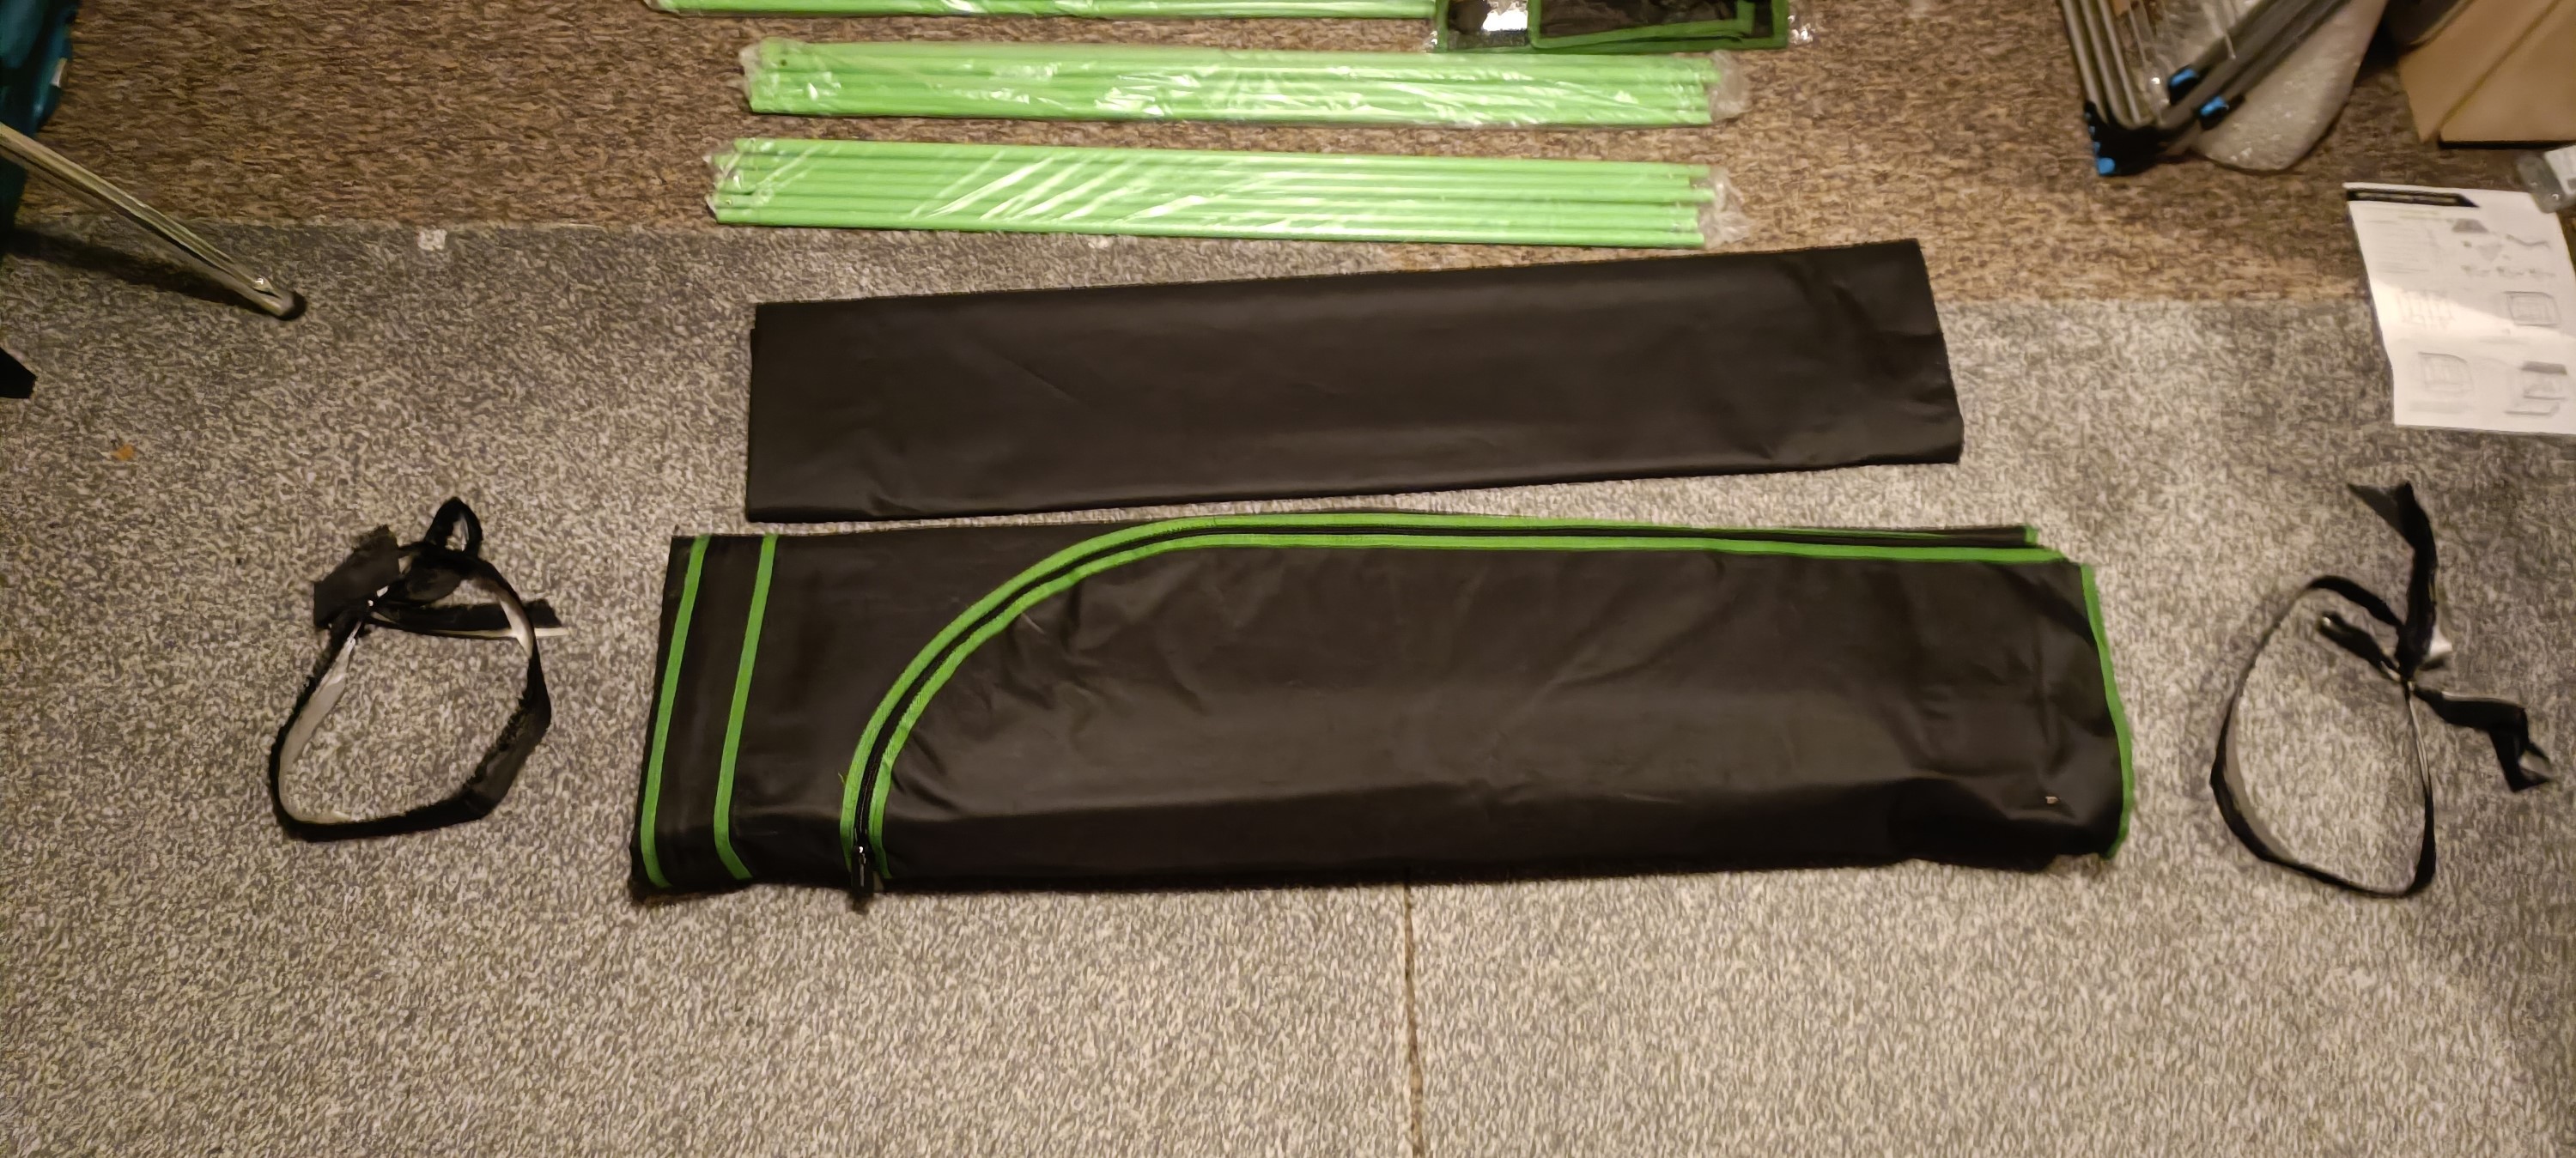
The zippers aren't heavy duty and massive like the Vivosun one, but they seem to get the job done (zipping the megadoor is the last thing to do to assemble the tent).
First use
Now, the thing was that I was planning to use an old but large ring LED to light up the interior temporarily until I finally got around to the artificial light subproject. Unfortunately, it seems that the 15V@4A power supply has an issue because the ring strobe flickers at perhaps 10Hz. Thus, I attempted to use the small singular LED built into a power bank.
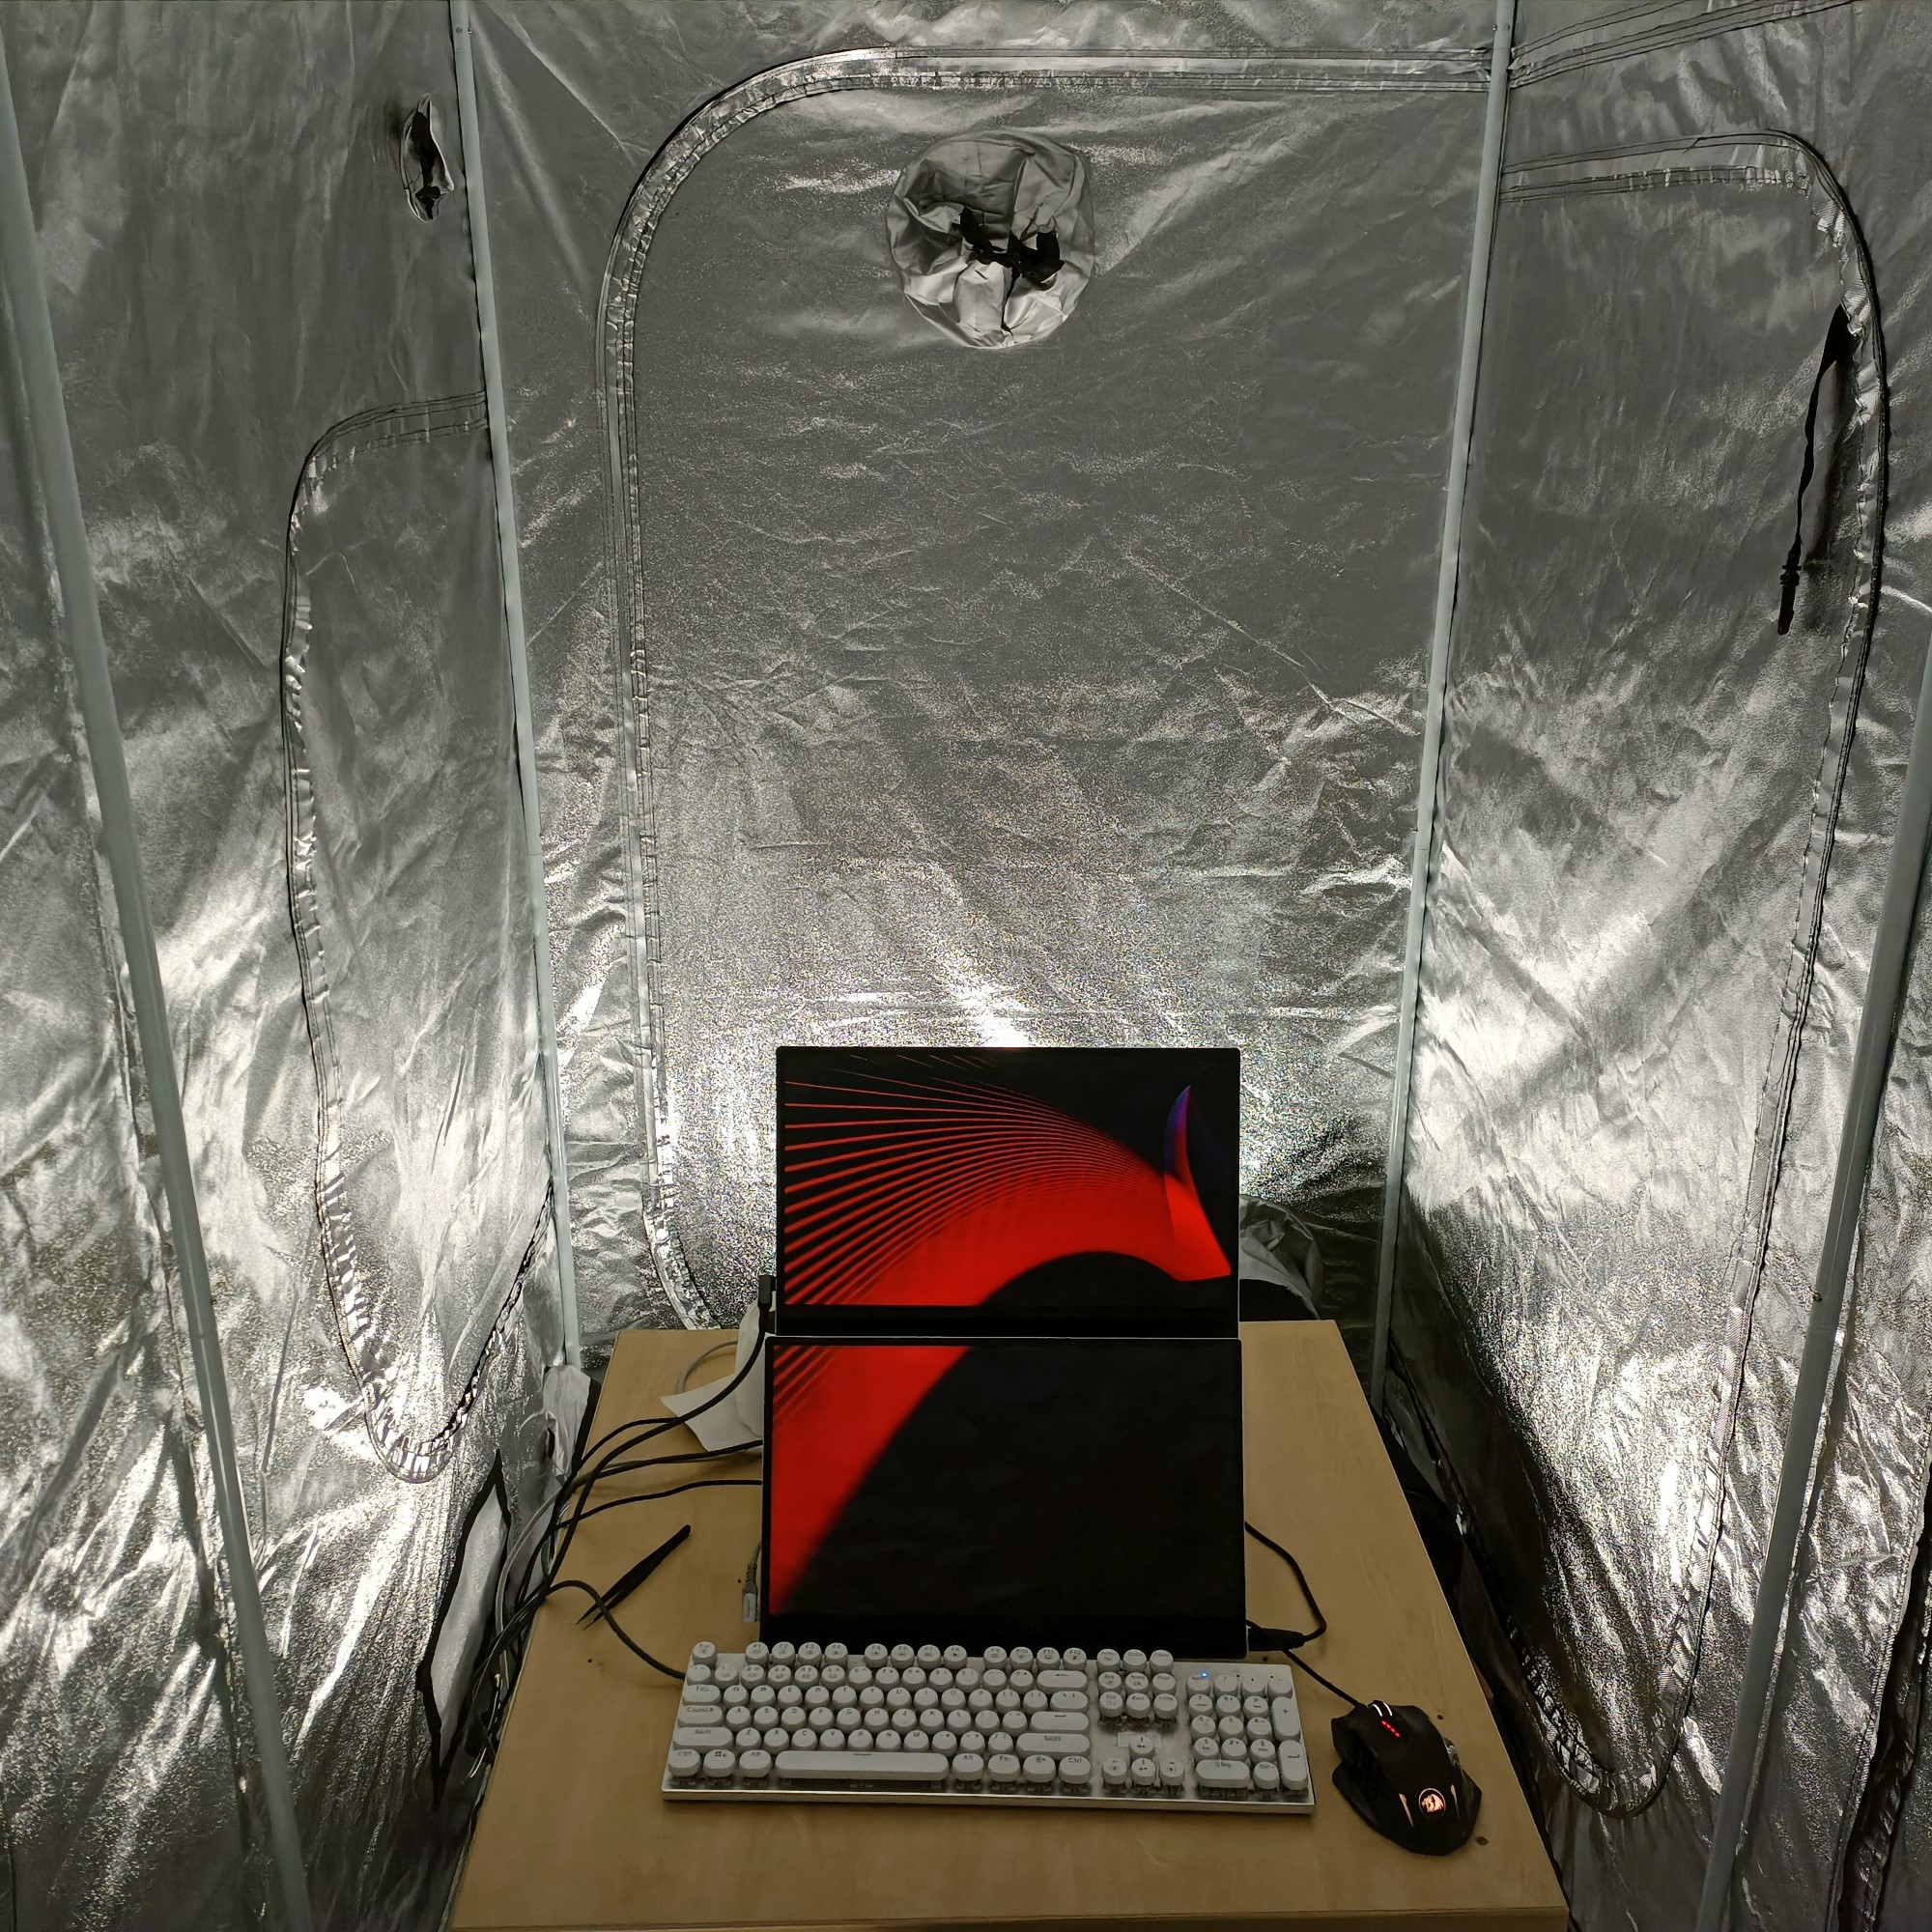
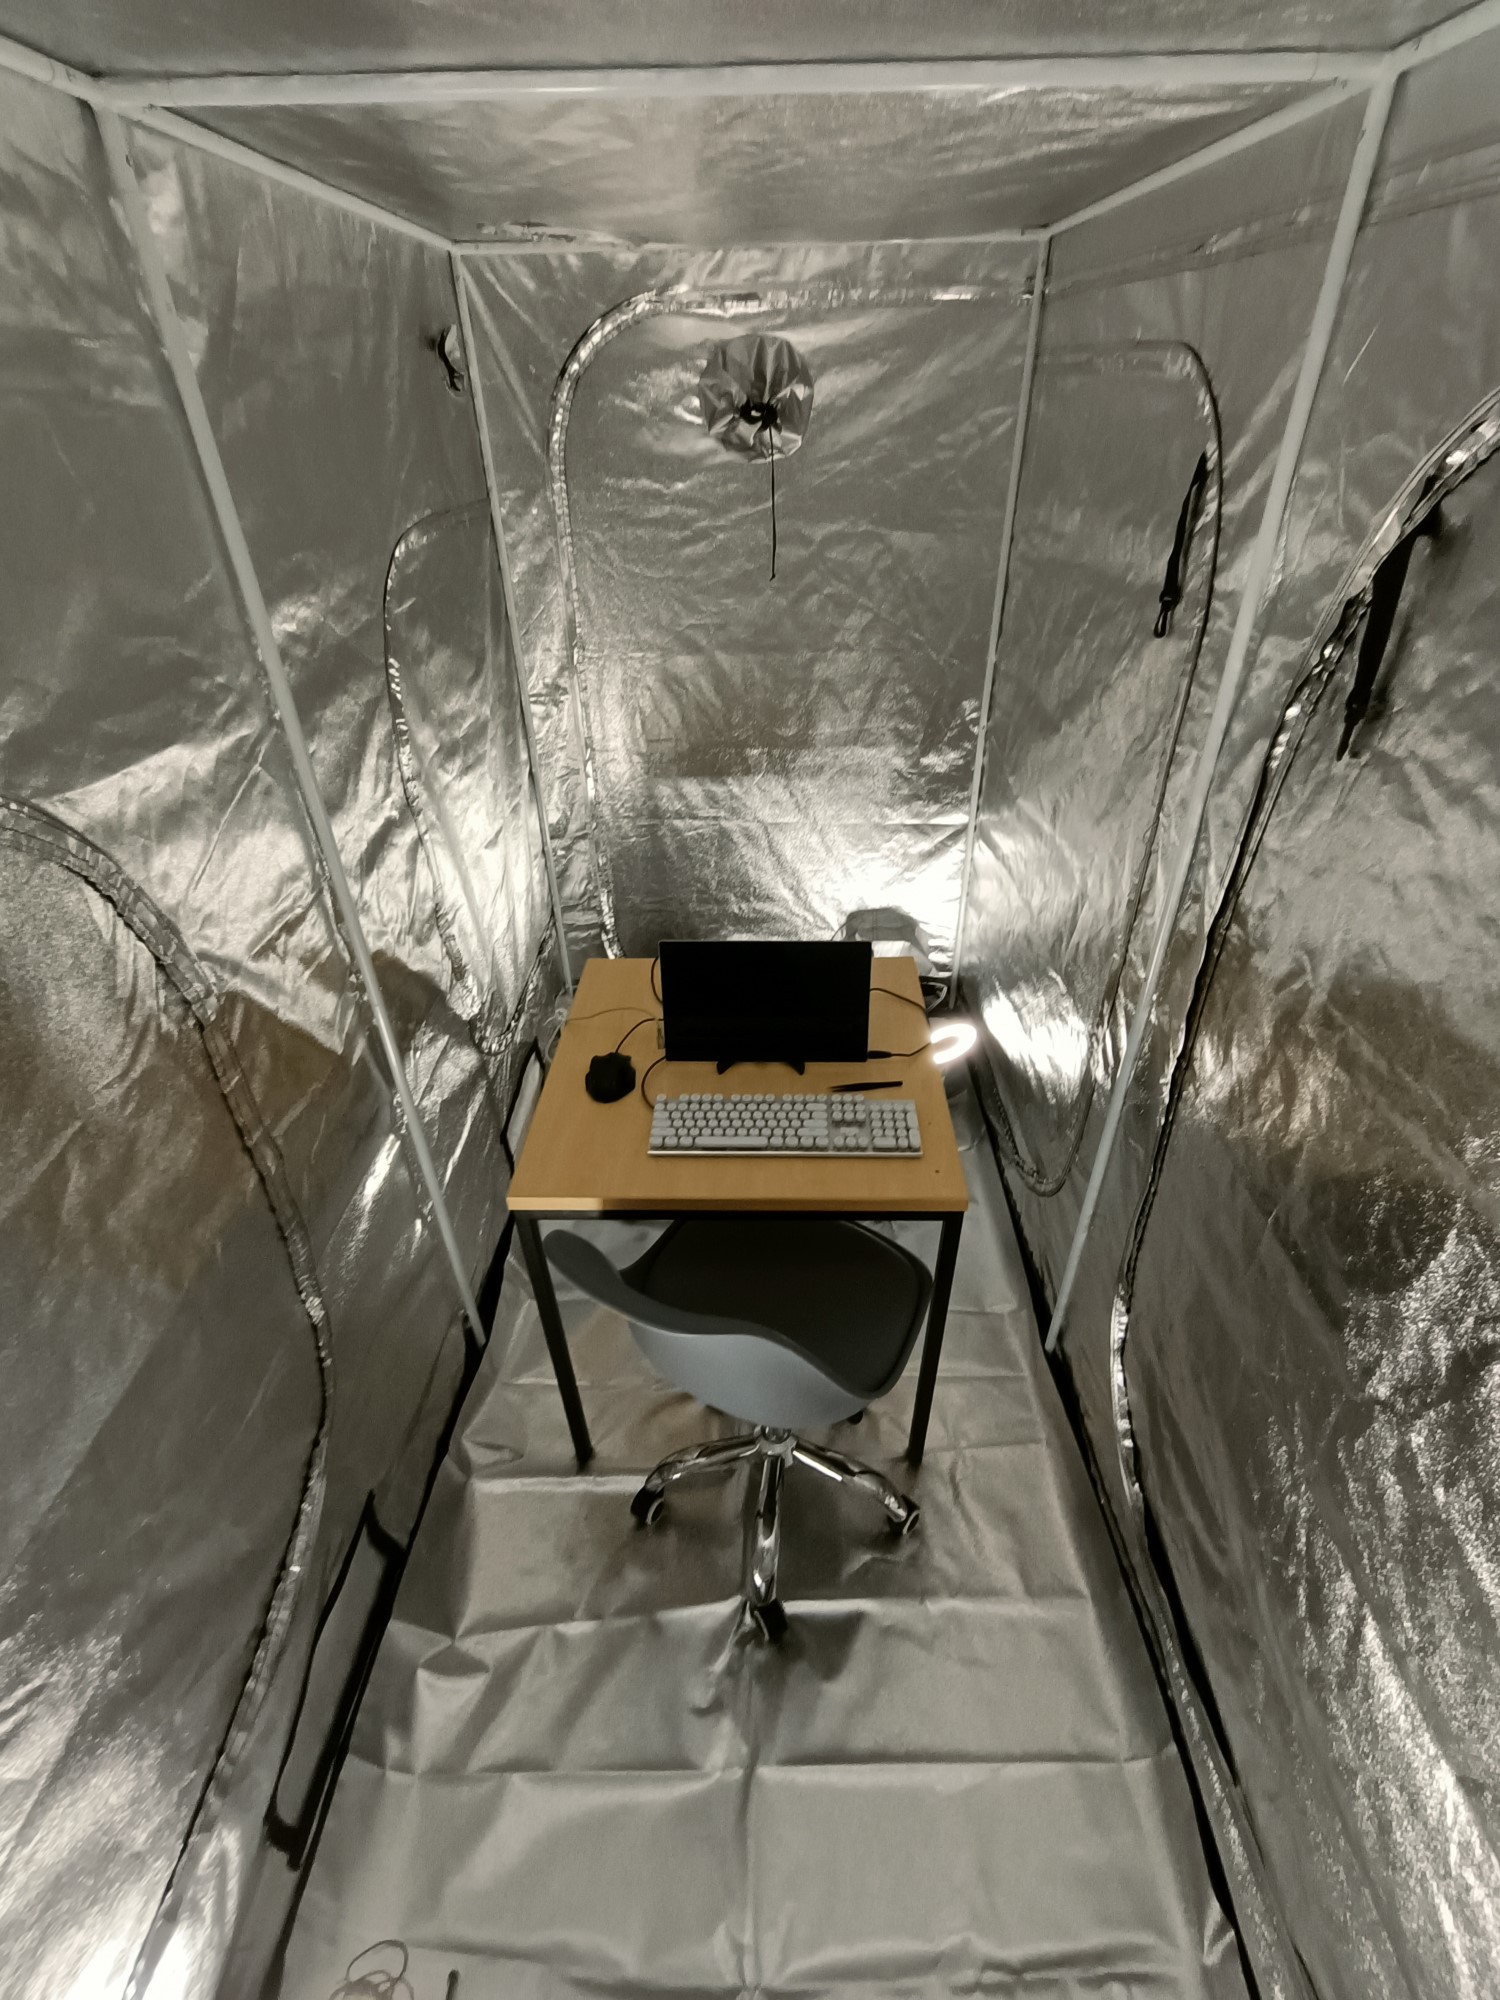
Then I moved my incomplete #Teti [gd0022] PC over, rolled out my lovely new flat ethernet cable and powered the system on.
[Tangent Start]
I put my PC to hibernate and, upon waking up, the Windows loading circle appeared fine but between that and the logon screen, the PC froze and blackness was displayed to the screen. It's an issue I've known about since the summer of 2022 and Me In The Past decided to just avoid the situation to avoid confronting the issue.
Well I Bing-ed... Bingified? for a bit, found nothing I could try, looked in Event Viewer for clues, went into the BIOS and saw a setting called "Fast Boot" set to Ultra Fast. I thought "Hmm. I was the one to that setting years ago. That sounds like something that looks like it would visibly do nothing but could actually cause issues. But it couldn't be that easy."
Well I changed it to "Enabled". It worked. It was that easy.
[Tangent End]
I still don't have a working inline fan, so I used a cheap but quiet normal fan. Unfortunately, it seems to be emitting a slgiht metallic odour. This tent fills up with whatever air is input extremely fast, so wether it's my exhaled breath or a particulate producing propellor, I'll notice. Basically, I've only got 1 of 3 ingredients required to work efficiently, which is an eyeful of sometihng that looks nice: the tent walls.
Dissasembly
Fast forward to finishing my time inside the tent. It's like 12am, I'm looking at this tent I need to dismantle, and I can't tell if my fatigue is to do with hunger or tiredness. Well, I had enough energy to dismantle the whole thing after I ate.
Coiling up the flat ethernet cable took ages. 20 minutes to be more descriptive. Finding out I could coil it while resting on the table instead of freehand really sped things up.
I decided to roll up the megadoor so that it was easier to work with. Good idea but it was still tough to execute. Then I dragged the frame forward and the fabric into the space between the frame and the back wall. I took down the frame, finding out that twisting the tube before pulling it out sped things up.
Suprisingly, I actually figured out the correct way to fold the tent to get back to the 1.2 x 2m folded stated (which I could then use the assembly images to fold back into the carrying case).
5th March
I feel like I was at least more fluid in putting the thing together, except that the fabric still turned to chaos so I'll have to remember to think of a better solution (since the fabric is where I'm likely to cut the most time for assembly). I didn't time it because I was also doing other house chores (which might not have been done if I didn't have a sizable tent I needed to build).
This time, I decided to also try the drip tray. It's interesting because it's like a flat sheet with origami corners.
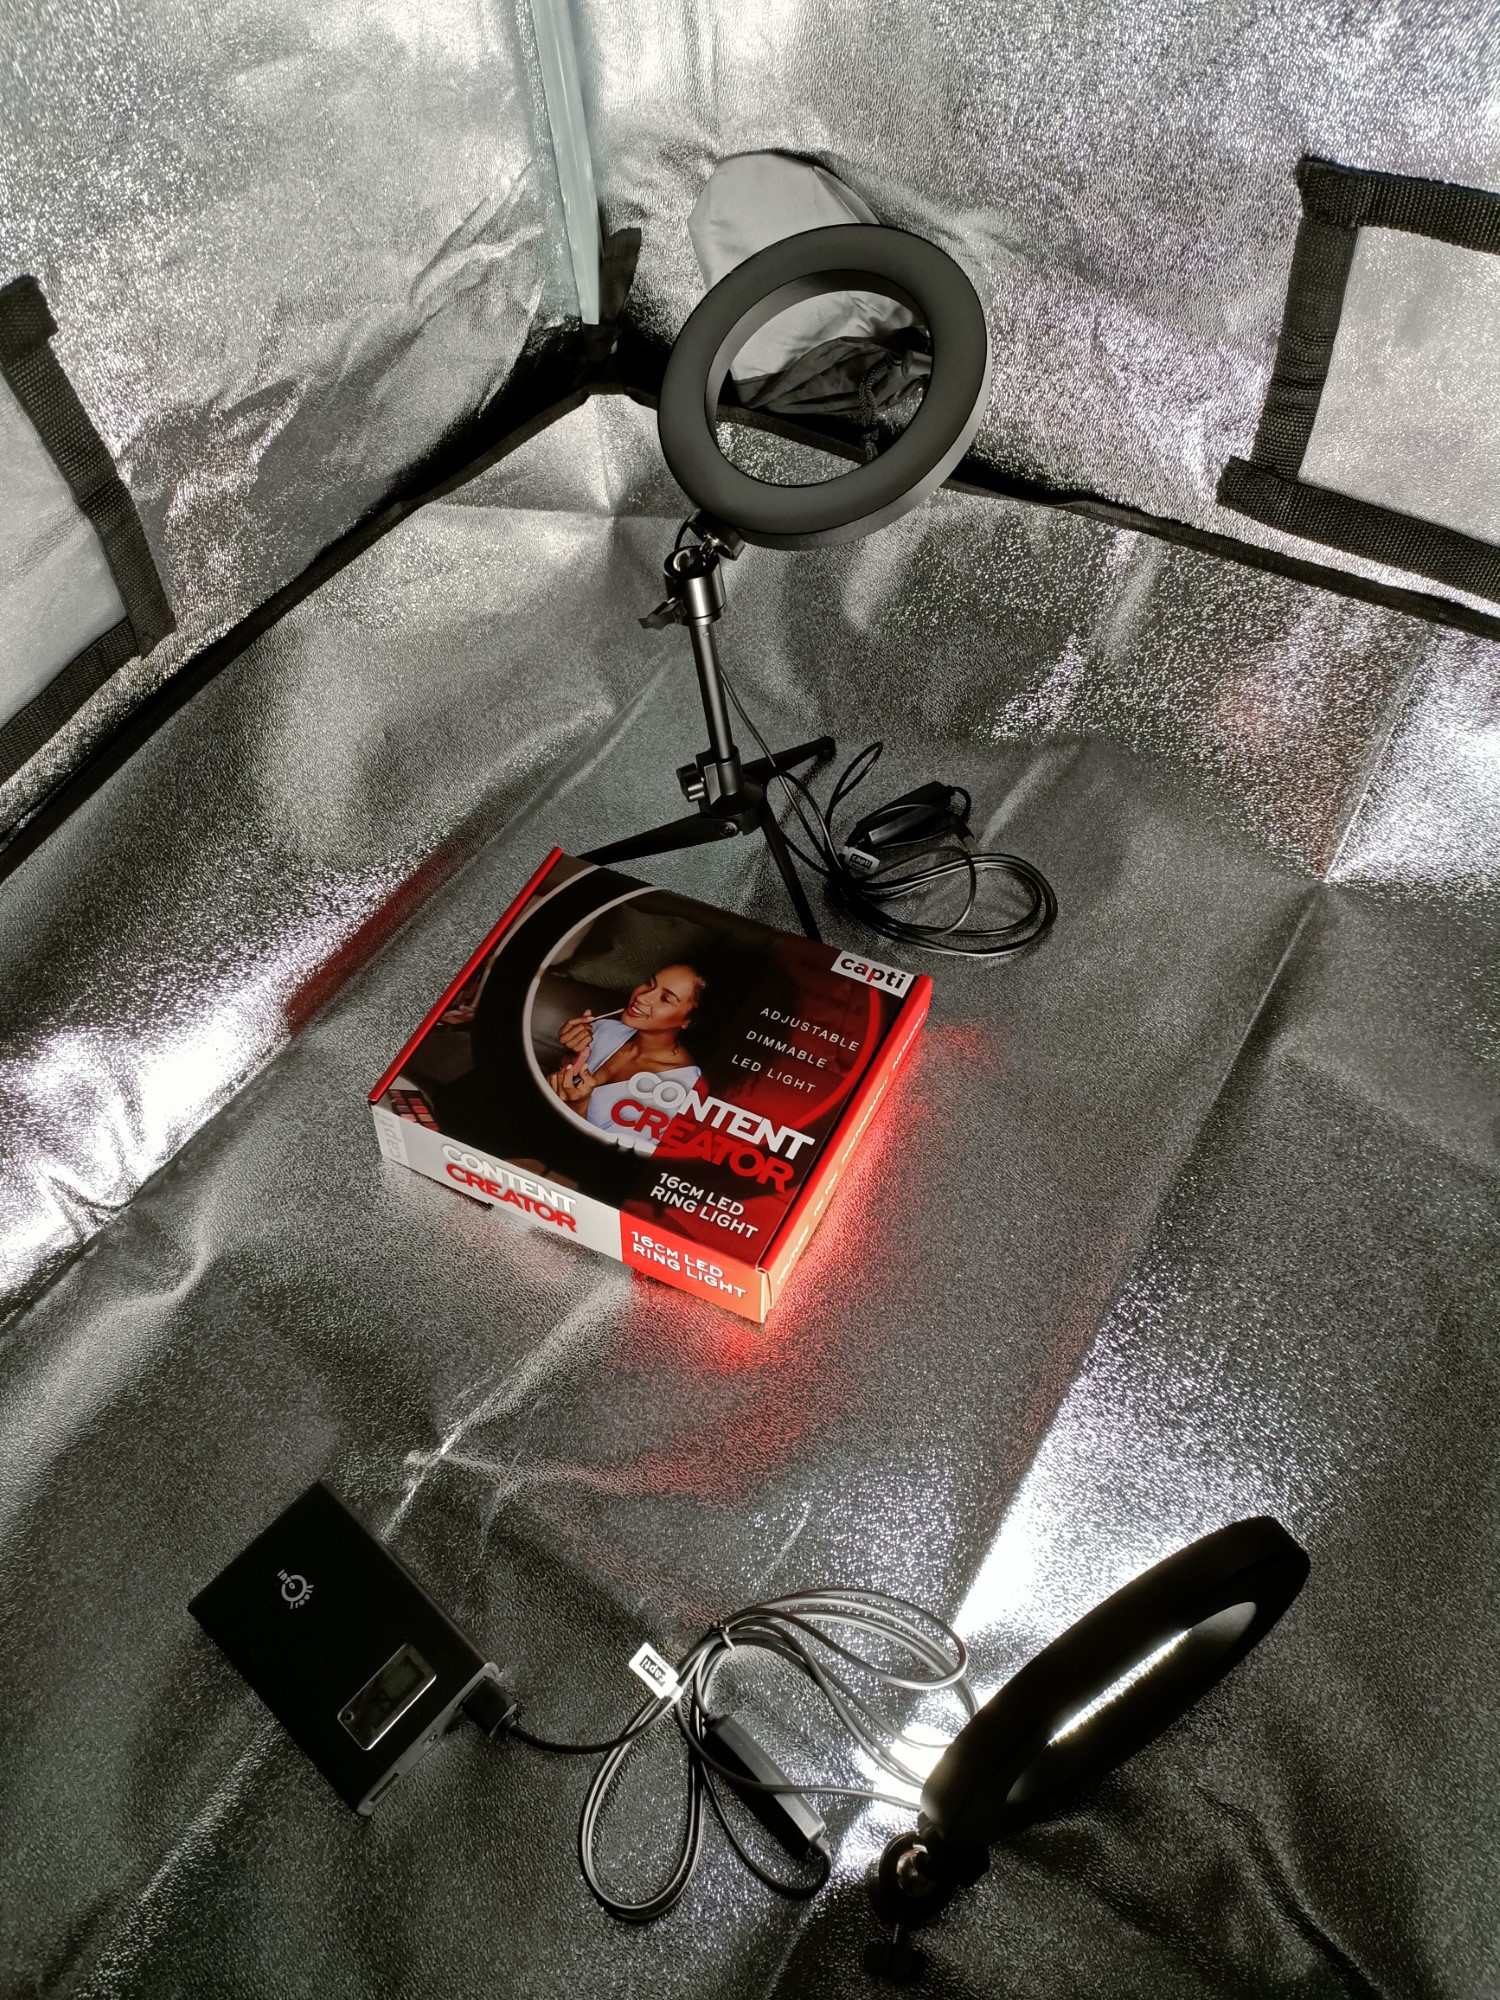
In a Poundstretcher, I remembered seeing some ring LEDs and I went over to see them. They had a 16cm Ring LED from Content Creator (I think "Content Creator" is actually the name of the brand) which also comes with a tripod. While it wasn't this kit specifically, it looked a lot like the ring LEDs I plan to install into the Hexadecibel to finally give it (and the loaded filament spool) some ilumination. Well they had that for £6 or a larger 26cm for £10. Thus, I was standing there for probably 300 seconds wondering if I should pick none, the £6 or the £10 option. I then thought "Wait. I could get 2 for £12, and dual point lighting always looks better than single point lighting.". Additionally, the 16cm should be easier to store.
I ran home, checked Amazon for LED rings of the same size, saw that most were £12.99+, ran back to the store, bought 2, ran home, found out that the kits have suprisingly high build quality for £6, plugged them into power banks and tried 2 configurations to see how the lighting was (images below), determined that I really like both, ran back to the store for a third light and tried to power them from Teti instead of the power banks that had already lost 20% in a relatively short time window.
The second light failed to turn on for more than maybe 2 seconds? Well I got a power tester up and it seems that the engineers unfortunately had the bright idea of setting the default brightness to 100%, meaning that it drew 5V @ 3A. Whilst it'll save the brightness setting when pressing the on/off button, this brightness is not saved after a power cycle. Each discrete level is something like a 0.4A difference. I can't press and hold, because then it does some kind of continuous brightness adjustment, nor can I adjust the brightness when the LED is in standby.
So, after sitting in sadness for maybe 5 minutes, I got the idea:
Turn on an LED
Reduce it to the absolute minimum brightness and set it to a warm or cold temperature
(which uses even less power than pure white, which seems to just power on both sets of LEDs).
Then, when powering the second LED, spam the -brightness button.
Lastly, get the LEDs to the preferred brightness, which is 2 levels above minimum.
Now thinking about it, I could actually get LED Ring (N) to the preferred brightness and then put it into standby. Then I can quickly adjust LED Ring (N + 1) and do the same thing. Lastly, turn on all LED rings.
The lighting looks good:
This already looks great, but imagine the triple screen Teti aesthetic!
Air intake
I decided to at least use my small air purifier (whereby I recently found out that replacement filters are like £15 now) to pump air into the tent. It moves less air, but it should still be better air than the fan I used yesterday. (I've now been in the completely closed tent for a few hours now and it seems that it works!)
I also like how most things are either white, silver, grey or black in here.
Second use inside the tent
A Future Garage Mix stream on YouTube seems to be good background music to match with the look and feel.
Because I don't have any artificial daylight lighting in here yet, and the LEDs are on the ground and beautifully reflect off the metalic looking walls, it feels like I'm working inside a shipping container turned into a modern-futuristic lab. That wasn't the goal, but Me 10 / 5 /2 Years Ago would be proud to know that, 10 / 5 / 2 years later, I'm working in such a new-age looking location.
This tent actually can sell a "The future is made here." vibe / aesthetic (the green pipes of the Vivosun probably couldn't do that). If someone was trying to improve short distance transportation, ascend hobbyist 3D printing to new capabilities, speed up human to computer interfaces and offer a new parametric 3D modelling workflow, solo, and all at the same time, I'd like to imagine that their work environment looks like that of Sonic Boom's Eggman, Dave2D's silver studio or Unbox Therapy's infinity-looking room. This tent is like the "Lite" editon of something like that.
Dissassembly
The solution... may fail.
It took 70 minutes to take down the tent and put the room back to how it was. I wasn't even able to get the fabric to fold well enough to fit inside the bag. As with a lot of things I do these days, this needs to somehow cut 4 - 6X for this Tent Office to actually be feasable.
6th March
[18:00] The solution... may pass. The reason isn't due to the transit time of 50 minutes to build the tent (though, to ease my mind, the UK average commute time is 59 minutes [citation]). It's because I tried working on my mattress and then at a table and the work vibe just wasn't there.
Putting this tent up was my 3rd option, and after spending 3 minutes clearing the area, 14 minutes on the frame, 15 minutes on the fabric and the rest of the time setting up the PC / lighting, work mode focus came to me in less than 100 seconds; that's without even having the intended air filtration/ventilation setup.
I feel like I can shave more time off the fabric section. Another time cutting idea is to print jigs to hold the A (horizontal) and B/C (vertical) poles seperately so that it's faster to grab the pole I'm looking for, instead of sliding a semi-random one out of a long bag. I'd imagine the 2.2m tall tents are even faster, since what's likely happened is that the B poles have been replaced with A poles, resulting in just 2 different tube types.
Honestly, I feel like that's what should've been done for the 2m too, and that the C poles are just 80cm instead of a 1m B pole (that looks like an A pole) and a 1m C pole. The difference between a 0.8m and 1.2m pole is also much more obvious than a 1m vs 1.2m pole.
Still worried about the time it takes to take it all down.
I'm also considering calling this "Tetoffice" because it rolls off the tounge, unlike "Tent Office", and because of similarity to other (Teti related) project names.
[00:10, 7th March] Unfortunatly took 75 minutes to reset the room. I admit I was going a bit slower on the fabric refolding this time to learn how to fold it well enough to fit inside the bag, and I was able to get it to fit this time.
I also had the idea of getting cardboard tube (for parcels) to hold the frame tubes.
[16 March] I've been having some Hackaday.io image upload issues, so this log took a while to get published. I'm also still waiting on a new fan (the broken one was picked up yesterday) and I can't really work in the tent until I've got excellent airflow / air quality.
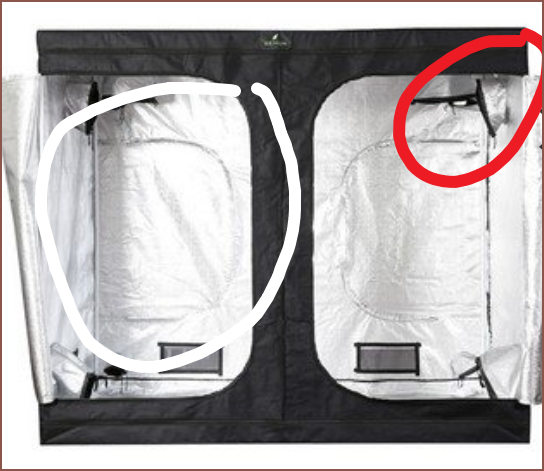
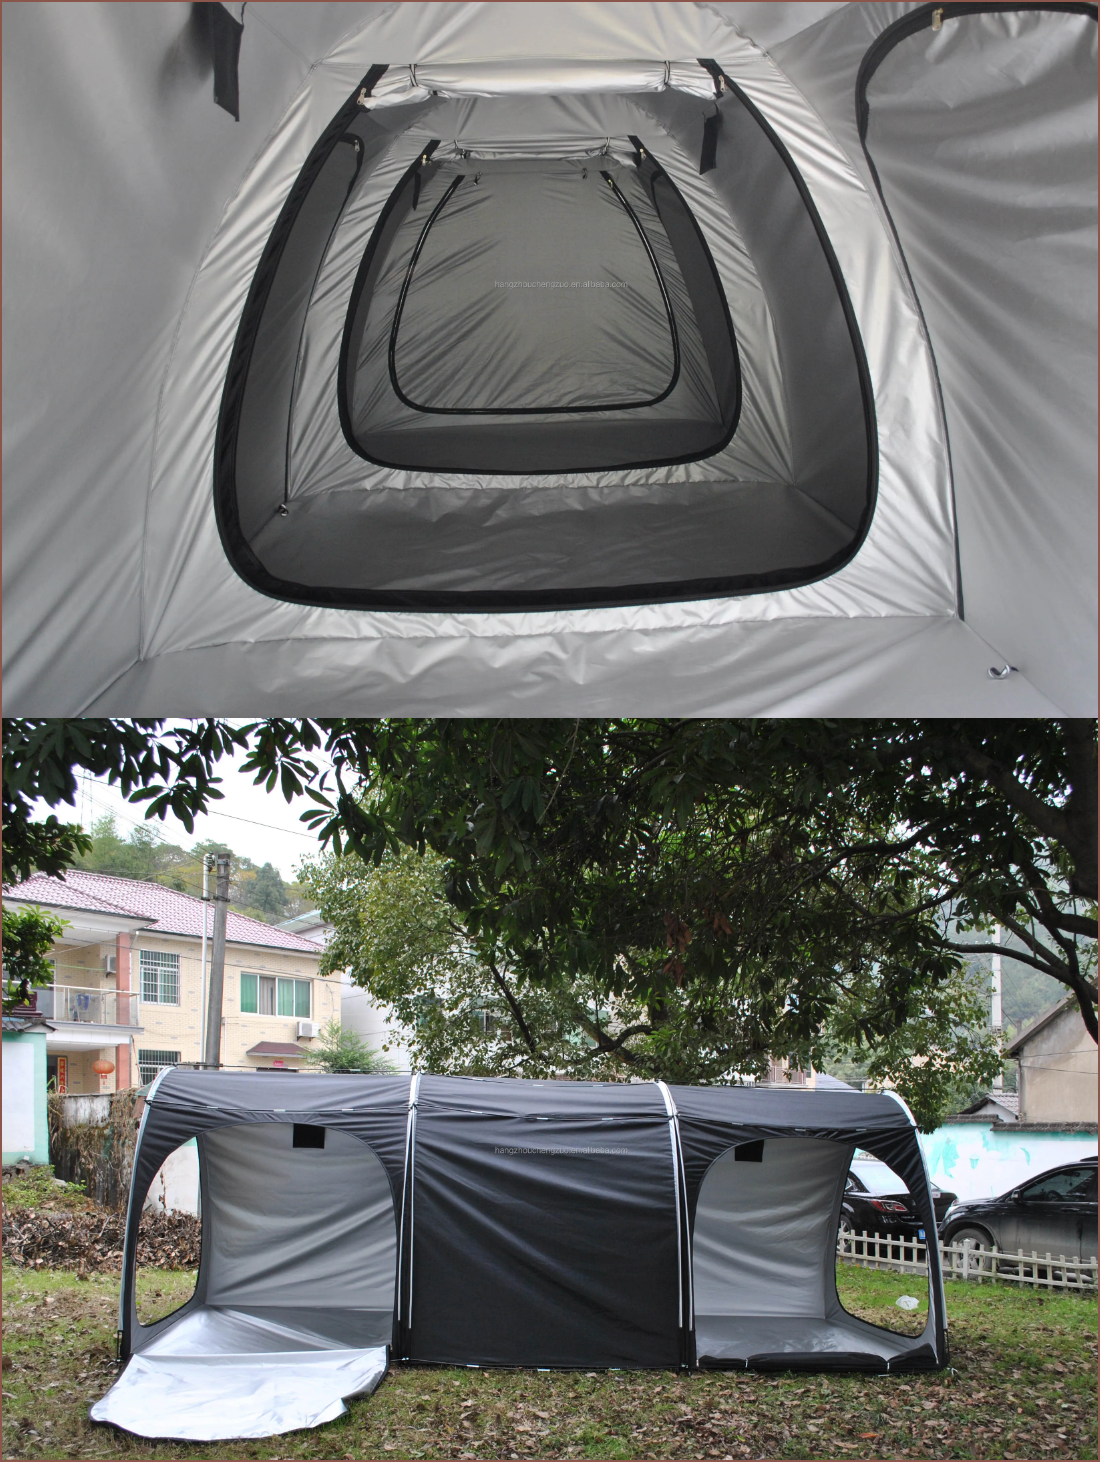
So I asked the seller of the £108 tent if they had a storage bag, and they said no. I asked the same to the £118 tent seller and they said yes. Additionally, this tent has extra vents that may prove useful (circled red). While this tent also has unnecessary doors, the borders are silver lined so they're not as easy to see as the black borders of the £108 tent.
That large black line is also visible in the Vivosun version, and the completely seamless back wall probably isn't worth missing the extra vent or storage bag.
I found out that there is a pop-up grow tent, but it doesn't seem to address the fabric manipulation issue and, at 2.2m, is too tall to install. I don't have that large, white pocket dimension the people in the video below has.
There are tents for bikes on AliExpress. The height isn't the greatest, usually coming in at 1.65m and this is a semi-circle, so the average height is much less. Most of them are 2 x 0.8m, but I have found a 2.1 x 1.5m one that looks quite nice inside:
However, I think the dimension are actually for 1 segment and they're just showing that they're modular. I'd otherwise find it hard to believe that those 3 segments are 2.1m long.
There is also a promising looking tent that is 2 x 1 x 1.9m tall and is more rectangular:
Anyway, I've bought the Seuna tent. If that fails, I know a solution using grow tents does not exist and that any further research would be looking for something to use in April (because of AliExpress shipping times) or some indefinite time afterwards.
There's also a cool looking tent that unfortunately has no floor, is a 1.8m cube that likely wont fit and usually costs £200 shipping included (but the listing below has some outlier shipping price)
This tent also has windows, which might be problematic or it might be possible to mount LCD backlight panels on the outside to give the illusion that the tent exists in the white pocket dimension.
I got this in the mail on Monday 27th Feb and was fully aware that, whatever happened, I was sending this tent back. I thought I'd try it anyway since I don't want to return a second tent from things I could've learned from this tent.
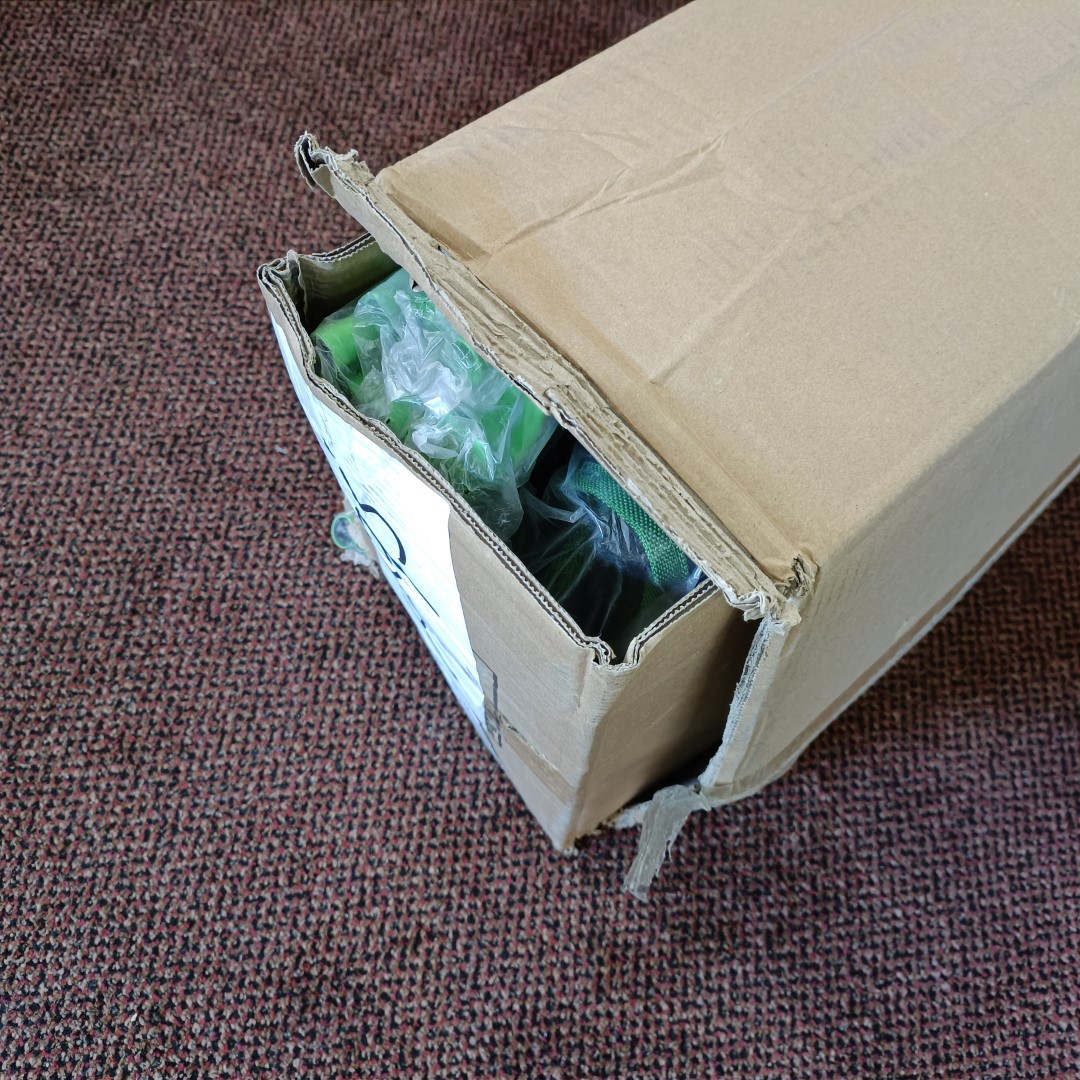
For starters, I was expecting to use the box as the storage medium (like a Christmas tree and the box it comes in), but I forgot that cardboard is usually standardised in terms of its strength, and it doesn't like carrying heavy things:
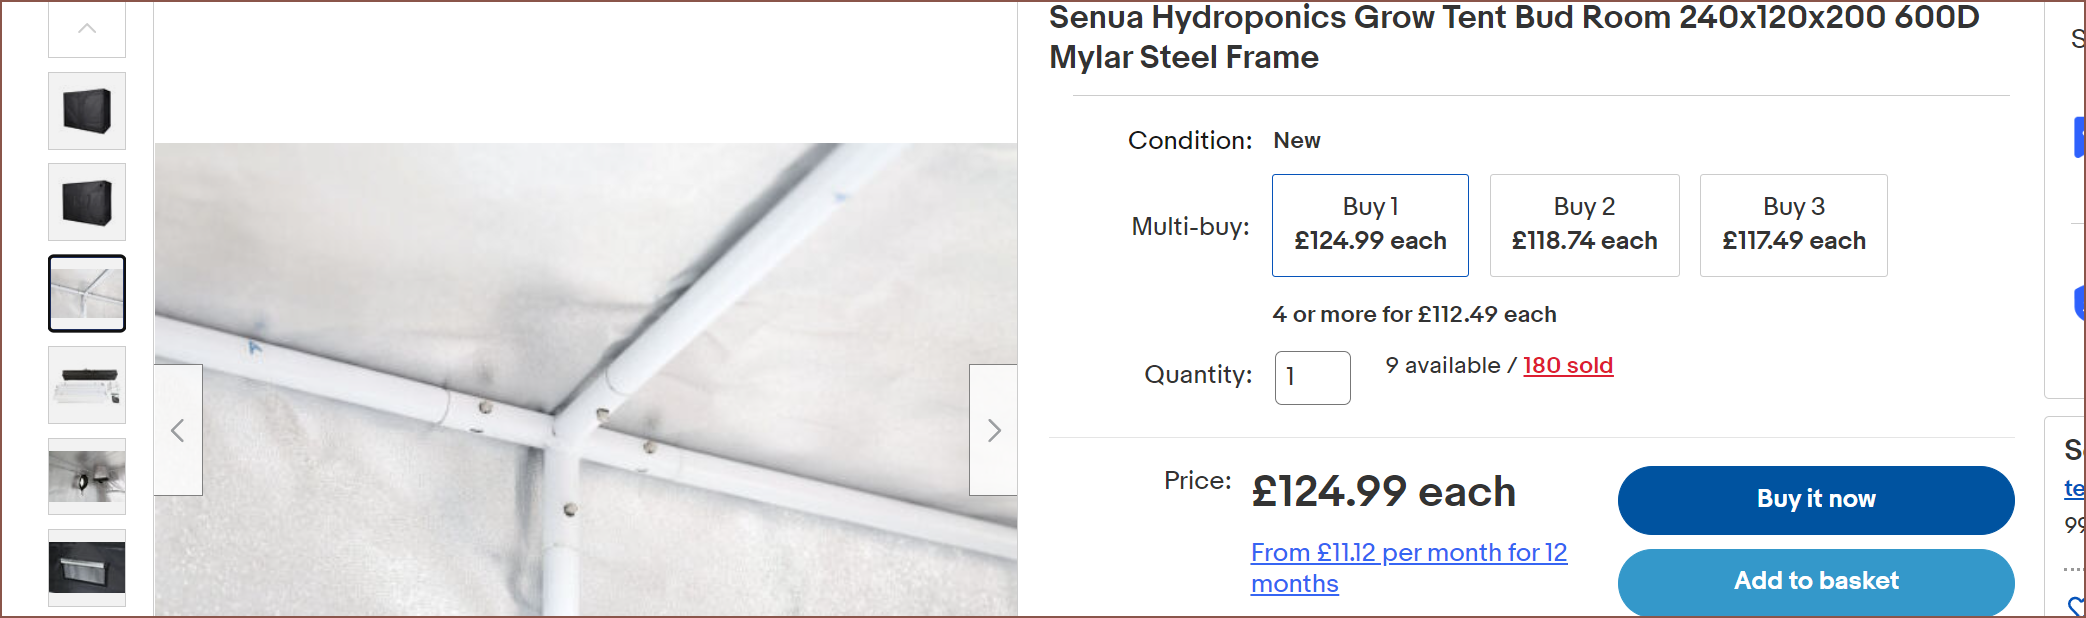
Nothing inside was missing or bent though so I moved on to taking loads of images of everything I could so that I knew how to refold the tent back. This also means that I'm going with the £119 Seuna tent instead of the £109 tent (among other reasons I'll mentiin the next log).
My hypothesis was that putting the metalwork together would be easy and manipulating the fabric would be the bottlneck for both assembling and dissassembling the tent.
Assembly
Not sure what that cutout of silver fabric is for, but I'm already not a fan of the branding. I did notice (over the couse of working with this tent) that my internal voice was repeating "Vivosun" loads because I was automatically reading text.
Anyway I took everything out and took pictures of every step of the way, because I feel that the majority of growtent buyers are only concerned with putting the tent up and less so of taking it down again.
I took one look at these instructions and new I had to improvise and that it was probably going to take longer than 10-15 minutes, as claimed by product listings and youtubers alike. The thing is, unlike those guys that have an entire garage of free empty space to put this together, I have 2.45 x 1.83m of floor space to assemble a 2.4 x 1.2m tent.
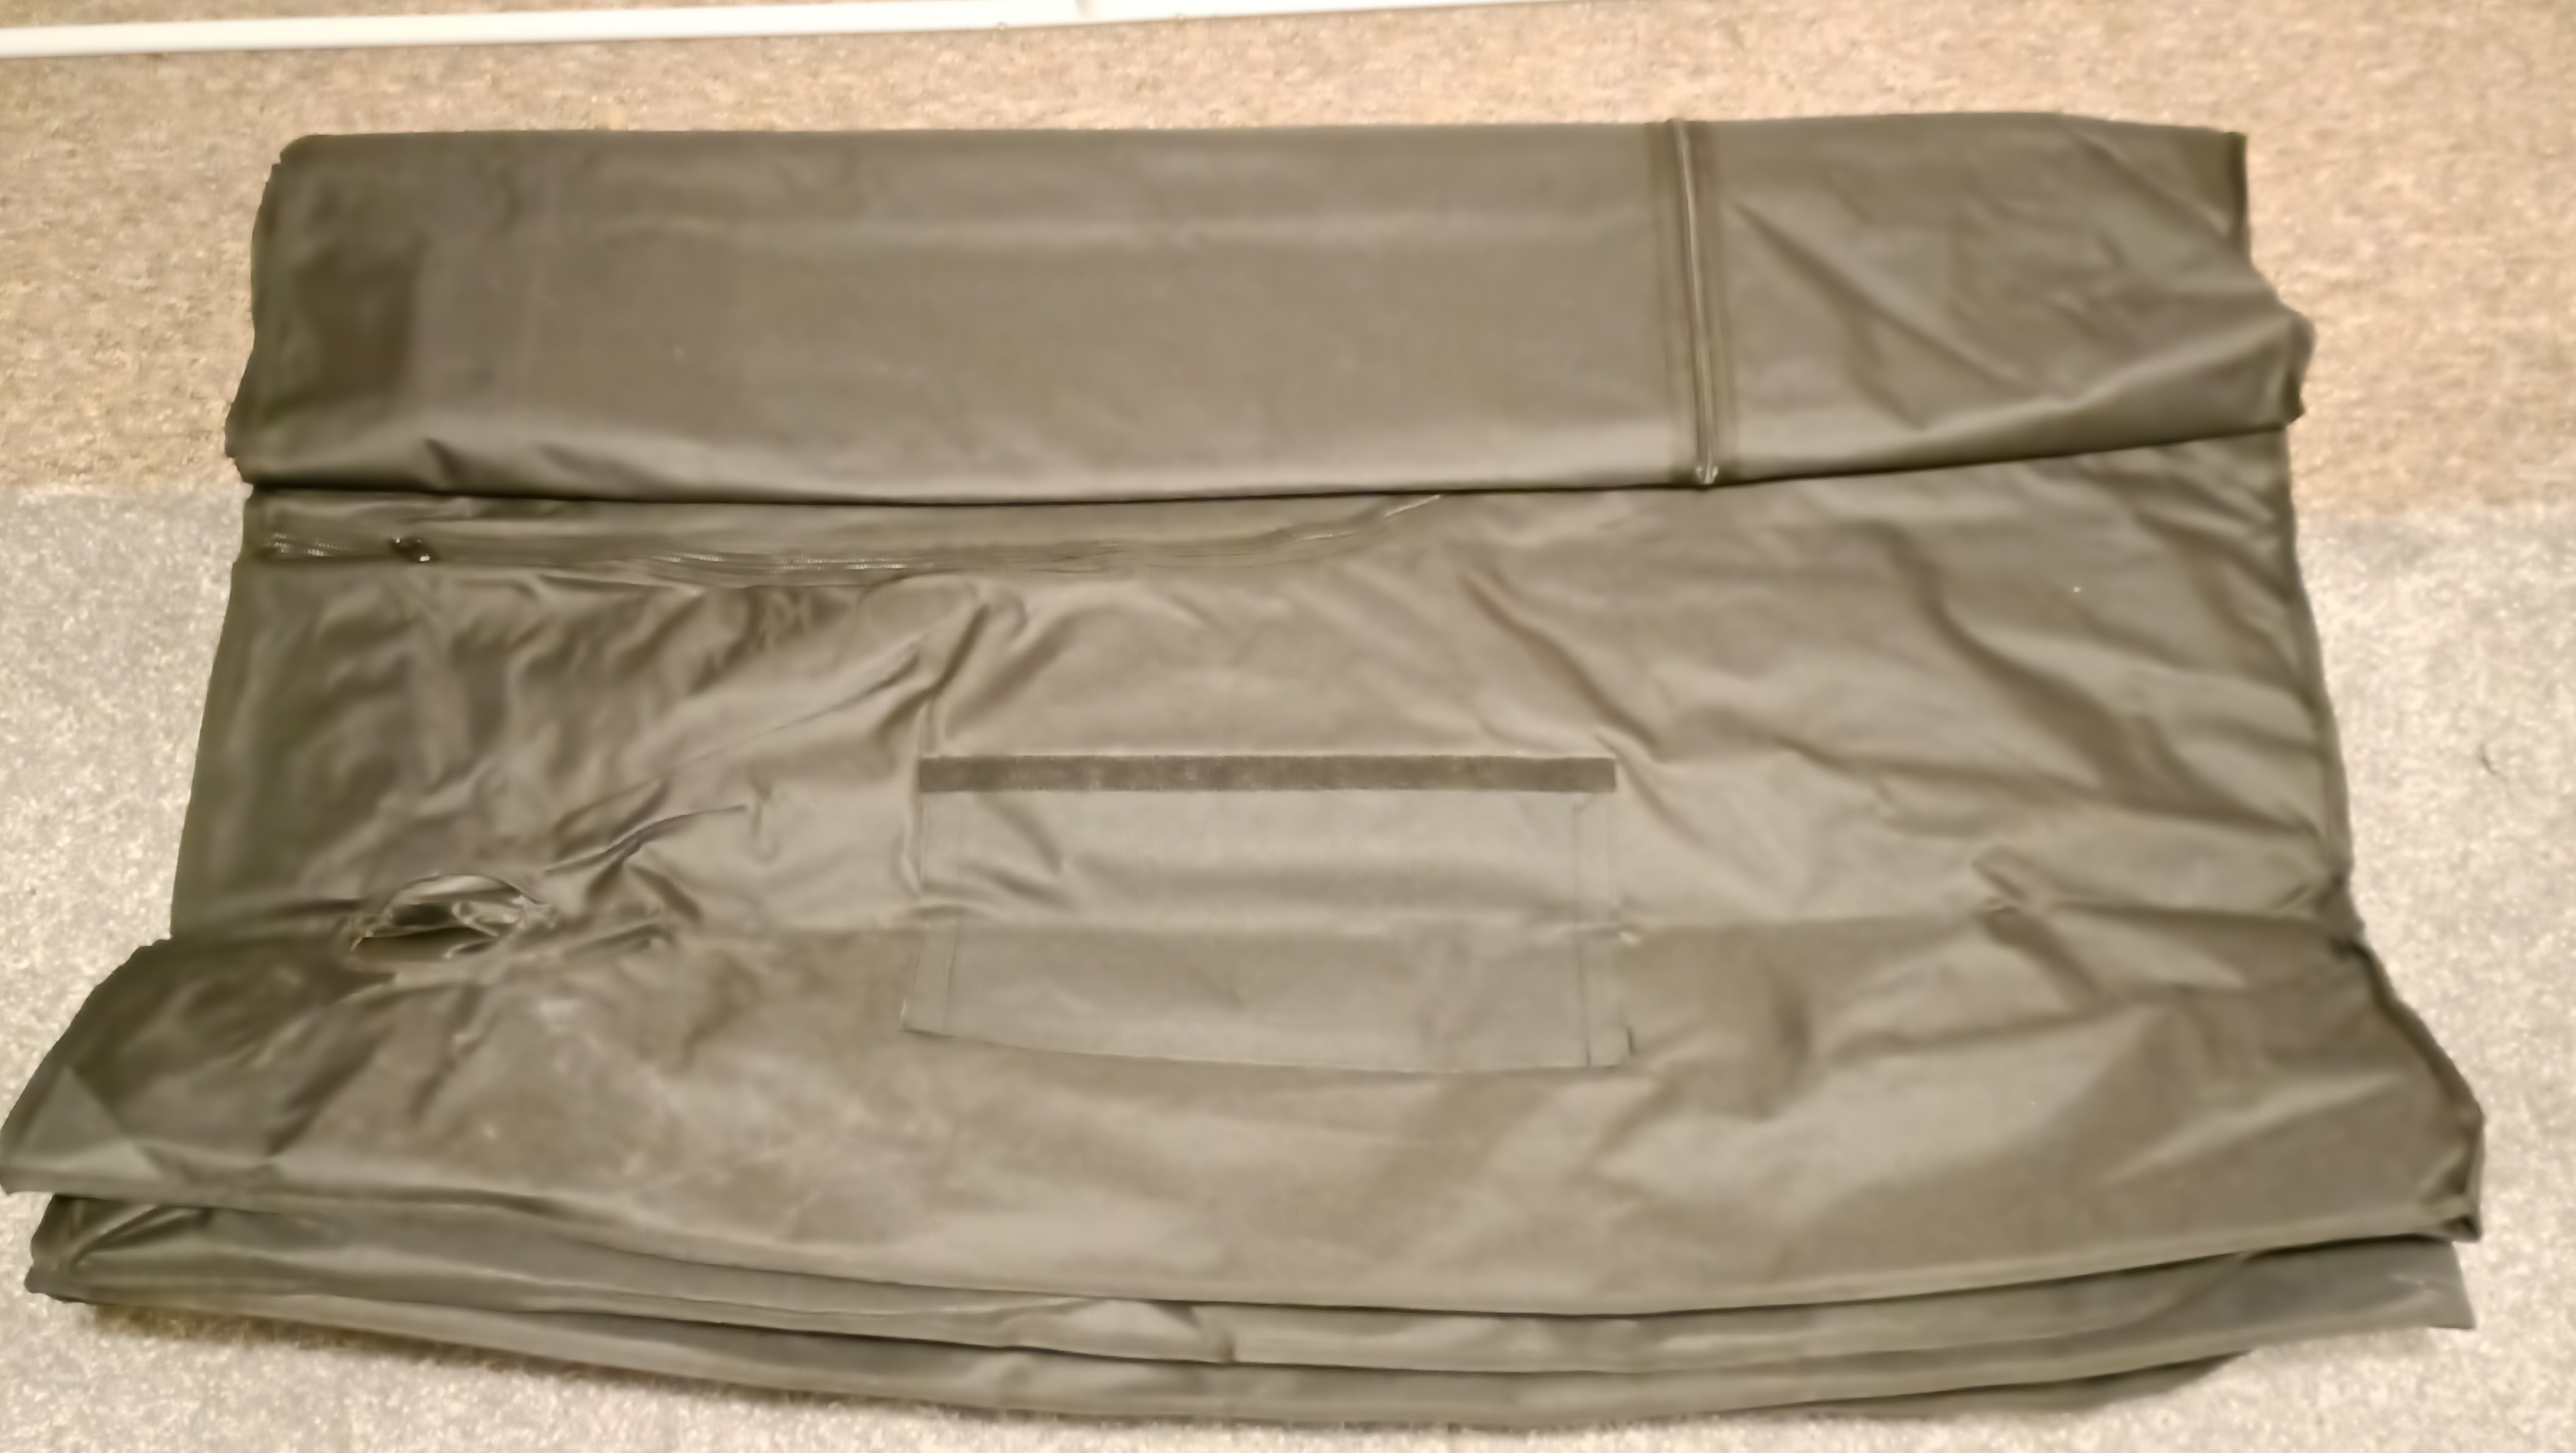
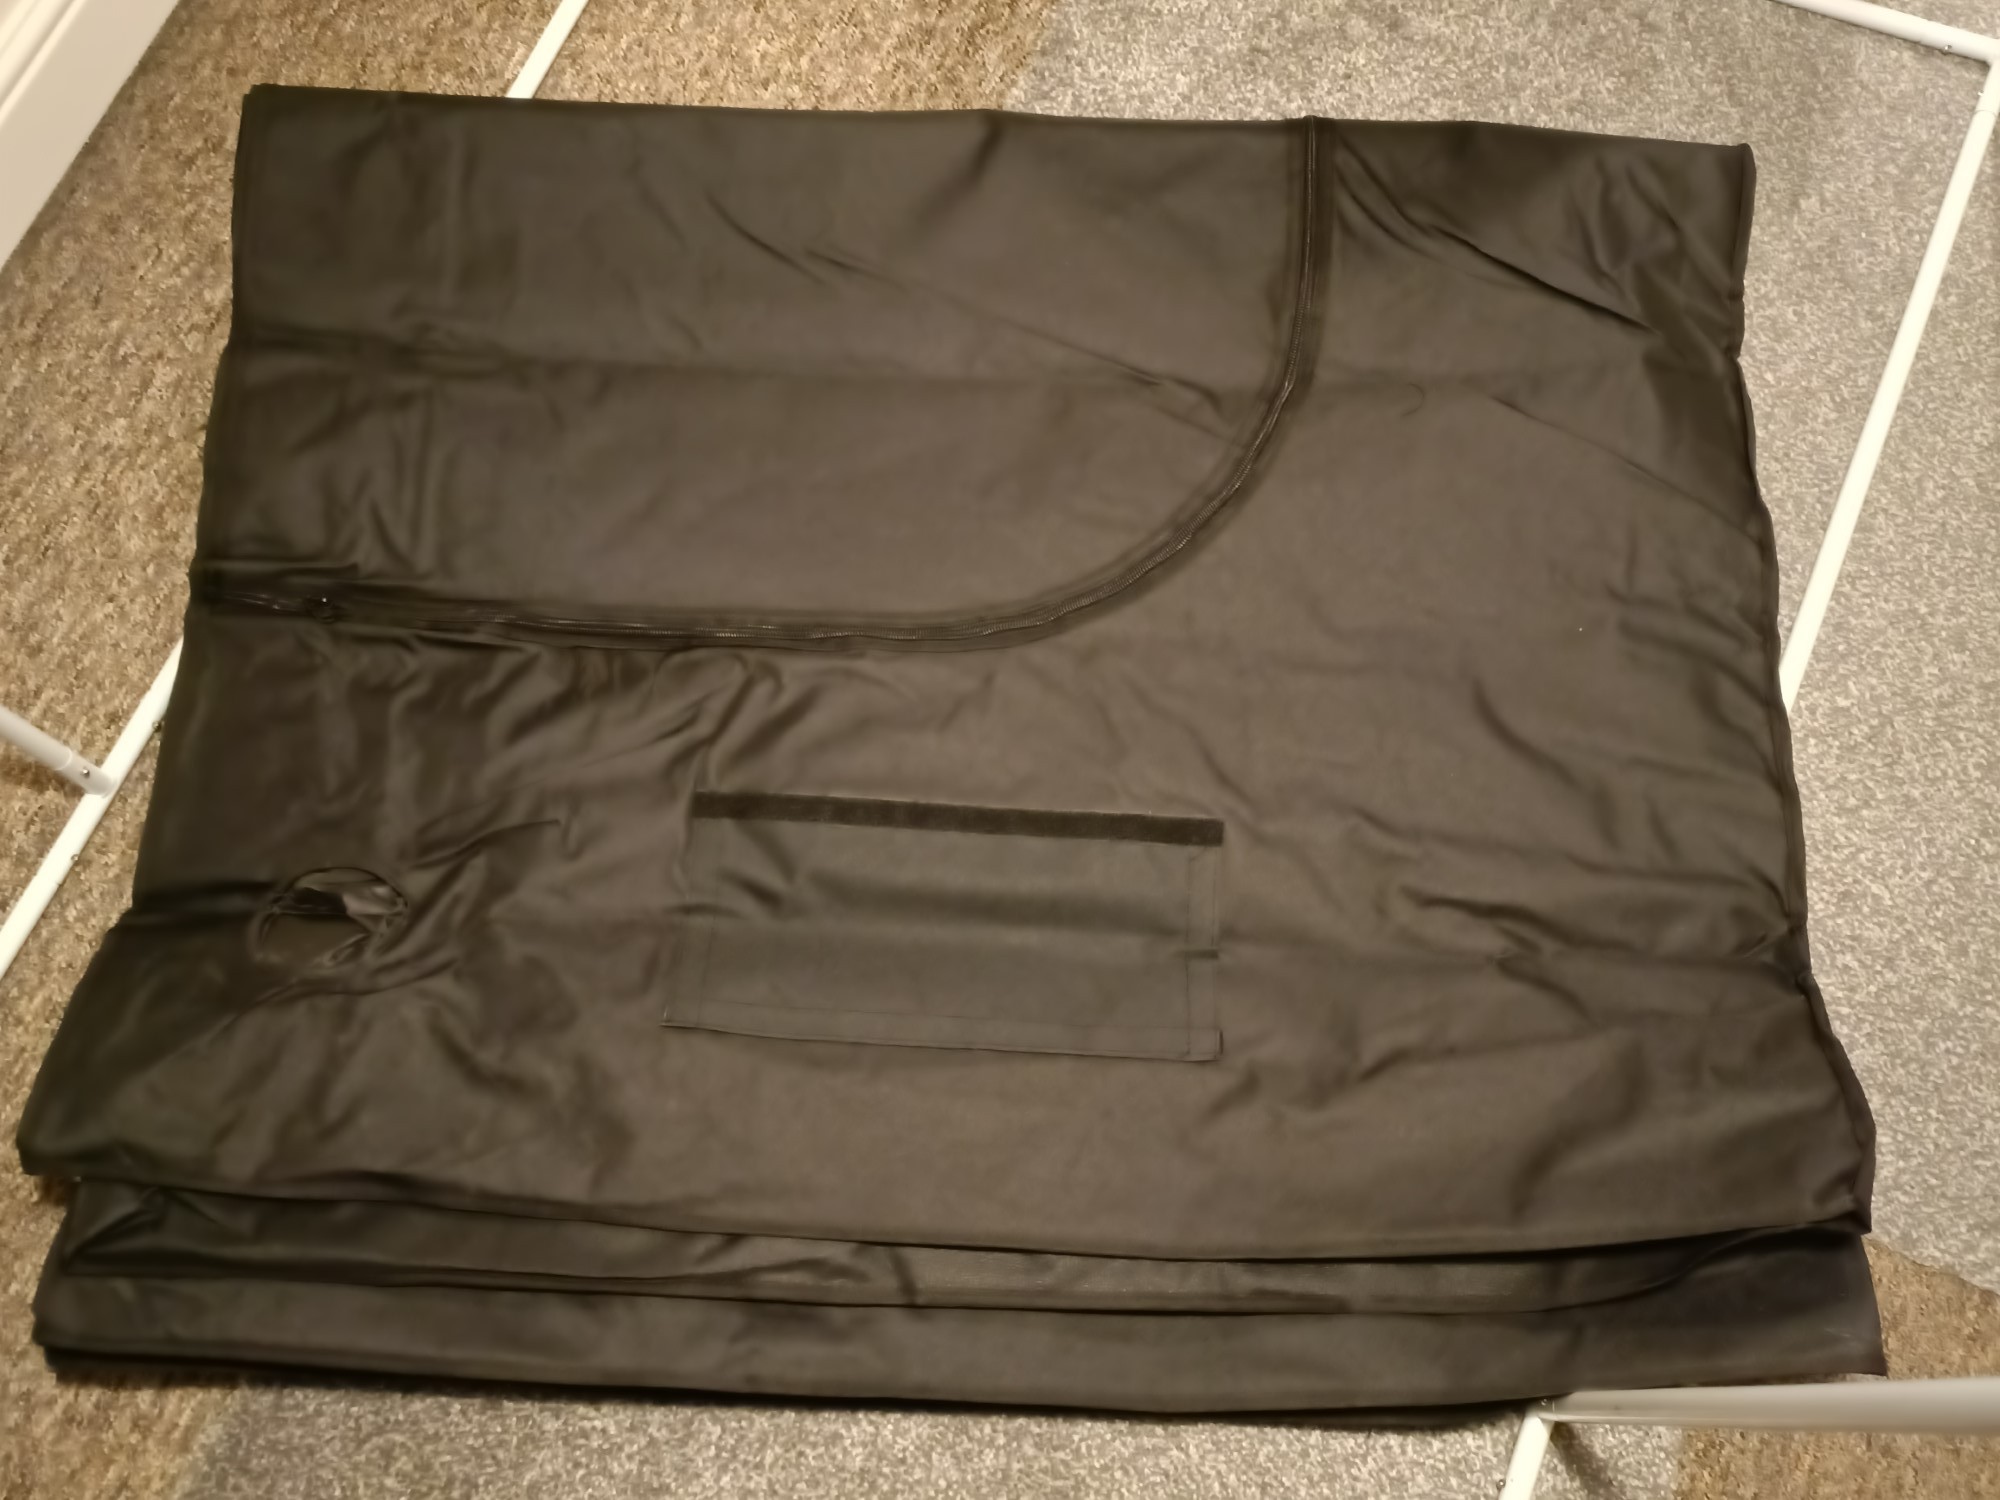
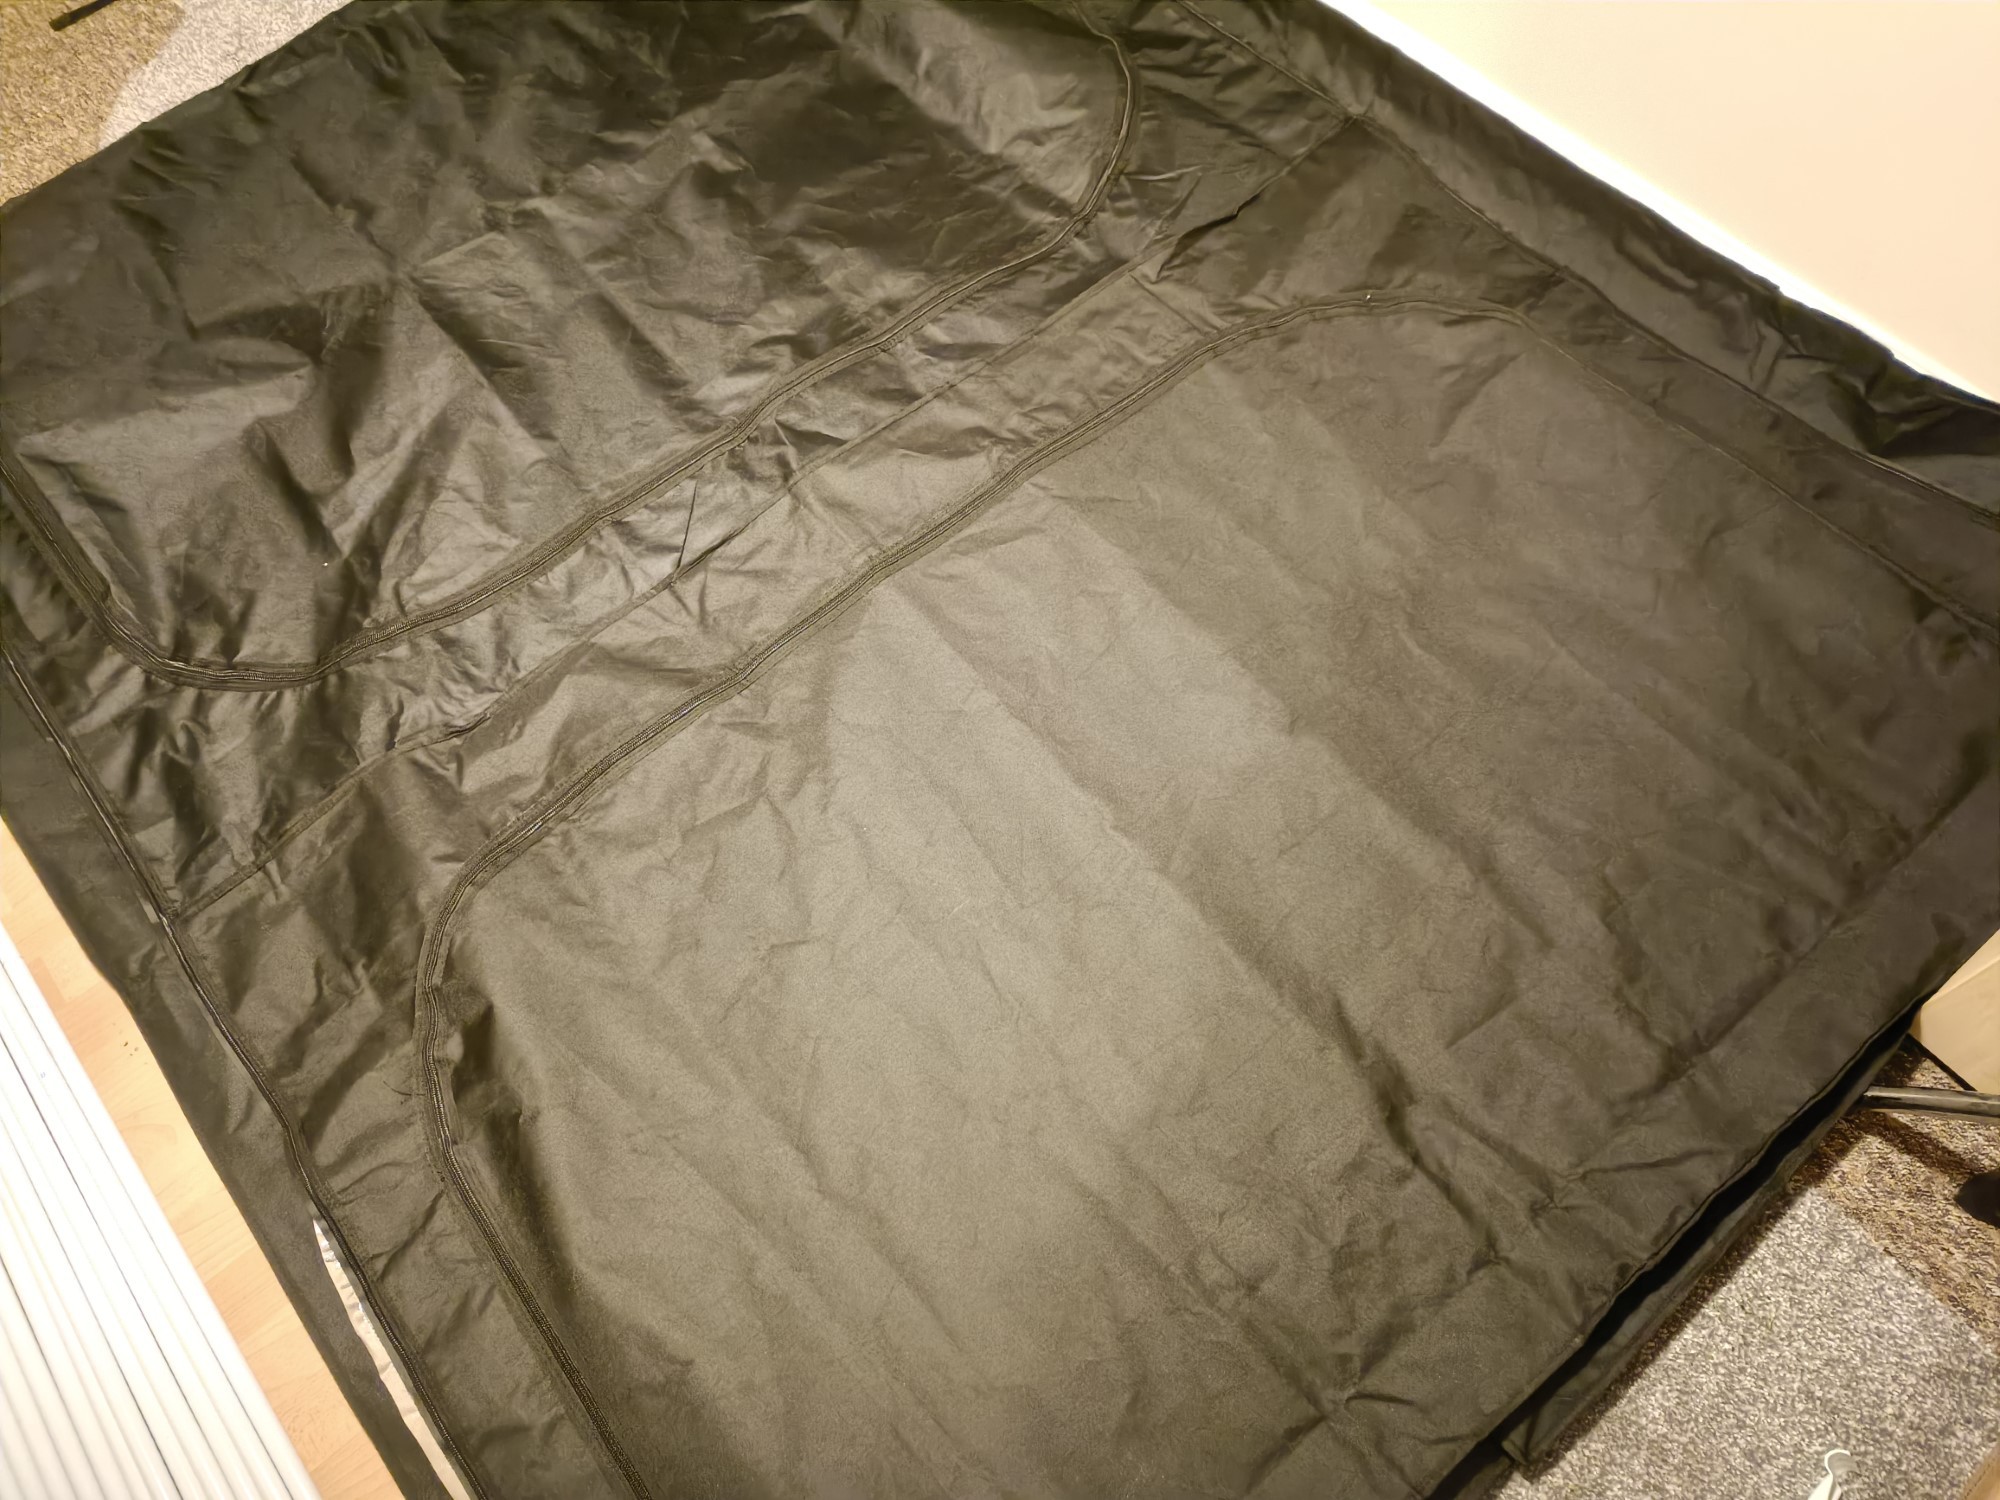
There was also a second rectangle of reflective fabric. under the main tent (and liquid tray). The back of it is a greyish blue.
Little silica bag in there.2 bits of fabric off-cut are used to tie the ends of the tent fabric.
Unfolding the tent
Just in the event that somone wanted to know how to fold such a tent back up again. There have been many instances where I got something all nicely folded and had no idea how to get back to that state after I took it out of the packaging.
After this is the main fold that turns this 1.2x2m looking thing into a 2.4x2m looking thing.
Looking Around
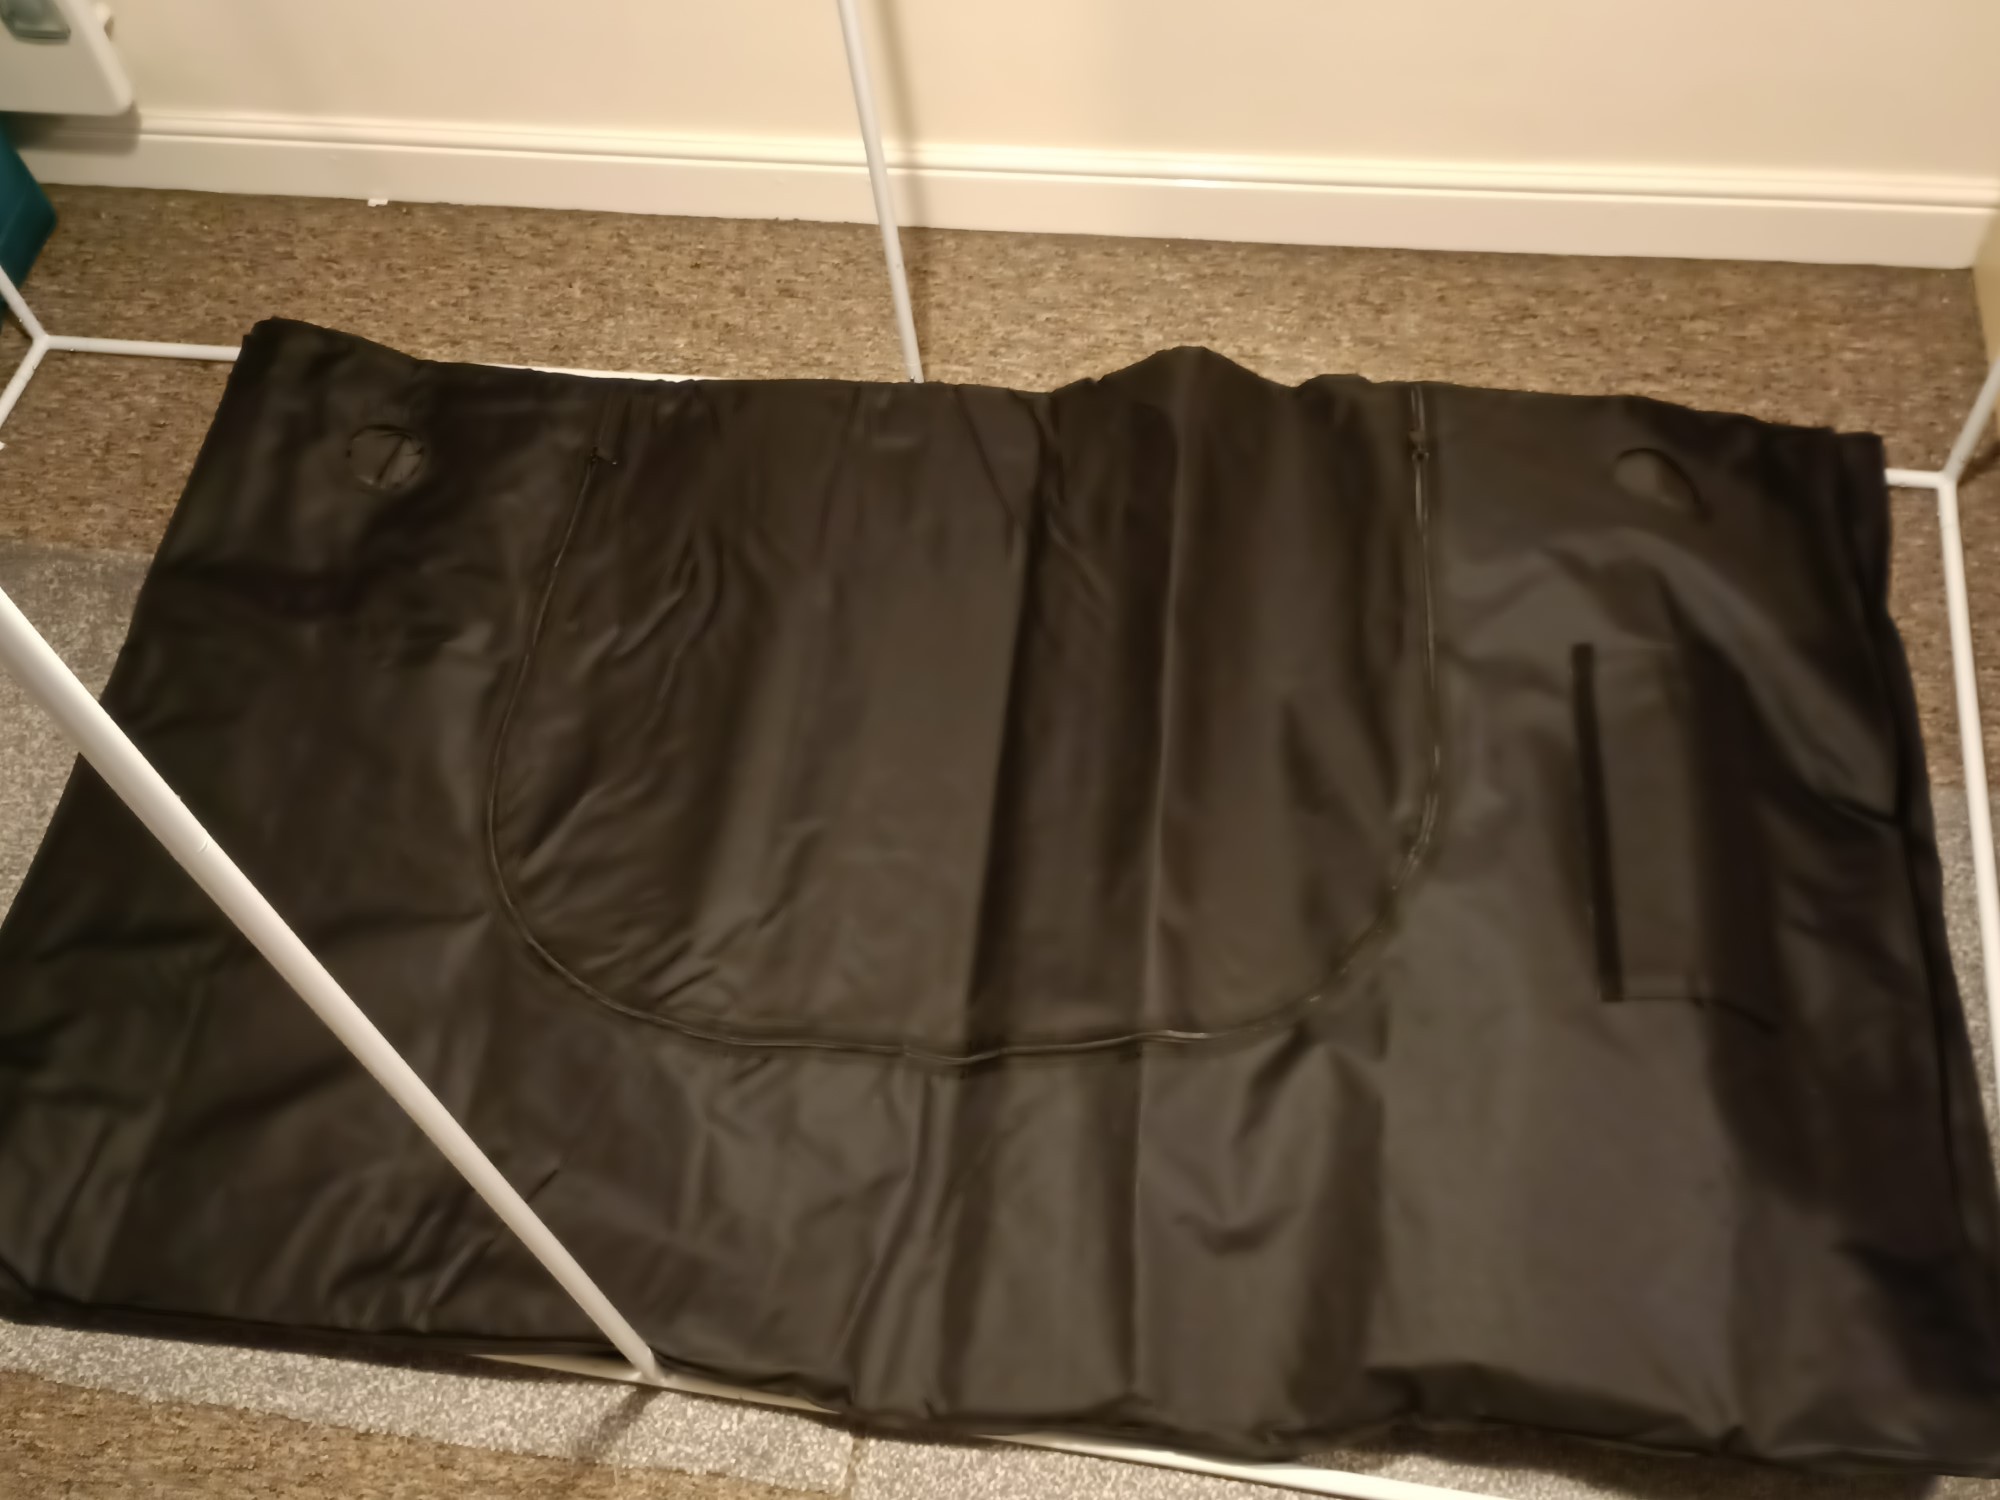
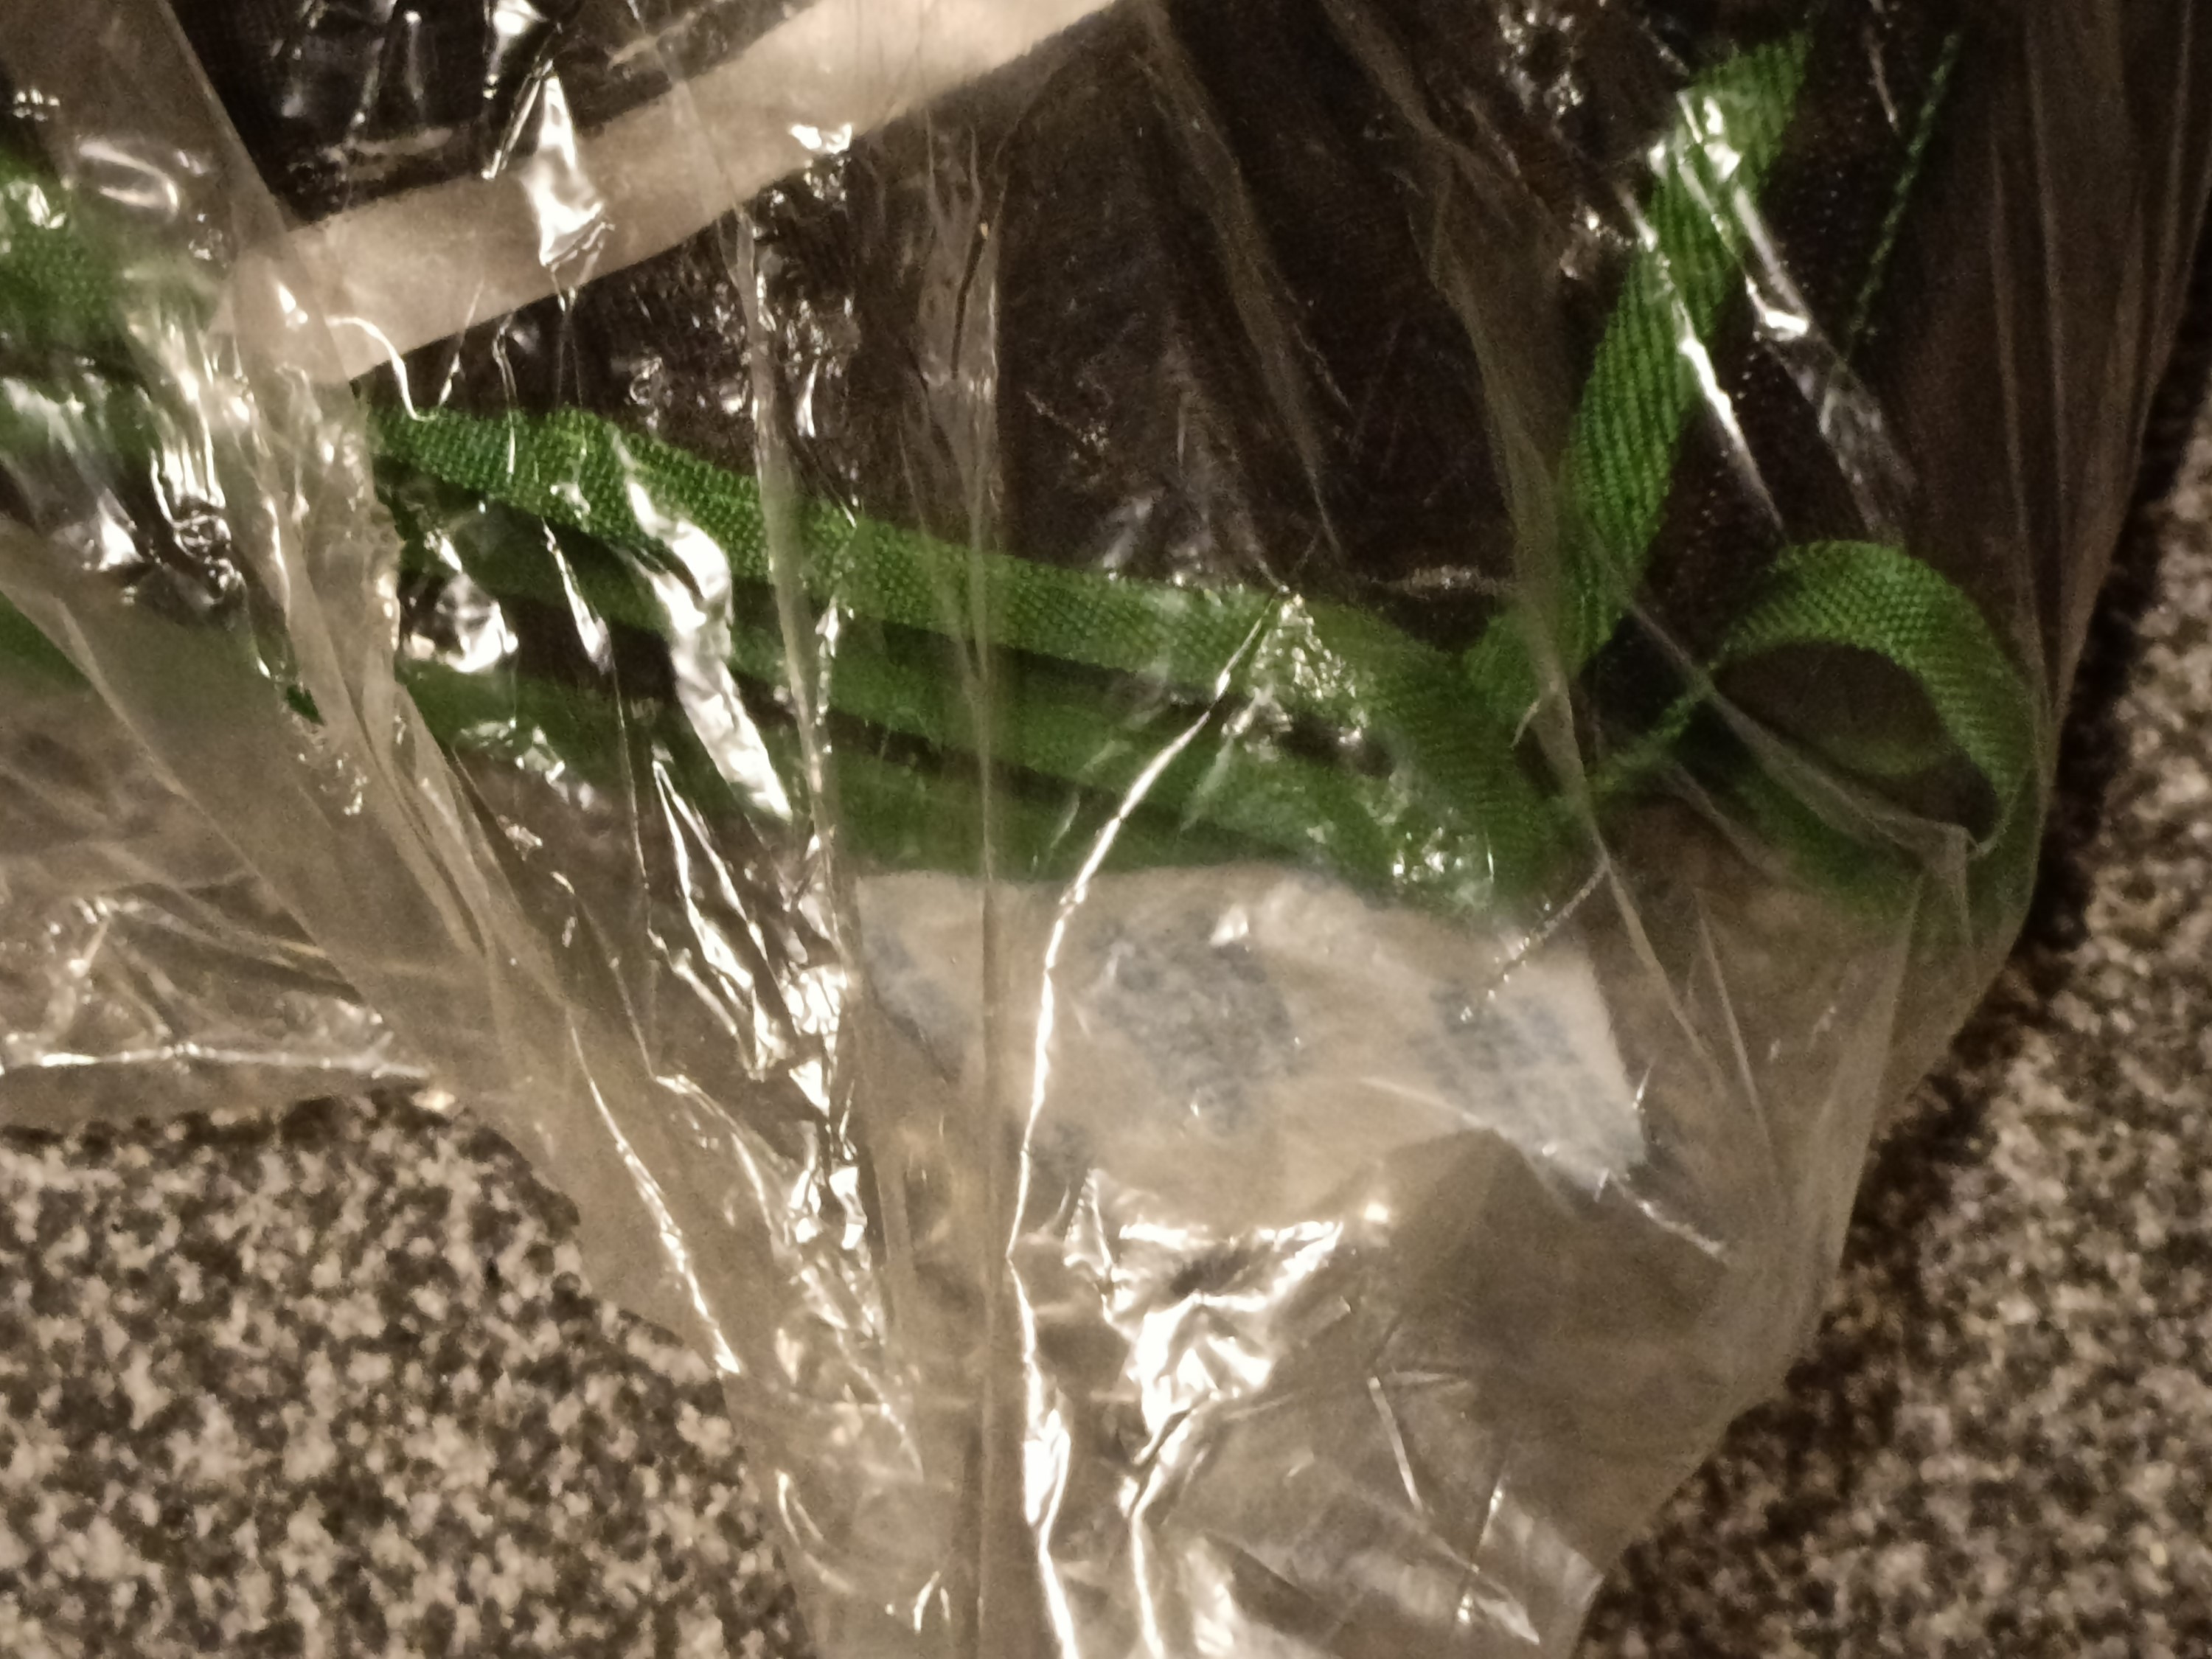
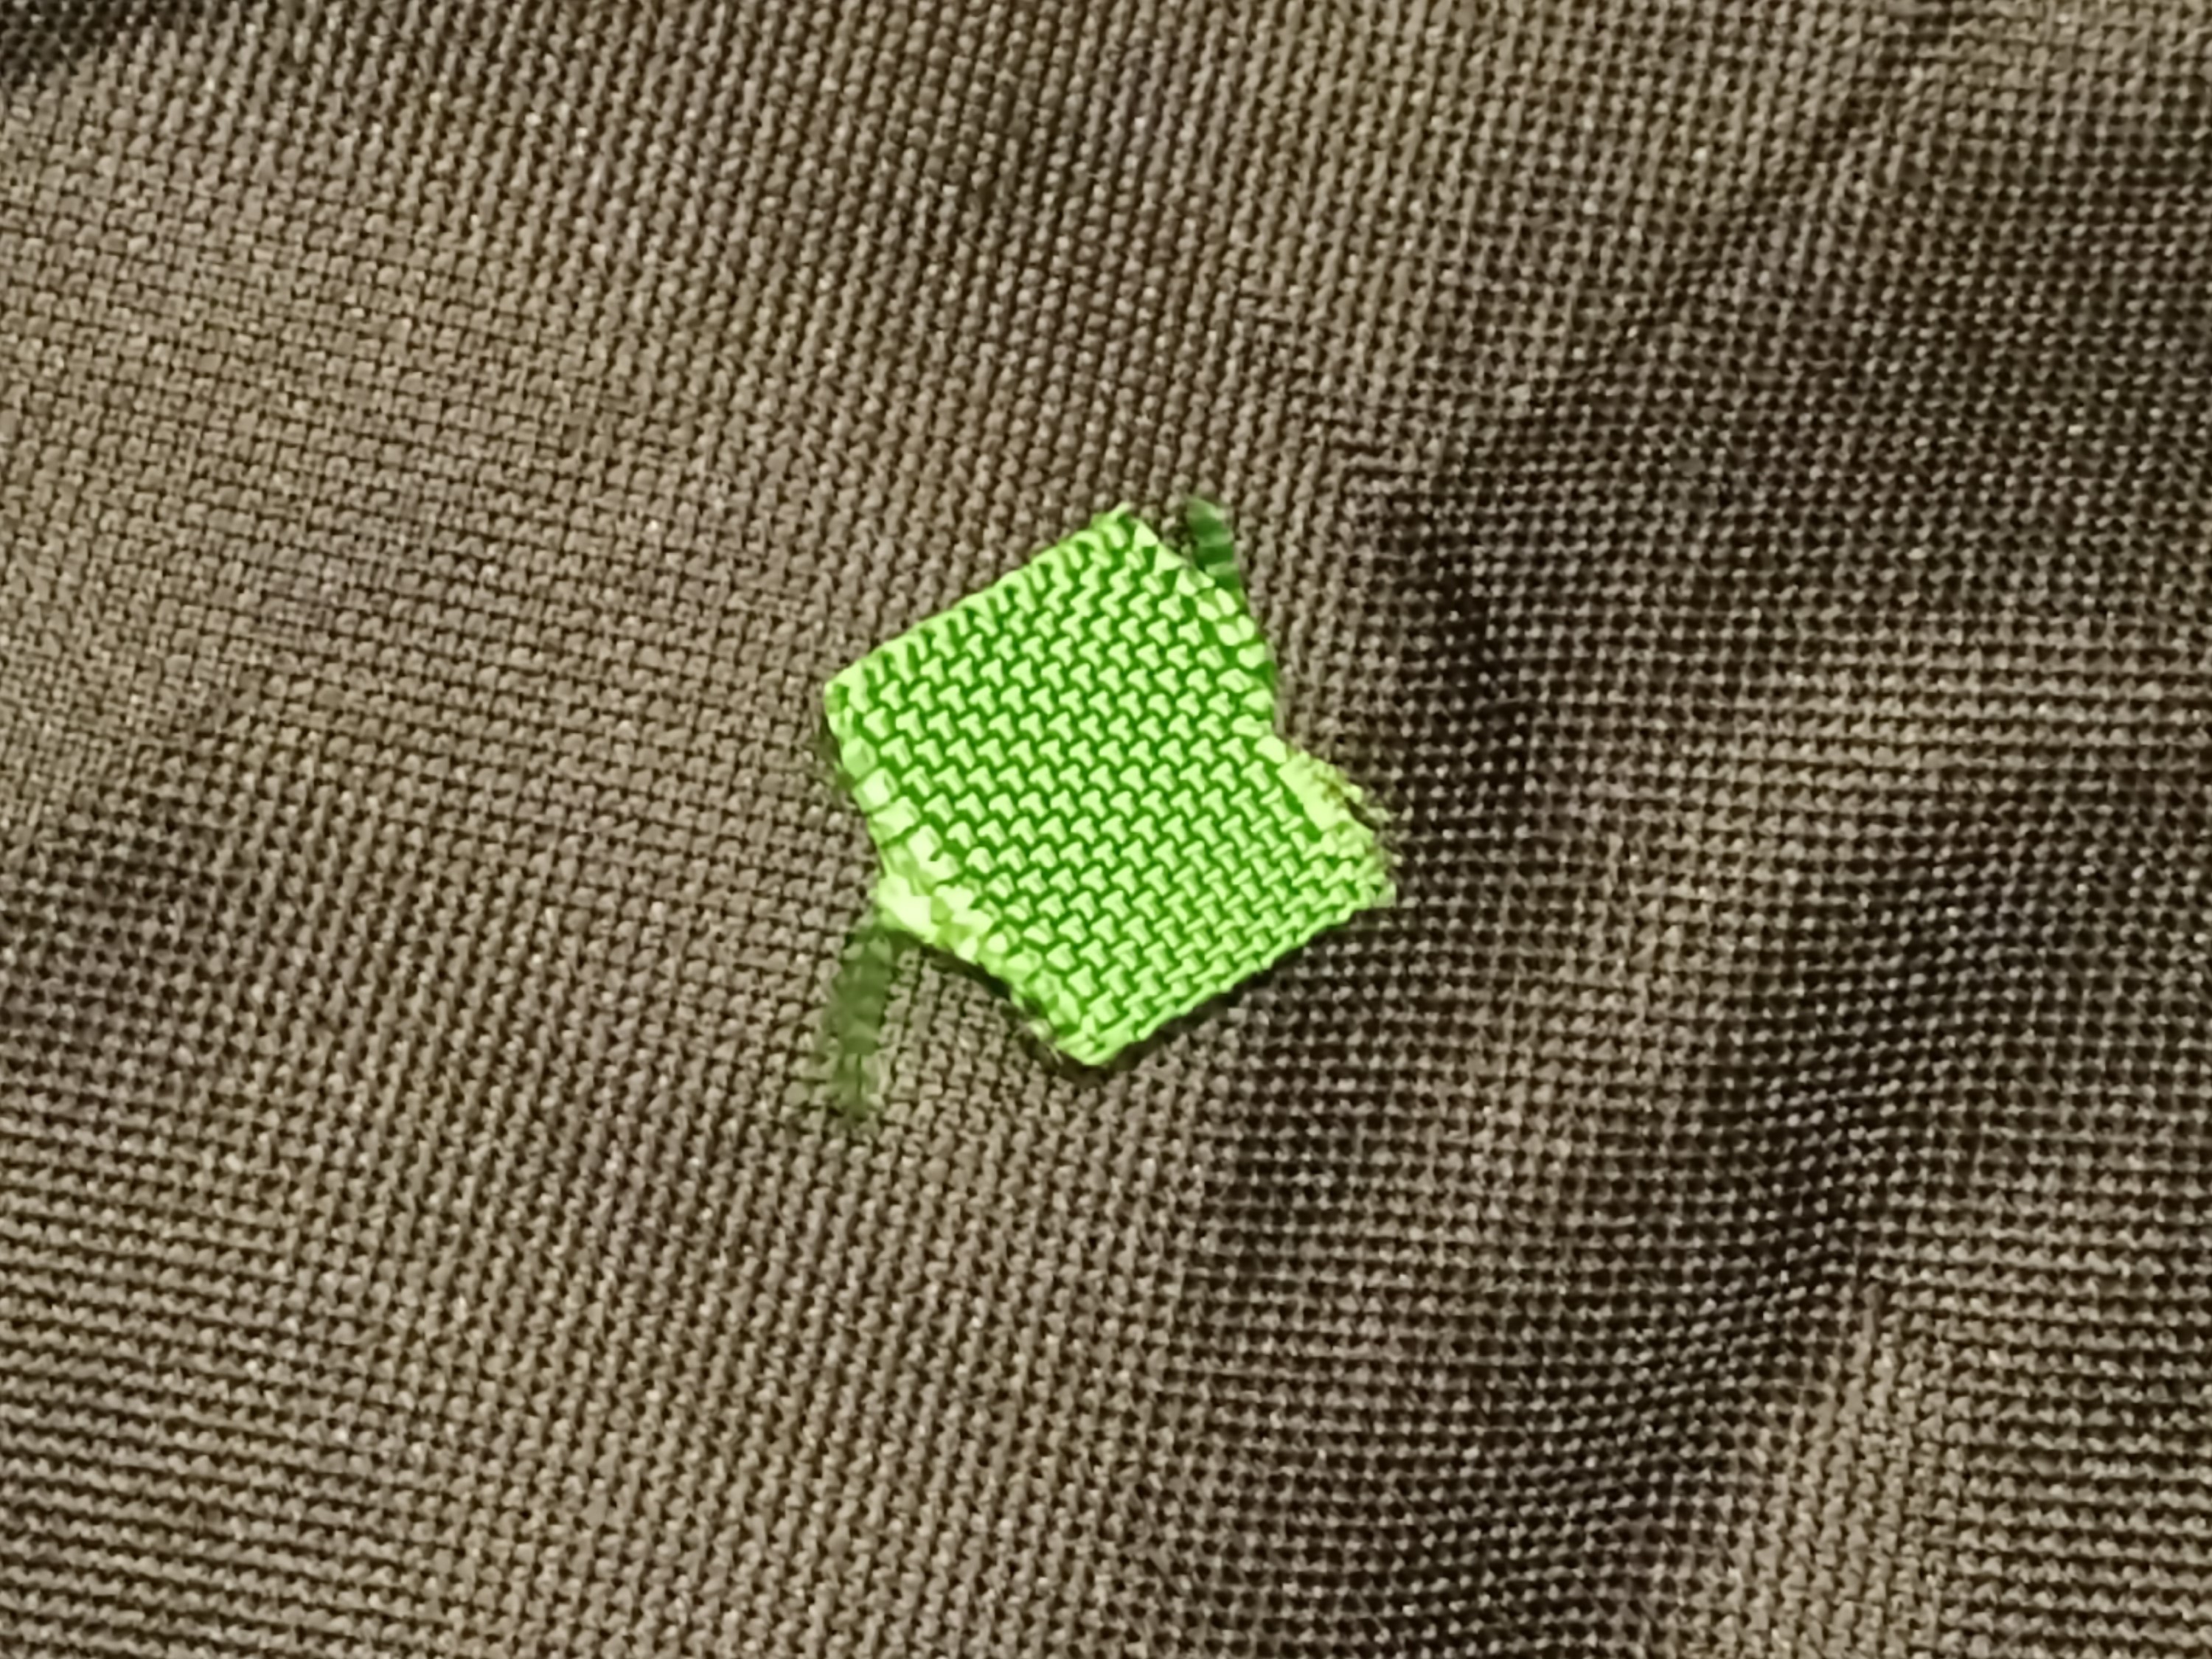
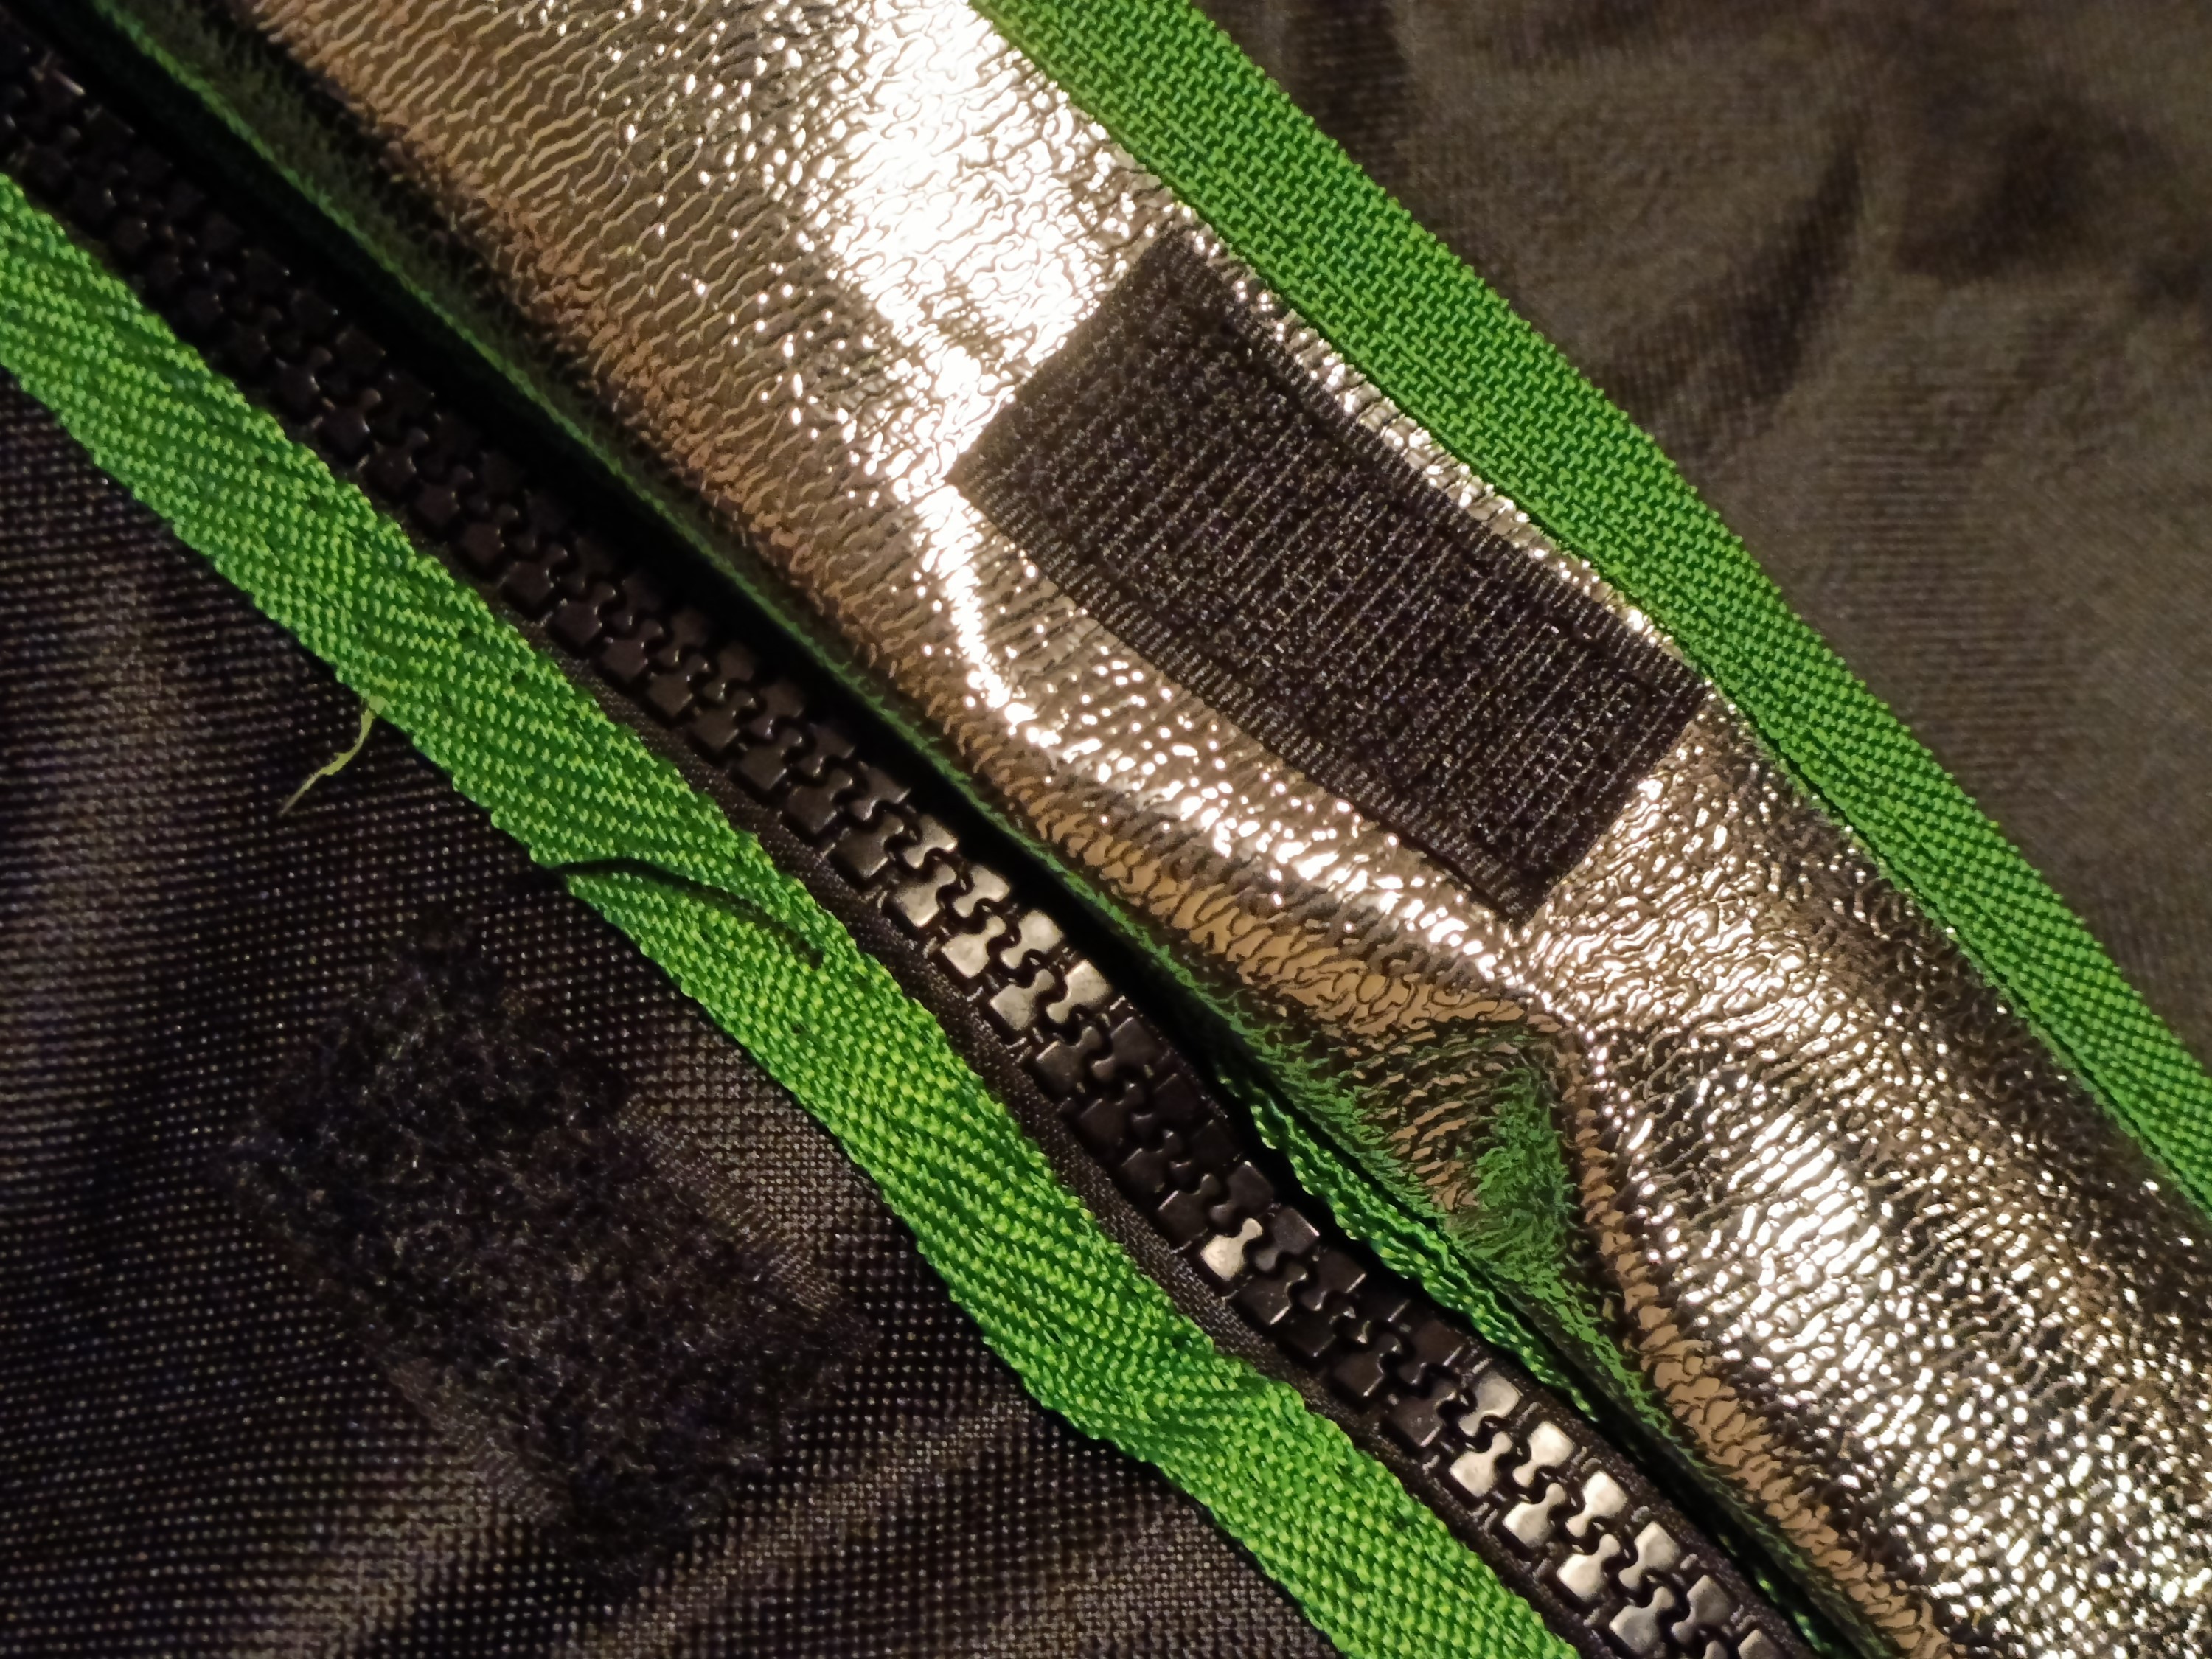
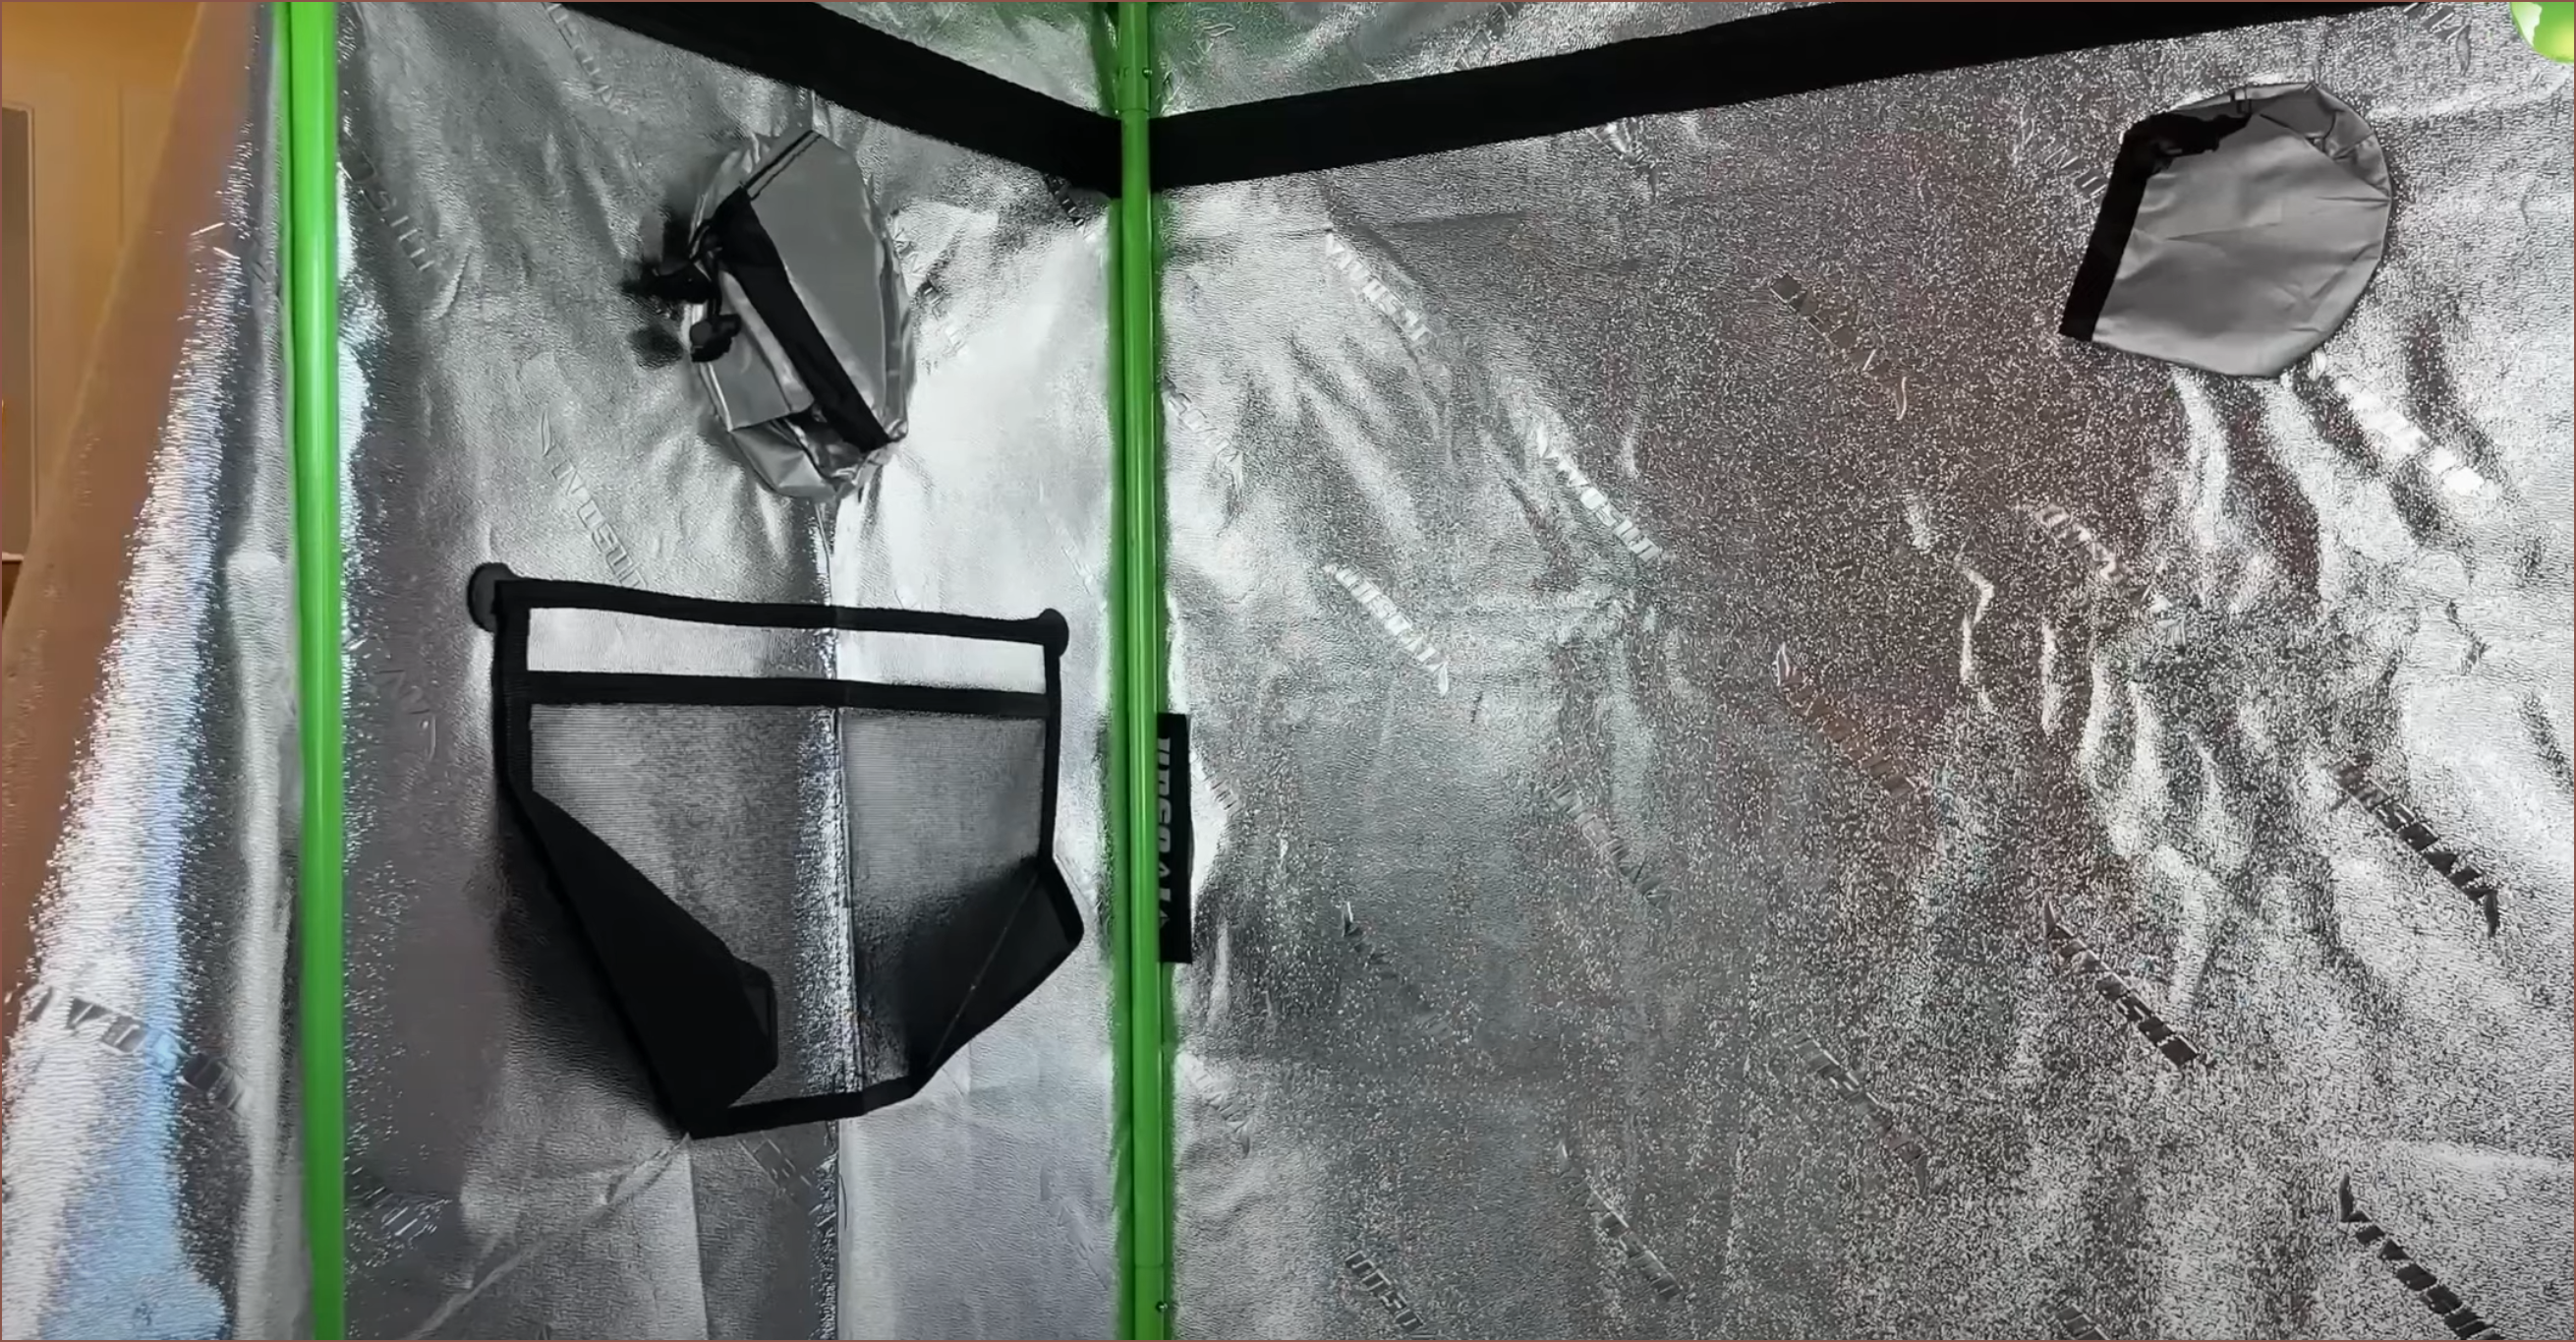
Some mysterious green fabric square.
The zipper handles are quite large and made of metal:
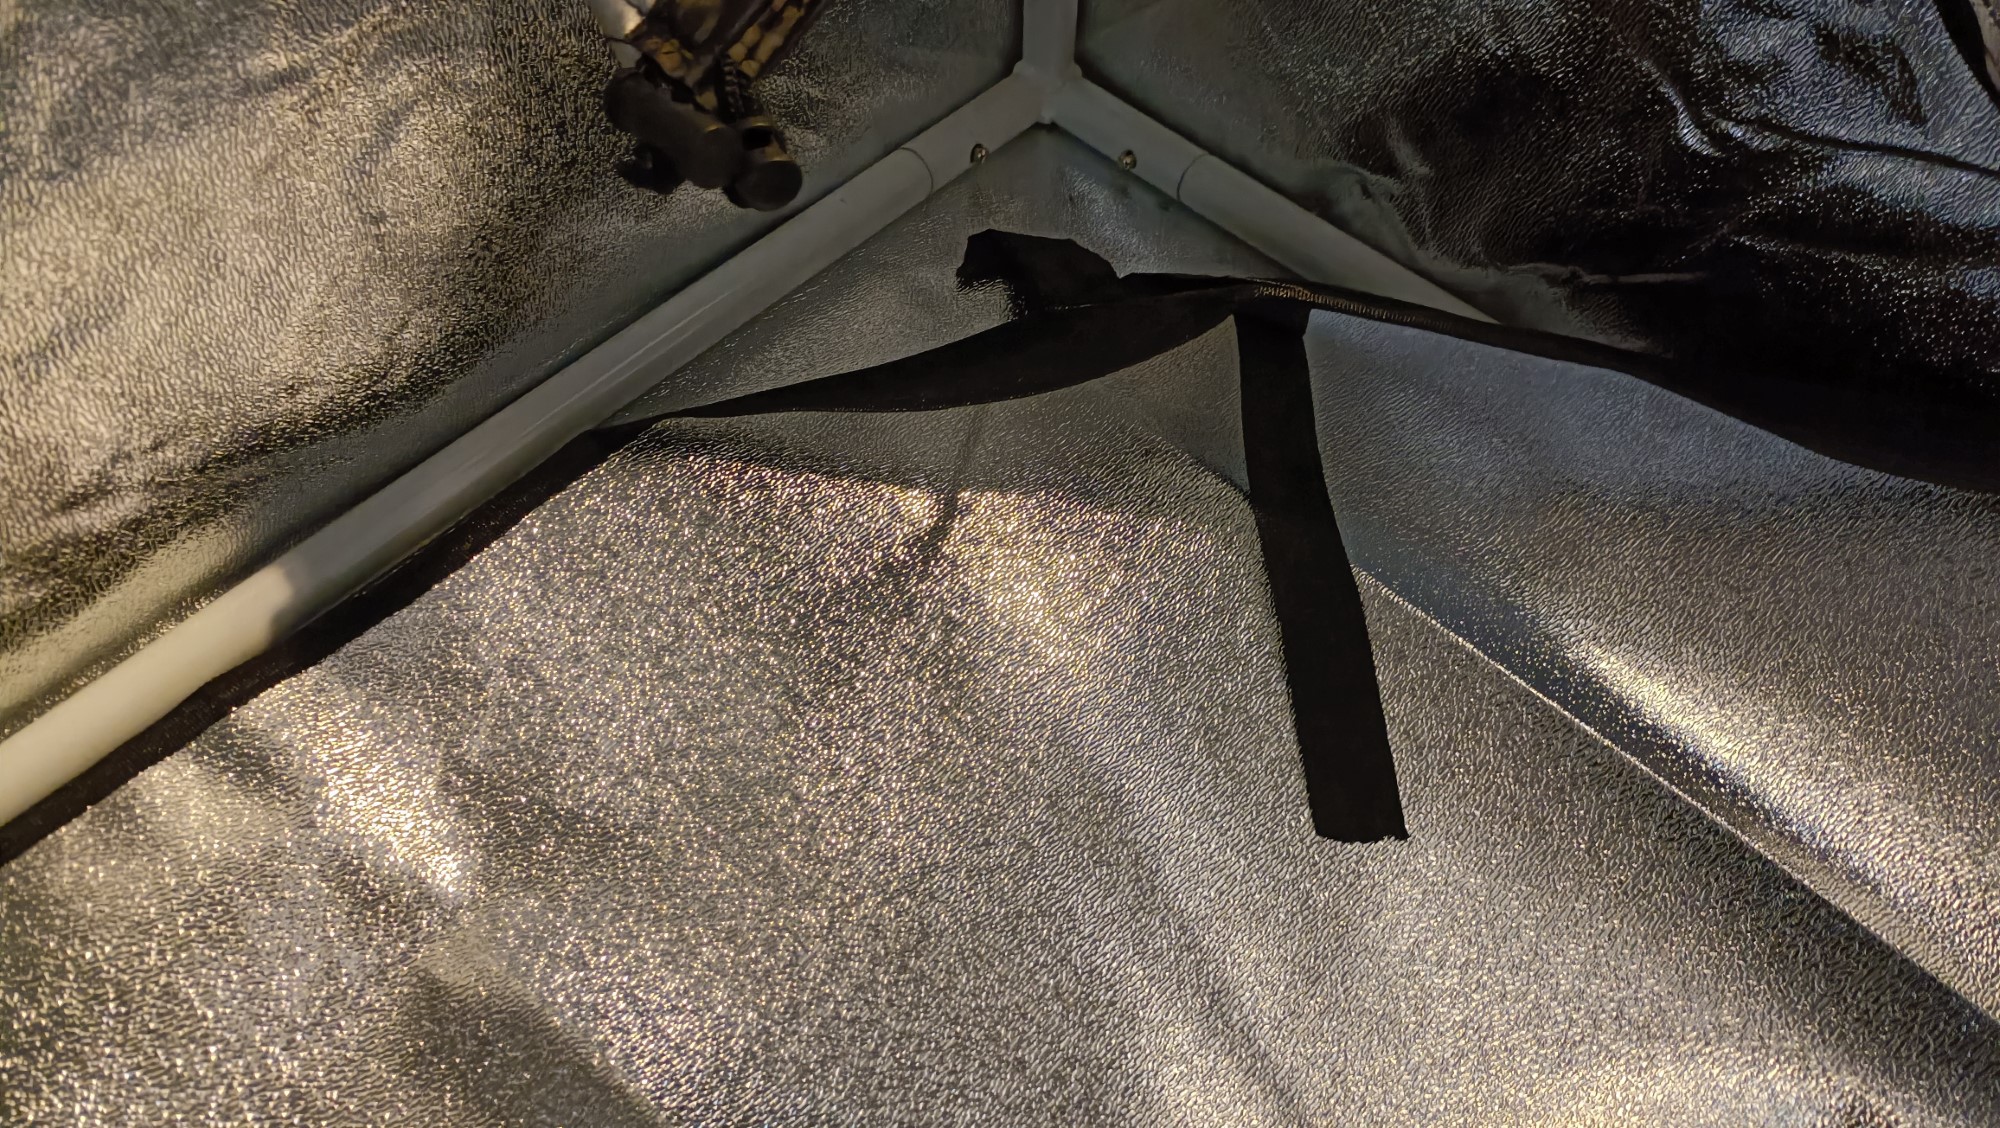
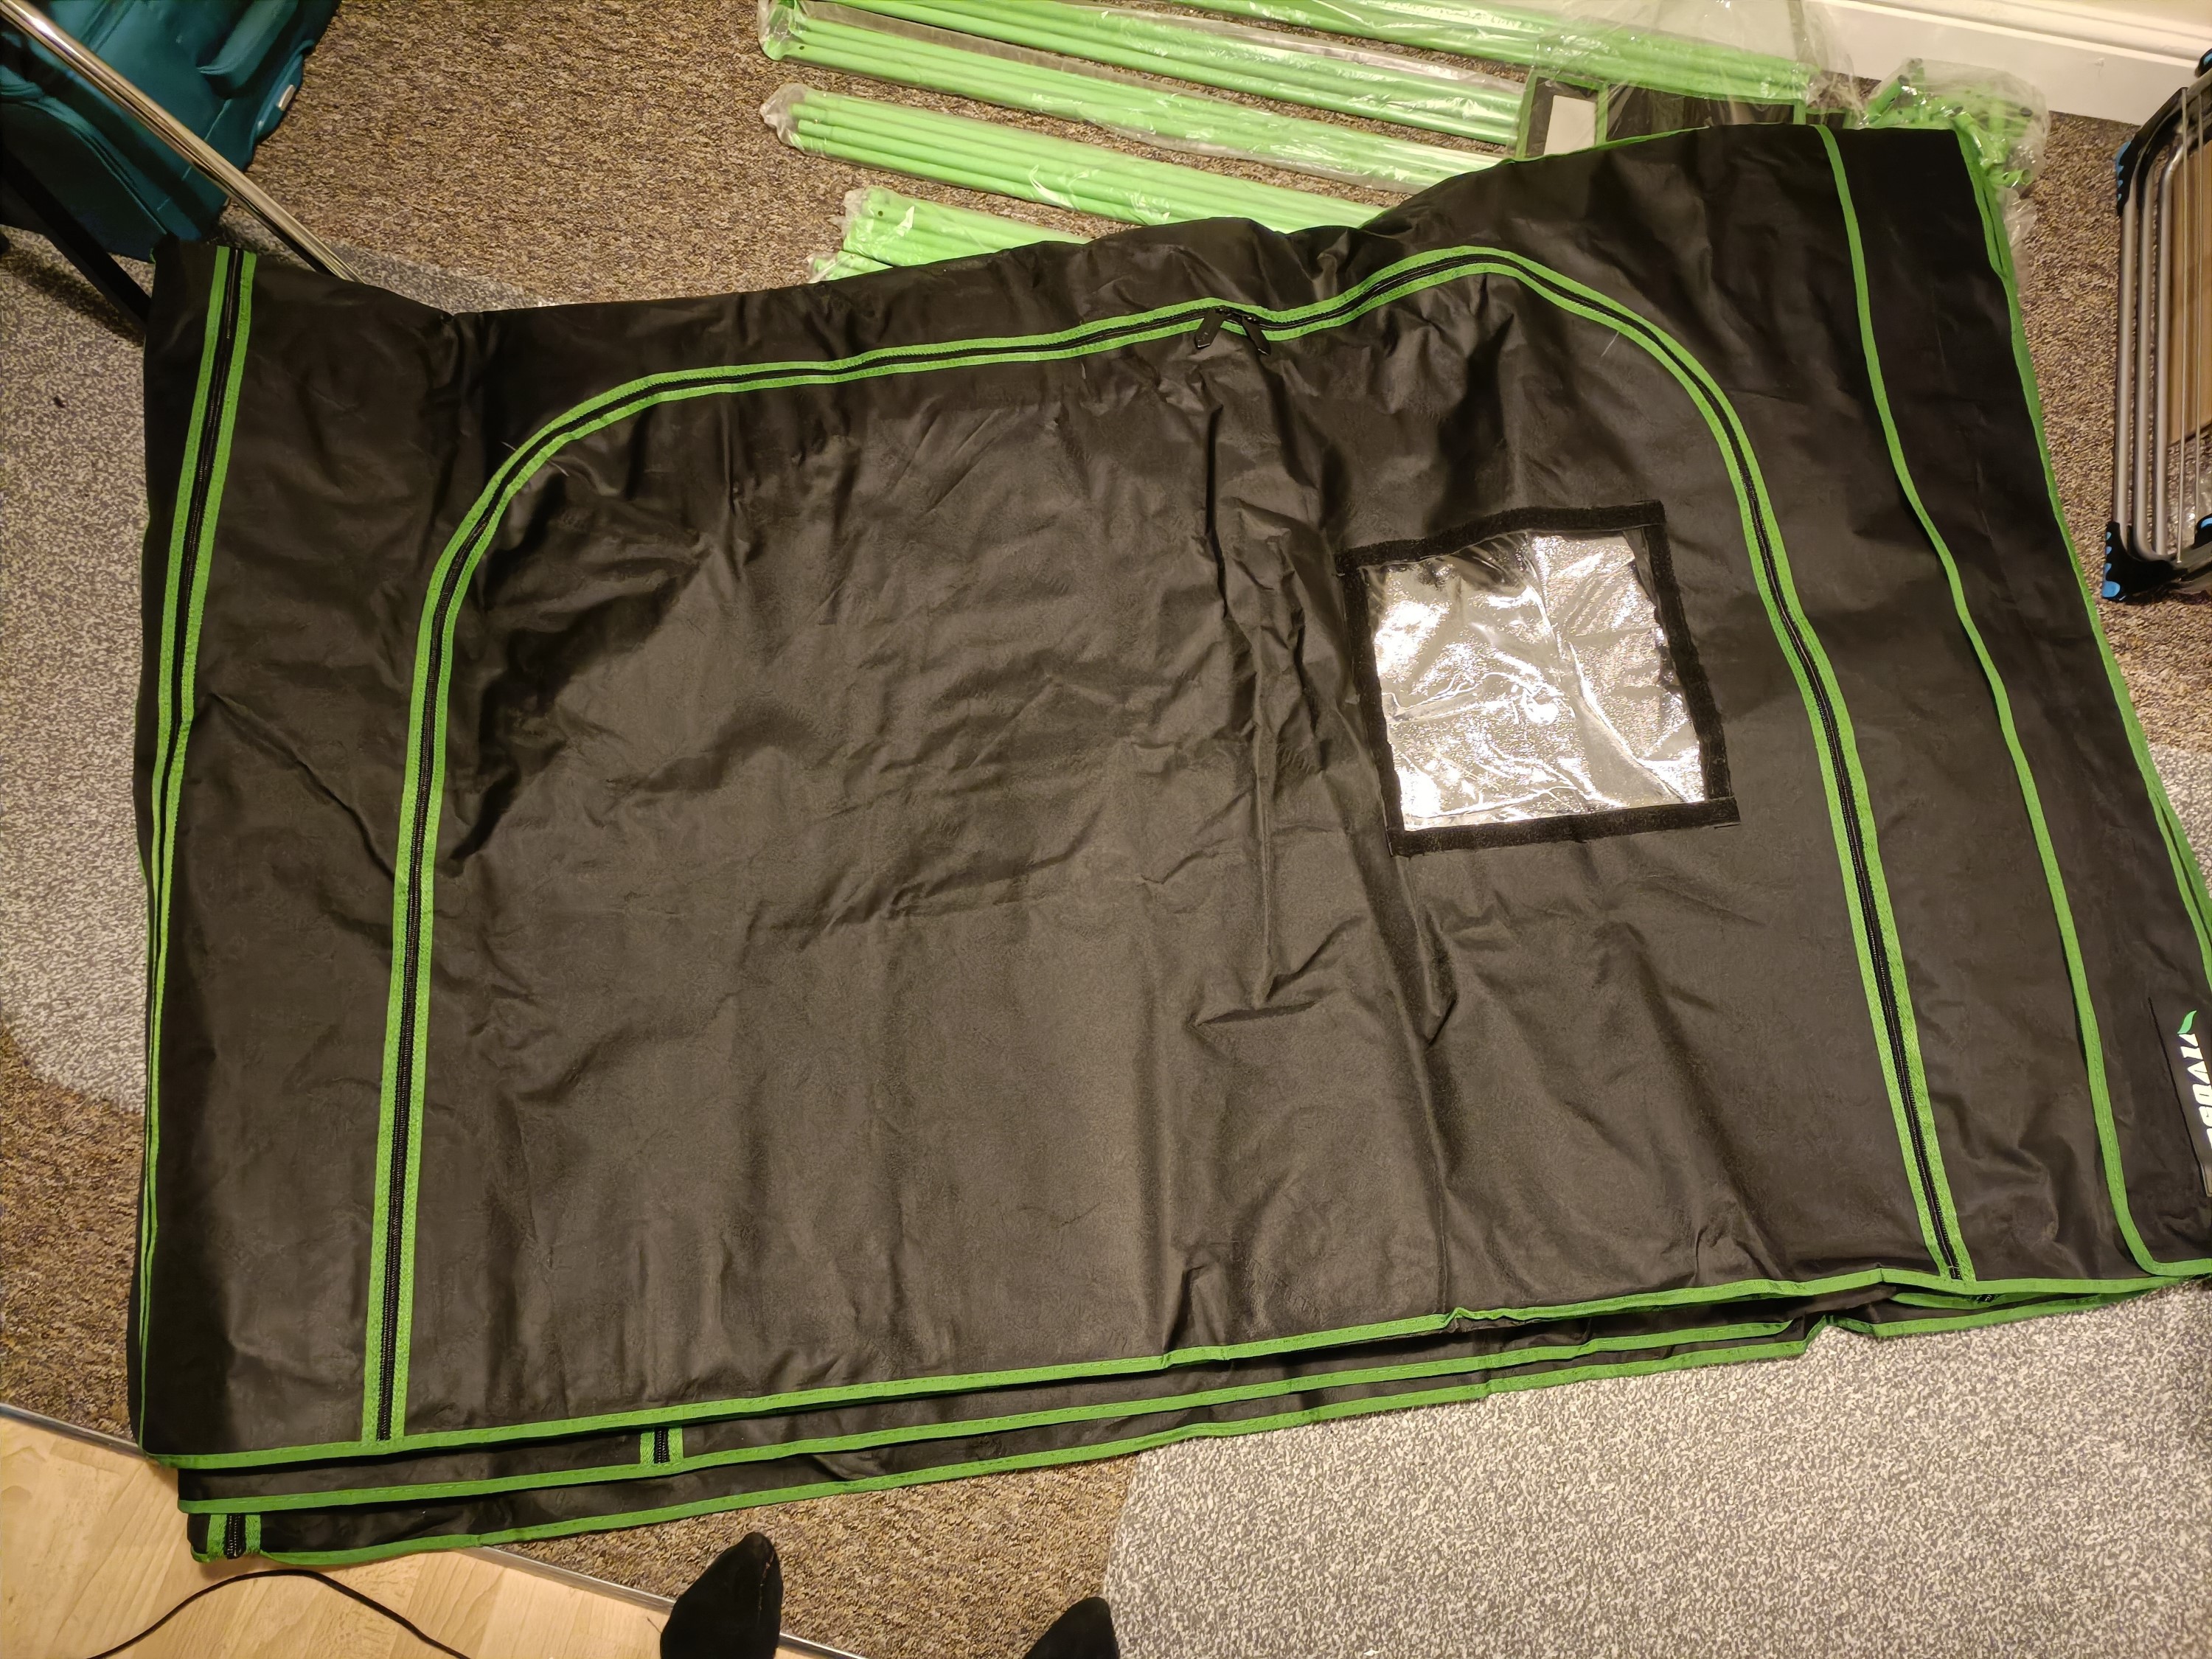
Moving on...I thought this velcro-attached flap was nice to hide this middle zipper.
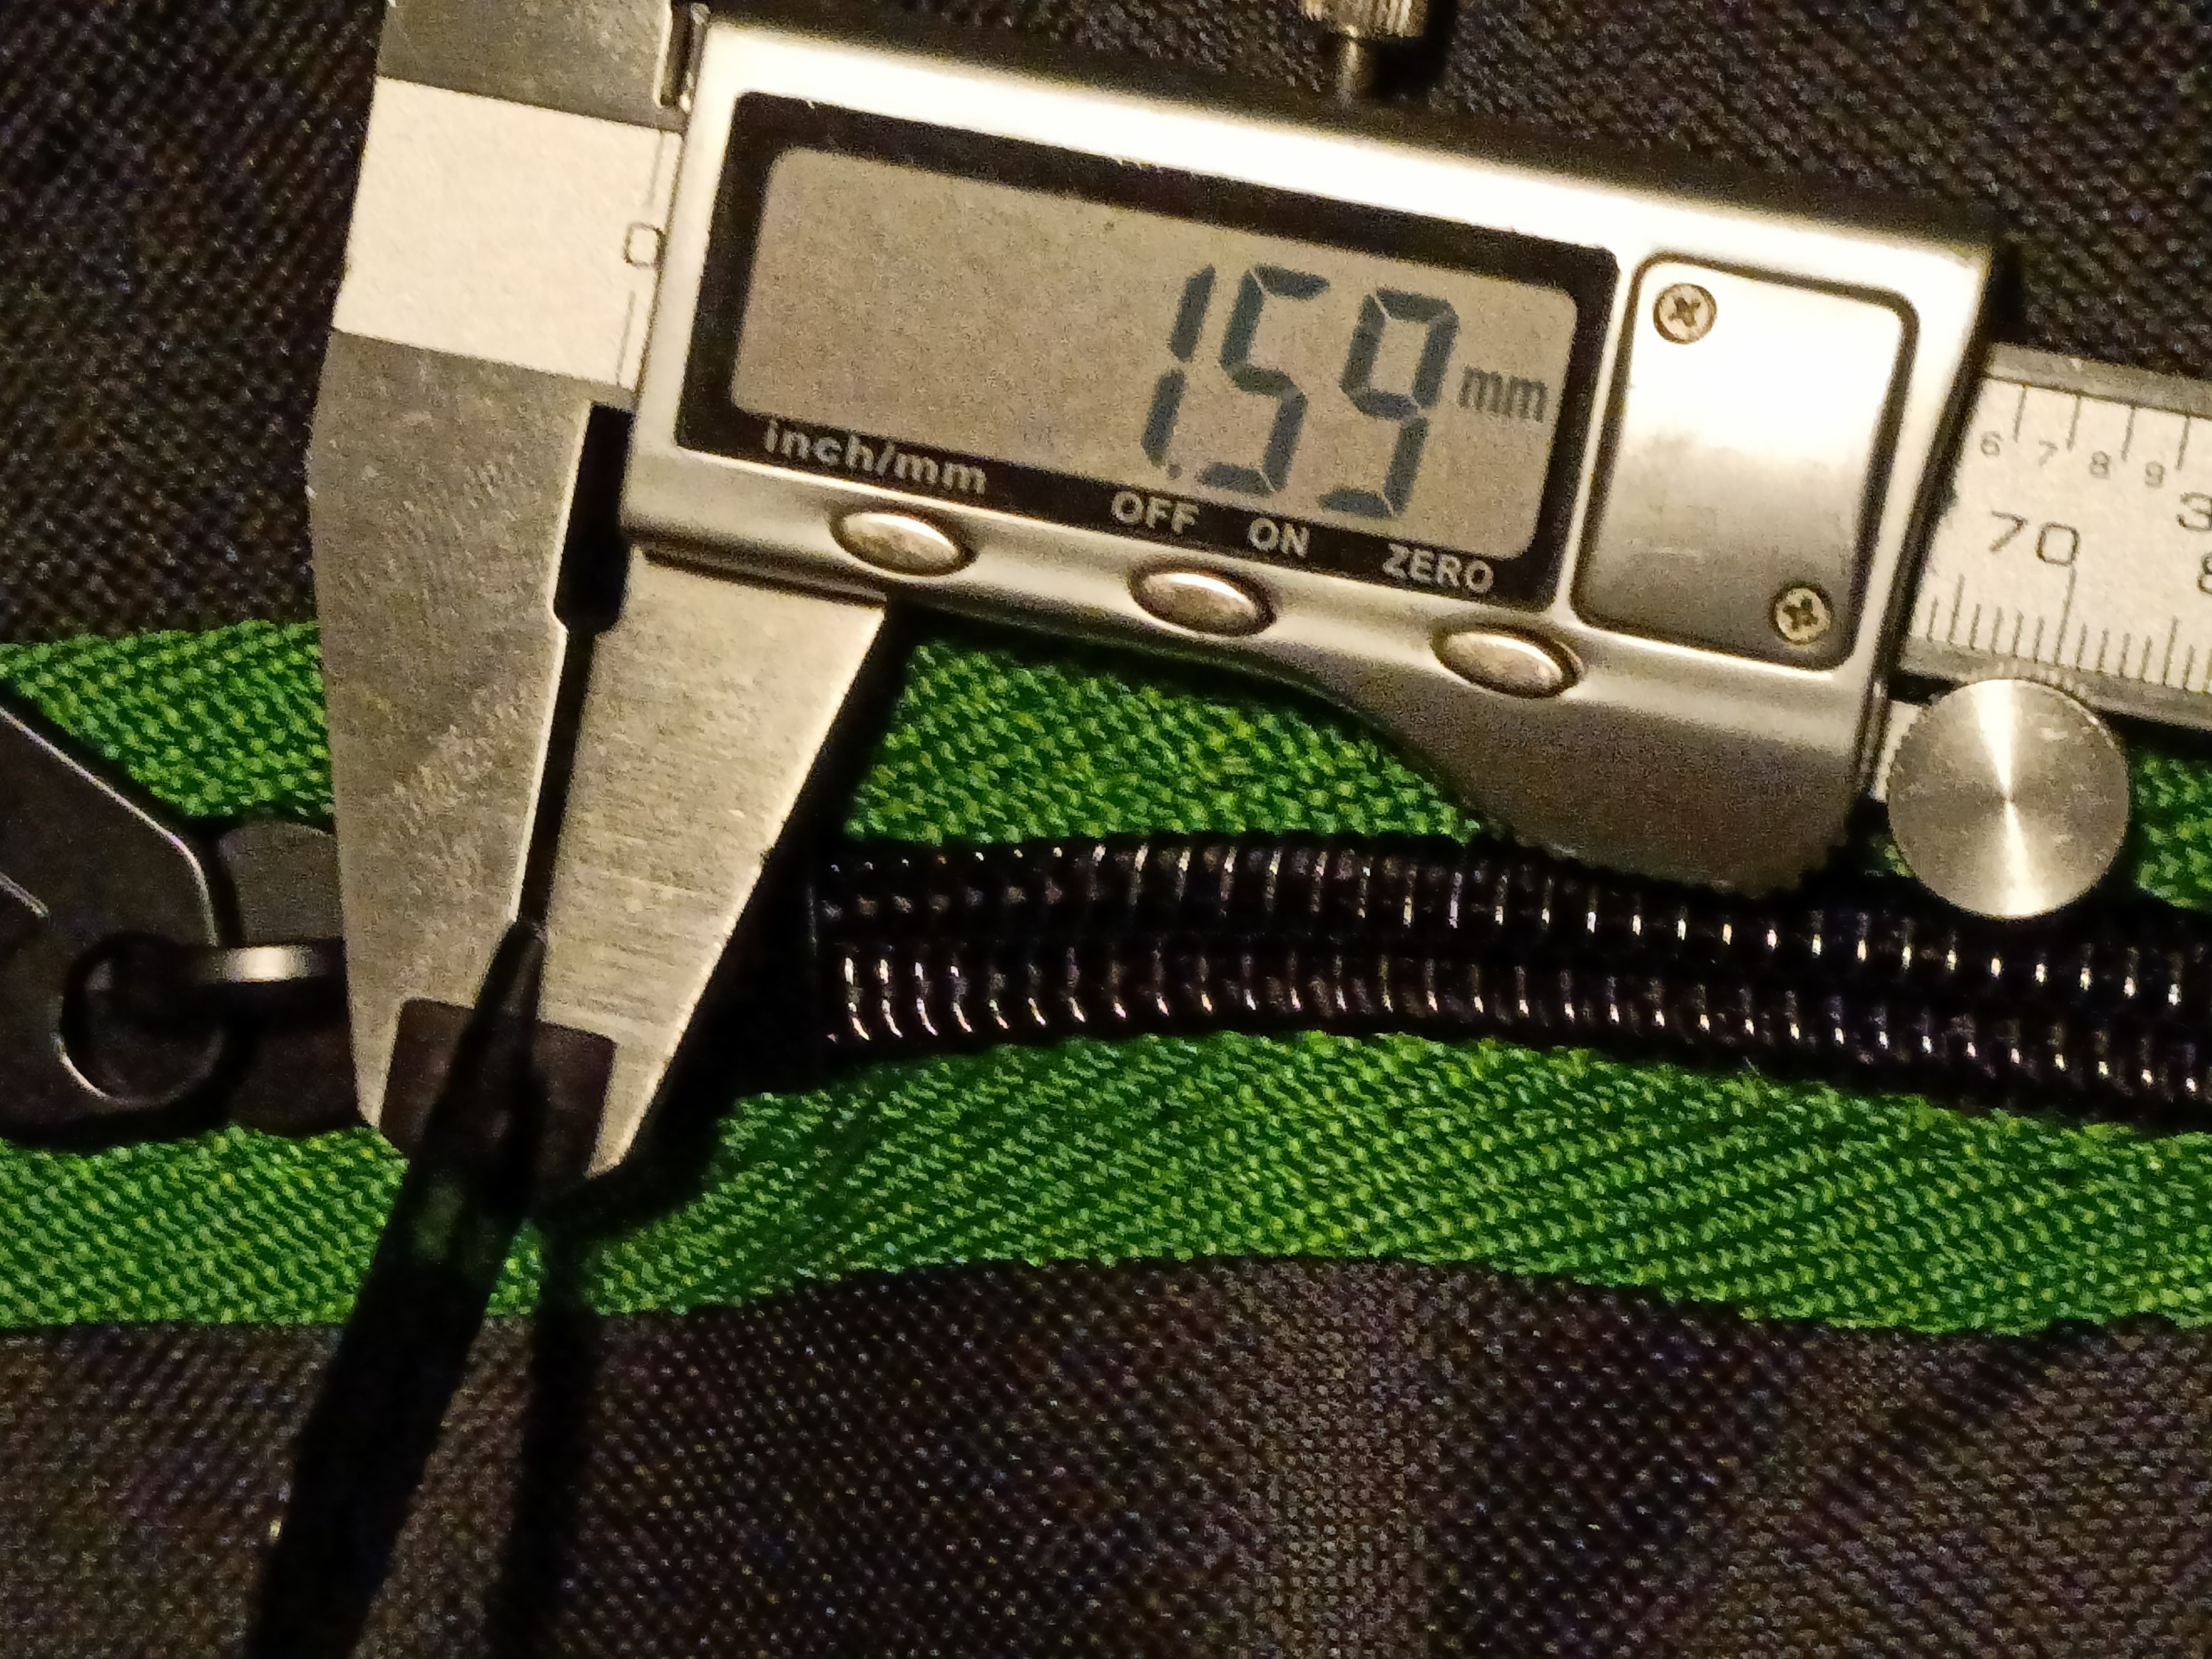
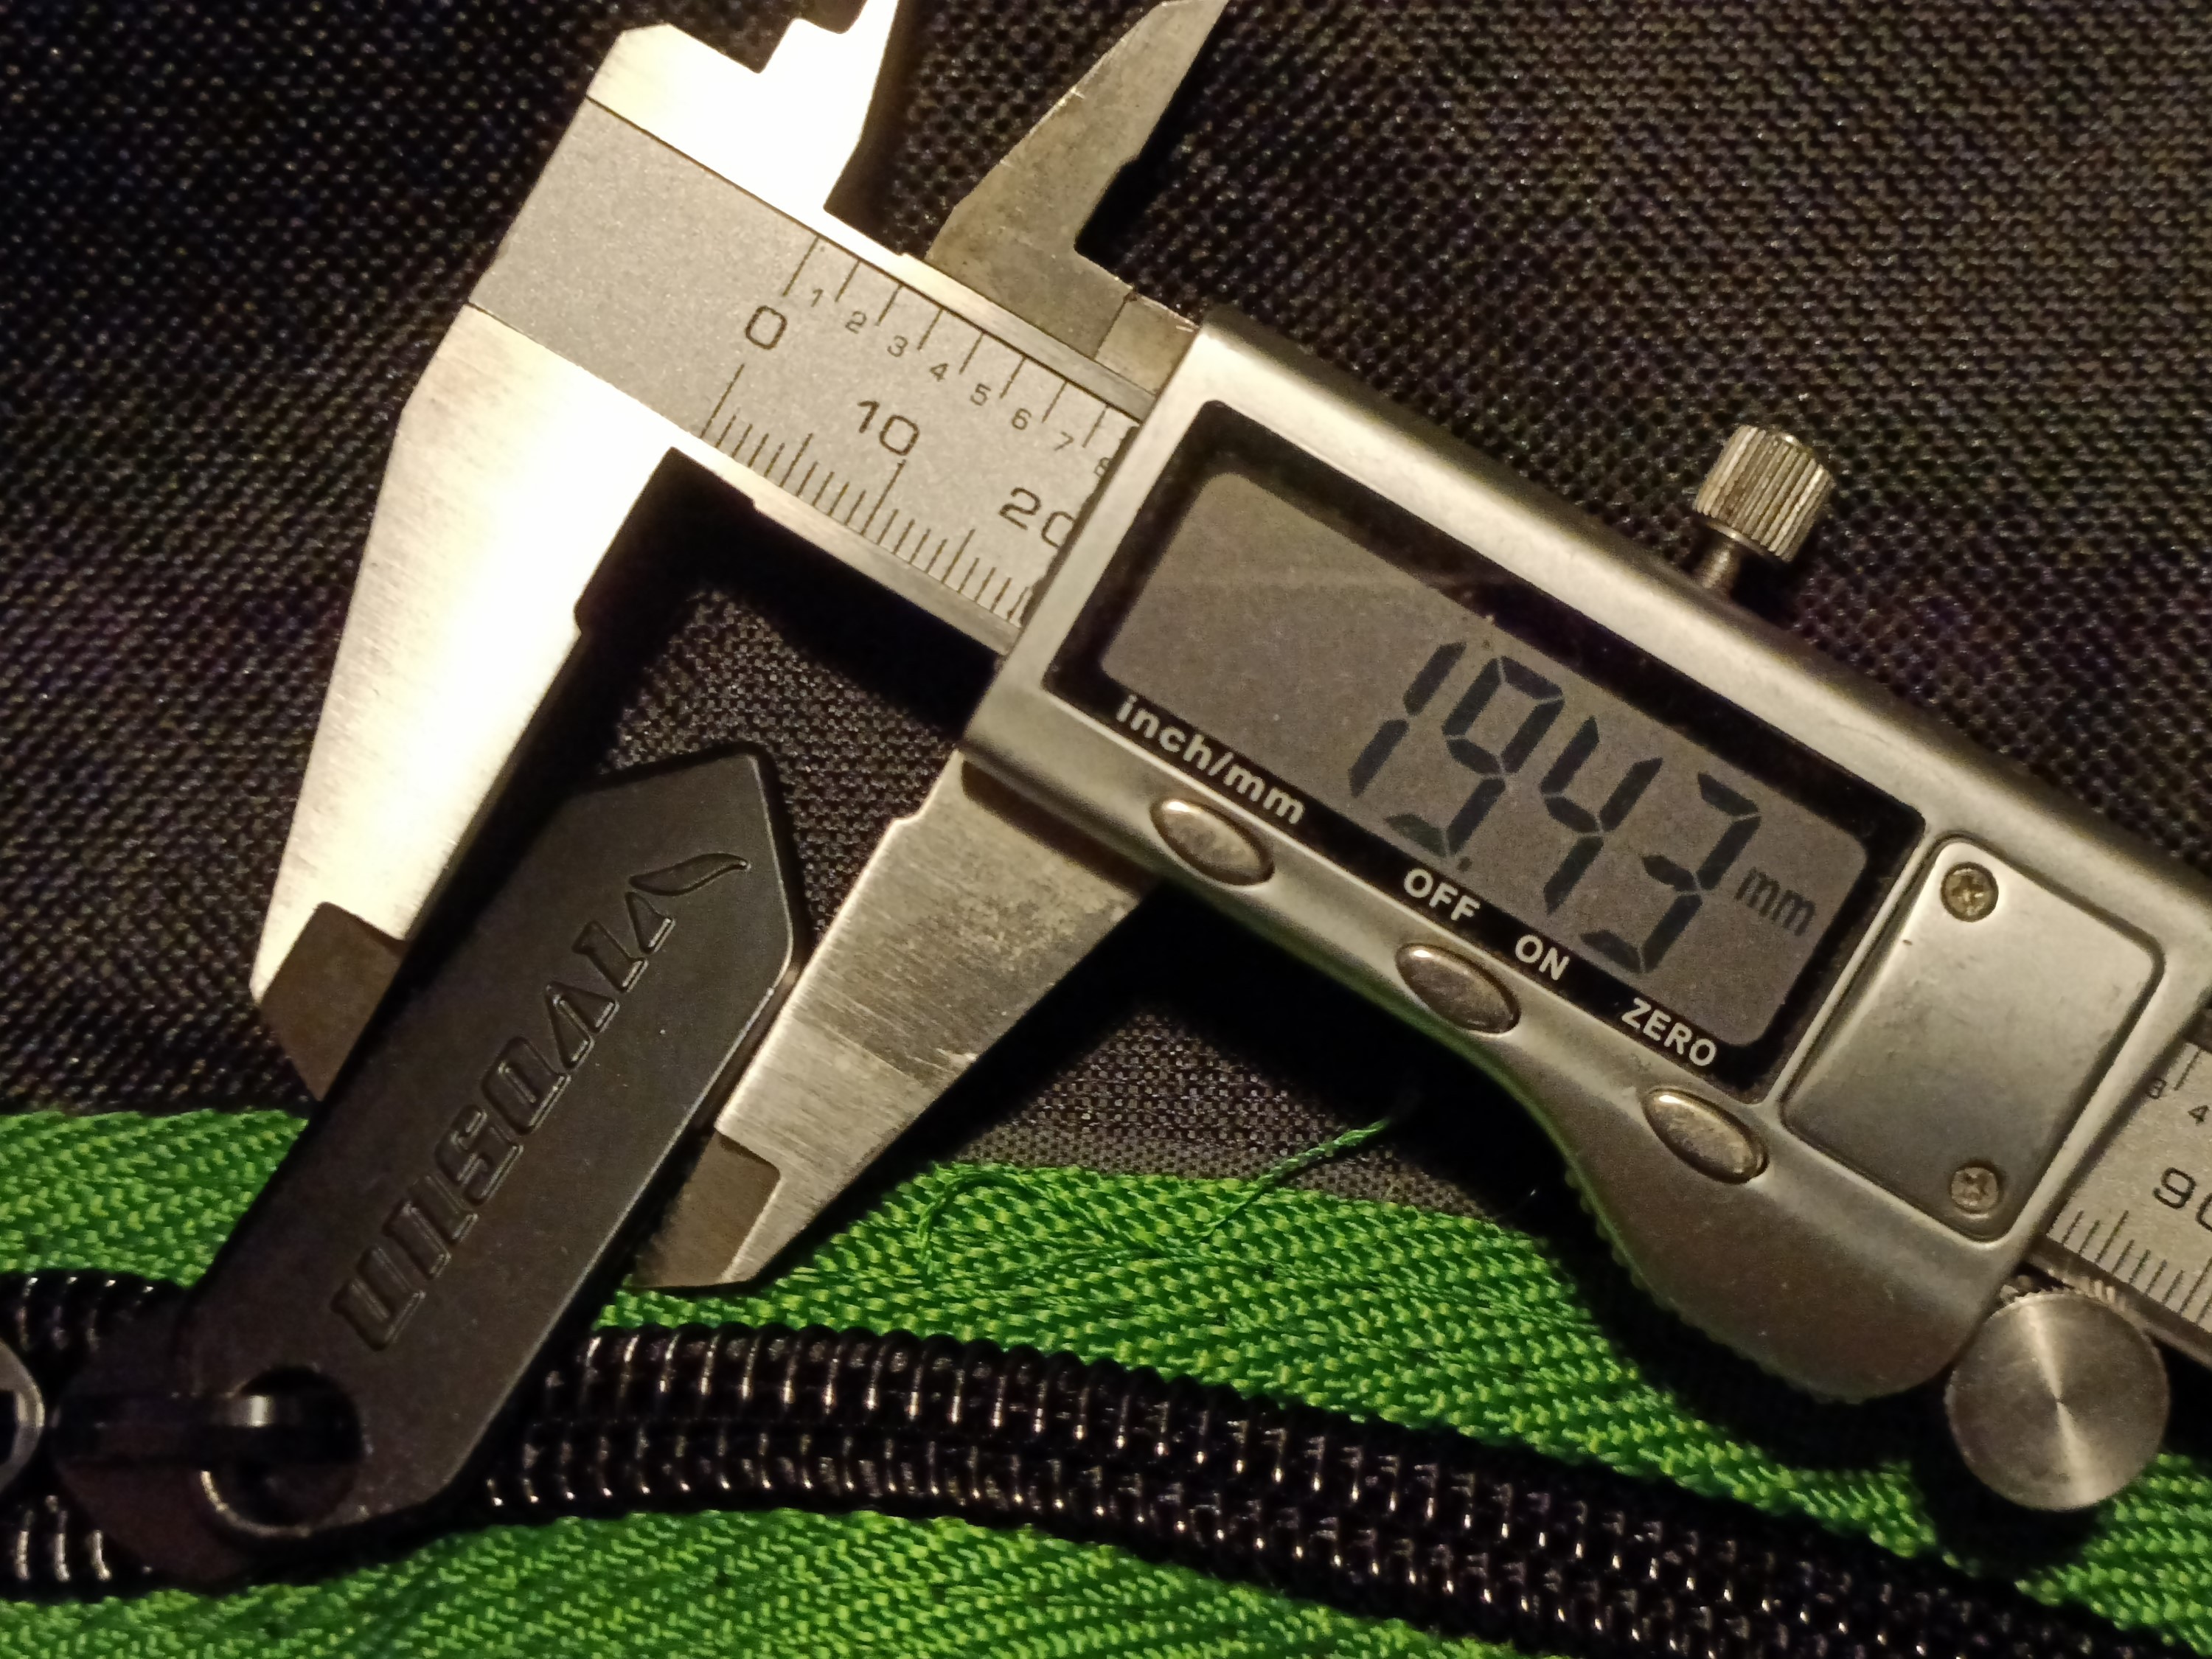
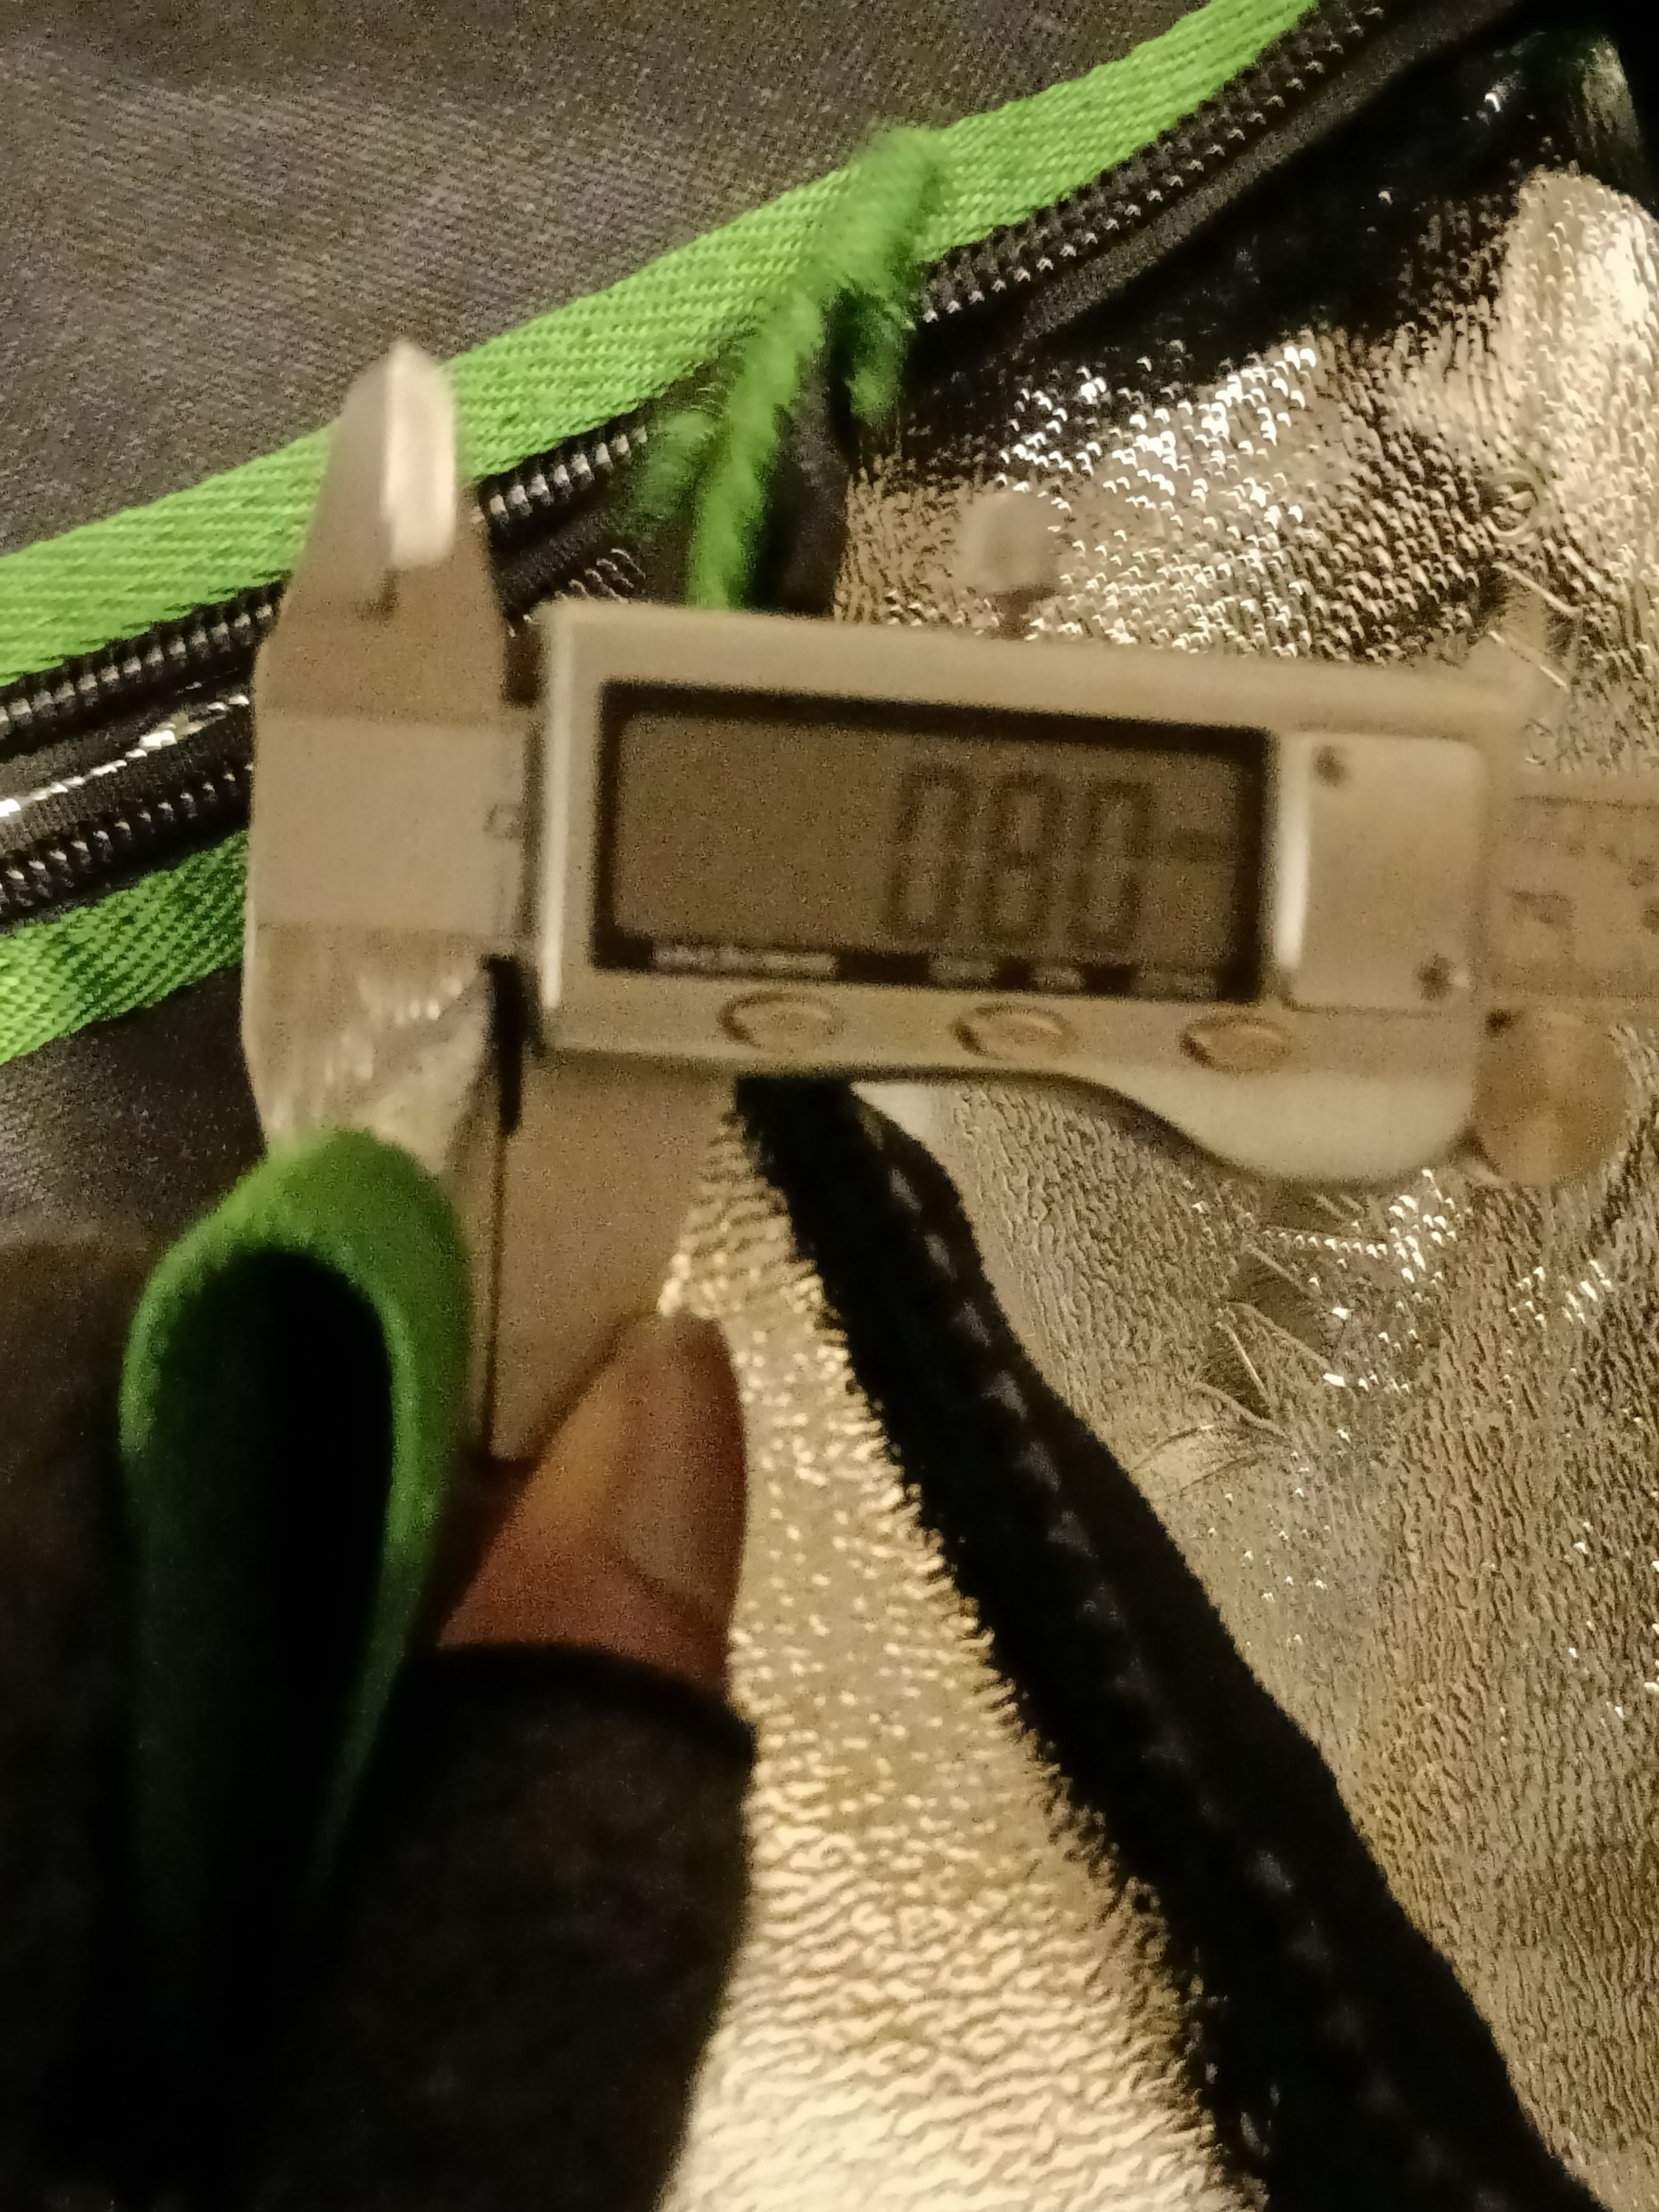
From the sounds of youtubers, I was thinking that 600D was some substantially thick material, but it's 0.4mm thick.
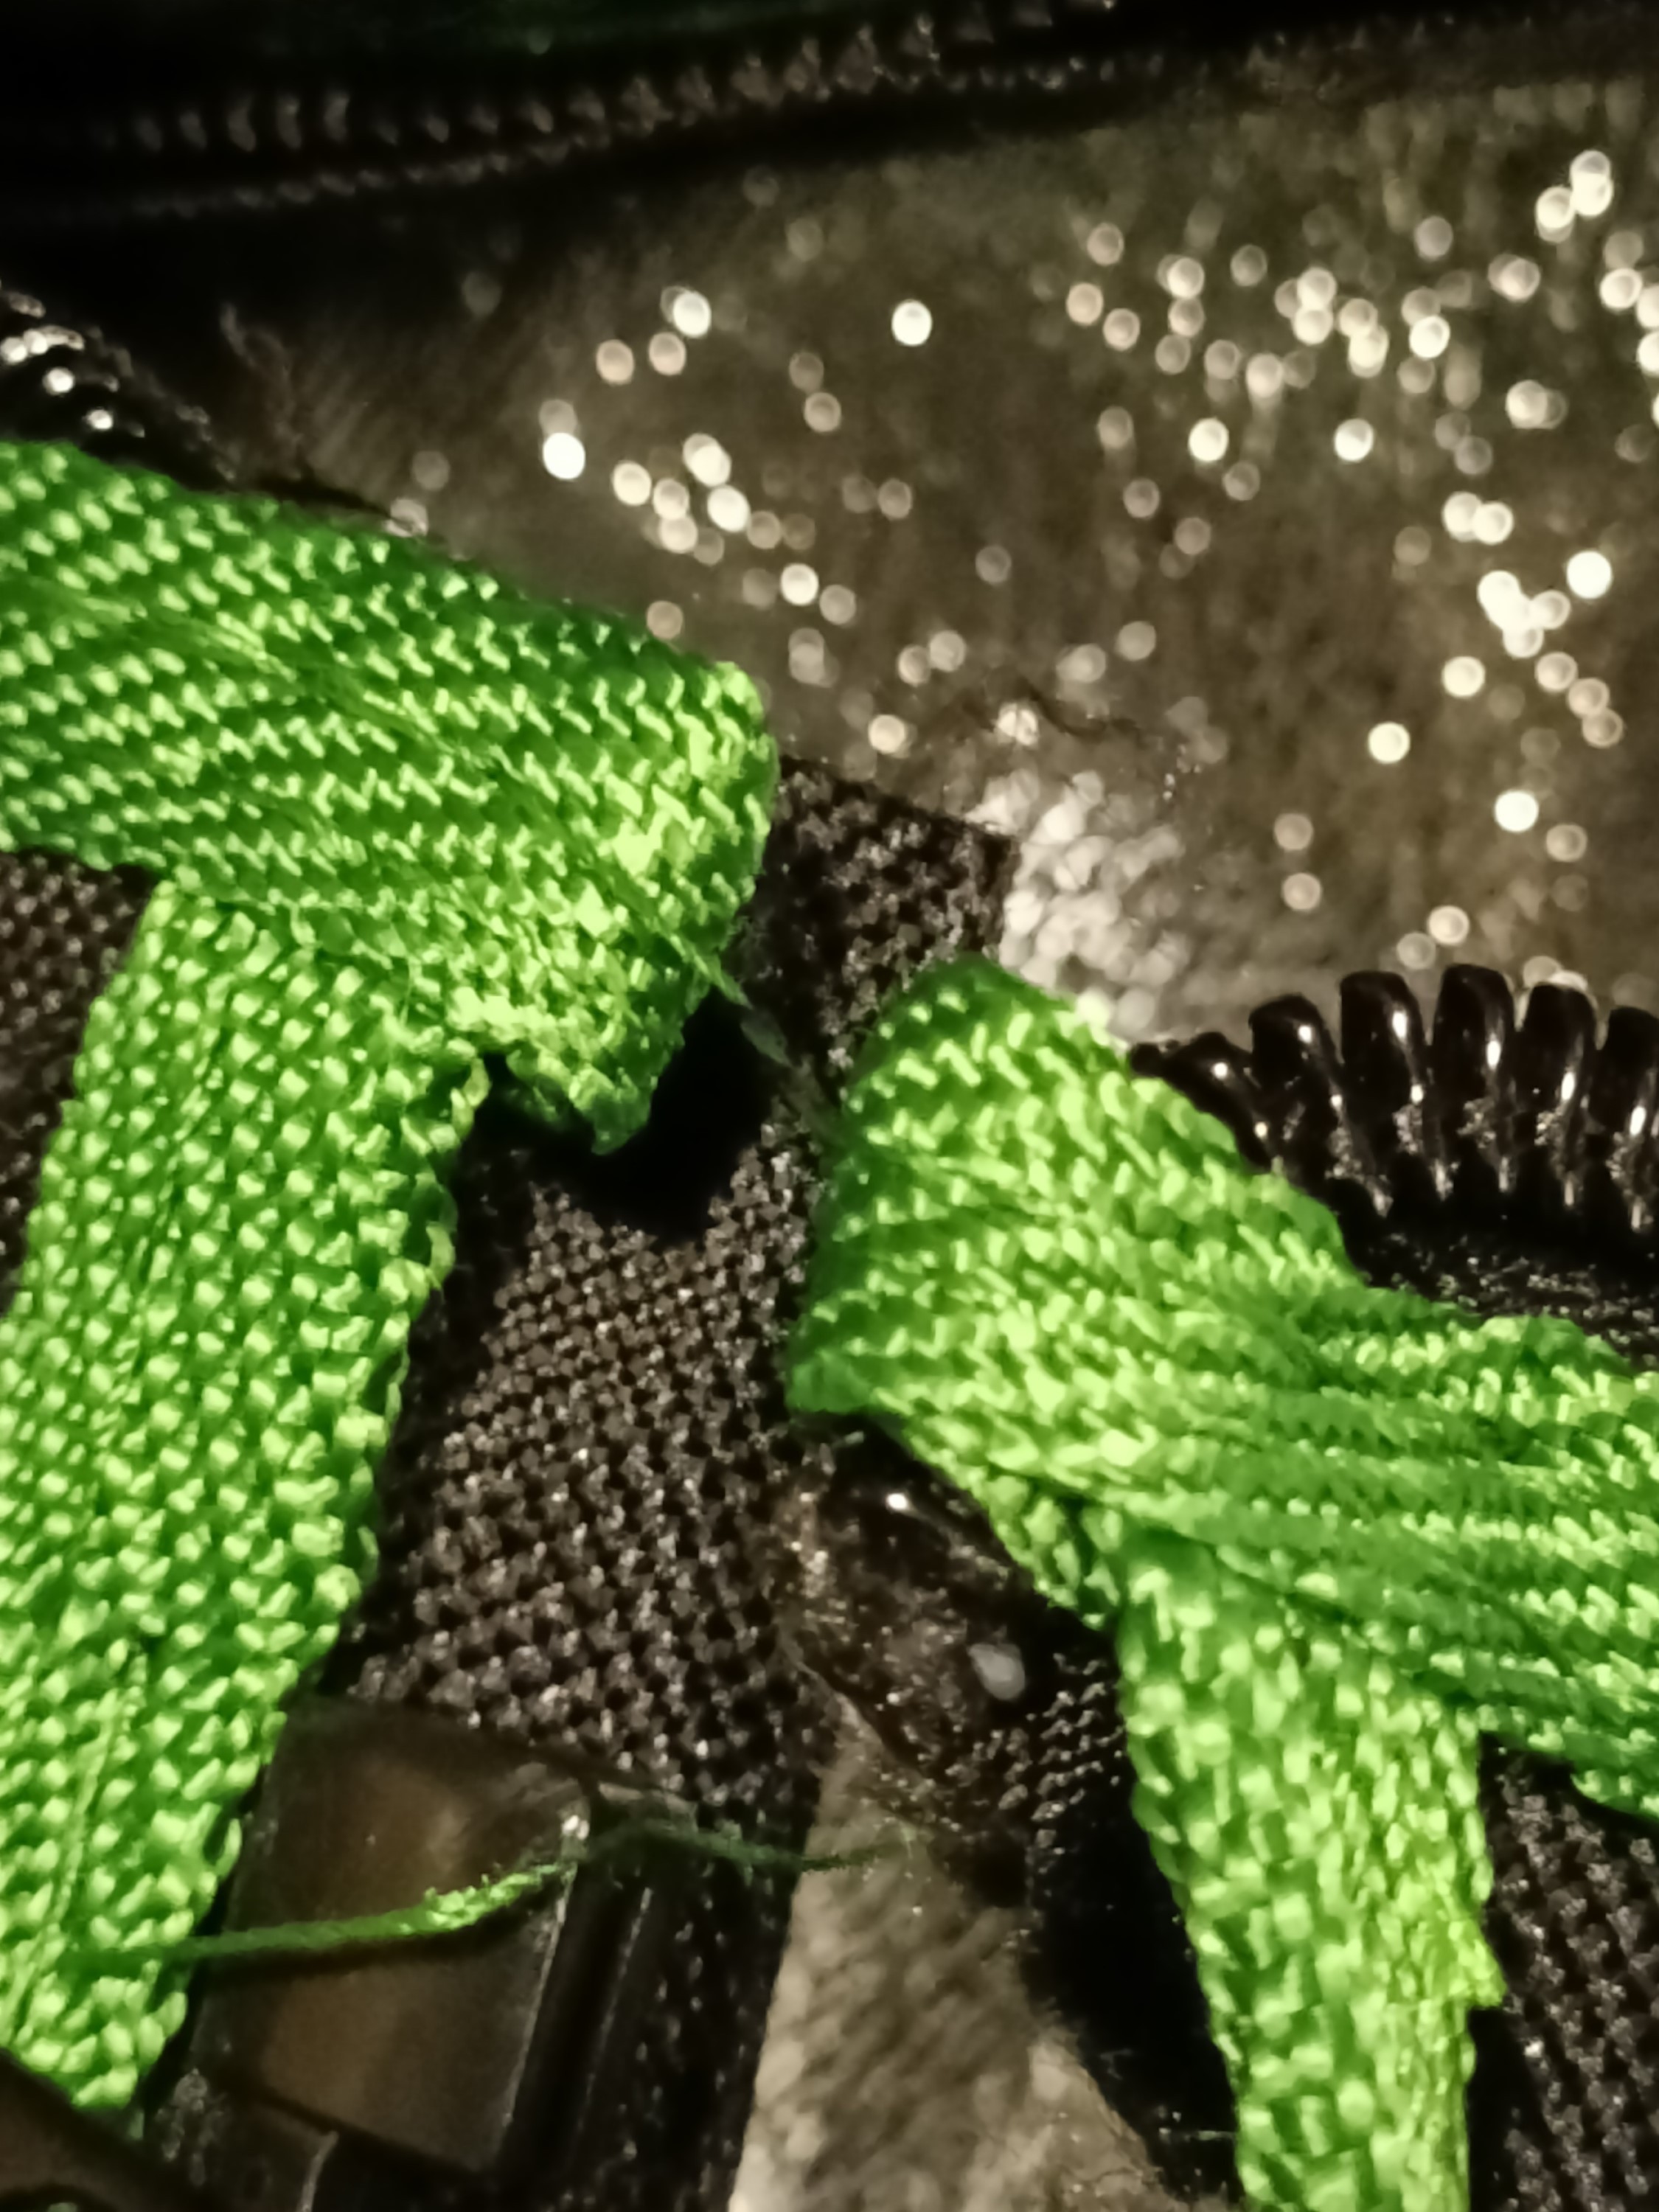
Some mystery thread I'm assuming isn't supposed to be here, so I cut it since it was preventing me from opening the tent fabric.
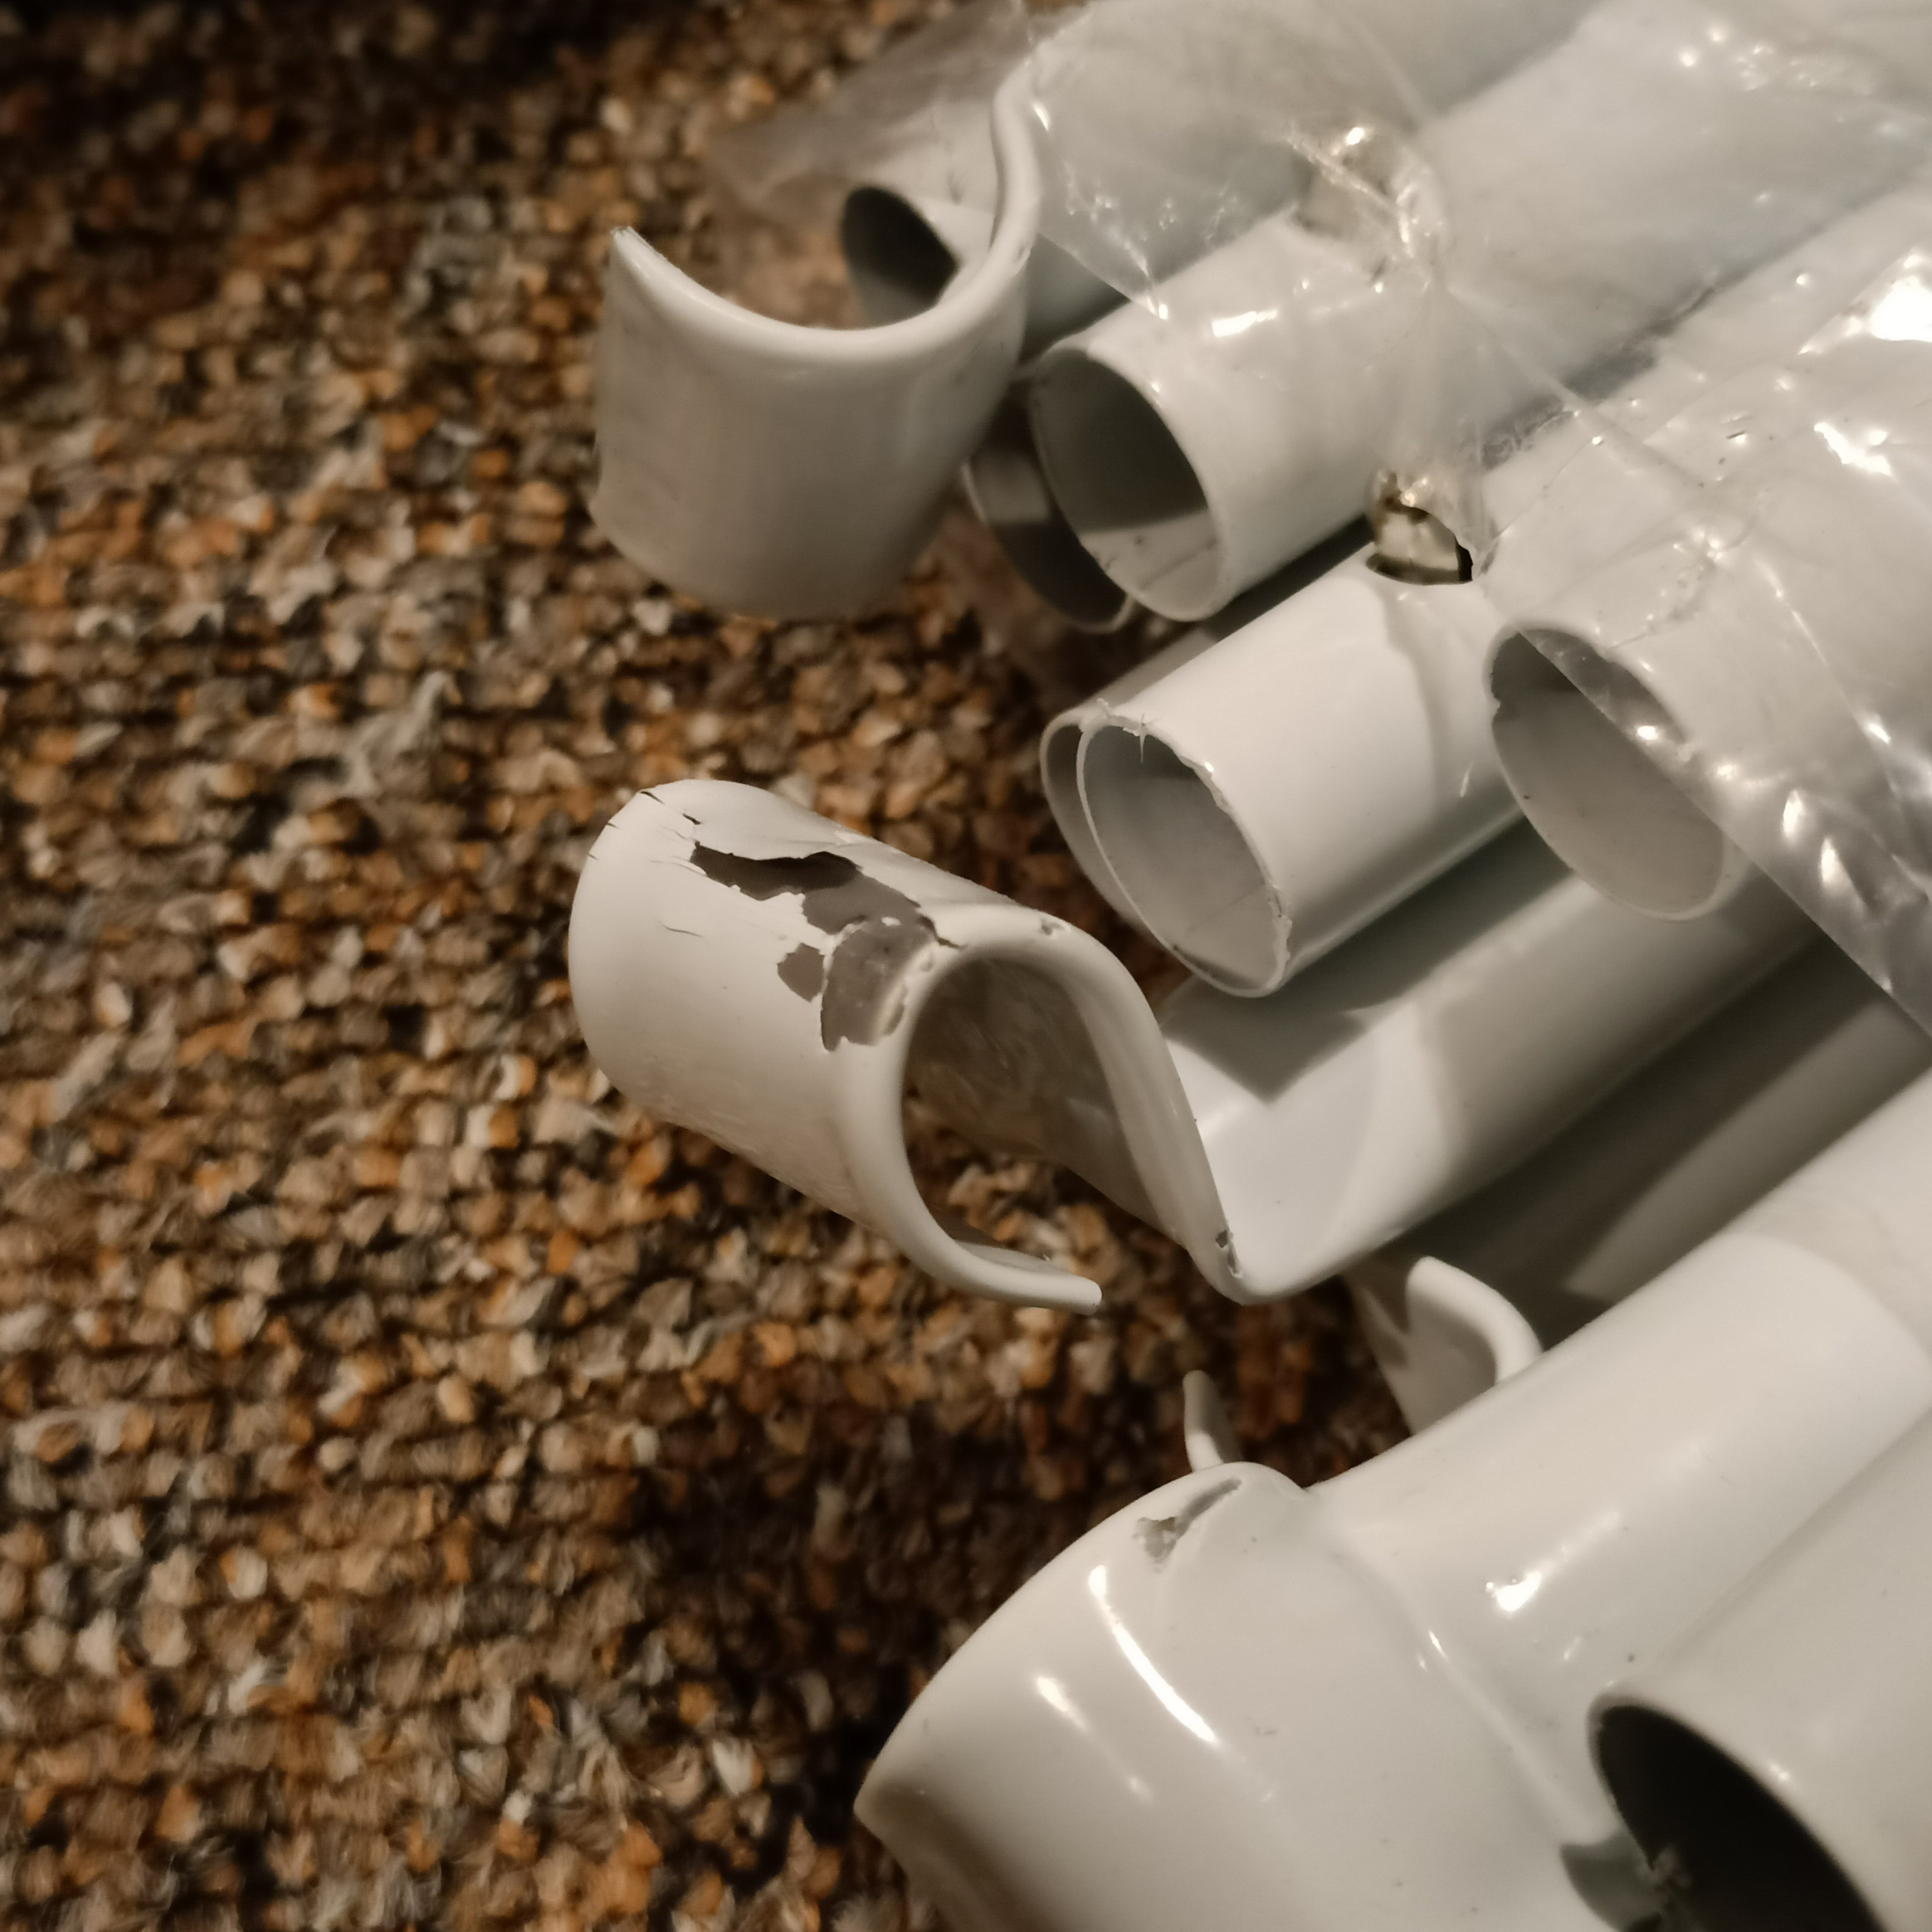
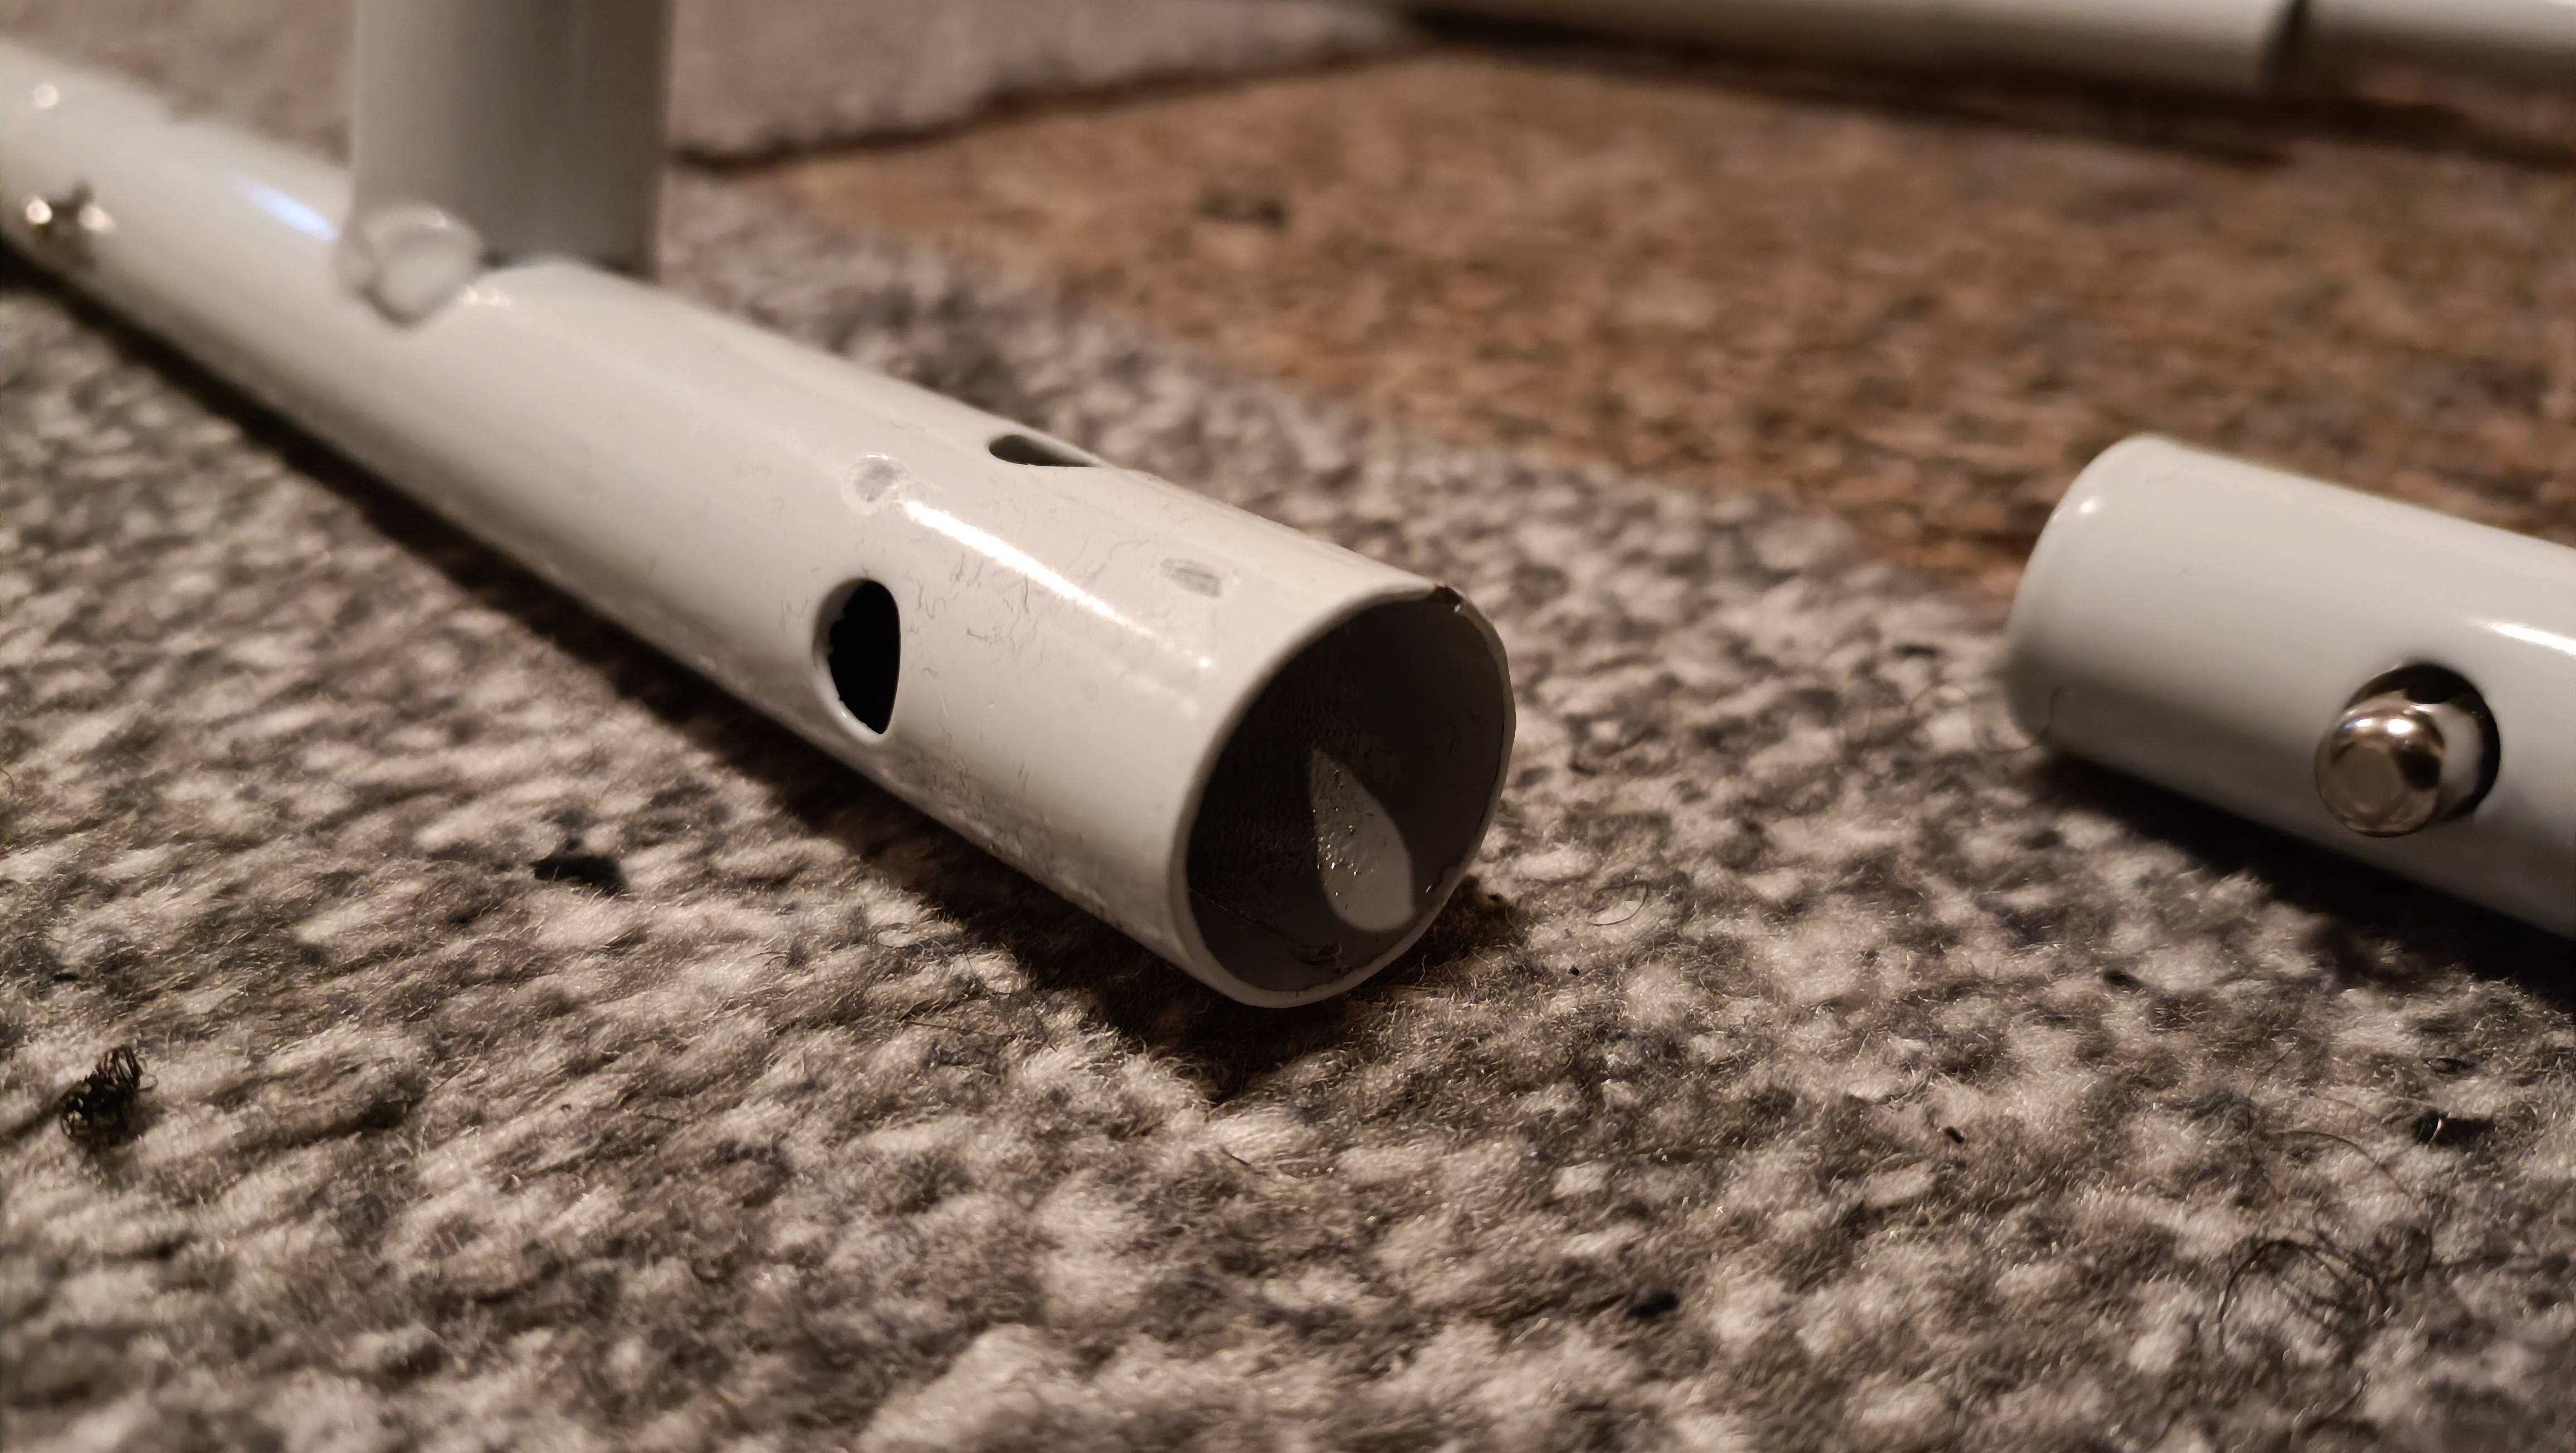
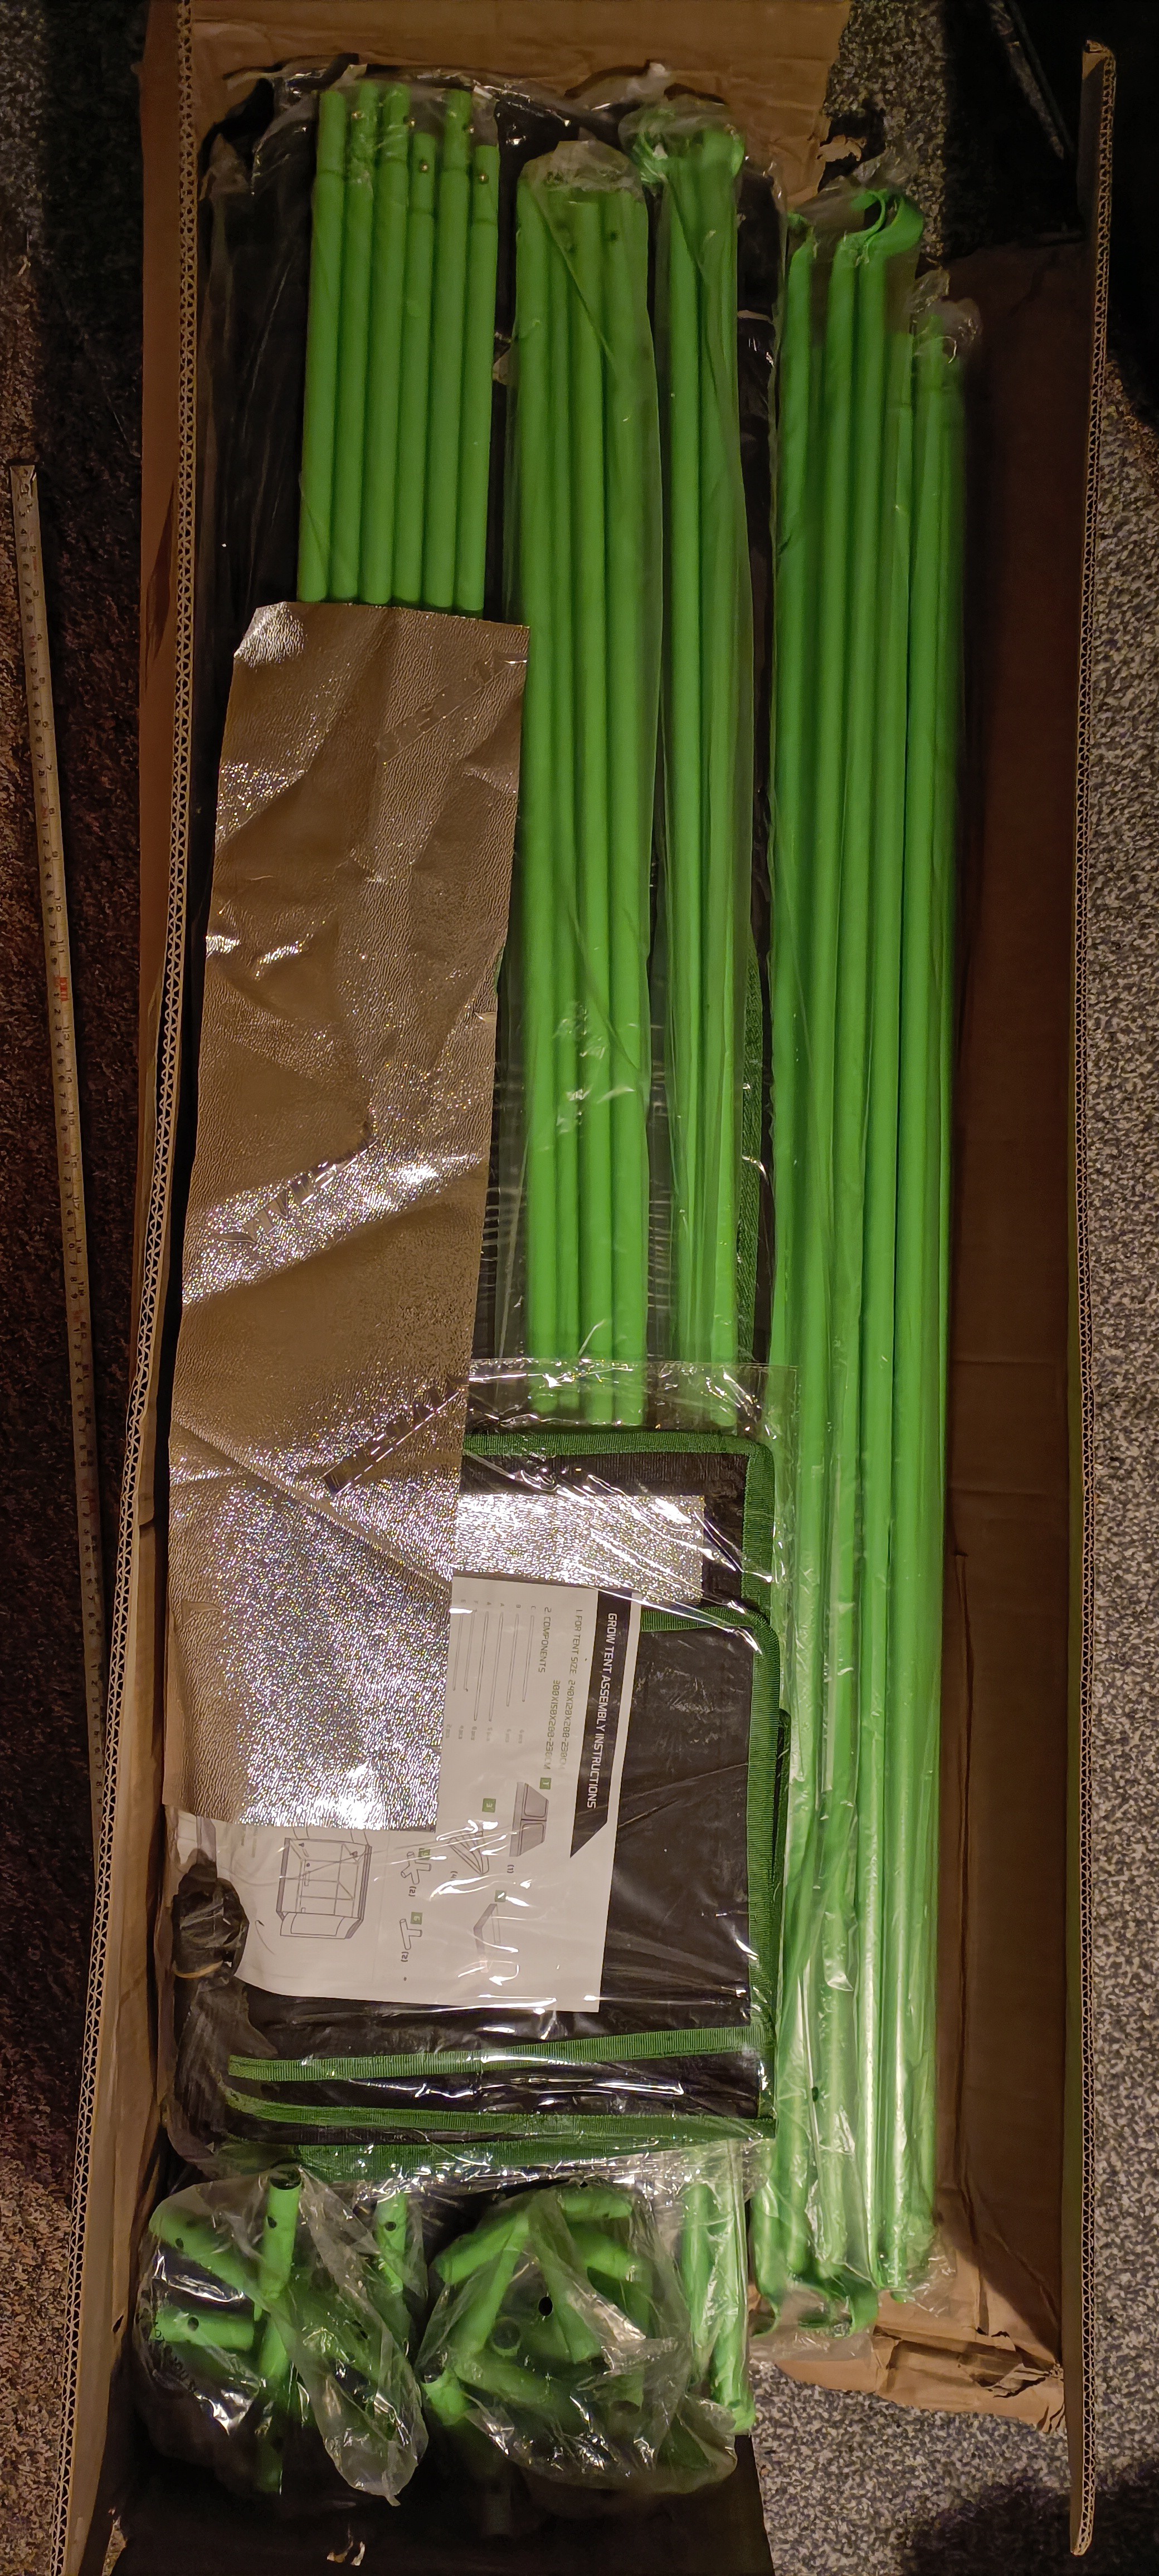
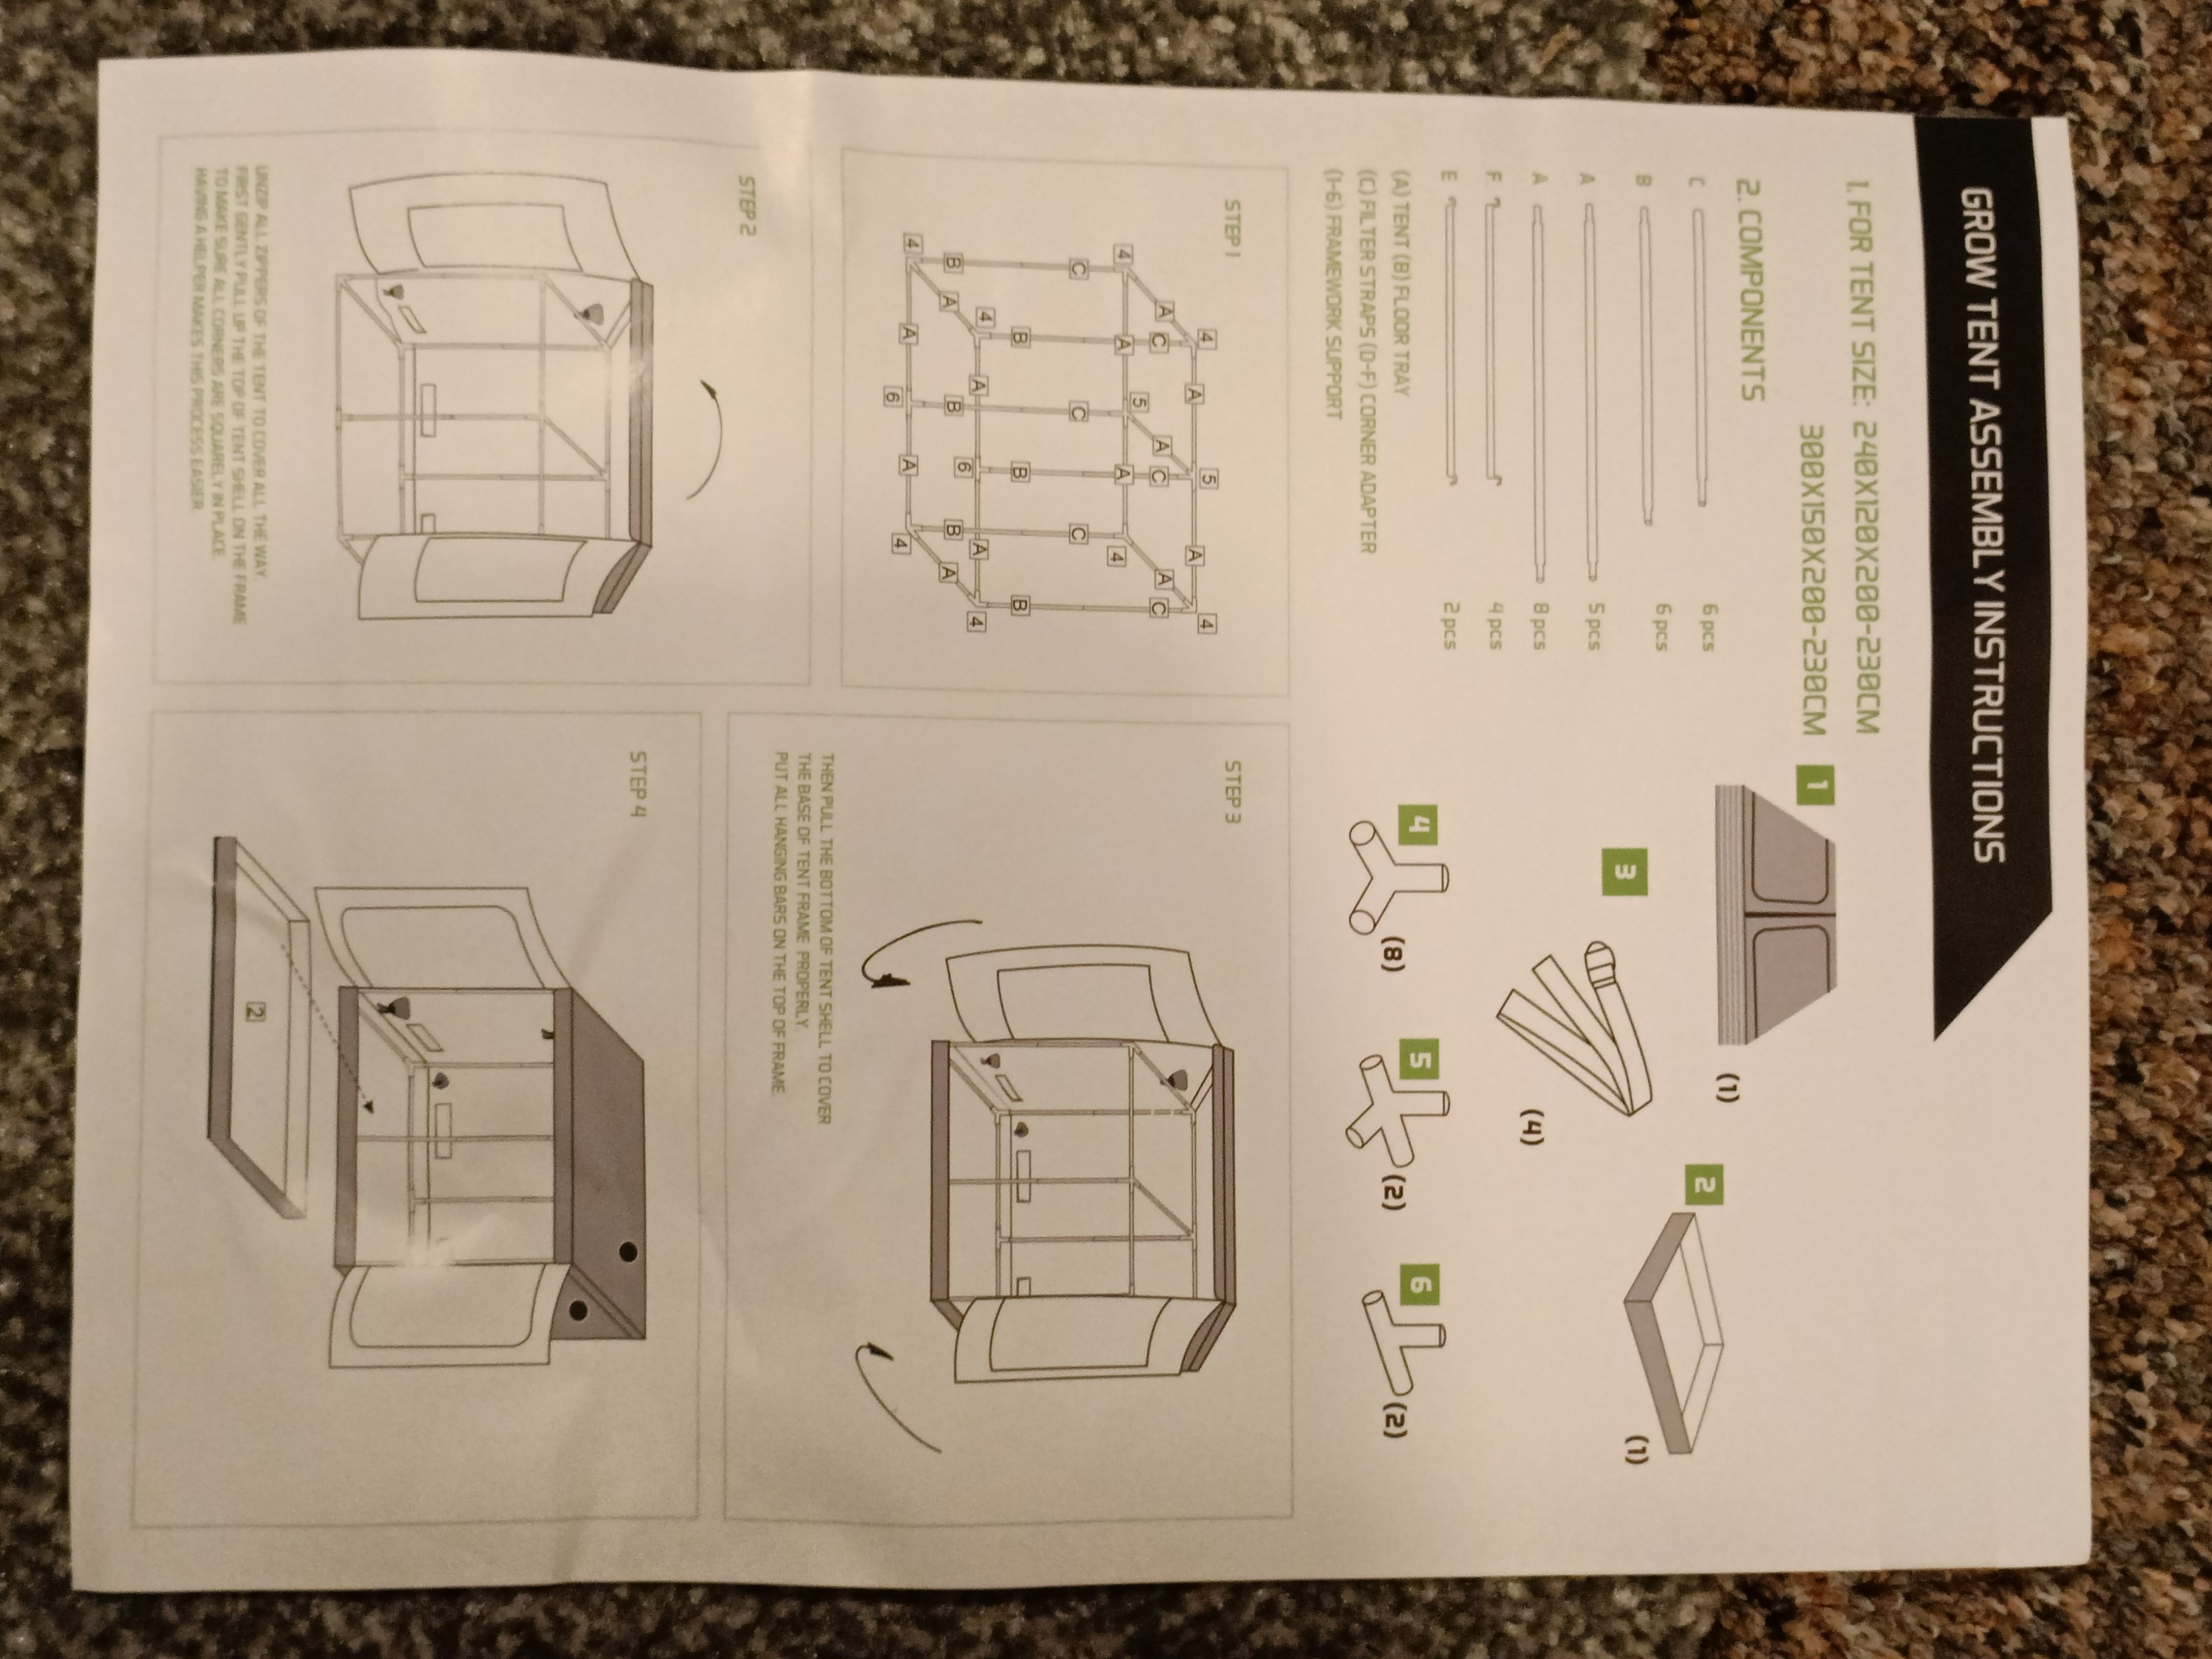
Putting the frame together
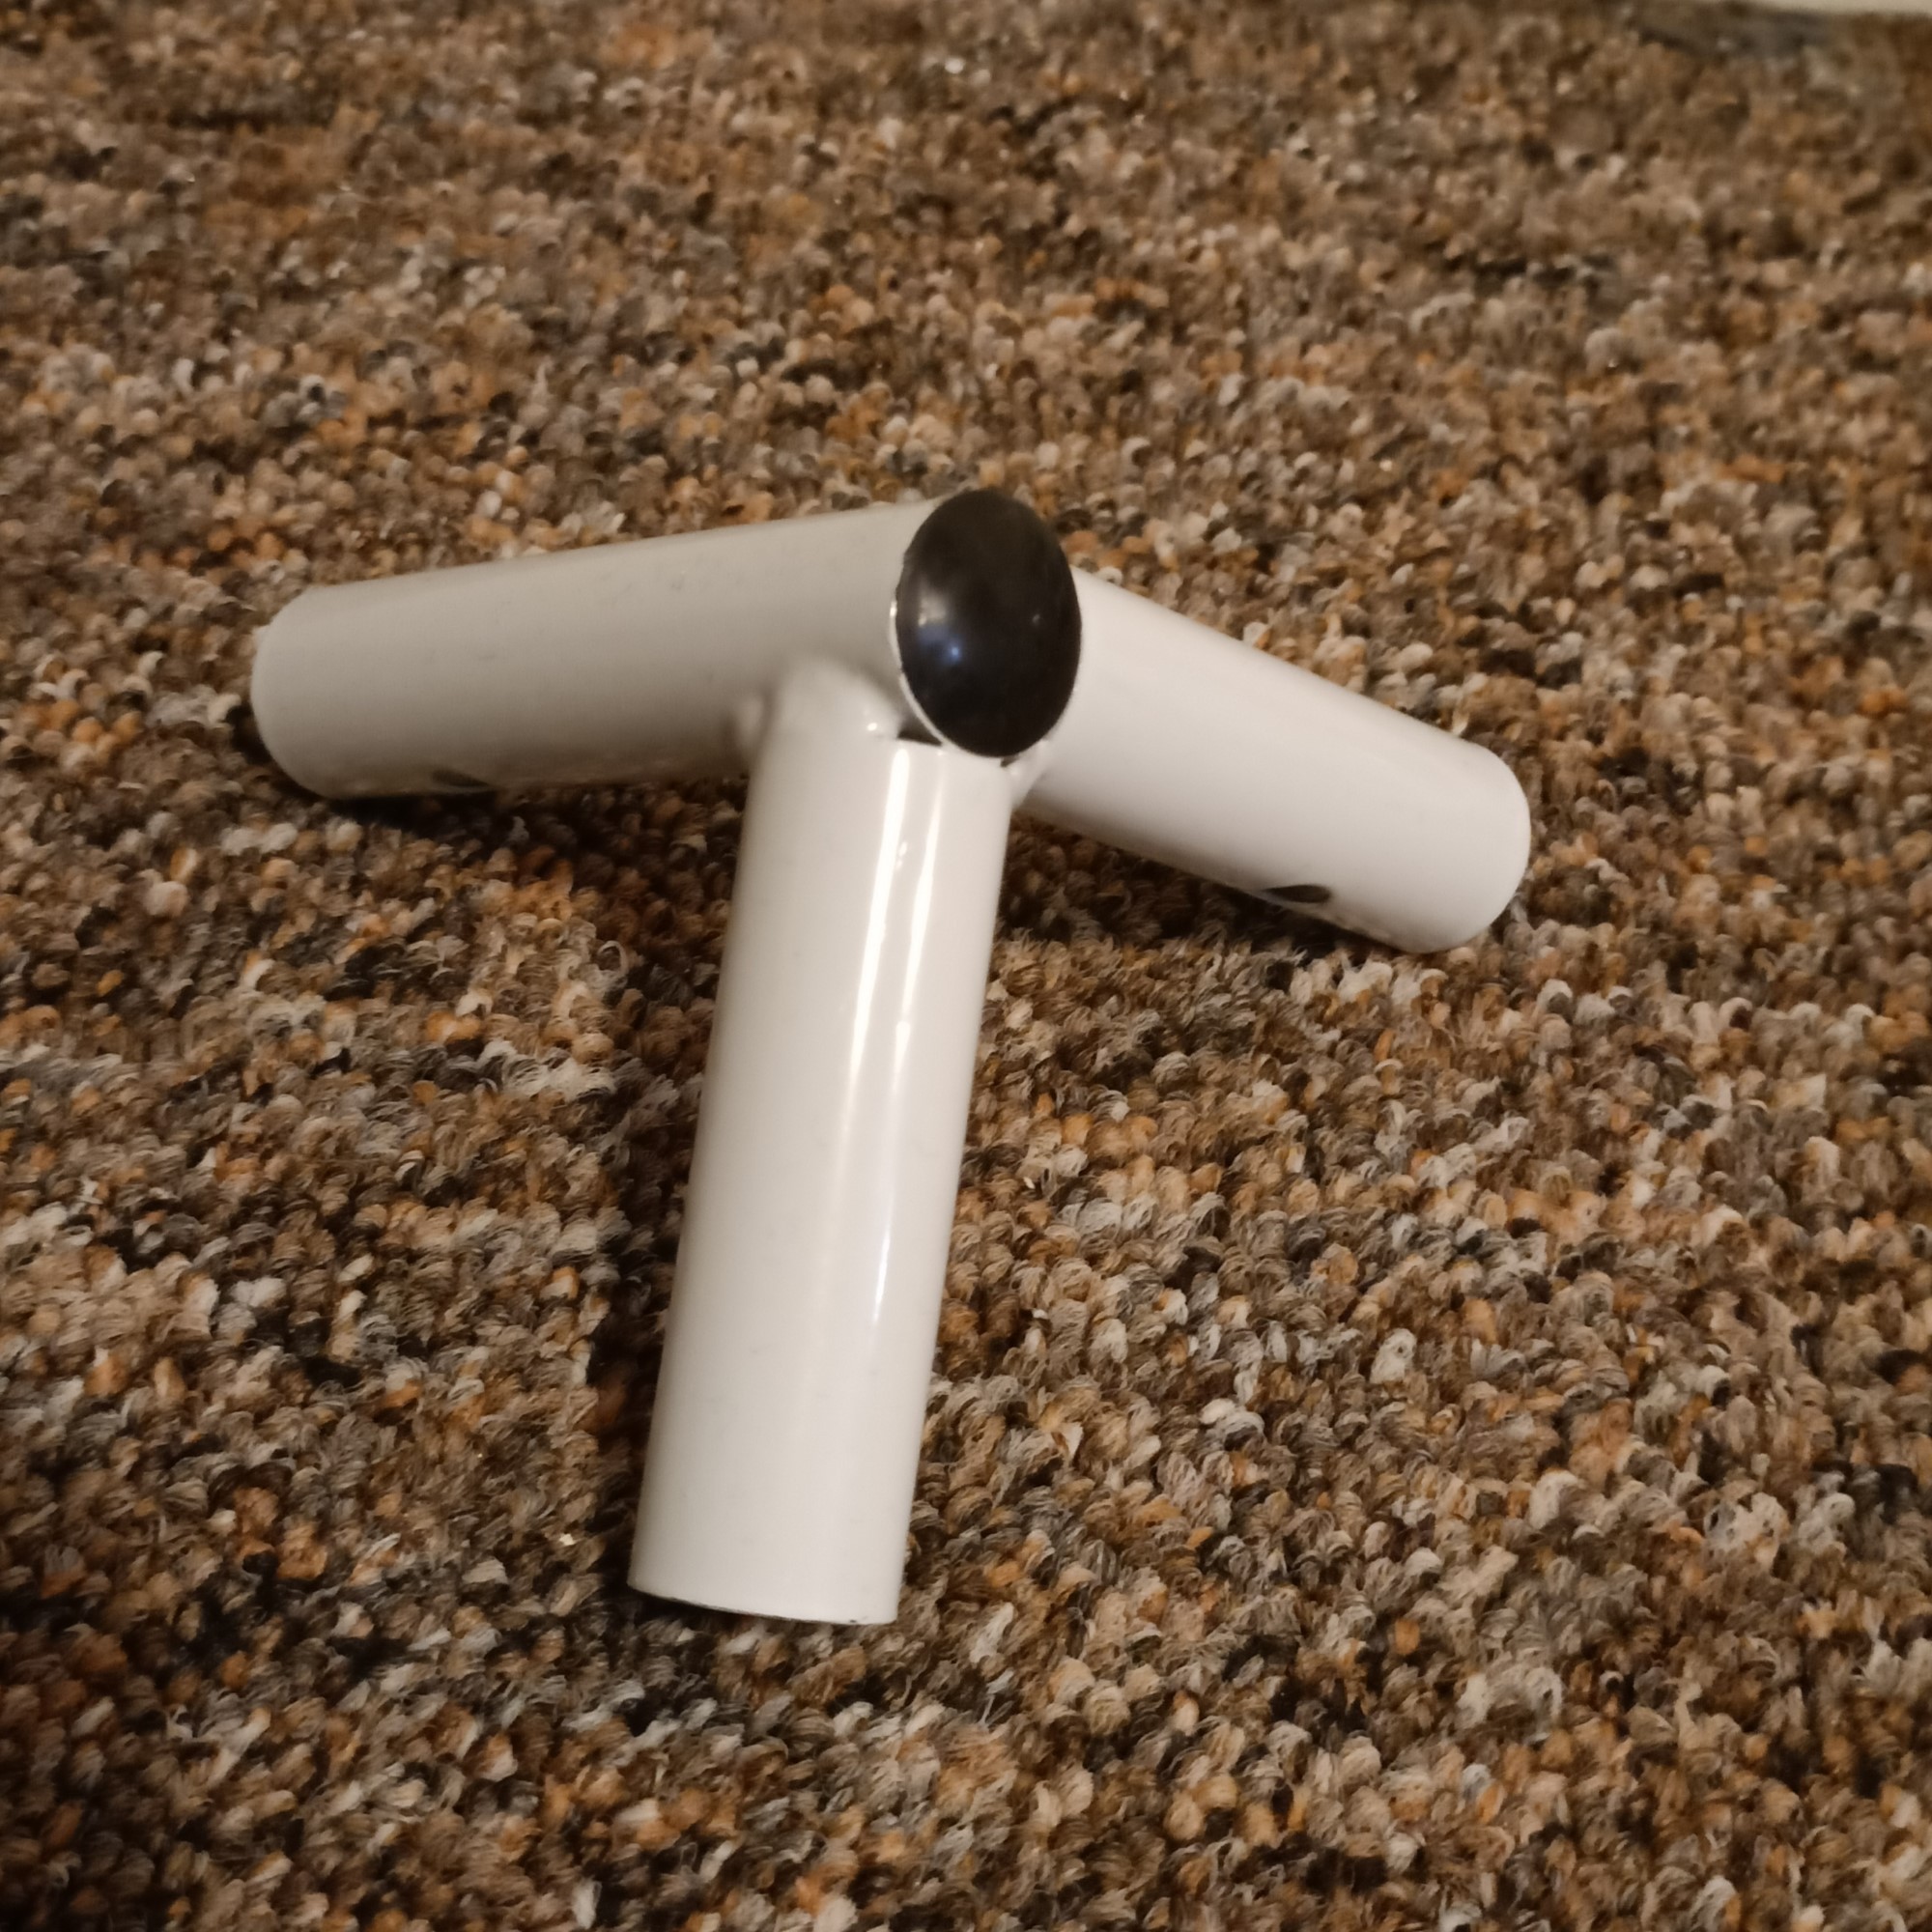
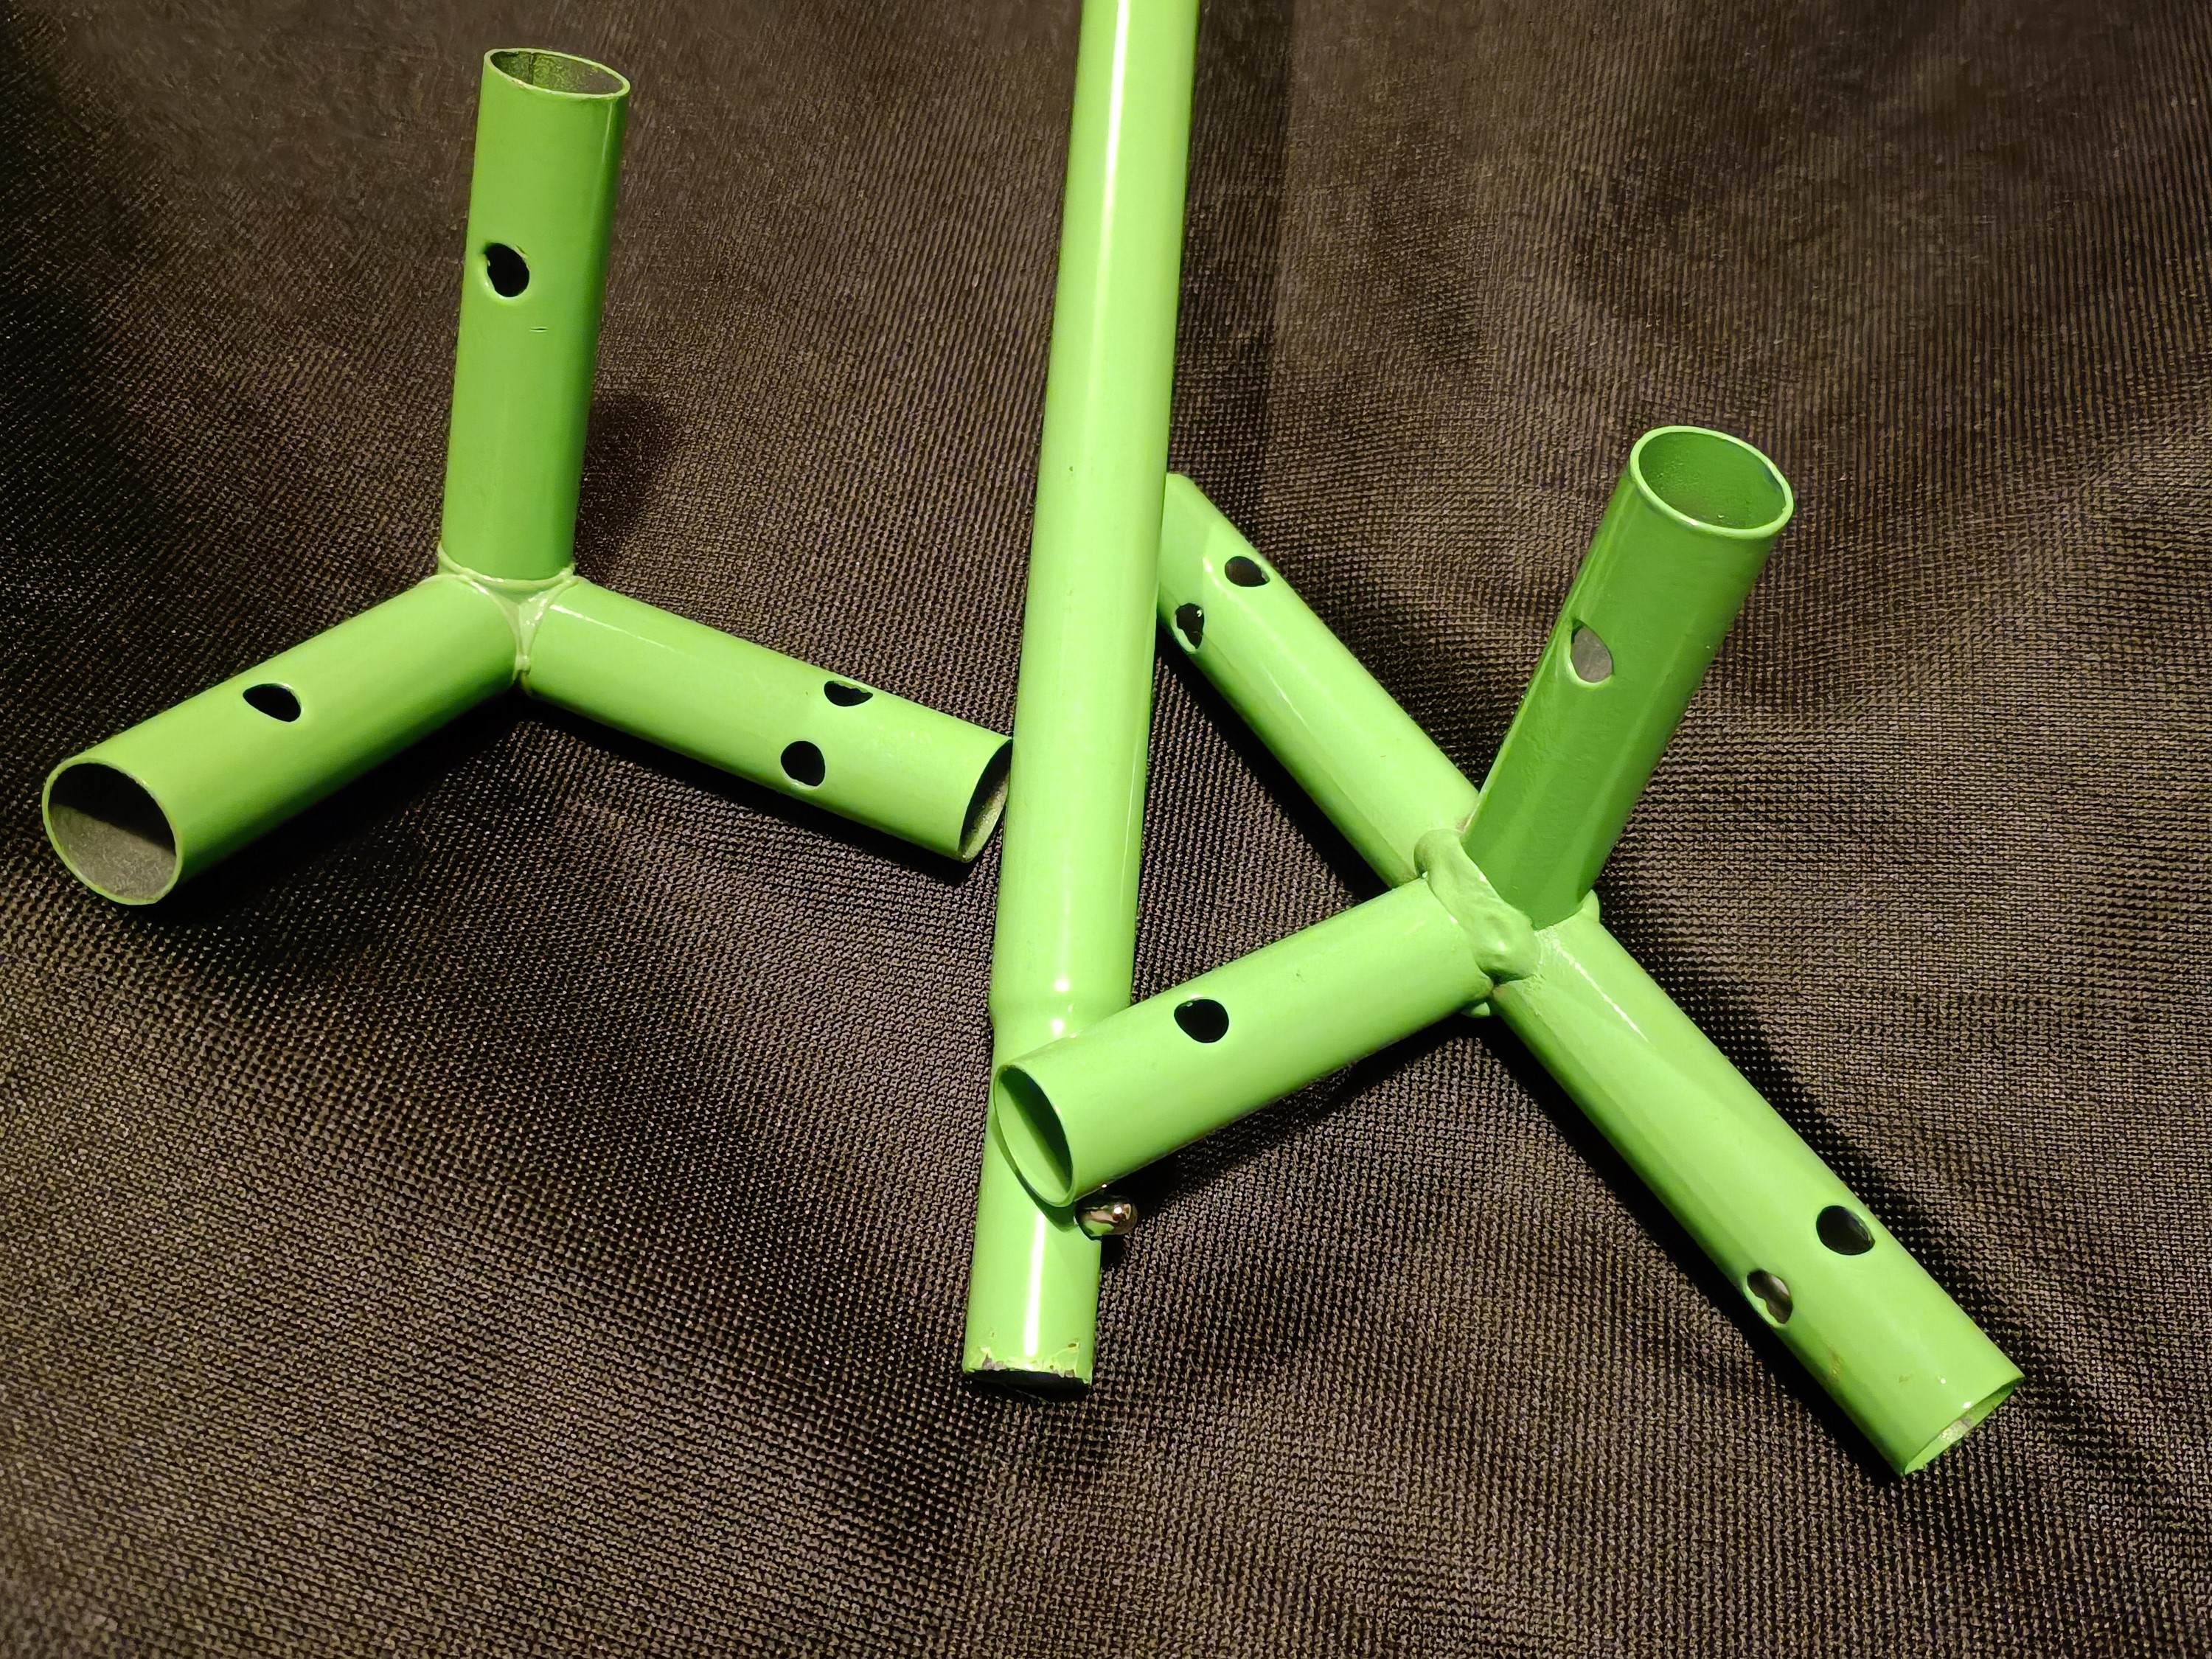
There's essentially 3 types of tube. Long tube with push buttons on each side, short tube with push butons on each side and short tube with a hole on one side and a push button on the other. The short tubes are verticals and the long tubes are horizontals.
I like how there are multiple holes on some so that any valid solution of putting this frame together is possibe.
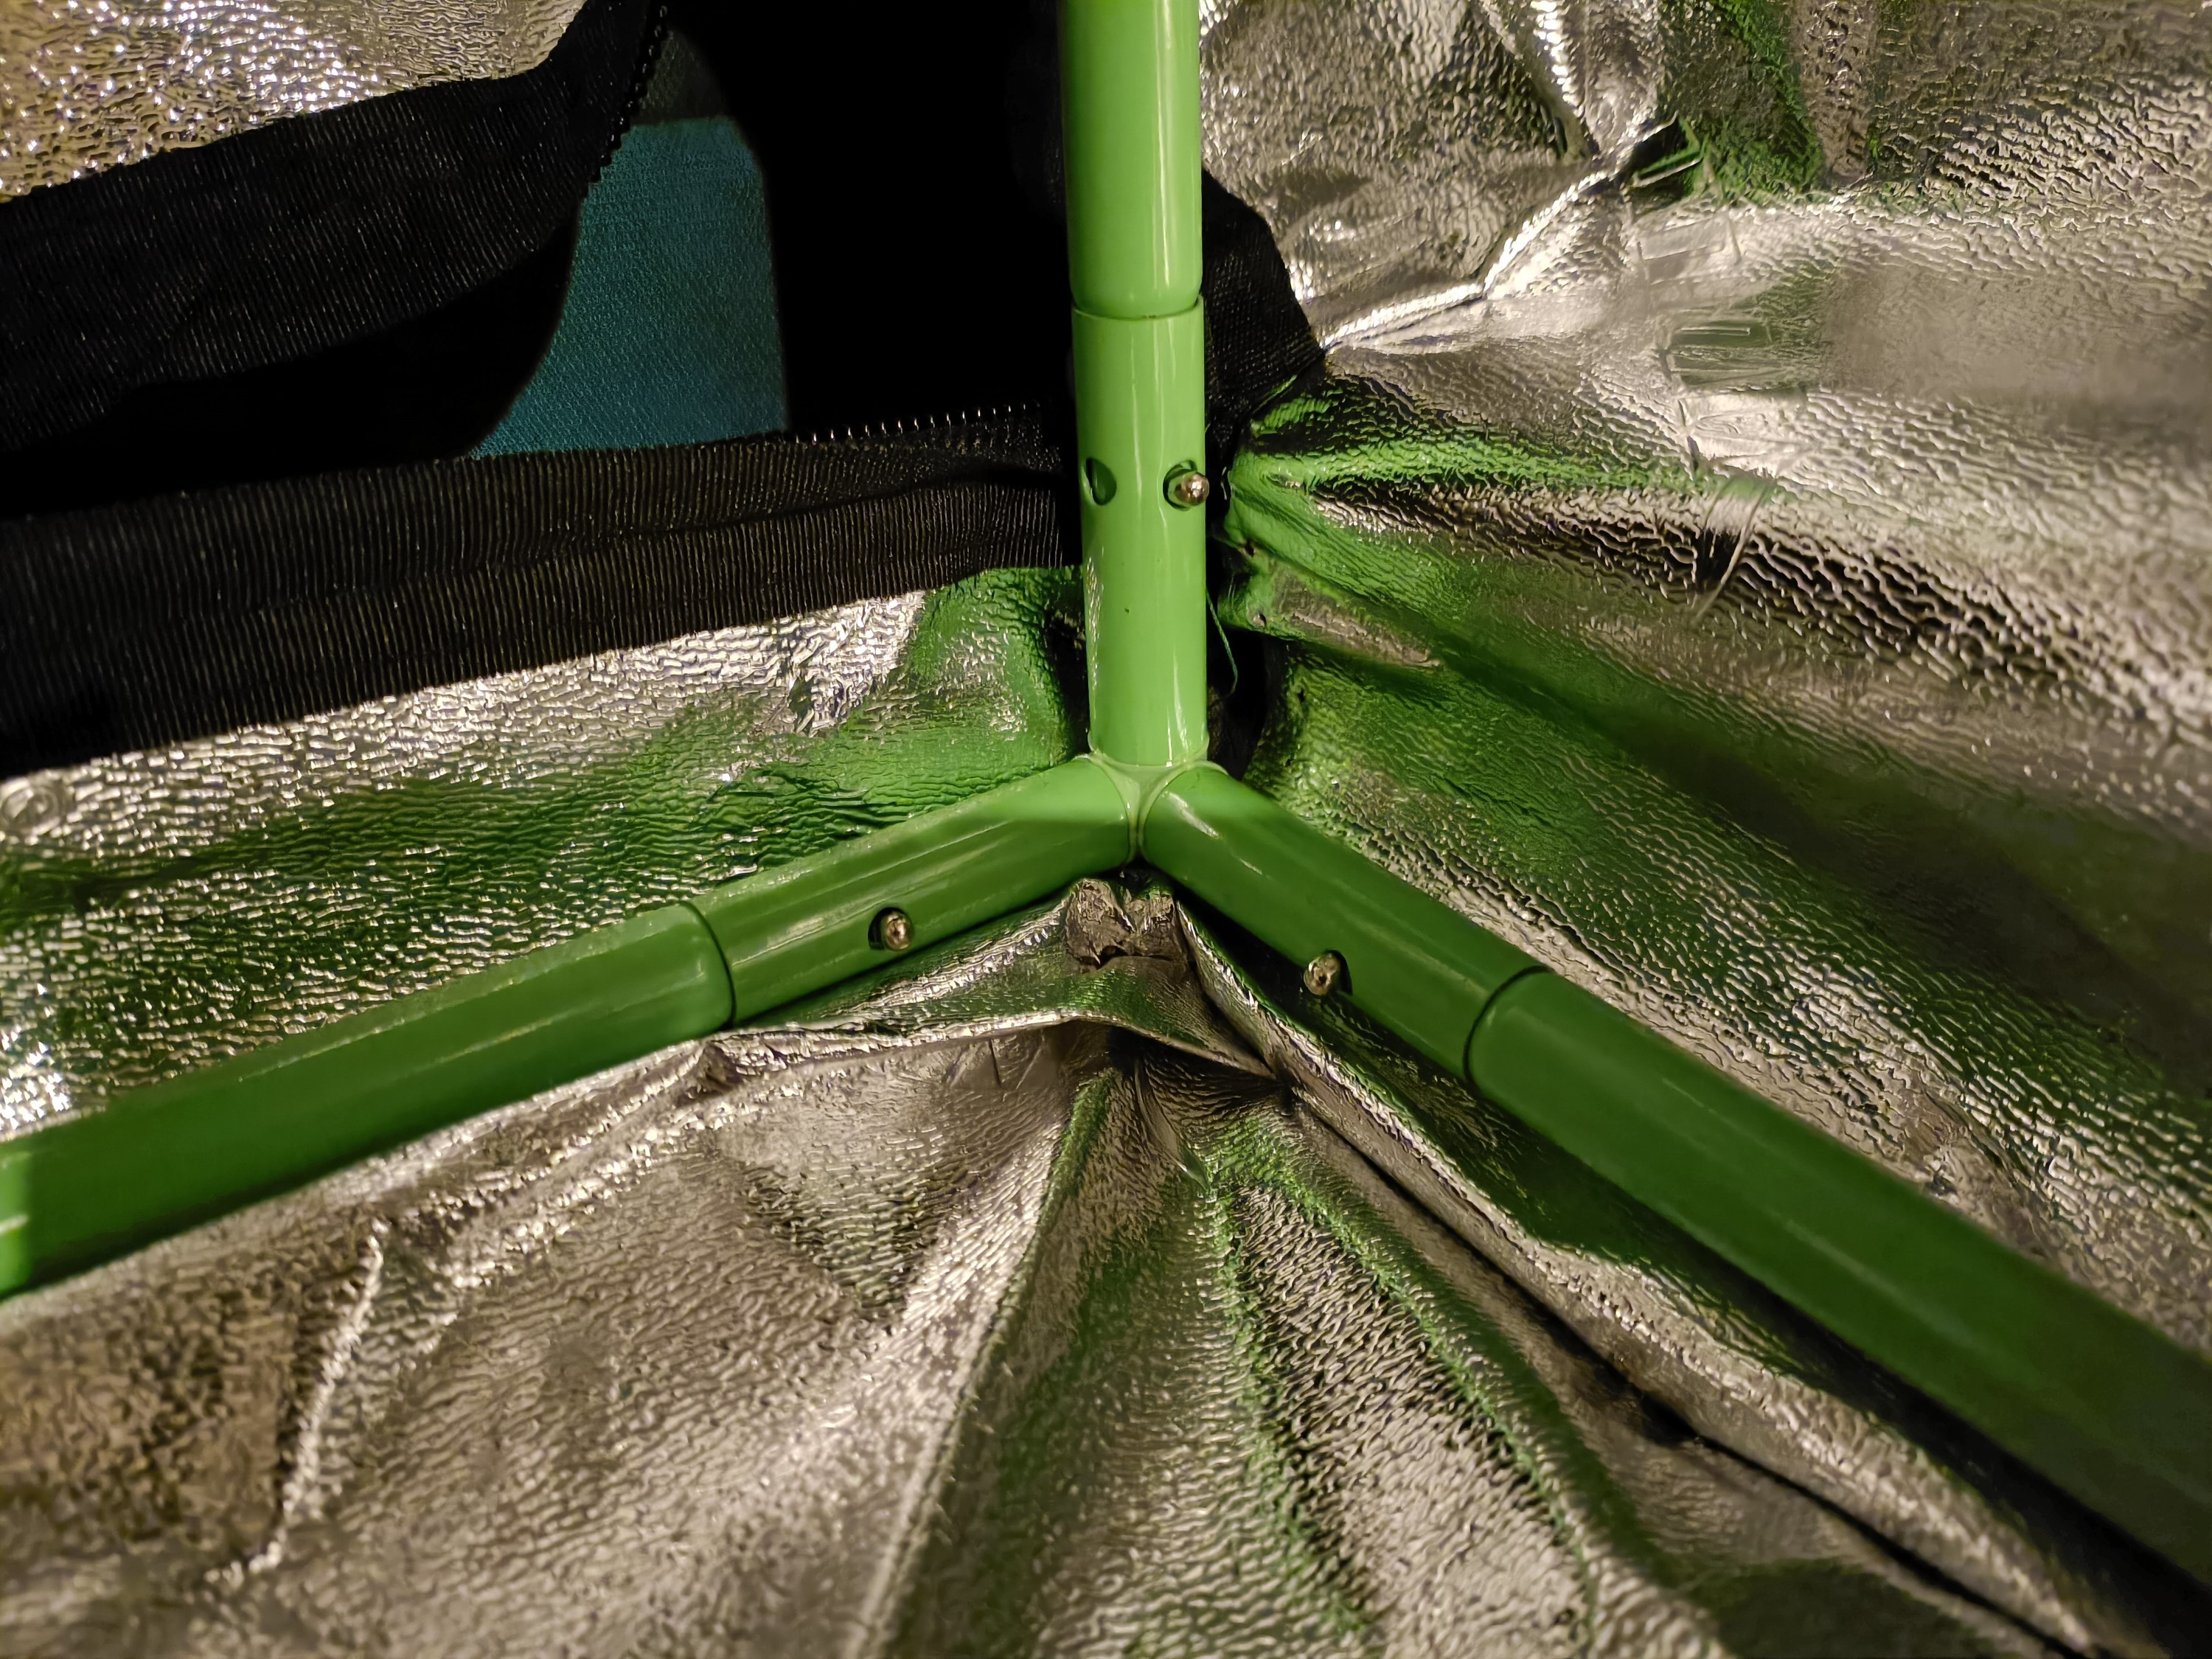
The green tube is a brighter shade of green than the fabric highlight. I should also mention that the more I looked at this green, the more I thought "Wow. This is really green!". Just... green green. Not LED green, not grass green, not milky green (though that would look great) but some stock standard, Fisher Price, kid-grade green.
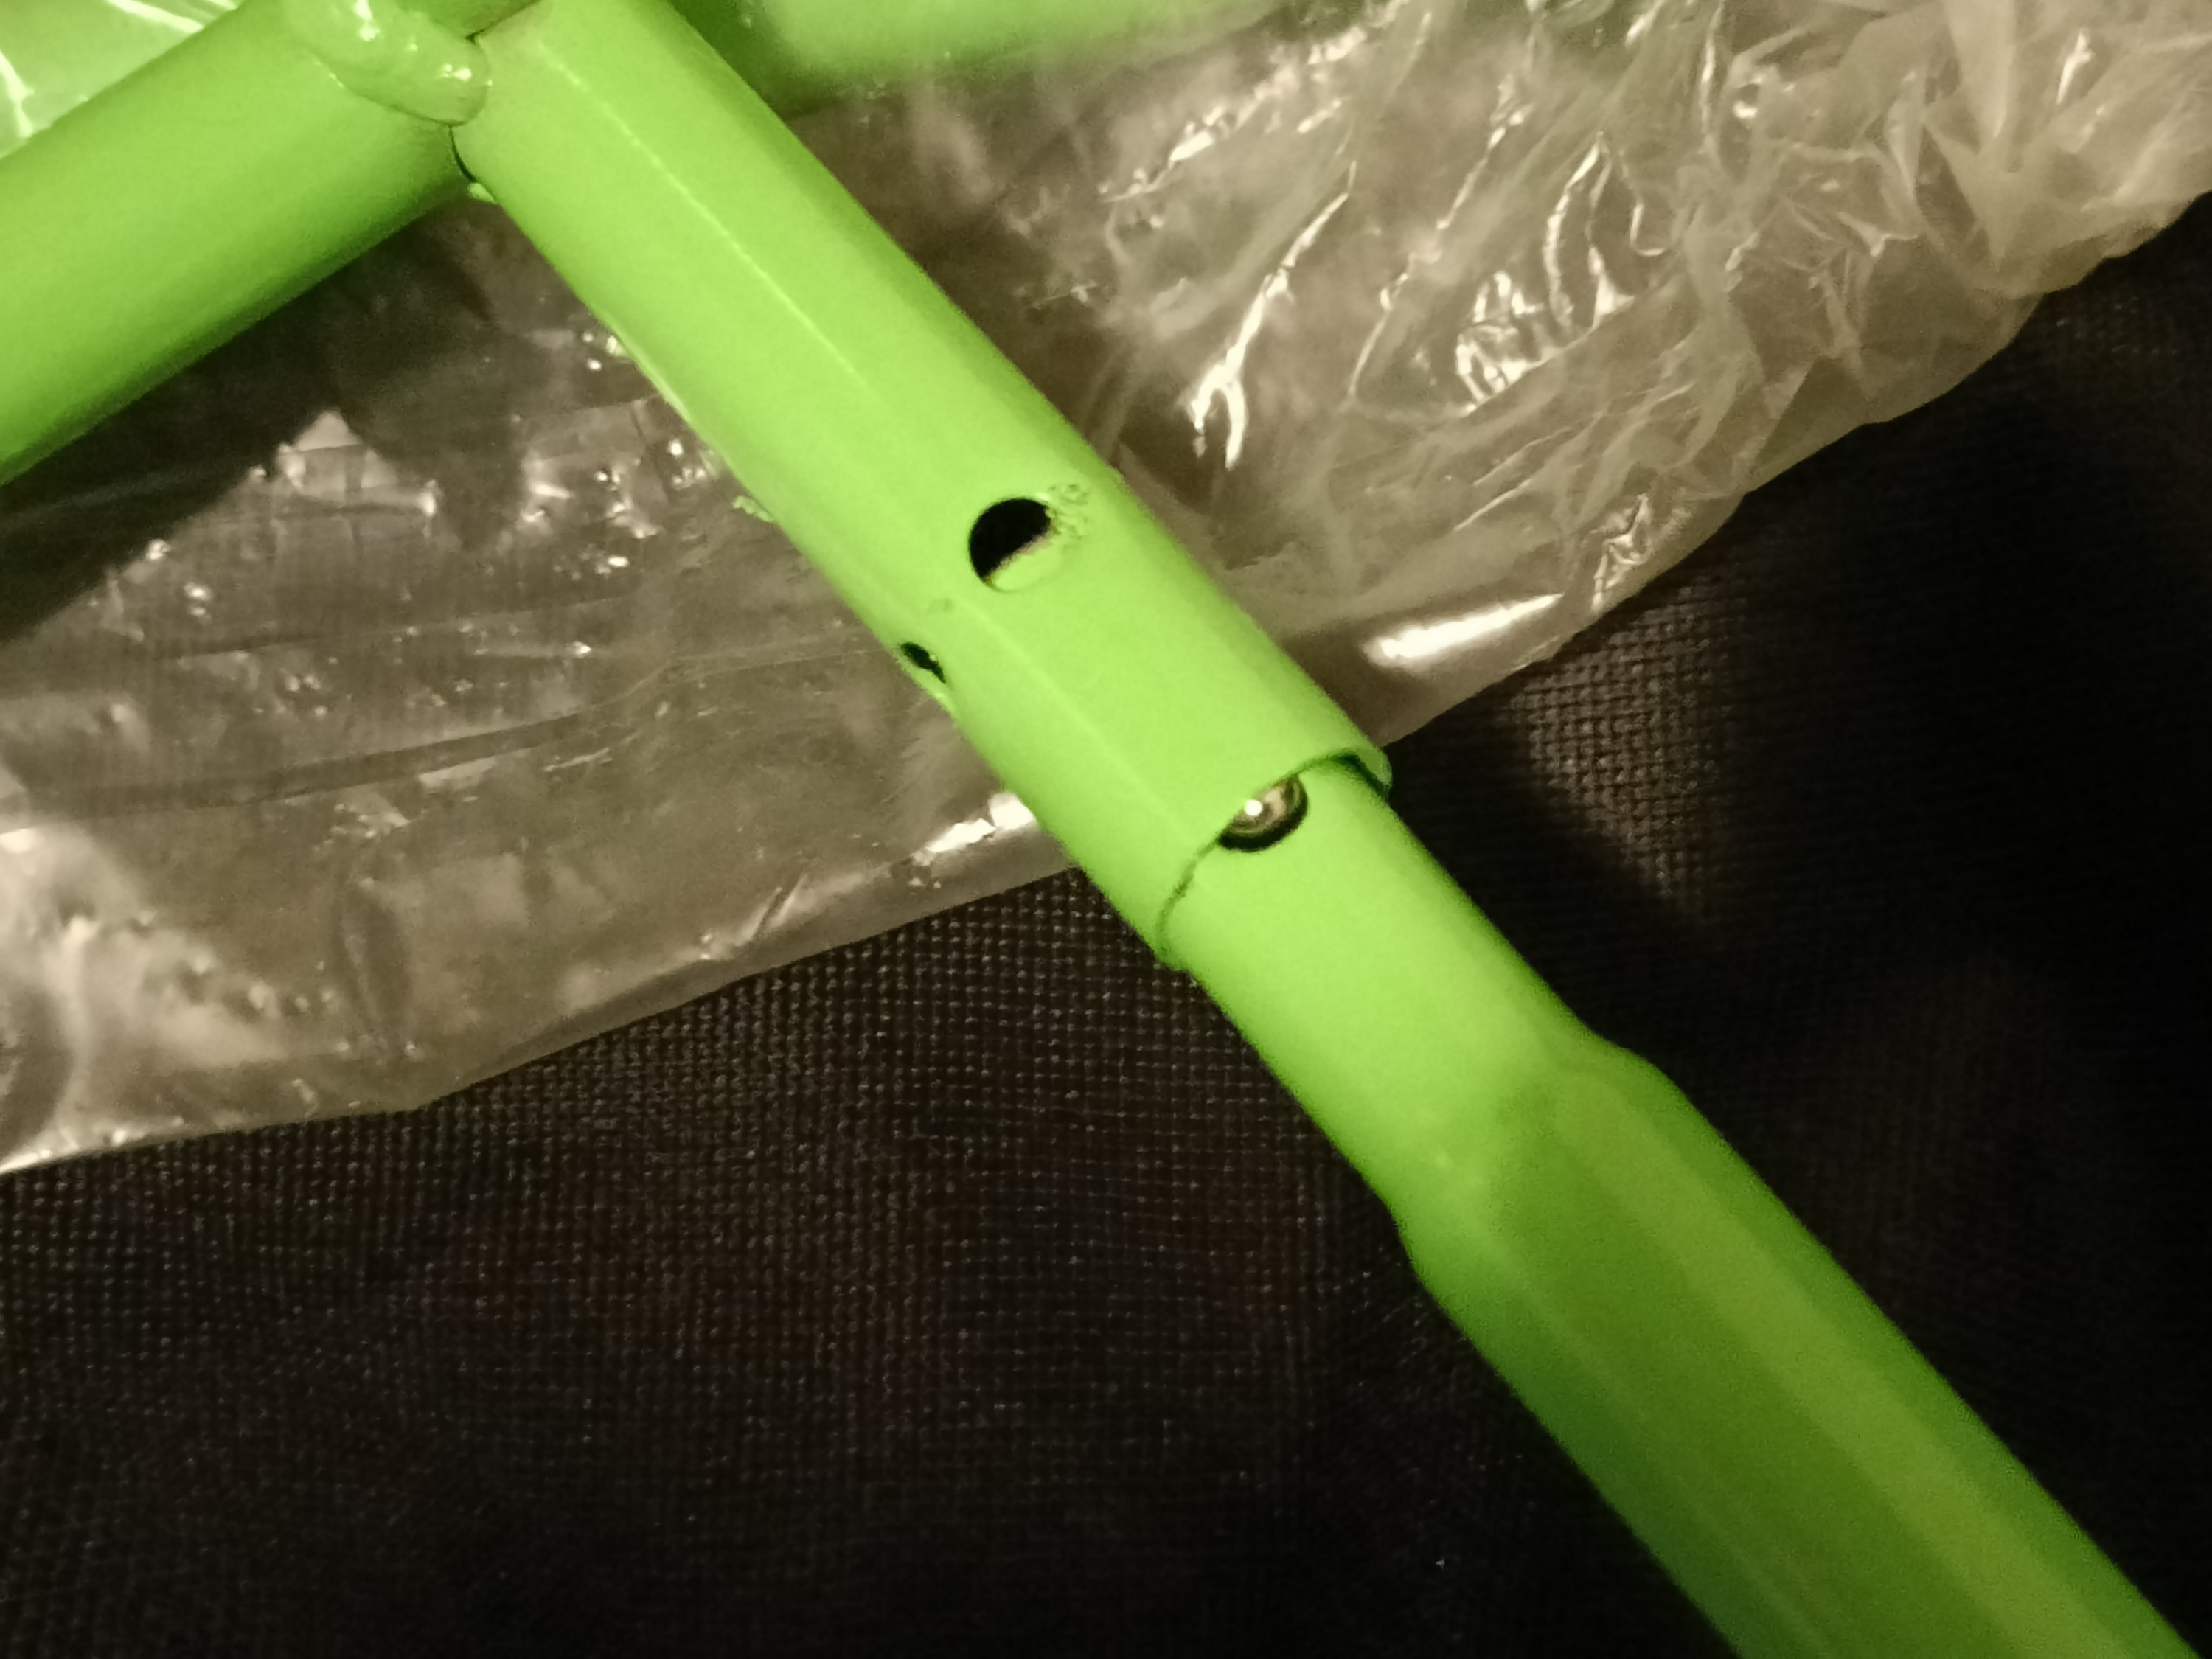
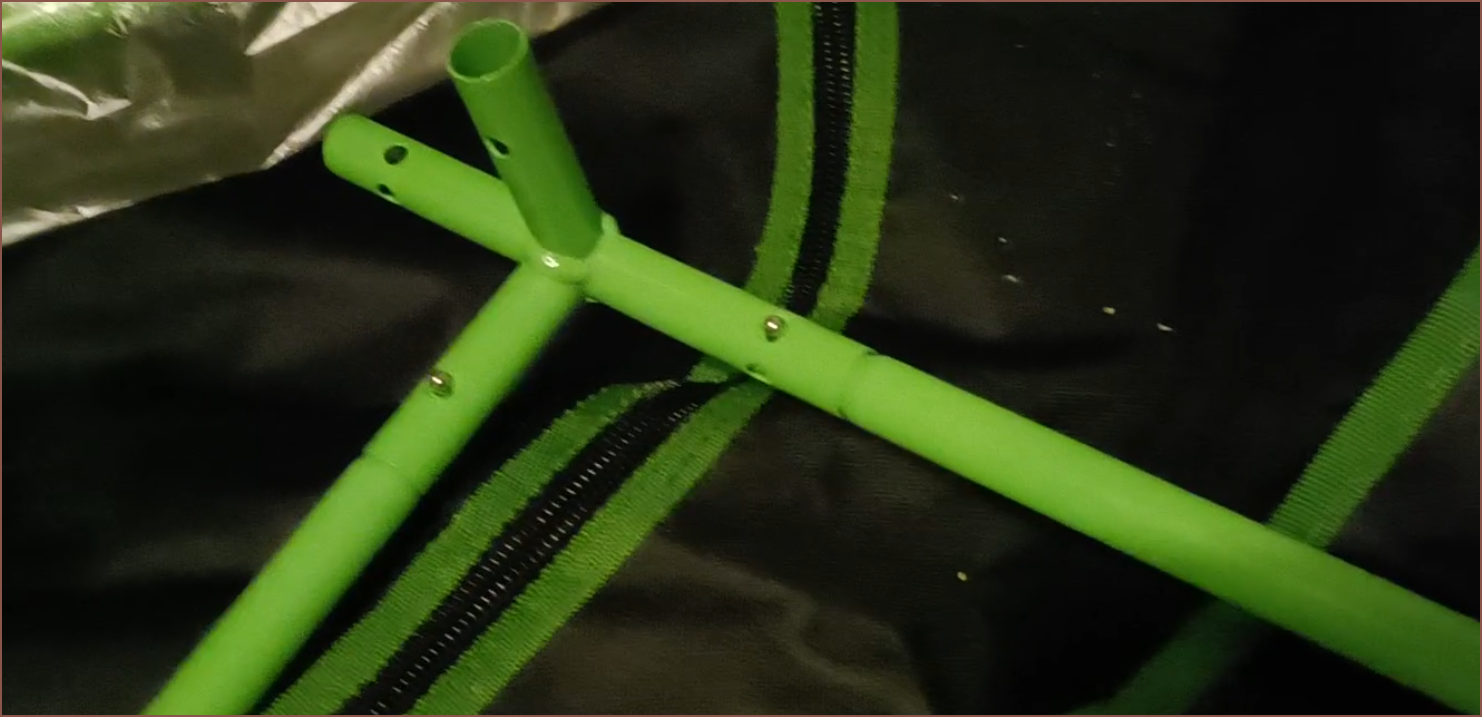
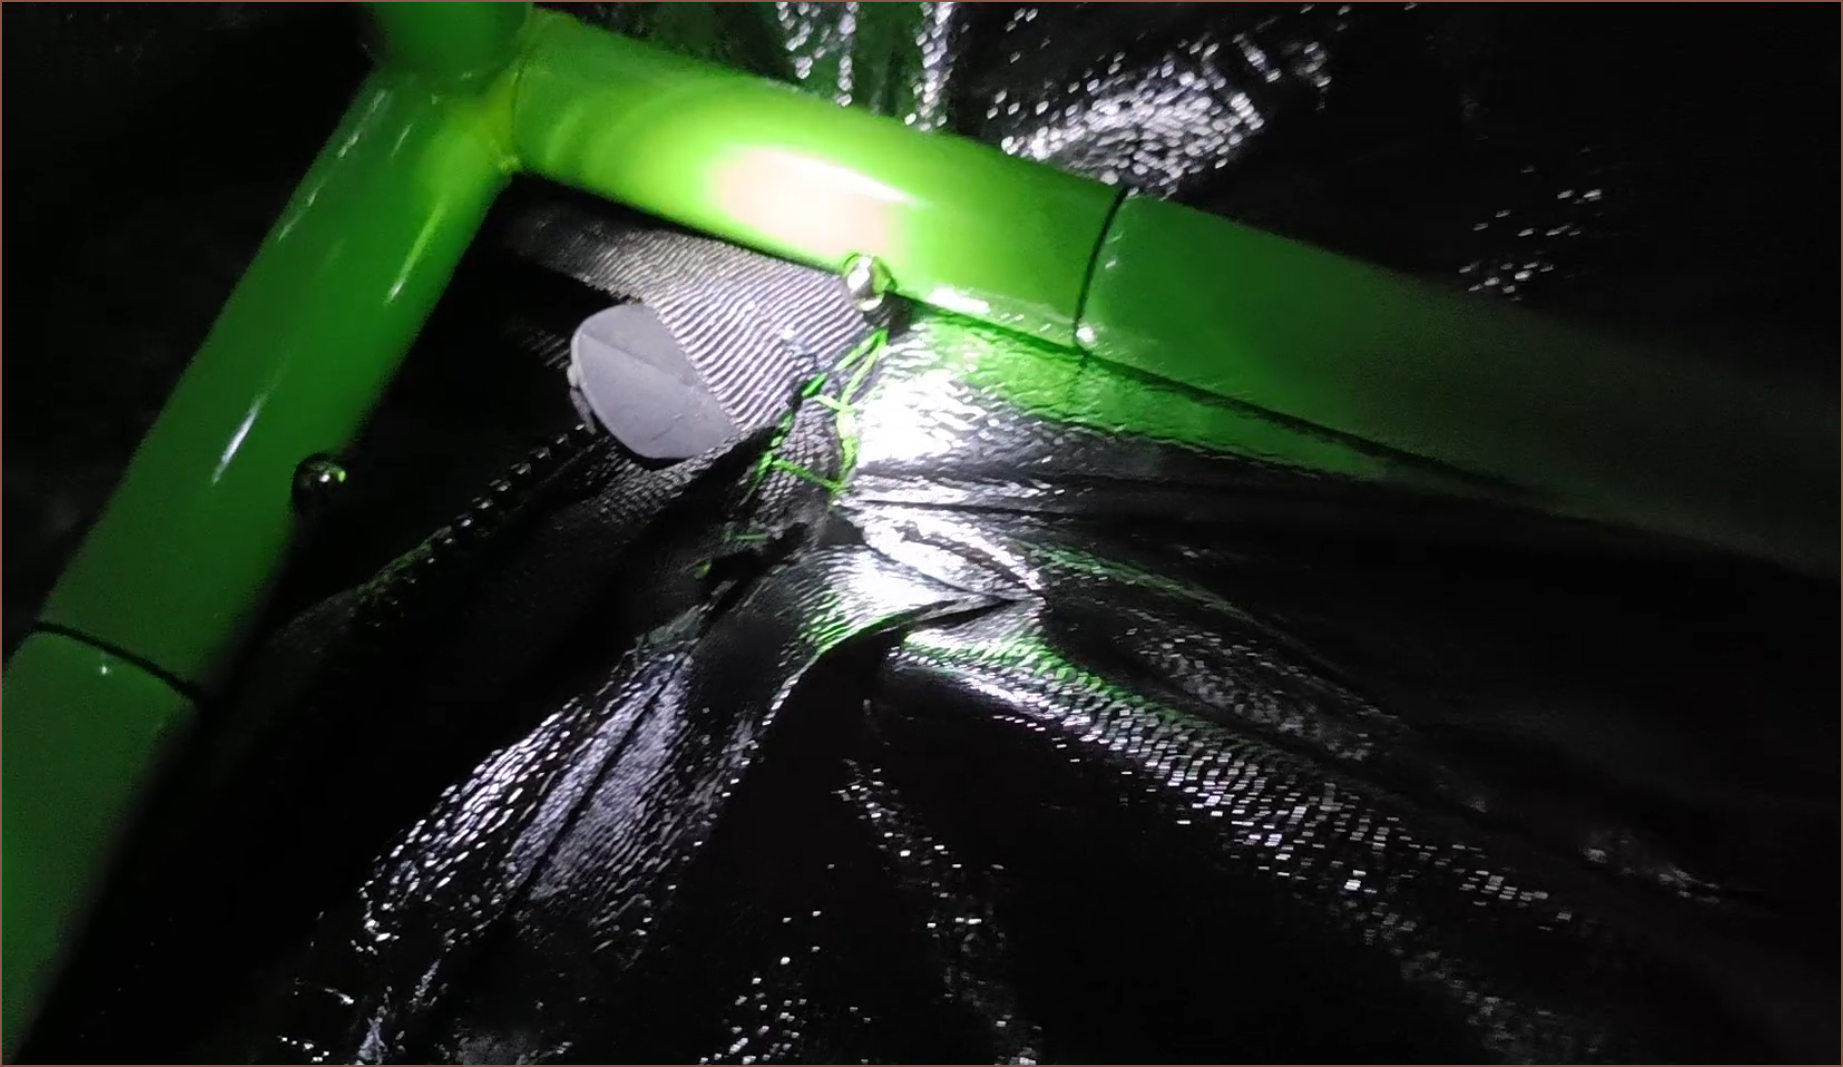
For some reason, the middle connectors were the only ones that were stubborn and took some effort to insert.Those little green dots is some of the paint chipping away trying to coerce the tube inside. None of the other connector types had this problem.My first idea was to start from the top and build downwards. Obviously that failed, so I quickly deconstructed my attempt and moved the quite heavy fabric so that I could start puting the base tubes in.Things were all going great until this back left corner attacked. I think there's been a sewing error because none of the other corners have such a fold and the back line, with reference to the green poles, is visibly not straight. Unfortunately, the threads holding the corner broke midway though trying (and failing to squeeze) this corner on.The scene is dark now because the top cover is blocking the overhead ceiling light.This is what it looks like when all the other 3 corners are in perfectly. As you can see, I'm miles off where this thing needs to be. If i put this corner in, the front left corner is miles out from where it needs to be.
So, probably after an hour, I moved on and assembled what I could. It did not help that the back top right corner also had a strange fold, just to a lesser extent. It just multiplied the issue in the back bottom left.
Anyway, I was able to assemble... half a tent. But don't worry because I can still get an idea of how this solution would work.
I checked the time and it had just been a minute over 3 hours to get to this point. It's now midnight. The hope was to see if I could dissasemble at this time (since this is when I'd likely stop working in the tent anyway), but since I just did 3 hours of manual work straight, I didn't think I'd get valid results (and I didn't want to break anything, including myself) so I slept and took it down in the morning.
Sadly, that took another 40 minutes.
Conclusions to draw from this experience
Right now the solution is about to fail.
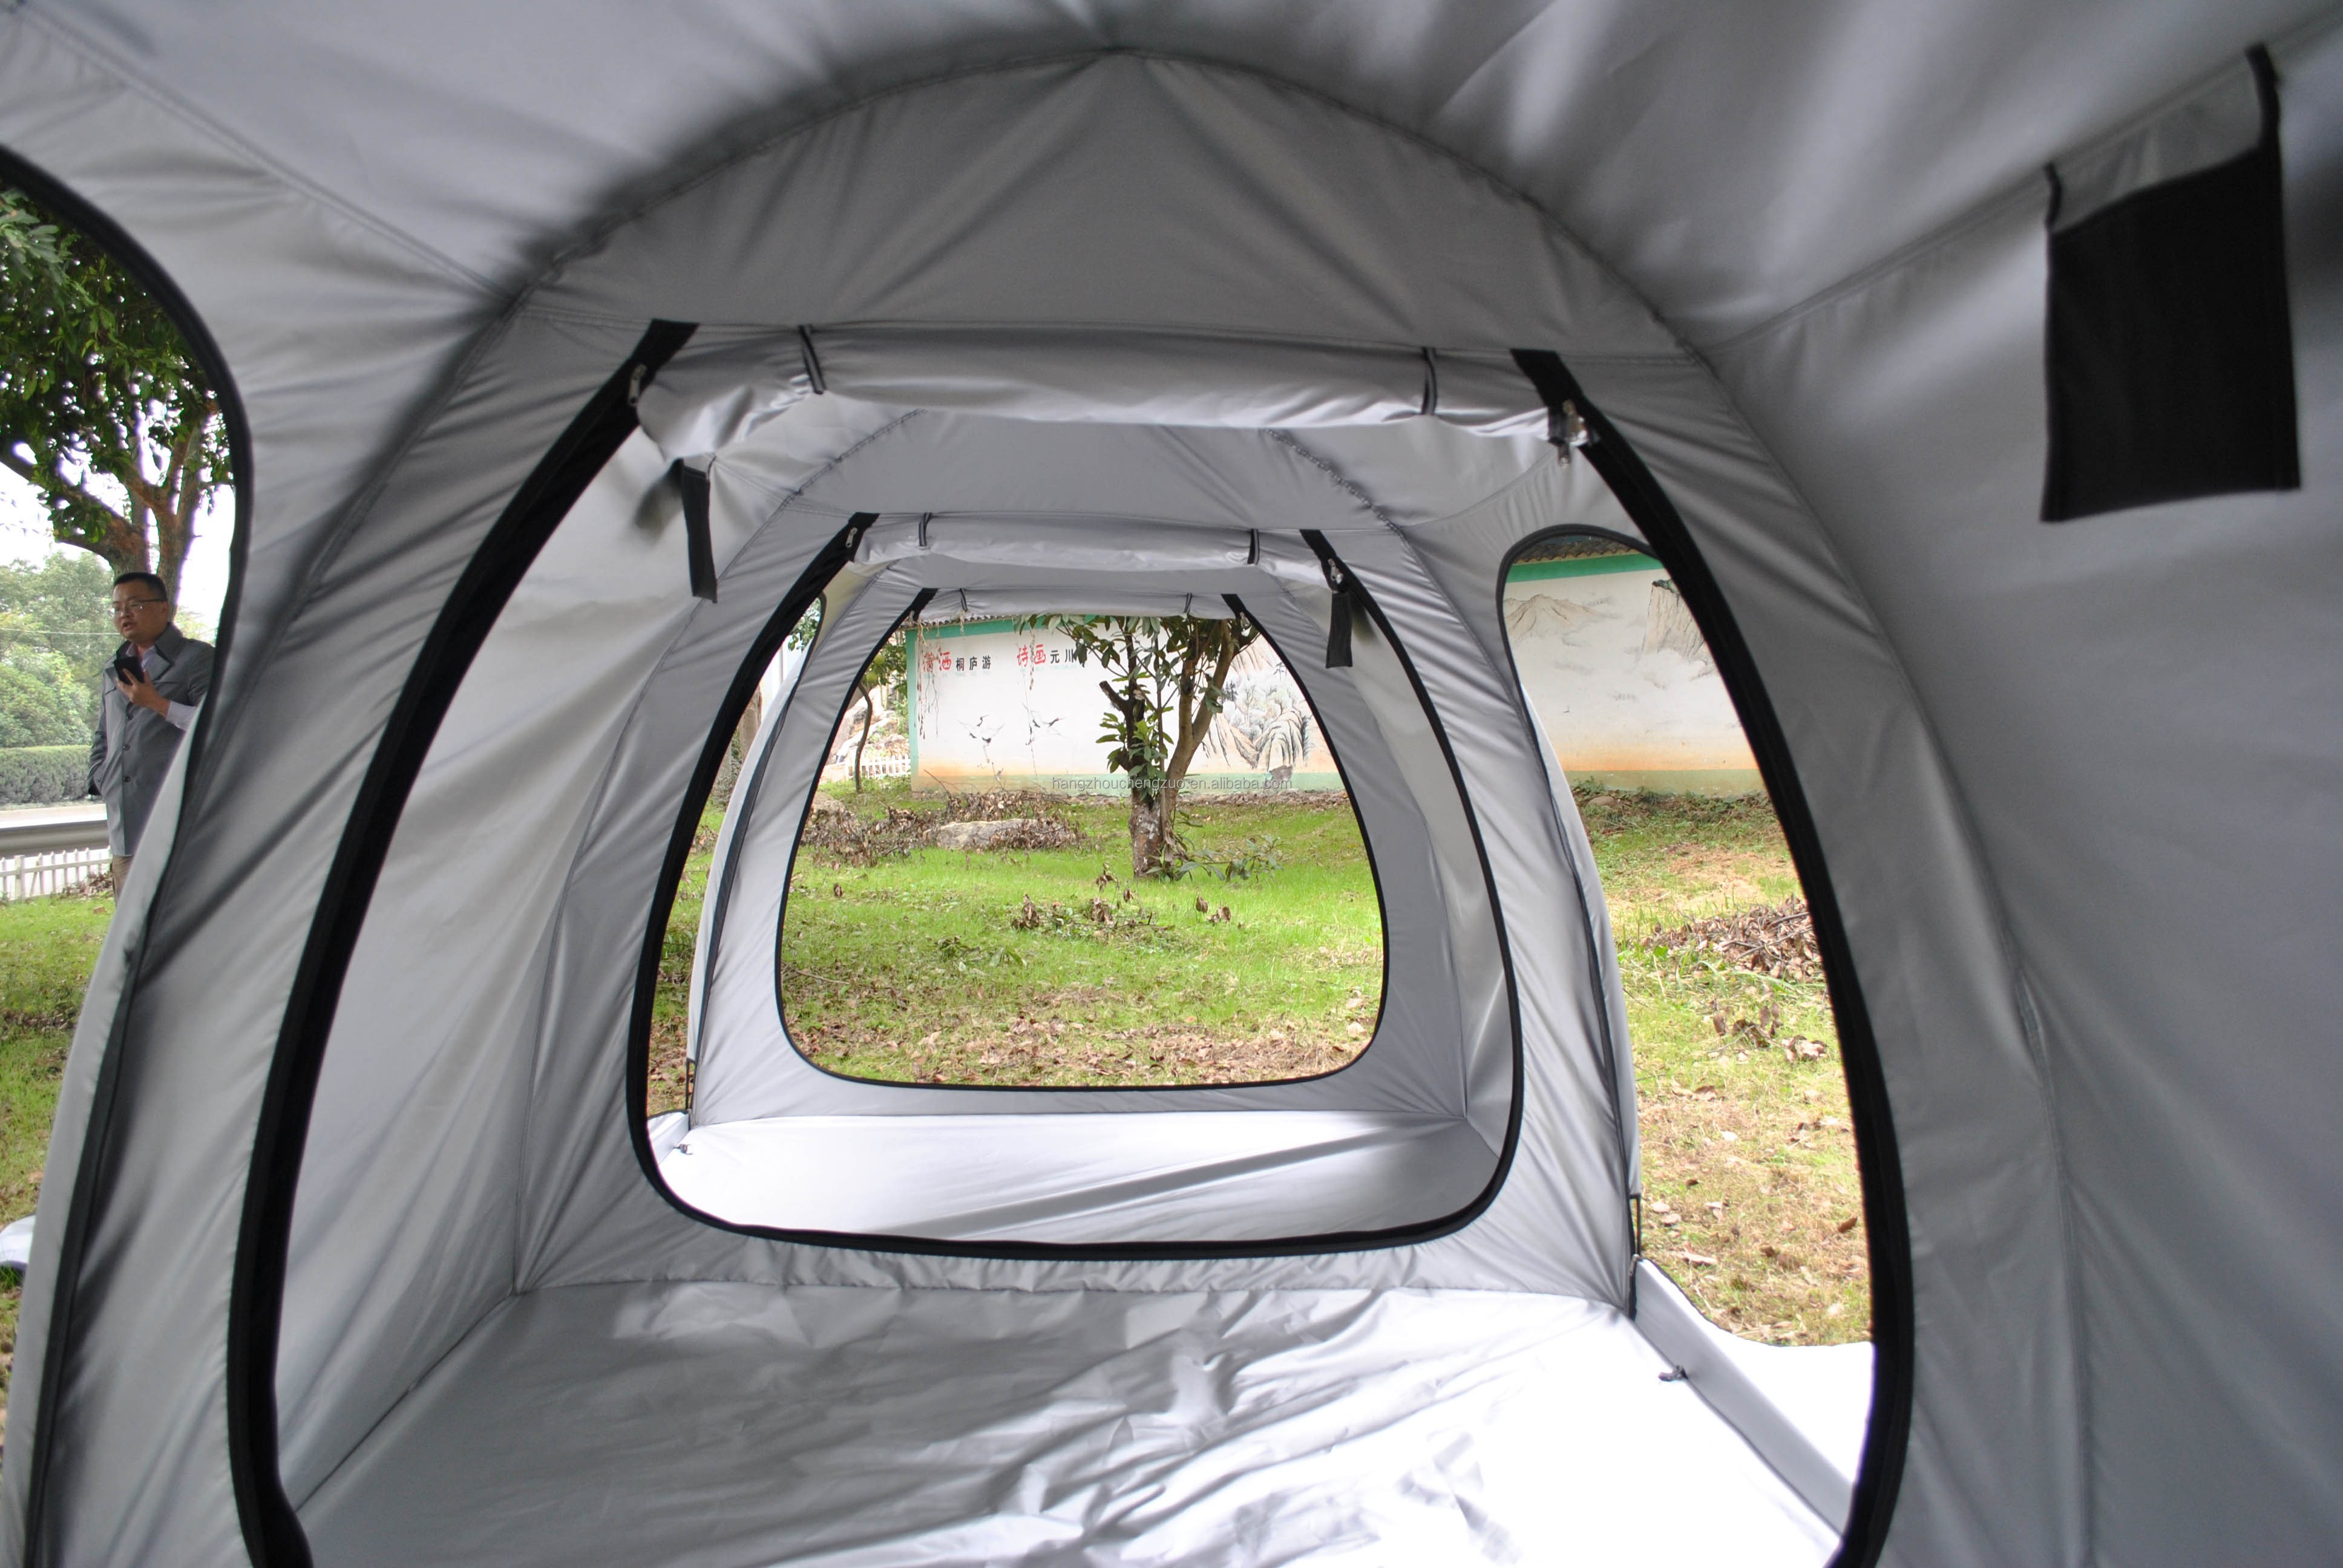
The actual tent experience is great because the walls are reflective and the space feels spacious because the rear wall is a good distance away and I still have enough room behind me to stretch my arms.
The issue is the transit time. I'm looking at the act of moving furniture and building the tent the same way as getting a bike out and cycling to work, which is decent if it's like 15 - 20 minutes, especially since it's integrating a bit of a "gym of life" workout to get my body moving and energised.
While moving all the furniture out of the way, building the tent, installing the ventialtion, running the power cables (and ethernet, now that I think about it since WiFi probably isn't making its way though a metal-lined tent), placing a table+chair in there and then doing all that in reverse feeeels like the merge between a Lego build timelapse and the title screen for Build A Lot 2, the time to do all that needs to come way down or the solution fails.
This is what I'm mostly concerned about with all my projects. In one way or another, the issue usually comes back don to time why the solution fails. That's the reason why many of my active projects are trying to make things less time-expensive and my 3D printer brand is called "SecondSavr".
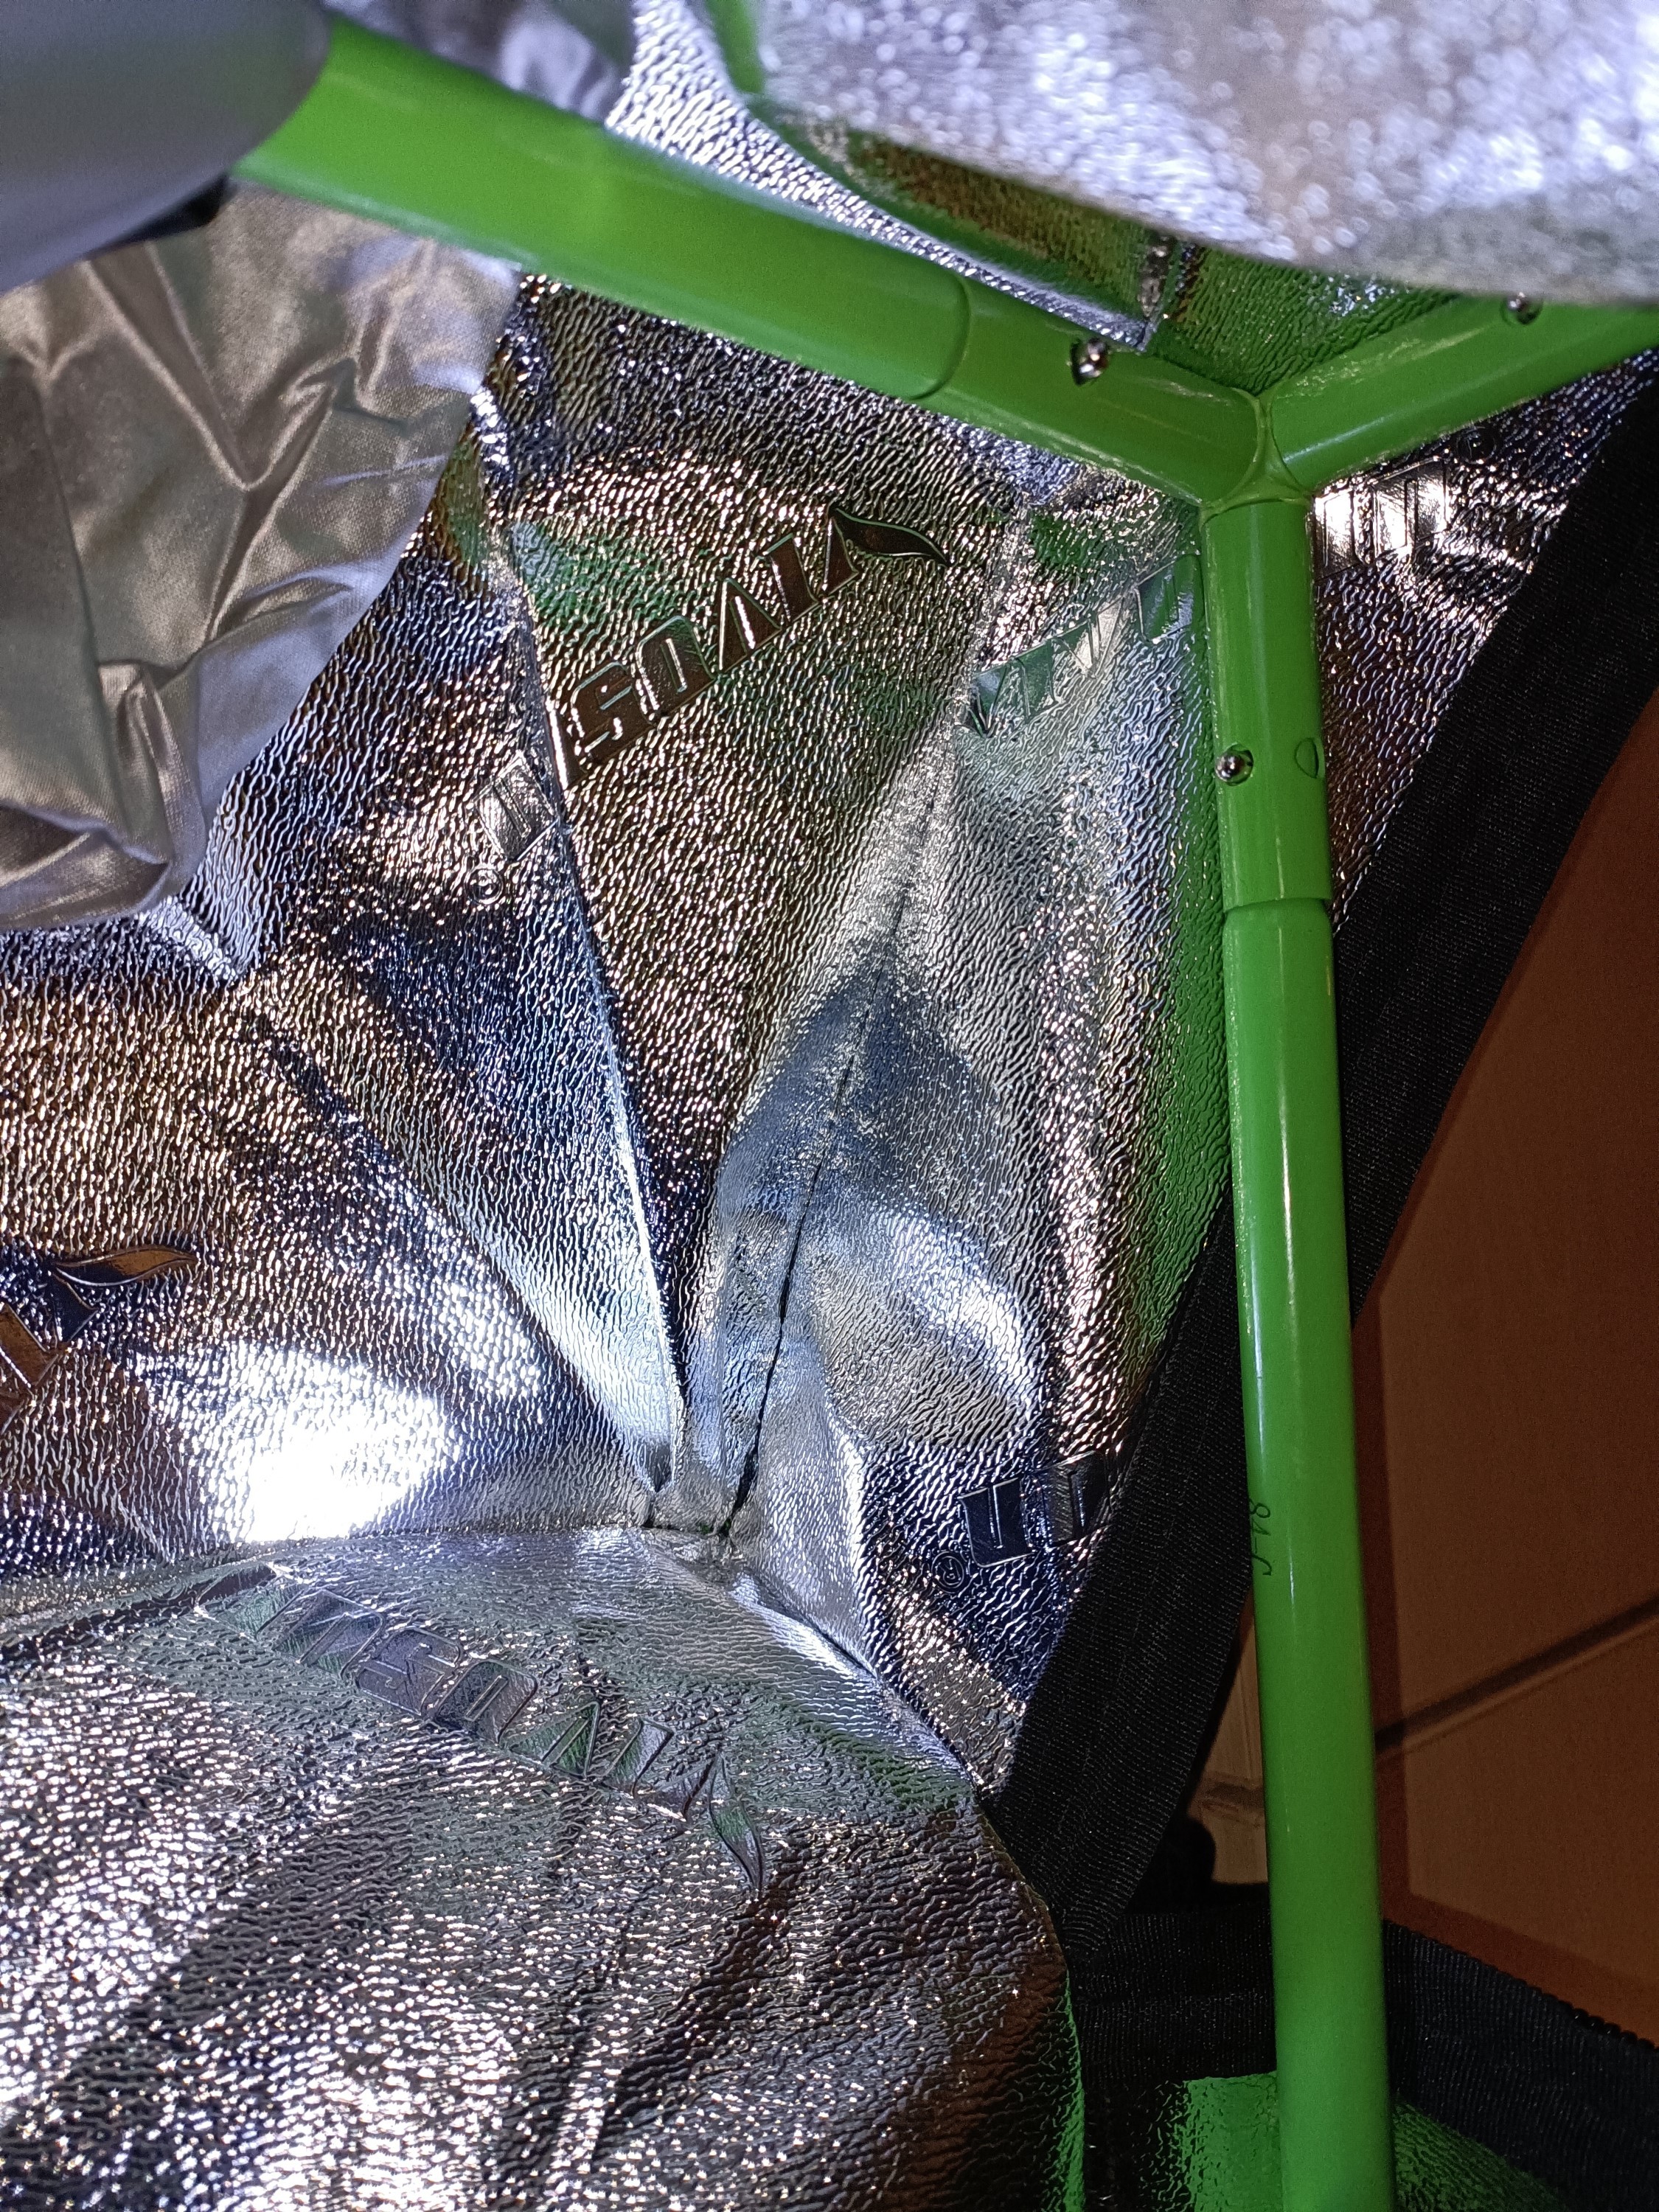
Hopefully, this is just an optimisation problem because 2.4x1.2x2m is both quite nice inside and conviniently the absolute maximum size my room can accomodate, particularly in height (due to the lighting fixture). The ventilation ports and ceiling mounting arrangements are also things not found in other tents.
However, as I hypothesised, manipulting the fabric slows down this entire operation.
16 March
Long story short...
I managed to pack up the tent back in the box, and used copious amounts of clear tape I just bought after asking the Post Office about this situation (to which they said to contact Royal Mail)
I got clear tape because some other grow tent listing said that they didn't accept returns with brown tape. Since a roll of tape lasts a while, and my brown tape was almost empty anyways, I decided to stay on the safe lane in the event that any future eBay sellers have the same return policy requirement.
I messaged the seller saying I'm returning the tent because of the fold issue. The seller offers £10 refrund + new tent sent out and I decline.
I get a return QR code, but it's from Royal Mail and I'm thinking "Can Royal Mail deliver a 1.3m long parcel? Even as a return?". I go onto their website to book a collection and the largest is either 66cm for a "medium parcel" or 90cm for a "tube". I then assume that the seller has used some automated ebay return feature and the system hasn't picked up on the issue, so I message the seller about it. They say to contact RM so I do.
I get an email back from RM saying that they indeed cannot mail the parcel, and I message the seller and ebay live chat.
Unlike the seller, which is like 1 response a day, eBay live chat was like travelling in hyperspace and the guy knew there was an issue as soon as I said "but the parcel is 1.3m...". I suggested Evri as a solution, since that was the courier that got the parcel here in the first place, but he said that I'd get a refund if the seller didn't provide a new label in 6 days.
In the meantime of those 6 days, I looked to see what my delivery options are and, as it turns out, Evri sends 1.2m parcels at max 15kg.
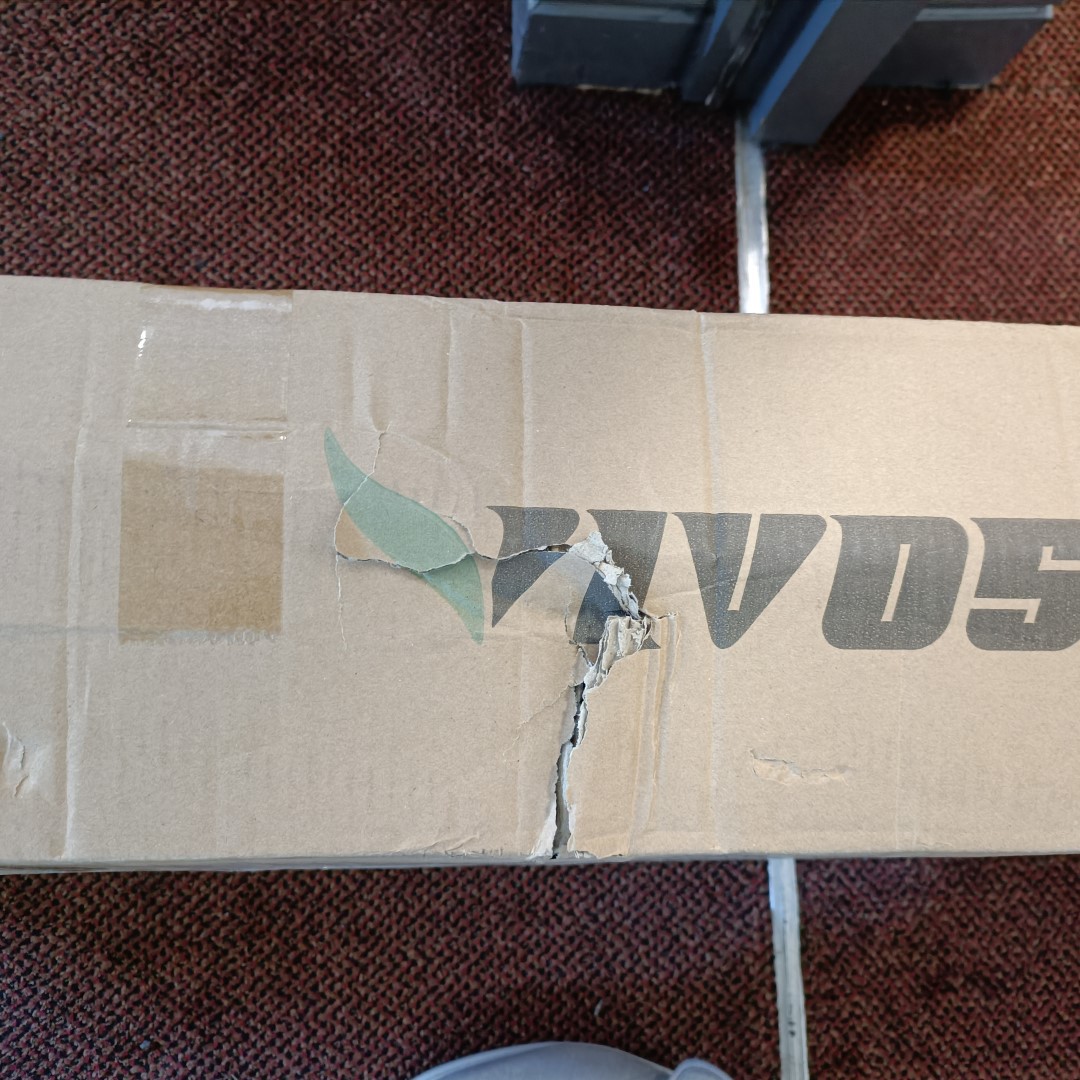
One probably would get away with a 1.27m parcel, but I don't think 5 entire KG over the limit is going to fly. Maybe that's the reason why the box was kind-of beaten up in the first place.
Well I now have a full refund and a 20KG box with a faulty tent inside. I guess I could sell it as "spares or repair" but I probably couldn't get a courier to deliver.
Ever since DIY Perks started projects on creating artificial daylight, I've always wanted to attempt it. The thing is that I didn't want to drill (more) holes into the ceiling or apply adhesive that could be difficult to remove if needed.
I've mostly been interested in the laptop one since the panels are small and, likely without suprise if you read the explanation behind the #T^2 TyMist [gd0138] project, I find overcast sky lighting relaxing and improves my focus.
Due to the hanging infrastructure in rgow tents, it means that I could mount the panels with ease. I also think it's a requirement to make the office feel more spacious / disconnected / time-invariant. Now that it's 2023, I also wanted to see if there were any new options that had been developed.
The reason why LCDs are used is because they include plastic layers under the LCD array which causes light rays to be more collimated, resulting in light paths similar to that of an overcast sky. It turns out Alibaba now has 2 or 3 manufactuers of artificial skylights, but interestingly, none of them are on AliExpress.
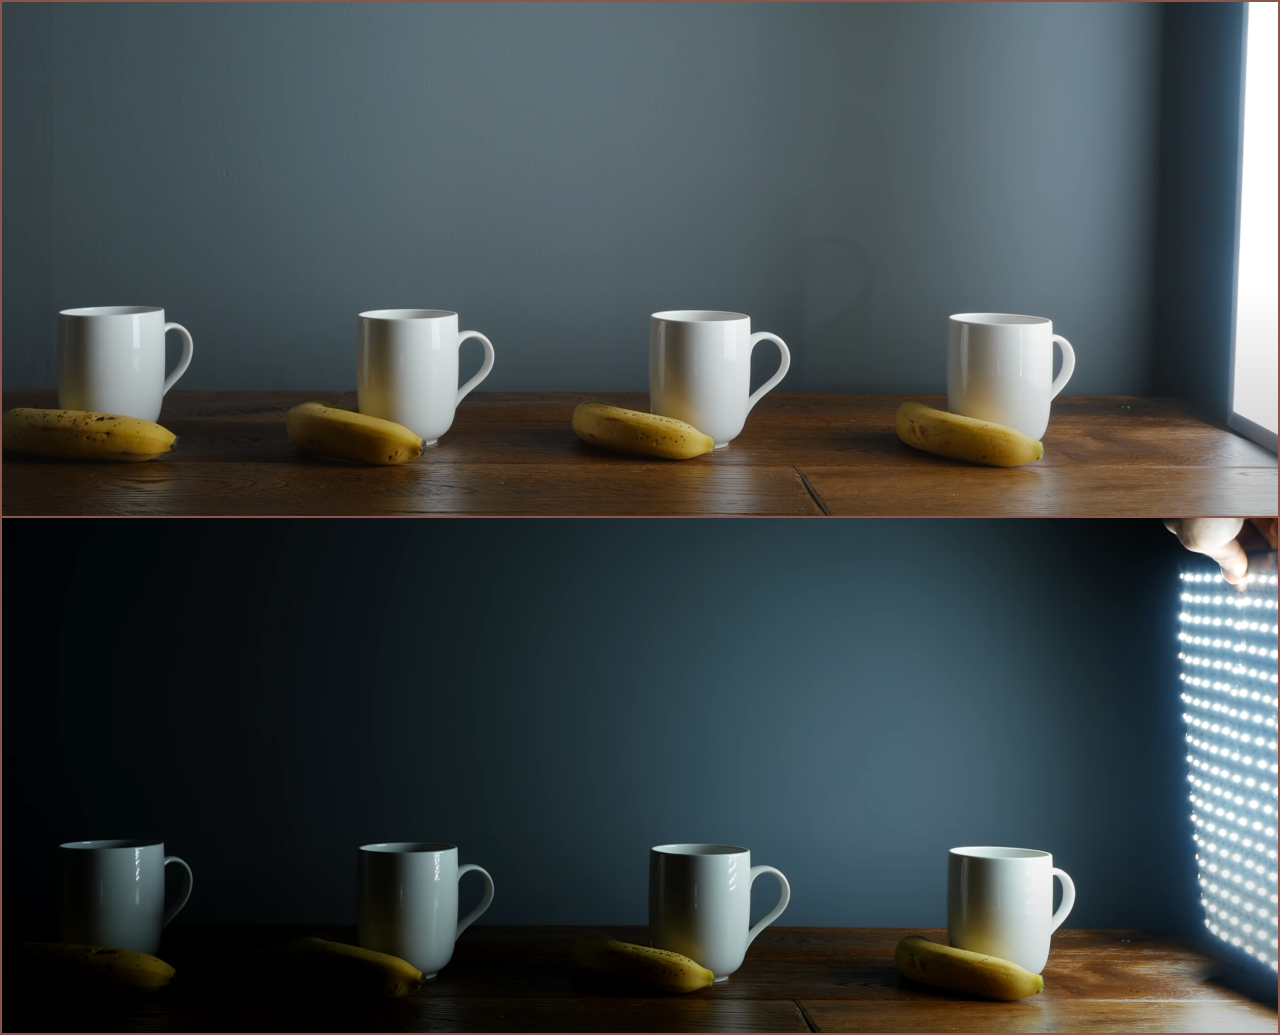
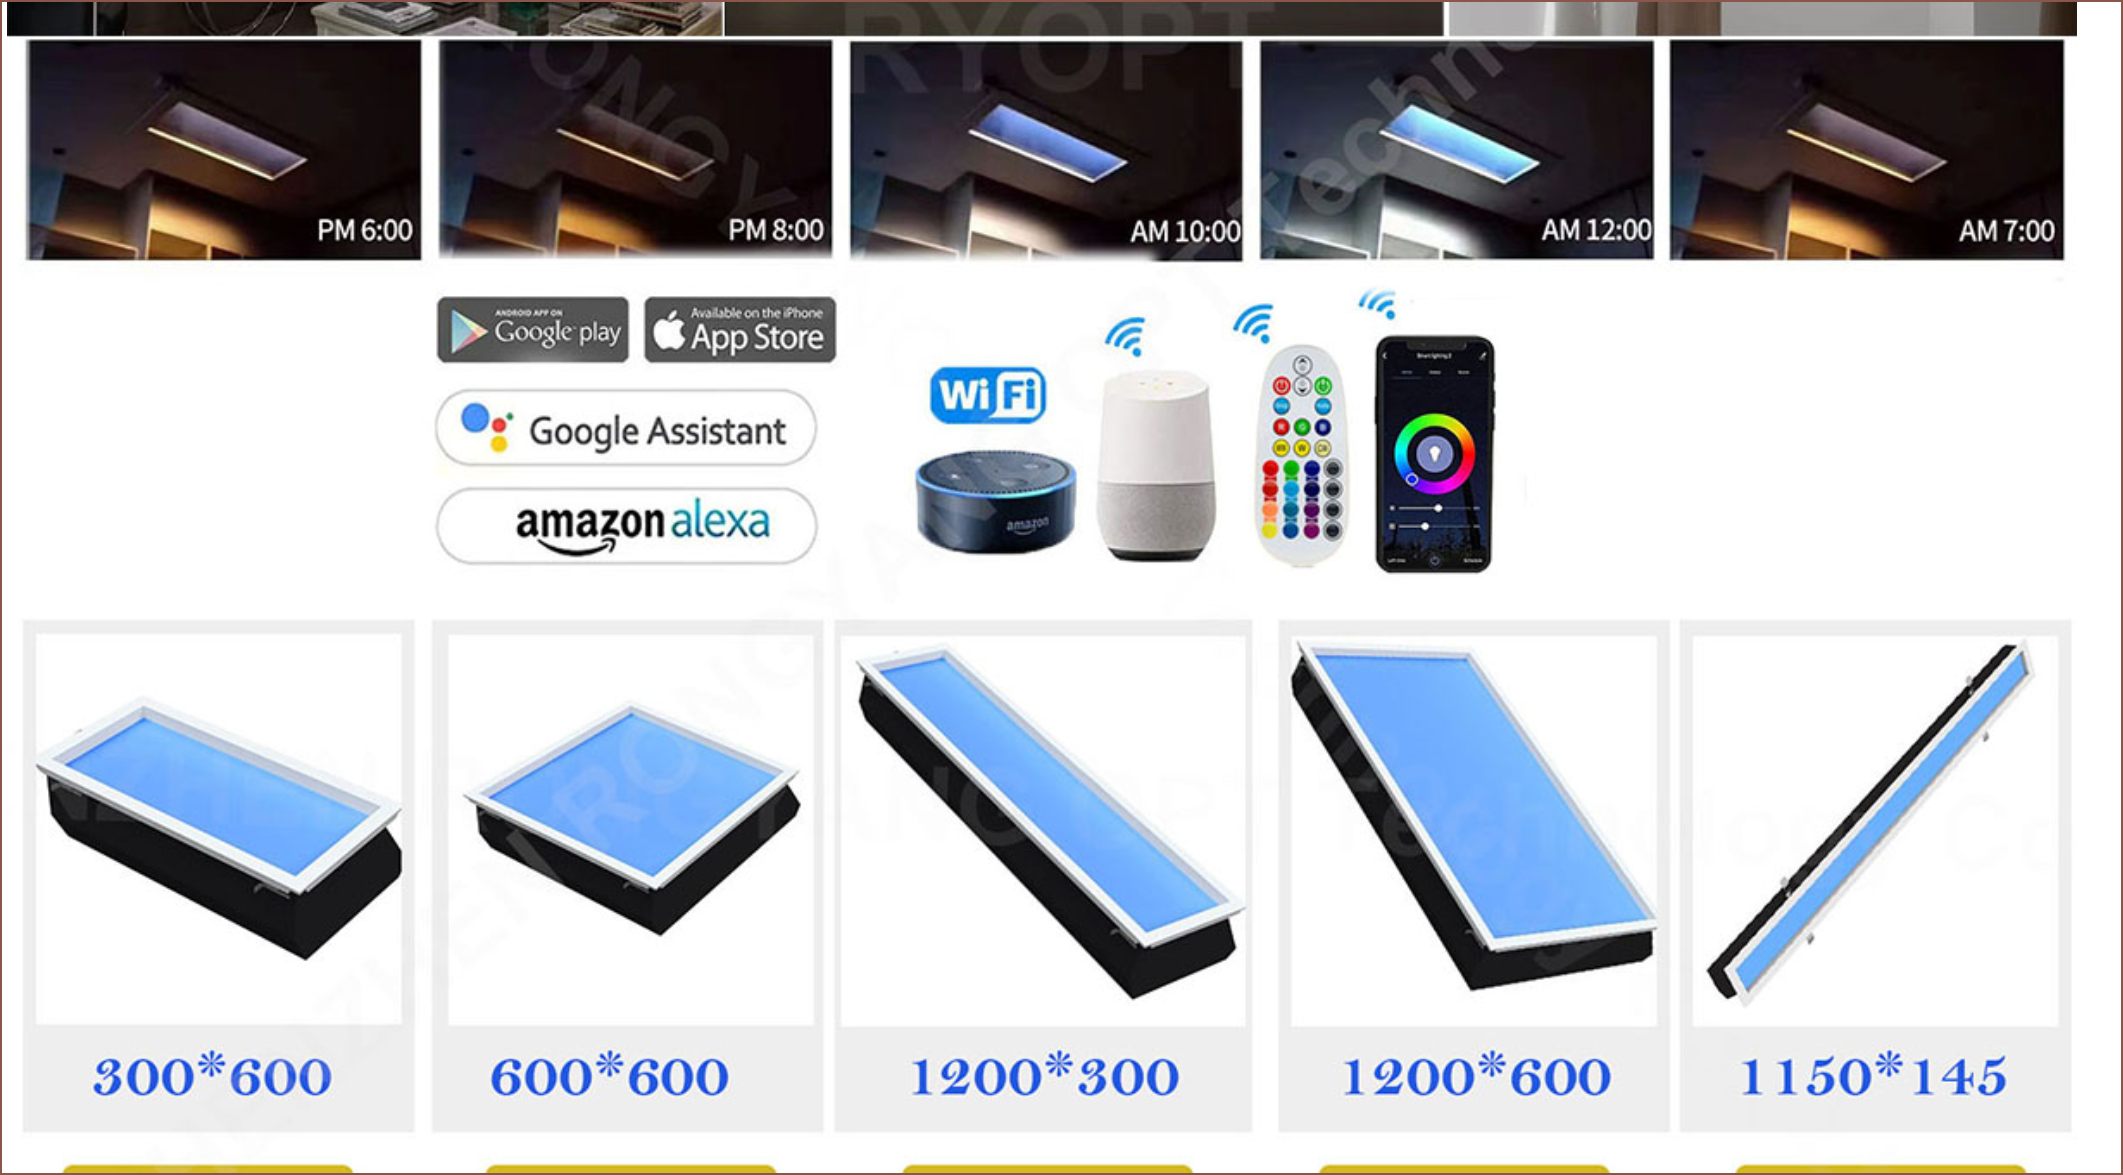
Since this Tent Office is the equivalent of a small room under the stairs or something, I imagine a long and narrow skylight would be fine. It's also smaller to store and probably cheaper than larger options. These lights can also do sunrise/set hues but none can actually change the angle of light.
Unfortunately, it does seem that these skylights start at $300. Additionally, the light that comes through looks like it went though a skylight diffuser material and it doesn't seem to produce sharp shadows.
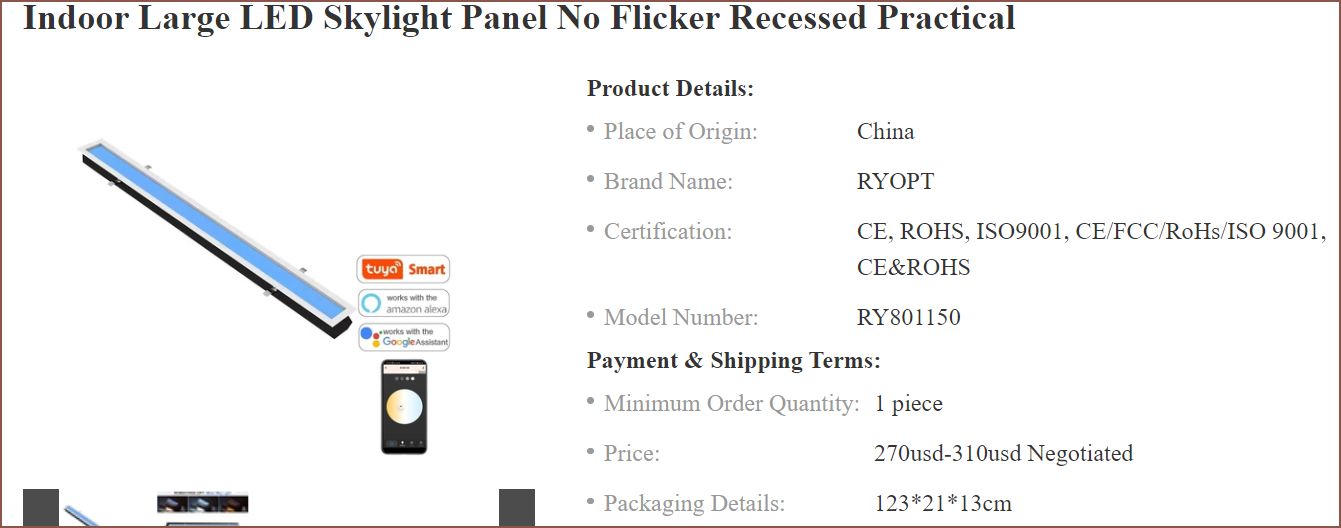
Well, I did find one that looks good:
At these prices, I'm somewhat dissapointed that they don't feature a PDLC film to also simulate clouds passing overhead. Imagine if there was an addressable grid over a large fake skylight that had low-resolution clouds passing though?
Through this research I found out that photographers also look into ways to get fake daylight, but the solutions used are kind-of large and quite expensive (>£1000).
What isn't expensive are high powered LEDs similar to the ones DIY perks used in his largest but most convincing LED daylight.
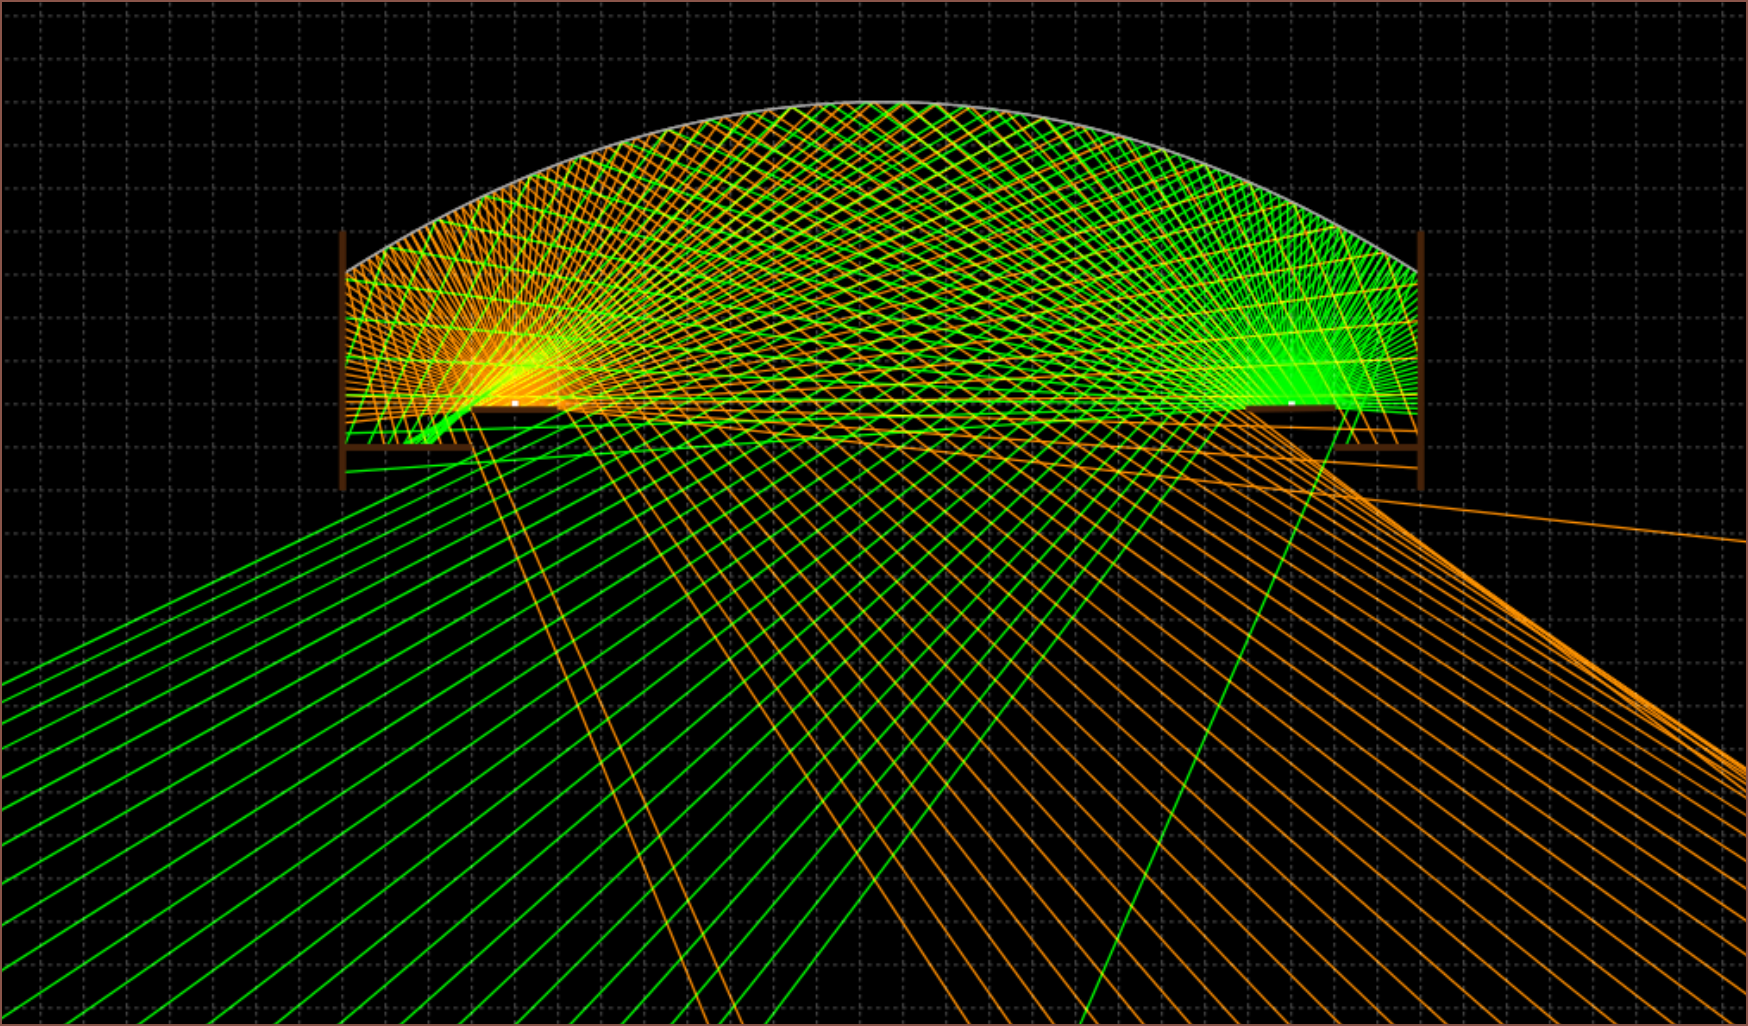
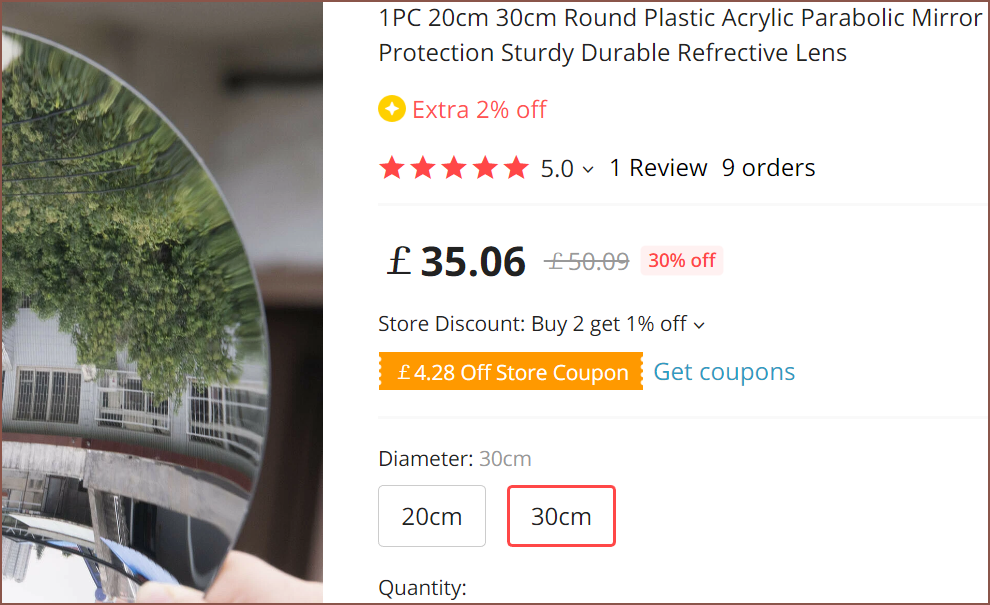
I was thinking of some kind of motorised solution to get multiple light angles, but with prices like this, It's trivial to install maybe 3 - 5 LEDs and address them via a binary relay system (to guarrantee that only one fake sun is on at once). With this method, each LED only needs to have a single colour temperature whereby the LEDs on the ends have a warm colour temp (2500K) and the LEDs in the centre have a neutral temp (5600K).There's 2 LEDs in this diagram above and those rays are probably parallel enough to look convincing. I should be working not looking up at the fake sky anyway, so it's not like I need the fancy light scattering to replicate the actual sky. The idea is kinda large though when you bring in a parabolic mirror that is large enough to make sense:The 45cm ones are notably costlier (£80).
Maybe it's possible to use a 3D printed base and apply reflective tape over the top. A fresnel lens could offer a solution, but after taking focal lengths into account, is likely too large to store when the tent is down.
Going back to the LED plan, there's actually some cheap job lots on ebay currently.
Very helpfully, the actual screen models are listed such as the size and the model code.
One listing was a bit of a mixed bag, but this listing has many identical screens such as the 13.3", the 10" and some 14" panels. This is ideal because then I can group these screens up to create a larger screen fixture. I'm also planning to address these LEDs so that I can have a low-budget version of Unbox Therapy's latest studio ceiling.
(How convinient. He has a video on grow boxes when I'm talking about a grow tent office. Back to the ceiling, the first time I saw it, I thought they were addressable white LEDs but it seems to actually be RGBW or very well calibrated RGB LEDs)
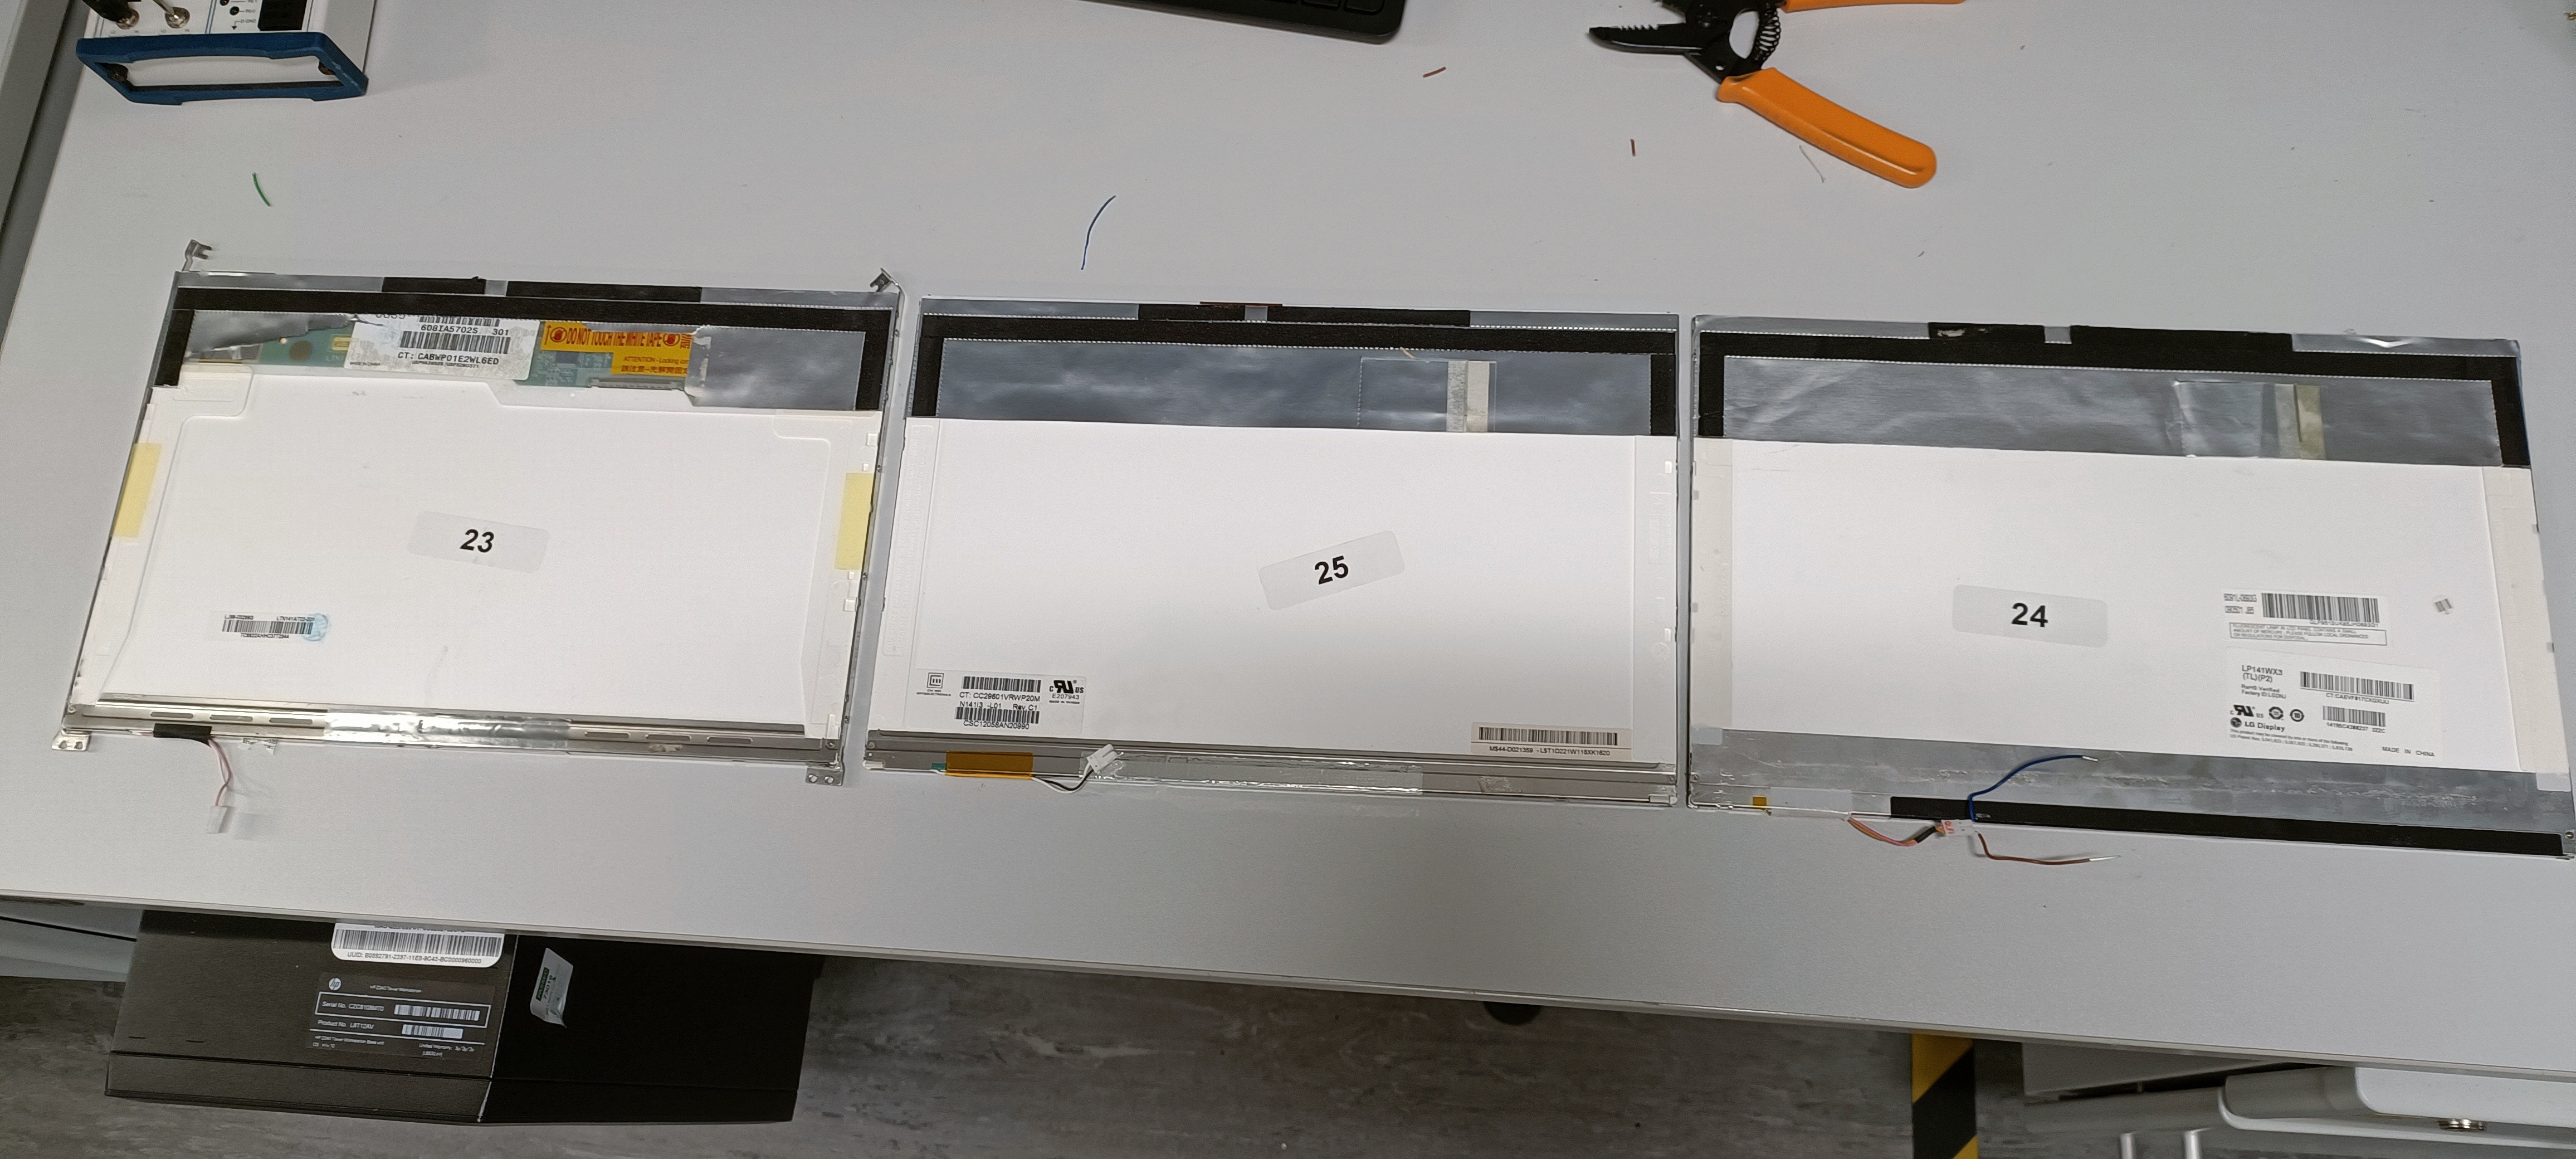
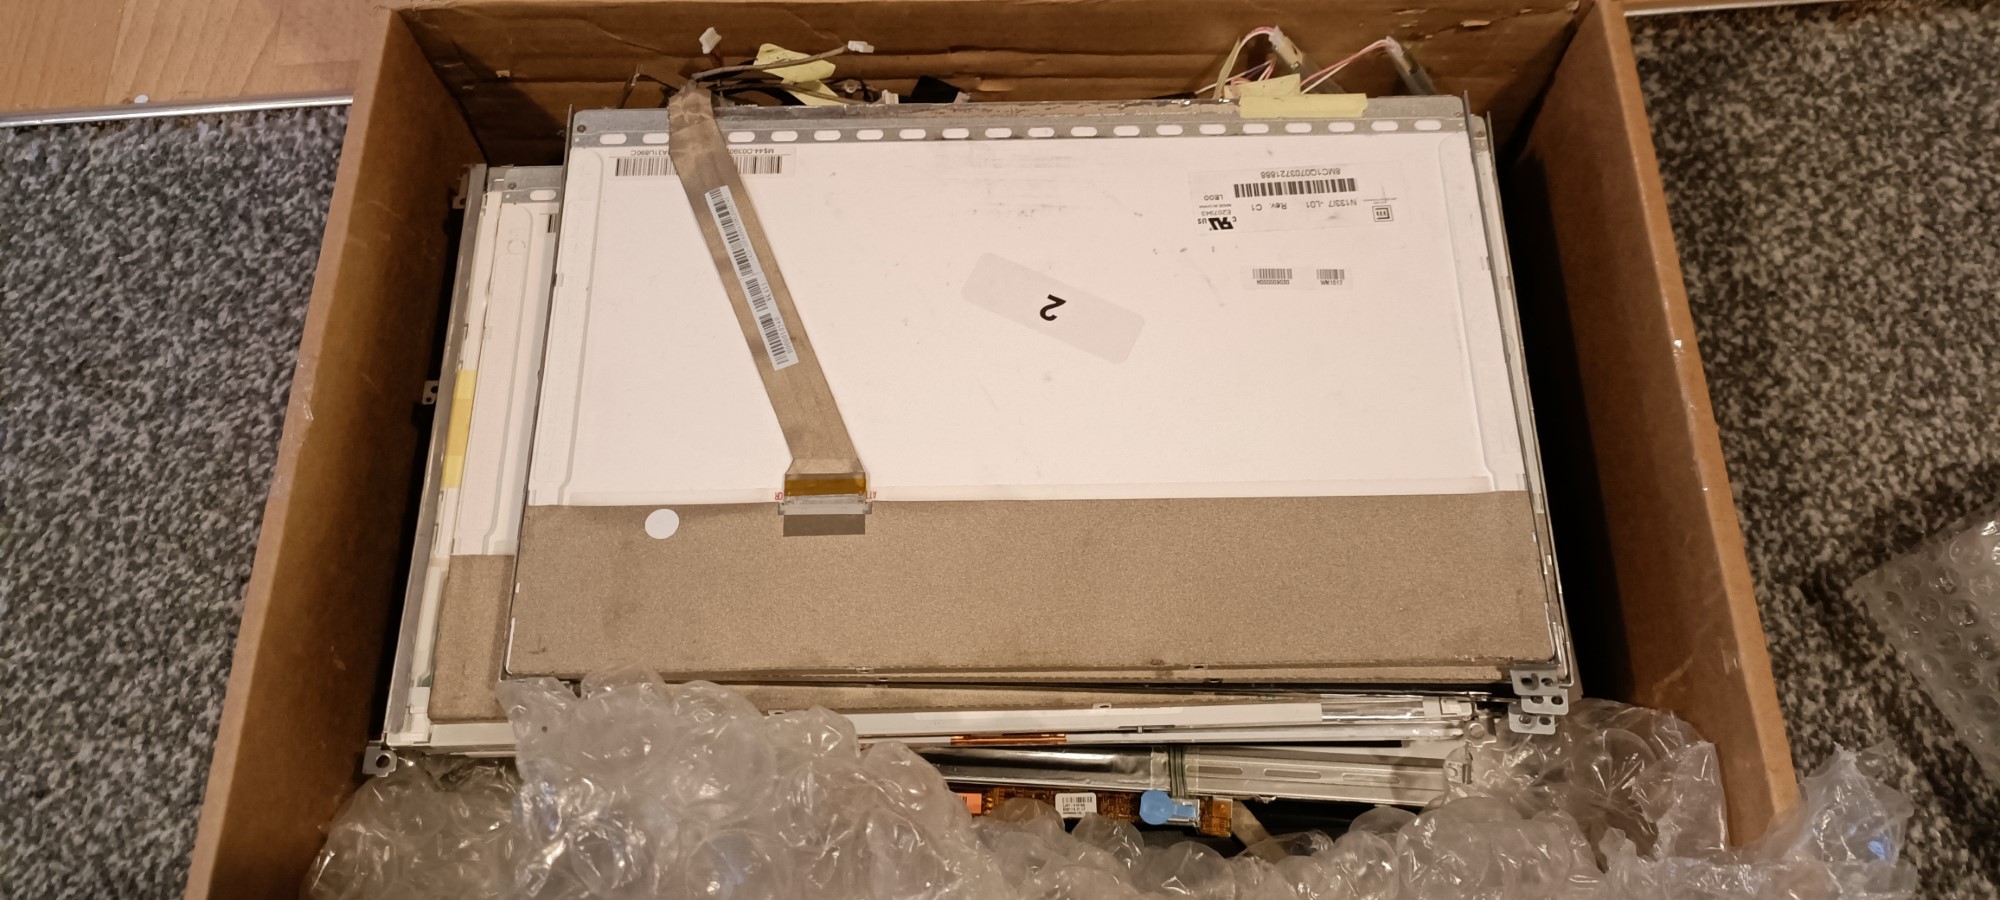
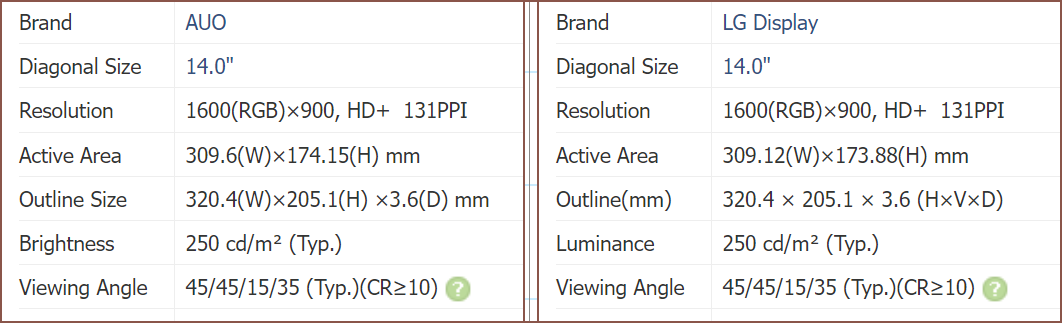
The "LCD job lot" I ended up buying was the one below since it had many 14" screens that were quite similar, and I was able to find the datasheets for both of them online easily.
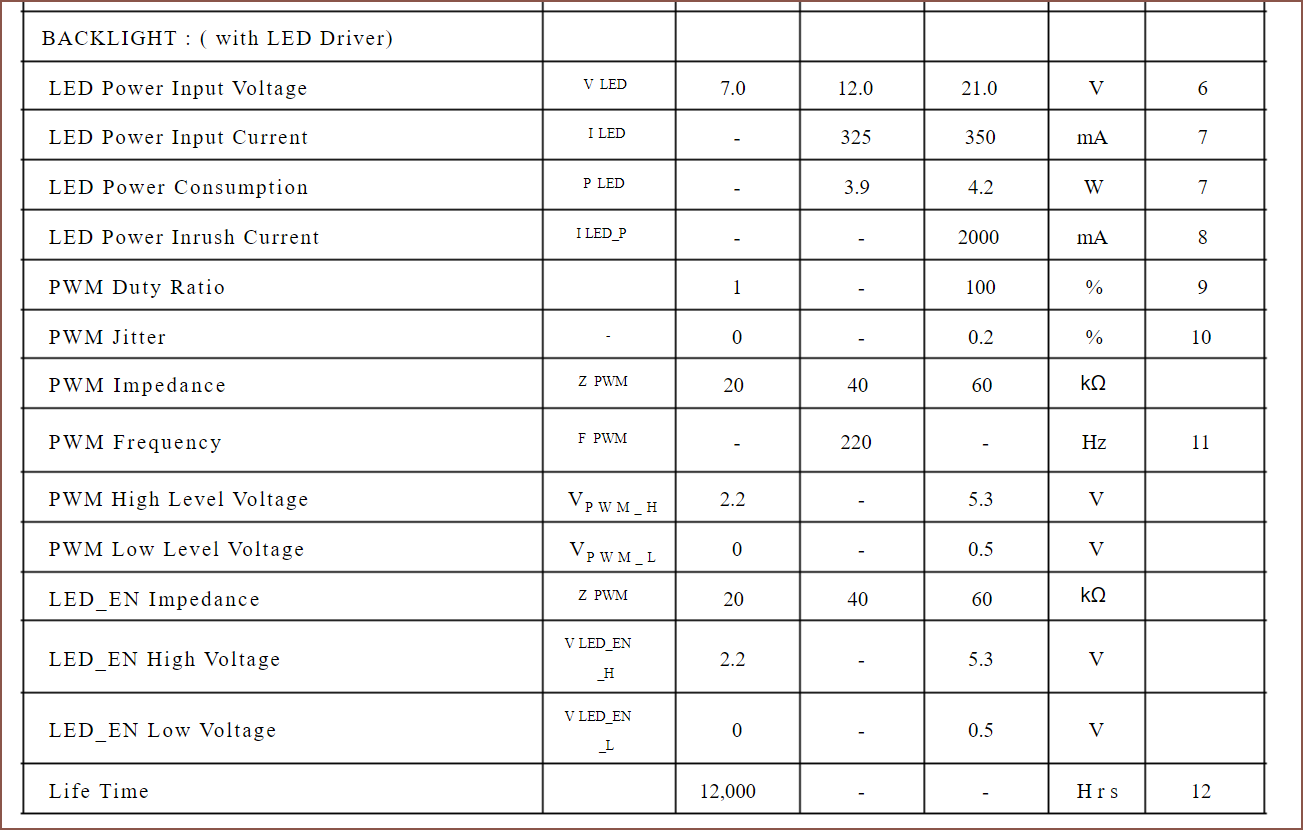
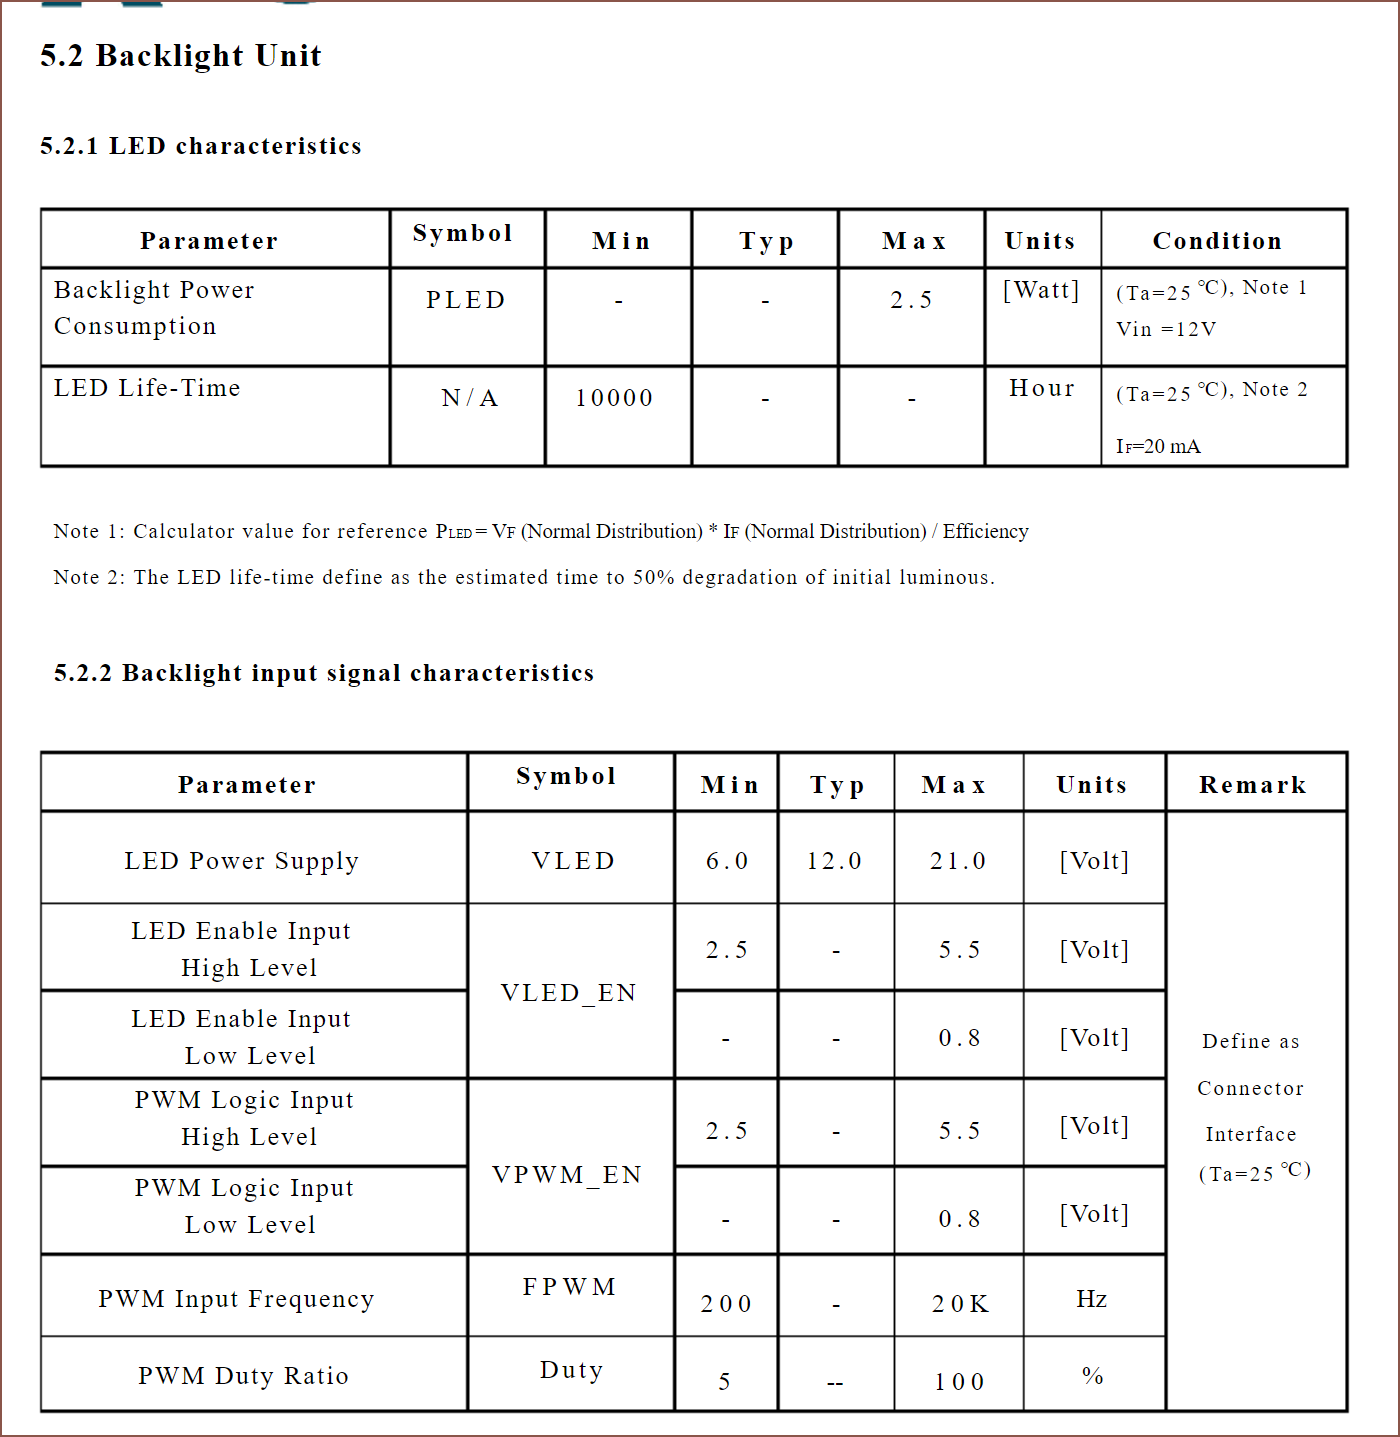
The datasheet shows some similarities, such as that the backlight can take 6 - 21V, with 12V being the nominal, but the power consumption differers for some reason (Ordered AUO, LG):
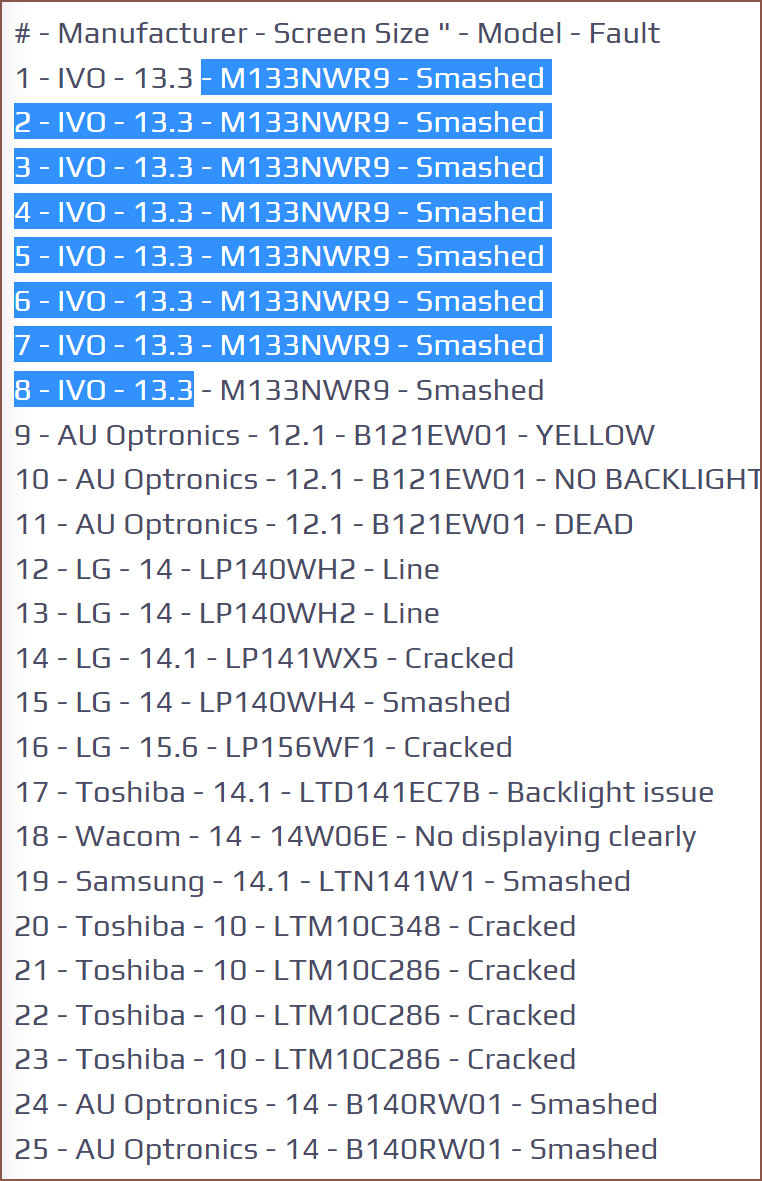
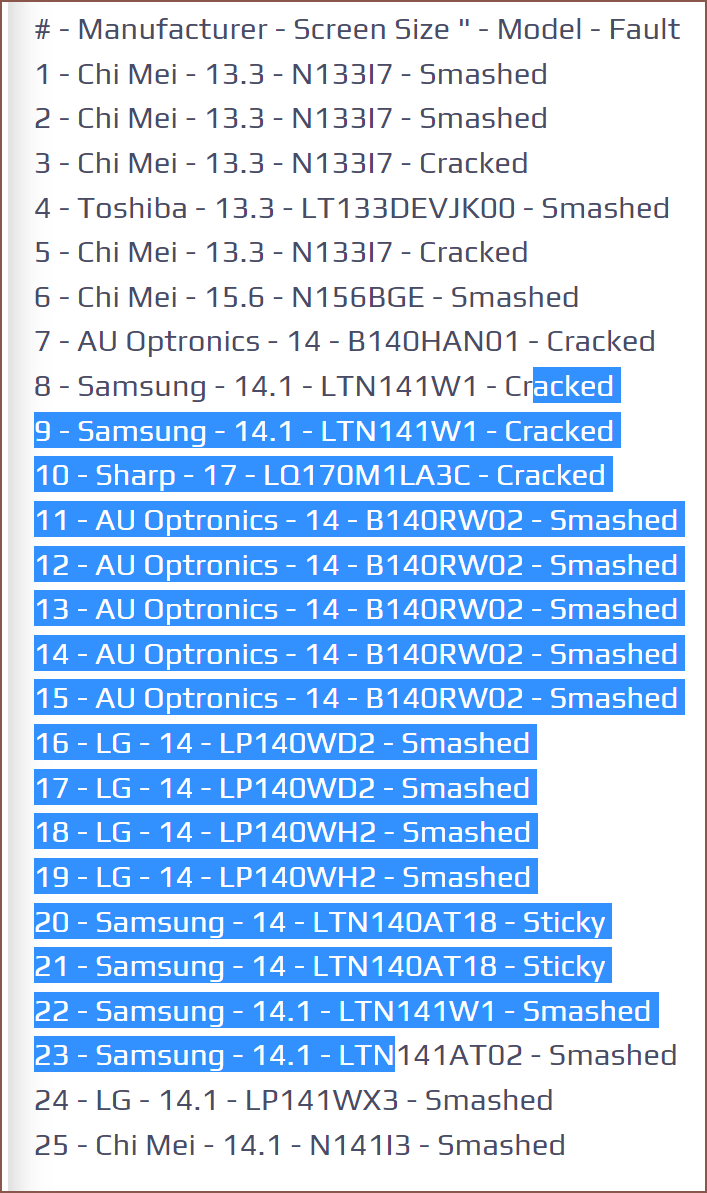
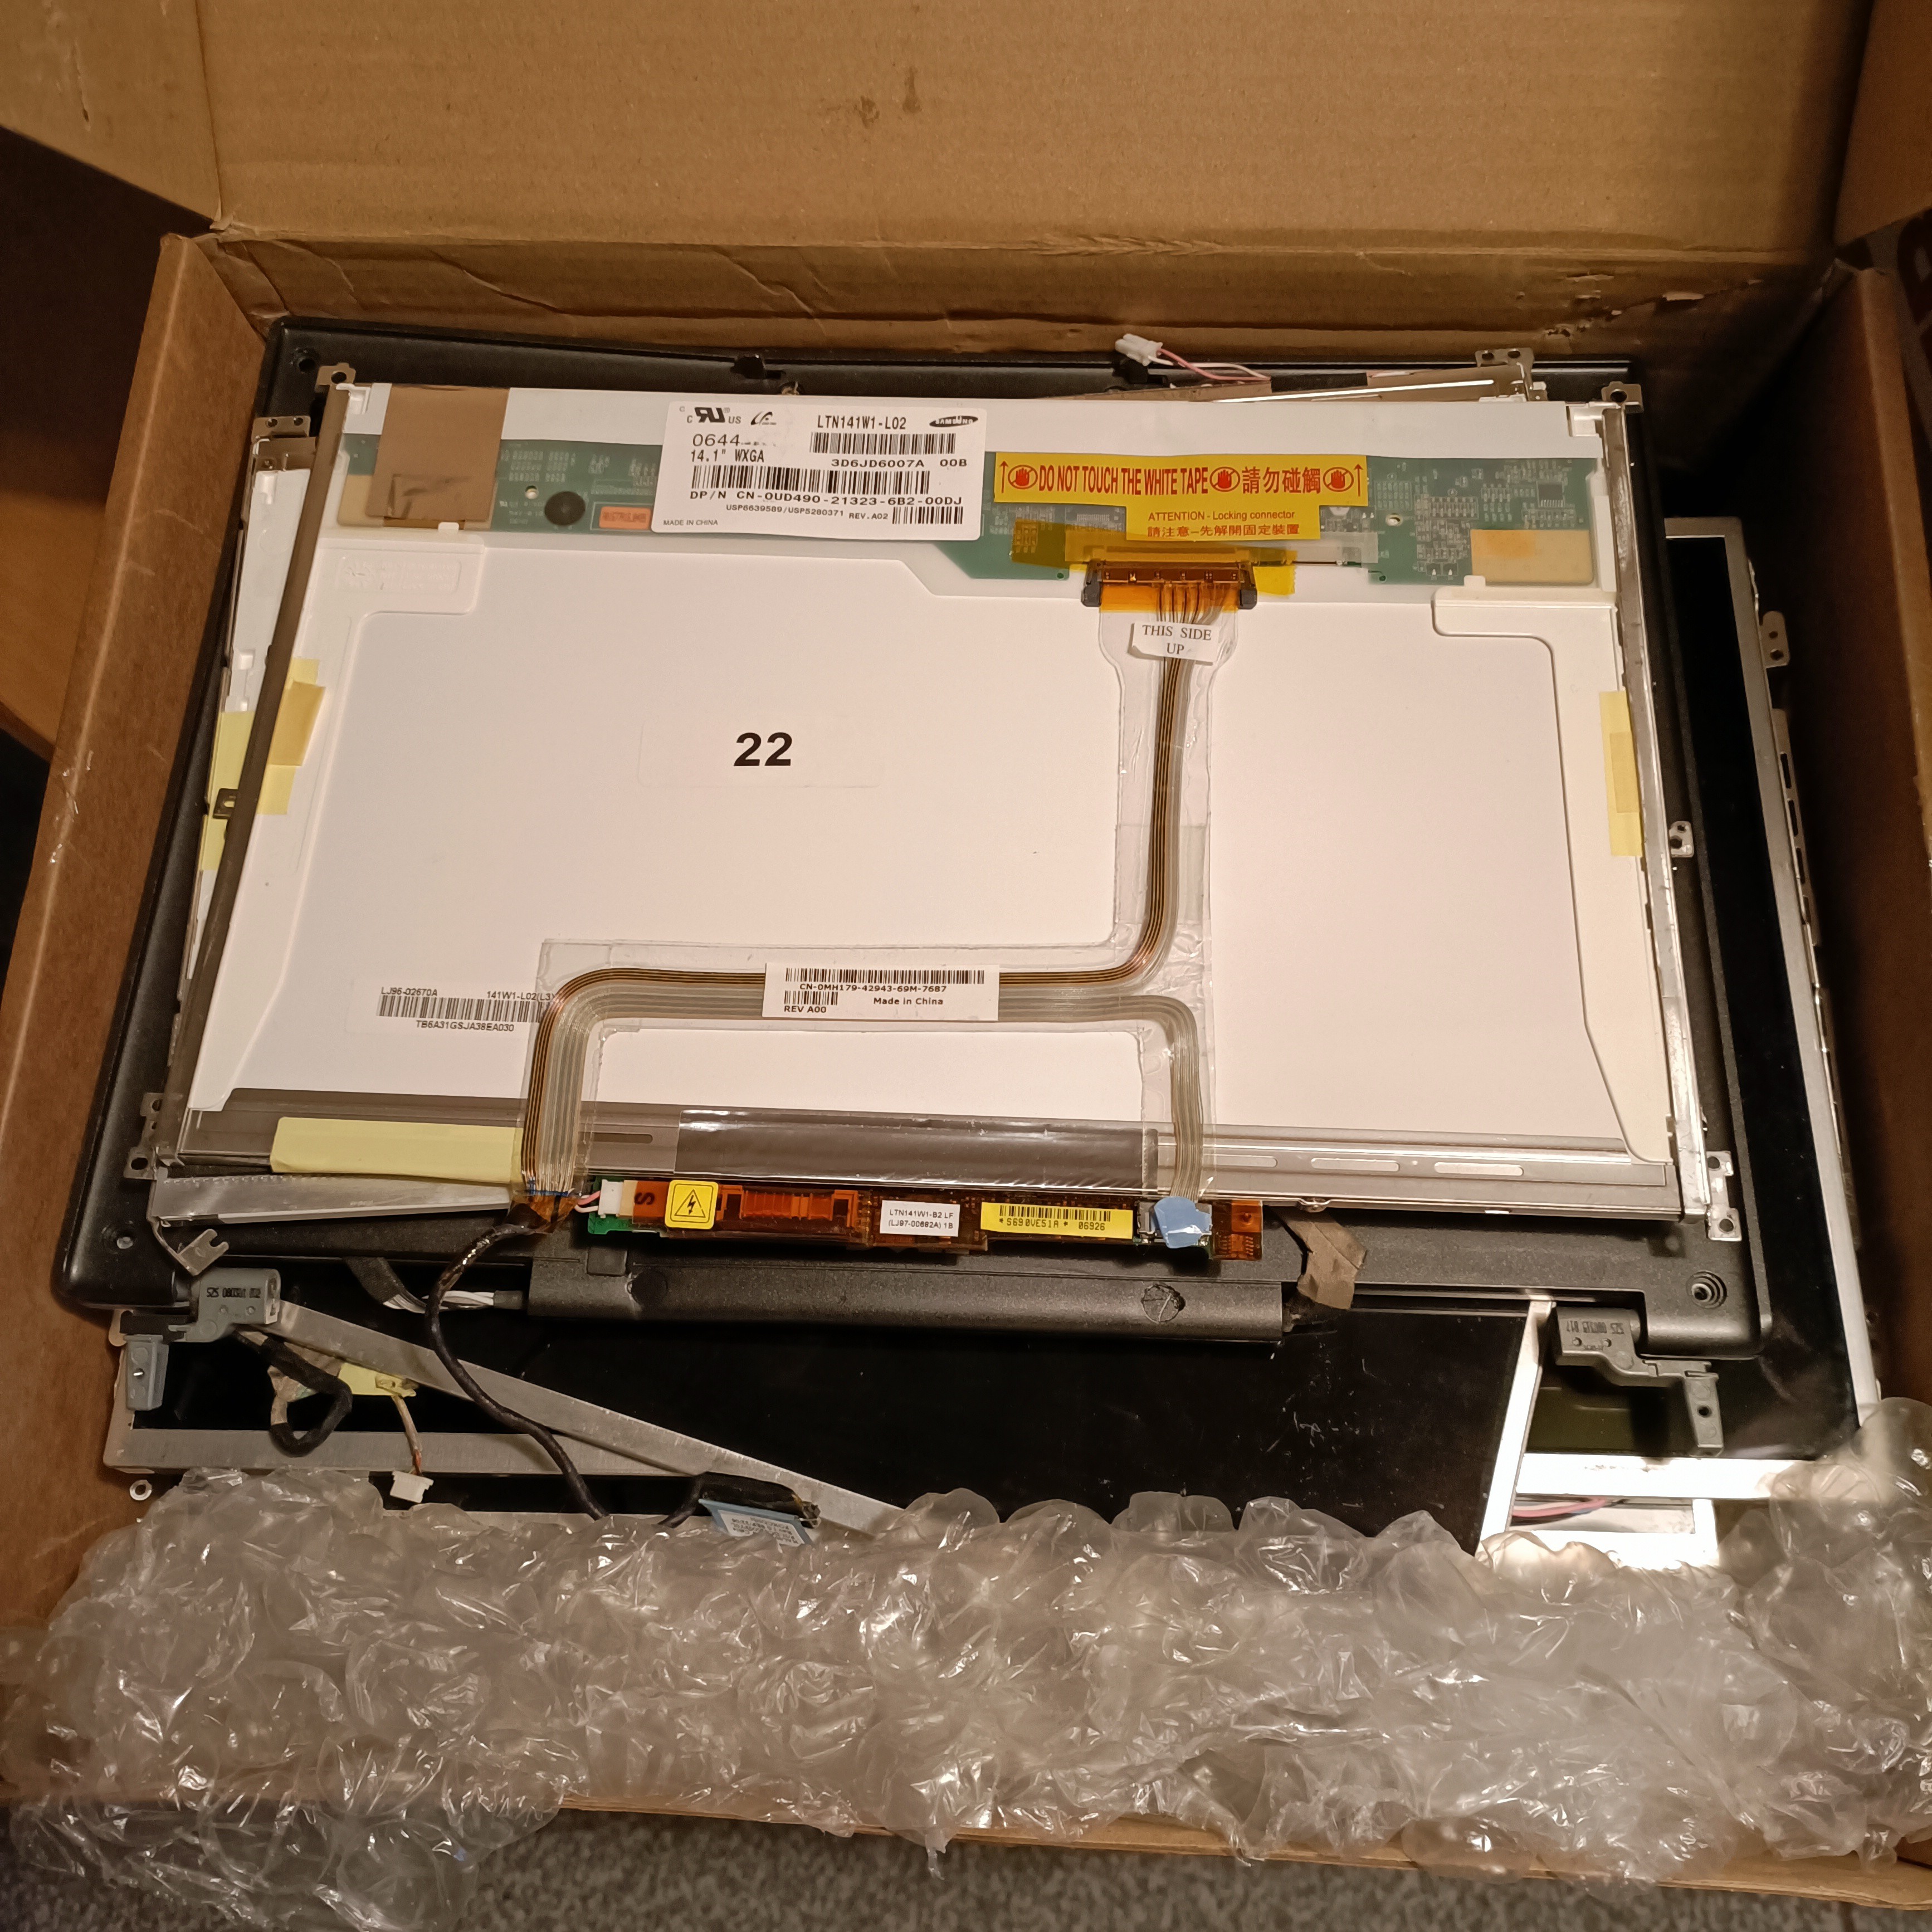
And here are the screens:
I wouldn't be suprised if the shipping the seller had to pay was over 50% the price I paid, because 25 broken screens are suprisingly heavy.Hopefully, the LCD layer protects the other layers that I actually need. Still though, I only need 1 to work to see if LCDs can actually be used as artificial overcast daylight.
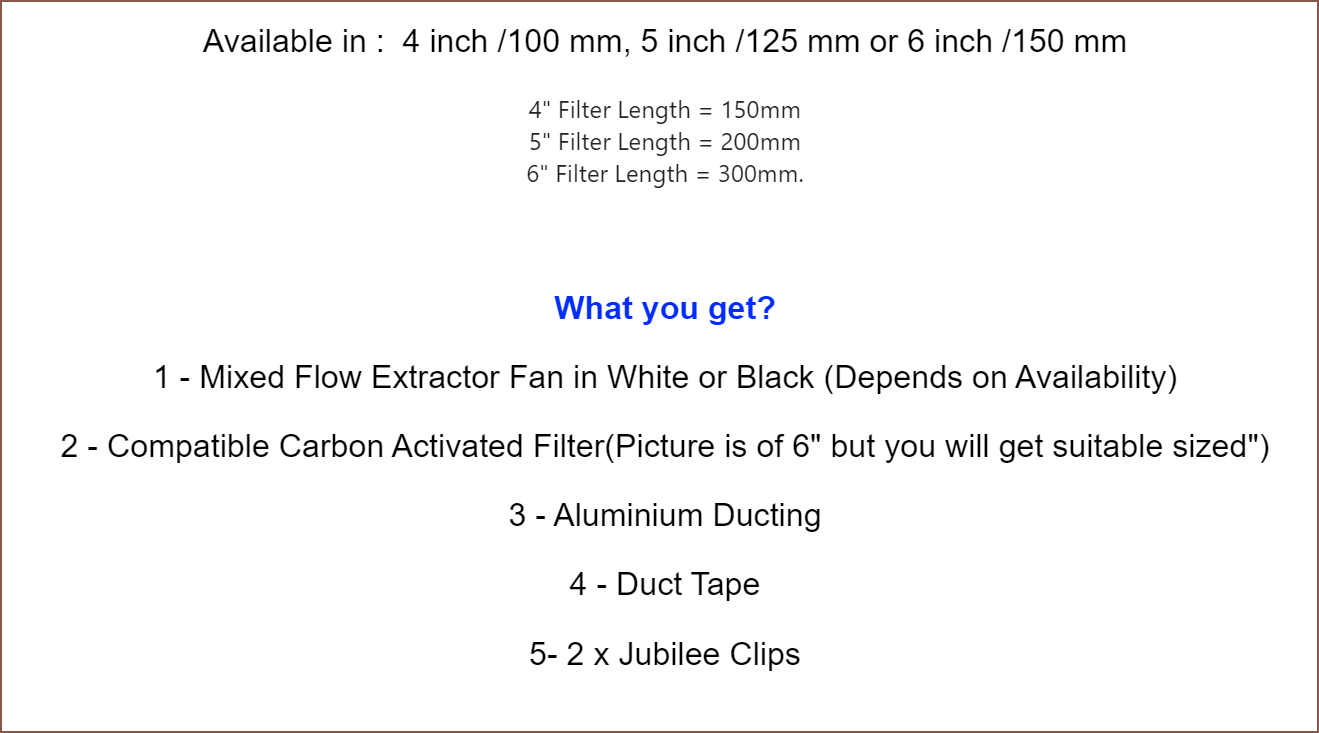
This was supposed to be written on the same day as Log1 but I didn't have the time. At least I can now also talk about the specific filtration system I ended up buying.
Research into carbon filters in general
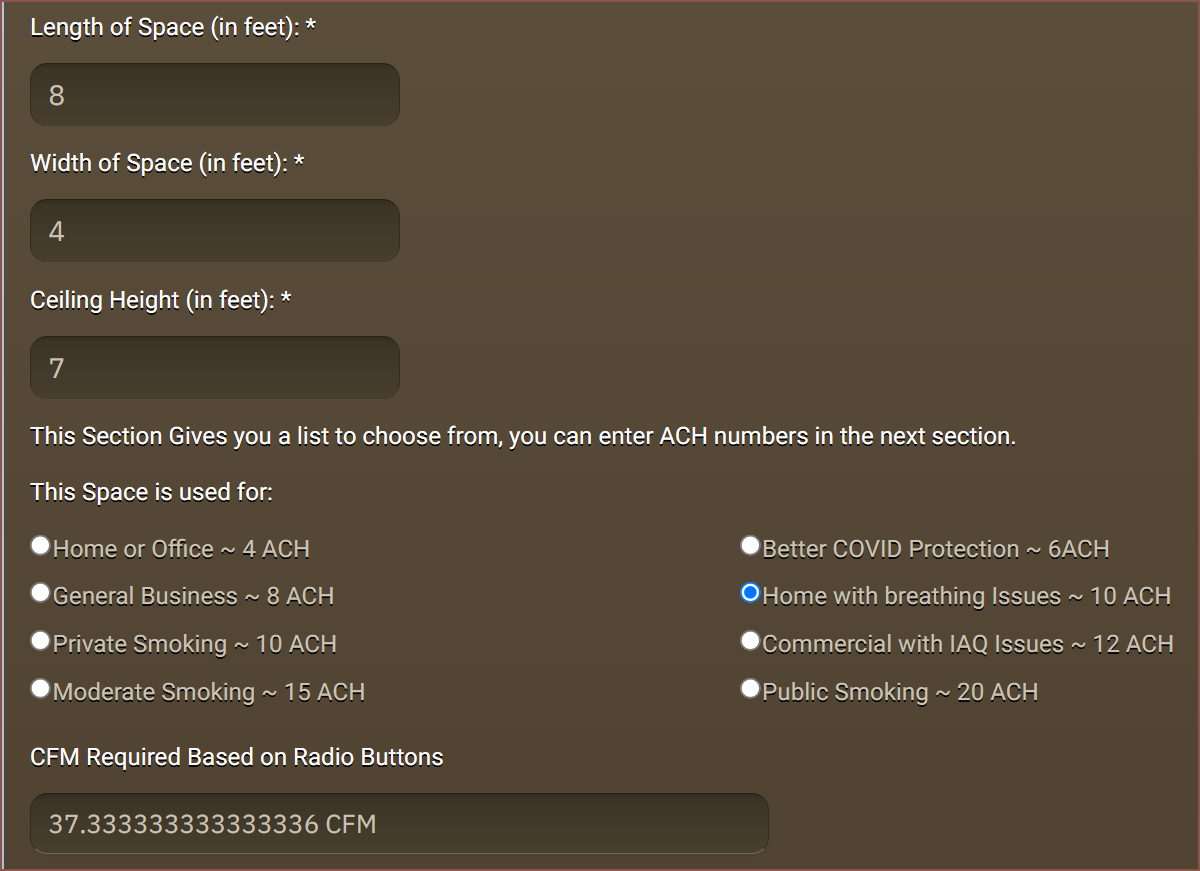
So I started some research and it was suggested to get a carbon filter that had at least one full air chainge per minute.
2.4 x 1.2 x 2 = 5.76 m^3 => 203 ft^3
There's loads of fan efficiency debuffs along the way though, so my aim was 350 CFM (cubic feet/minute)
I thought that a human would require more ventilation than small plants, but it seems that the actual requirements are much lower:
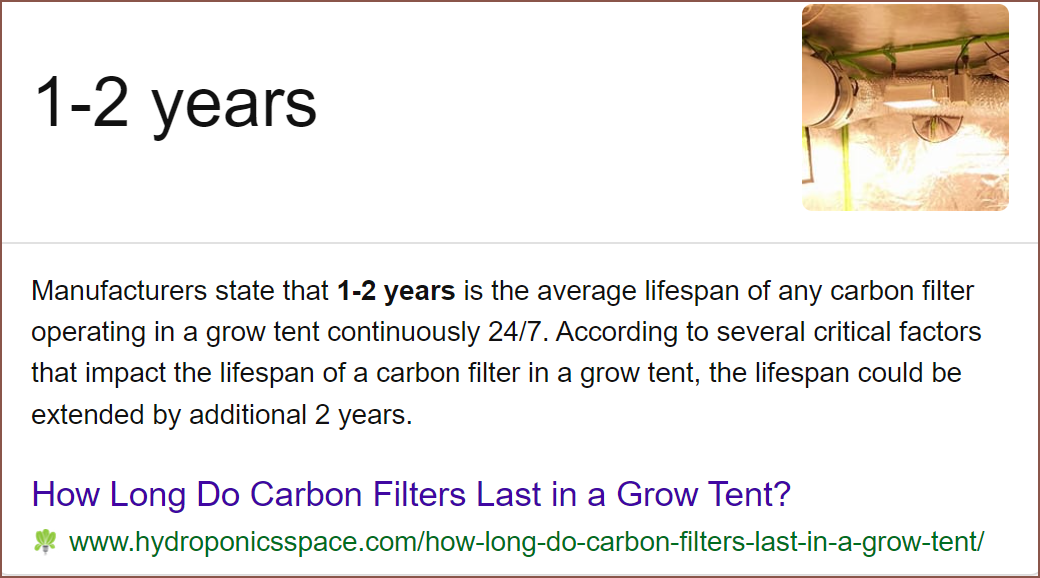
That area entered in is on overestimate too. From my research, quite a few sources say that a carbon filter should be good for a year minimum. It is also straightforward to stretch this longevity to 2 years.
I'm skeptical because I have a small air purifier that claims 6 months filter life, but the filters were spent within 4 weeks. However, I was researching the Nevermore when researching for the #SecSavr Suspense [gd0105] and these kinds of consumer air purifiers likely don't have enough activated carbon / charcoal to last very long.
Still though, spending (as I'd soon find out) £40 - £50 on a massive filter that lasted 6 months is still better than 1 small filter / month costing >£9 that likely only effectively filters for half the time. Also note that those 1 - 2 year expectations are with the filter running 24/7 and I wasn't running my small purifier 24/7.
Researching purchaseable options
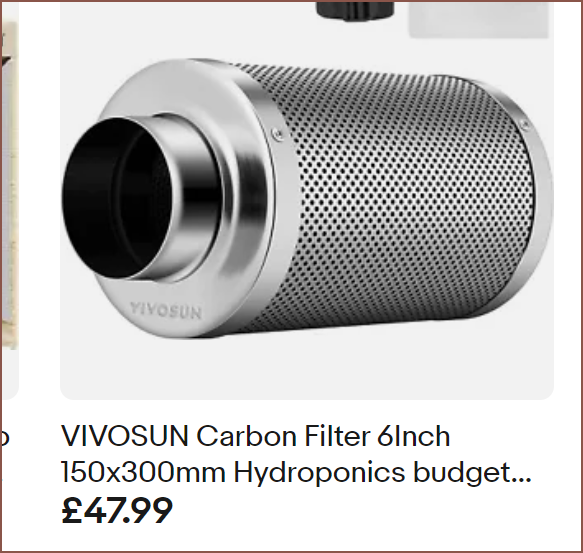
The first filter I found was from Vivosun because I had just found thier £120 tent and wanted to see what else they had.
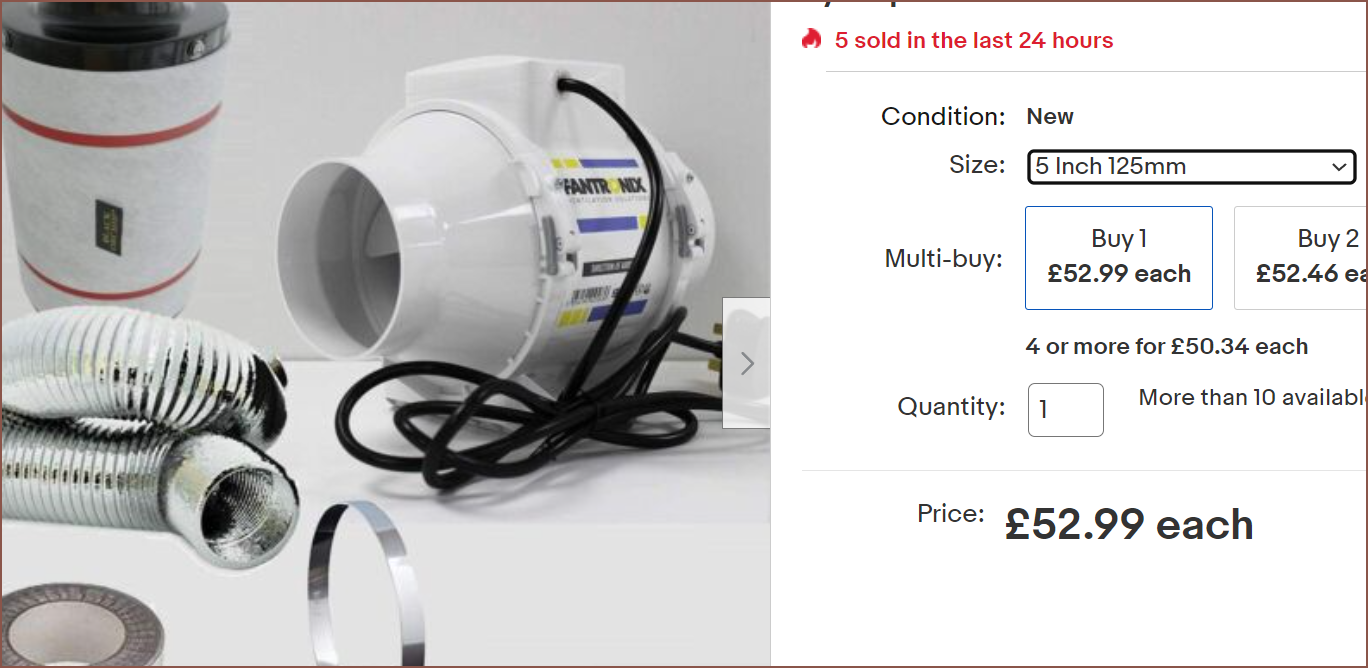
These kinds of things really do look cool.I find this listing and am suprised that you get all this for only £53:
The 6" wasn't in stock when I first saw this listing, but it was the next day for £65.
There is also kits with smaller fans, but while they are quieter and use less power, I don't trust them to move enough air. Well, another way of putting it is that I trust them to move a dissapointing amount of air.Anyway, I eventually found and added the red-blade fan kit into my basket. The 300mm long filter was only £9 less and I thought that a longer filter would last longer and allow more airflow. Looking though the seller's store, I found the same listing but with a white-blade fan. The listings don't really talk about the fan in enough detail to pick on over the other, so I went with the white one because it looked better and a bit longer.I saw this fan earlier and since blindly assume a longer fan is a quieter one.
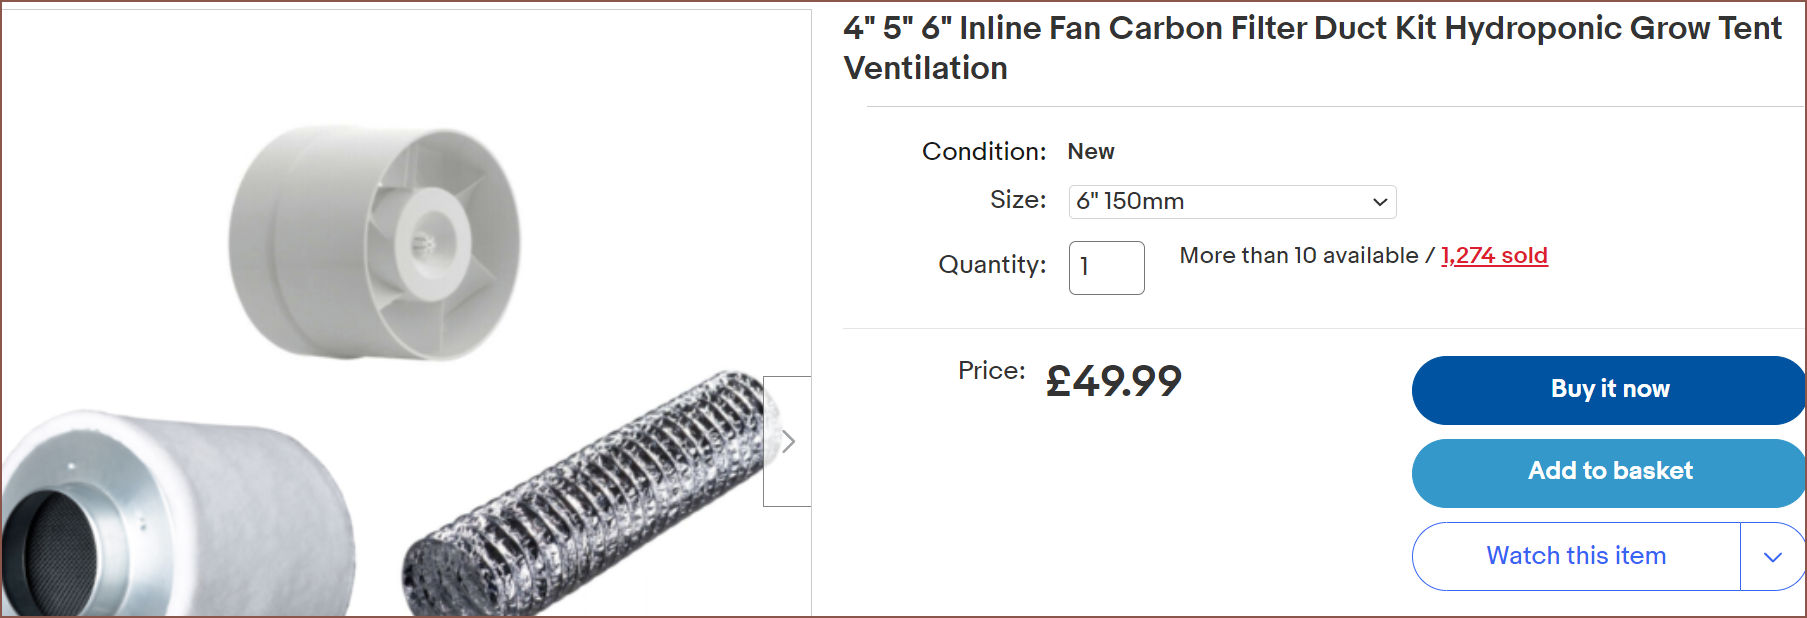
The reason why I went for the £82 kit instead of the £65 kit is because I did some looking around on filter / fan prices and that £65 was a bit suspicious. The cheapest 150 x 500mm filter was £40 and the cheapest 6" fan (the red-blade one) was £41. I looked into the filters each kit seller sold as individual listings (because they probably don't stock filters specifically for a kit and a different filter for refils) and the £65 seller never mentioned anything about "Australian Mined RC412 activated carbon". I've seen that specific carbon mentioned on so many listings that I thought it was redundant or just an industry standard. Lastly, the £65 kit only did 150 x 300mm (which is acceptable for the price difference).
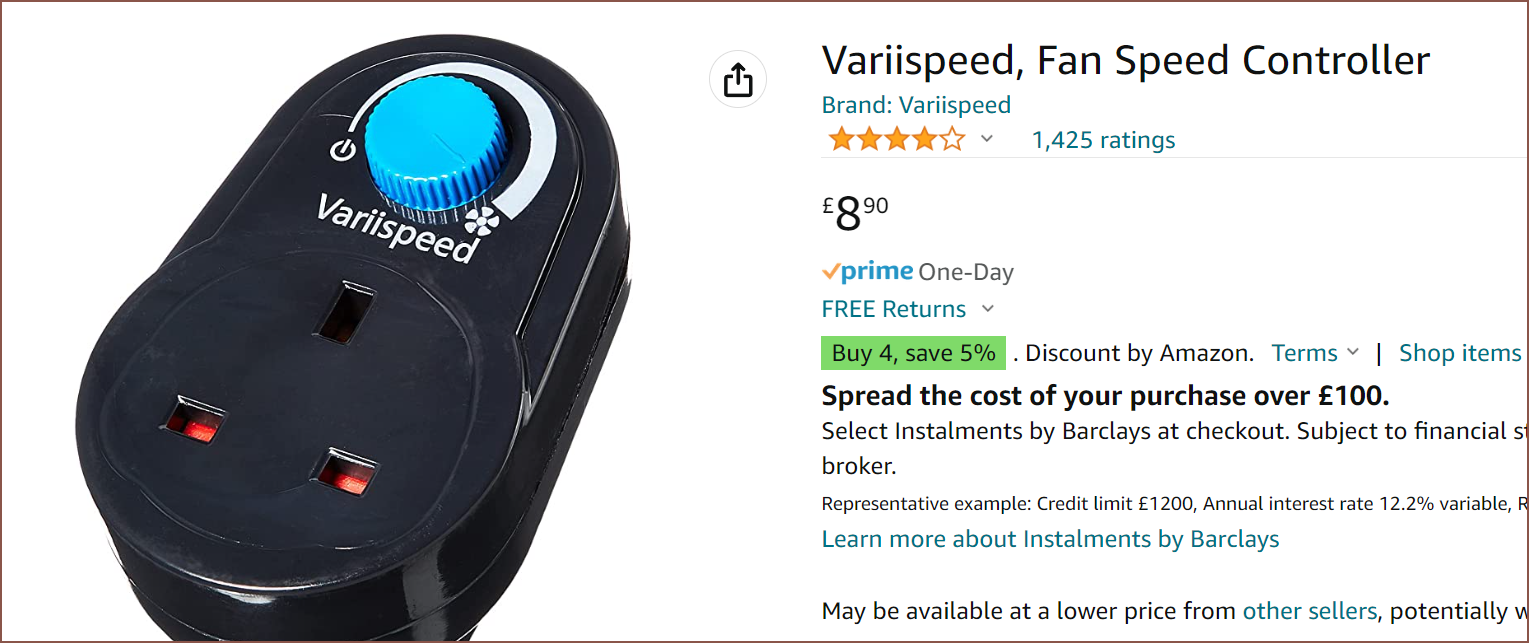
I also found out about fan speed controllers:
This would've been realy useful for my large metal fan that has the speed options [fast, faster, fastest].So if the 6" fan is too loud (which is my main concern over choosing a 5" fan), i could potentially use this to tone it down.
Trying the system
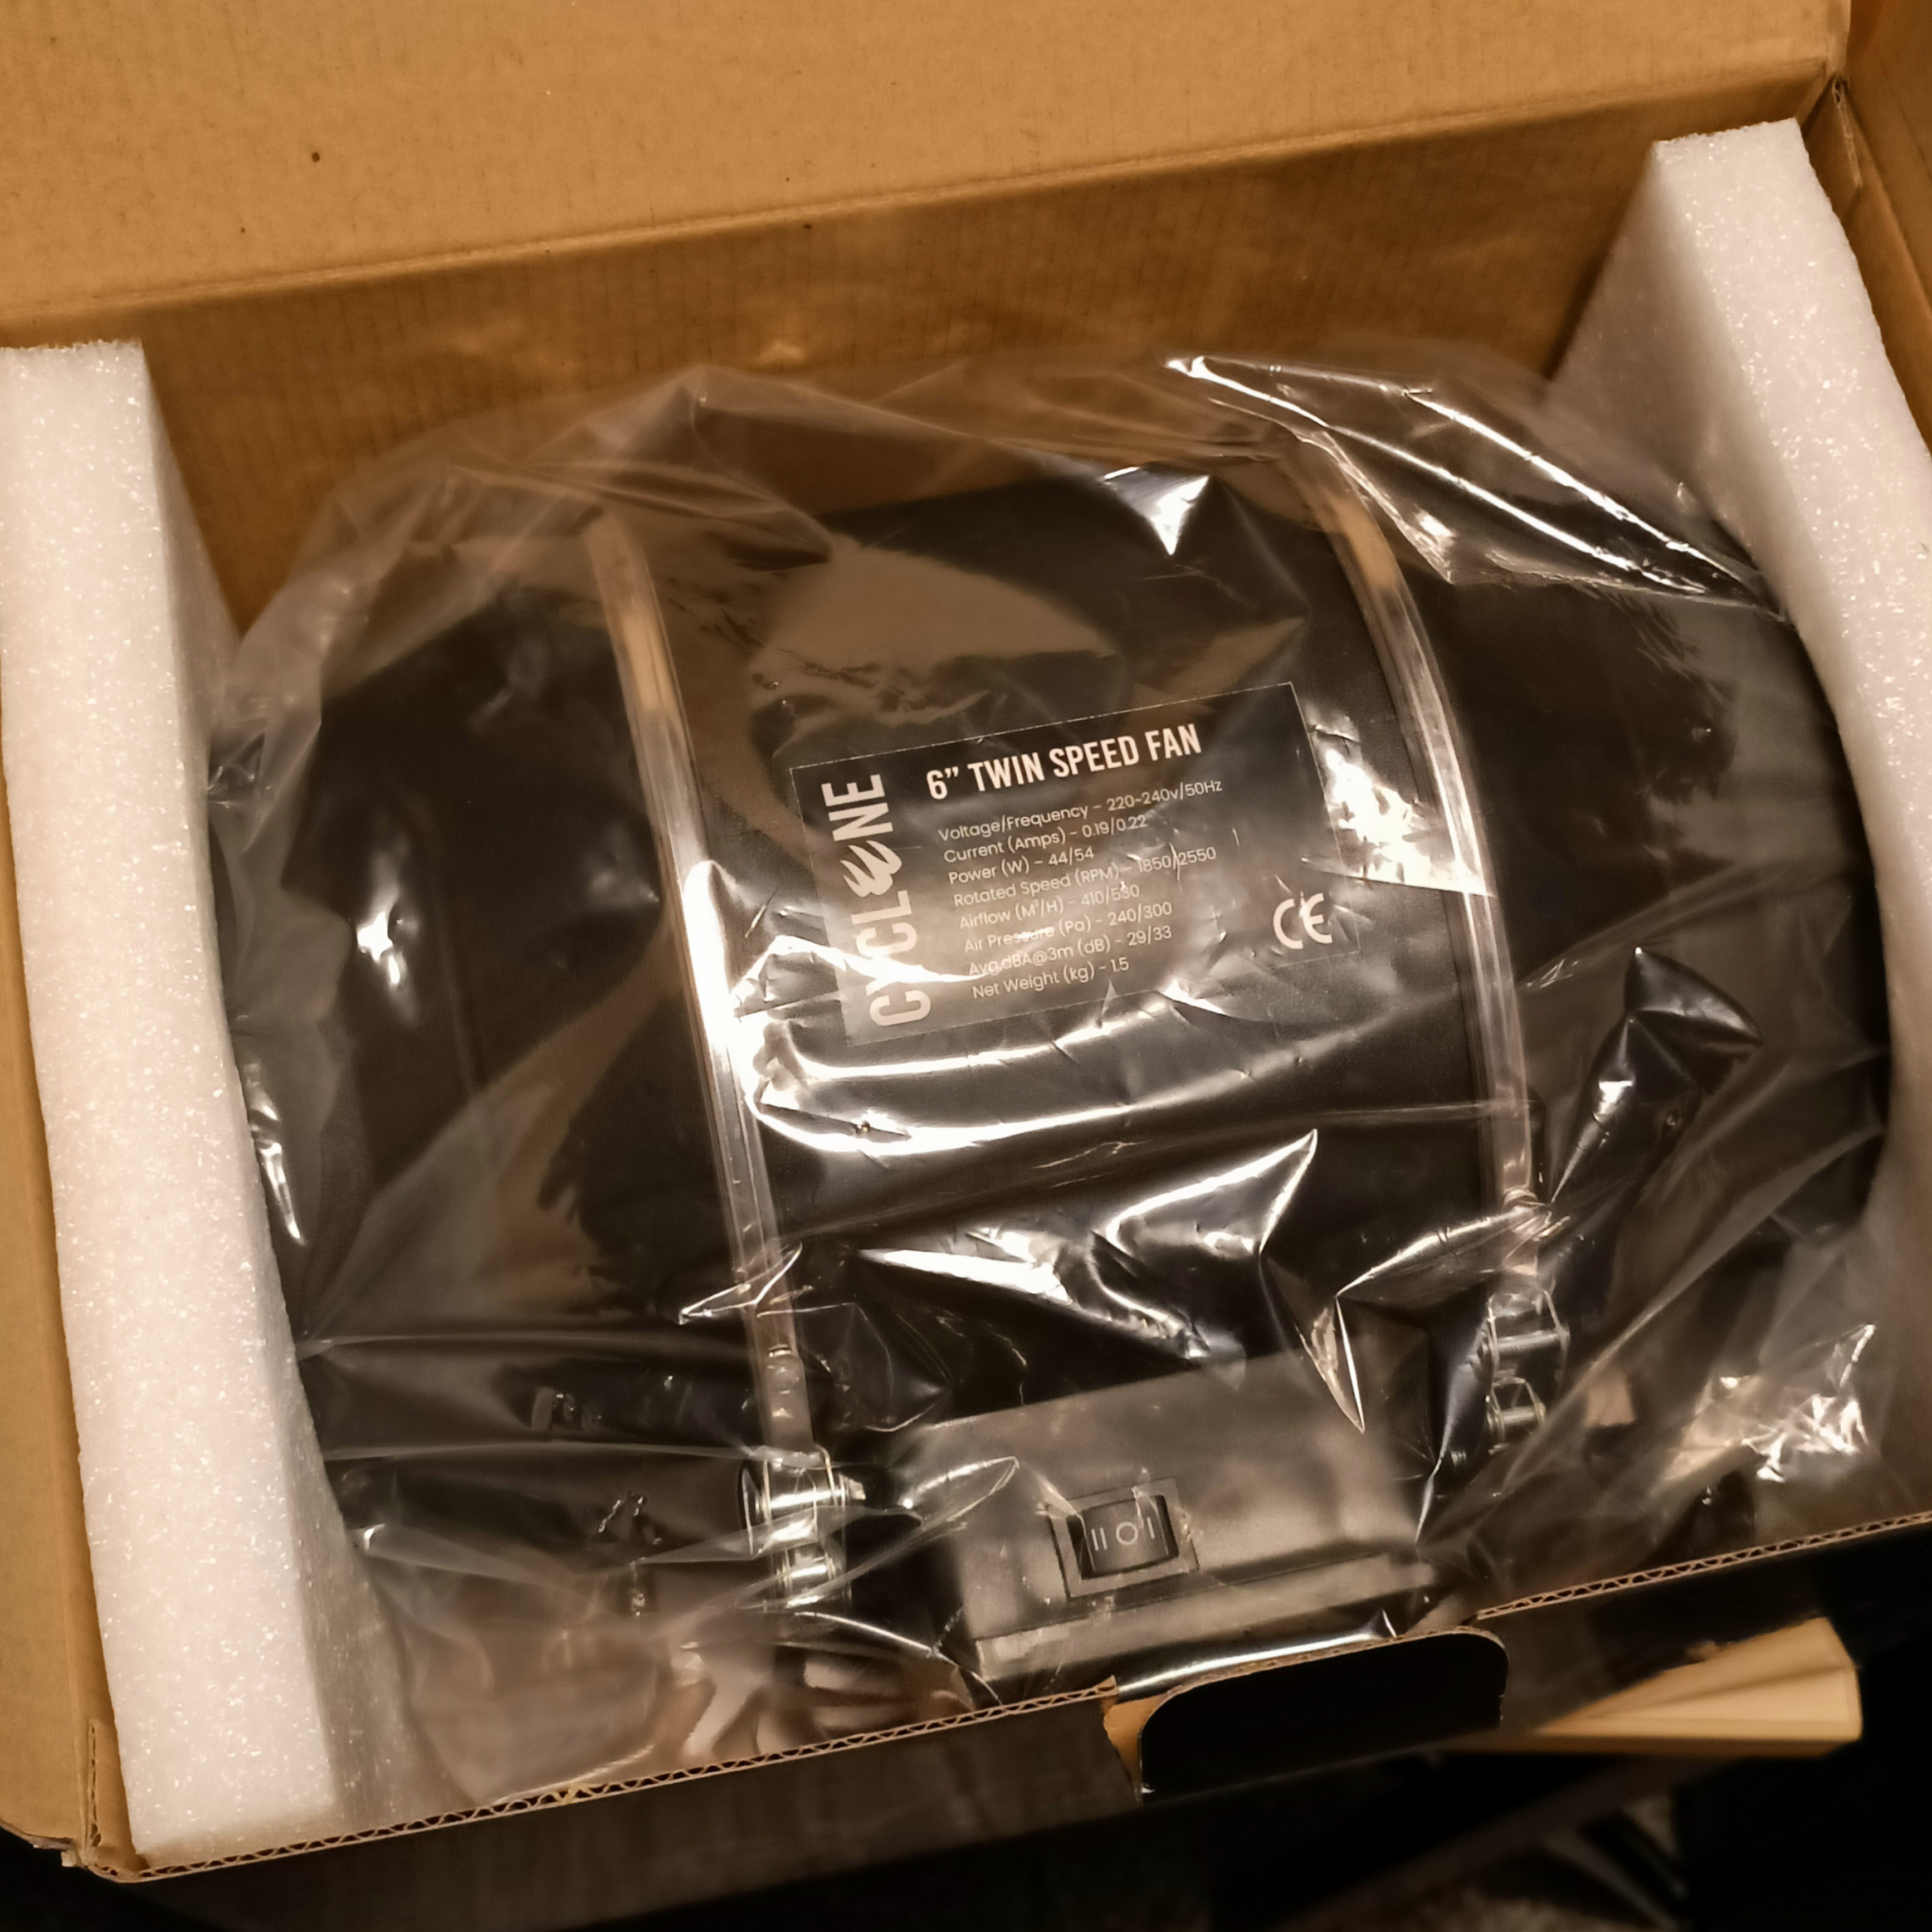
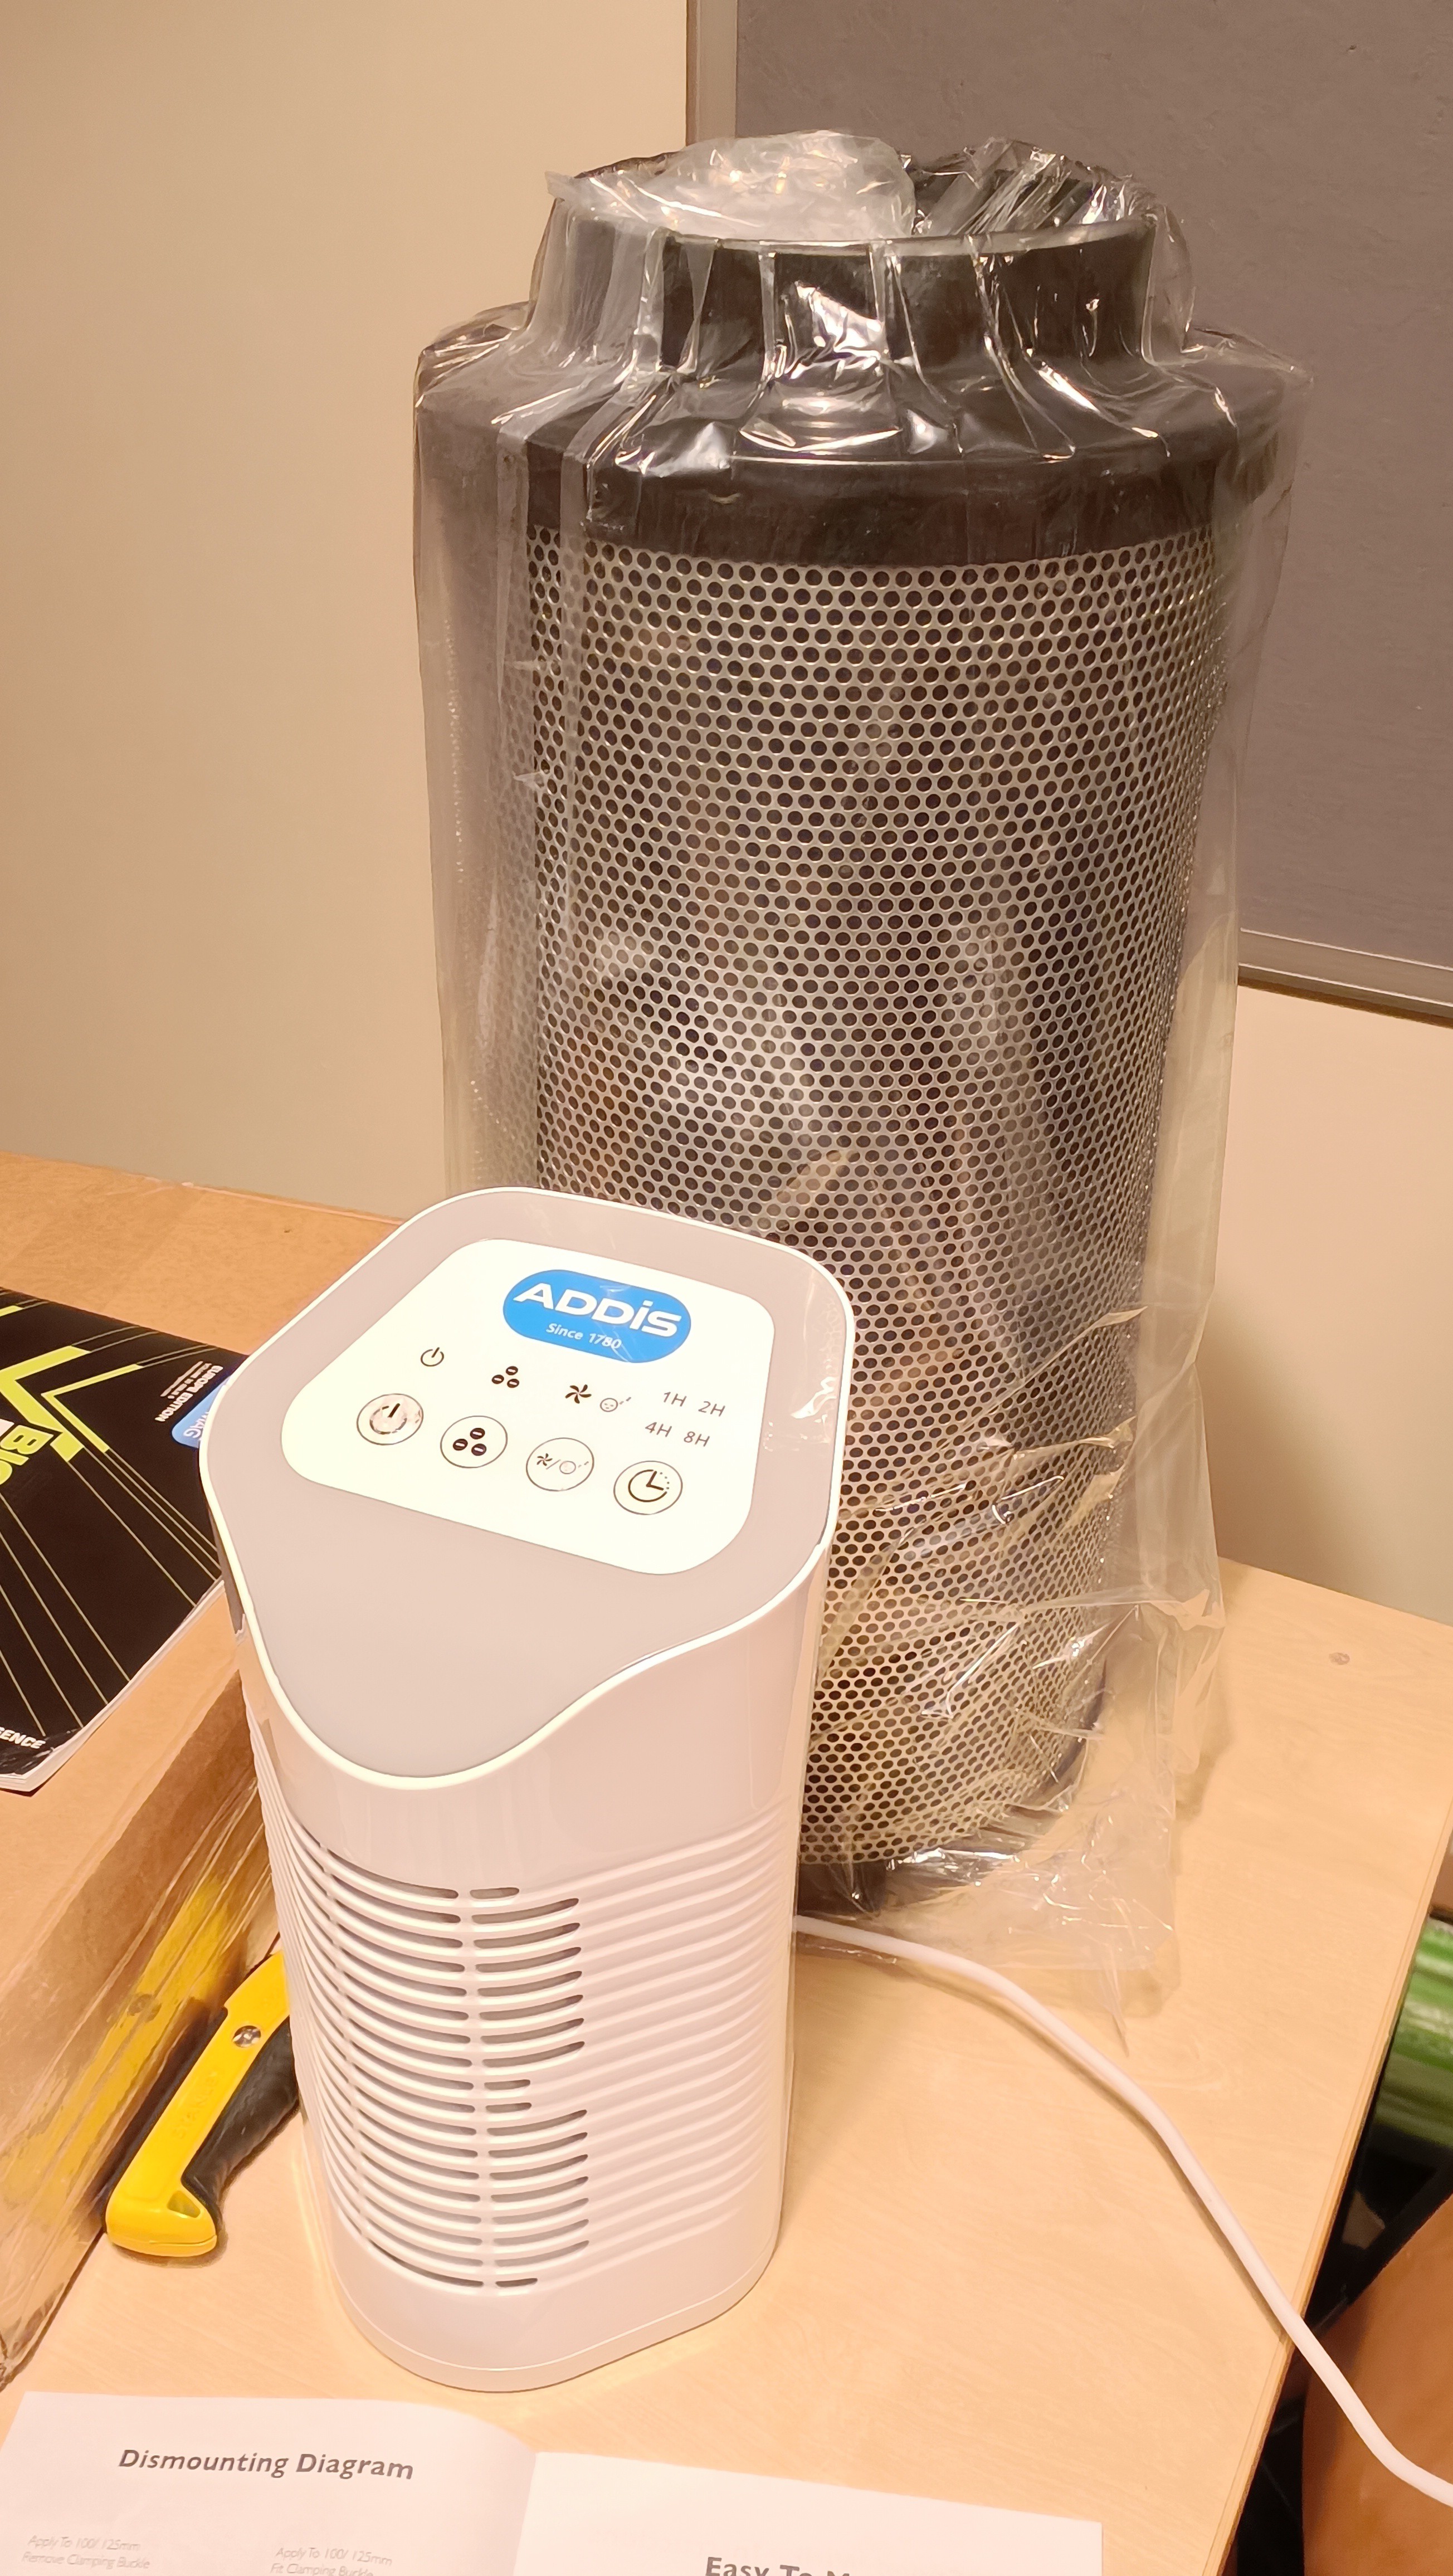
So it came in a massive box to the right (and the broken LCDs are in the box to the left, which I'll talk about in the next log)Here's the fan. Note how it says 33dB at 3m distance. I think the red-blade fan was rated at 46dB at 1.5m, so I perhaps this fan would be something like 43dB at the same distance? (This is assuming that halving the distance doubles the apparent sound, which is equivalent to 10dB).Just woughe. That entire carbon filter is like 2X the entire air purifier in size. Perhaps this thing really could actually last. It also came with a black pre-filter (which is unusual since they're usually white) and some tiny black particles which are visible on the table if you look closely (possibly the activated carbon).Tested the fan. Sounded kinda loud but ok, like a peaceful vacuum cleaner. Then I stacked the fan ontop so that it blew upwards. Perhaps 5 - 7 minutes into this, I decided to see what the dB reading is. I'd imagine it'll be quieter with the ducting on, but I measured 53dB at around 2m. I stood closer to get more data and, moments later [strange ominout sound] was emmitted from the fan and the airflow and noise level dropped substantially. I assume this is a fault so I turn off the fan.Look. You can see the events described in the waveform.I didn't see anything fall into the fan and I didn't see something like a loose bit of activated carbon inside that could've been whisked into the system. It's also on a surge-protected socket which hopefully prevents any strange spikes from damaging equipment.
I was hoping to at least get a room purifier going, since this setup should be able to change the volume of air in my entire room over 10 times an hour. Unfortunately the indifferent universe said NOPE to my hopes.
So this is the first tent in my budget I found on 23 Feb, 23:00:
This is a very cool but very expensive tent:
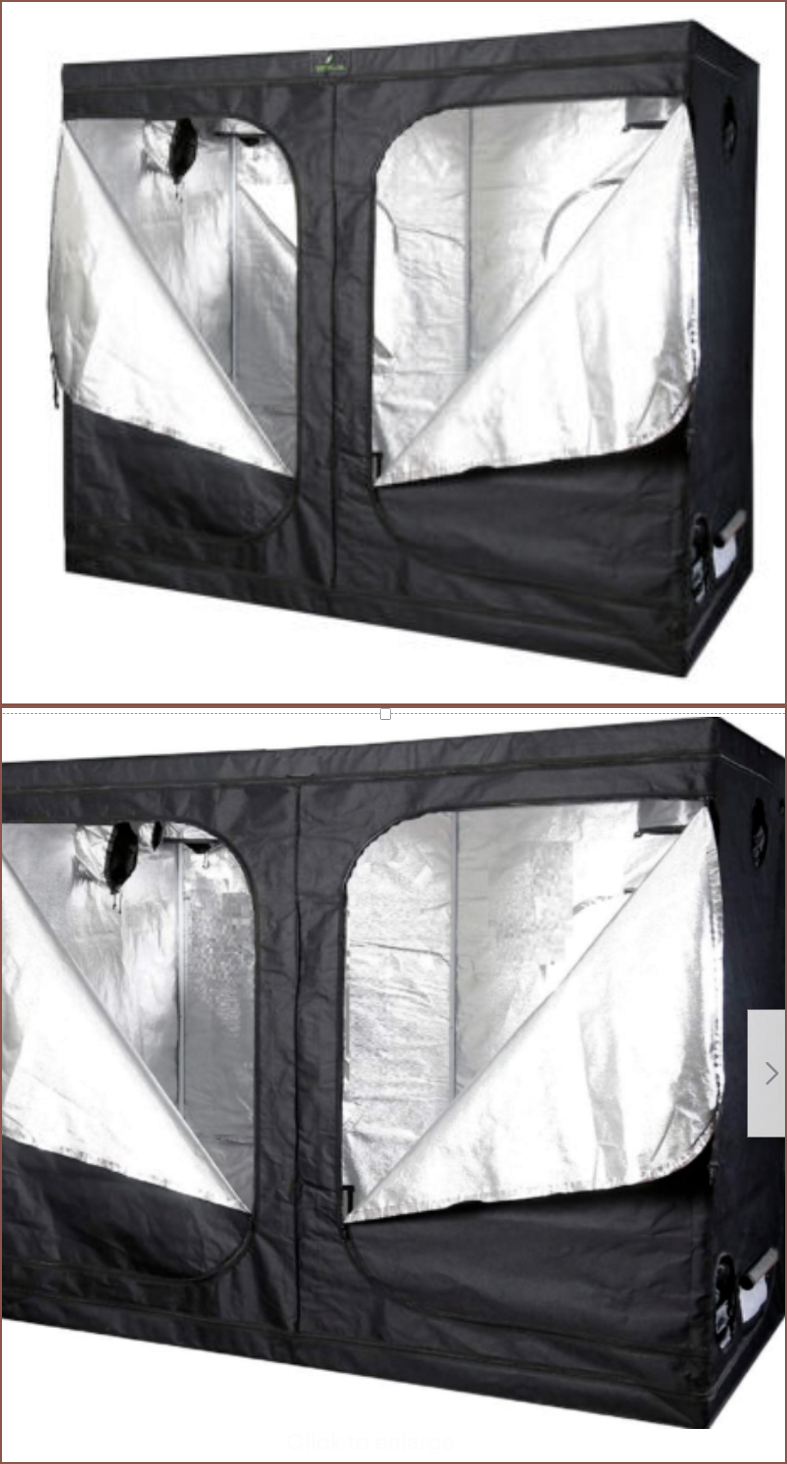
This is a cheaper tent that looks more professional:
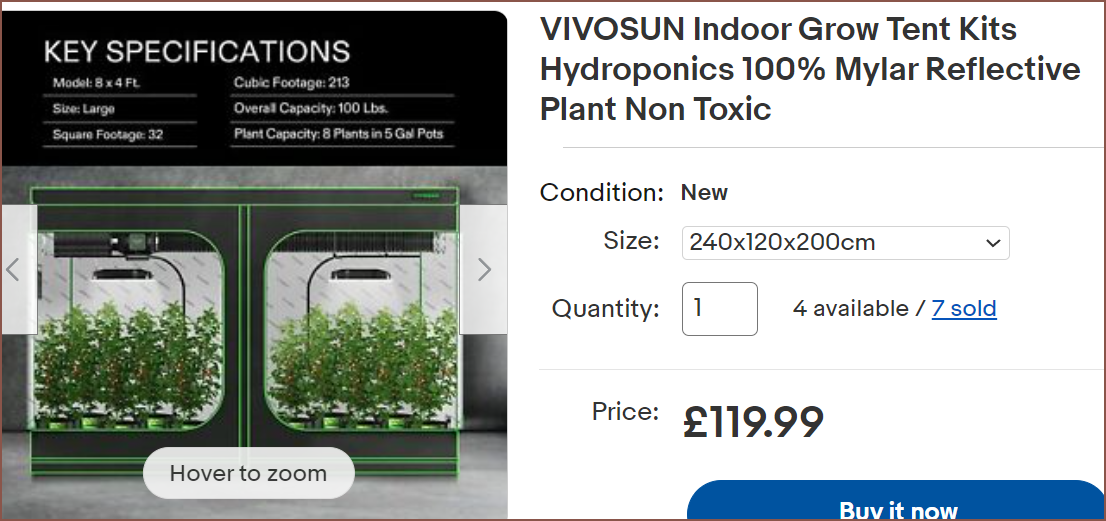
Then I spent 2-3 hours researching about ventilation (which I'll talk about in a different log) and I didn't want my lack of finds to delay the tent itself from arriving. At 3am (24th Feb) when I bought this tent, I didn't detect any issues with the green tubes or branding everywhere. I was just thinking "Yeah green and light grey are my branding colours anyway." and "WOW! This reflective texture looks much higher quality than the first one I saw!". Before I went to sleep, I saw the below image and I quite like the industrialist look of the overhead filter and bright interior walls, looking at this from an office setup perspective.So it was a new day and it took until maybe 6pm to realise I didn't mentally render the branding in any of my mental simulations. I look closer at the videos of the tent I can find to gather data, and soon I was thinking "Oh noh! There's "vivosun" every which way I'd look, and the green is the wrong shade." I can tolerate the green, but my worries have spiked because of all the interior branding.
The reason why I realised I didn't render the branding or question the specific shade of green is because I found this tent:
With the coupon, it's £119
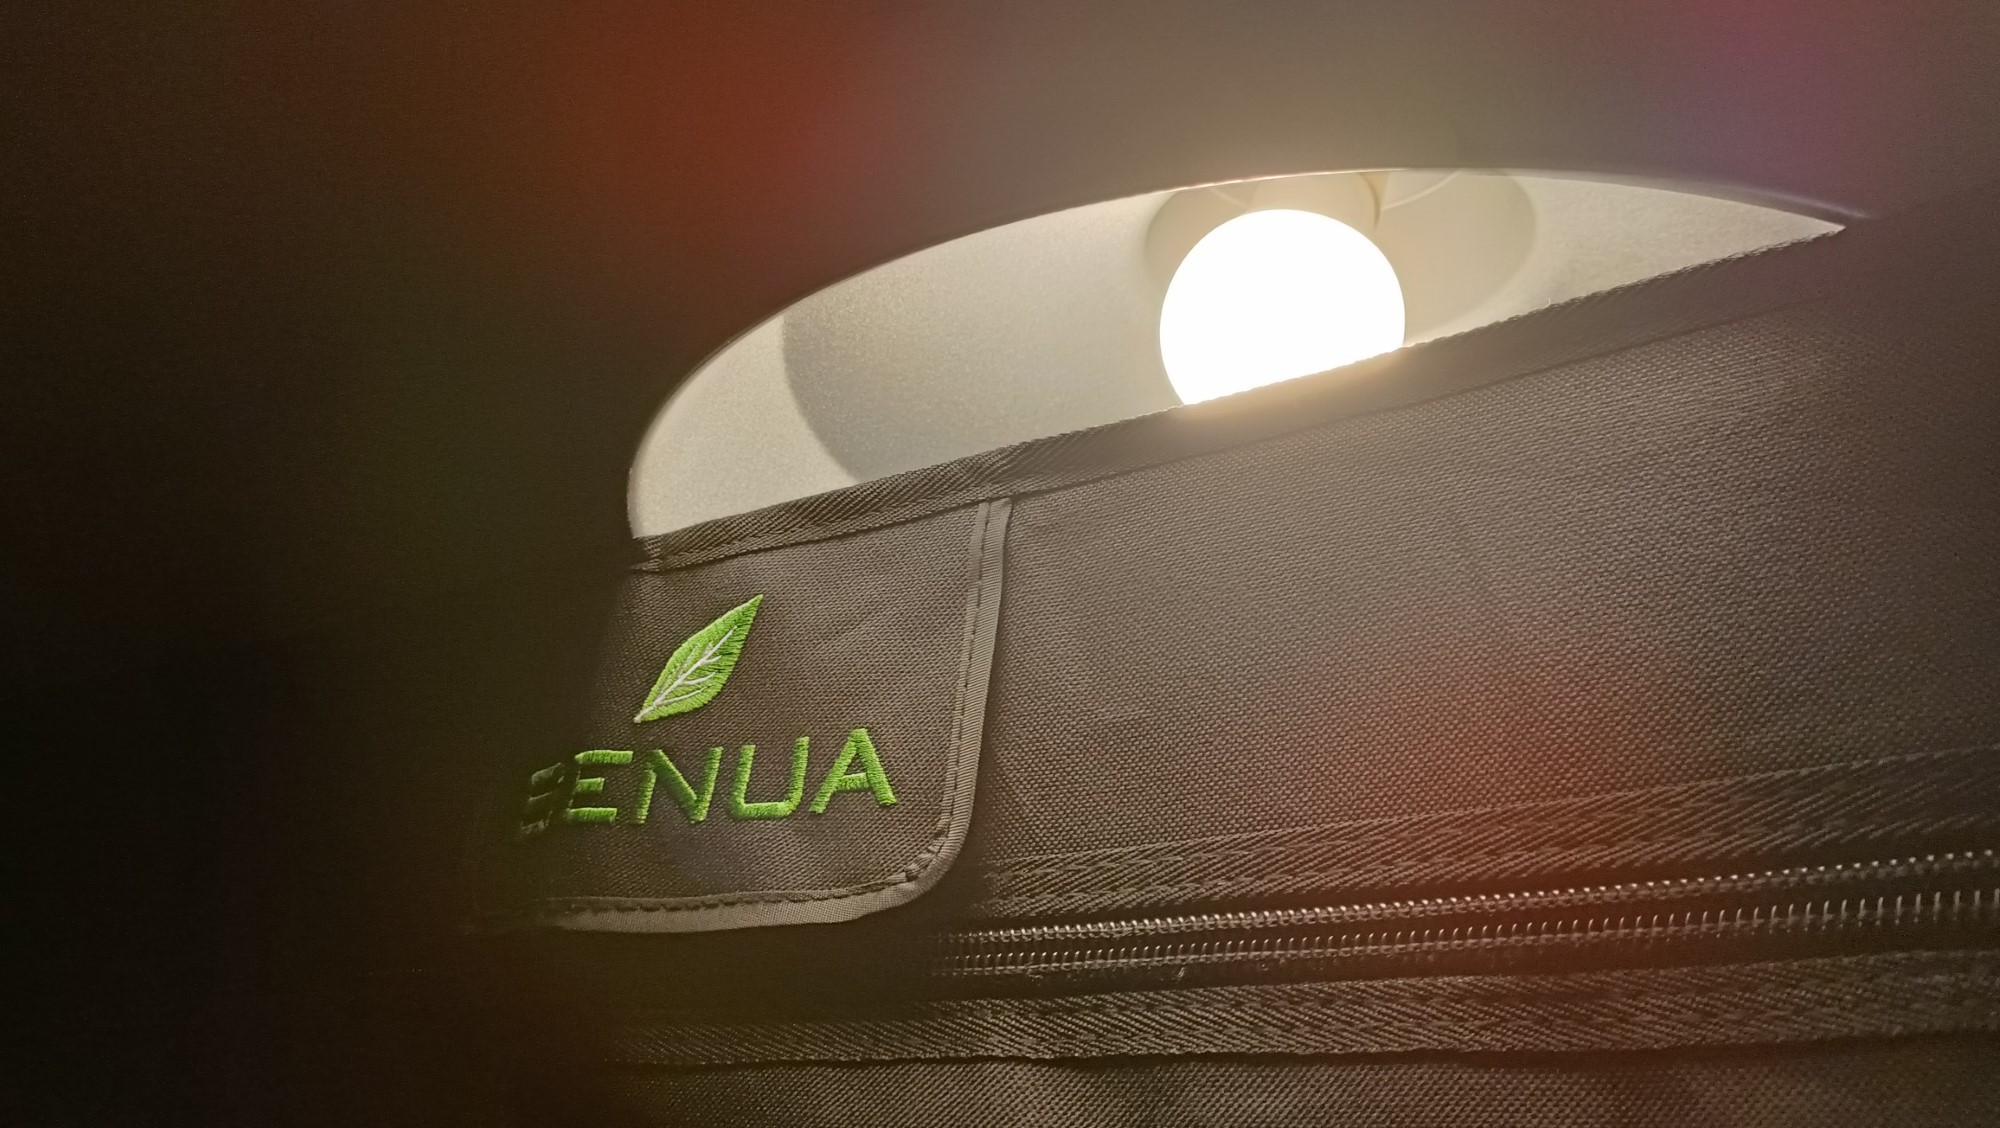
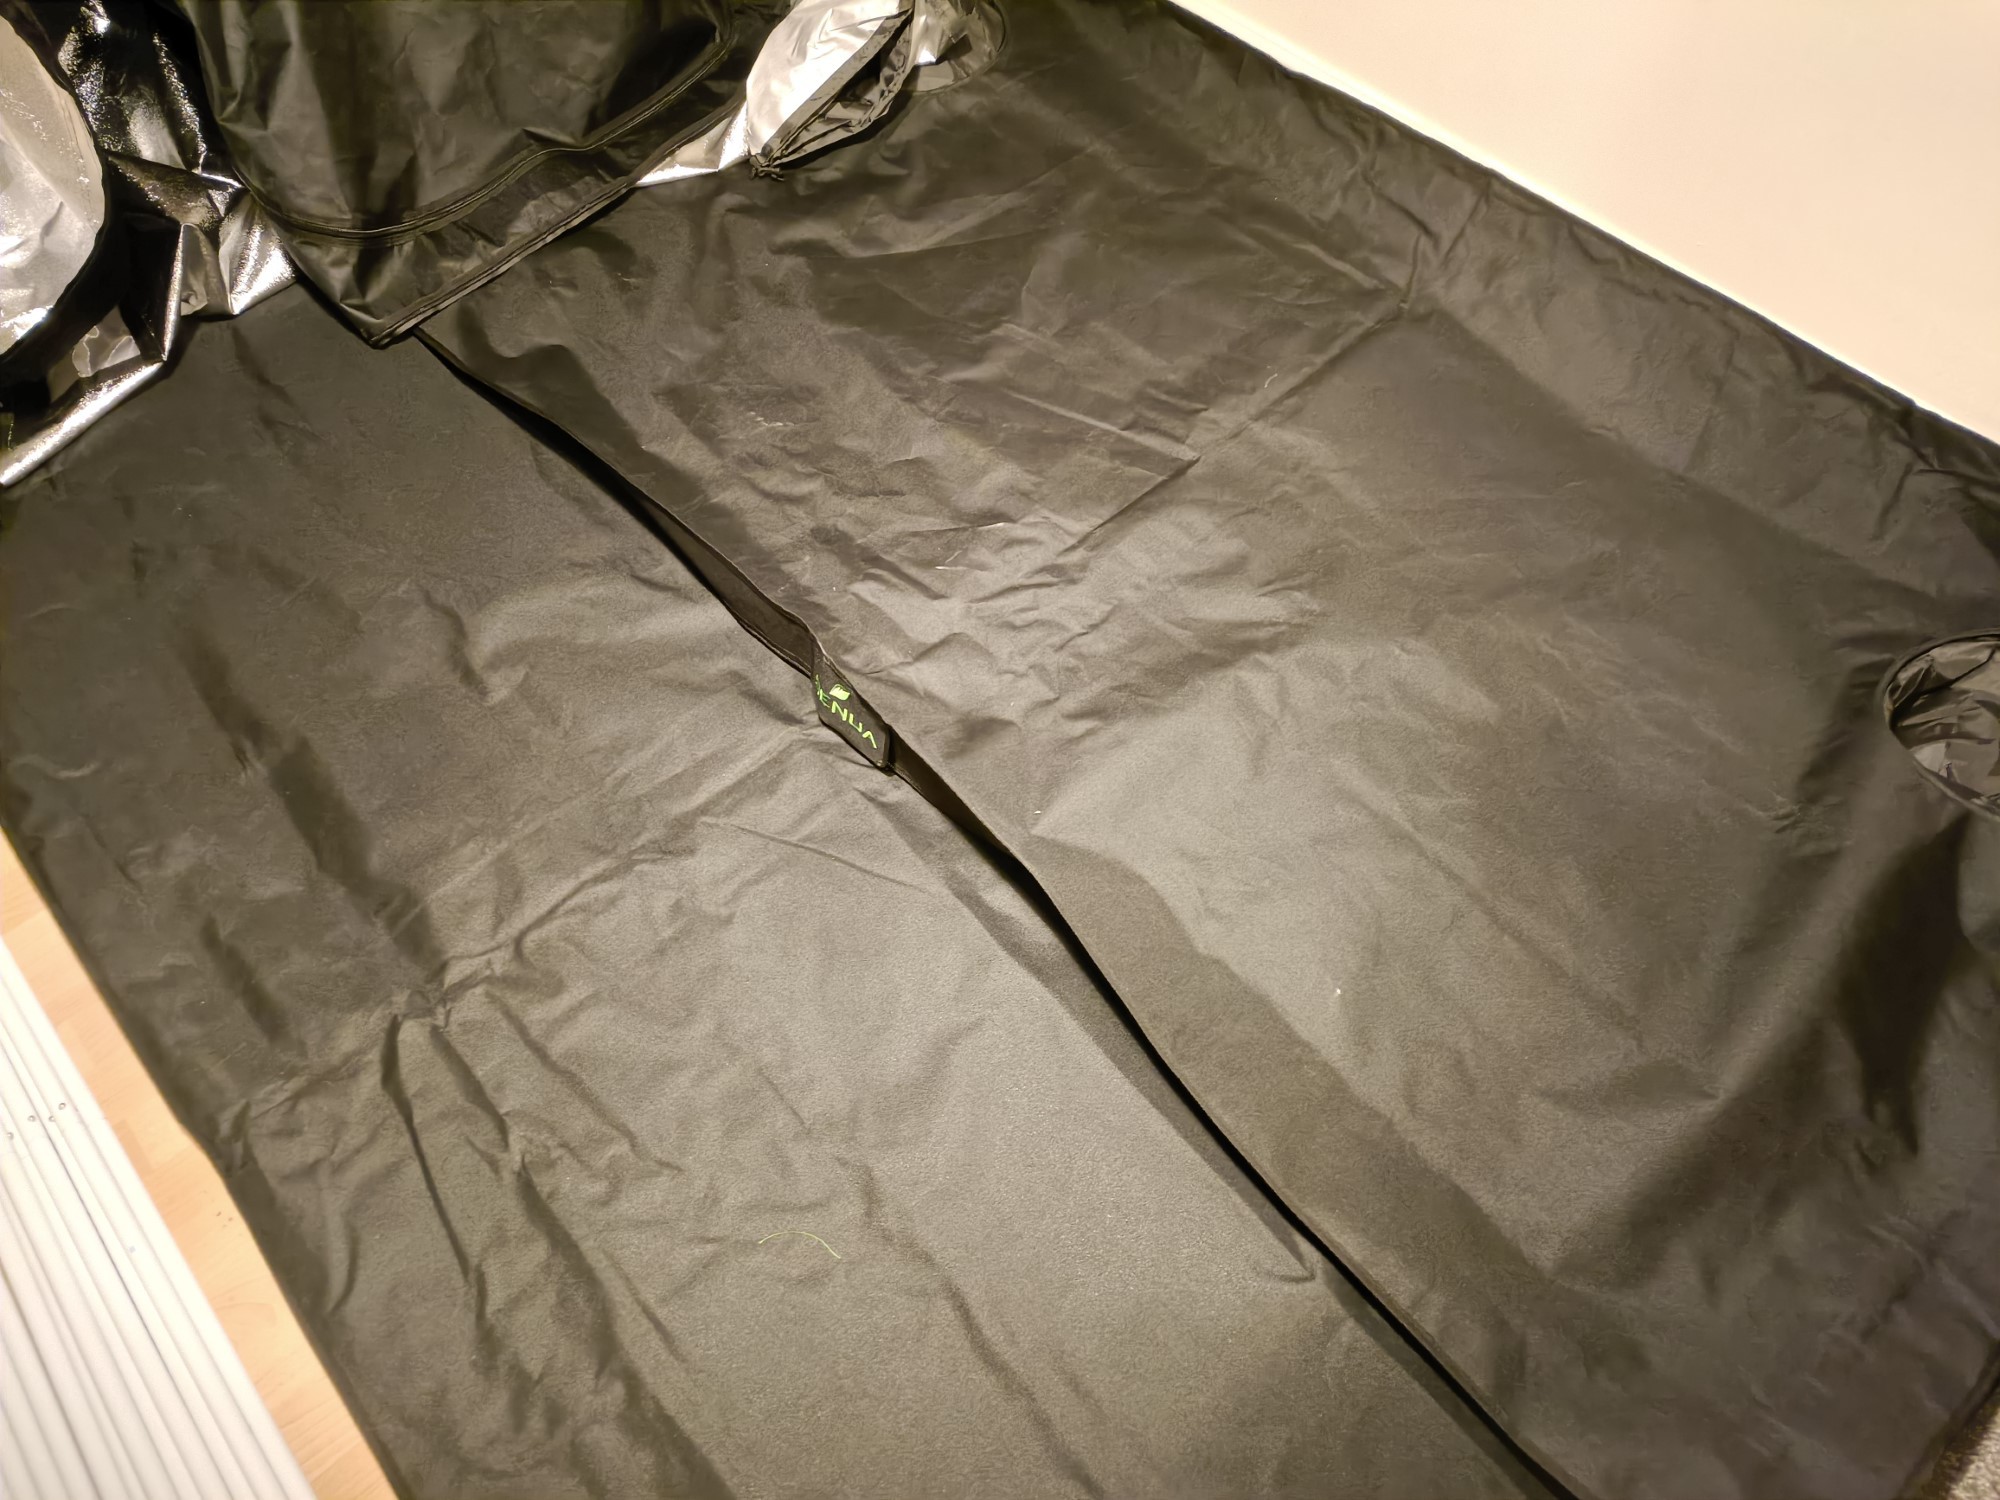
This Senua tent has the same lovely texture as the Vivosun, but absolutely no branding.
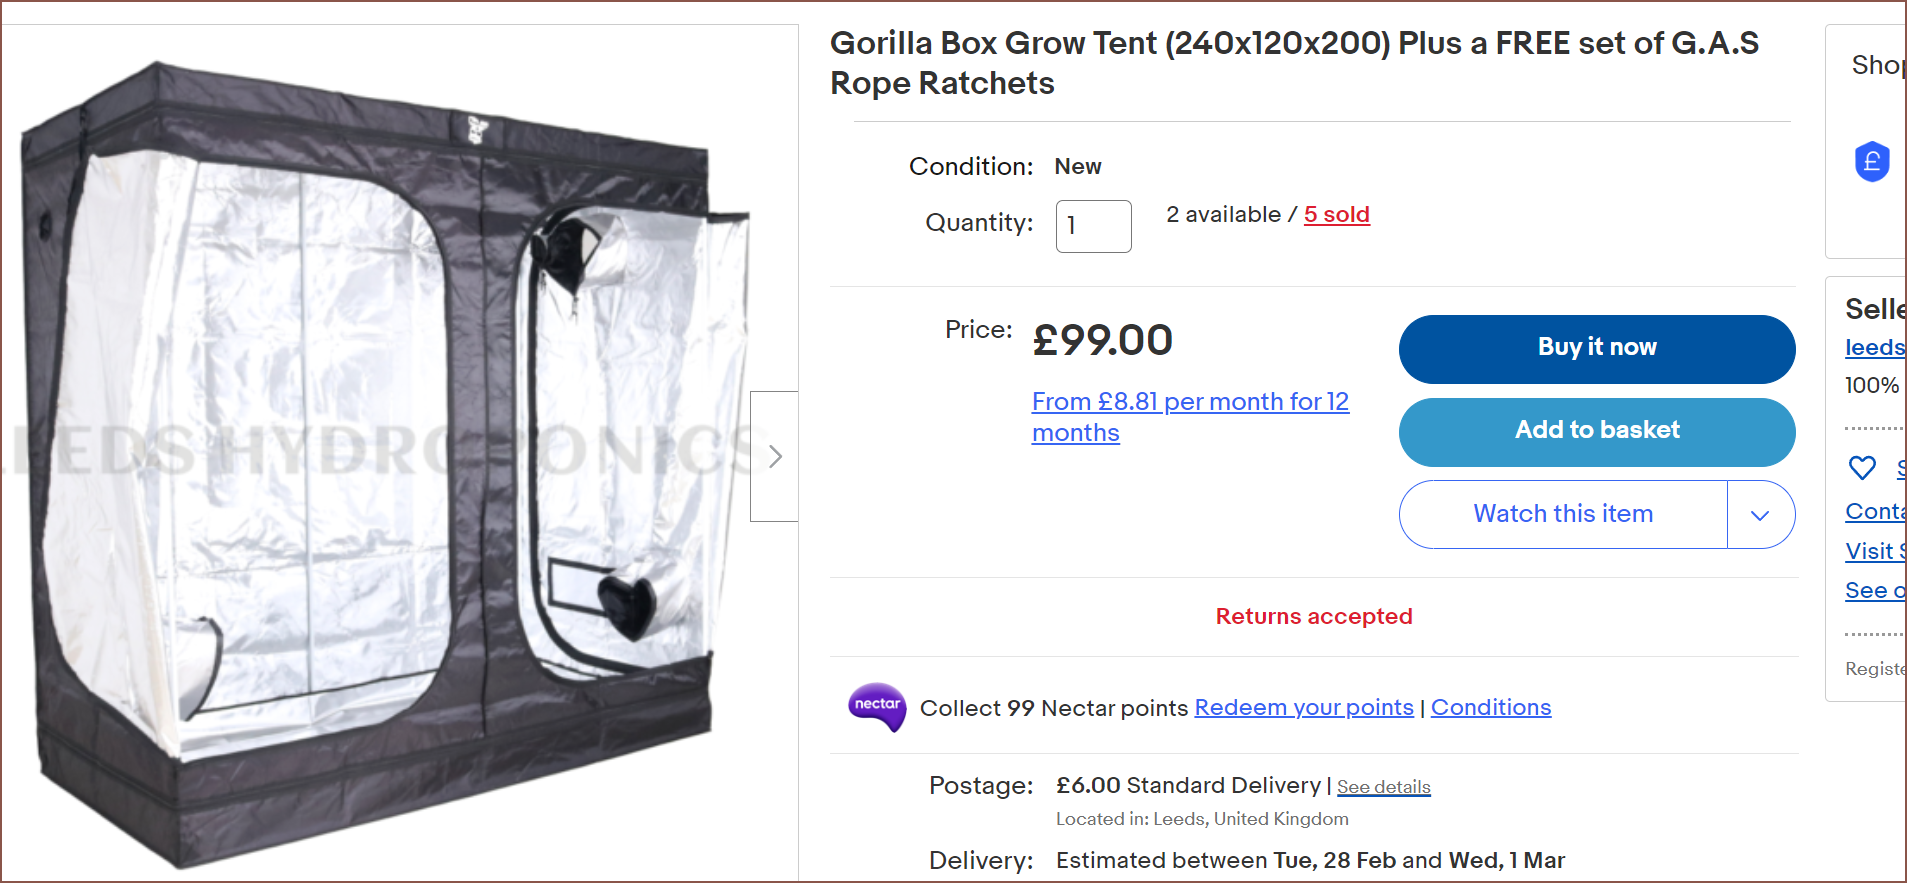
There's an even cheaper tent that comes with rope rachets which are used to hang the carbon filter gear on the ceiling. Unfortunately, I looked into Gorilla Box tents and they also do the same branding thing that Vivosun does.
It's now 9pm on the 24th of Feb and my vibe is at all-time lows because of the branding plastered inside a tent that's already been dispatched. The Vivosun tent was the only one where the seller actually offers to pay for return postage apparently, so perhaps I could see this as a risk-free venture? I did send an email to the seller and got a response at 8:30 saying that it's not cancellable but I could try and refuse the package. I've never done that before so I'm not sure how well that'll pan out.
Because of this, I'm now being extra strict with the interior look of the tent. Thus, I decided to reject tents that have windows, since they'd always be closed and would just be some black rectangle in the wall:
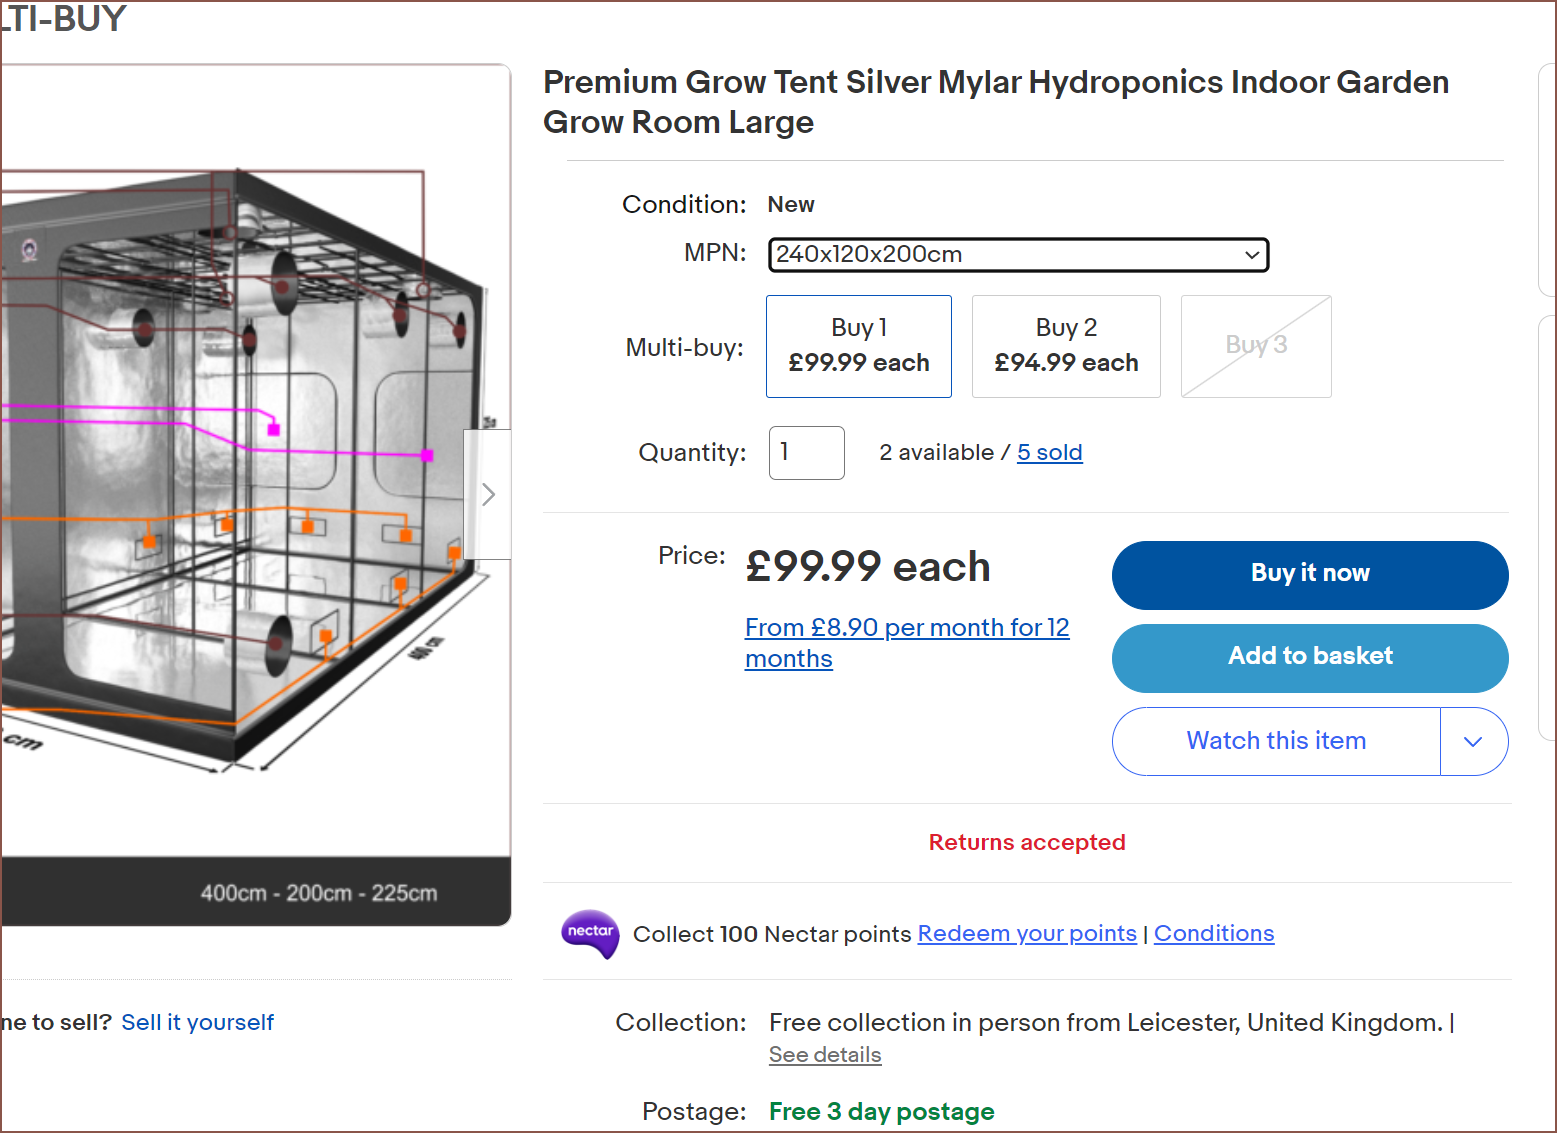
I found a listing that was kinda sketchy only because they took an image of another tent and poorly modified the image:This tent was £108 after a coupon, which is one of the lowest I've seen so far. Well that is untill I'm scrolling through the search results and see this detailed render listing:The tent is from Prodigy Tents, but in the process of finding that information, I found a 3D model of a similar tent. The tents seem to have more ceiling bars than most others.
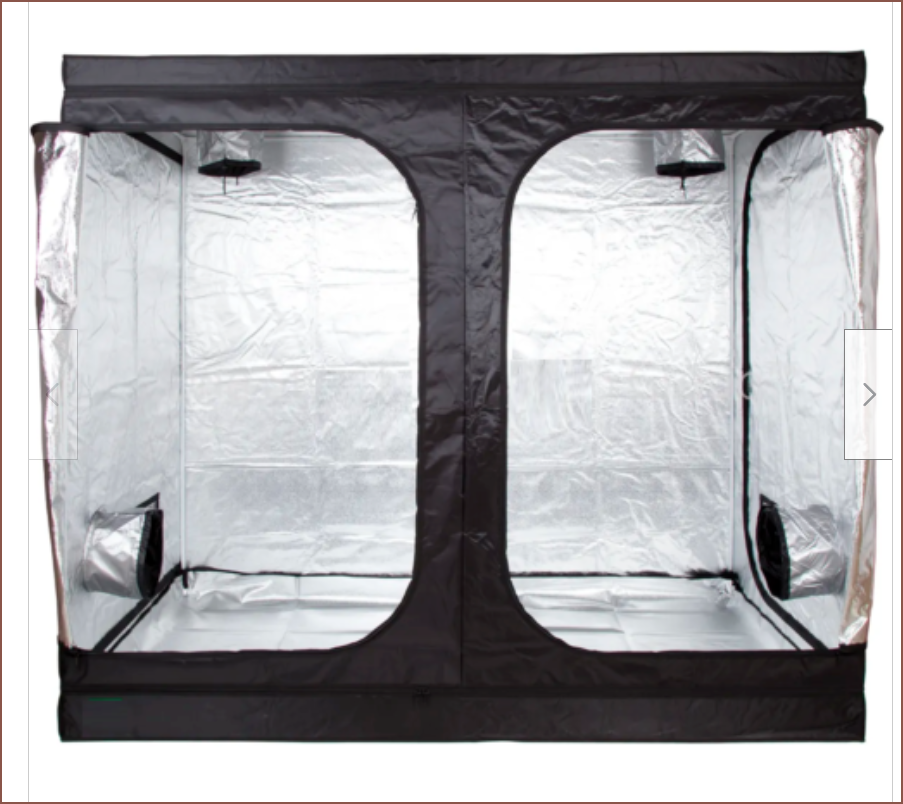
To end off the day, I saw this tent intended for office spaces:
Now it's today, the 25th and I notice something missing in that £99.99 tent: the waterproof floor tray thing. Seems that option is out now.
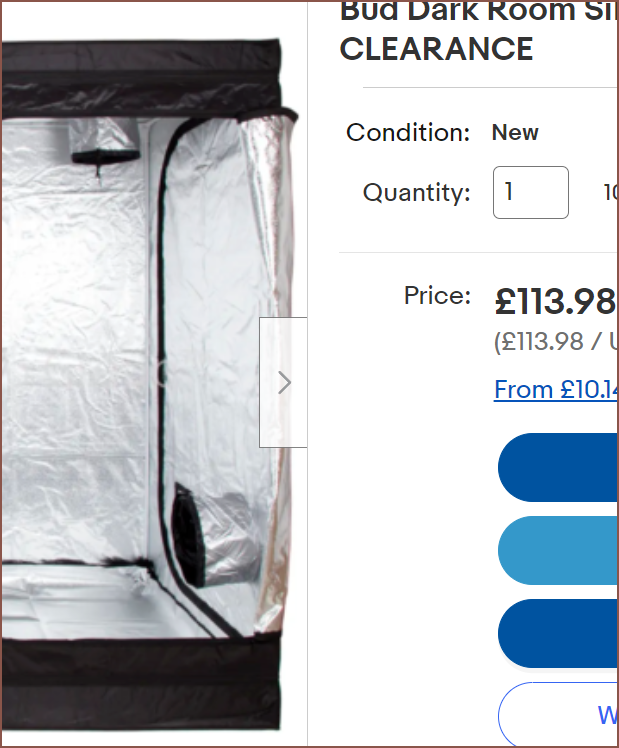
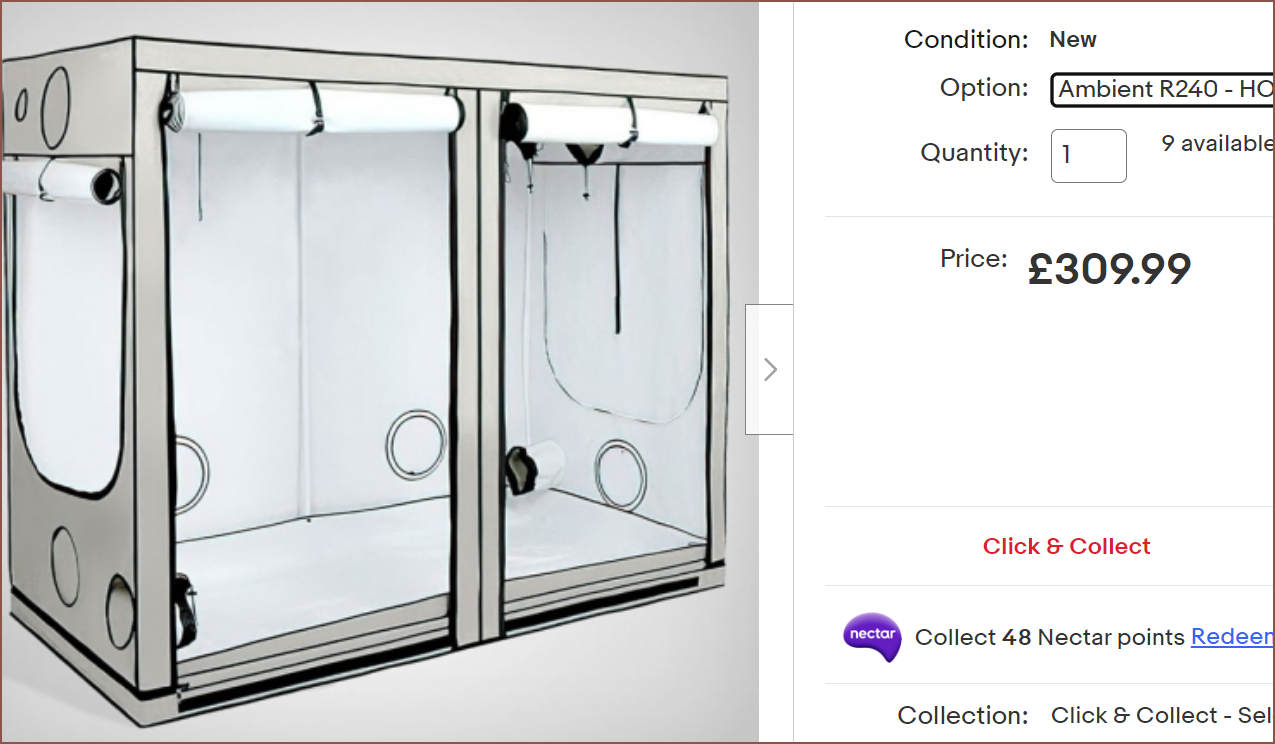
Currently, I'm thinking of getting this £109 tent for the long-term:
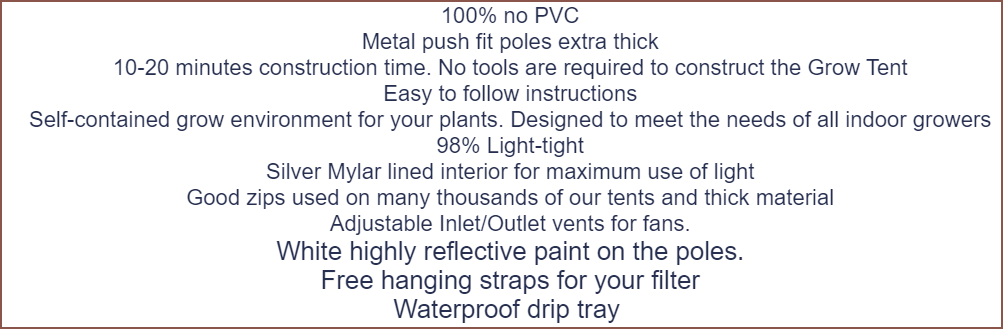
It looks like there's few things on the walls, such as extraction vents or rear mini doors (see the Vivosun tent) and the white beams blend in too, so I think this is a good solution with the Seuna one being a backup choice. The listing description also has everything I'm looking for in a tent:
 kelvinA