Close
0%
0%

Brushless Motor and Driver Business Card Kit

Learn how to build your own brushless motor and control it with a Brushless Biz Card!

Similar projects worth following
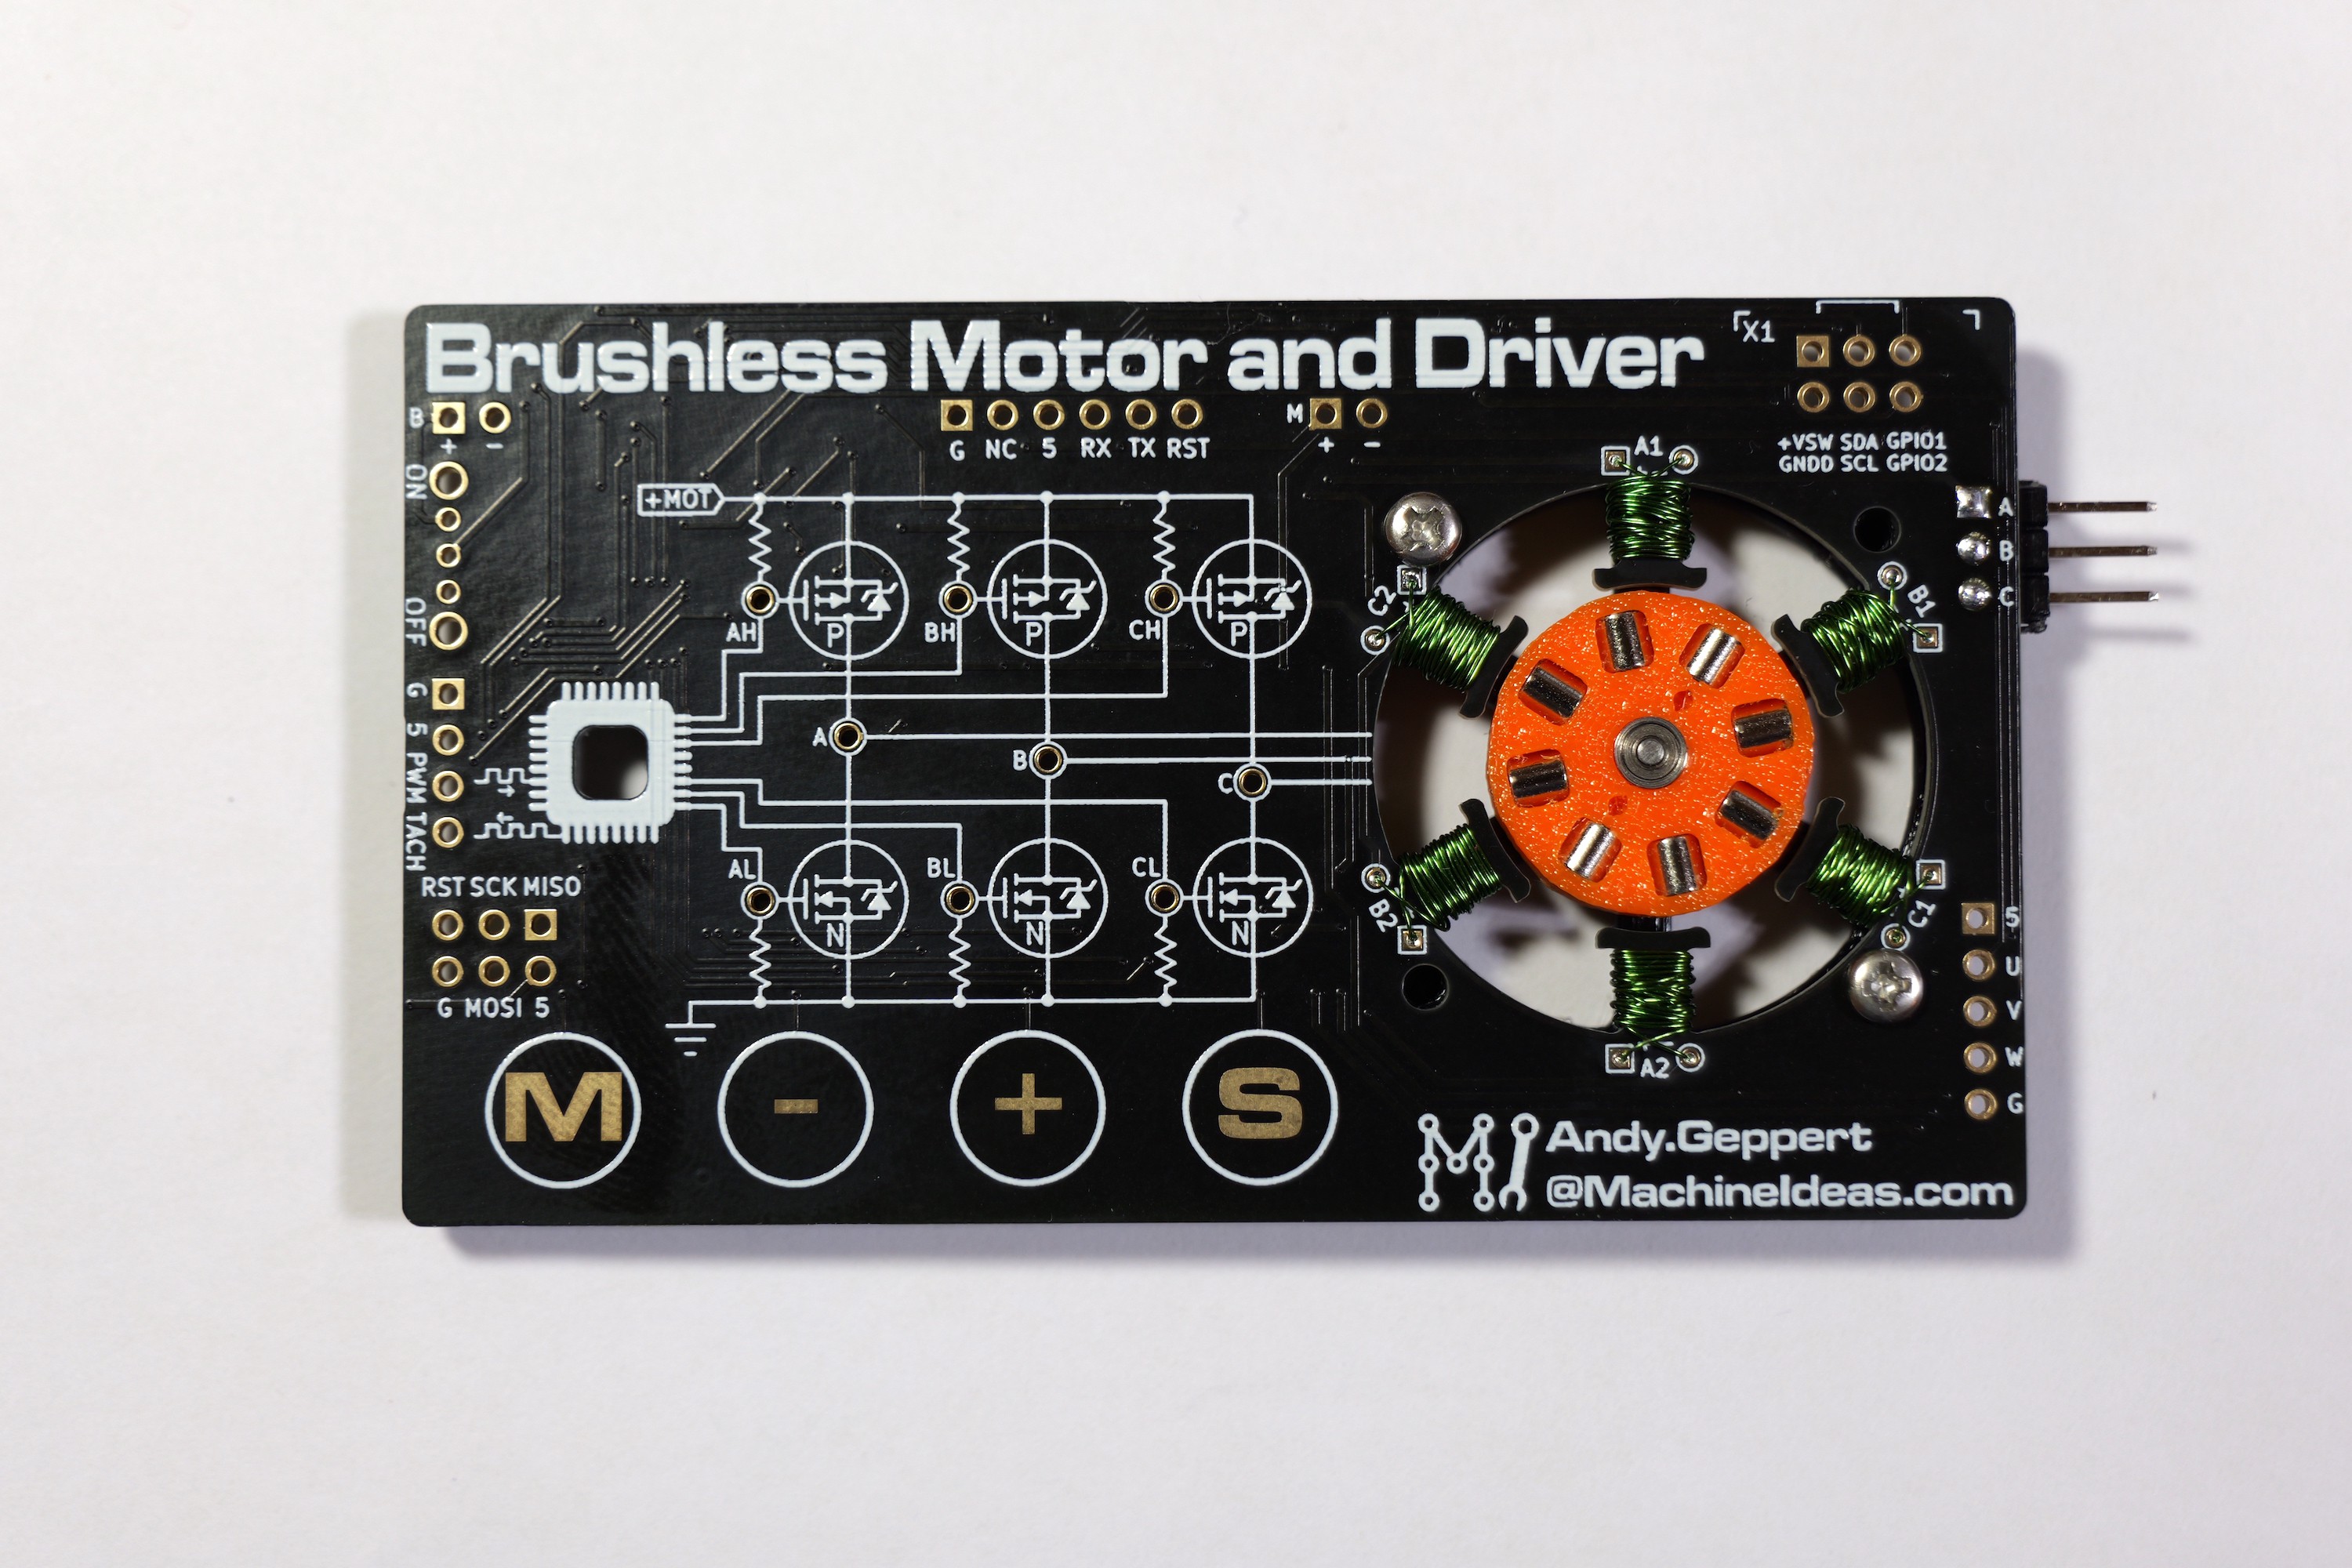
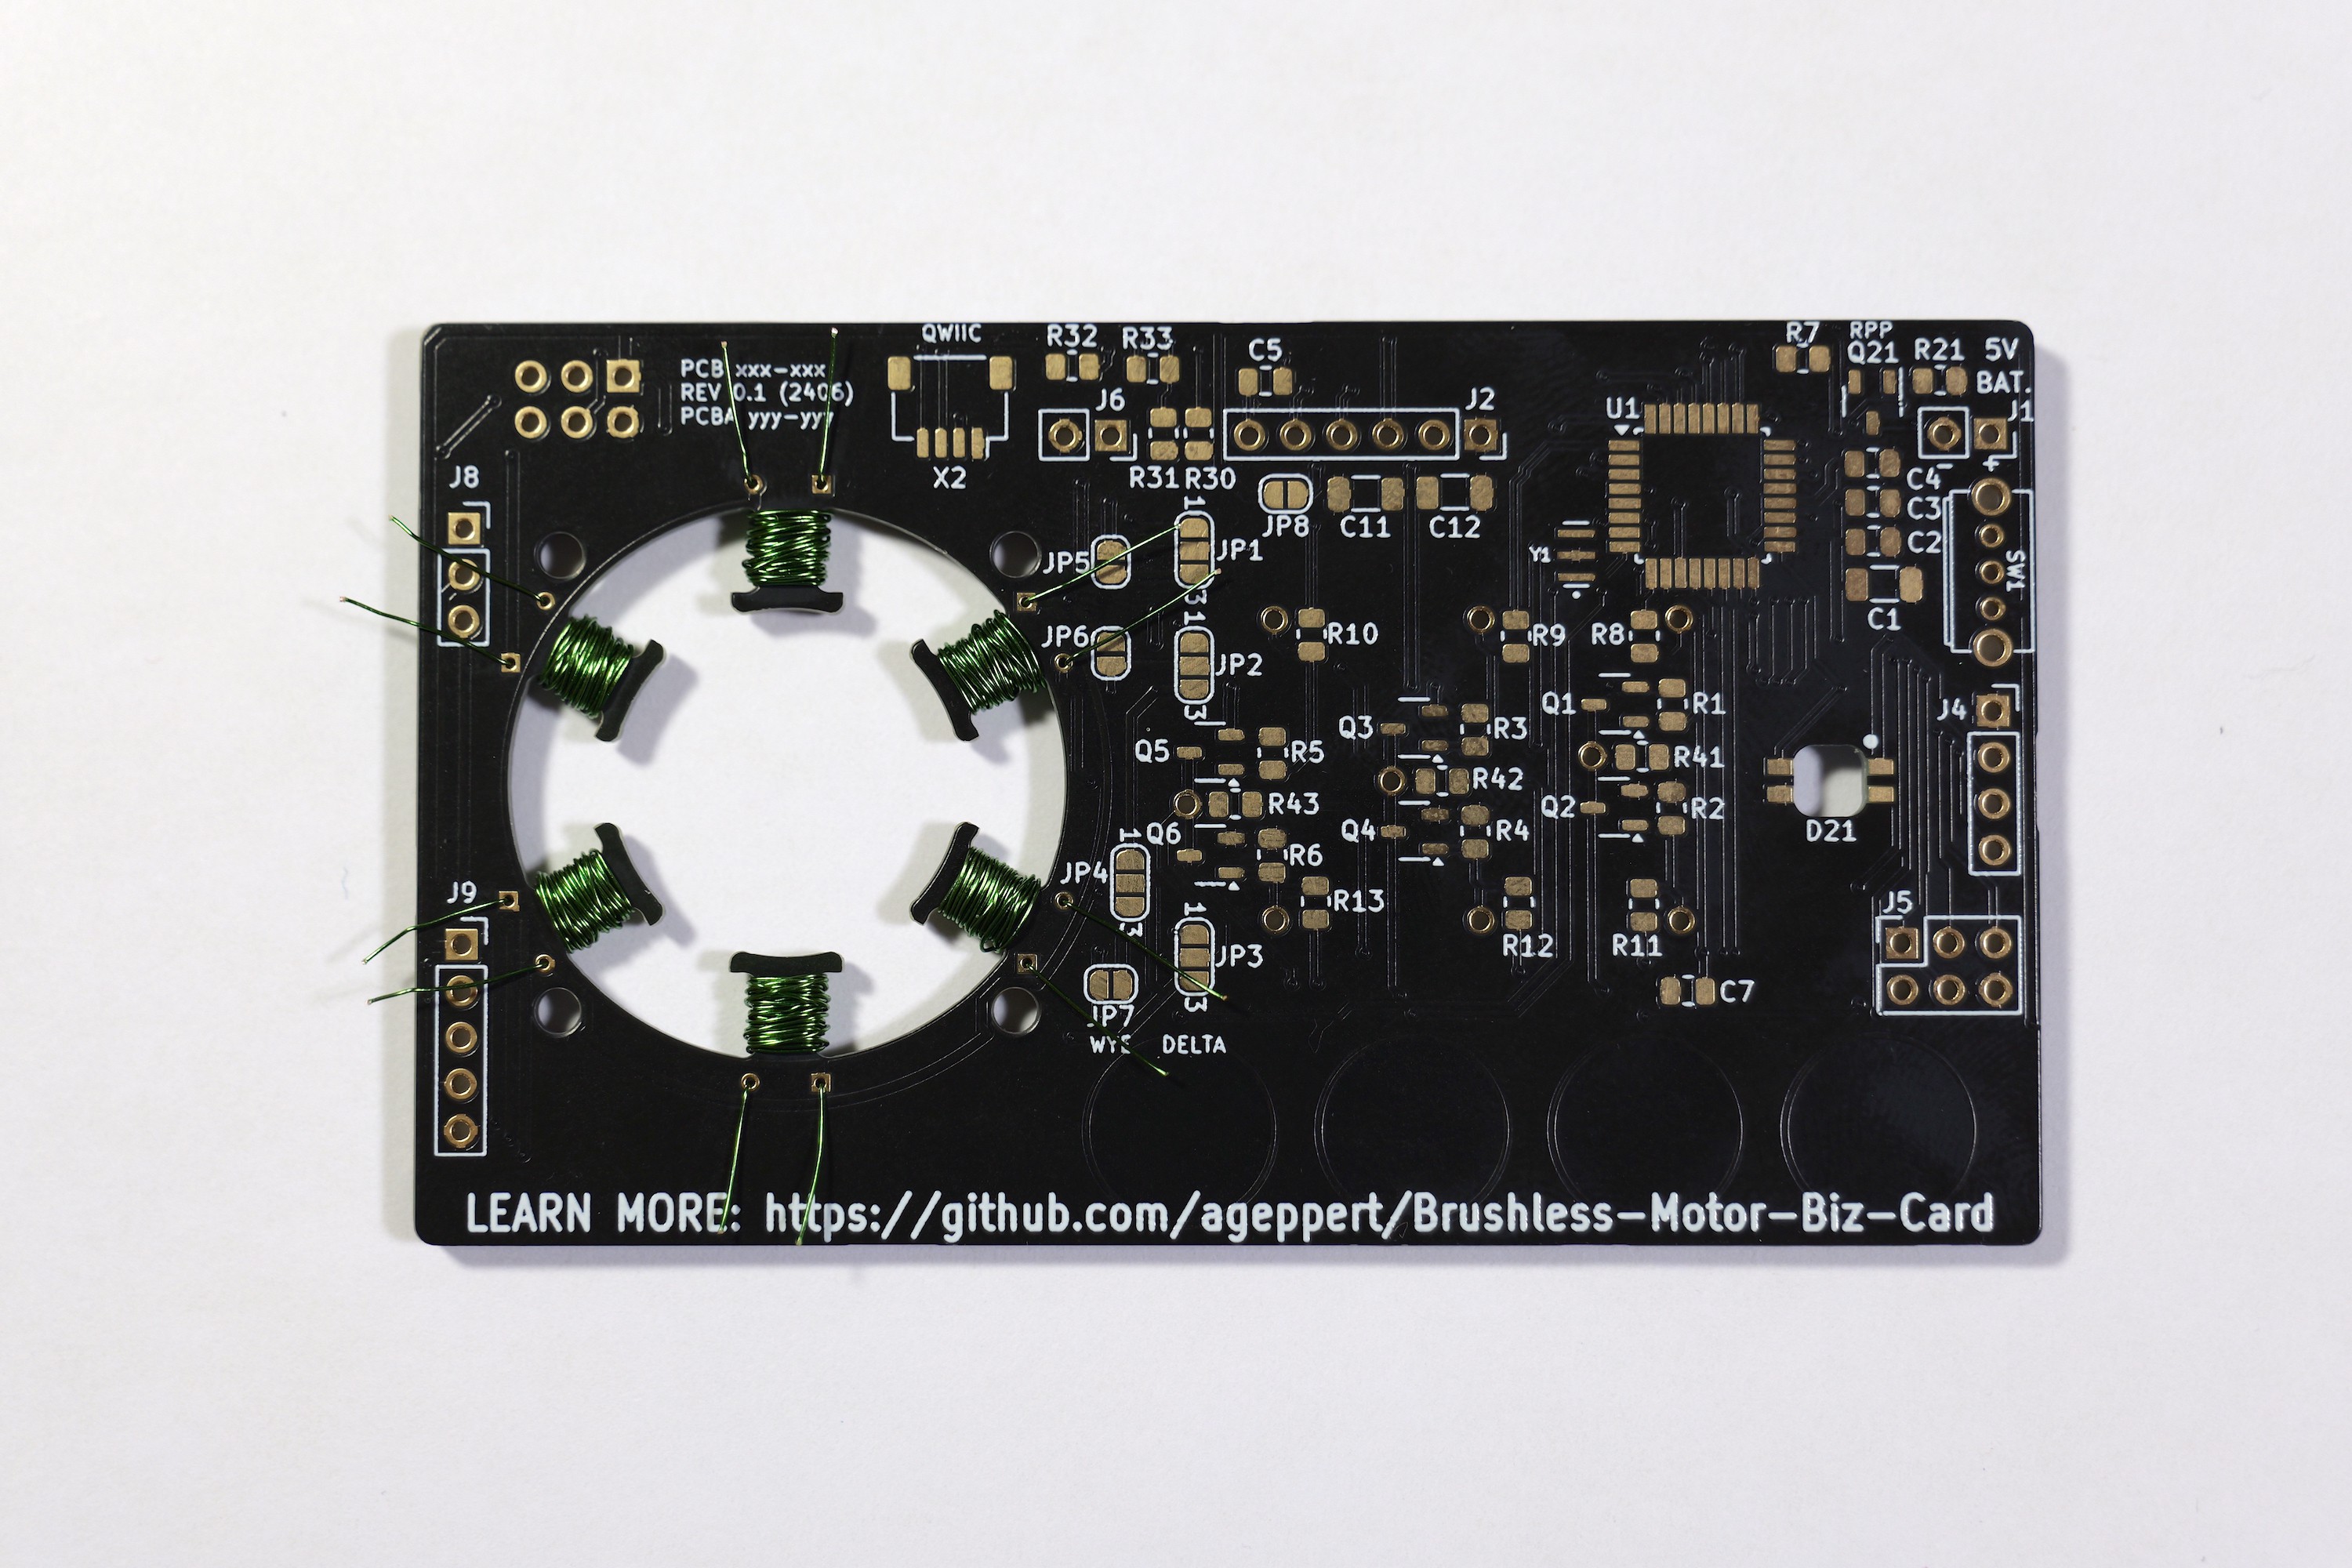
Designed for learning, this electronic business card PCB will guide your build of a brushless motor and provides the opportunity to experiment with control algorithms. Try delta and wye winding configurations and experiment with rotor and magnet designs as much as you want. The circuit is illustrated with test points on the front side, and the components are all placed on the back side.

Everything is open source and freely accessible via links shared below. Design tools used are KiCAD (electronics), Inkscape (graphics), and OnShape (mechanicals and motor). BOMs for electrical and mechanical components are in the Github link too. Check out the video for an overview and assembly instructions.

VIDEO: https://youtu.be/VpZeIkvS7Ww

I've had this idea in mind for a while and the Hackaday Business Card Challenge is the perfect motivation to bring this idea to life. I'm in a frantic scramble to finish the design and get a board running before the close of the contest!


Features

  • Built-in schematic with illustrated test points on the front
  • Built-in motor with option to connect external motor and hall sensors 
  • Adjustable winding configurations via solder jumpers
  • Simplified voltage feedback from the motor phases for position (using 328PB analog comparators with interrupt feature)
  • Optional connections to external motor and hall sensors
  • ATmega328PB - Arduino bootloader (via USB-FTDI cable) 
  • Capacitive touch buttons (Mode, -, +, Select)  to control mode, speed, and who-knows-what?
  • RGB User LED
  • QWIIC/Stemma I2C port
  • R/C connector input with tach output
  • ISP port
  • Power switch to select USB or battery power source
  • SAO port for an SAO OLED, of course!
  • Simple Arduino code for you to learn and expand upon
  • Size is standard US business card 2.0 x 3.5 inches (50.8 x 88.9 mm). Thickness with the motor and support plate (on back), without headers on top is 0.35 inches (9 mm). The PCB is standard 1/16 inch (1.6mm) to provide enough structure to support the motor.

I've been inspired and learned a lot from these folks which I'm applying in this project:

Check out this playlist to learn more about brushless motors and controllers: https://www.youtube.com/playlist?list=PLgr0YZUR4CSVKWWj0__yitdxPeQSaBse1


This project has come to life in a hurry and is not optimized. These are some forward looking features I'd like to incorporate in a future revision:

  • Voltage regulator (5V) to allow 4x "AAA" or 1S LiPo power options
  • USB C port and built-in USB to Serial conversion, maybe a different MCU solution all-in-one
  • More LEDs to visually indicate which transistors are active, and coil polarity
  • Built-in single row header to easily connect to scope/logic analyzer such as Analog Discovery
  • A hall sensor (or a three) built-in to the PCB for feedback capability
  • More complete analog feedback capability
  • The rotor is easy to swap out with other pole counts, but other than the wye/delta configurations jumpers for the windings, they are not easy to change. Perhaps the windings could be a separate and removable PCB to enable experimenting with different windings all together?

I'd like to know your feedback and questions in the comments below!

Brushless Motor Business Card Mech. BOM V0.1.xlsx

Mechanical Component BOM

sheet - 11.51 kB - 07/02/2024 at 03:59

Download

Brushless Motor Business Card Elec. BOM V0.1.xlsx

Electronic Component BOM

sheet - 11.38 kB - 07/02/2024 at 03:58

Download

BLDC_BIZ_CARD_V0.1_Schematic.pdf

Schematic plotted from KiCAD, ISP port rotated to match PCBA position

Adobe Portable Document Format - 429.67 kB - 06/29/2024 at 18:31

Preview

BLDC_BIZ_CARD_V0.1_Gerbers.zip

Gerber package

Zip Archive - 215.29 kB - 06/27/2024 at 13:25

Download

  • Put down your pencils. It's time to hand in the test.

    Andy Geppert07/02/2024 at 03:55 0 comments

    This is my last log entry prior to the close of the contest. But not my last entry in this project by any means! I've learned a lot, but have more to do! Video summary follows.

    I didn't get the control scheme refined, or have time to try and implement the capacitive touch buttons. But I'm satisfied with the results because there is a lot of promise. The fact that it drives pre-made motors nicely means that I need some refinement in the motor construction on the board. I have ideas to improve that. But I'll need to step away from active work on this until later this fall. Other projects call, but it has been a blast bringing this one to life in a hurry!


    Unfinished business:

    • Ensure adequate bulk power storage for motor pulses.
    • Ability to burn 328PB boot loader after assembly.
    • Capacitive touch button library and testing.
    • Hall sensor feedback testing.
    • Analog comparator feedback testing.
    • Reduce overall thickness even more.
    • Optimize PWM pin usage to allow high frequency without affecting Arduino delay() and millis().
    • Optimize control algorithm.
    • Test delta winding configuration.
    • Clean up the code and implement a simple switch/case based state machine.
    • Test R/C PWM input signal mode, use the EEPROM for calibrations.
    • Add library to play music through the coils.
    • Add LEDs to visualize current flow and direction in the output phases.

    If you are interested in collaborating and/or remixing it to make it your own, I'd love to hear from ya!

  • It's alive!!!

    Andy Geppert07/01/2024 at 04:06 0 comments

    It moves! Not pretty yet, but it's alive and I'm controlling all 6 PWM channels with blind output sine waves, and no feedback. 

    In the video, the top board has the ATmega328PB and the FETs. Since I designed it to drive motors outside of the business card body itself through the three pins in the upper right, I'm using those to drive another business card that only has the motor windings in it. I started out assembling a few different boards with different components so I could isolate and test the sub-systems. Time to put it all together!

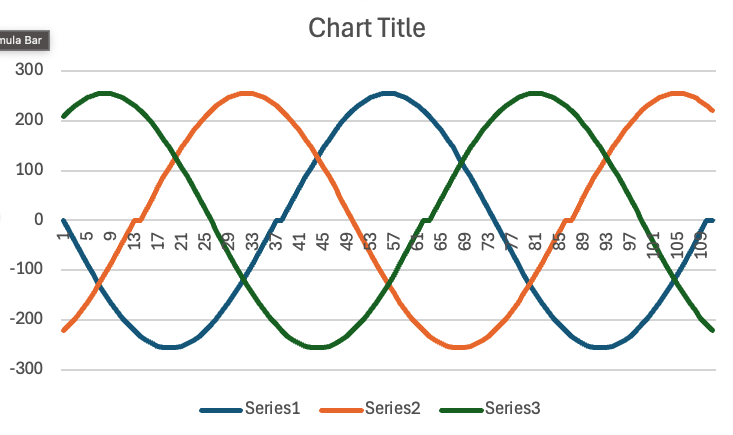
    Plot of my blind sine waves:

    When the sine wave is positive, I modulate the upper FET of the 1/2 bridge for a given phase. When the sine wave is negative, I modulate the lower FET of the 1/2 bridge for a given phase. Certainly not optimized, if it wasn't obvious in the video, but very inspiring progress to me.

    I may not be using the best PWM channels on the 328PB. The frequencies don't match, and SimpleFOC docs suggest using different pairings. Coils are getting pretty warm quickly. Only using 500Hz and 1KHz at the moment. 

    But it moves!!!!

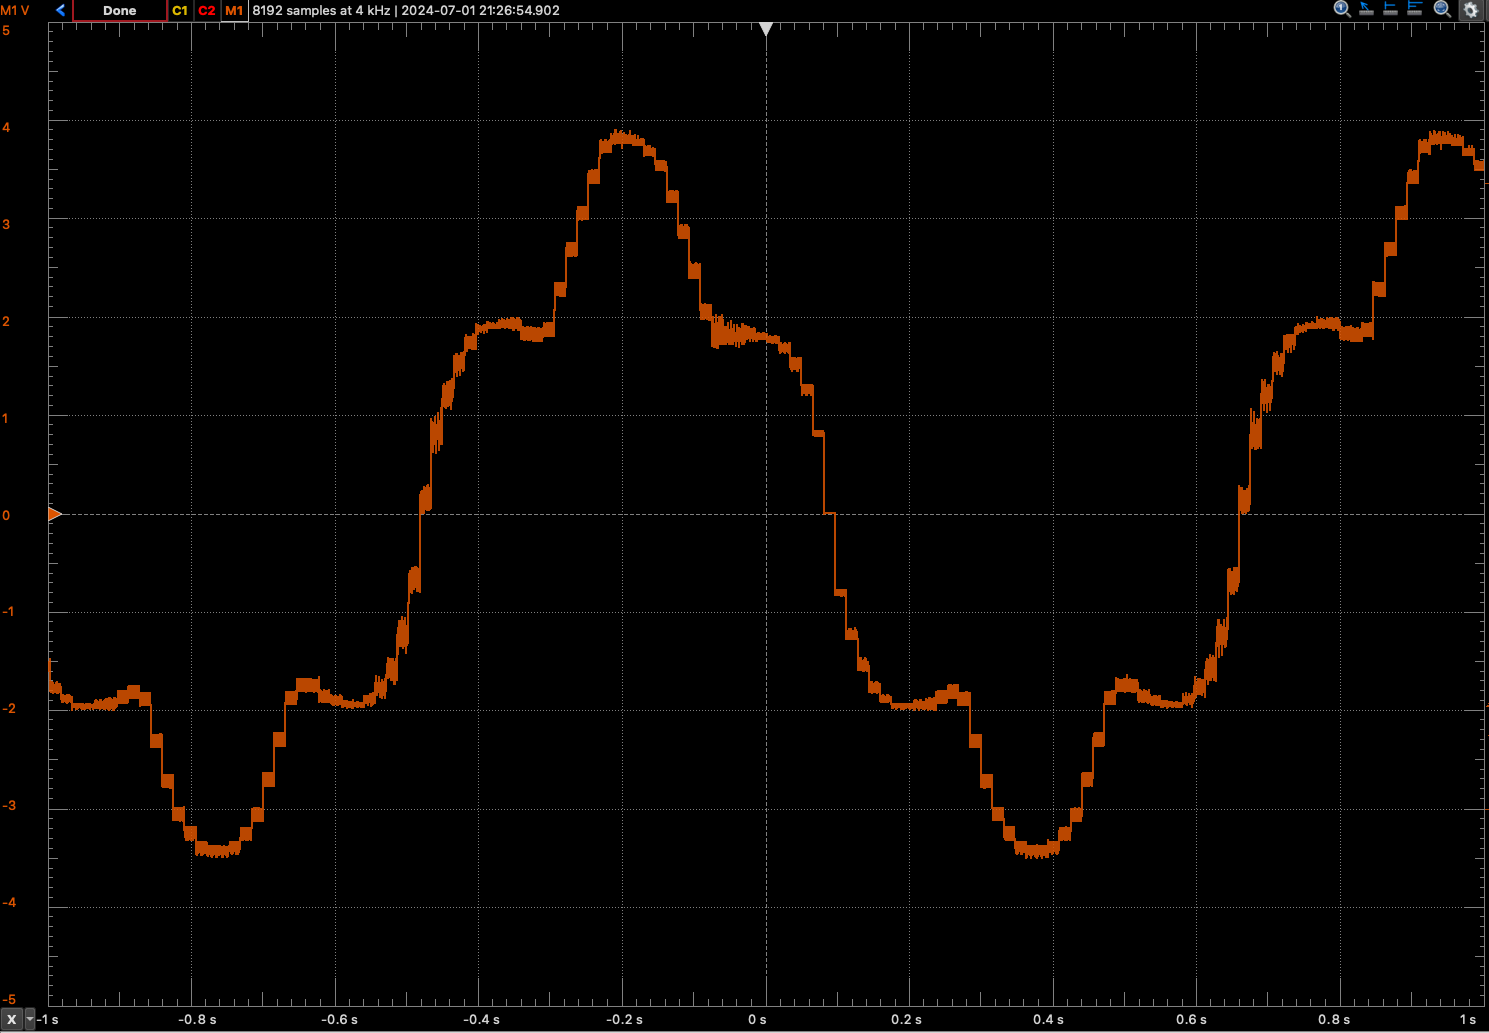
    Here is a "good sine..."

    That is the voltage measured between Phase A and B showing how the sine profile mixed with back EMF and the other phase. Certainly more work to be done!

  • PWMing the low and high sides

    Andy Geppert06/30/2024 at 03:50 0 comments

    We do these things to learn! I was thinking I could just PWM the low sides, but it's not making sense to me to do that. So after wrestling with that concept, I'm going to PWM the high side too. The drive circuit is alive and well, and I'm able to make coils buzz, bi-color LEDs alternate, and an external factory made brushless motor warble. Taken as a whole, all good progress.

    Tomorrow I'll see if I can get all 6 FETs oscillating with a pseudo-sine wave. So far I have a pseudo sine running on each channel individually, but I need to tie them all together to get an external motor to run first. Then maybe the built-in one?

  • I2C and SAO OLED are alive!

    Andy Geppert06/29/2024 at 20:17 0 comments

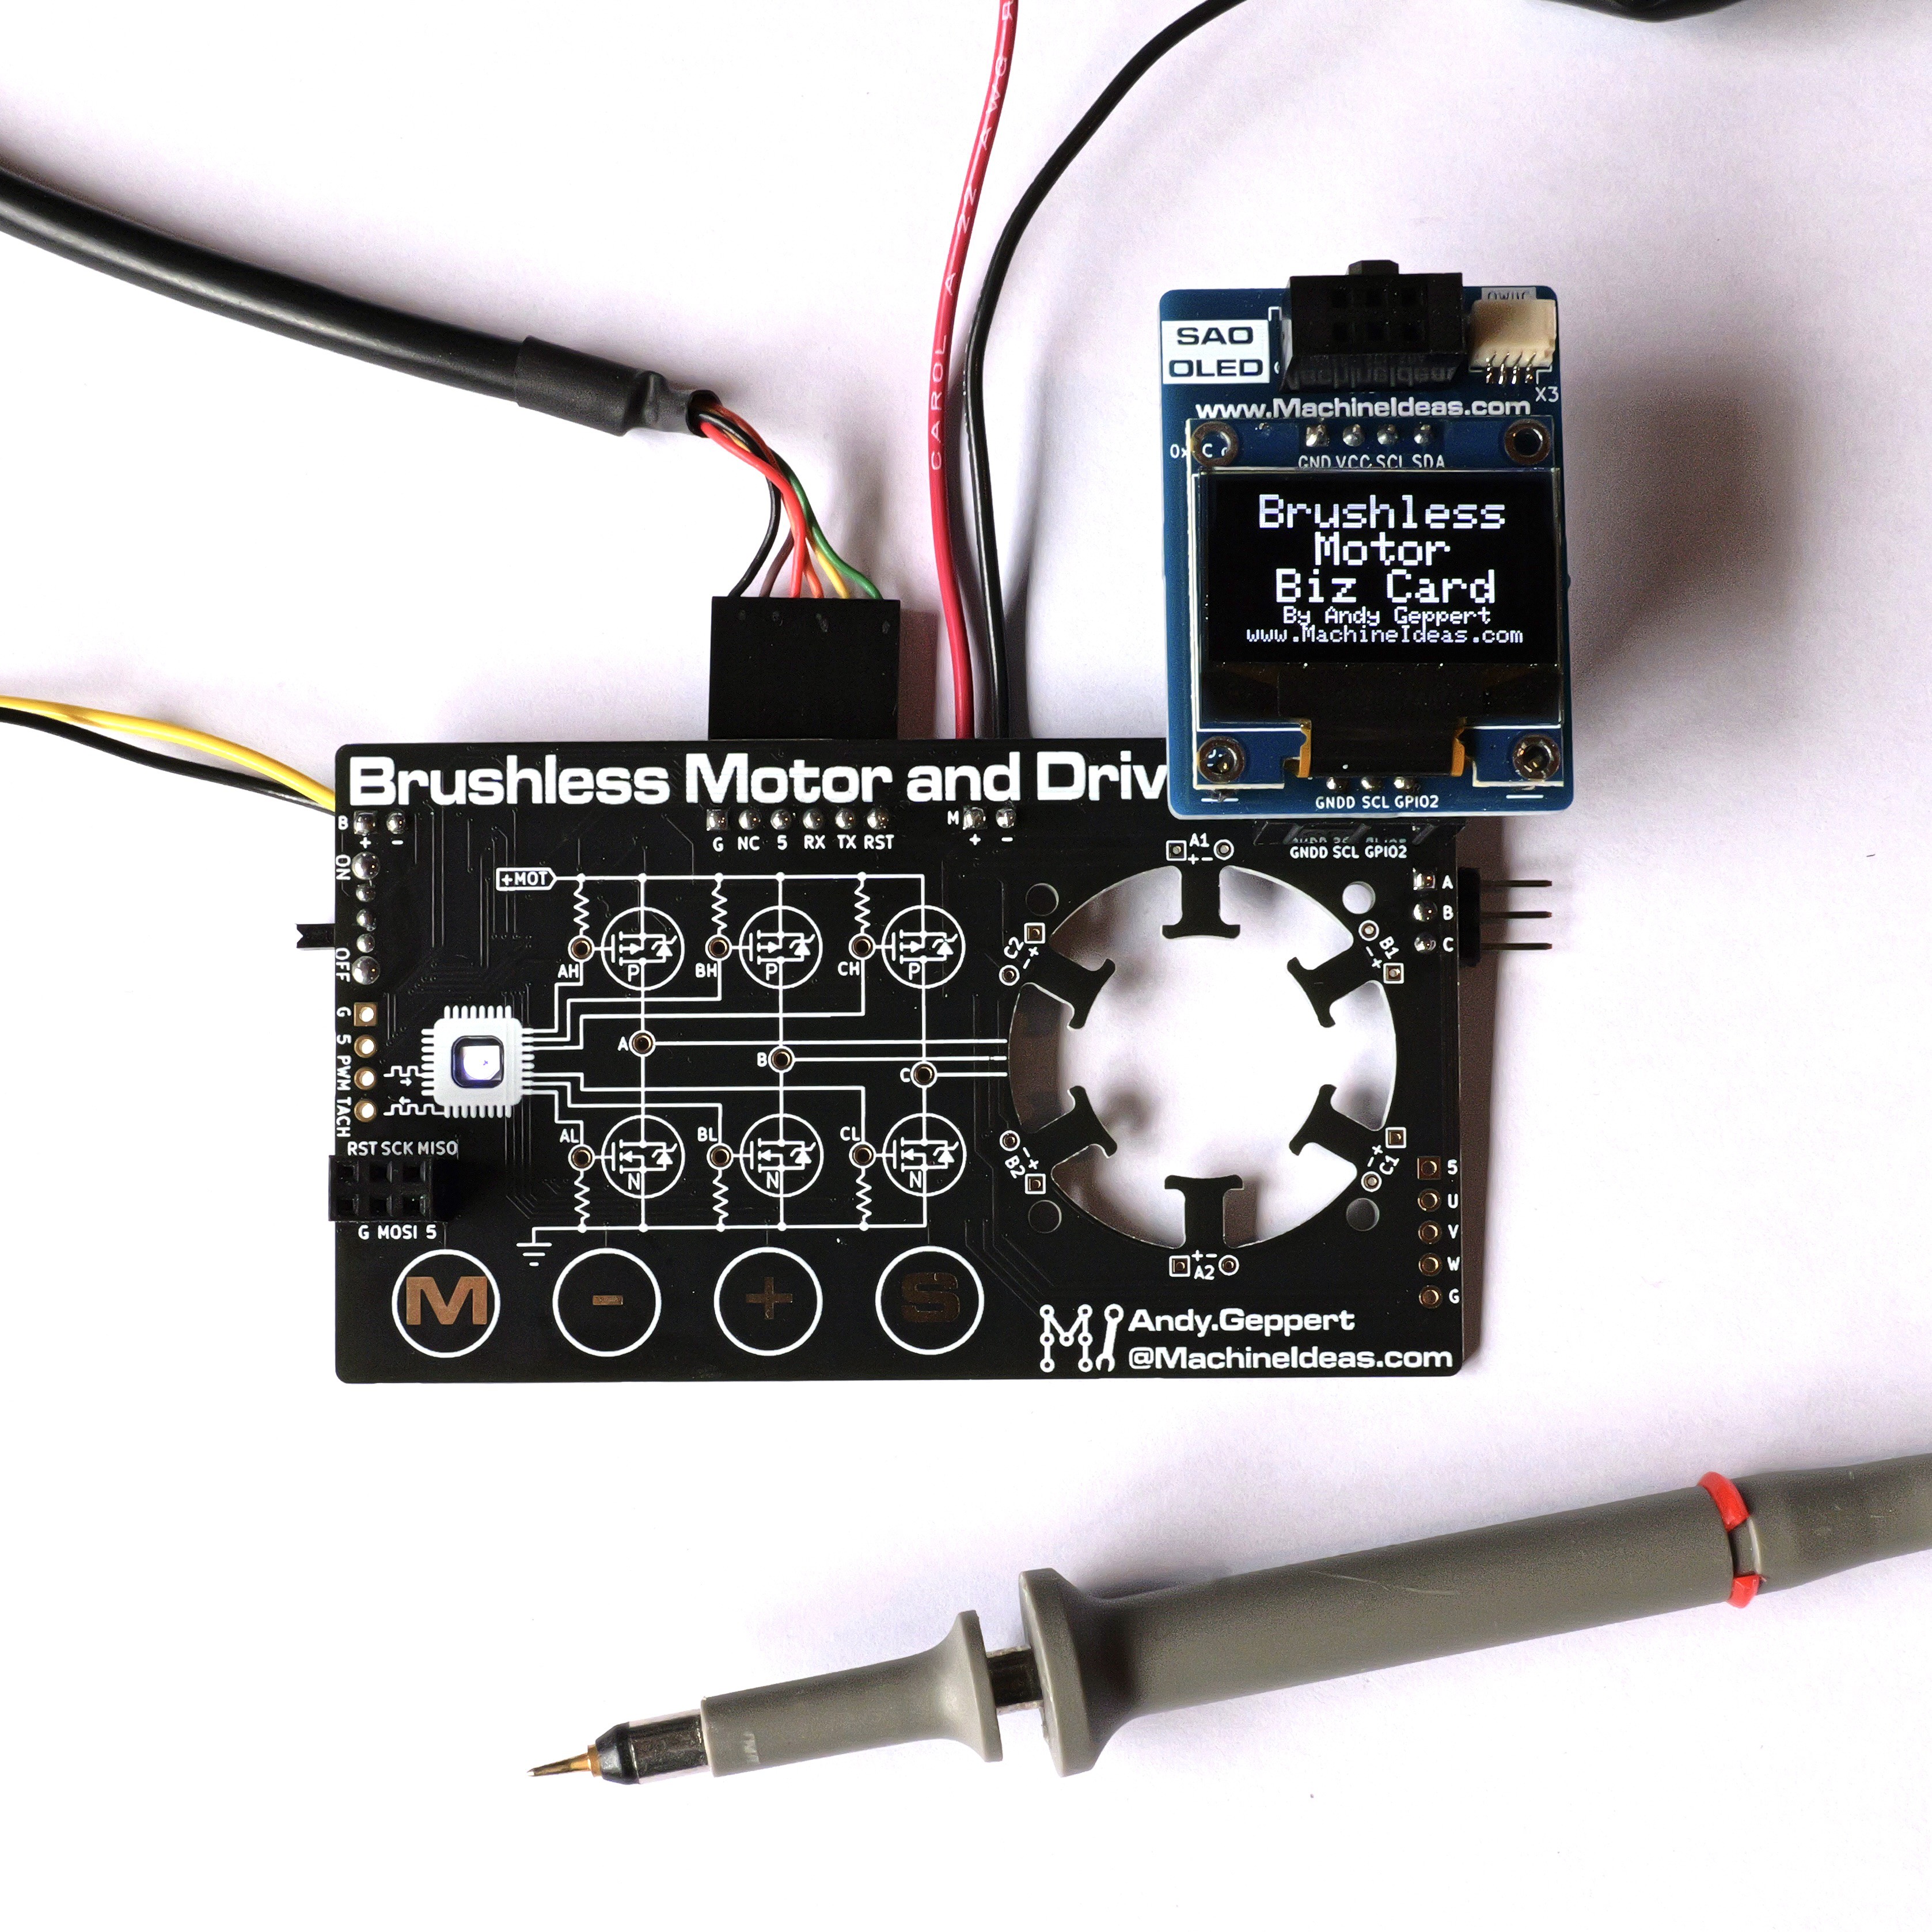
    Nice to make some relatively easy progress and confirm more of the board is working:

    Time to get serious about installing the 3 half bridges and bringing up the PWMs and some open loop motor control!

    NOTES:

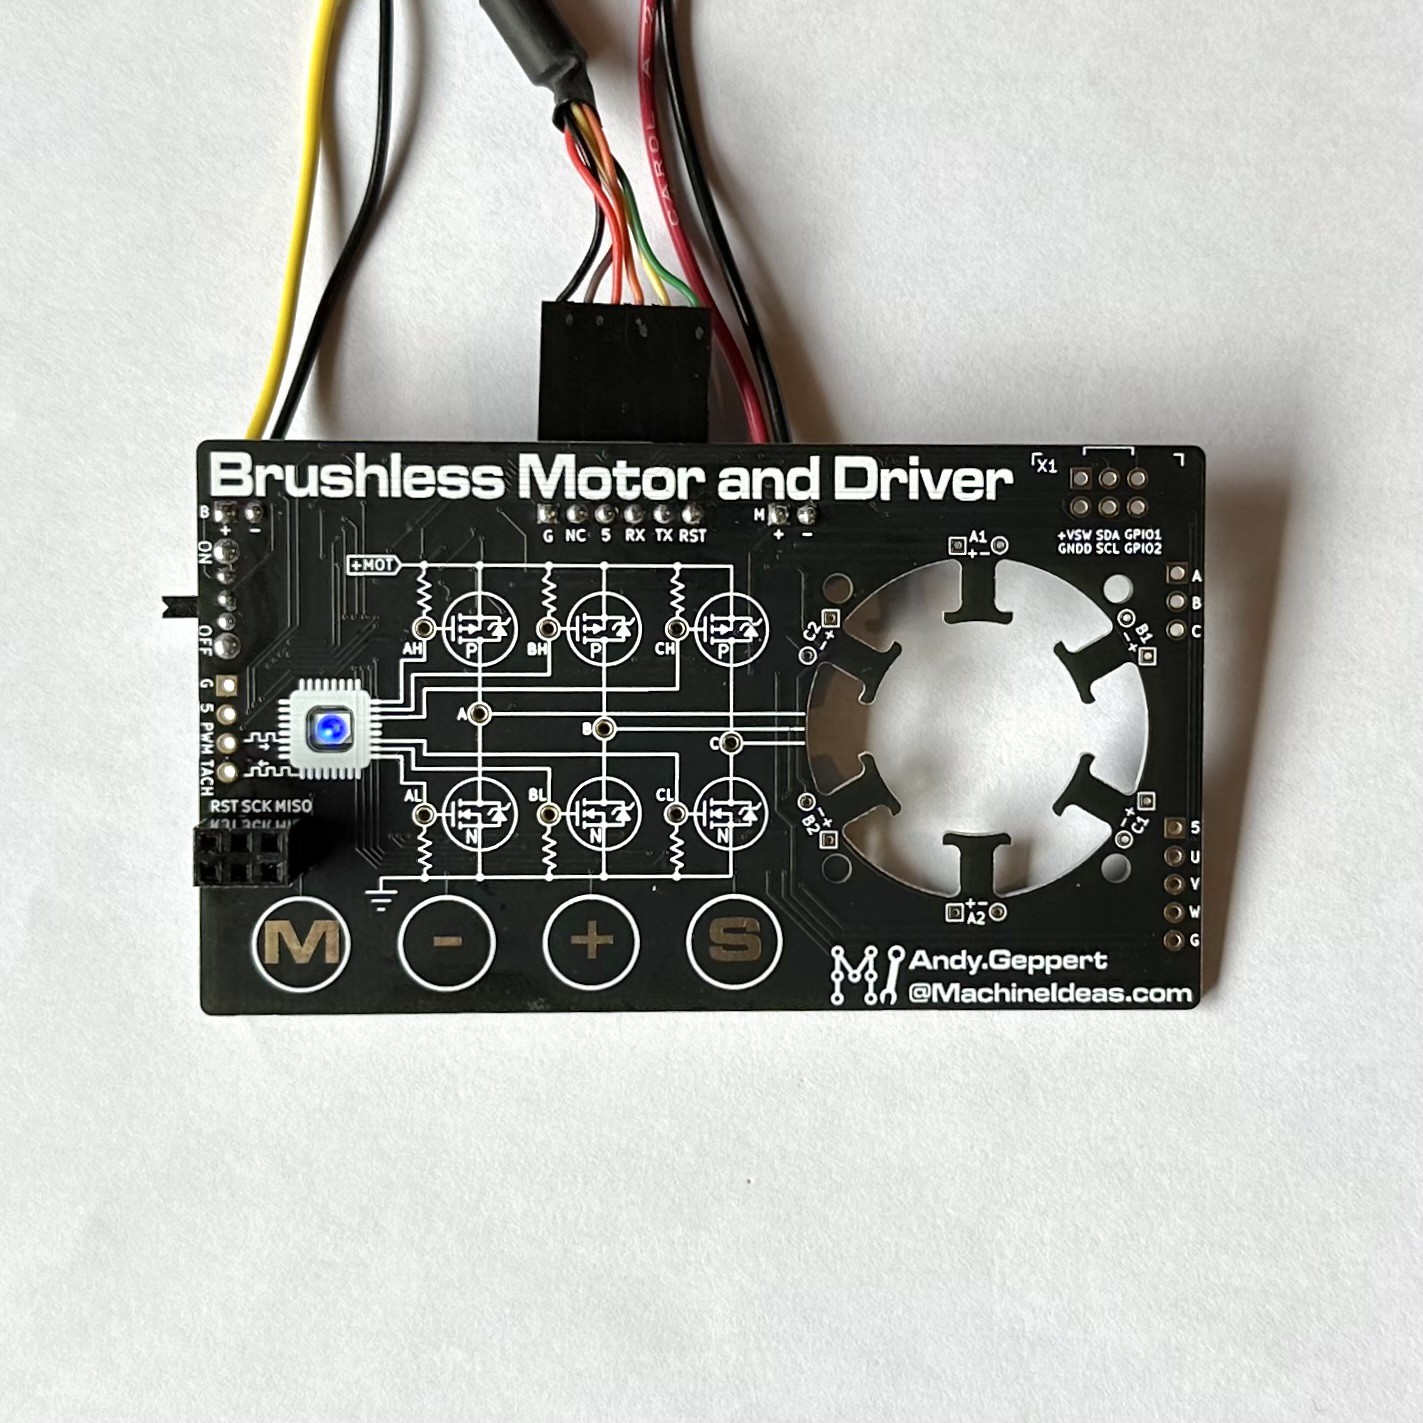
    1) The cable is a USB to 5V FTDI converter, for programming. No built-in USB capability on this first prototype. I'd like to add USB-C later on.

    2) The yellow and black pair of wires is to power the logic side, when the FTDI cable is not used.

    3) The red and black pair of wires is to power the motor driver side, and allows me to current limit that part of the circuit during bring-up.

    4) There is an open solder jumper I can use to bridge logic and motor power so only one power source is needed.

  • On burning a bootloader to an ATmega328PB...

    Andy Geppert06/29/2024 at 18:20 0 comments

    I'm trying to bring up the MCU on the board, but I cannot get an accurate or consistent MCU ID out of the chips. So, I'm set aside that struggle for later. Just swapped in a 328PB from an Arduino Uno, and it's alive and well at 16 MHz! RGB LED responds correctly, and the serial port is spewing data.

    I've been able to burn a boot loader to a Pololu A-Star 328PB with the AVR ISP mkII, but I'm missing something with the fresh 328PB's I bought from Digi-Key. Since a swapped in 328PB works fine, I think the basic circuit and connections are in good shape. I'm not going to try and re-burn the boot loader in the 328PB I swapped in now... maybe later. I will try to program the new 328PB's in the Arduino Uno later on though.

    On to bringing up the I2C and SAO port with OLED next.

  • The boards are here!

    Andy Geppert06/28/2024 at 04:14 0 comments

    Boards showed up today! Wrapping coils! Testing!

    I abandoned the plastic mockup and have the coils wound. Continuity and wiring pattern seems good. None of the components are installed on the back of the board yet, so I'm using the three pin "alternate motor" header as in input to do testing.

    The rotor moves a little bit with manual voltage pulses, but the small brushless motor driver I tested with can't get the rotor to turn. There is a lot of room for testing and optimization. Gaps, flux density, coil and magnet coils... guaranteed learning of one kind or another awaits me.

    I'll resume tomorrow evening...

  • Roughing out the concept in CAD

    Andy Geppert06/27/2024 at 03:53 0 comments

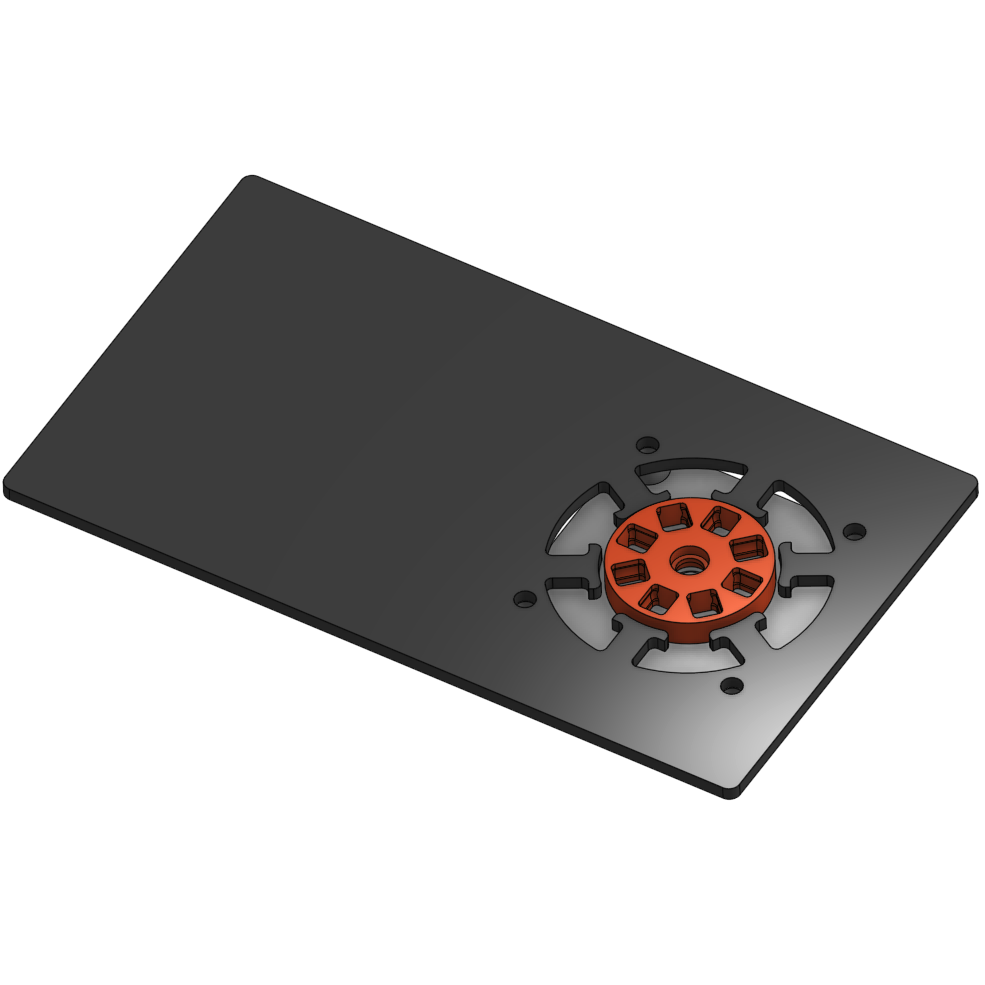
    This is the board design concept, with the rotor shown in orange:

    The CAD design is available in OnShape: https://cad.onshape.com/documents/f519e018cd04a070474f7458/w/7211a2b8f86f81003258f57c/e/c9c6c988519f346738a797cf?renderMode=0&uiState=667d5e72c0a2c30711b7db9f

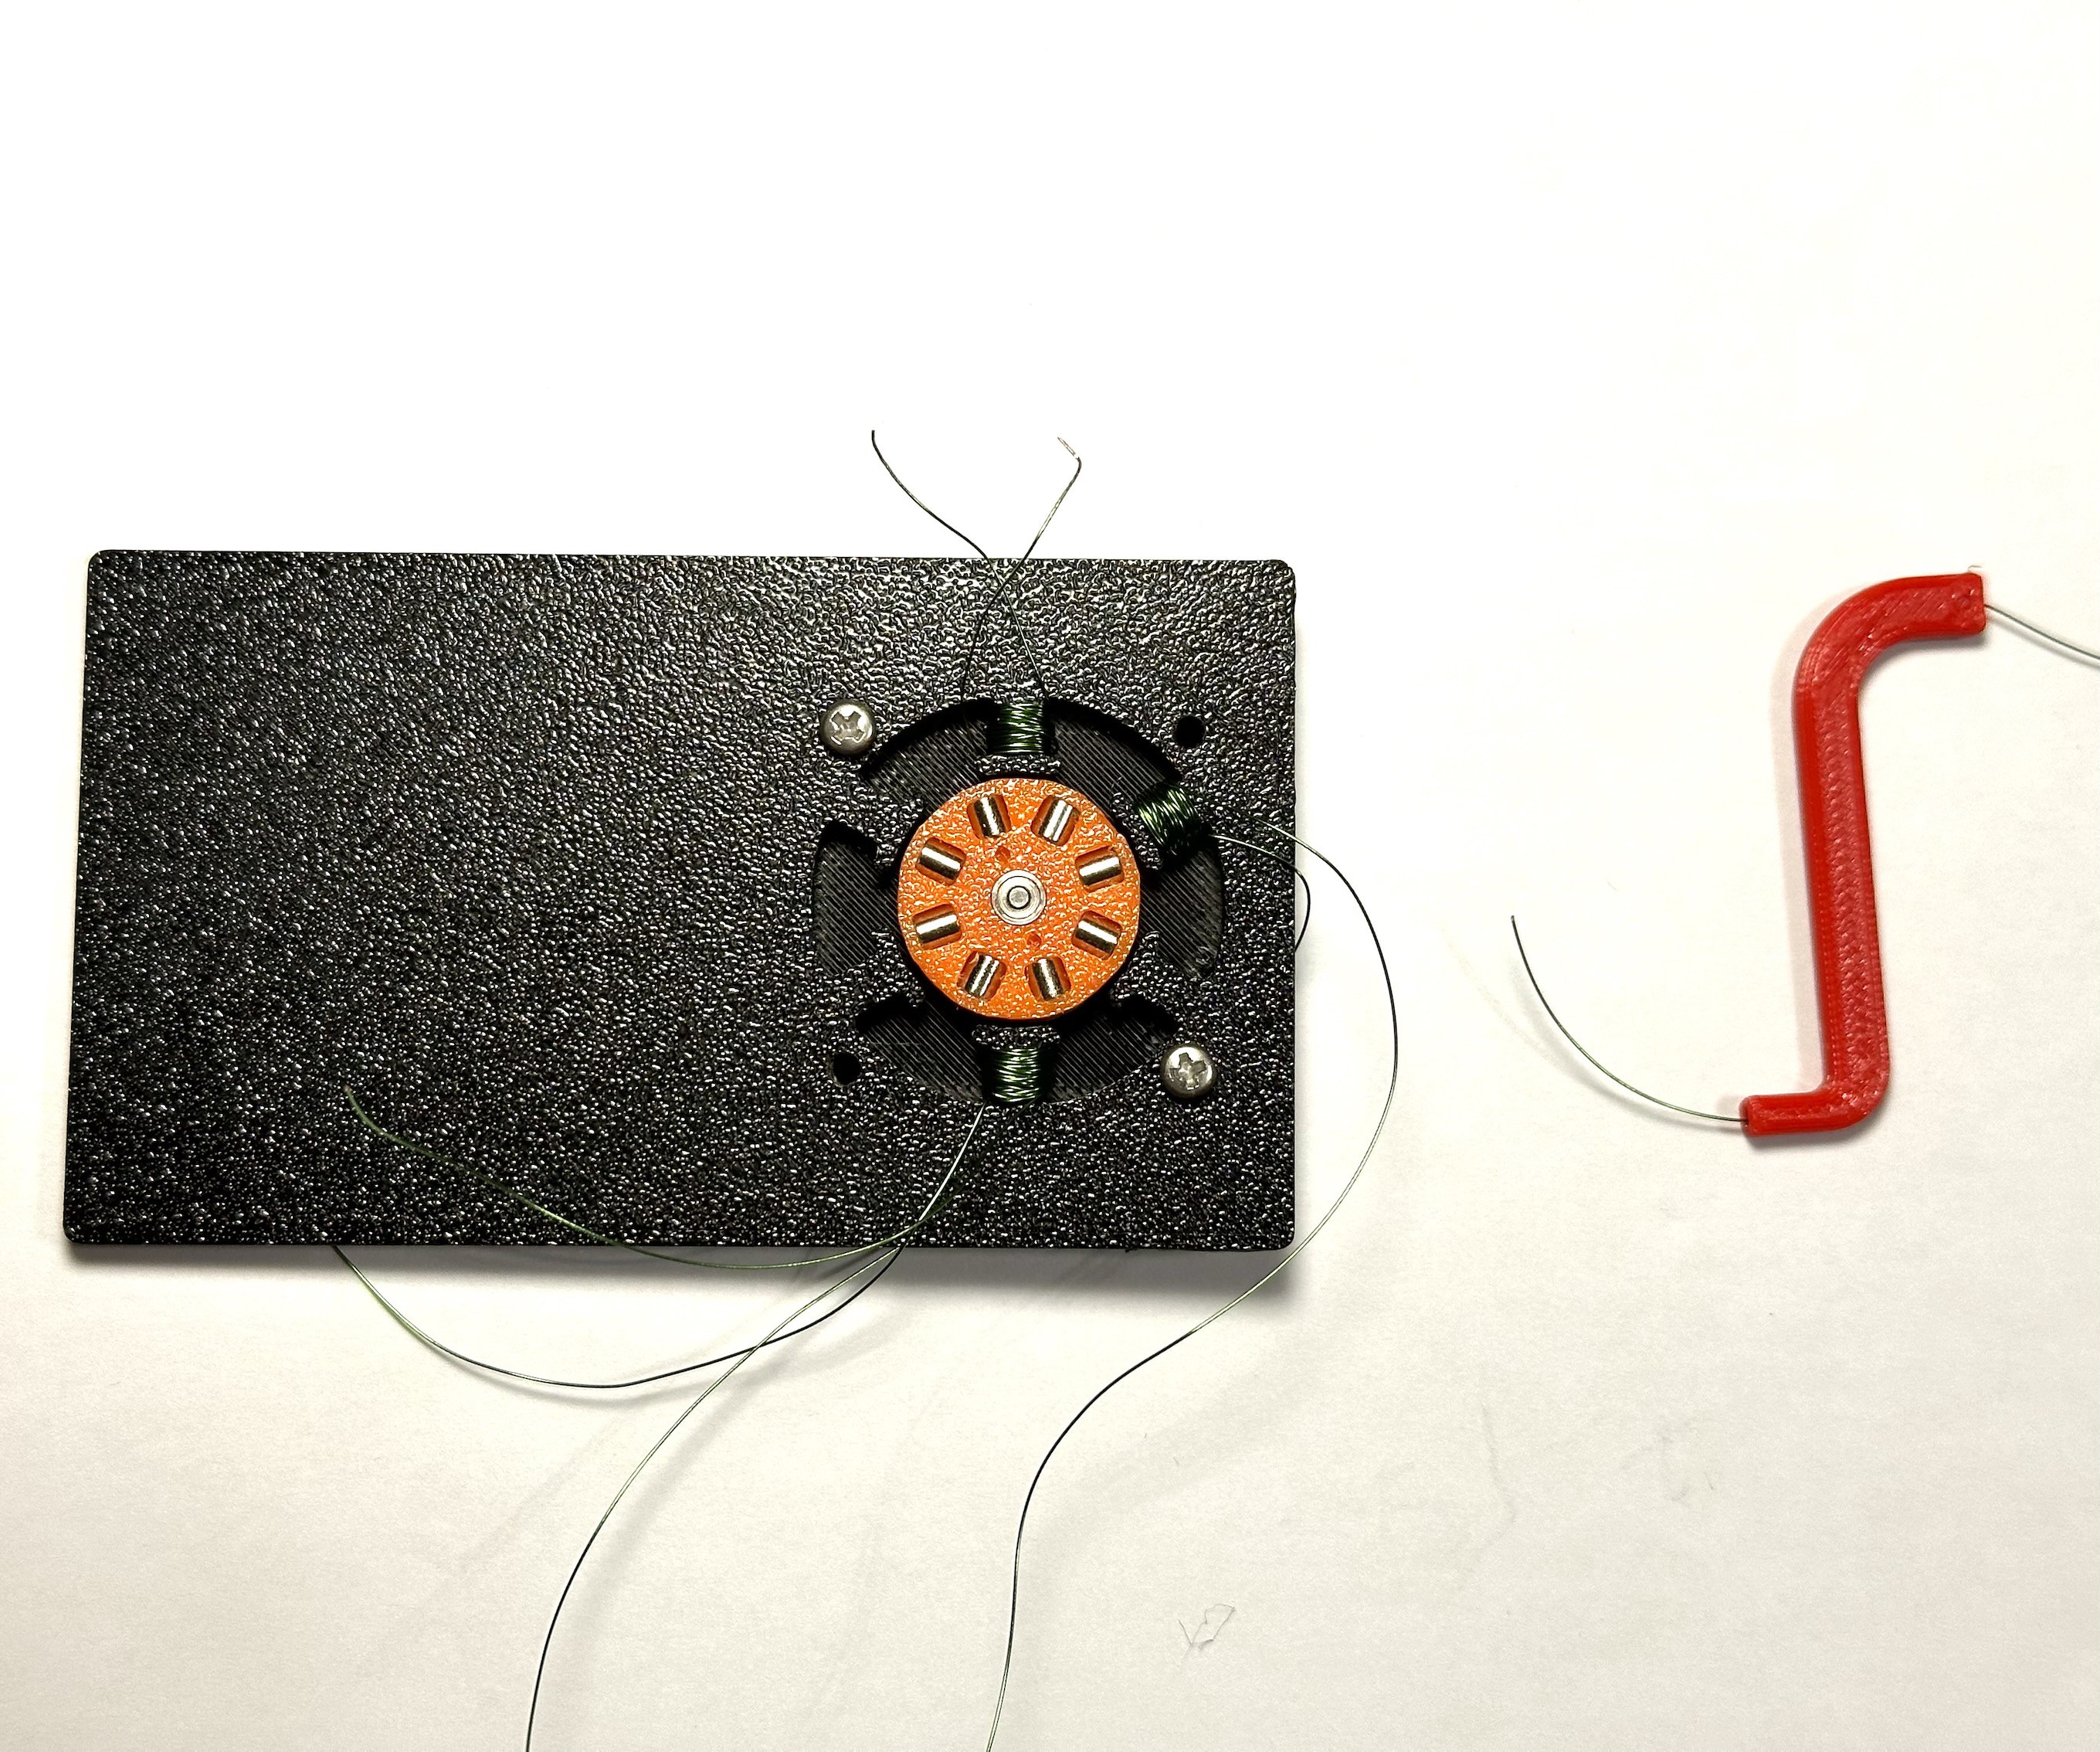
    The [3D printed] rotor will have 8 magnets that snap into it. The magnets are cylindrical, 1/8 x 1/8 inch length and diameter. Two small bearings press in to the top and bottom of the rotor. A fixed shaft is pressed into the rotor support base (light gray) underneath. It all comes together like this:

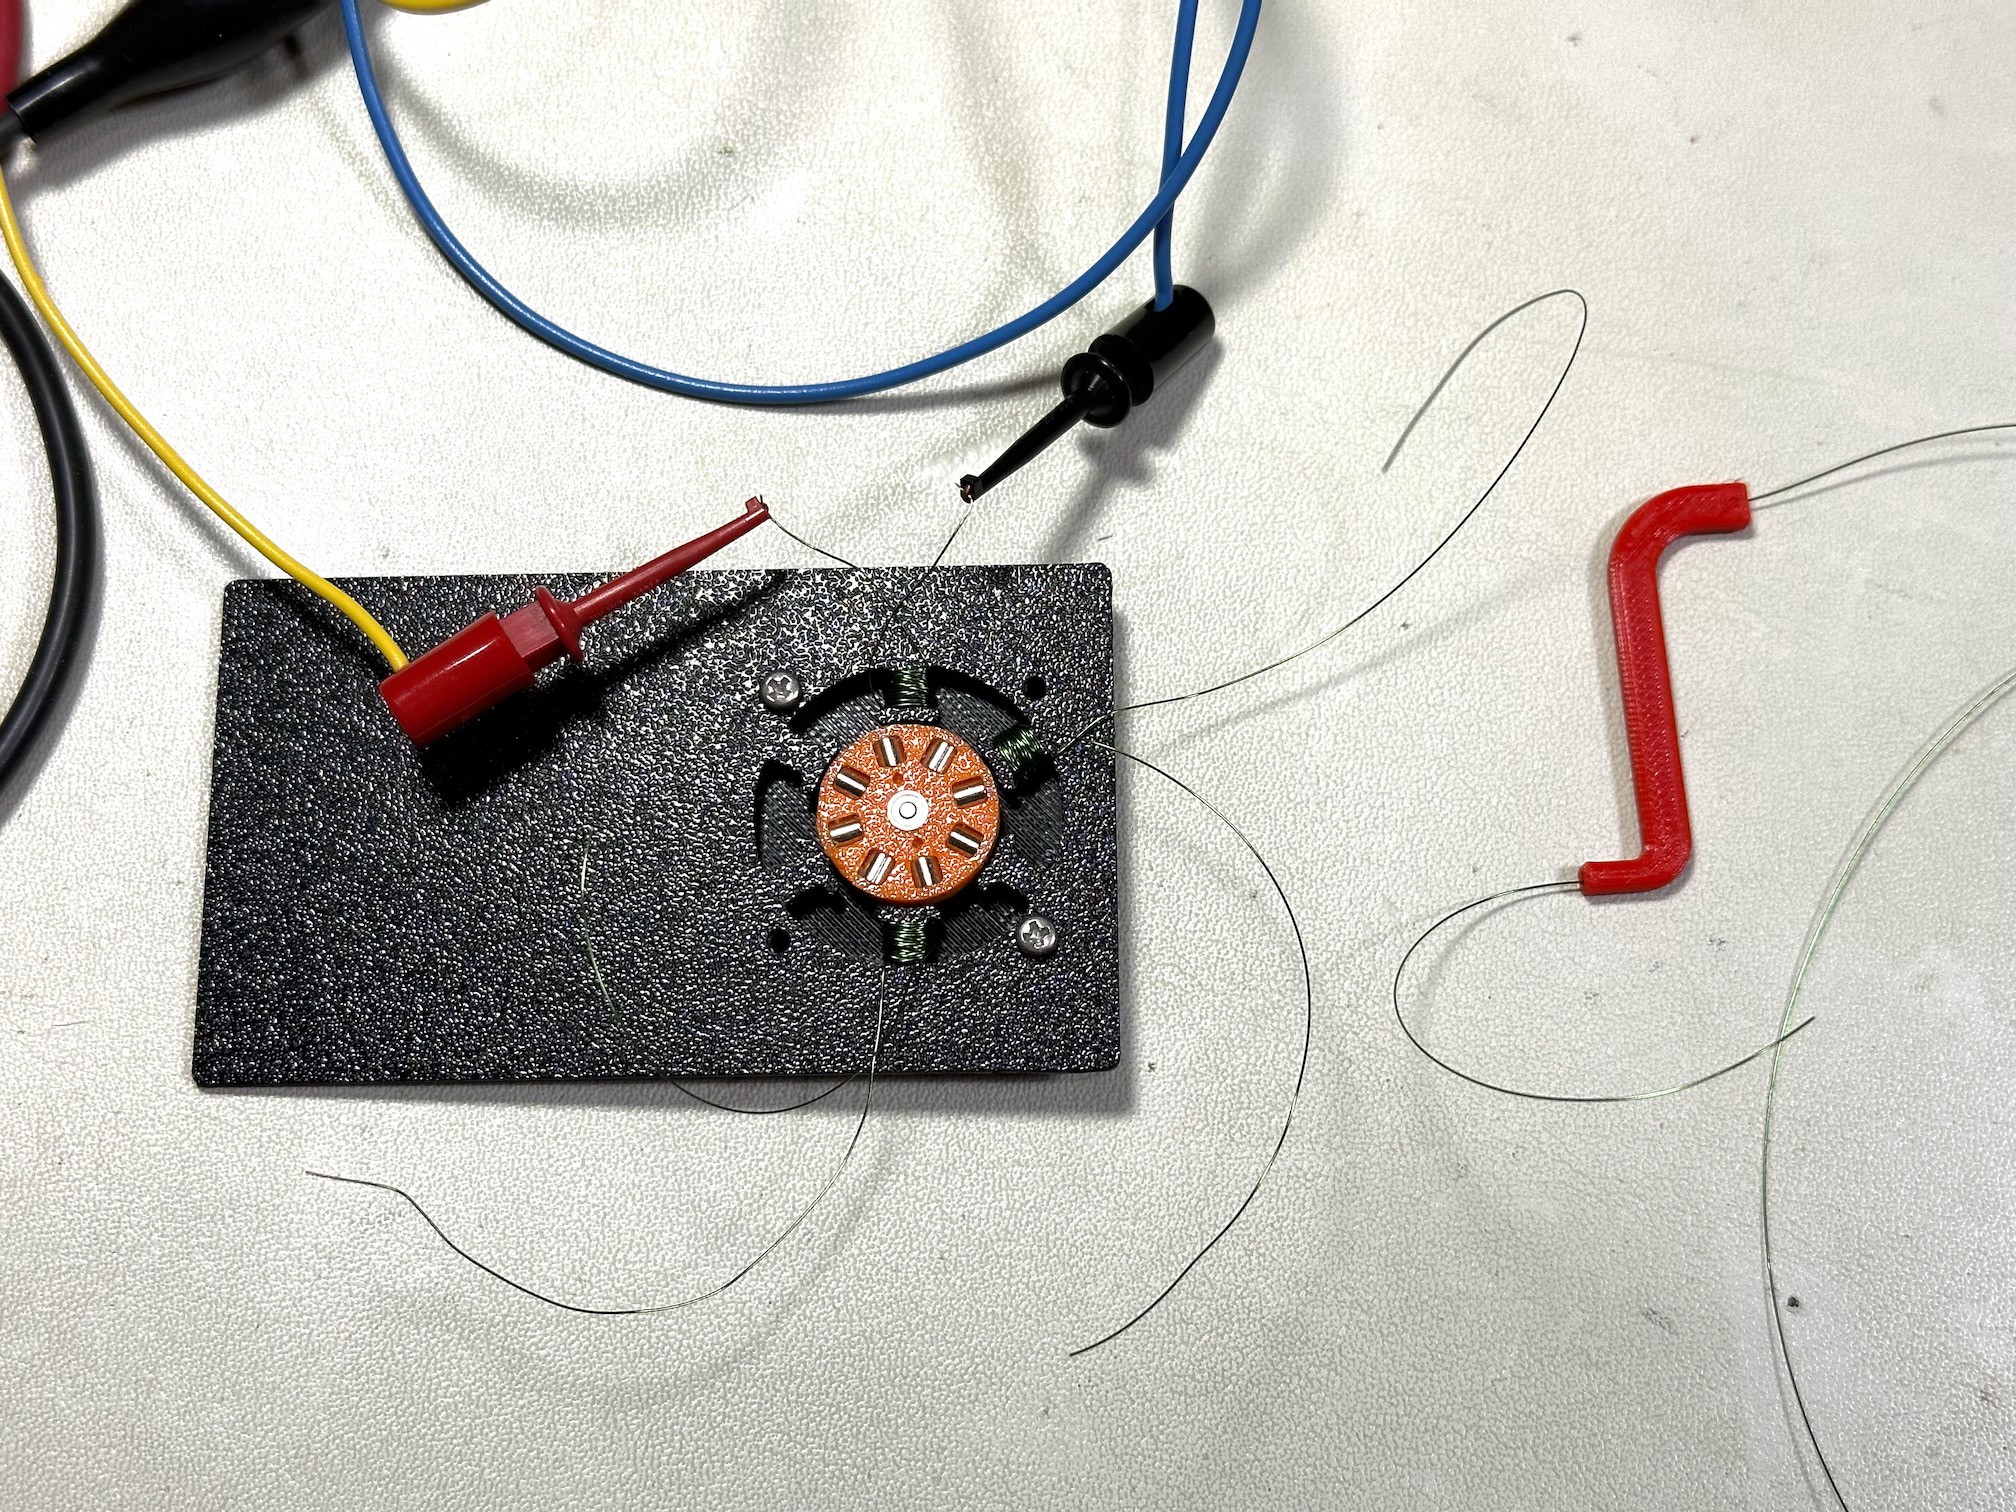
    I don't have boards yet, but I can still make progress with all of the mechanical elements and the windings. On the right side in the "S" shape is the winding tool, also 3D printed. It serves to smooth out the wire, and provides drag on the wire to make it easier to wind. Surprisingly, it worked on the first try, and it's quite easy and fast to wind the coils. WAY FASTER than weaving core memory! So progress is very good on the mechanicals now. The rotor "spins like a low-end fidget spinner" and is just as fun. Even if this whole project doesn't work, I'm gonna have a great business card sized fidget spinner...

    Some initial testing on the coil windings to evaluate current and torque:

    The motor kicks! Less than 1 Ohm in the winding, .3V and .3A, and the rotor kicks into position to align with a coil. It's a beautiful thing. Look for more progress tomorrow night. I think I'll be able to get it spinning with an off-the-shelf brushless motor driver.

  • Brushless Motor Business Card Concept

    Andy Geppert06/24/2024 at 21:47 0 comments

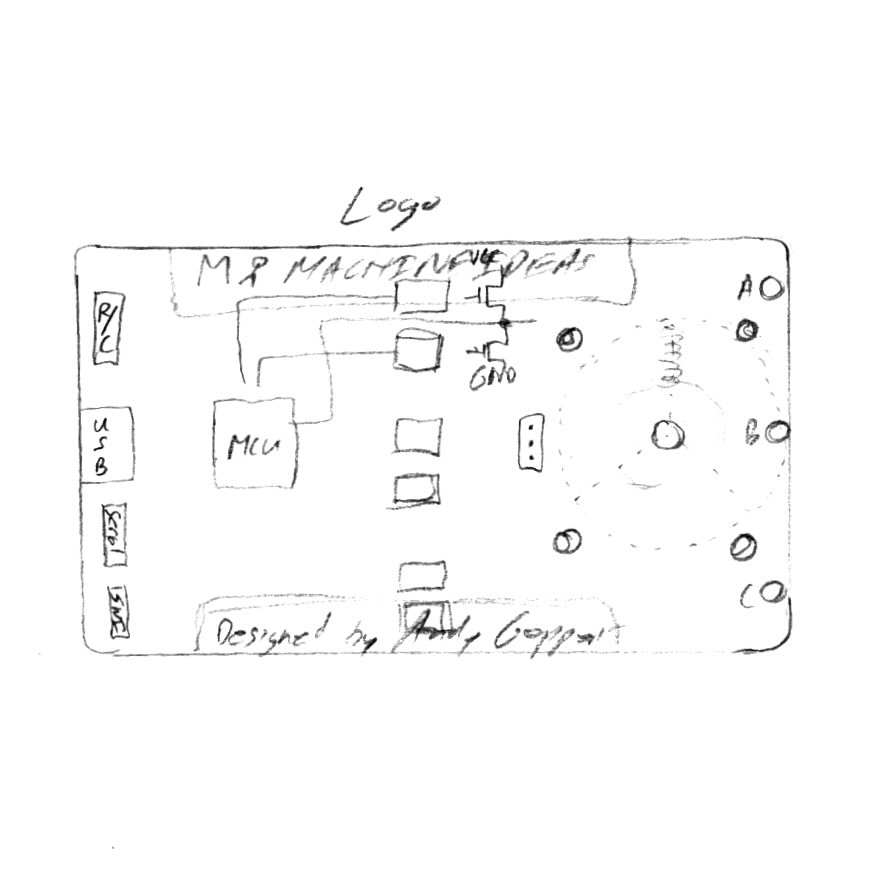
    This is the first sketch I drew to capture the concept on paper:

    My vision is to show the entire motor concept from the front side of the card, including the most relevant schematic elements. By having everything accessible from the front side, I can experiment and probe the different signals, along with making firmware changes, in one clean set-up.

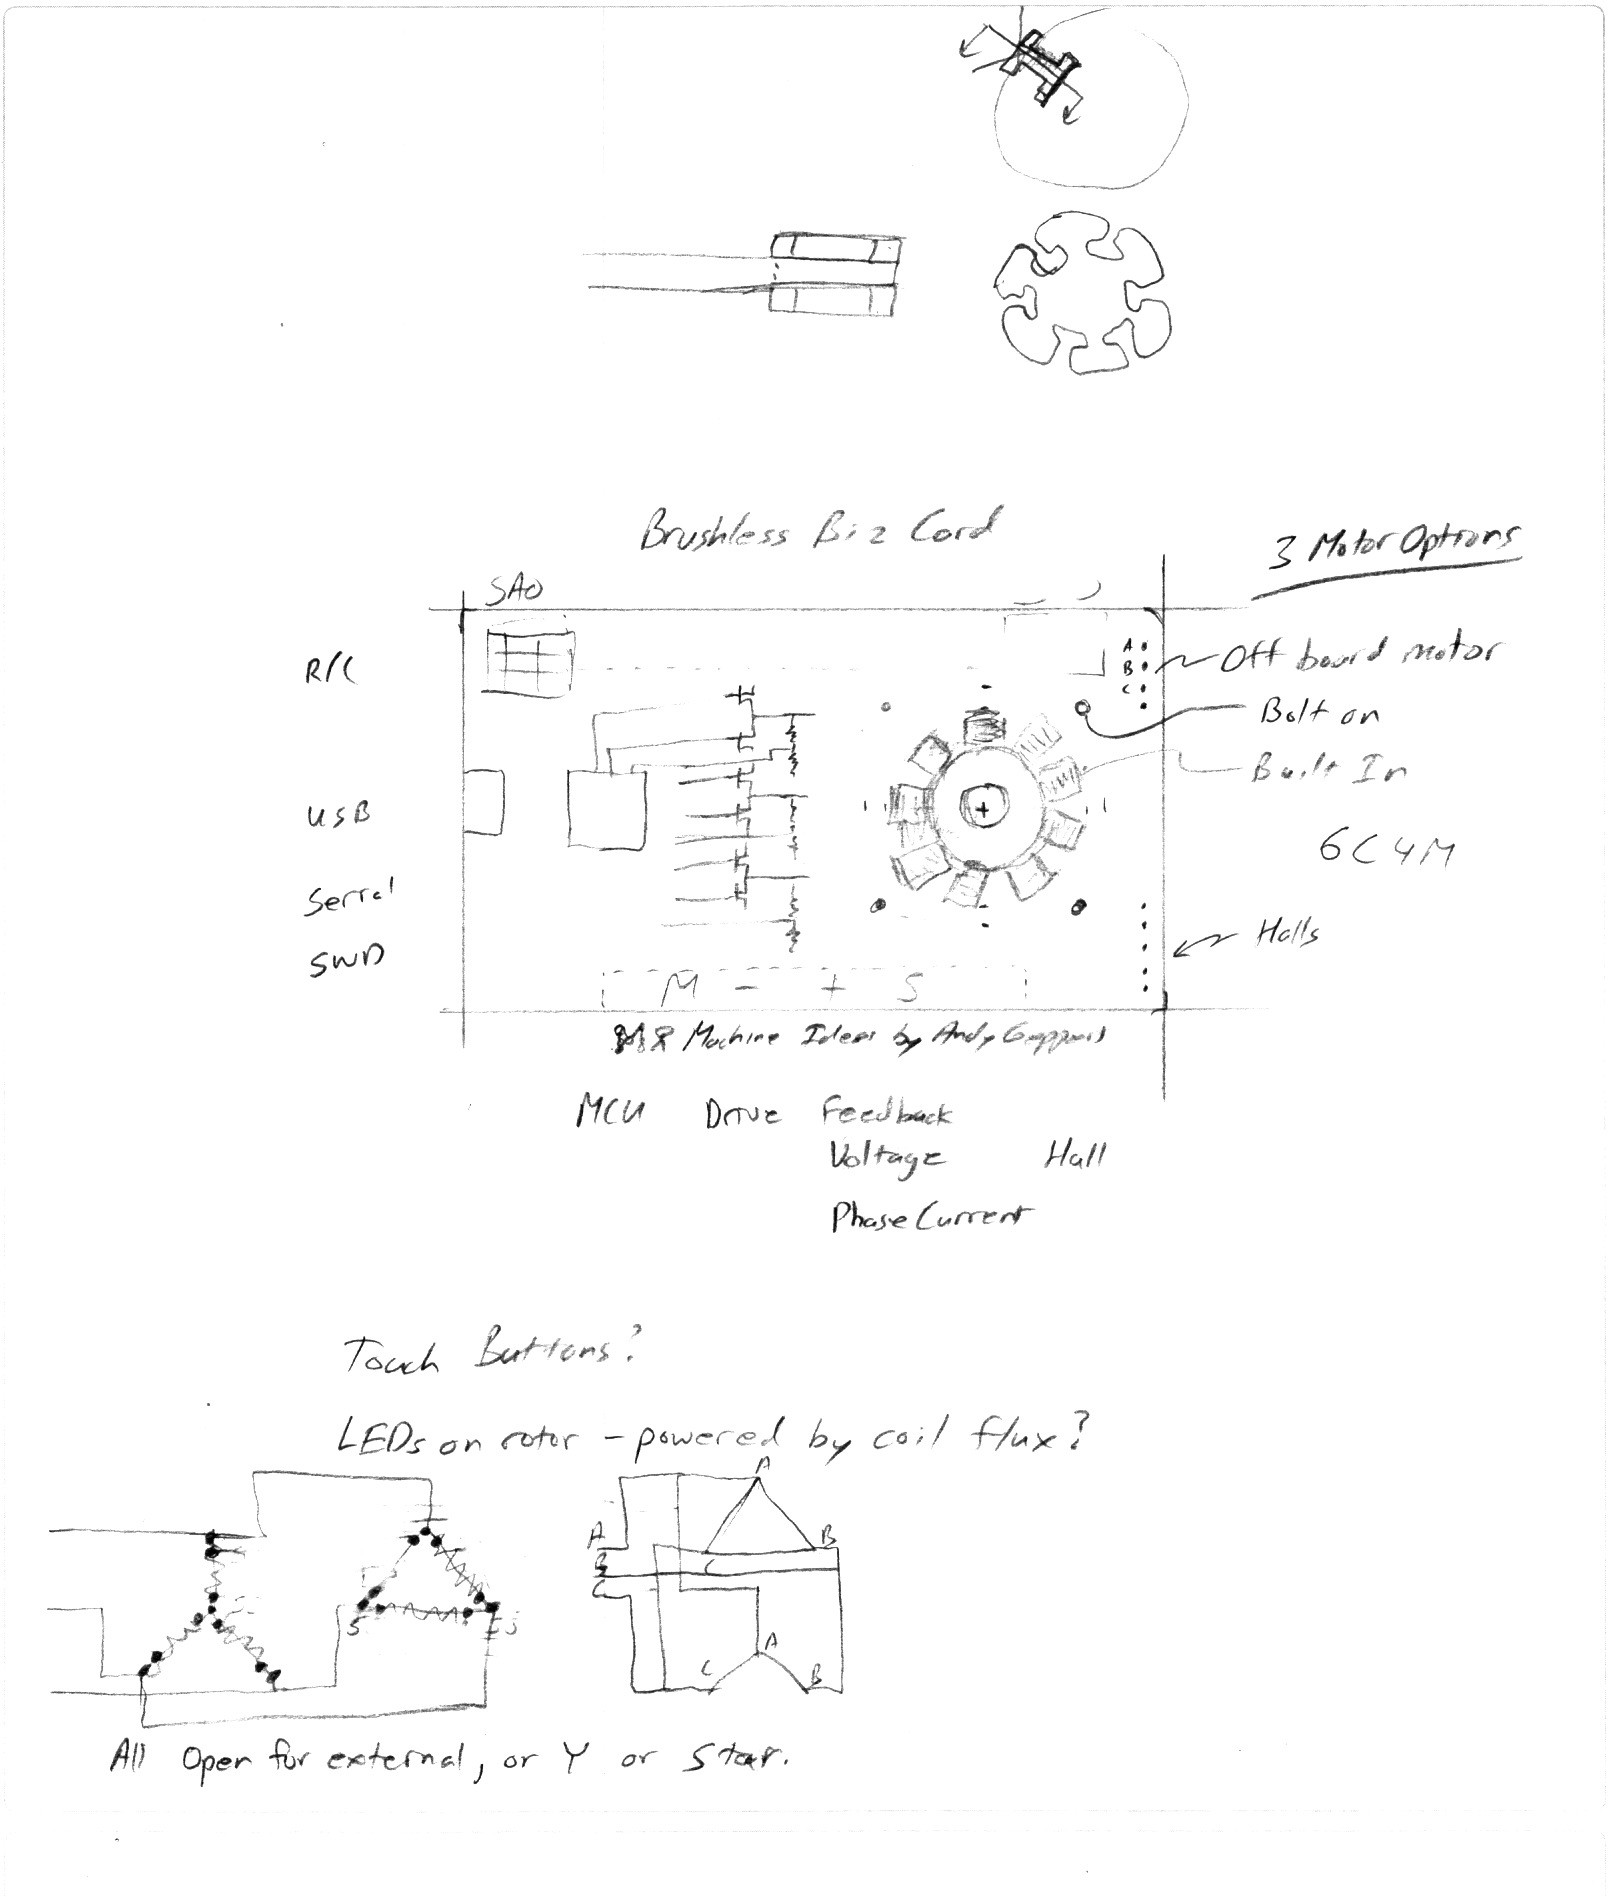
    Next I started to think about the structure and placement of headers:

    Making the motor have an optional WYE or DELTA winding configuration through solder jumpers will allow even more experimentation. The winding configuration has the potential to change the performance characteristics significantly, so I wanted that option to be available.

    Additionally, I have found that having four buttons enables easy access to more functionality in the future, so that needs to be part of the design. Furthermore, an SAO port lends itself to expandability and makes it easy to install an SAO OLED, which I've been making and using recently. 

    Of course, more fun ideas start to flow. I'd like to have LEDs which indicate which coils are energized, and the polarity. Or maybe add LEDs to the rotor itself to visualize the pulses of current in the coils through inductive coupling?! These ideas will have to wait until I get the basic functionality enabled.

View all 8 project logs

Enjoy this project?

Share

Discussions

matt venn wrote 07/02/2024 at 14:52 point

great project, love it!

It reminds me of this: https://hackaday.com/2016/04/23/a-simple-and-educational-brushless-motor/

  Are you sure? yes | no

Andy Geppert wrote 07/05/2024 at 15:25 point

That’s a great project Matt! I love the simplicity and hands-on nature of it. Very useful educational gizmo. Birds of feather…

  Are you sure? yes | no

Similar Projects

Does this project spark your interest?

Become a member to follow this project and never miss any updates