Close
0%
0%

PICTIL

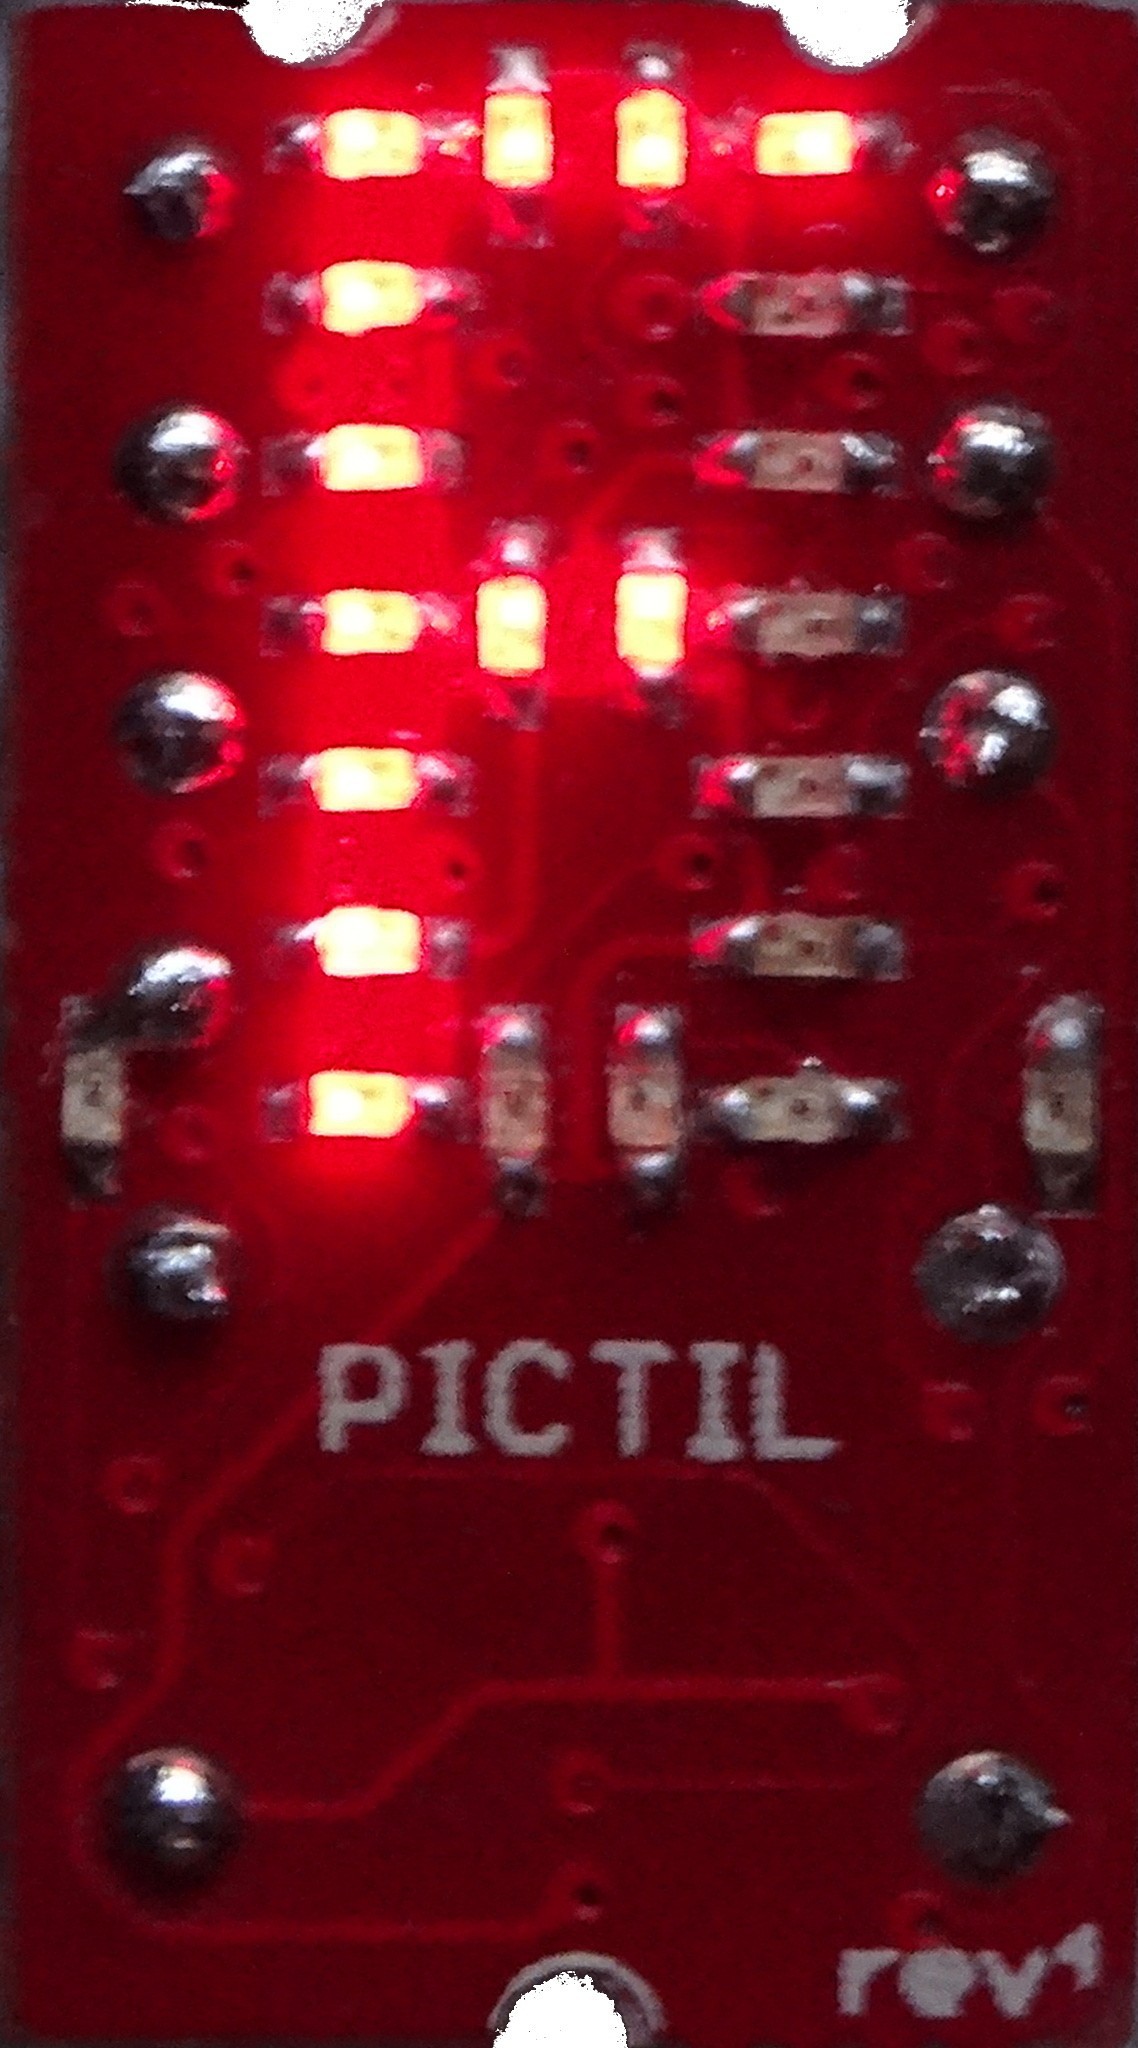
Remake of the TIL311 hex LED display with recent technology.

Similar projects worth following
I will do some further - quite similar work here: https://hackaday.io/project/175903-retil. Because no PIC is used there and there is little time gap I started a new Project.

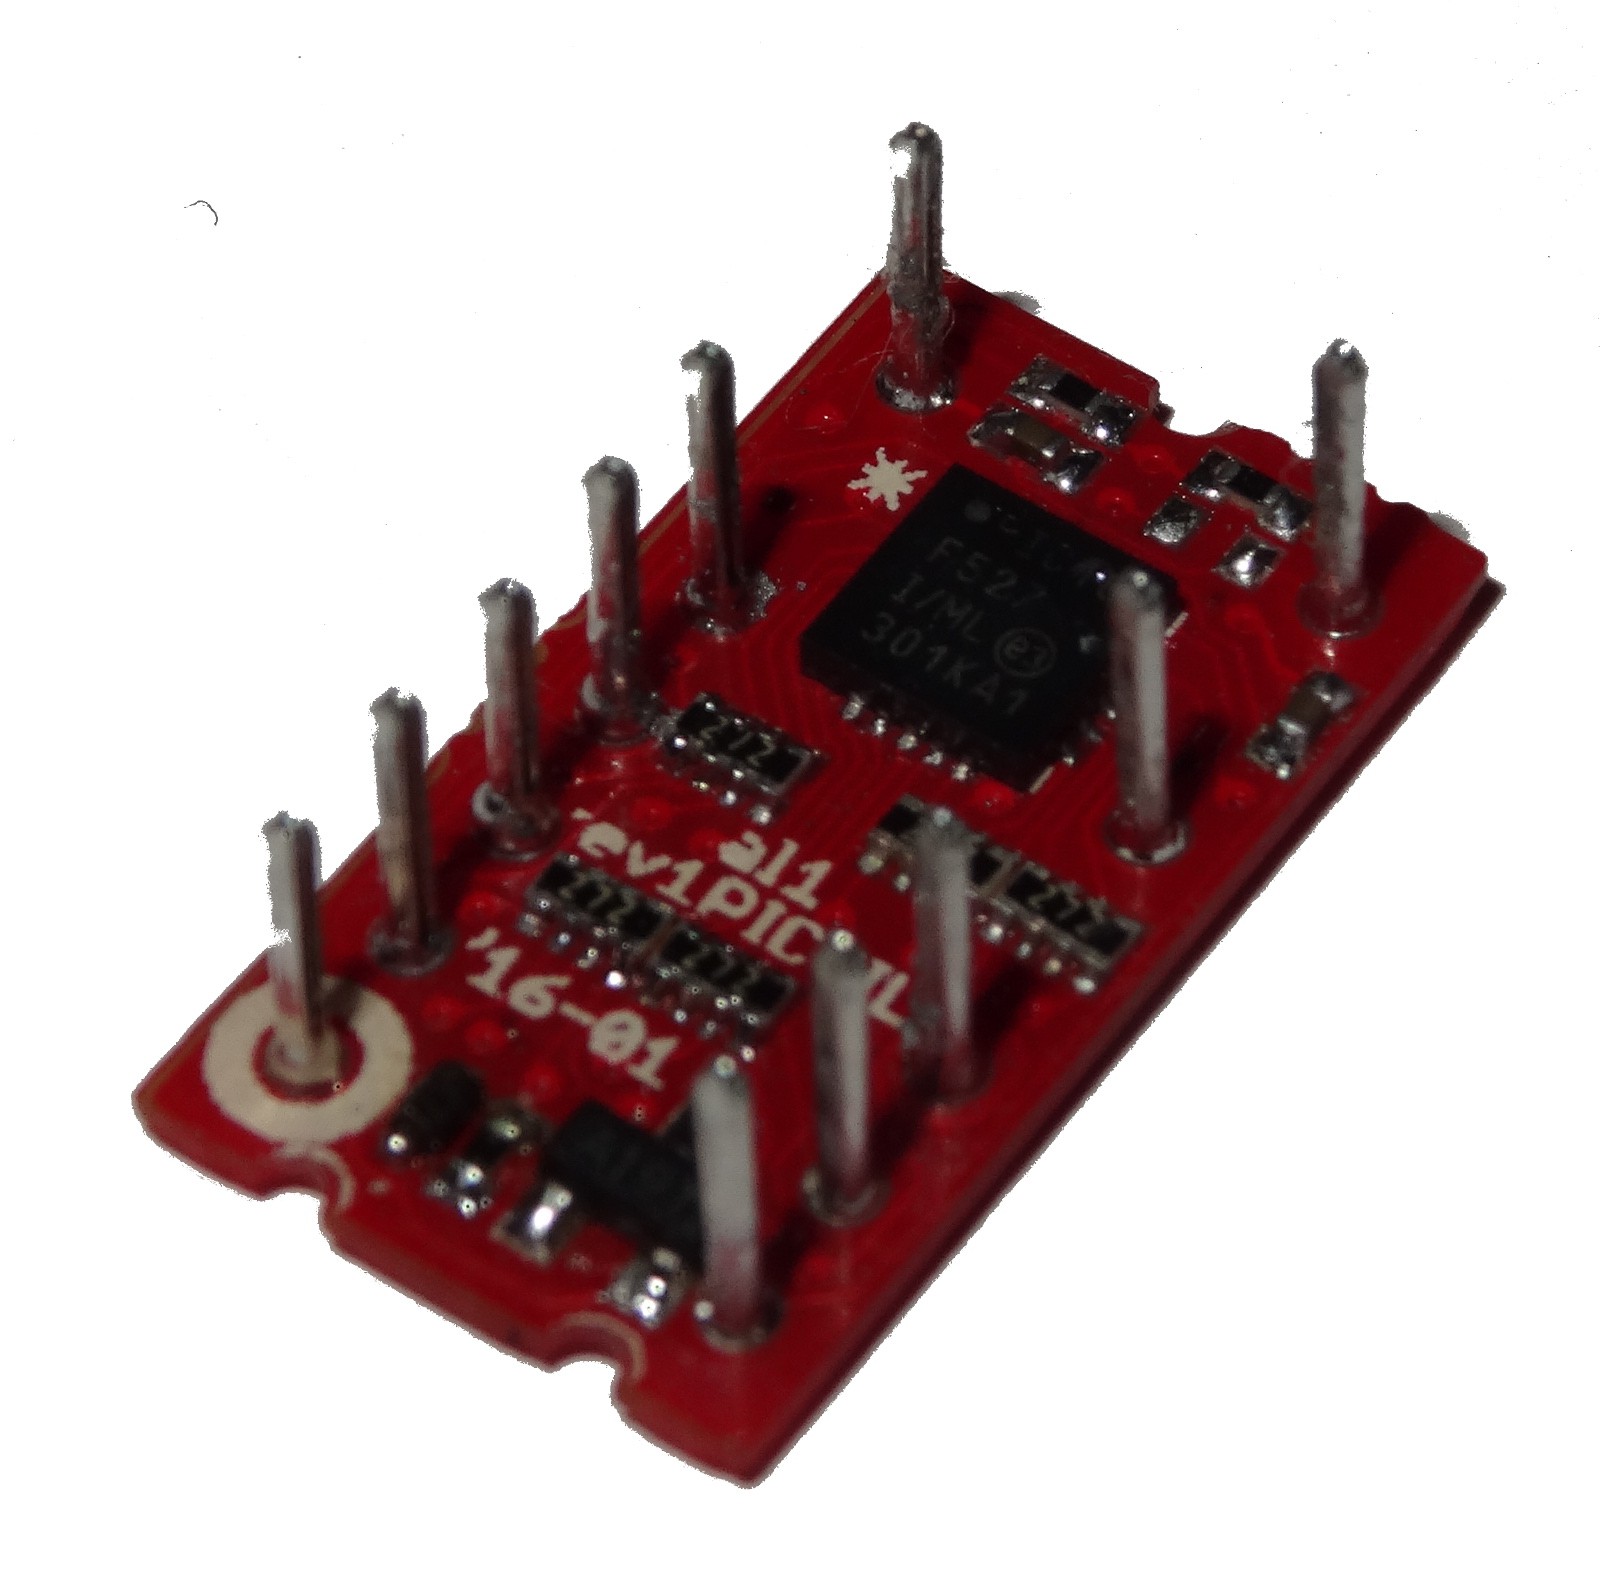
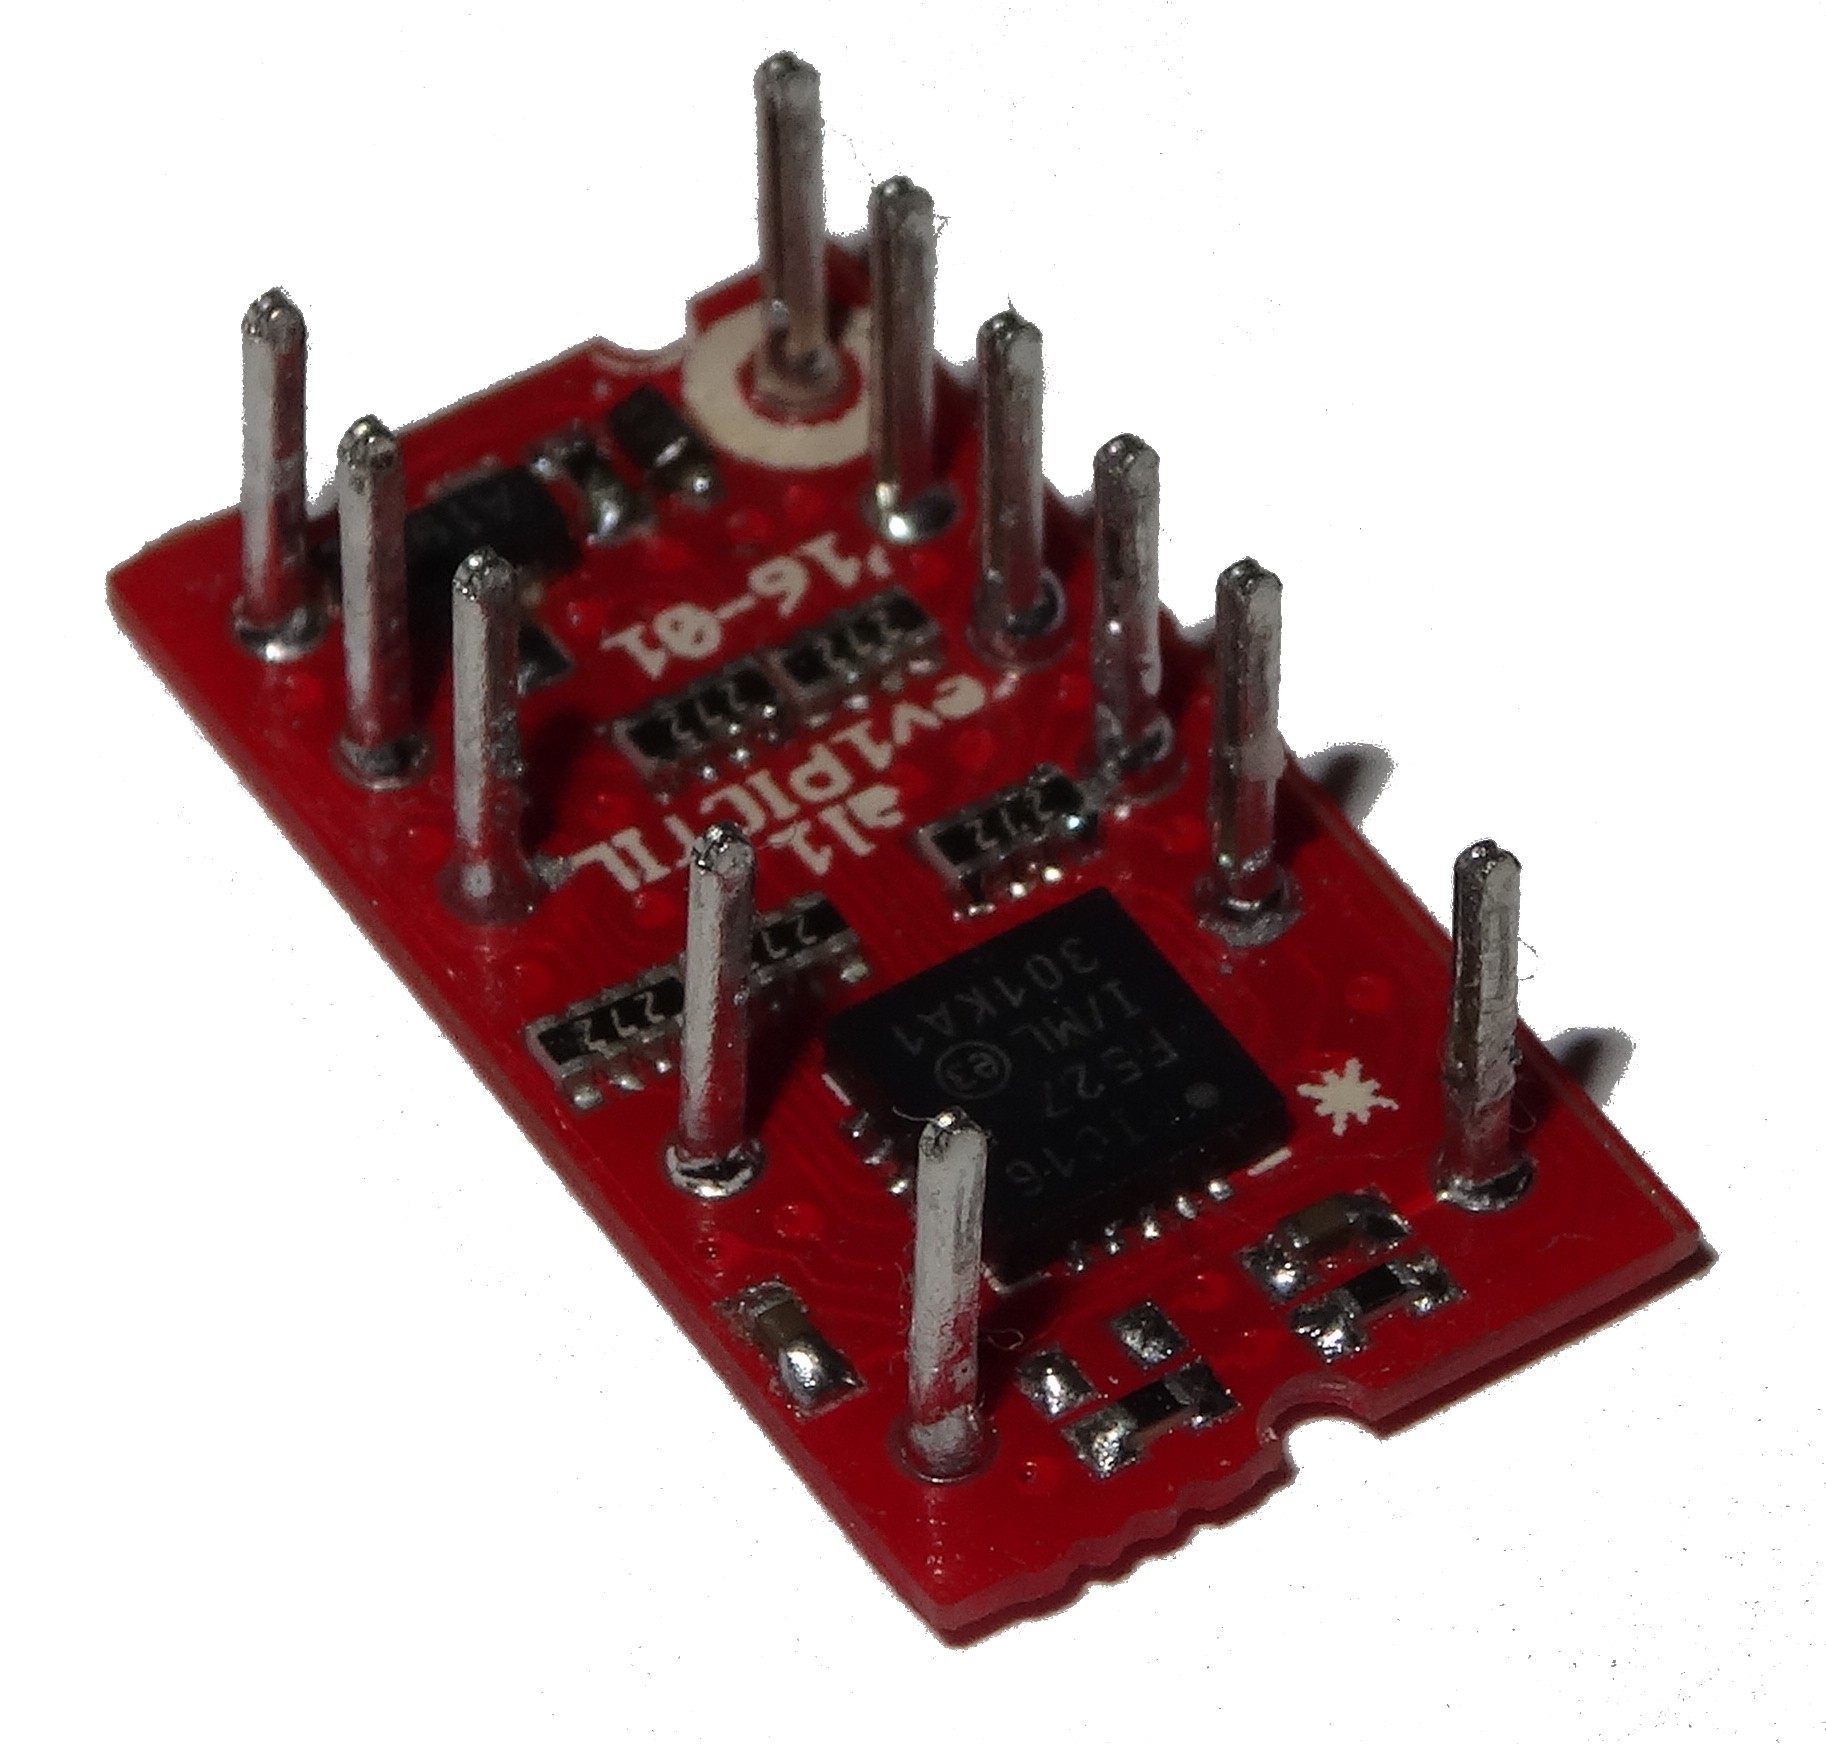
The TIL311 is a nice but expensive, obsolete, power-hungry hexadecimal display. It would be cool to make a tiny module with similar functionality which solves its shortcomings. A 20-pins PIC is a solution but other decoding chips could work too. The PIC16F527 is one of the cheapest 20-pins PICs (sub-dollar), but it can't implement the latch pin as fast as the original TIL311.

This project was created by Yann Guidon/YGDES but is actually being implemented by al1.

This project was original created by @Yann Guidon / YGDES out of frustration about this. Yann got some TIL311 to go forward in his project. The modules are cool for hobbyist projects but they have some issues. However it looks straight-forward to make such a module oneself, so why not DO it ?

Out of the suggestions I ( @al1 ) joined this project. I had some fun designing this little PCBs. Some iterations can be found in the project logs and comments. The goal behind these PCBs to get a very similar replacement for the TIL311. The size of the PCB is the same and at least the pin mapping is similar (timing could be different). The PIC16F527 is a very good micrcontroller for this: Cheap and exactly the right number of IO.
Something about the Hardware

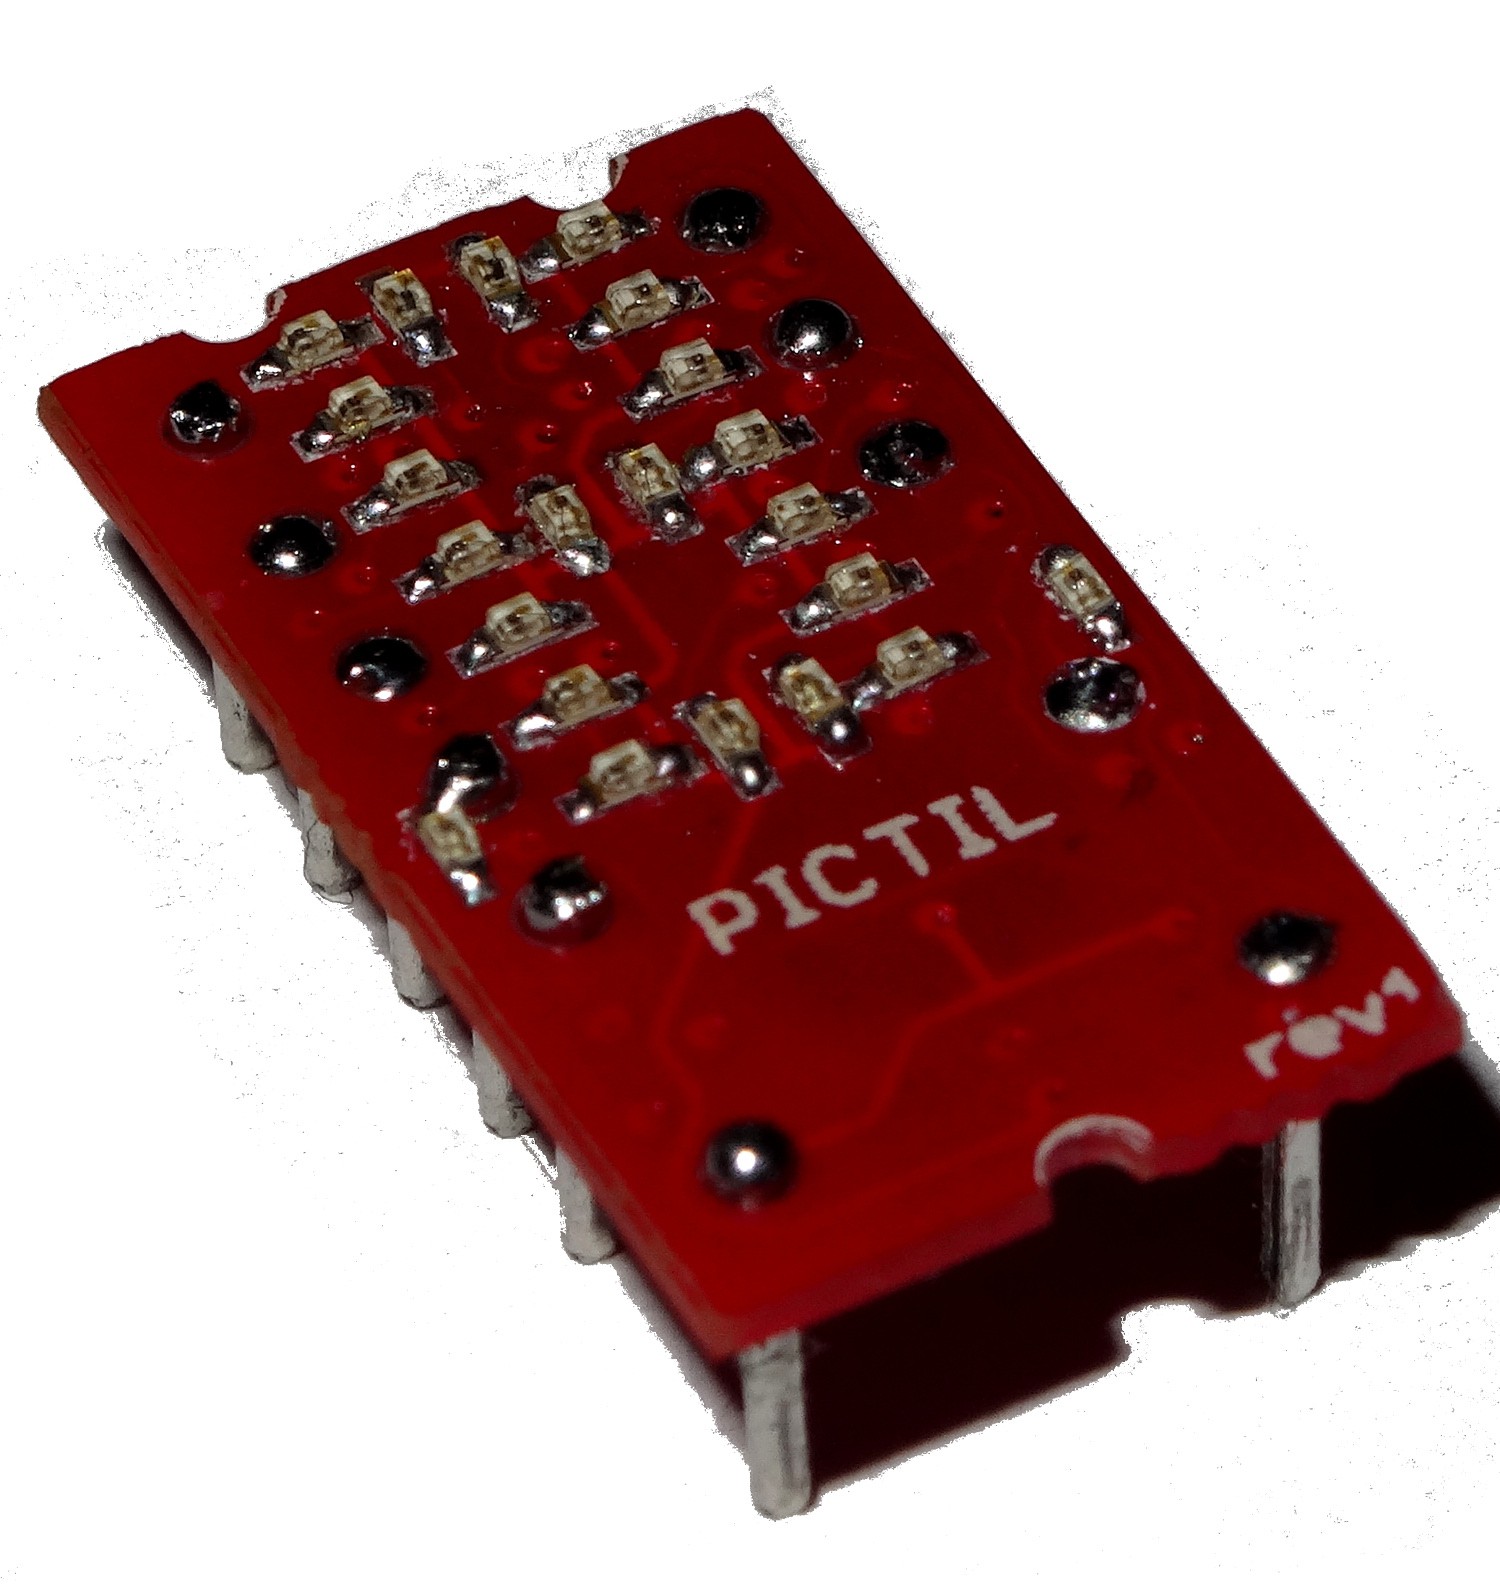
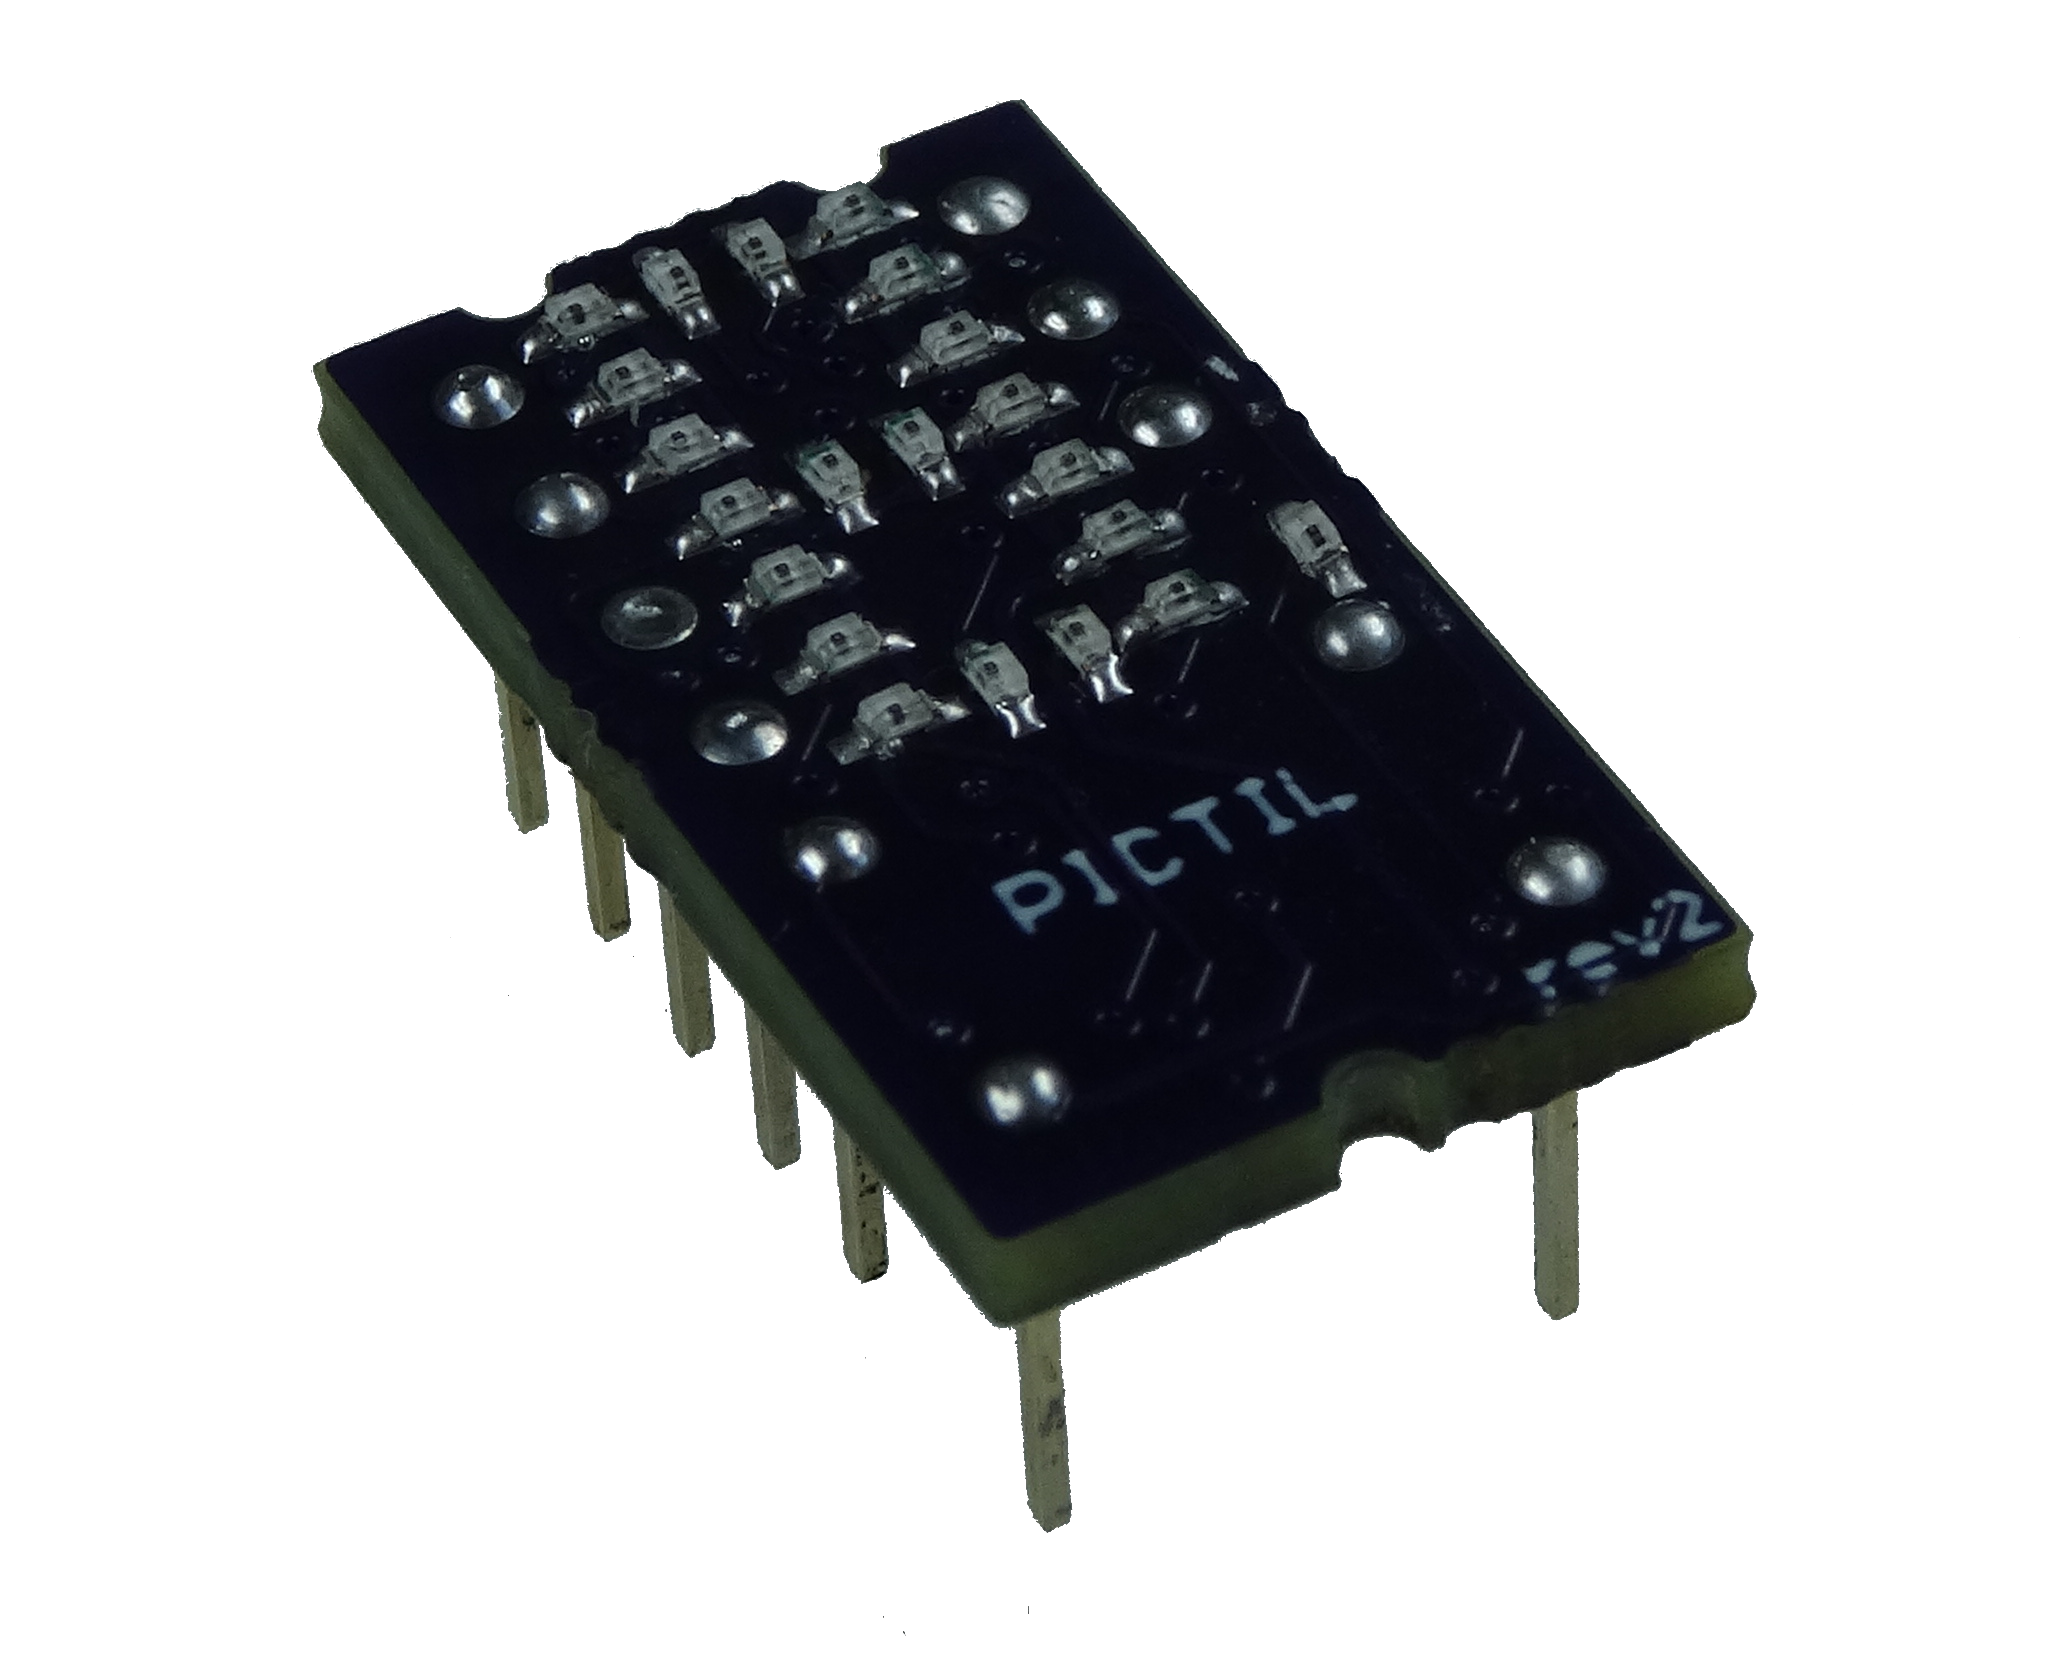
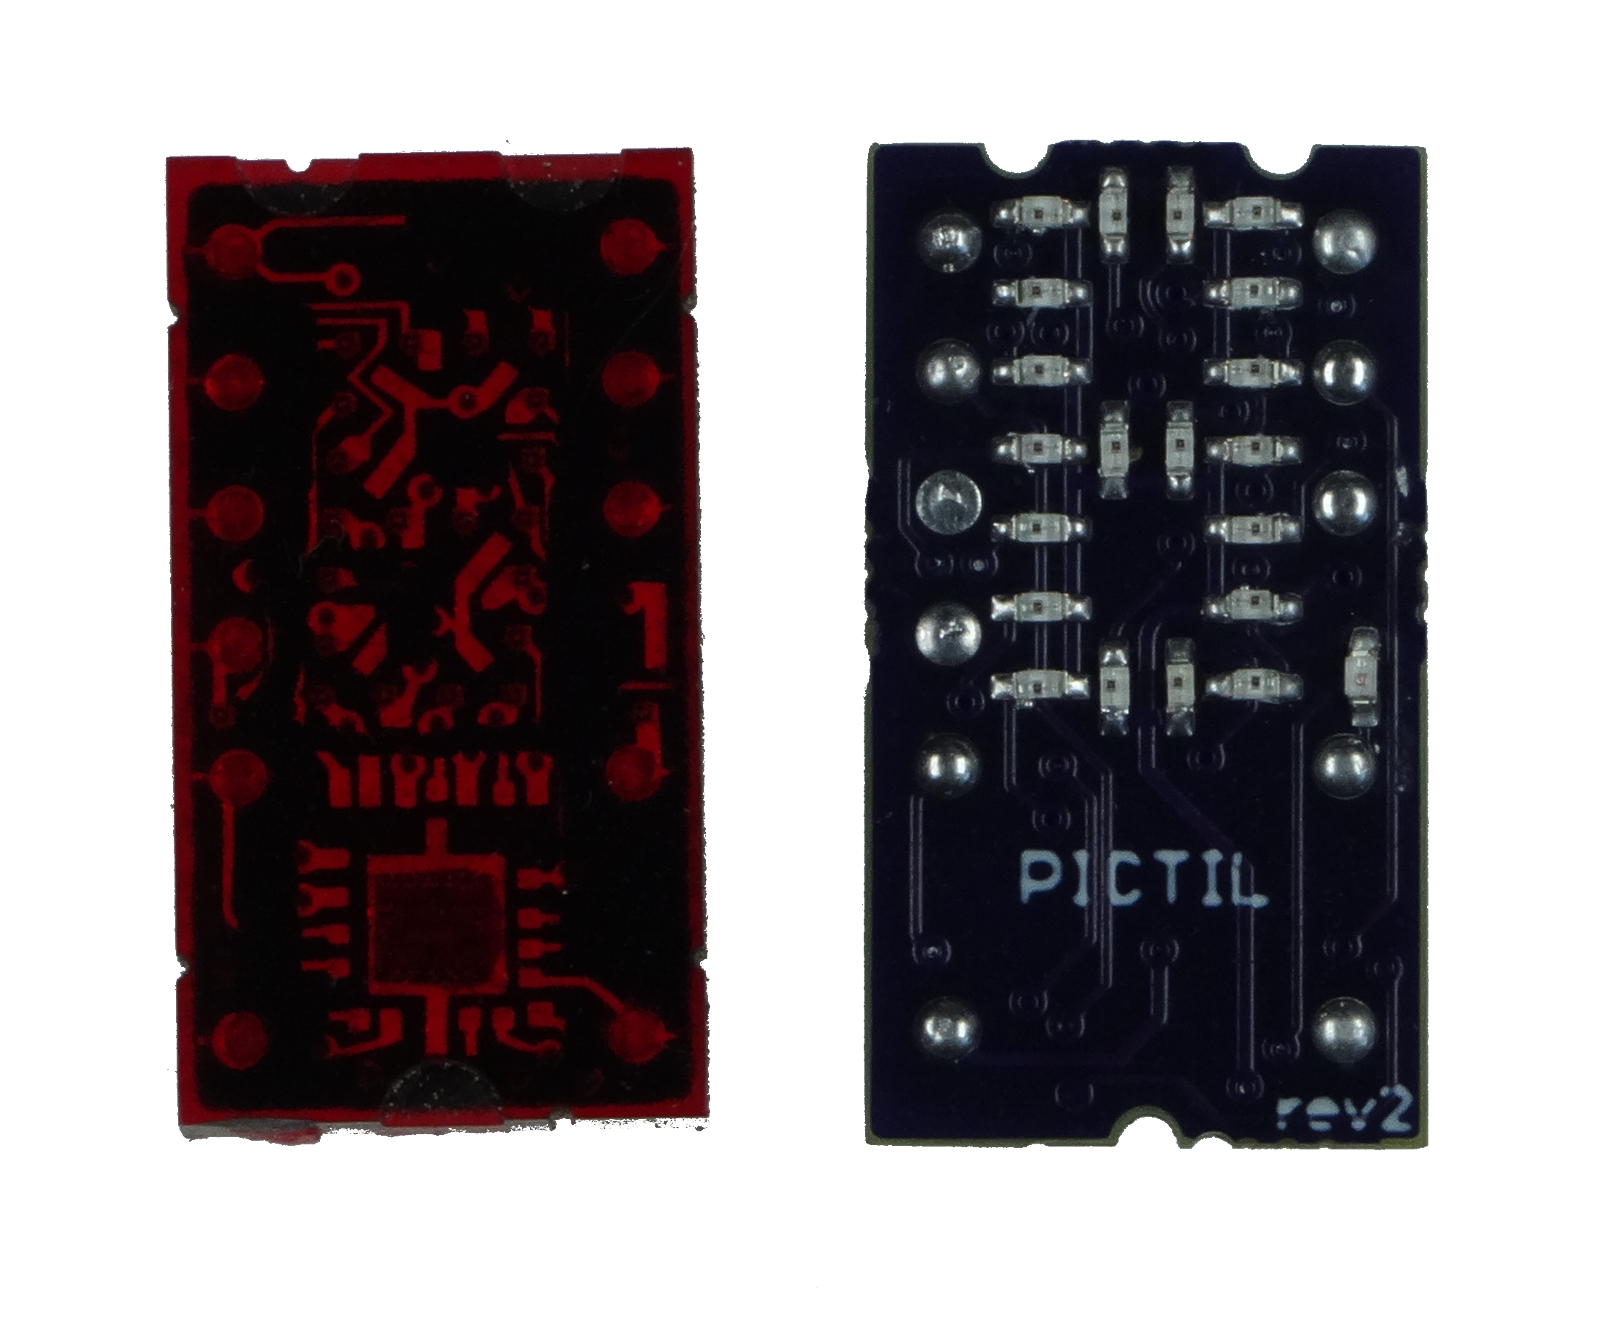
Not much to say about the Hardware. Its an quite basic schematic. The 20 (rev1 and rev2) or 13 (rev0) LEDs are controlled by the PIC. There are four inputs for the value and one latch input. The blank input is built discrete with a p-channel mosfet.

You can find schematic down in the file section.

There are different Hardware revisions available. Only rev2 and rev1NEO boards are working completely (see Errata). Following some additibnal information about the two working versions:

rev1NEO

This is a correct version of rev1. It uses the now working blank circuit of rev2. The benefit of this version compared to rev2 is that also the left dot is available. This dot is not present in rev2. The downside of this revision is that is uses to small traces to fulfil OSH parks design rules. 5mil traces/space and 12mil min Vias are used. This is manufacturable by dirtypcbs for example.

rev2

This Hardware Version does not have the right dot. Only the left dot is available. That is because rev2 conforms OSH Parks design rules (6 mil traces/space 13mil min Via),

Software

The software is nothing special yet. After some setup there is a endless loop. In this loop the led status gets updated if the input status changed and if the latch pin is low. The fonts for the LEDs is stored in a array. You can find the c-code as well as ta compiled hex-file in the bitbucket repository.
Future

  • Update and Improve the software
    • going in sleep mode if latch in high (saving energy)
    • interrupt on falling edges of RA3/latch to react faster and more like original TIL311
    • optional alternative control scheme (serial? /i2c? )
  • Get alternative software for other use cases
    • pulse counter
    • bus-controlled Display
    • #tiny7 replacement software
    • clock / timer /counter / thermometer....
  • Sell / Shop / Tindie
    • Some already did ask about that. I am thinking to sell some ( or at least PCBs).
    • Or maybe crowdfunding? mh? would be a good case to test that.
  • Crazy Idea in my mind
    • RGB version
    • Version with Bluetooth or other radio
  • Programming/Testing jig

Errata

rev0

There is I mistake in the schematic and because of that also on the circuit board. I should had noticed that before but source and drain are interchanged. This can be fixed by not using the blank-circuit and bridging the transistor by a 0 Ohm resistor. See also this log.

rev1

The error is still there. Thought I did fixed it. (see rev1NEO for a fixed rev1)

rev1NEO

No known (yet)

rev2

No known (yet)

PICTIL rev1 schematic.pdf

Adobe Portable Document Format - 662.51 kB - 05/14/2016 at 13:10

Preview

PICTIL rev2 schematic.pdf

Adobe Portable Document Format - 651.34 kB - 05/14/2016 at 13:10

Preview

gif4.gif

PICTIL rev1 in animation

Graphics Interchange Format - 2.39 MB - 03/29/2016 at 12:22

Preview

  • 1 × PIC16F527-I/ML Microprocessors, Microcontrollers, DSPs / ARM, RISC-Based Microcontrollers
  • 15 × Led SMD 0603
  • 1 × P-Fet NTK3139PT1G SMD SOT-723
  • 1 × Capacitor 100nF SMD 0402
  • 1 × Diode (signal) SMD SOD523 1N4148WT

View all 9 components

  • Meassuring the current consumption

    Alex05/11/2016 at 20:57 1 comment

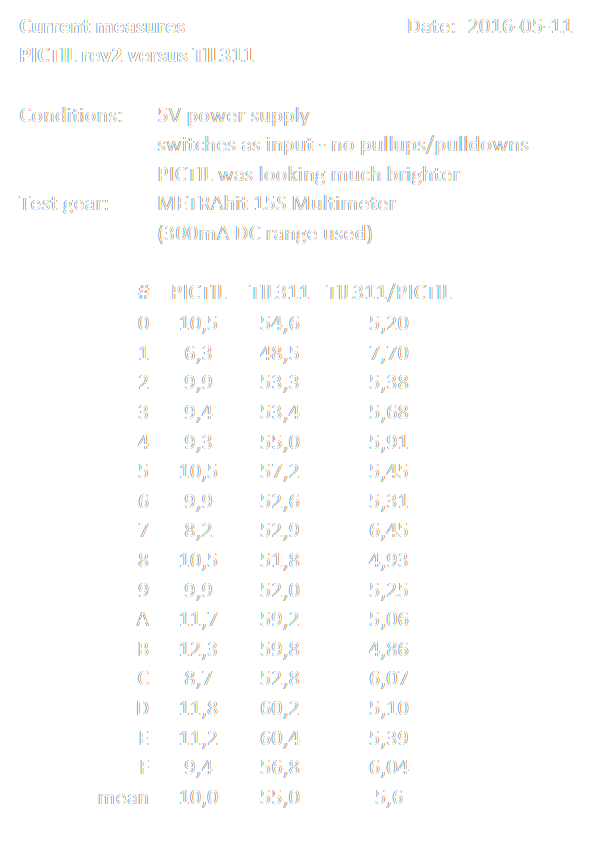
    I did some current measurement of PICTIL rev2 compared to a original TIL311. As also seen in the table I powered both from 5V using the same breadboard circuit. The PICTIL was also much brighter (as far as the human eye is an instrument for that). Another point is that I do only have one original TIL311 (datacode: 9243 made in Korea) I do not know whether this one is typical for all. The used current range (300mA) was the lowest on my multimeter. The unit for the currents is mA. The last columns is the current of the original divided by the value of PICTIL.

    As you can see the PICTIL rev2 is much better than the TIL311 in terms of power consumption. On average the PICTIL consumes only 10mA! When dimming the PICTIL to archive the same brightness as the TIL311 the results should be even better.

    Some added Note:
    I repeated this measurement today with a other meter. According to the specs the Fluke 8040A is better. It has also a 20mA range, but this meter is much older and as far I know was never calibrated. (The METRAhit used before was last calibrated in December 2011). But never the less The measurements were very similar most times about 1,2mA higher for both PICTIL and TIL311.

  • rev2 is working!

    Alex05/11/2016 at 19:59 7 comments

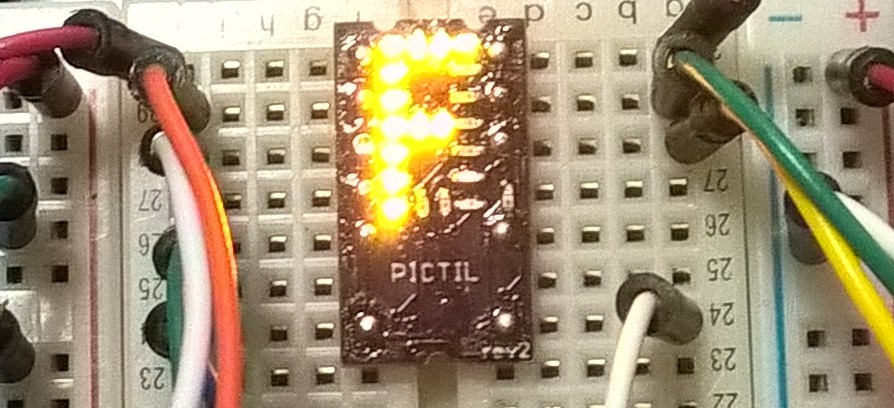
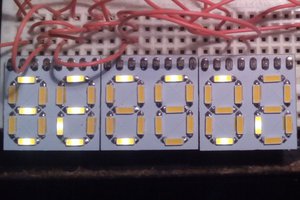
    Today the missing parts for finishing rev2 arrived. And it's also working. Also the blank circuit is working! Here a first image. I will take better ones soon.

    The changed firmware is now also available in the bit bucket repository. So in combination with the link to the board at OSH park. Everyone with decent soldering skills can build his own. If you do that please post some pictures.

  • rev2 soldering - Part 1

    Alex04/18/2016 at 15:31 0 comments

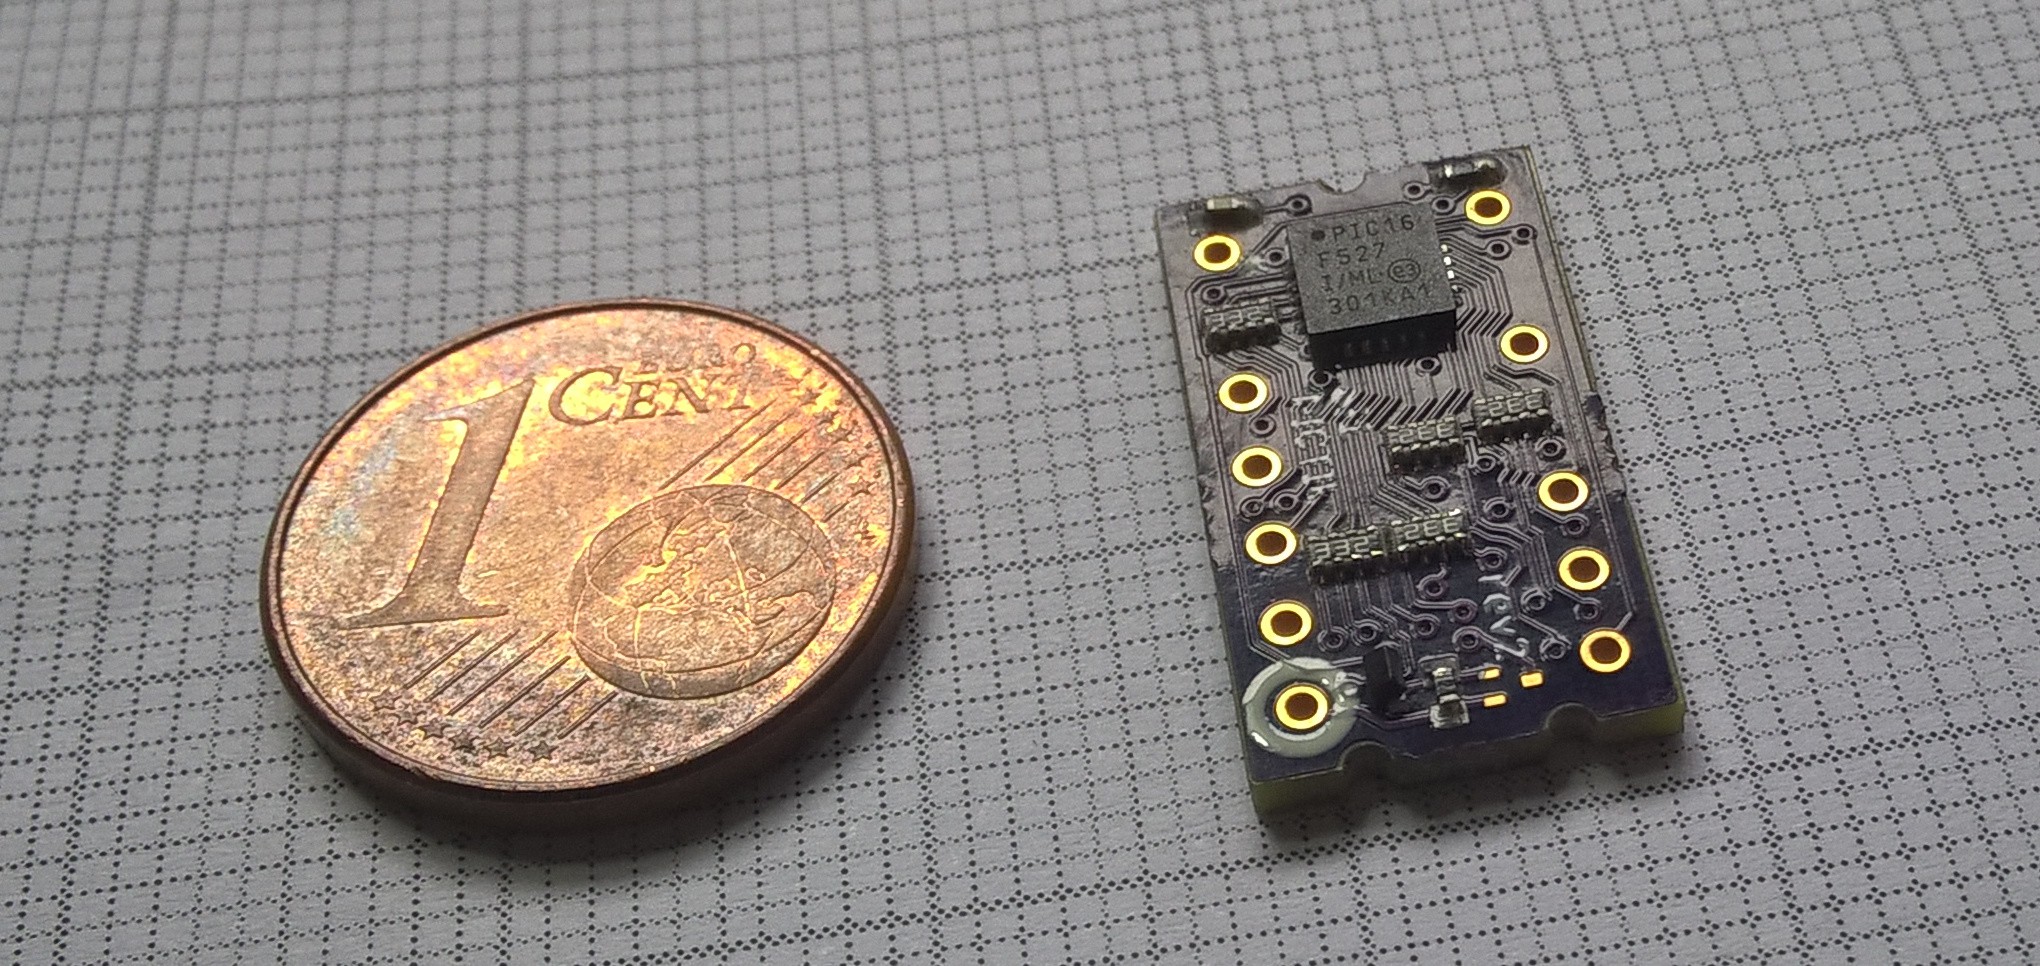
    I did stated with the soldering of the first rev2 board. Now I have to wait on the missing transistor before soldering the other (the LED) side. The coin in the image has a diameter of 16.25mm/0.64''.

    I am also not sure yet which LED color I will use. If you have a wish please leave a comment. I do have red, green, yellow, blue and white LEDs.

  • rev2 PCBs are in

    Alex04/14/2016 at 17:23 4 comments

    The new rev2 PCBs did arrive from OSH park. I hope the p-fet bug is fixed now. I am still waiting on some parts (the new p-fet LEDs in not red). When I do have all parts I will solder one and take some more pictures.

    If you want to get your own ones, here you can order the PCBs: https://oshpark.com/shared_projects/LDcRWFo1

    Please Share some photos if you built one

  • update to rev2

    Alex04/01/2016 at 16:31 9 comments

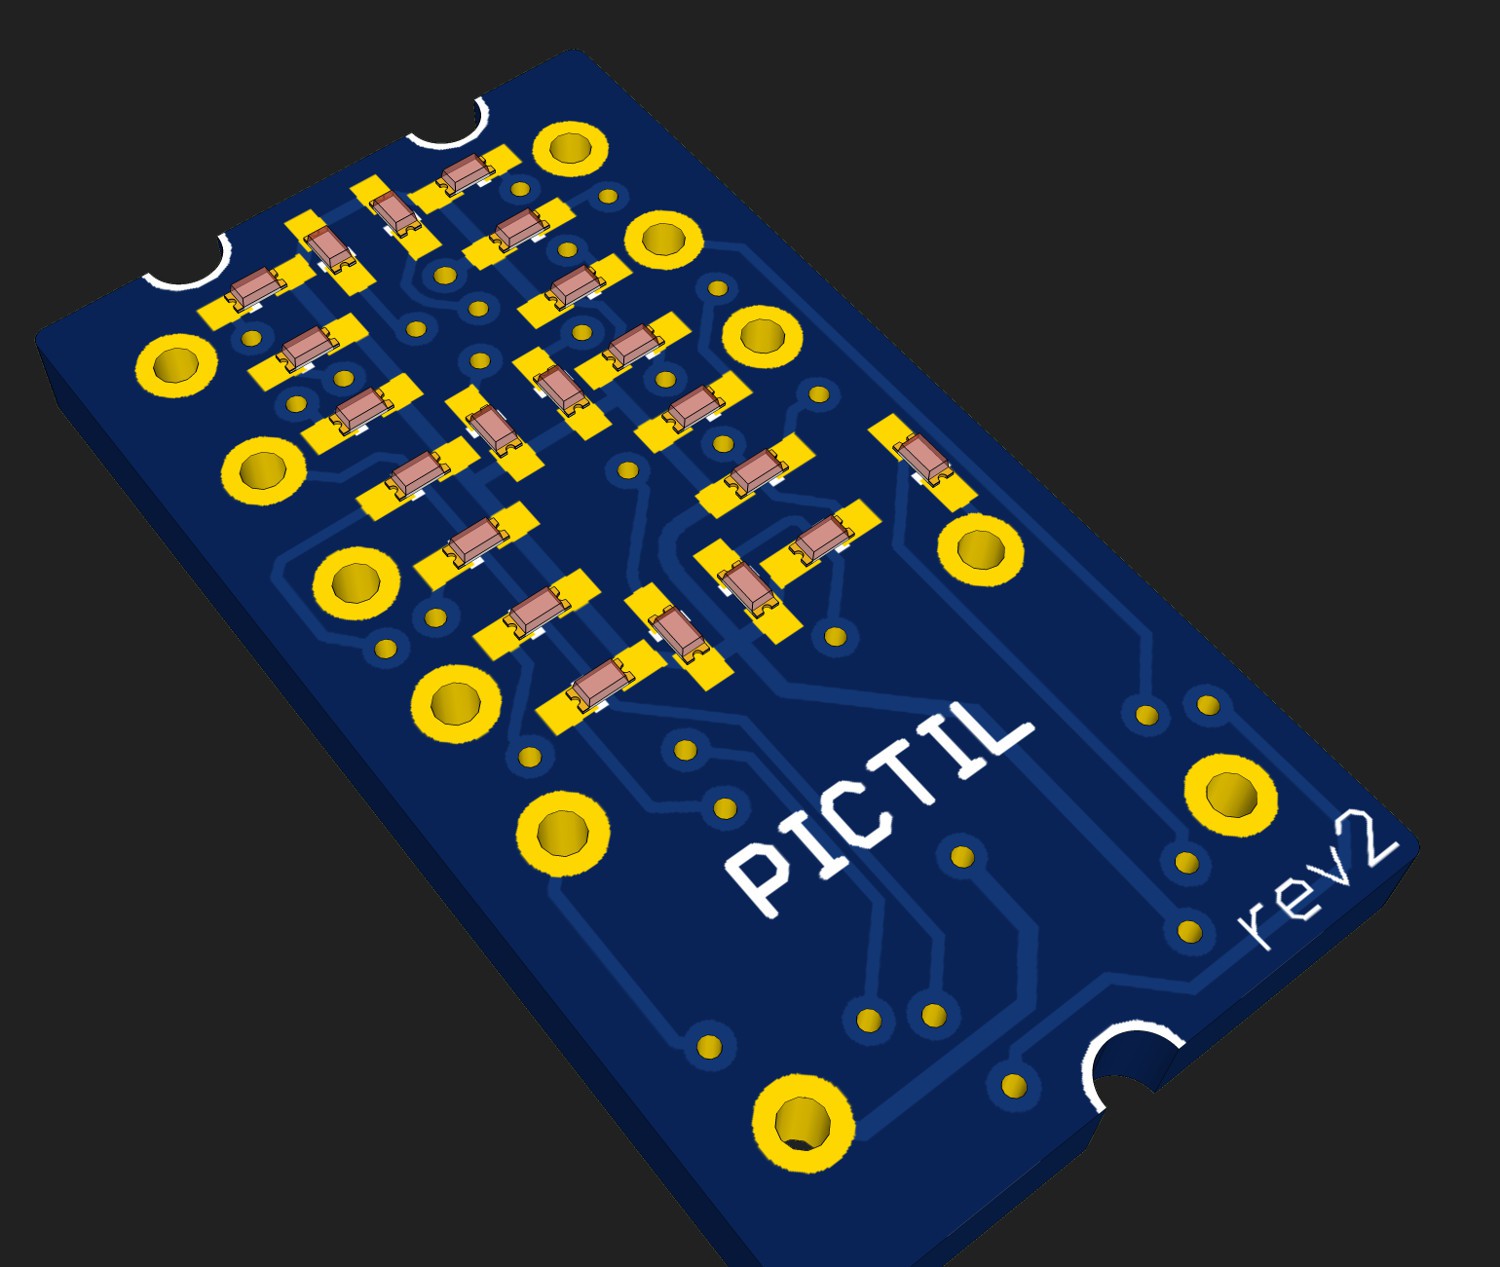
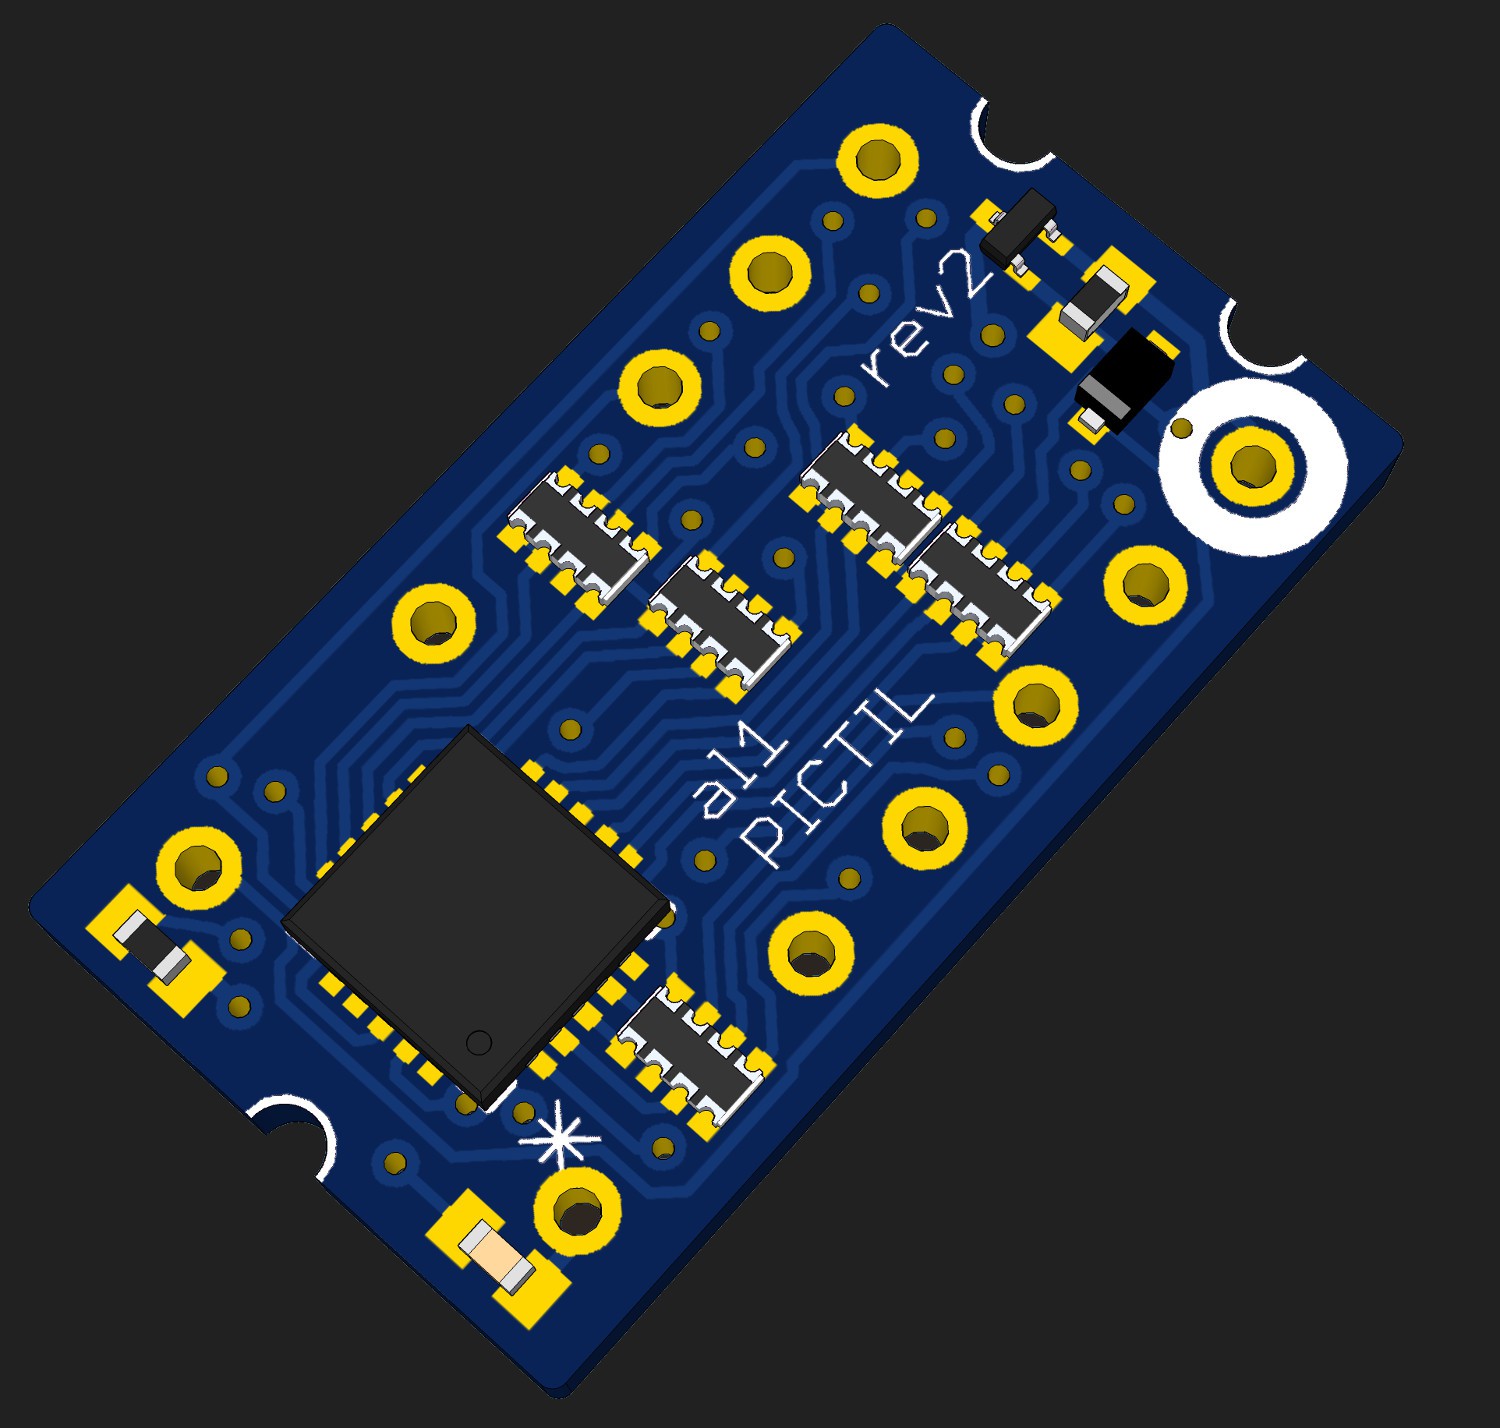
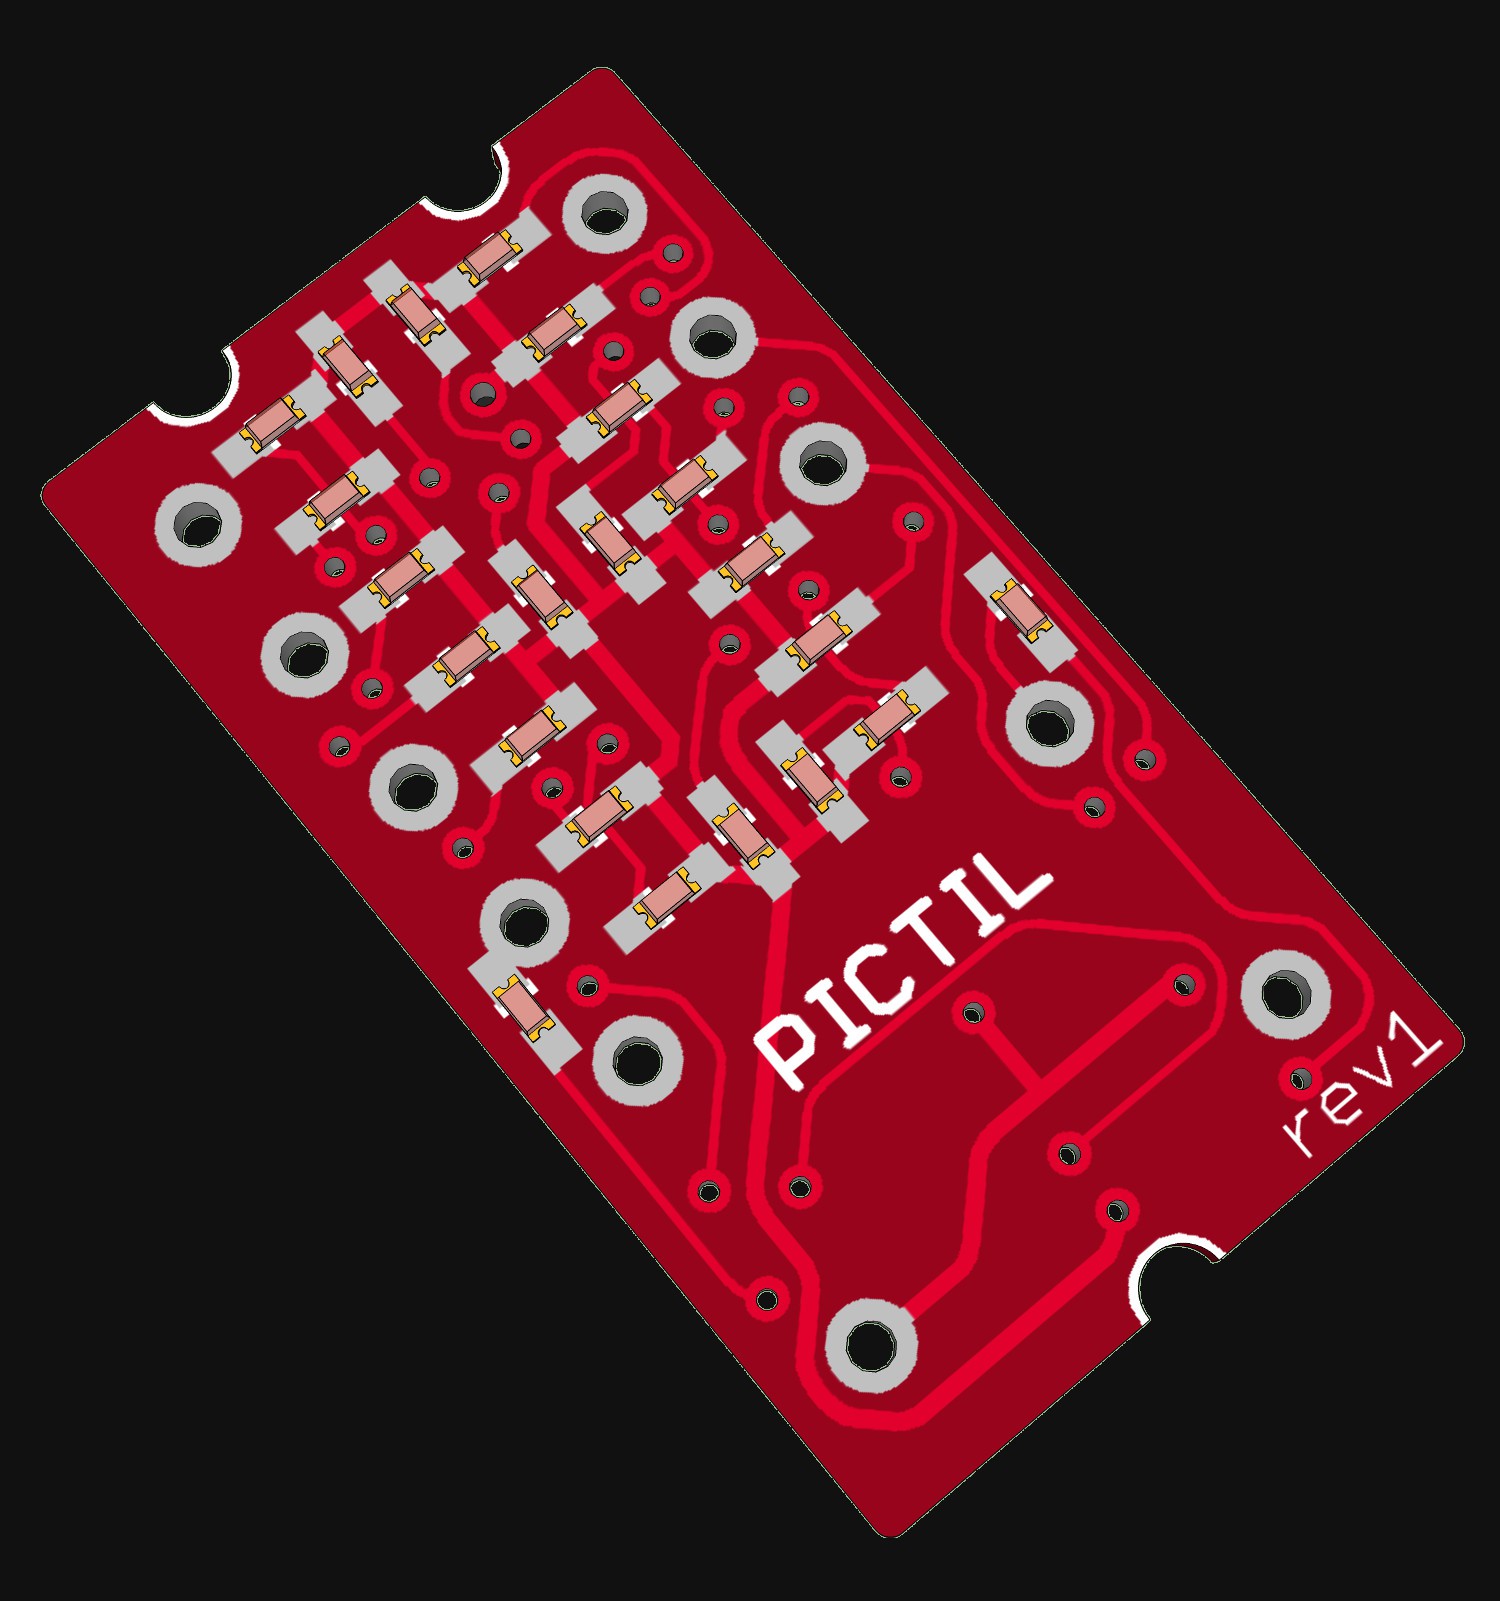
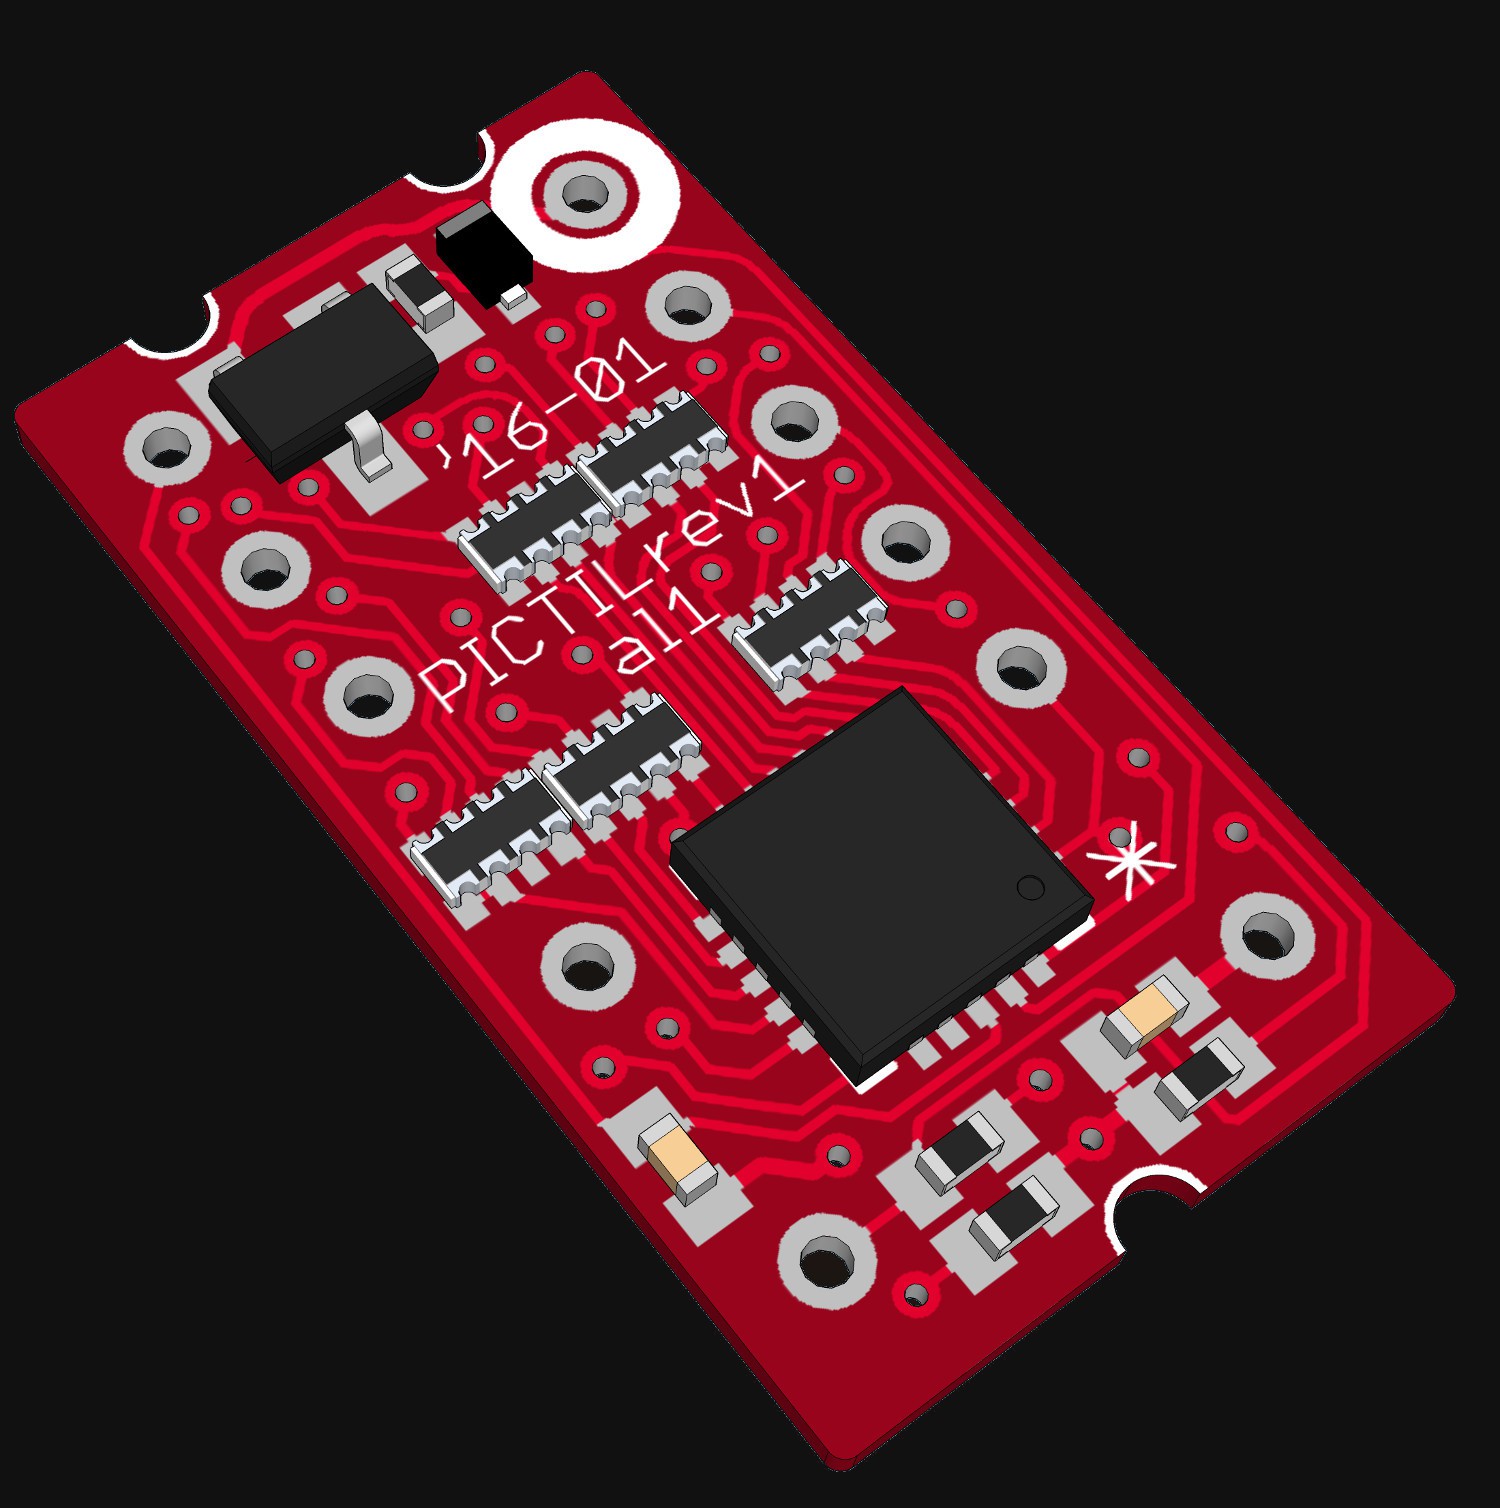
    There was still the mistake with the not working blank input in the last version. And I did not like that. Specially if looking for testing Tindie with this. So I did some rework on the PCB layout. Now I do think I did fixed that issue. Additional I did change the layout in a way to be inside more Manufacturer's specs. In rev1 I use 5mil Traces/Spaces with 12mil drills. No it is 6Mil/16mil with 13mil drills nad is now again producable by OSHpark (with was important for me to get cheaper and faster Prototypes in low quantity - 1,55$/3PCBs ). To get that I did throw out some unnecessary components and changed the mosfet package to SOT-723. Boards are ordered and should be arrive soon. Here are some renders:


  • more Pictures

    Alex03/14/2016 at 18:16 0 comments

  • .gif time

    Alex03/13/2016 at 18:50 4 comments

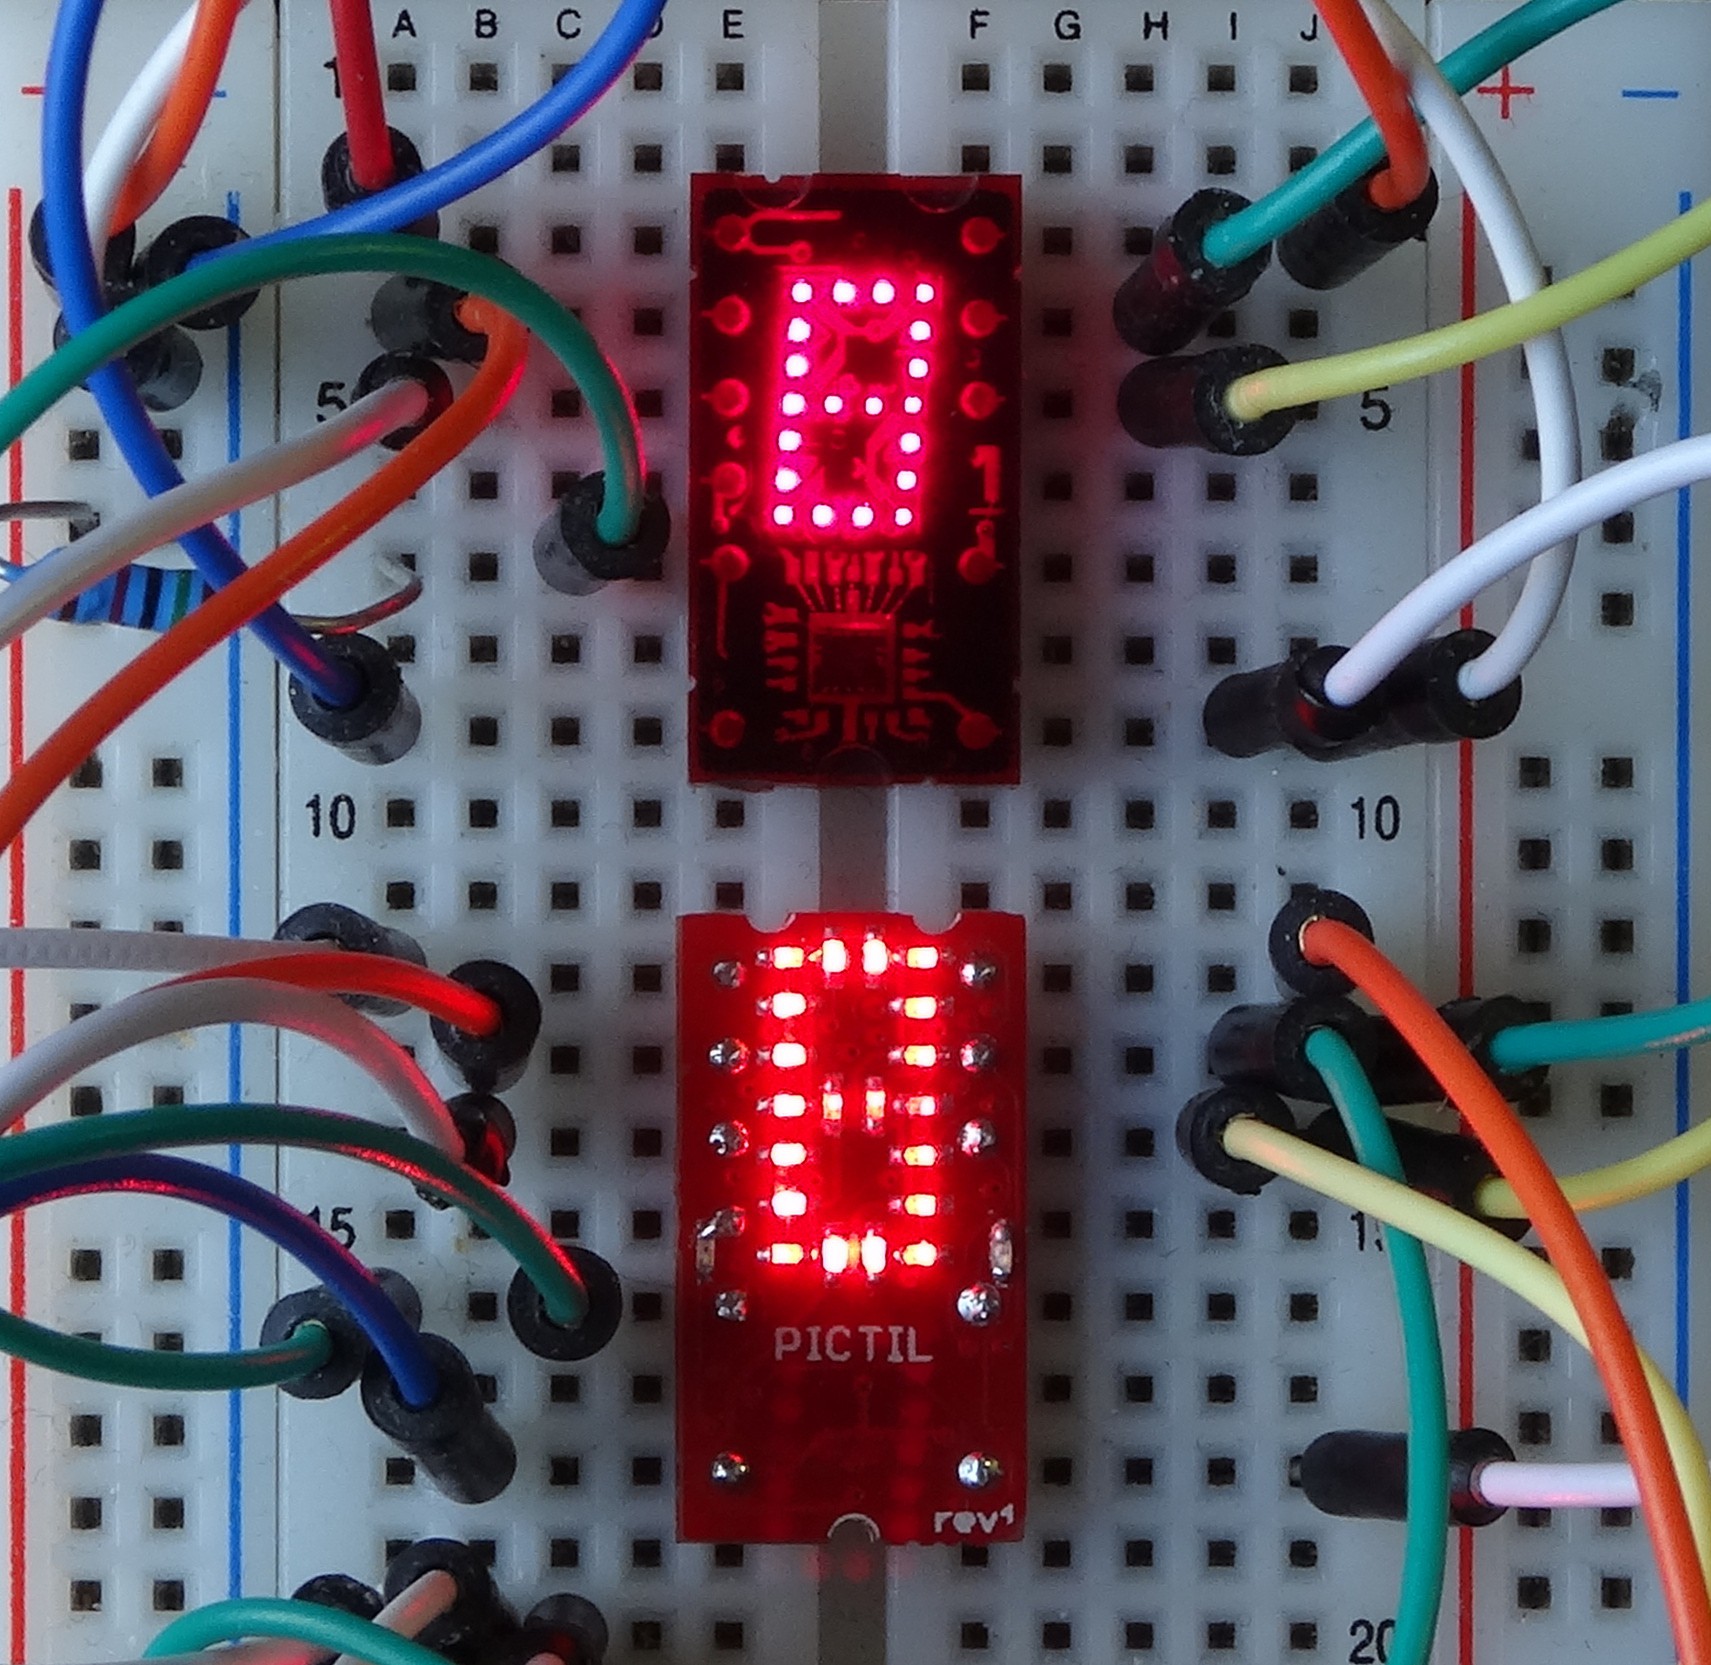
    did change the software. Now rev1 is also working correct. On the top is a original TIL311:

  • some soldering

    Alex03/12/2016 at 20:55 3 comments

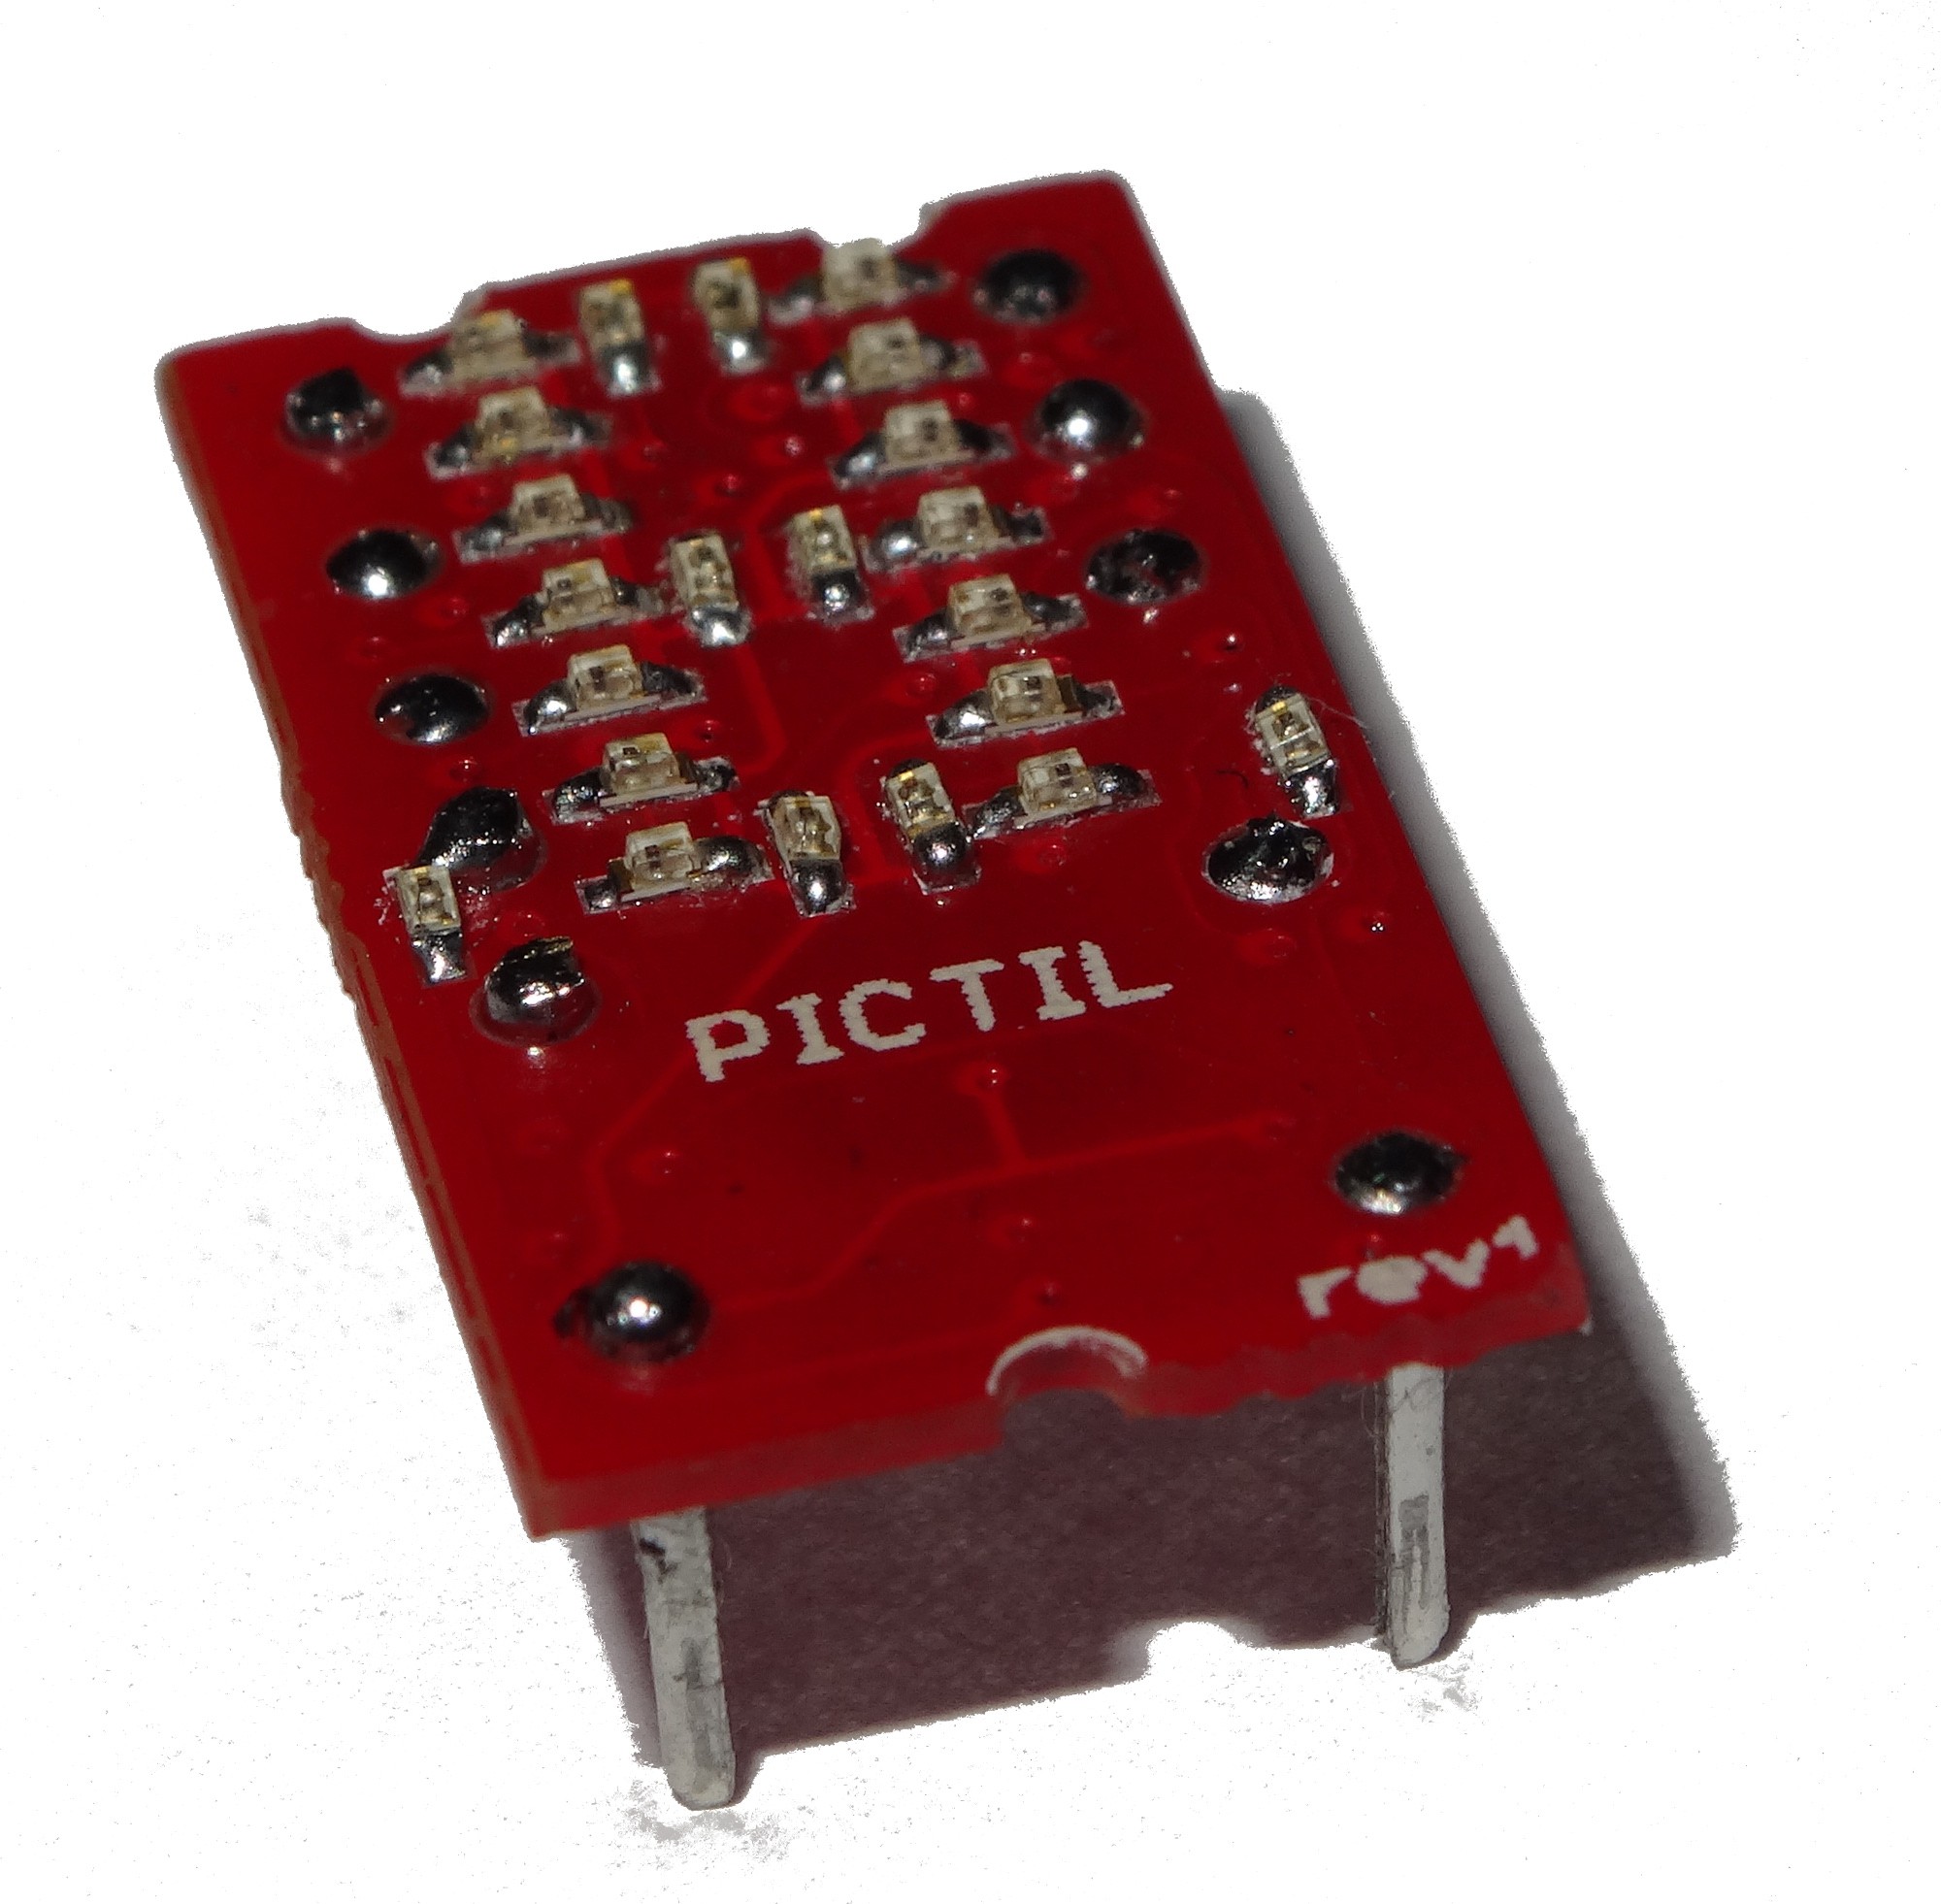
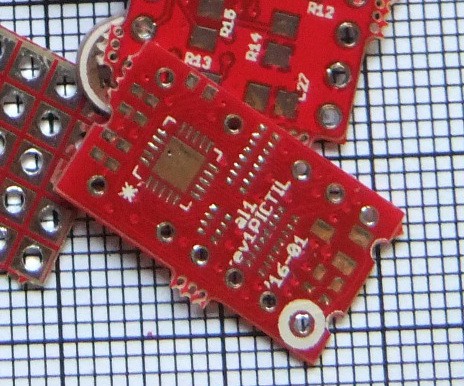
    soldering ready. And it did also work (but I did not change the pin mapping in the code so no right numbers are shown). First some pictures:

    This is the most extreme thing I soldered so far and is working.

    Sadly I did not corrected the mistake in the schematic. I did wrote about that in a previous log. But that is only affect the BLANK pin.

    The PCB is 0.6mm thick. The single resistors, capacitors and LEDs are 0402. The dimensions are now the same as the original TIL311 (I will take a side by side picture the next days).

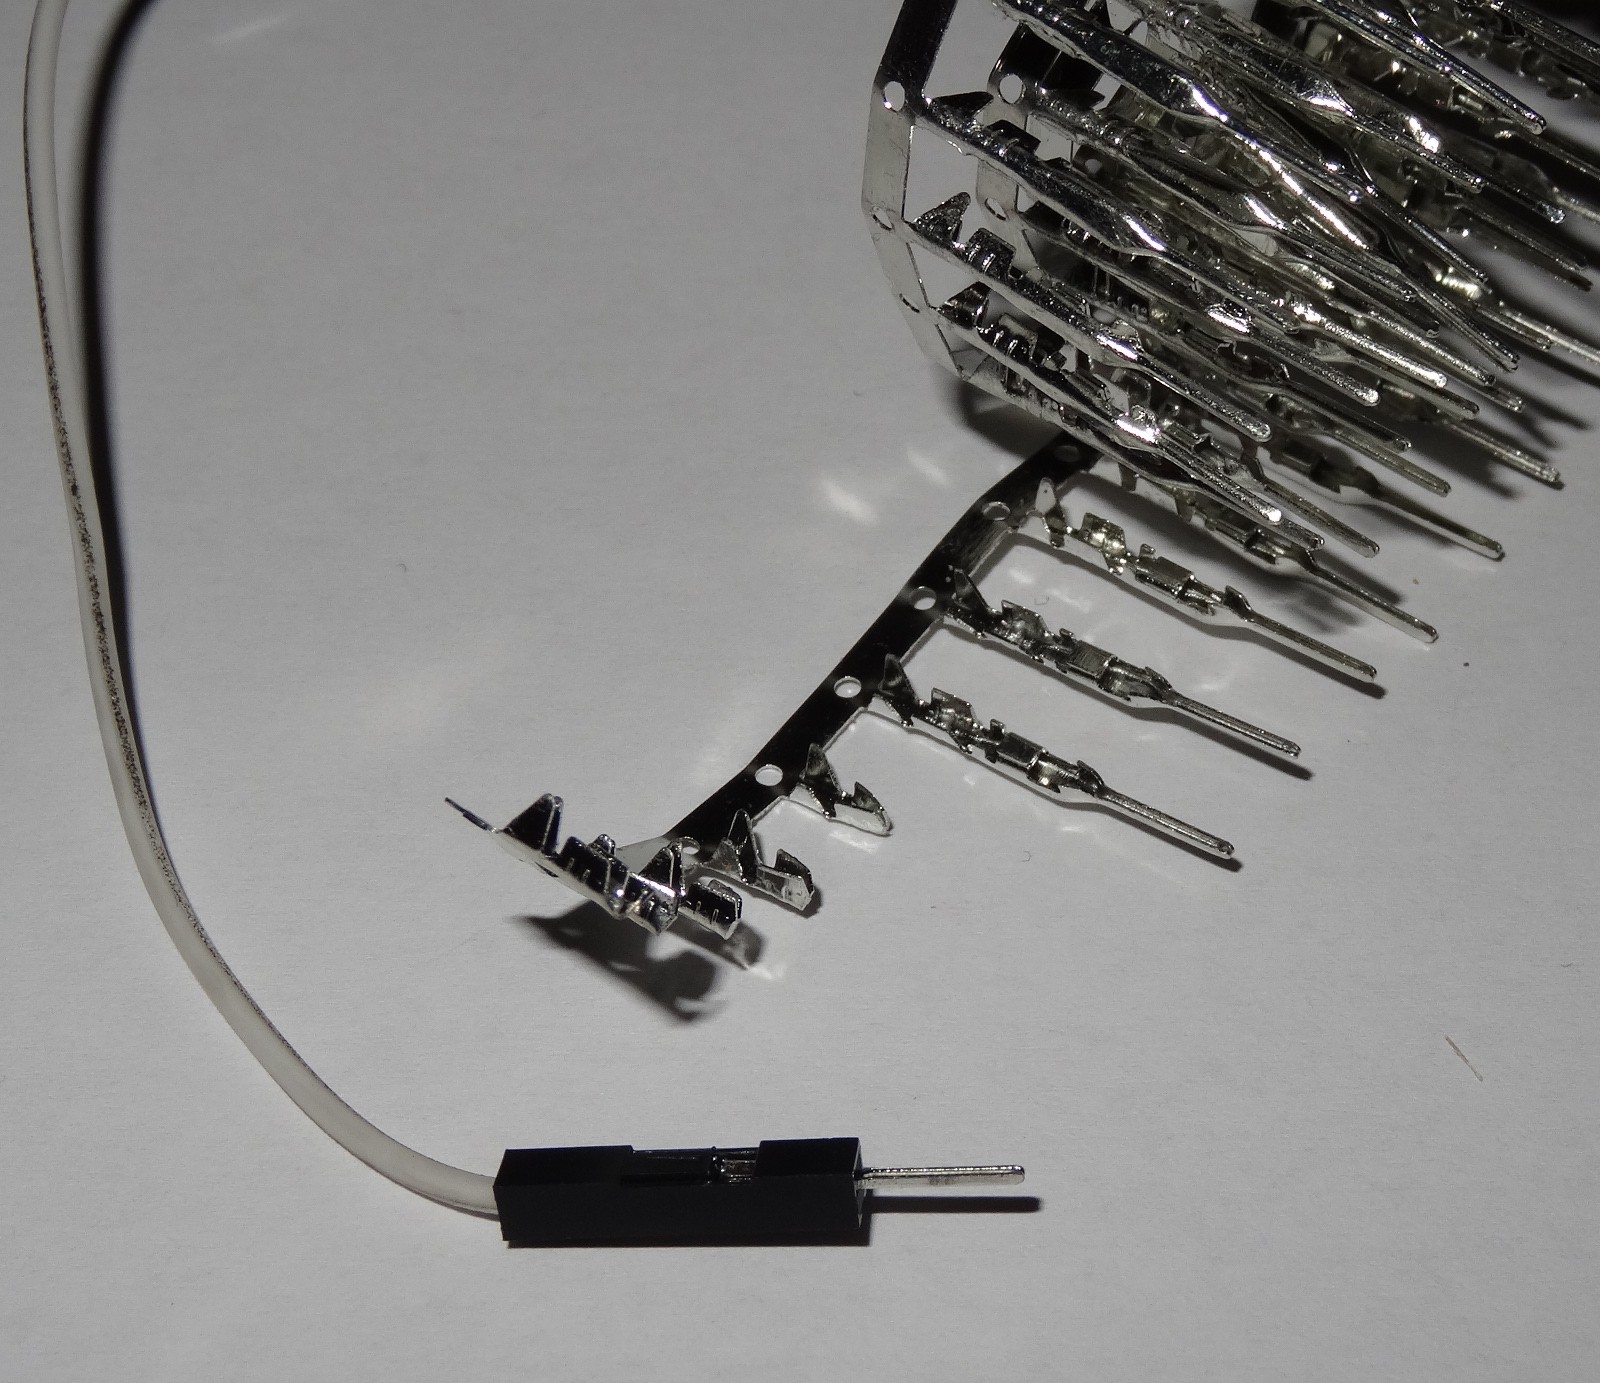
    To the pins: There where some very good suggestions in the comments of a previous log. I do still like the idea of using nails. But I was to lazy to get them. So I did searched for substitute which I had available. I ended up with the pin of these wires:

    After soldering the whole pin in I did cut of the crimp part of it. This came out good enough and is also not expensive (0.82€ / 100 pins).

    Next I will update the software. This is needed because I changed the pin mapping of the LEDs.

  • rev1 PCB arrived

    Alex03/12/2016 at 16:16 2 comments

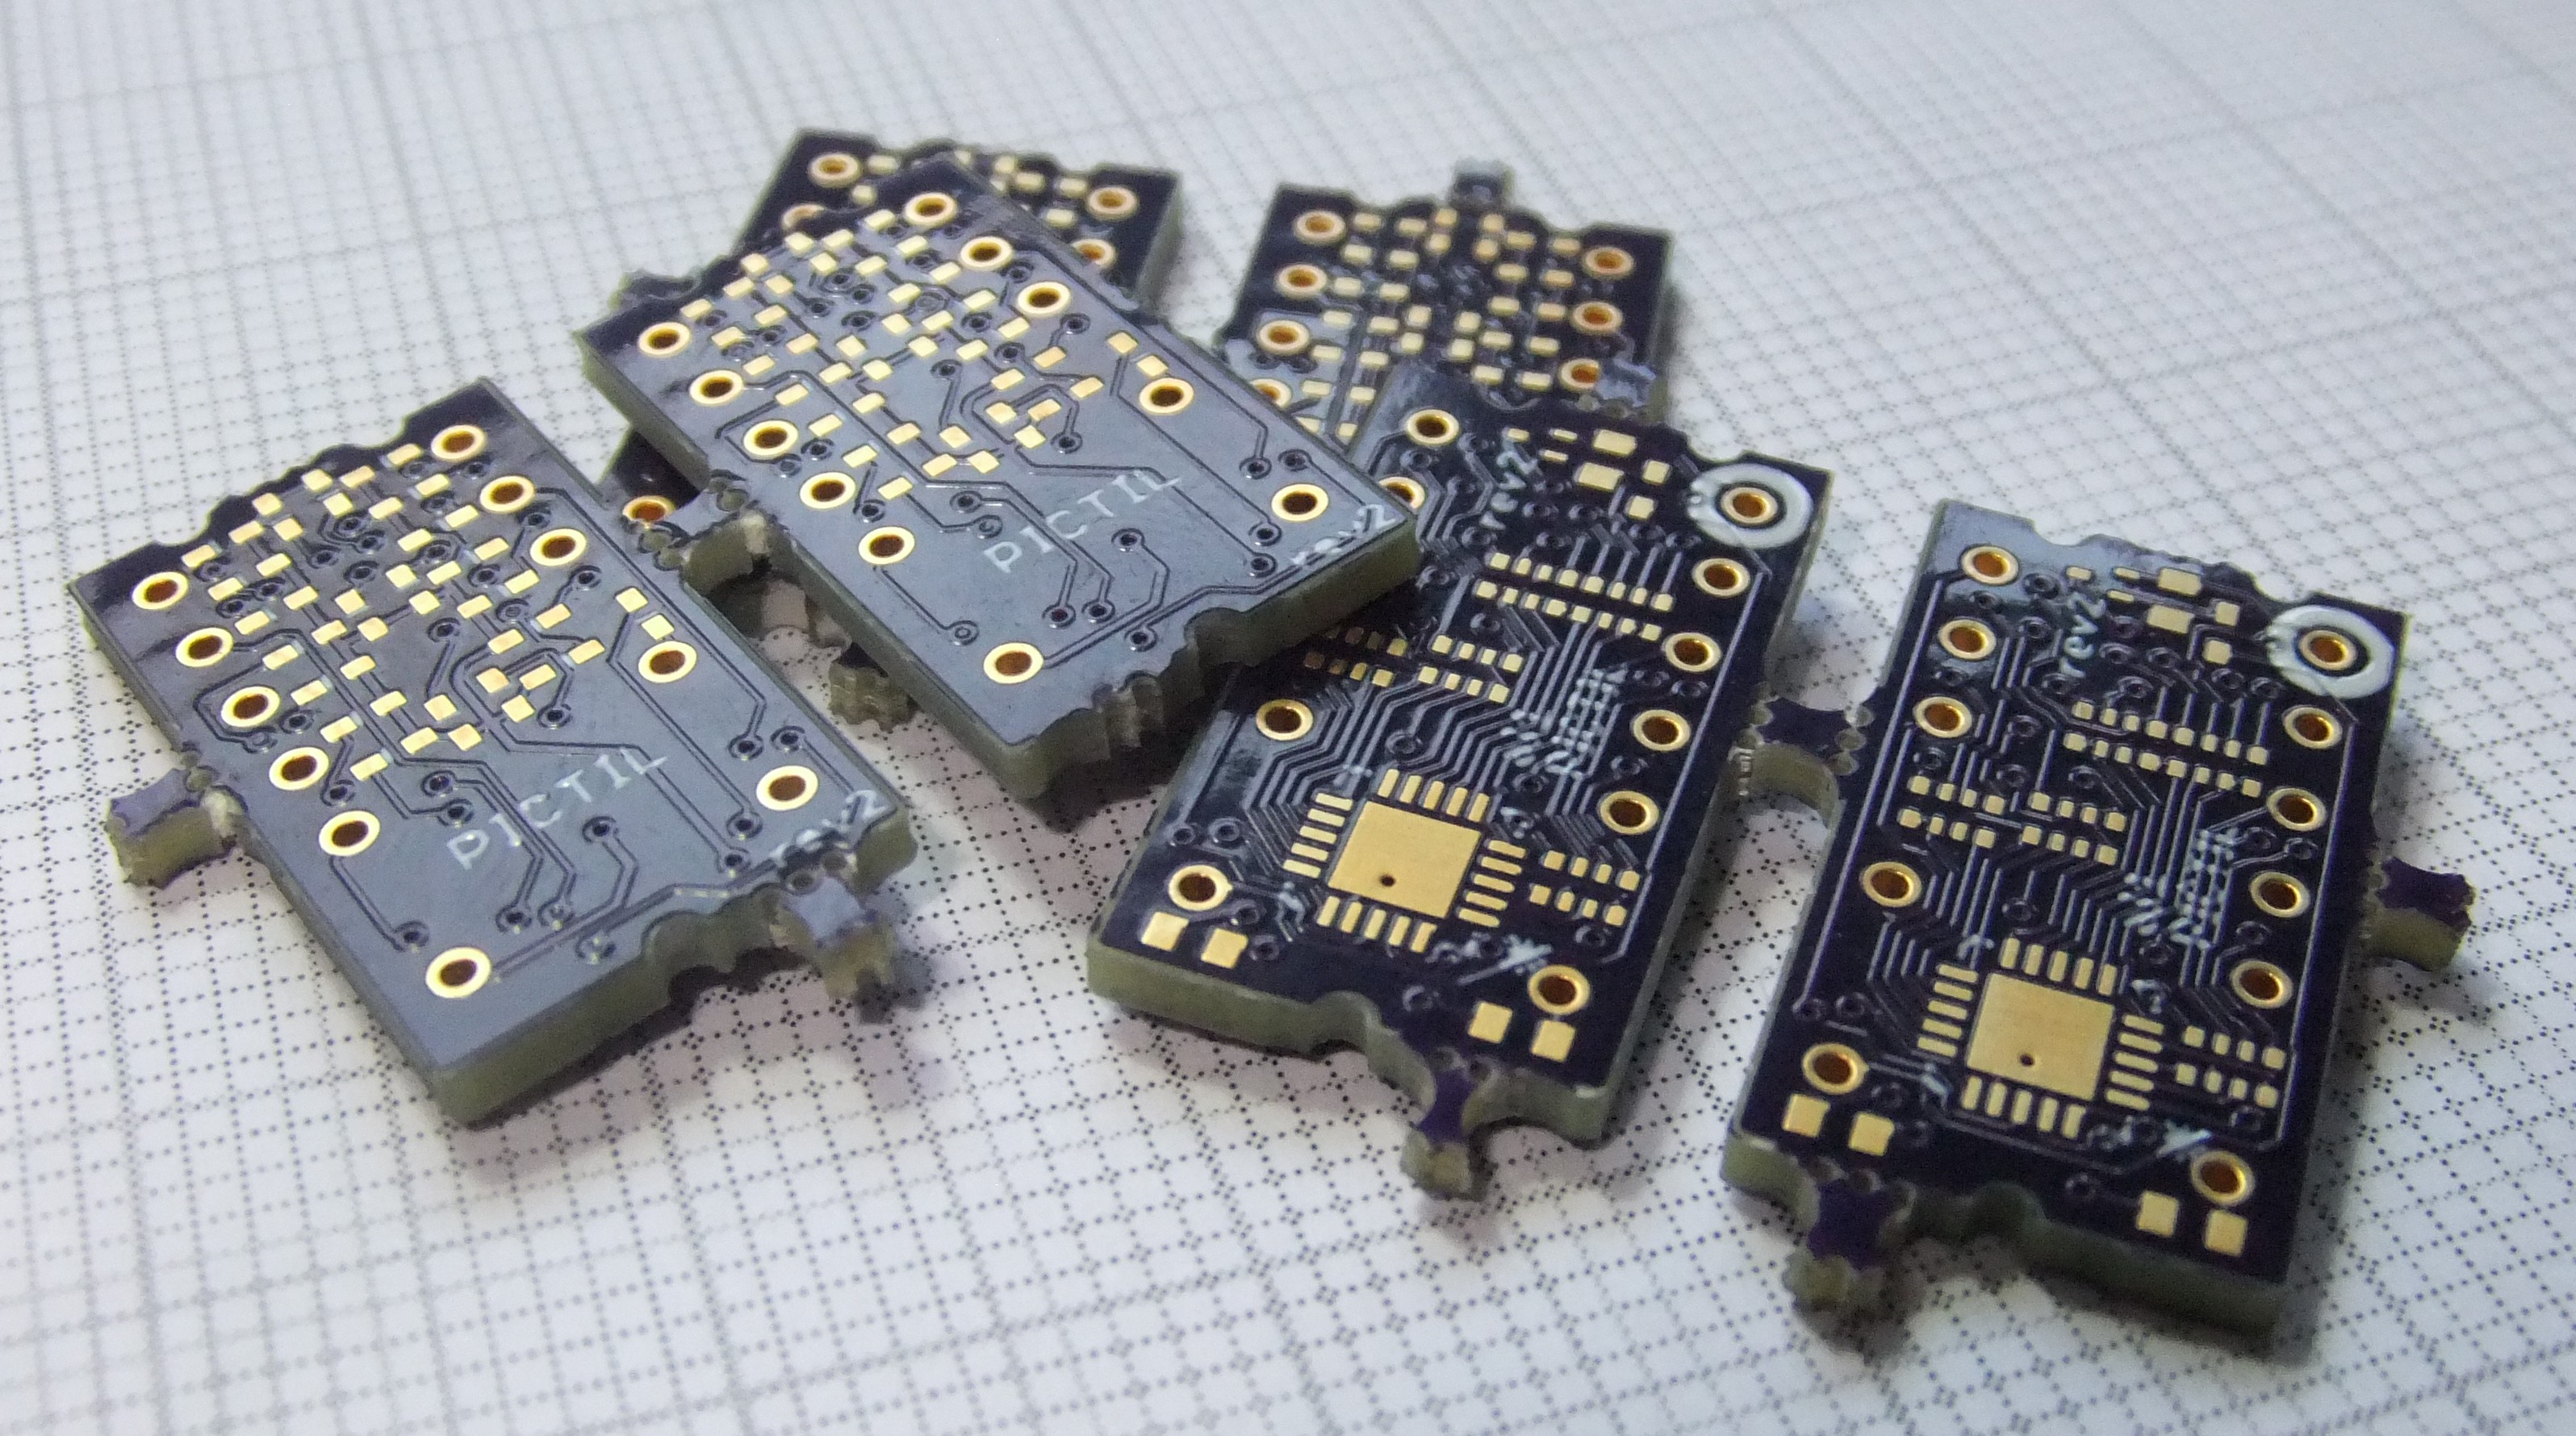
    The PCB from the last post was part of a small panel. If you follow me on Twitter, I did post a photo on the whole panel there.

    Next task: some extreme soldering. I did also found a low budget solution (not the brass nails) for the pins. I will write something about that when its soldered and ready. I think I will do the soldering today. There are also some changes in the software needed, but only some pin changes.

  • rev1

    Alex01/24/2016 at 21:14 7 comments

    I did made some improvements in the design. first I did add holes for small THT pins ( pins like used in #OSHChip V1.0 would be nice). Unlucky there is no source for small pins. but normal thin hard wire could also work. The numbers of LEDs did also increase. Now there is the same number of LED like in the original TIL311. all parts beside LEDs are now hidden on the back. The down side of this is that this design uses 5mil traces and 12 mill holes, which is smaller then OSH-park's specs. But some of the Chinese manufacturers should deal with that.

View all 20 project logs

Enjoy this project?

Share

Discussions

haroldmoore016 wrote 04/22/2022 at 18:05 point

try the attiny3226 in 3mmX3mm vqfn, no?

  Are you sure? yes | no

Alex wrote 04/23/2022 at 09:33 point

well... #reTIL is kind of the successor of #PICTIL there I used a STM8S003F3 in a UFQFPN20 3x3 mm package. So same size

  Are you sure? yes | no

Yann Guidon / YGDES wrote 04/23/2022 at 14:09 point

you mean, successor ? :-)

Still, I'm eager to get some units !

  Are you sure? yes | no

Andrew Wasson wrote 11/10/2020 at 04:43 point

Alex,

I’ve had a browser tab open to this project for weeks, months and now that the weather is getting cold and dark, it’s inevitable that I’m going to make a set of these for one of my vintage or vintage inspired computers. Do you recommend the Rev2 or the rev1NEO? If it’s the rev1NEO does anywhere have the Gerber’s on file so that you benefit from the purchase of a board or 20?

Also, have you tried to get a board fab place to offer etching and assembly? I was discussing this with the Cosmac ELF group the other day and one of the guys mentioned that some board fab companies will etch and assemble. Again, if that could be arranged so that you get a small royalty for your work, I think it would be pretty cool.

Regardless, I’m keen to try these out. They’re such a nice replica of the original.


Cheers,
Andrew

  Are you sure? yes | no

Alex wrote 11/10/2020 at 17:48 point

Always nice to read such positive feedback. Regarding your questions:

Rev2 or Rev1neo: If I remember right Rev uses bigger traces/spacing (6/6mil) to fit osh-patk's deign rules. But the left dot is missing because of this. Rev1 (normal an neo) are using smaller traces (5mil). Rev1neo fixes the error of the normal rev1 but I never made a rev1neo myself. So I would suggest using rev2 if the left dot is not needed.

Gerbers/Board files: I could export gerbers of all Versions if needed and add them to the repository. For rev2 there is also a buy link for single boards from OSH-Park. Just leave another message which you prefer.

Board House / Manufacturing: I did made some experience with whole board manufacturing recently with my #COPXIE - chainable, dual 5*7 tiny led matrix project. PICTIL is just quite old an at that time it was not yet easily available. I would be open to manufacture (and sell) some on my own behalf if there is some demand. But we could also talk about manufacturing from someone else an some form of agreement with me.

I was also recently working on an more Breadboard-friendly spin-off of this you can see a first Image here:
https://twitter.com/tinyledmatrix/status/1317964656691023872


Another thing I probably would do: Create a production optimized version of PICTIL with the learnings from the breadboard Version. And the latest PICTIL is also four years old..some updates could make sense.

  Are you sure? yes | no

raptor90se wrote 10/11/2020 at 14:46 point

By any chance can I get a part number for the resistor array size.  It says 0402.  I checked Mouser and they display EXB-28V102JX.

  Are you sure? yes | no

Alex wrote 10/12/2020 at 17:55 point

Got mine from aliexpress. These look similar:
https://de.aliexpress.com/item/4000534622228.html

The original Listing is not available anymore. But similar arrays should be also available on Mouser, Digikey....

  Are you sure? yes | no

John Lonergan wrote 10/10/2020 at 02:53 point

Love it.

For my ttl cpu it would be nice to have a "0.56inch" format version of this for the breadboard.

  Are you sure? yes | no

Alex wrote 10/10/2020 at 13:05 point

I quite like that idea. Did a little placement test for just the LEDs:

https://cdn.hackaday.io/images/6330331602335369070.e41e6ee67900109edfa0570f32d7f385

Something like this would fit. Maybe I will finish it (all beside LEDs, is still missing and no routing done). Suggestions for the Pin out? For data inputs pins on one side. VCC, GND, blank on other? Maybe I should also add at lest one dot.

  Are you sure? yes | no

Mark pepper wrote 08/03/2020 at 19:31 point

hi, a bit late to the PICTIL I know but, just in case anyone is there... how do you go about programming those 16f526 chips, in circuit? My TL866ii plus doesn’t support it but I guess I could get a suitable programmer for in circuit programming. Any suggestions would be greatly appreciated.

Mark

  Are you sure? yes | no

Alex wrote 08/14/2020 at 23:19 point

Hi,

back when working on PICTIL I used a PICKIT2 to program them. It was quite handy because all needed pins where connected to one of PICTIL's pins.

  Are you sure? yes | no

bprosman wrote 09/04/2019 at 17:05 point

Are the LED's multiplexed or directly drive by the PIC processor ?

  Are you sure? yes | no

Dave Ruske wrote 09/28/2018 at 16:05 point

Nice project! The TIL311 is too rare and runs too hot, and improved replacements like Innocor's INL0397 are even more scarce. If you ever decide to crowdfund a production run, be sure to drop an announcement to the COSMAC ELF Forum. TIL311s are commonly used by builders of these simple computers, and there's sure to be some interest there.

  Are you sure? yes | no

sven.schott wrote 01/01/2018 at 21:46 point

Hi, I just ordered the boards from OSH and had a few questions.

1) Is the component list for the rev2 board up to date? It has the FET as a SOT-23 package and I think that's too big. Is there a full list of the components for Rev2? I think the PIC also needs a package type listed (I'm not familiar with the package types available).

2) Is there a placement layout somewhere? Most of the PCB is ok but the resistors and the cap are hard to tell just from the size and colours.

And thanks for all the hard work!

  Are you sure? yes | no

Alex wrote 01/02/2018 at 19:32 point

Hi,

nice to see someone rebuilding this. About your questions:

1) I just updated the parts list on this project page above. The Fet was the old (rev1) one. Also the part number of the PIC specifies a package now. 

2) I uploaded one in the image section. I did not marked all LEDs and the resistor networks. 

Would be nice to see some image when you are ready.

Greetings

  Are you sure? yes | no

chmod775 wrote 01/31/2017 at 23:33 point

What a piece of ART!

Beautiful layout and, in a 'LCD / OLED' world, we need some 'retro' stuff like this.

  Are you sure? yes | no

Alex wrote 02/01/2017 at 16:33 point

Thanks

  Are you sure? yes | no

Trevor Johansen Aase wrote 07/18/2016 at 04:28 point

Any updates on a Tindie shop?? I could really use 6 pieces myself in the next week or two.

  Are you sure? yes | no

Alex wrote 07/18/2016 at 20:56 point

There are no updates on a Tindie shop. So far my home production would be also to expensive. And I am a bit worried about the legal/tax stuff of semi-professional selling. The easiest way to get some is to build it yourself. I did shred the link to the boards at osh-park above.

  Are you sure? yes | no

Trevor Johansen Aase wrote 07/19/2016 at 01:16 point

Possibly just sell the pre-programmed PIC's? I don't mind a kit, I just have nothing to program a PIC with.

  Are you sure? yes | no

Yann Guidon / YGDES wrote 07/20/2016 at 01:08 point

Is a classic TIL311 out of question ? It has drawbacks but it will get you started faster, until you get the enhanced version...

  Are you sure? yes | no

Yann Guidon / YGDES wrote 03/28/2016 at 14:27 point

OK, now tell me : where can I buy it ? :-D

  Are you sure? yes | no

Alex wrote 03/28/2016 at 14:54 point

For PCB only just sent me your address. A soldered version will take some weeks to produce. There is no "official" way to buy it yet, but I was thinking about Tindie - also just to try it out.

  Are you sure? yes | no

Yann Guidon / YGDES wrote 03/28/2016 at 15:03 point

I could use a half-dozen finished PICTIL right now ;-) but I'm sure you could make a little money on eBay and Tindie, since the TIL311 is pretty in demand and the PICTL is a great improvement. Even solving just the power supply/heat issue is amazing, and the absence of resin reduces the problems of aging.

Keep us informed ;-)

  Are you sure? yes | no

Yann Guidon / YGDES wrote 12/15/2015 at 00:02 point

Cool ! I just noticed : @al1 now has ownership of the project, that's less pages that I have to manage ;-)

  Are you sure? yes | no

alpha_ninja wrote 12/07/2015 at 00:55 point

[verified: no design files missing]

  Are you sure? yes | no

Yann Guidon / YGDES wrote 12/07/2015 at 05:47 point

Great work @al1 :-)

  Are you sure? yes | no

alpha_ninja wrote 12/02/2015 at 00:45 point

This is your one-week reminder to upload design documents: https://hackaday.io/project/7813-the-square-inch-project/log/28566-design-deadline

  Are you sure? yes | no

Klima wrote 11/25/2015 at 22:27 point

The TIL has more diodes - you will not have the same nice effect with your circuit. I have tried with 0402 diodes, but the effect was not that good, and I had similar diode arrangement to yours.

  Are you sure? yes | no

Yann Guidon / YGDES wrote 11/26/2015 at 09:03 point

Hi !
You seem to have experimented with LED displays for your #Small voltmeter :-)
I hope you can share your experience and show the prototypes.

al1's experiments follow his own set of criteria, he wants to preserve the form factor, I am looking for other characteristics and I develop my own version (for the #Discrete YASEP ). Between form, function, features, technologies etc. I think there is a lot to do and learn :-)

  Are you sure? yes | no

Klima wrote 11/26/2015 at 18:00 point

I did experiment, and it was a fail. I ended up using those bubble displays, as they are better. For a while I did consider HDSP-2011, but it is more complicated and I ended up using QDSP-6064.

  Are you sure? yes | no

Alex wrote 11/26/2015 at 18:14 point

yes the effect will be not the same. I did choose the 0402 leds for easier soldering. In a first idea(https://hackaday.io/page/1315) I used 0201 leds an nearly the same positions as in the original. But 0402 leds are much easier to source and to solder. 

In the next weeks prototype board should arrive. Then we will also see if the effect is good enough.

  Are you sure? yes | no

Yann Guidon / YGDES wrote 11/07/2015 at 00:31 point

I am experimenting with an alternate 7-segments system, see https://hackaday.io/project/8121-discrete-yasep/log/27617-hexadecimal-7-segments-display-continued

This uses 4014 LEDs for the segments. I'll see if/how I can make small modules with this system.

  Are you sure? yes | no

Alex wrote 11/07/2015 at 10:19 point

The 4014 LEDs do look good. But with these LEDs you have only an classical seven segment display. 

  Are you sure? yes | no

Yann Guidon / YGDES wrote 11/07/2015 at 12:03 point

This is true, it doesn't have the same charm. But my initial requirement is to display hexadecimal numbers (low power, low profile and low price are also important) and it does just that :-)
One could add some "style" by adding a 1206 dot at each segment crossing (or 0805?). Then a 3014 format should be used instead of a 4014 LED. brightness consistency would be harder to balance though.

  Are you sure? yes | no

Stefan Lochbrunner wrote 10/30/2015 at 12:06 point

I'd probably make this into a 5x7 matrix display and for your specific application only populate the LEDs necessary for the 7 segments. This way you could use this PCB/module for other projects as well.

  Are you sure? yes | no

Alex wrote 10/30/2015 at 11:47 point

nice Idea. I would use seven segment displays as display. Then also less microcontroller outputs are needed. Something similar (with serial interface) I did made here #tiny7

  Are you sure? yes | no

Yann Guidon / YGDES wrote 10/30/2015 at 16:42 point

I saw the #tiny7 :-)


7 segments are nice but it has already been done over and over. I have found several projects online when I was looking for bin-to-hex converting chips, "Use a PIC" was a frequent answer...

The 4×7 display has a certain charm and a distinctive look that appeals to me and others :-) For example I have found http://anachrocomputer.blogspot.fr/2015/01/building-hex-led-display-on-pcb.html (though this display uses an expansion chip)

But my need is to replace the actual TIL311 I have, probably dropping the latch strobe input along the way. In fact I hope to reuse this design in #Discrete YASEP

  Are you sure? yes | no

Alex wrote 10/30/2015 at 21:16 point

I did some research on small leds (somehow I do really like your idea)  and found this:

http://www.kingbright-europe.de/kingbright-develops-the-smallest-smd-led-package-2/

I think with these leds it could be possible to built a drop in replacement for TIL311

  Are you sure? yes | no

Yann Guidon / YGDES wrote 10/30/2015 at 21:26 point

Wow that's TINY...

My plan is different though, I'm looking at 1206 LEDs to make nice square dots.
One of the TIL's shortcomings is the width of the digits, they are separated by a significant gap when soldered side by side.
More LEDs is not a reasonable approach but since the TIL's days, plastic diffusers have progressed and can spread the light in a desired shape.

My plan is to have the 1206 LEDs on the visible side and a SSOP/SOIC chip on the other side, with 4 pins in .1" spacing on the top and bottom.

I should do some routing to try the idea...

  Are you sure? yes | no

Alex wrote 10/31/2015 at 15:06 point

If you are interested I summarized my ideas to your project on this page: https://hackaday.io/page/1315 

  Are you sure? yes | no

Yann Guidon / YGDES wrote 10/31/2015 at 16:37 point

@al1 your rendering is awesome ! I had something less extreme in mind but I'm impressed and I am glad I gave you inspiration ! I can't wait to see it done for real :-)

  Are you sure? yes | no

Similar Projects

Does this project spark your interest?

Become a member to follow this project and never miss any updates