Close
0%
0%

Tetizmol [gd0153]

A Tetwice-layout keyboard designed to be abysmal.

Similar projects worth following
Opinion: typing on a keyboard with nails >5mm long is abysmal, i.e. "very bad". This mostly stems from key-slippage typos, but the force exerted where the nail connects with tissue become uncomfortable too. Inspired by Svalboard (and Master Forge), this project is a keyboard that uses 4 long microswitches around each digit to sidestep this problem. Furthermore, having the phalanges in wells means that they can be insulated from the cold, empowering one to type in the crisp outdoors.

While I named this project to reflect my low expectations, the other definition of abysmal is "very deep", which is coincidental as the wells are bottom-key-less.

Navigation

The title tag system is explained here, and the table is updated when a change occurs. Notable logs have bold L# text.

L1
[X][R] Microswitch choice and placement
L2
[P] 55mm KW11 Microswitch
L3
[X] Bending the lever
L4
[M] Keycap
L5
[P] Keycap test prints
L6
[X] Keyboard PNP transistor matrix
L7
[M][T] Dual spacemouse tube?
L8
[B][R] PS5 Hall Joysticks and Espressif ADCs
- Planned pins for ESP32-S2
L9
[R] Hall / TMR joystick electrical properties
L10
[R] Component Considerations
L11
[L] Perfboard Circuit
L12
[B][P] 6-core cable and joystick PCBs
L13
[C] KMK SpaceMouse Compact emulation

Preface

[Nov 27]

I've tried a Let's Split keyboard. I've tried a WK-50 keyboard. I want to try a Svalboard but it's not cheap nor portable enough to use anywhere but on a desk or affixed to an armchair.

My efforts developing #Tetent [gd0090] advance at a glacial pace. Thus, I'm still using my (not so temporary) "temporary" Z-88 (typewriter style) keyboard I bought 3 years ago. Furthermore, there's still a lot more typing/programming I need to do between now and [insert time when Tetent exists]. There's now a very wide feature gap between Tetent and a split mechanical keyboard, so there must be some kind of stopgap solution that can slot in-between.

Looking through keyboard images on the internet, I don't think I'm going to get a user experience much different to what I've already tried and used; it's essentially the same keys just rearranged slightly differently if the designer was feeling daring, or just a different colour/shape on the keycaps of the tried-and-true QWERTY stagger if not. Basically, I look at a keyboard, look at my nails, look at my to-do list and think "Mn, probably not going to pad out.".

Then I remembered the passing thought I had while browsing the DataHand / Svalboard discord around February time:

I wonder when someone will try to make a "poor man's" DataHand using microswitches.

I also still want to learn Tetaip -- the layout I formulated during #WK-50 Trackball Keyboard -- as a bit of a hobby. With twice the switches, I think I could formulate a layout that enters twice the characters per chord, hence the name "Tetwice".

I've also somewhat sold myself on that "digital nomad" lifestyle, and Britain has some rather nice weather that is overshadowed by 10C temperatures. 

Due to all this, I've now started researching into this project.

  • [C] KMK SpaceMouse Compact emulation

    kelvinAa day ago 0 comments

    For the past week, I've been programming a solution to bring spacemouse emulation to KMK.

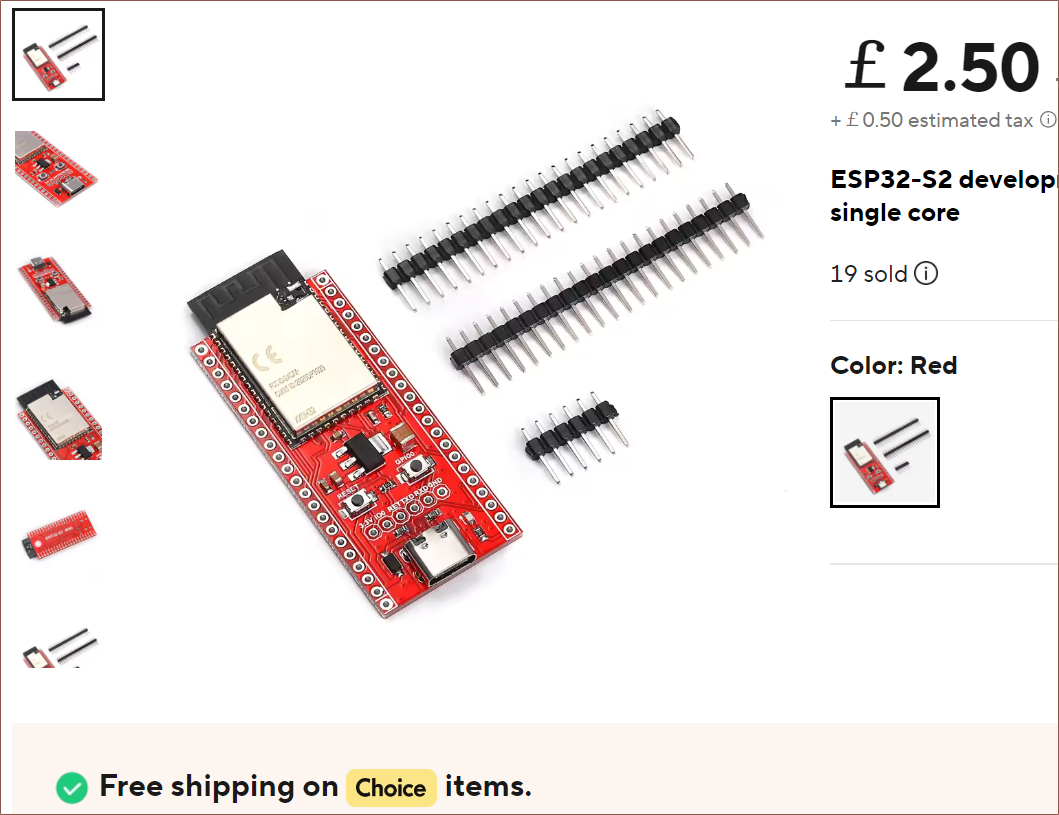
    Red ESP32-S2-WROOM with Type C

    Immediately upon receiving this board, I got to work on adding it to CircuitPython's supported board list, because it's surprisingly not there and there's no other boards that is essentially a S2-WROOM breakout. Long story short, I was getting MemoryError on both cpy 8 and 9, as well as discovering that pin IO38 was defective on the chip.

    The long story

    First I followed how to use esptool.py to communicate with the board. had to modify my PATH because I was calling MSYS Python, meaning that it was creating a linux style .venv instead of Windows.

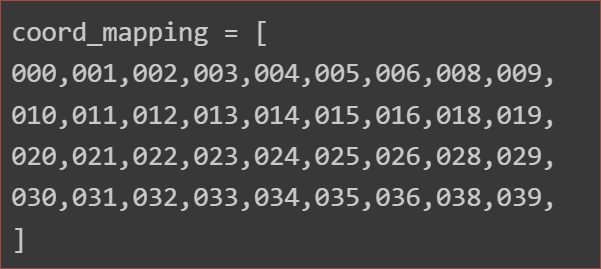
    Next, I was making a new board entry and compiling cpy 9 for espressif and then using esptool.py to flash firmware.bin. I set up the pins in Pog and got this:

    So I disabled the pins from the map and checked them:
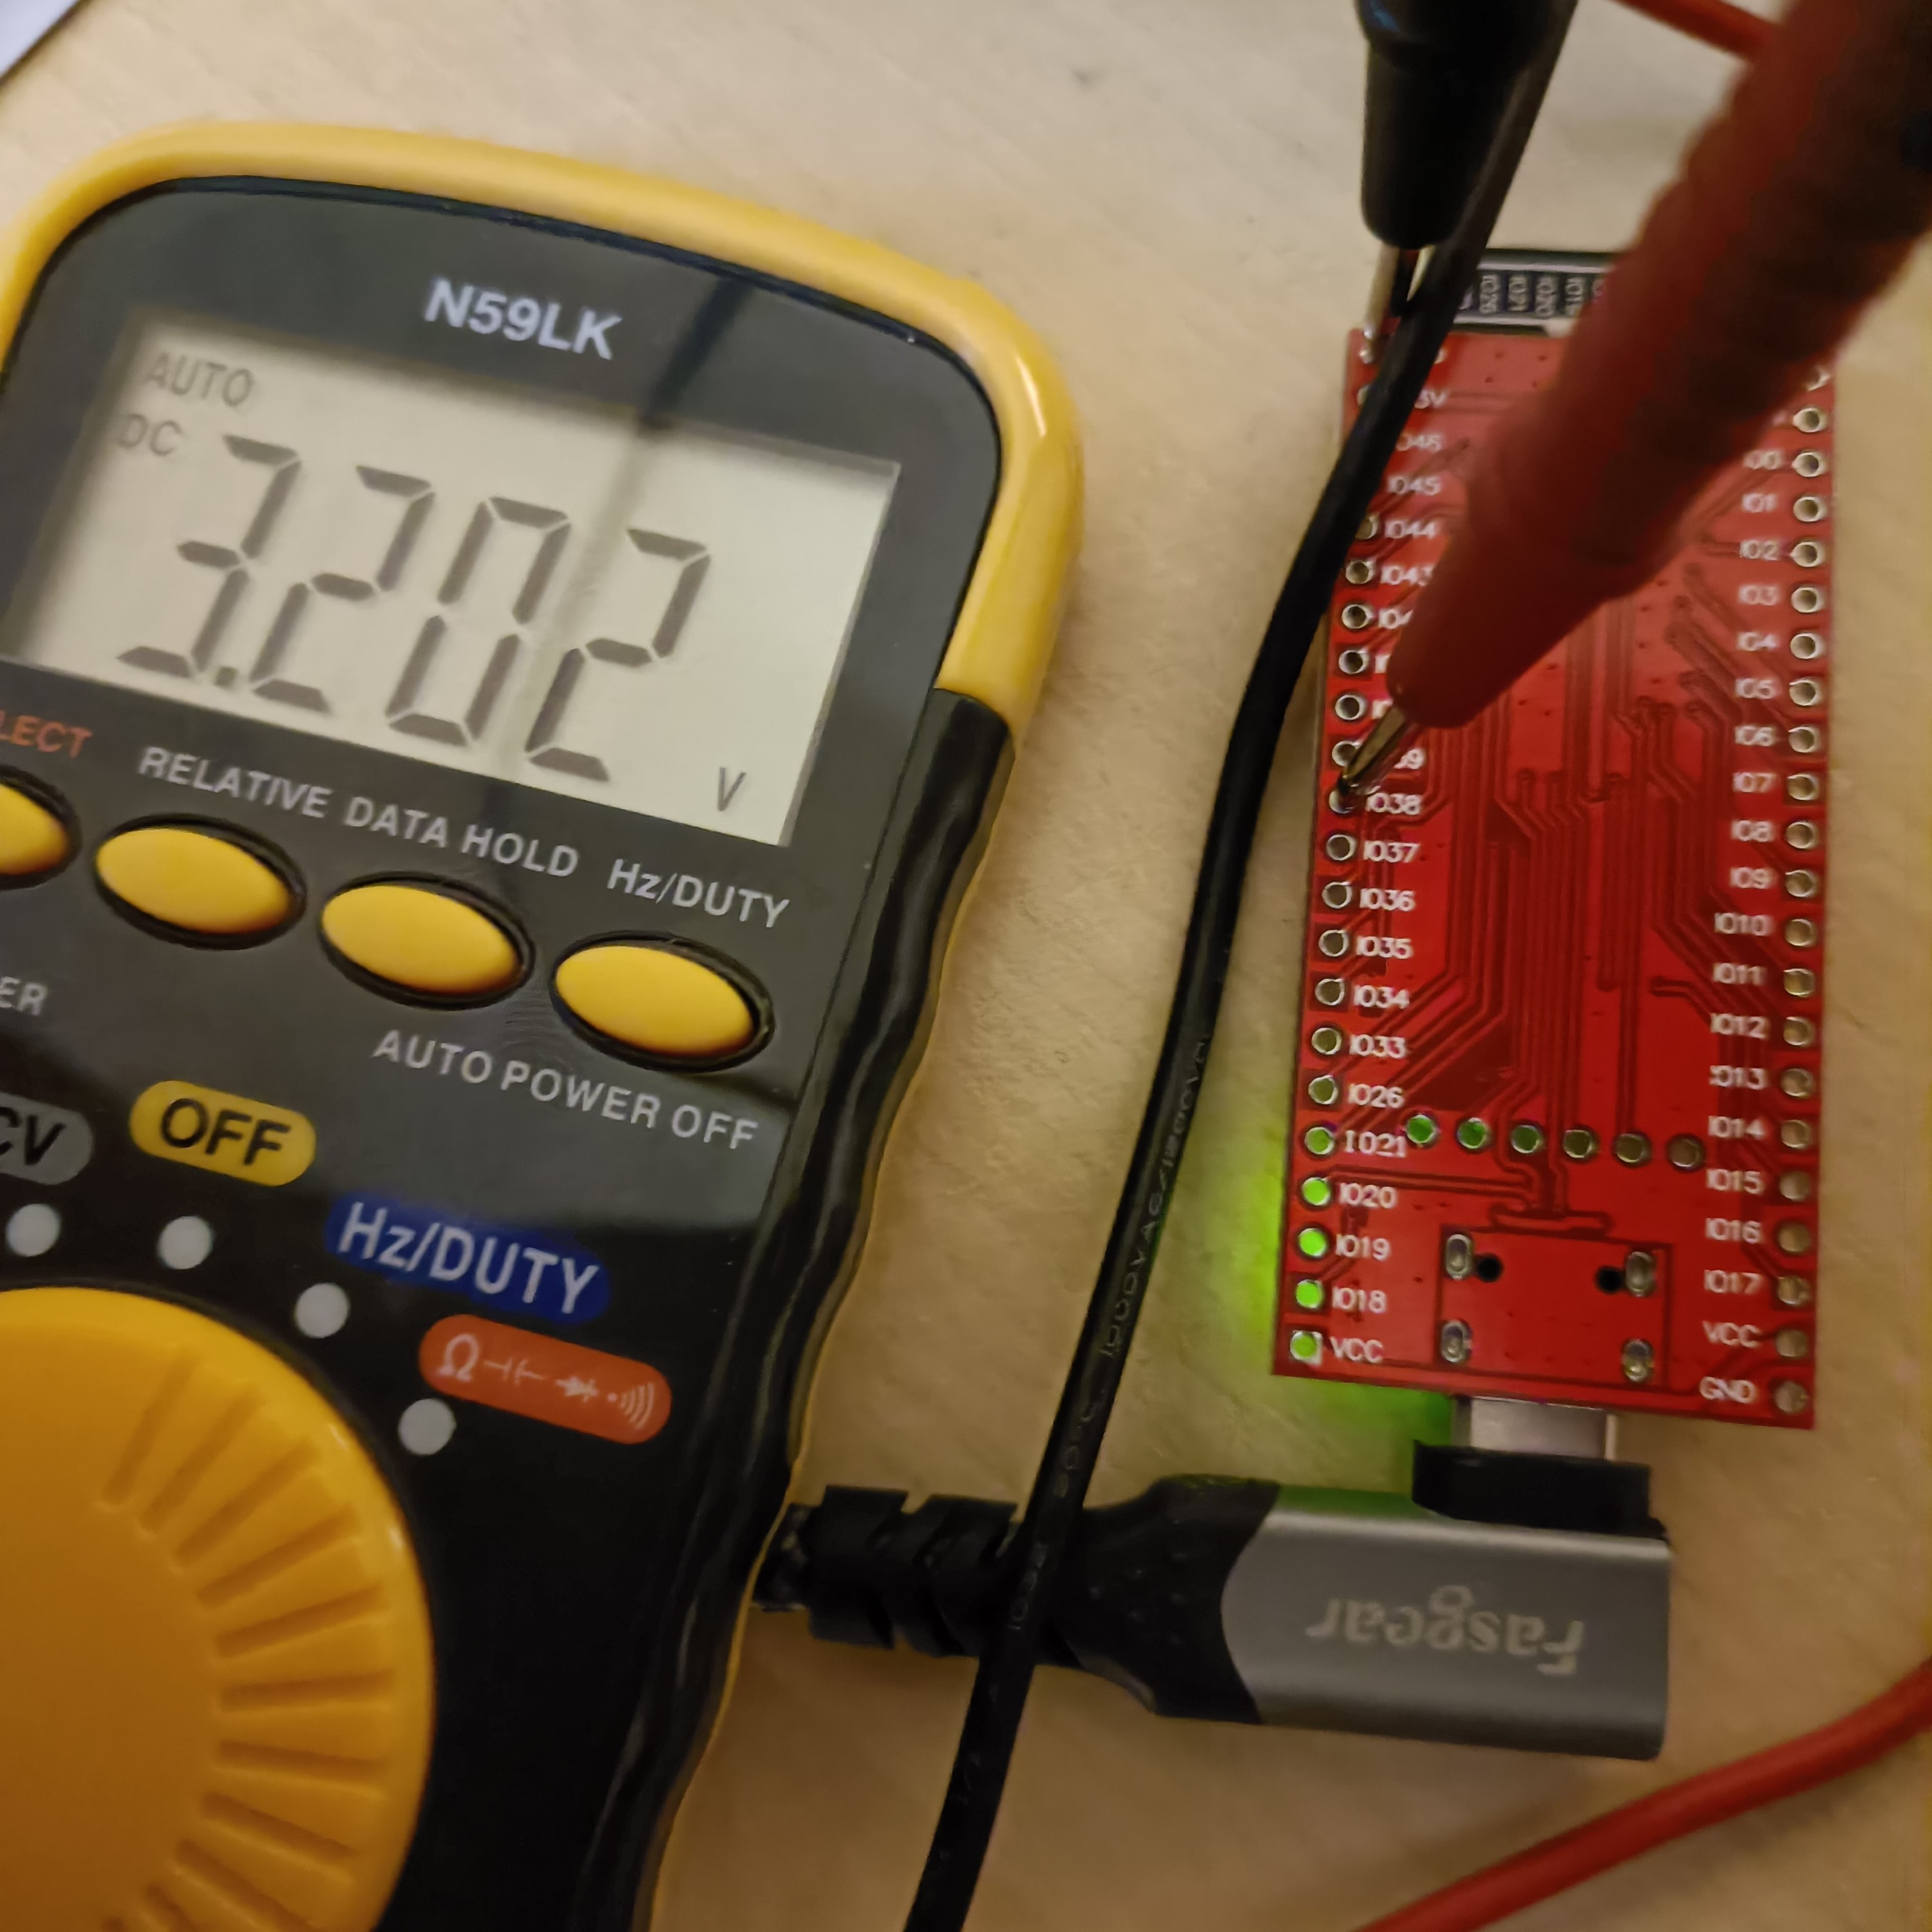
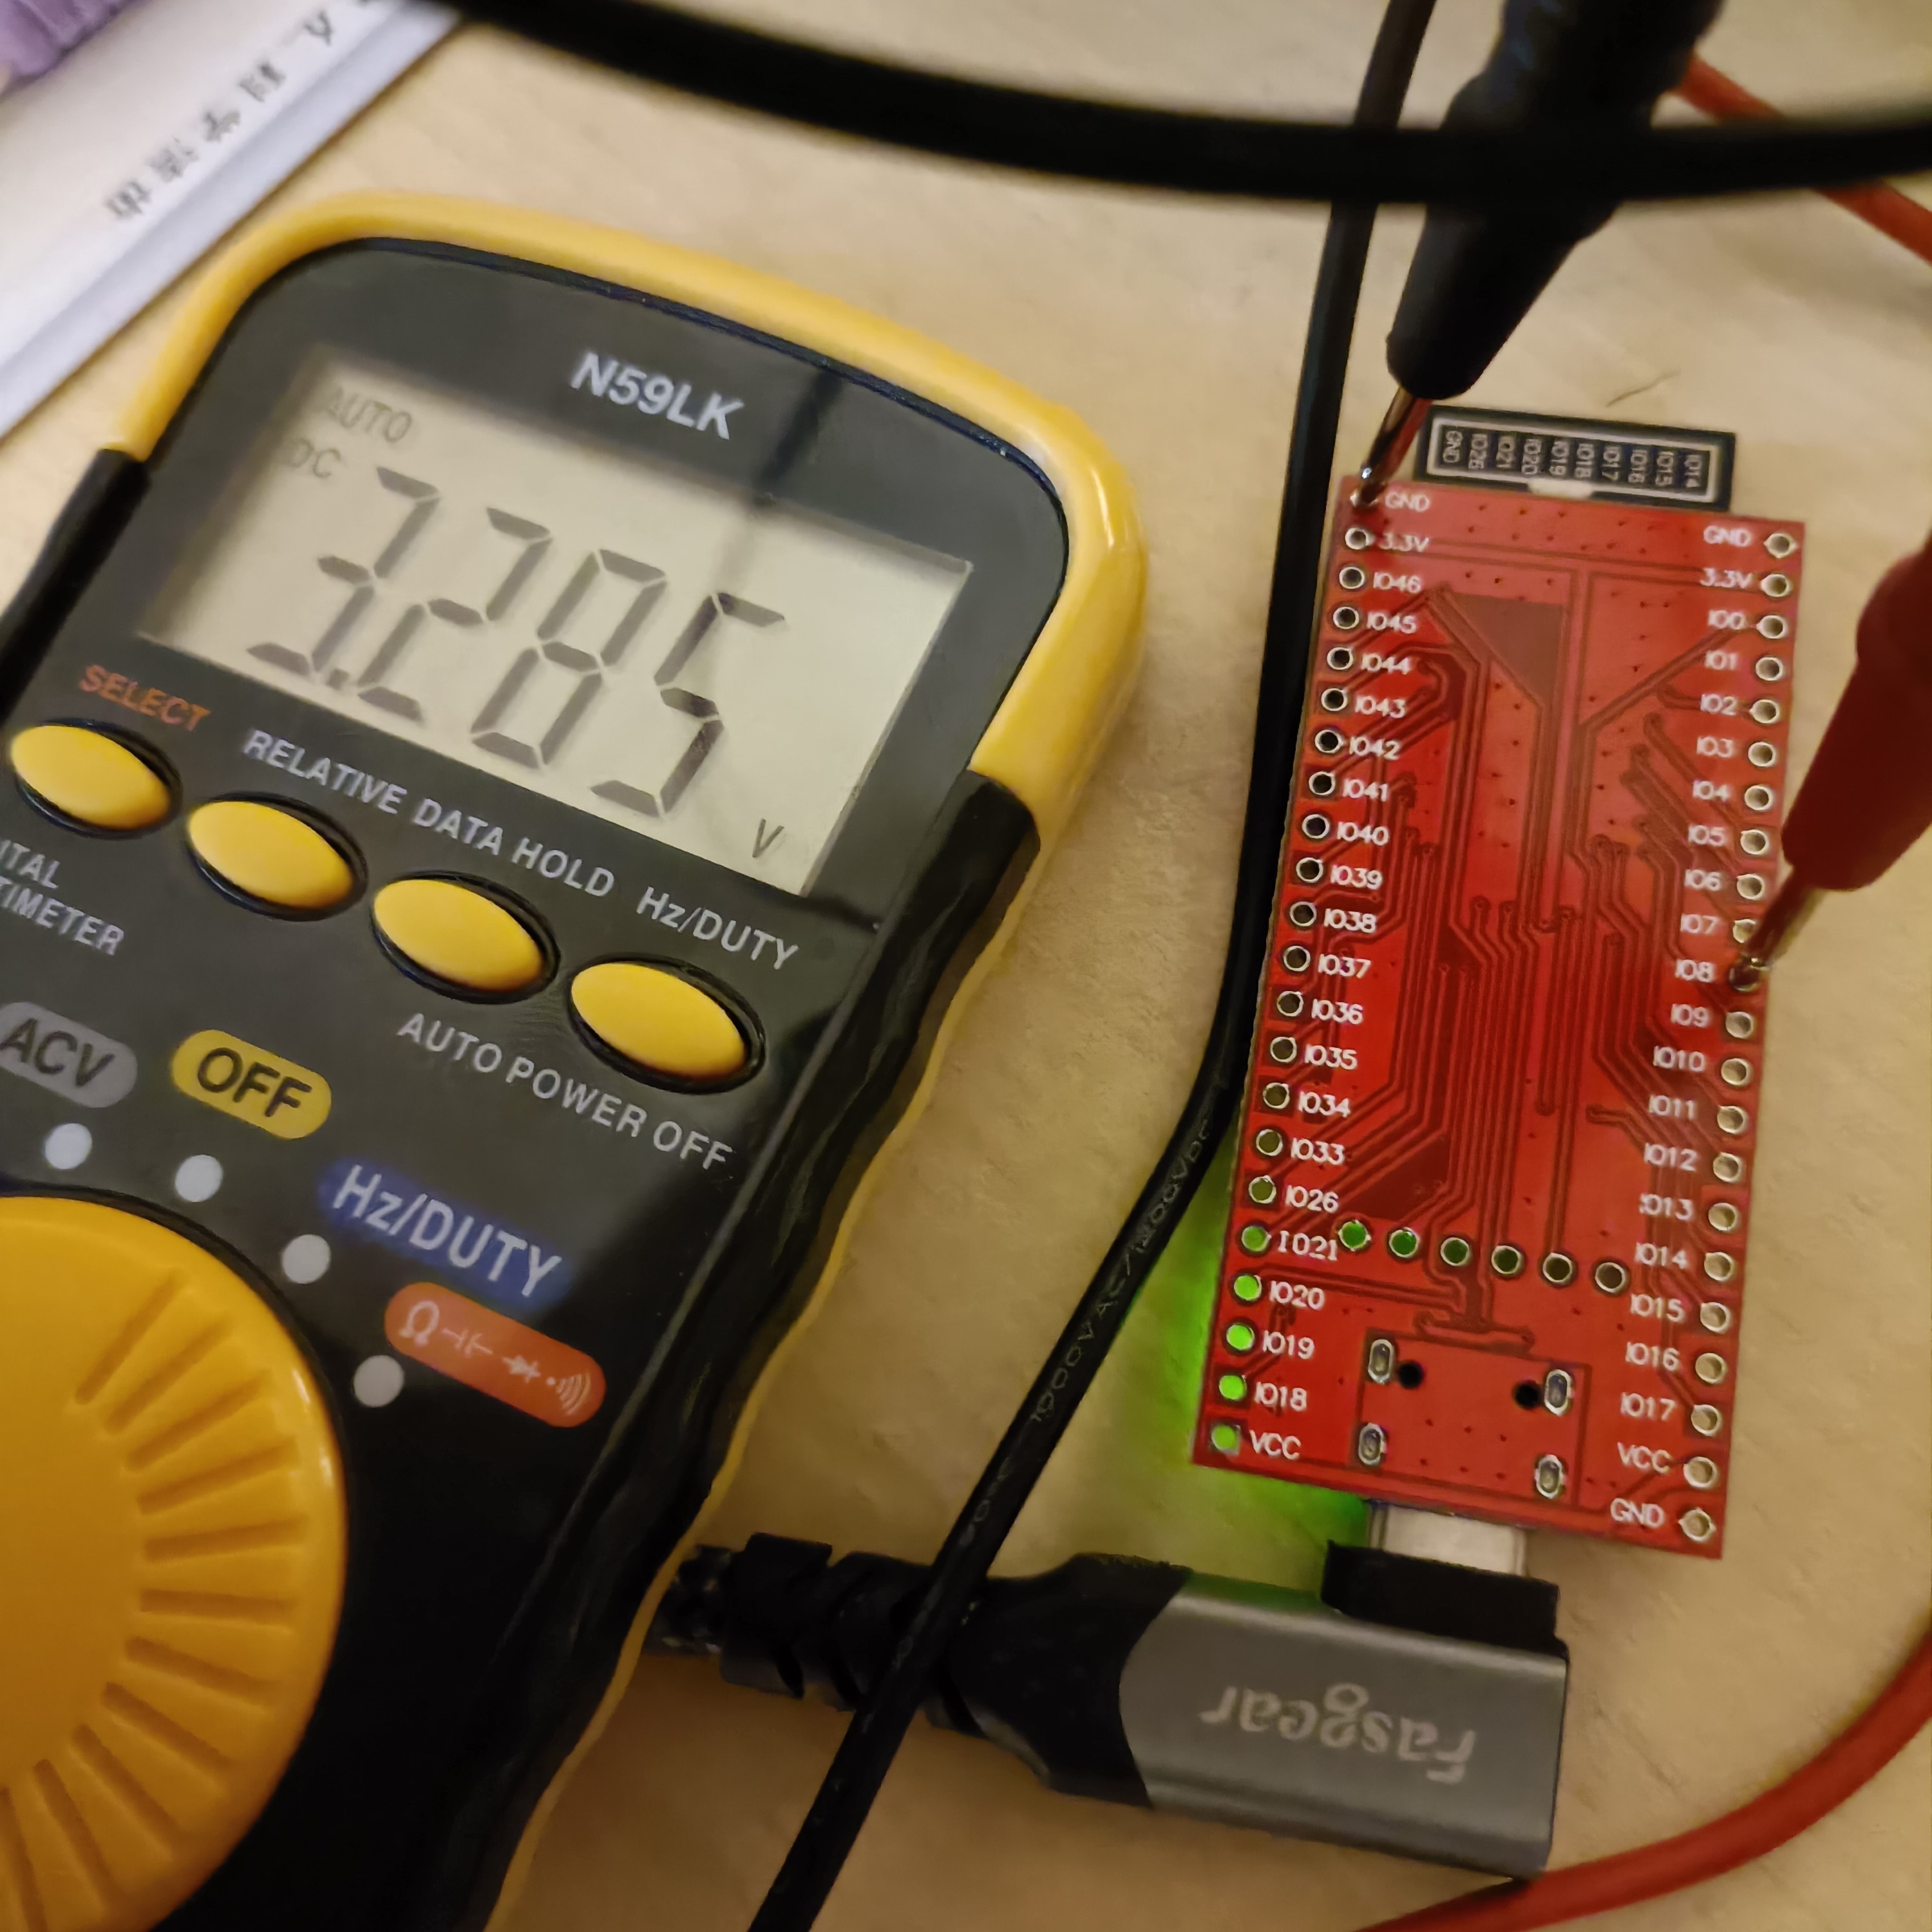
    All other pins were over 3.25, most being 3.28 volts when not in the chord map, and a few mV above 0 otherwise. However, IO38 was precisely 3.202V (when out of the map), so I think there's something wrong with the chip.

    Moving on, I heard pan was fixed so I tested it out and Windows 10 22H2 still complained.

    Unexpectedly, I started getting hit with MemoryError, so I went to compile cpy 8, which was a can of complaints most likely because I didn't do make clear board=[boardname]. I was doing things like deleting the .espressif directory and removing all submodules when WSL unexpectedly folded and the git repo seemed corrupt.

    Still memoryless, which doesn't make much sense as the RP2040 has less RAM but it worked fine.

    RP2040

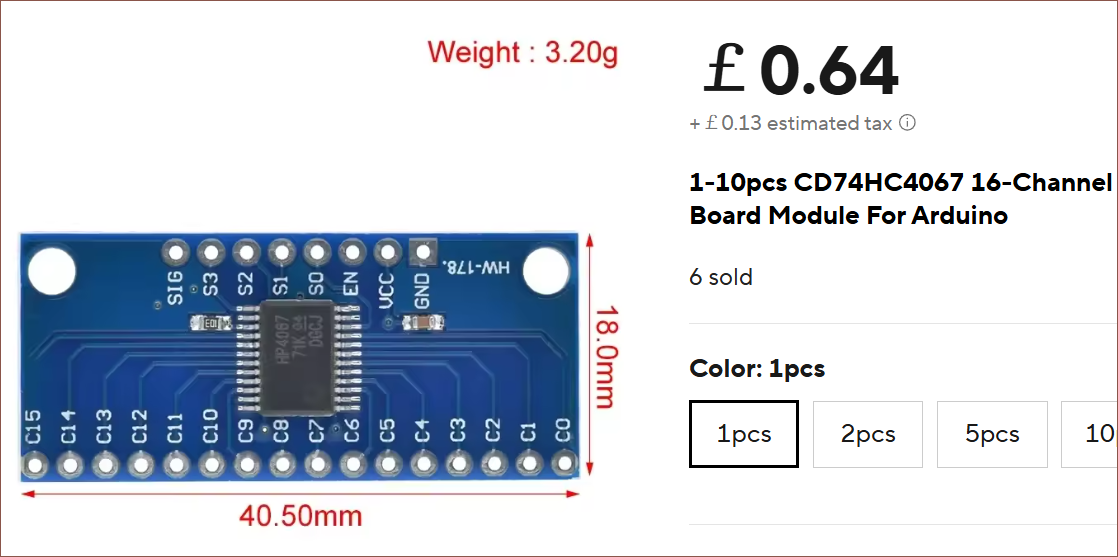
    So the plan now is to use an RP2040 along with a 16 channel mux:

    A CD74HC4067 breakout board.

    It's probably for the best, since it's got a more linear ADC and more support since it has ARM cores and is the keyboard community's new favourite. For some reason, I had to swap the diode orientation again and it's because it was incorrect till Pog v1.8.2.

    SpaceMouse for KMK

    Here are all the USB HID descriptors that I found:

    1. https://github.com/openantz/antz/wiki/3D-Mouse
    2. https://github.com/ouser555/qmk_spacemouse/blob/main/qmk_firmware/tmk_core/protocol/usb_descriptor.c
    3. https://github.com/AndunHH/spacemouse/blob/main/SpaceNavigator.md
    4. https://github.com/AndunHH/spacemouse/blob/main/spacemouse-keys/SpaceMouseHID.h
    5. https://pastebin.com/GD5mEKW6
    6. https://thingswemake.com/six-degrees-of-syncopation/
    7. https://github.com/joshsucher/six-degrees-of-syncopation/blob/main/spacemouse_pro_emulator/boot.py
    8. https://www.cs.cornell.edu/~curran/articles/space_navigator_quirk/
    9. https://forum.3dconnexion.com/viewtopic.php?t=9827
    10. https://stackoverflow.com/questions/30805483/stm32-usb-hid-reports
    11. https://taoofmac.com/space/blog/2024/05/18/2000

    My main search query in Google was:

    "Usage (Multi-axis Controller)"

    After 3 or so hours, I had understood enough to have an idea on what could be wrong with the AC Pan descriptor, and it worked!

    I decided to use the logical minmax range of 500 instead of the more common 350 since 3DxWare supports values of -512 to +511 (signed 10b int). 

    0x16, 0x0C, 0xFE,  #     Logical Minimum (-500)
    0x26, 0xF4, 0x01,  #     Logical Maximum (500)
    0x36, 0x00, 0x80,  #     Physical Minimum (-32768)
    0x46, 0xFF, 0x7F,  #     Physical Maximum (32767)
    # where 0xF4, 0x01 encodes the 2byte number 0x01F4 (500) for example

    One report floating on the internet has an incorrect comment, as the bits correspond to -32768/32767 respectively:

    0x16, 0x00, 0x80,     #     Logical minimum (-500)
    0x26, 0xff, 0x7f,     #     Logical maximum (500)

    I decided to use the report on newer devices, which have one large report on ID1 instead of a translational and rotational on ID 1 and 2 respectively. It's easier to implement and more likely to be supported for longer. 

    I then went into circuitpython's device.c to pick out the descriptors, as the keyboard, pointer and consumer control descriptors now needed new report IDs.

    I joined...

    Read more »

  • [B][P] 6-core cable and joystick PCBs

    kelvinA02/06/2025 at 15:29 0 comments

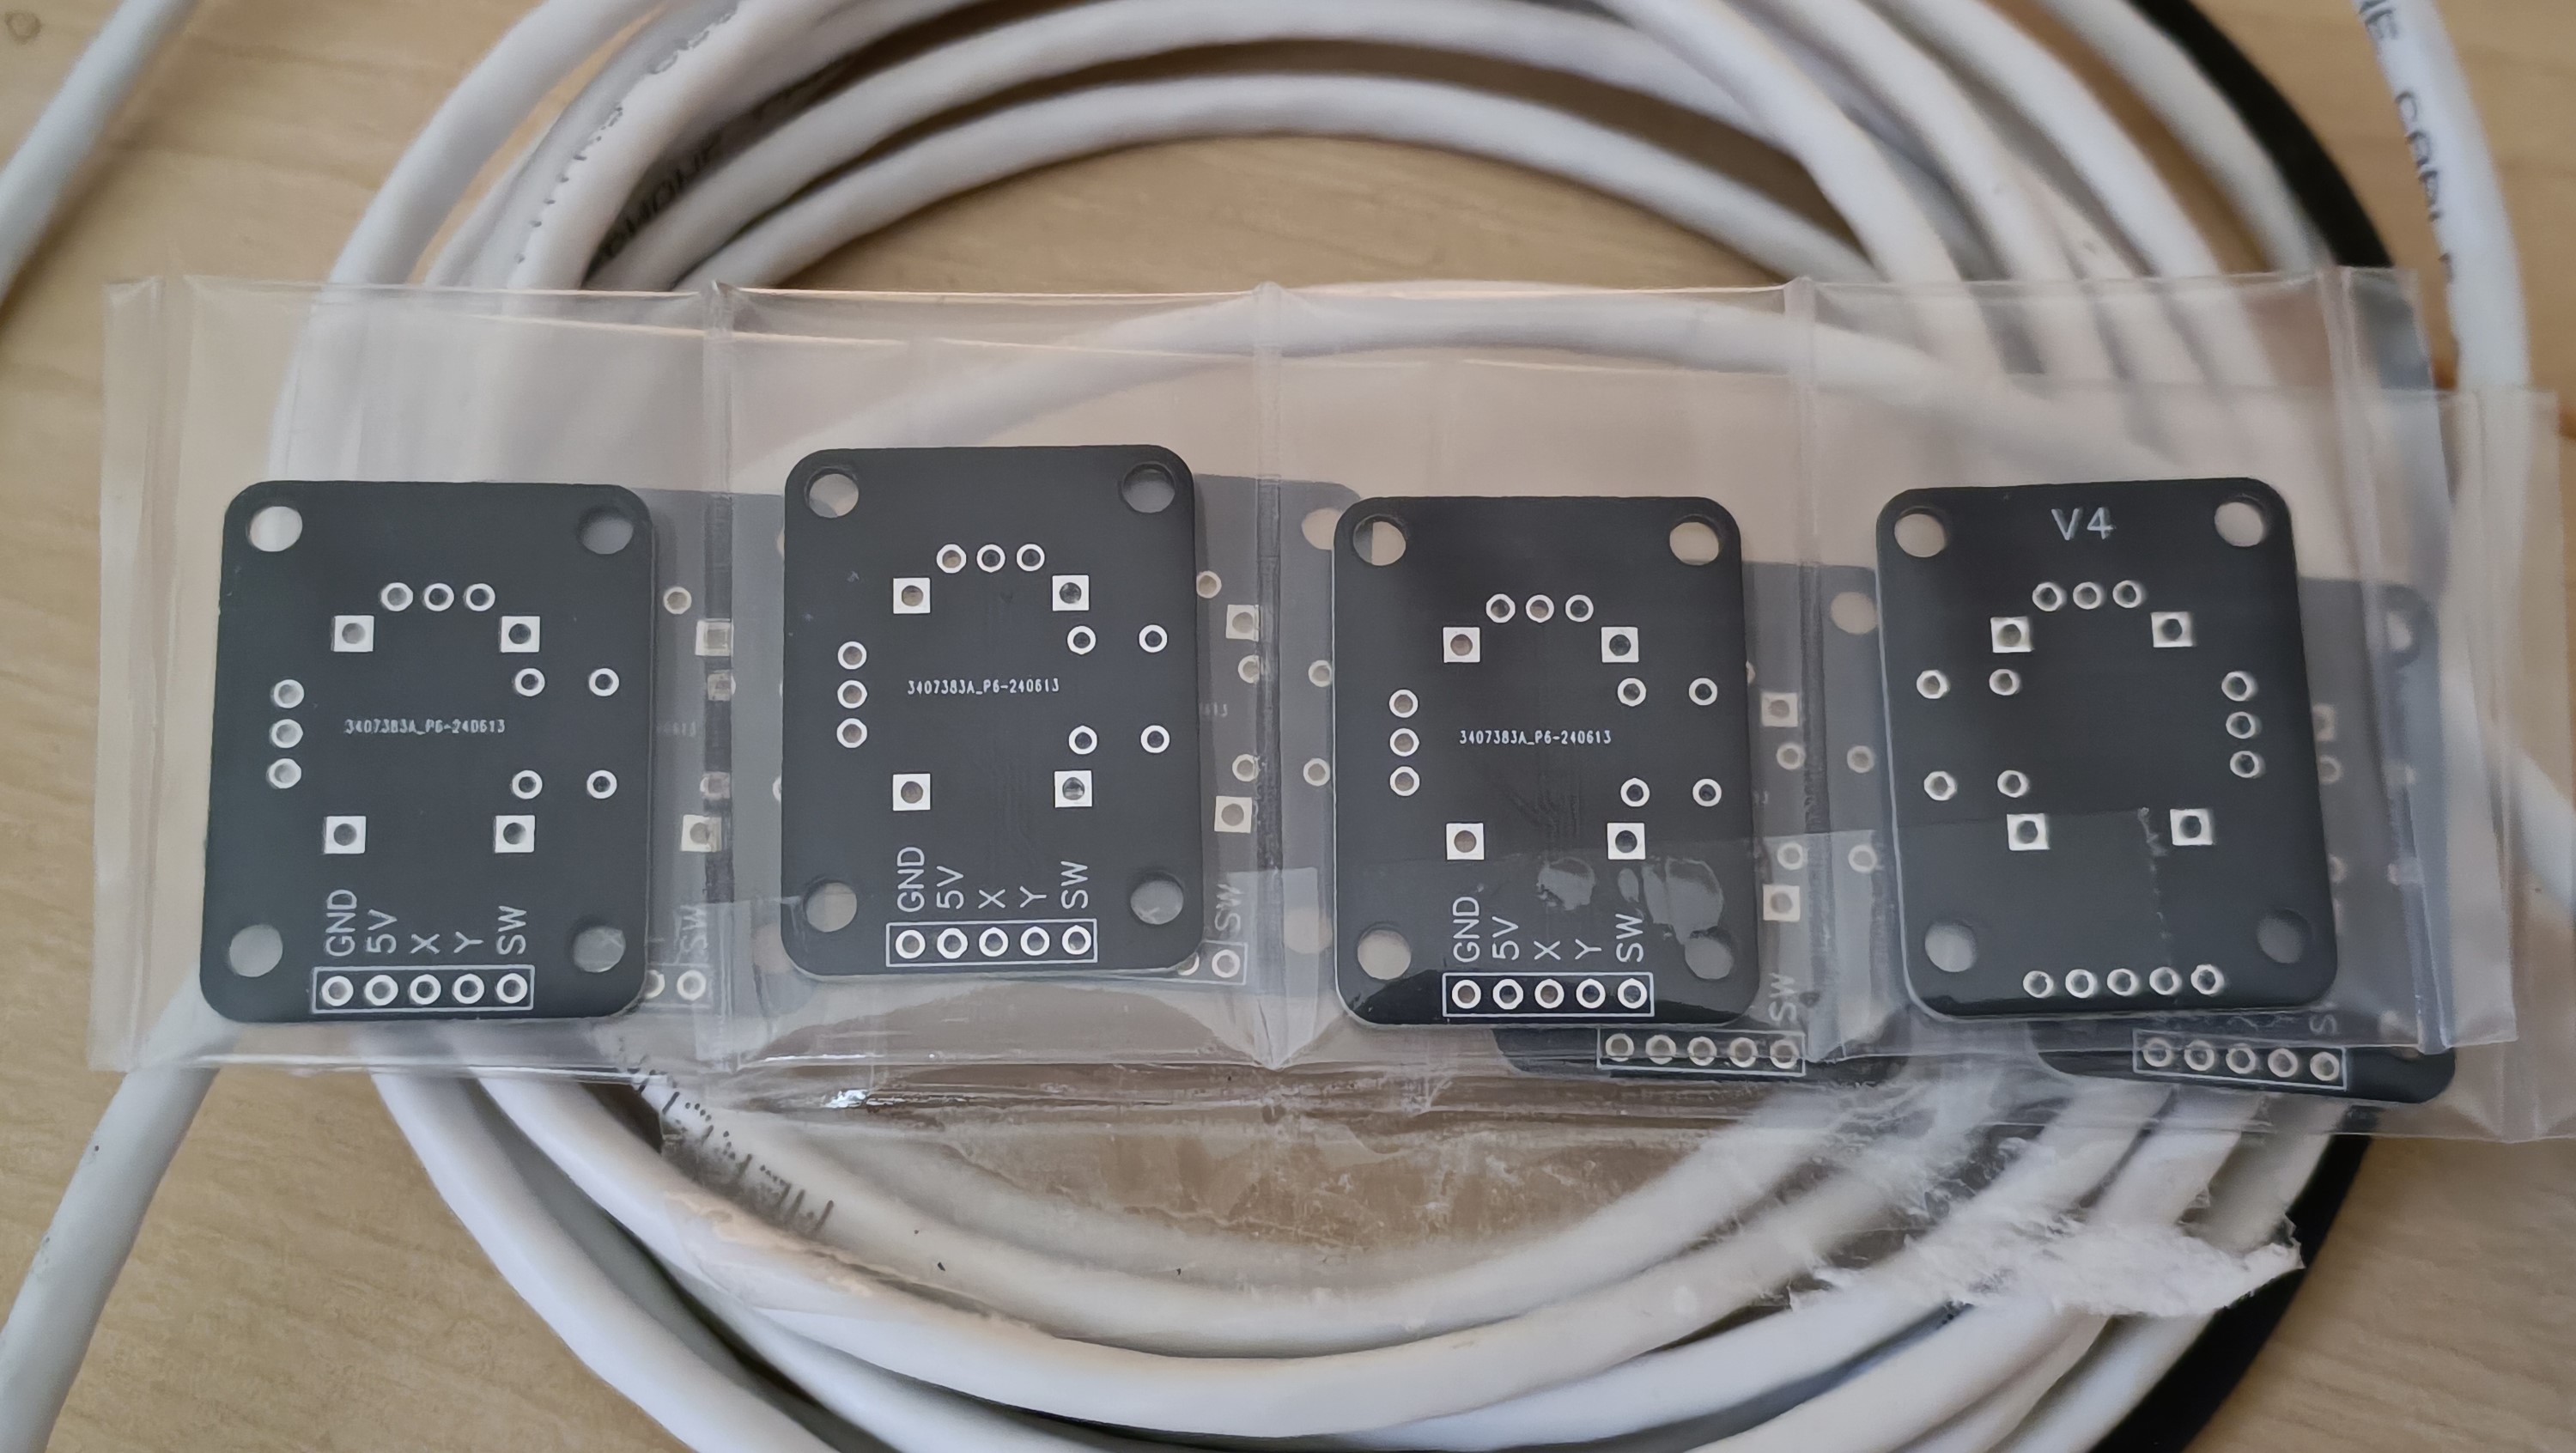
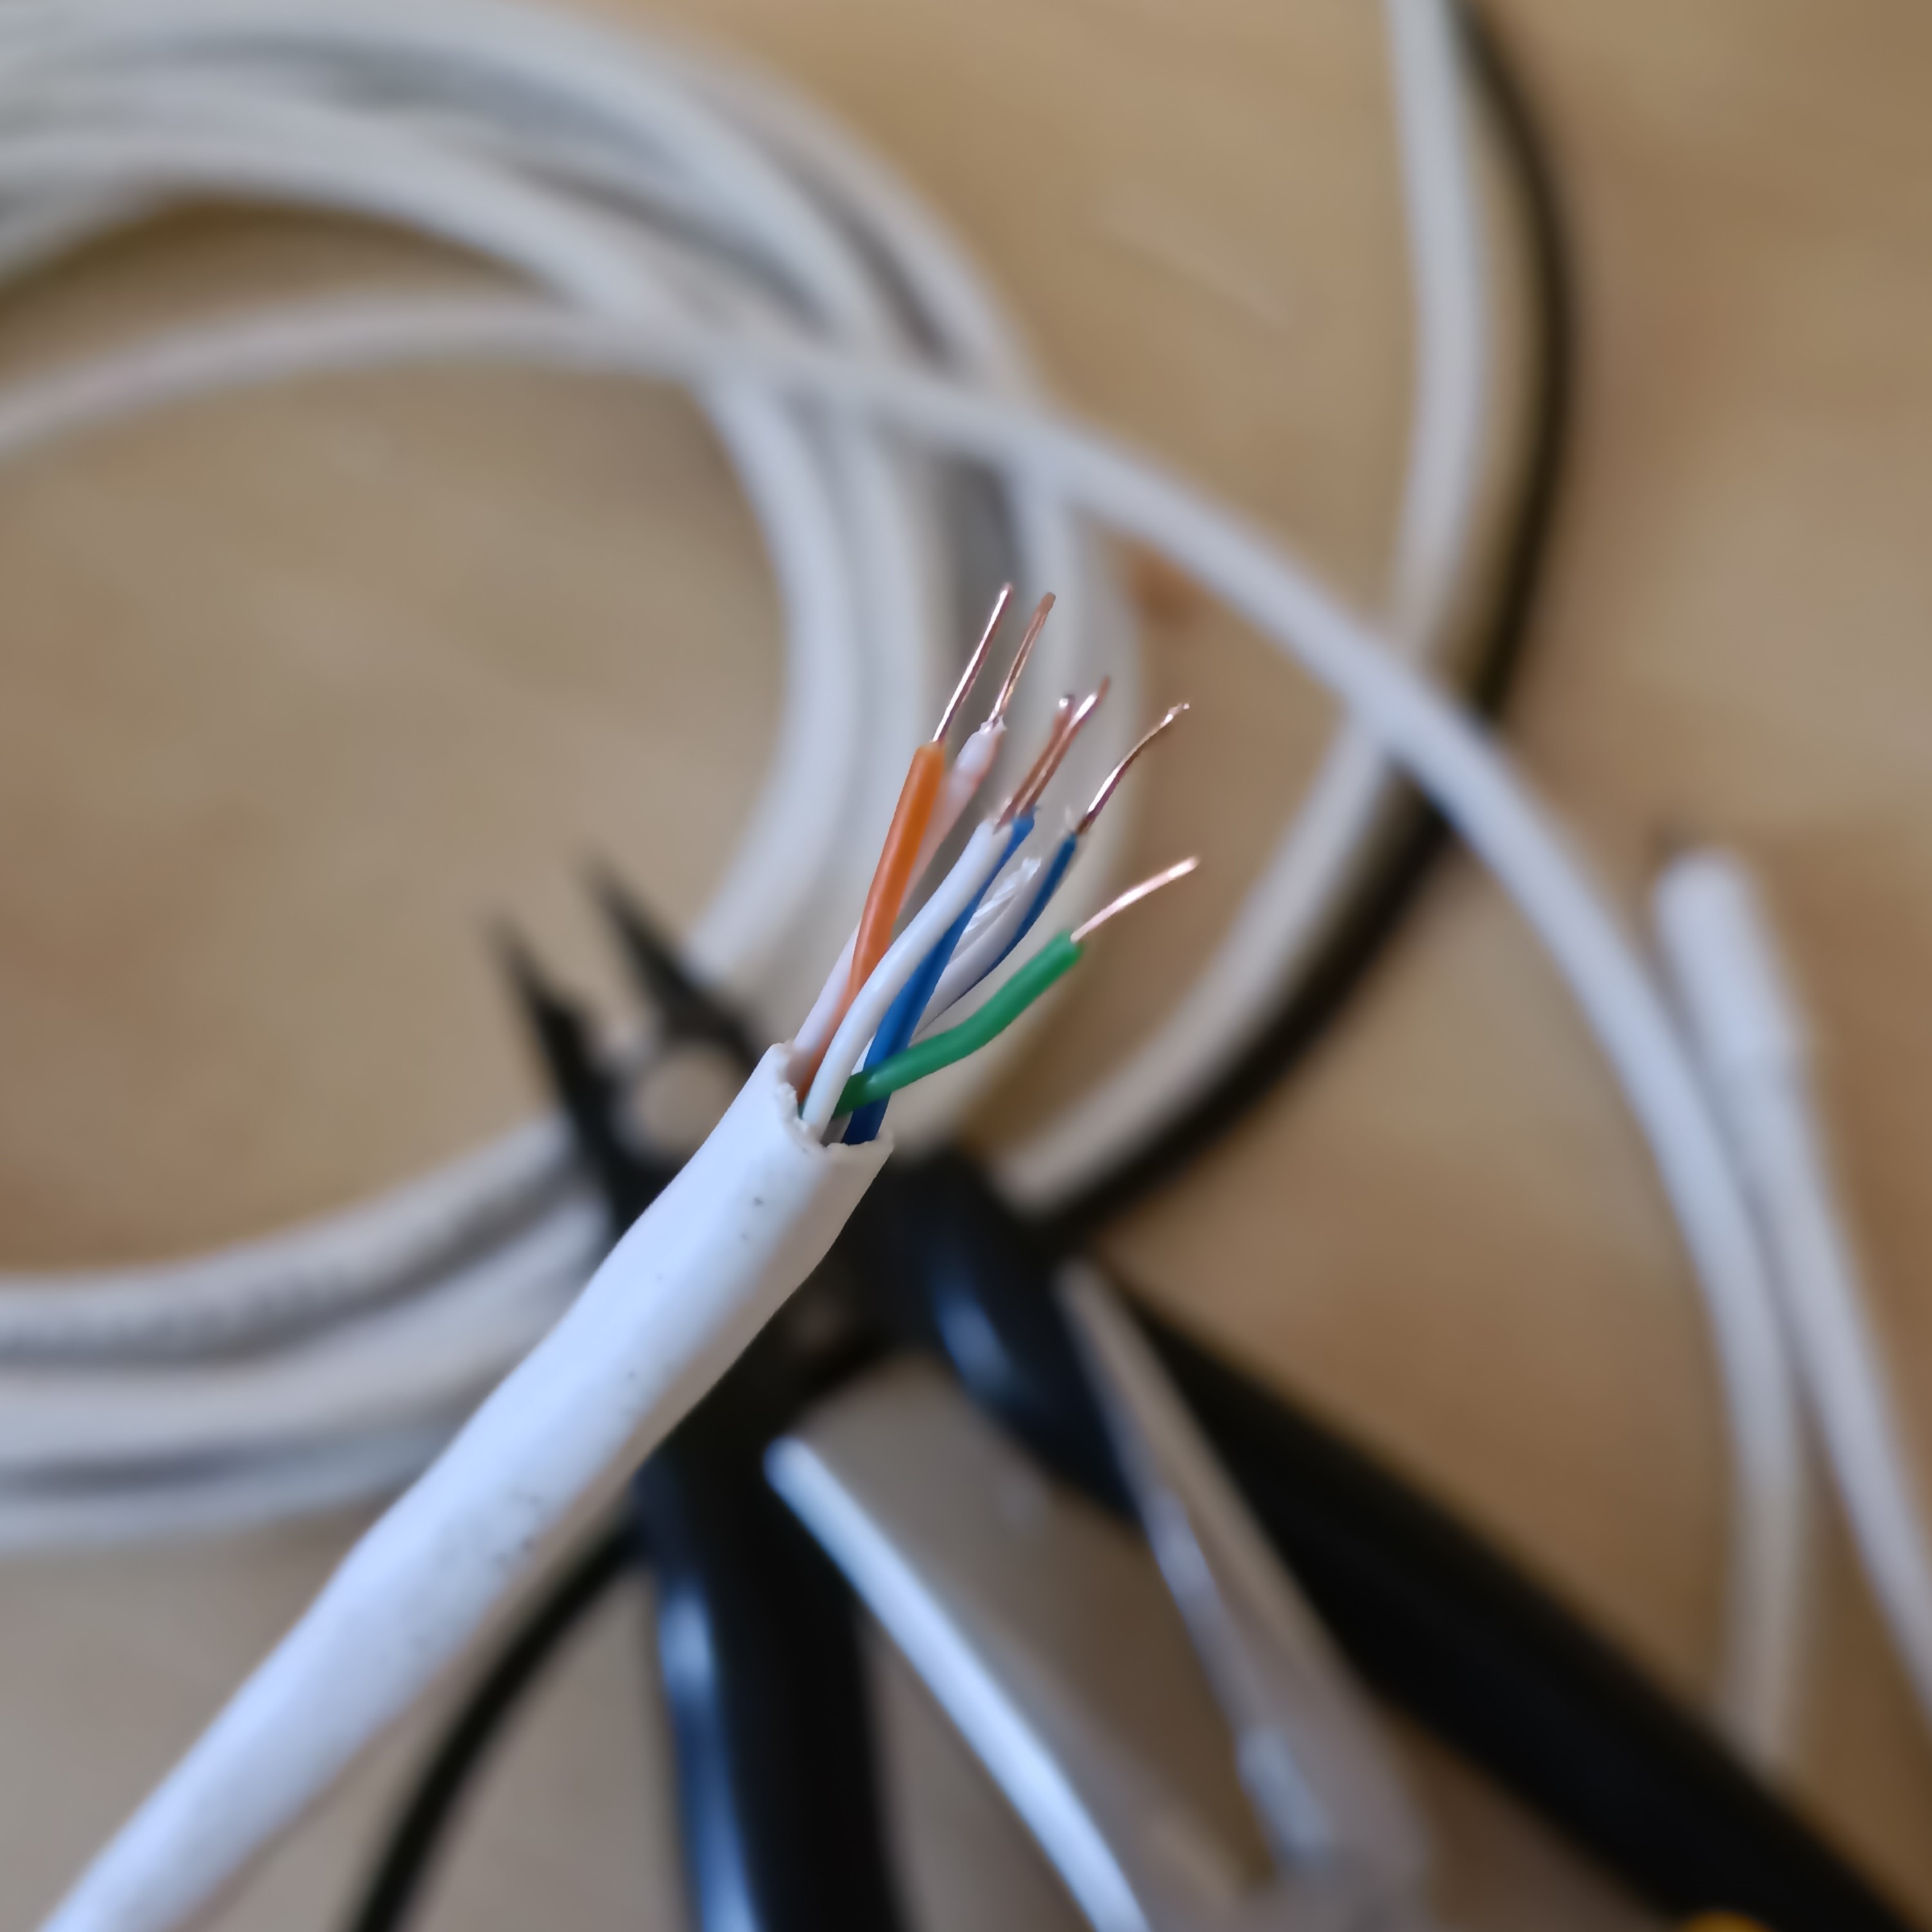
    The PS5 joystick PCBs ontop of the 6-core telephone cable

    Most things from the BOM (see below) are going to be delayed due to Lunar New Year celebrations, but 2 components have arrived.

    I was unable to figure out a good way to mount the joysticks without needing the PCB's, so that's why I got them.

    The reason why I got the telephone cable and not some other type of multicore cable is because it was low-cost and each internal wire is single core, which has the following benefits:

    • Easy to strip.
    • No tiny strands to twist and tin to be able to thread them though perfboard.
    • It can hold a bent orientation, making it easier to manipulate.

    As seen below, I was able to use snippers to score the insulation and then use needlenose pliers to pull it off:

    I then measured its dimensions:

    • Outer: 4mm +/- 0.5
    • Inner: 0.85mm +/- 0.07
    • Core: Nominally 0.32mm, thus 28AWG

    It also seems possible to remove the outer insulation with snippers, but I believe a dedicated 50p tool is still worth the investment considering I'd need to do this at least 22 times:

  • [L] Perfboard Circuit

    kelvinA01/25/2025 at 12:07 0 comments

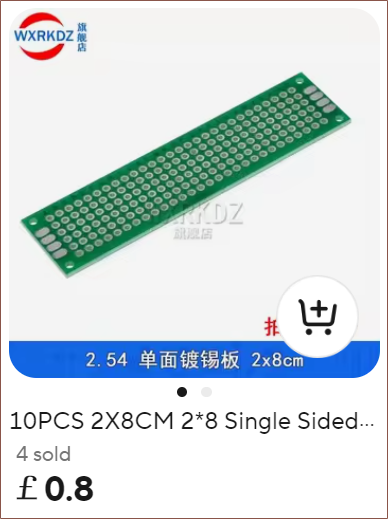
    I was planning to just break and stick stripboard around the place, but I found out about 2x8cm perfboard and found a listing for 5pcs black double-sided for 76p and another for 10pcs green single-sided for 80p:

    It just sounds like double sided isn't a need-to-have and would just make desoldering mistakes harder, so I went to design using the single-sided version. After about 4 hours, this is what I've got:
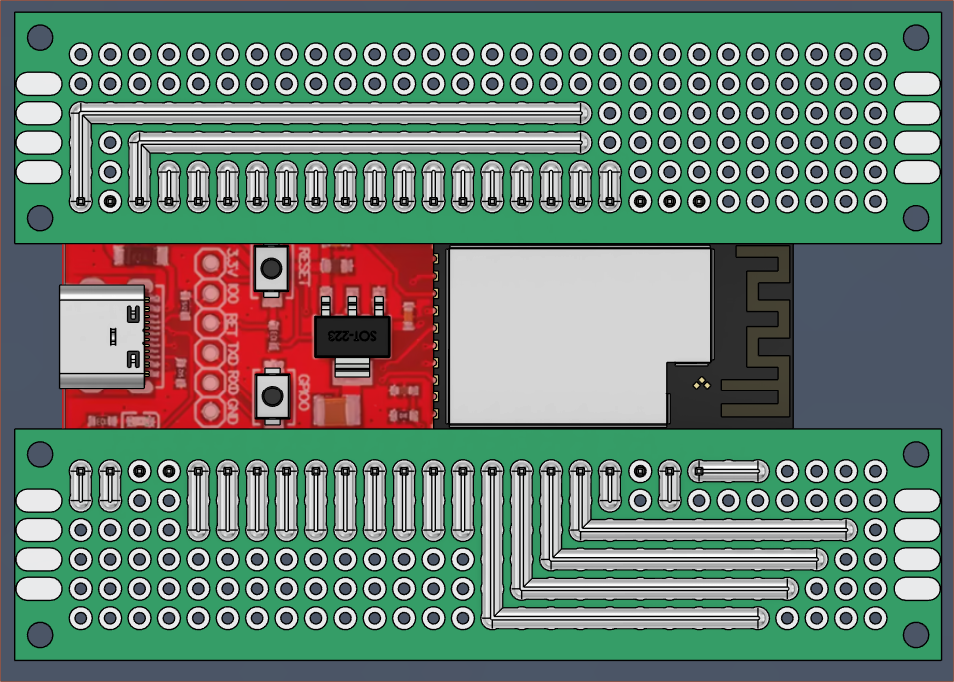
    Before I went to bed, there were also some jumper wires so that I could take GPIO18 and VCC and move them closer to GPIO0 in the pursuit of bundling the RGB ring and luminance sensor in one 6-core cable, but I decided it'll be better to use GPIO45 and just strip some of the wire 50mm longer. GPIO46 is input only, so I assume I can't use it for ARGB data out. I also think the D-in of the WS2812 is high impedance so it hopefully doesn't affect the strapping function of IO45.
    The 6 pins highlighted for the ARGB + ambient light sensor.

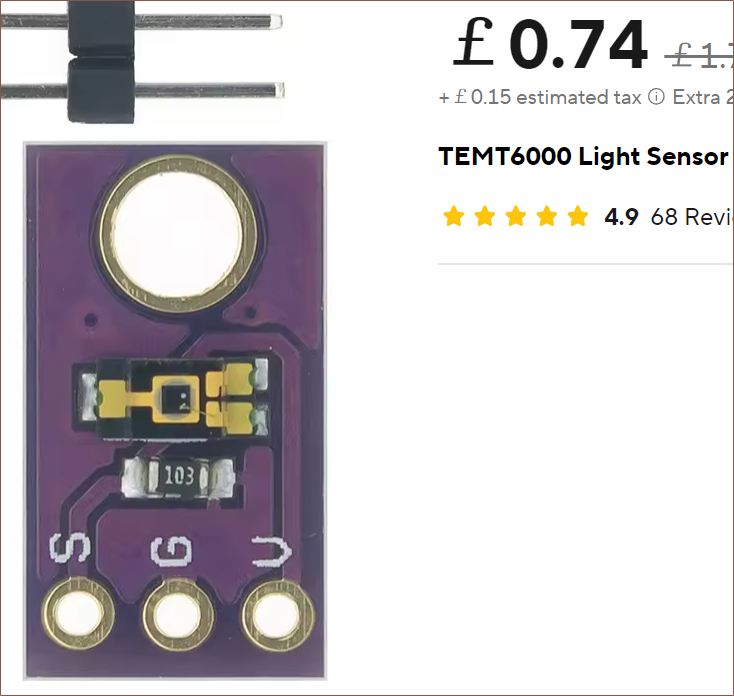
    The reason the TEMT6000 is using 3.3V is because Proto Supplies found that the max voltage when VCC=5 was 3.8V. Assuming linearity, with VCC=3.3, I'd expect a 0 - 2.5V output range. 

    Also on this side are the columns and rows, shown in yellow and white respectively. Each "row" is one keywell.

    Moving onto the other perfboard, the 4 pins needed for each of the 8 joysticks is shown below:

    I've alternated the colours so that it's easier to see. Each backwards-L shows the 4 pins needed: X, Y, Vref, GND

    Coincidentally, the mounting holes are M2, same as what I need for the joysticks. Thus, where possible, I'm going to try using self-tapping M2 holes to affix parts together with the M2x14 tapping screws.

  • [E1][R] Component Considerations

    kelvinA01/23/2025 at 21:34 0 comments

    Ginfull joysticks

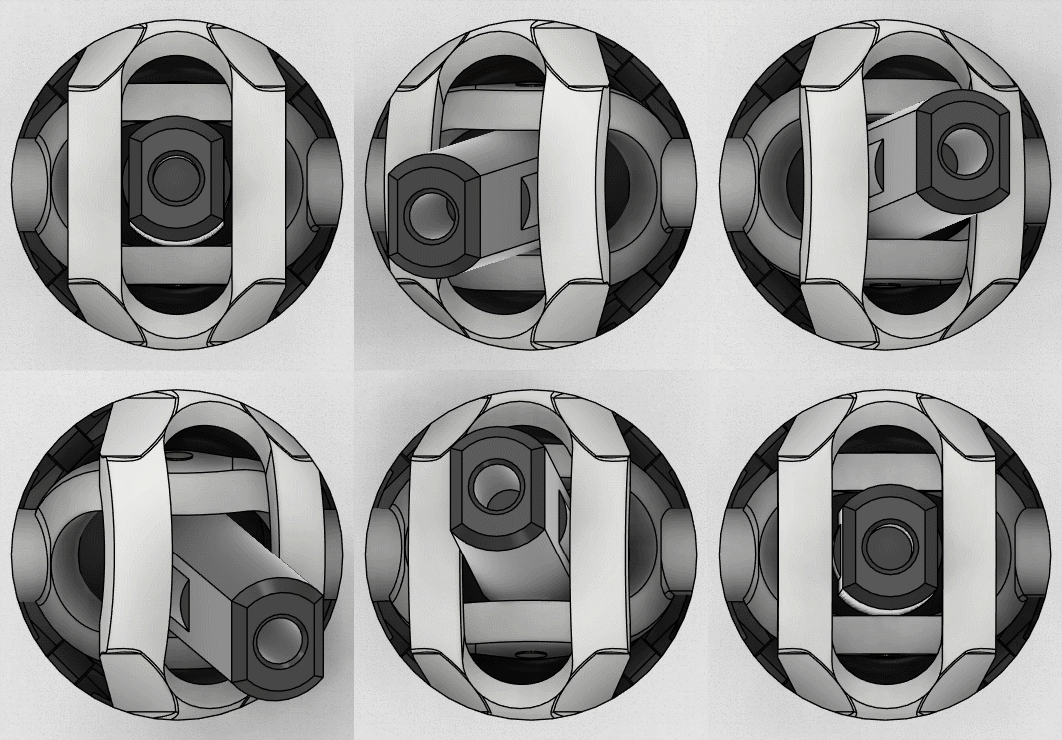
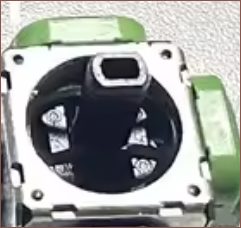
    I've spent about an hour or two jointing up the joystick assembly so that I can drag the stick and everything moves (as an approximation):

    I've uploaded it to GrabCAD.

    I also talked with a user on Printables who informed me that they preferred the stiffness of a traditional spacemouse. I already had worries that the joysticks might not be stiff enough in the orientation I'm planning, so I started researching into increasing joystick tension. First I measured my SpaceExplorer, which was 300gf. Then I started looking inside the joystick.

    Source: MPE's Ginfull TMR video
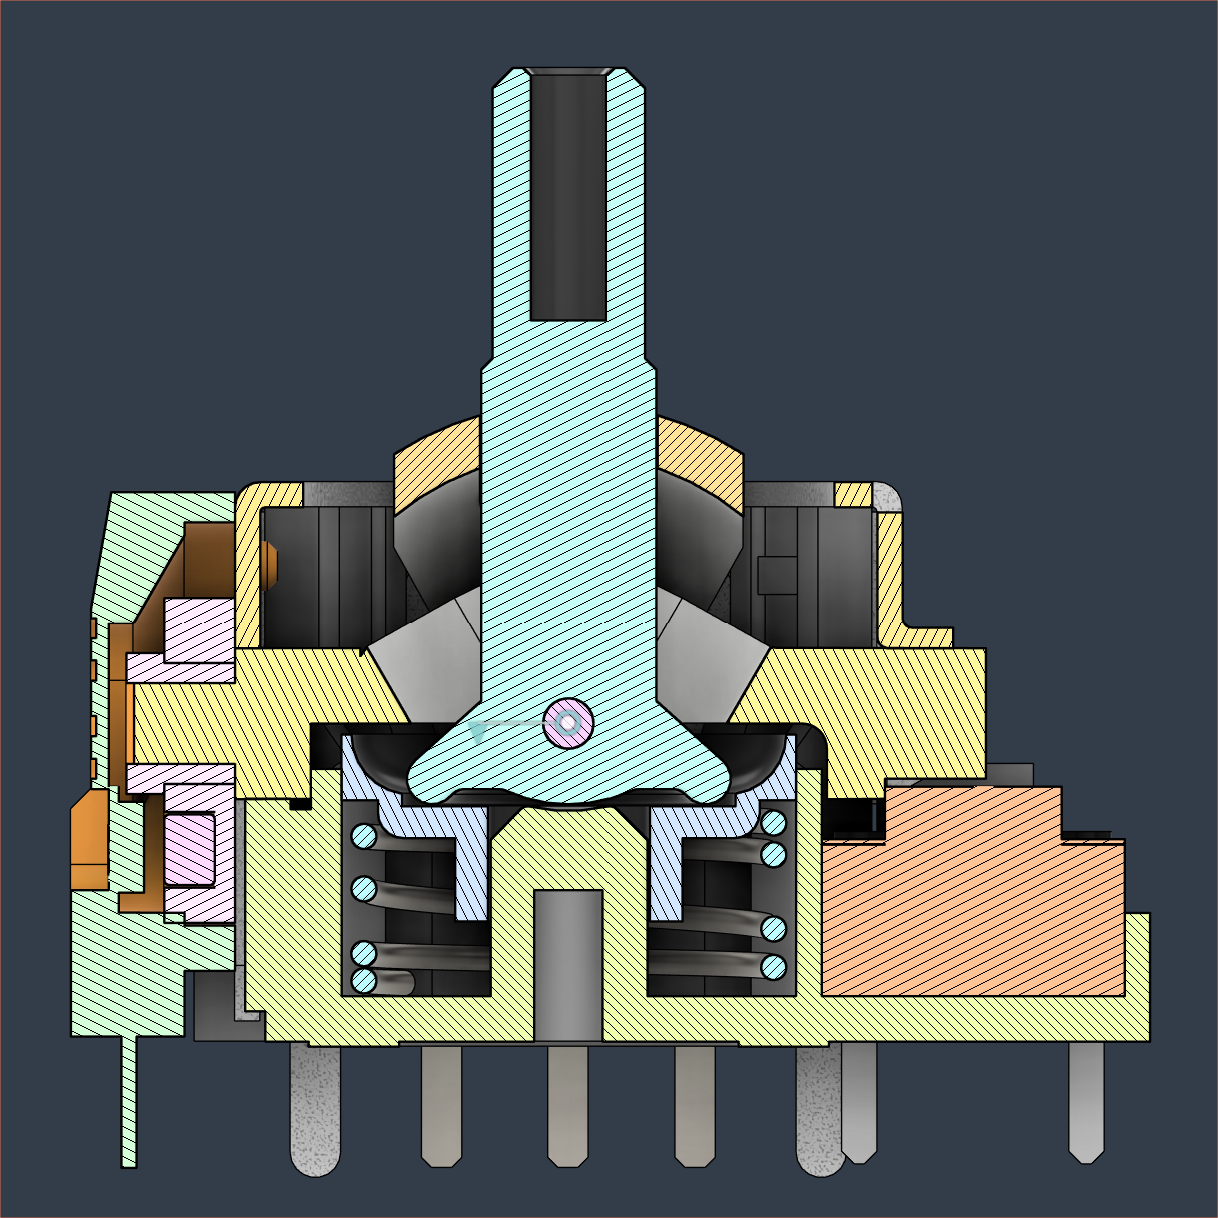
    Inside the CAD of the joystick

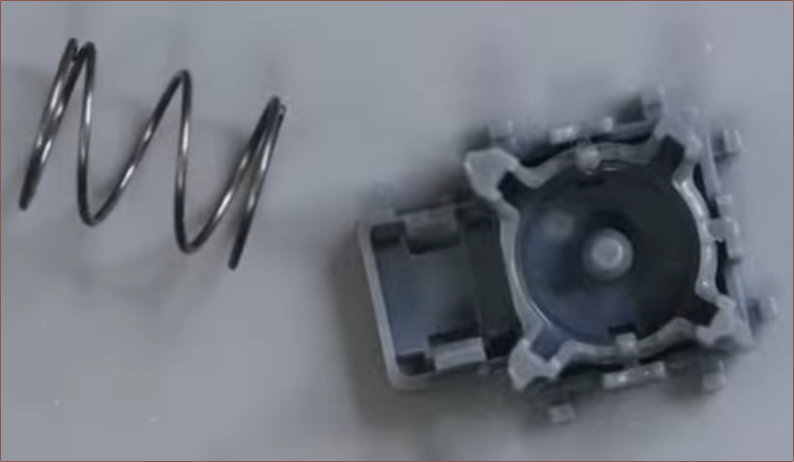
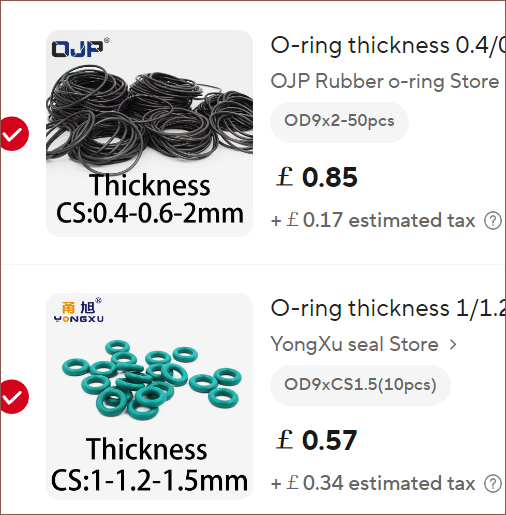
    One of my first thoughts was to replace the spring with stacked O-rings. there's about 3-4mm of vertical height but, due to that middle cylinder in the base, only a 2mm diameter o-ring or smaller would fit. This would suggest either a 2mm and 1.5mm, 2 sets of 2mm or 2 sets of 1.5mm rings stacked on each other.

    However, I had suspicions that the ESP32-S2 ADC's would be able to detect the much smaller range of motion, so I looked into springs. The spring constant depends on a few factors, and since the original spring is 0.5mm wire diameter and 8.6mm outer diameter, I was able to calculate the expected stiffness increase of an 8mm OD spring with wire diameter of:

    • 0.7mm = approx 3X stiffness increase
    • 0.8mm = approx 5X stiffness increase

    I then found this video showing that the Ginfull Hall Effect joysticks have 60gf of force, which is lower than the standard of 80gf.

    This would mean that 0.7mm = 180gf and 0.8mm = 300gf. After much hopping back and forth, I've decided that using 0.7mm springs are more likely to work, or perhaps I should say that both share the same list of "reasons it might fail" but 0.8mm has additional reasons. One of them is that a 5X increase might be too much for the components in the joystick to handle.

    I'm not entirely sure if 9mm OD springs will fit, but I get twice as many 8mm OD for the same price.

    12 bit LED ring and ambient light sensor

    My original idea for lighting was to have LEDs inside the keywells and they'd glow like a sci-fi prop. However, I thought it would be more useful to have some sort of "display" instead. 

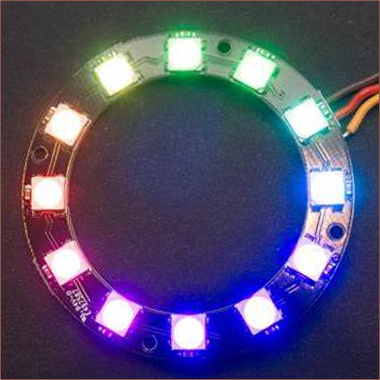
    With a 12b ring, 5 LEDs could be on the left/right and shine a different colour depending on the chord of its respective keywell. This would act as a display for my peripheral vision, should be visible in daylight and allows brighter LEDs without drawing too much current from the host. I've also got ideas for sci-fi-esque animations, like a slow loading circle when it's idle.

    Since Tetizmol is likely to be used in a range of ambient conditions (sunny day to midnight coding) and I remember just how eye-stabbing the bright LEDs under the WK-50 encoder were to my peripheral vision, I'm going to try connecting the LED ring to one of the strapping pins so that the above TEMT6000 light sensor can be read via GPIO18. Another idea is to put this sensor on GPIO17, along with all rest of the ADC-in pins, and use GPIO18 as DAC-out.

    1/4-20 Wood Inserts

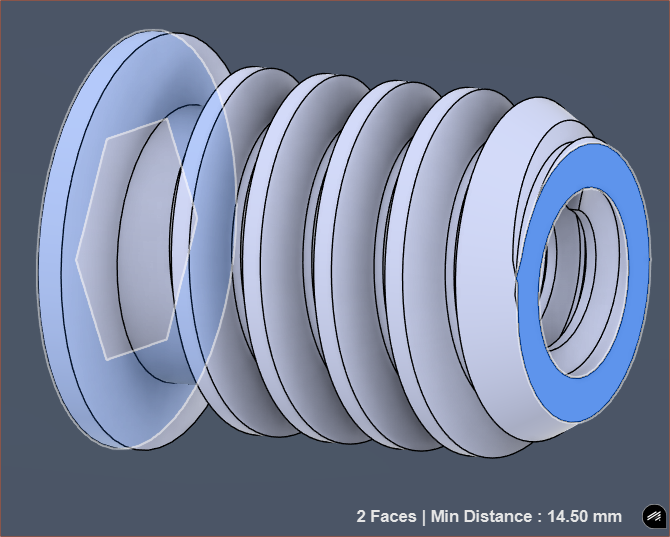
    I've never been keen on heat inserts since I need to use my soldering iron to insert them and make sure they're straight. One day, I found out that the Charachorder CC2 CAD files were on Github and so I was able to see the insert they used:

    Well these ones specifically seem to only be available as a pack of 50 for £8 on AliExpress. However, I found these zinc wood inserts:

    I wasn't too sure about them, but I then found this video:

    A commentor mentioned that having the flange on the rear side of the intended thread is the strongest configuration, unlike what was tested in the video (for both rivets and these zinc wood inserts).

    It turns out that I have every allen key size except 6mm, so I've put that in my basket too.

    Super clamps and magic arms

    Ignoring that the names of these products sound like Superman V Dr Strange, the mounting solution is...

    Read more »

  • [E1][R] Hall / TMR joystick electrical properties

    kelvinA01/13/2025 at 21:25 0 comments

    I almost lost hope that I'd find out some electrical information for the hall effect joysticks, but then I found an oasis of information: Metal Plastic Electronics (which I'll abbreviate to MPE). 

    It's a channel that has dug for details on many of the electromagnetic joysticks on the market! This log kind of serves as a TL;DW. I'll try and speedrun though the things I learned watching his tests yesterday, starting with a video where he tests these:
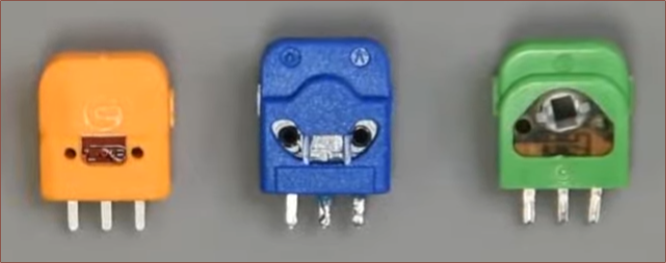
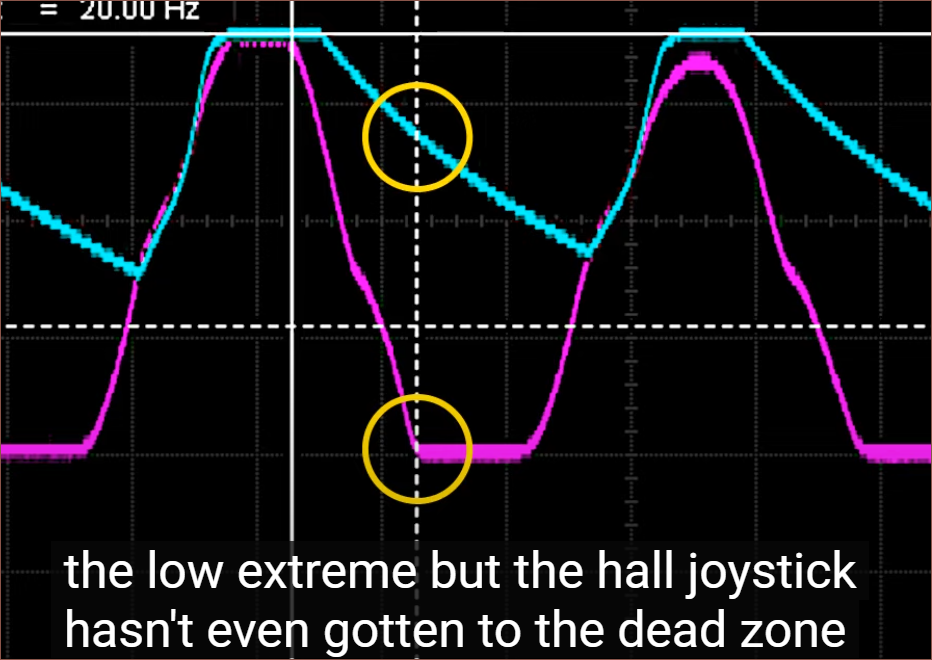
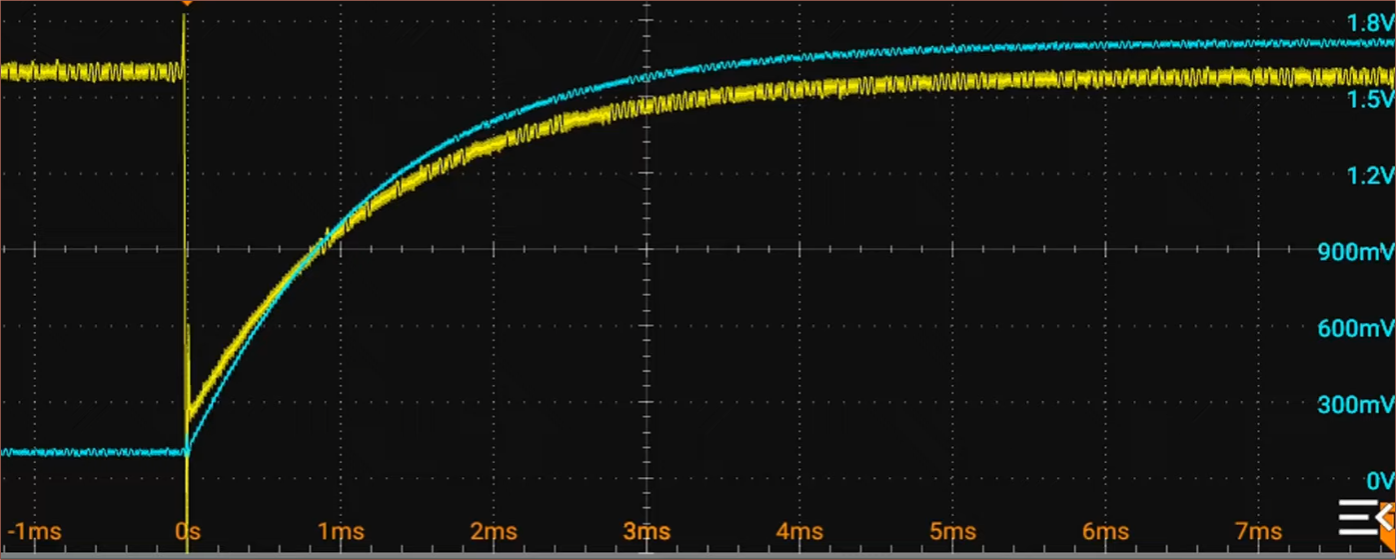
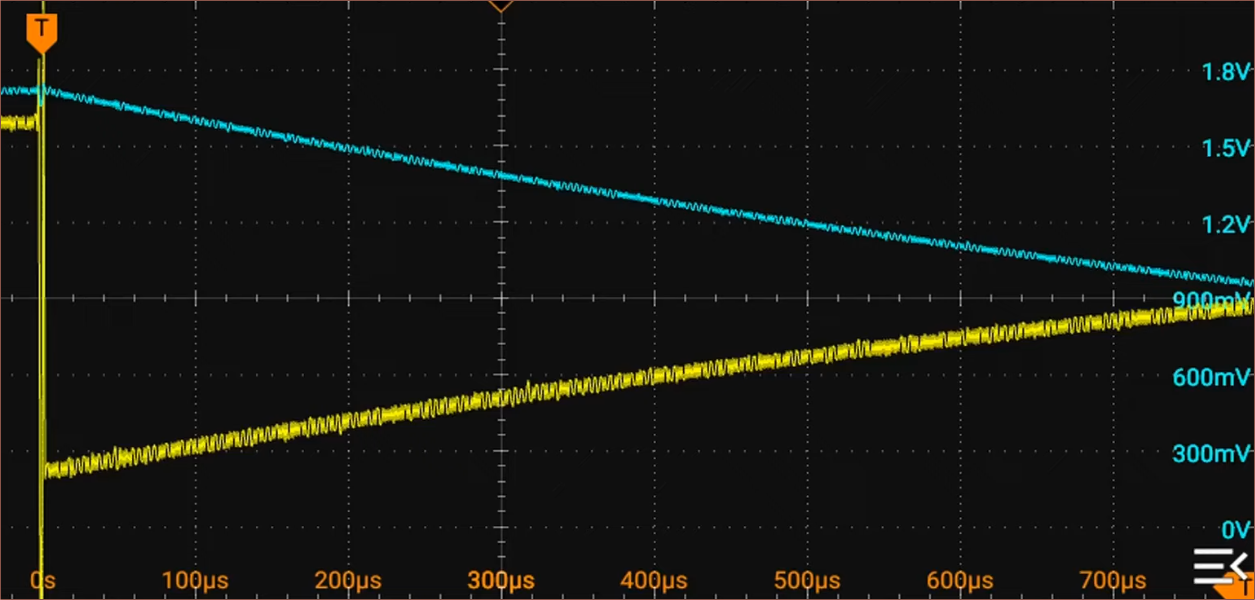
    The rise/fall time of yellow (Ginfull) sticks are unbalanced

    The one I found on ebay are the L4A sticks:

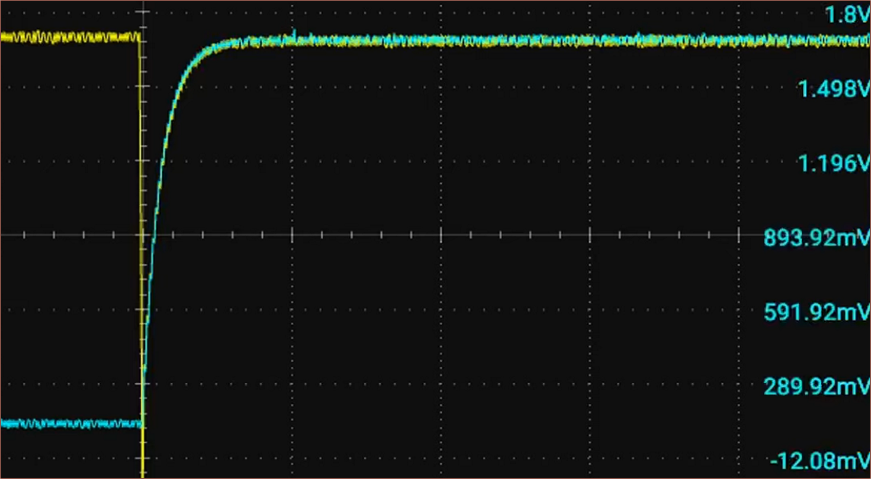
    Yellow is the current of the electromagnet.
    As it turns out, a capacitor is on the output pin meaning that it has to discharge when the signal voltage is lower than it. This results in fast rise times but very slow fall times. In a comment, MPE tried using pulldowns to no avail.

    This might not be too noticeable when orbiting around in spacemouse mode, but it's going to lead to overshooting if used as a trackpoint. 

    As you can see, the magenta trace is a (not so traditional) potentiometer stick and cyan is Ginfull hall sticks. MPE manually moves both sticks to and fro.

    The rise/fall of the blue and green sticks are fast and symmetric

    Blue sticks
    Green sticks

    The green sticks use a larger magnet, so it seems they'd be less susceptible to stray magnetic fields than the others. The drawback for this application is that the sticks don't have a cylindrical hole, meaning I can't screw in a ball to the end of it:

    The blues/greens are similar in price.

    The sticks likely accept 1.6 - 5.5V

    The chip inside the Ginfull hall effect sensors is rumoured to be the Hallwee HAL9303, which has the following voltage ratings:

    • 1.6V Min
    • 3.3V Typ
    • 5.5V Max
    • 7V Abs Max

    MPE used 1.8V in his testing.

    TMR sticks use low power to output a signal that closely matches the magnetic field

    For example, here are the Hallpi TMR joysticks, which are about 2X the price of the average hall joystick:

    There were also the blue K-Silvers (cheapest) and black GuliKit on his channel.

    TMR sensors seem to pull around 210uA of current, compared to 700uA for the Ginfull L4B board (which was found to be identical to the L4A board).

    Ginfull TMR recently arrived on the market?

    So I was thinking that I was going to get the blue joysticks below:

    But I also noticed some translucent Ginfull TMR sticks:
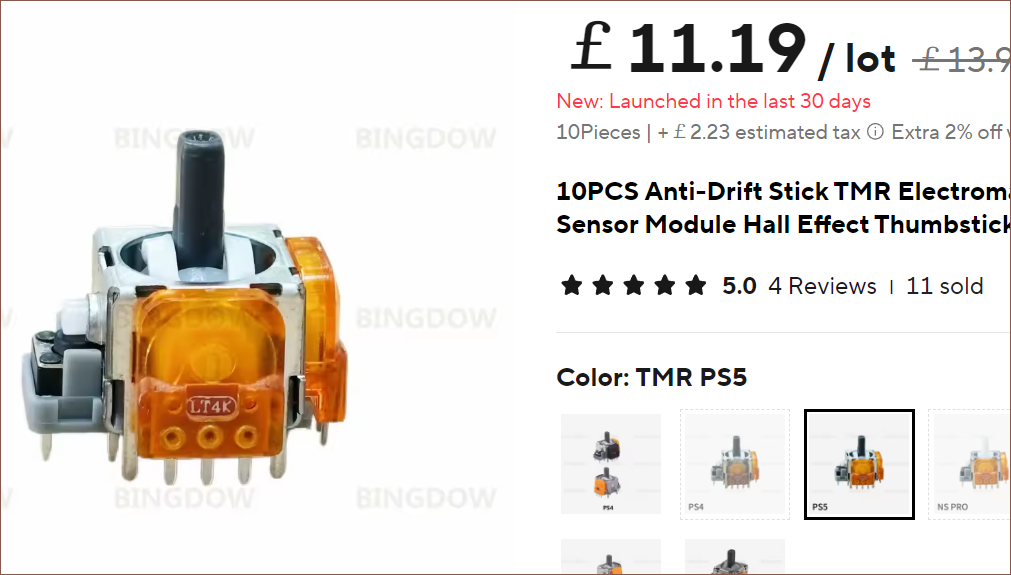
    I found another listing where the price difference between the two options would be pennies, both effectively being £16 including shipping and VAT. 

    If these were like the other Ginfulls, I'd have to skip them. If they were like the other TMR brands, it's an easy win. One of the only references I could find was a 15-day-old post on reddit and 2-week-old comments under the Hallpi video with MPE replying that he had them on order. 

    Thus, I went to bed hoping that the video would come out in the near future.

    The TMR future is now!

    MPE published a video of them today:

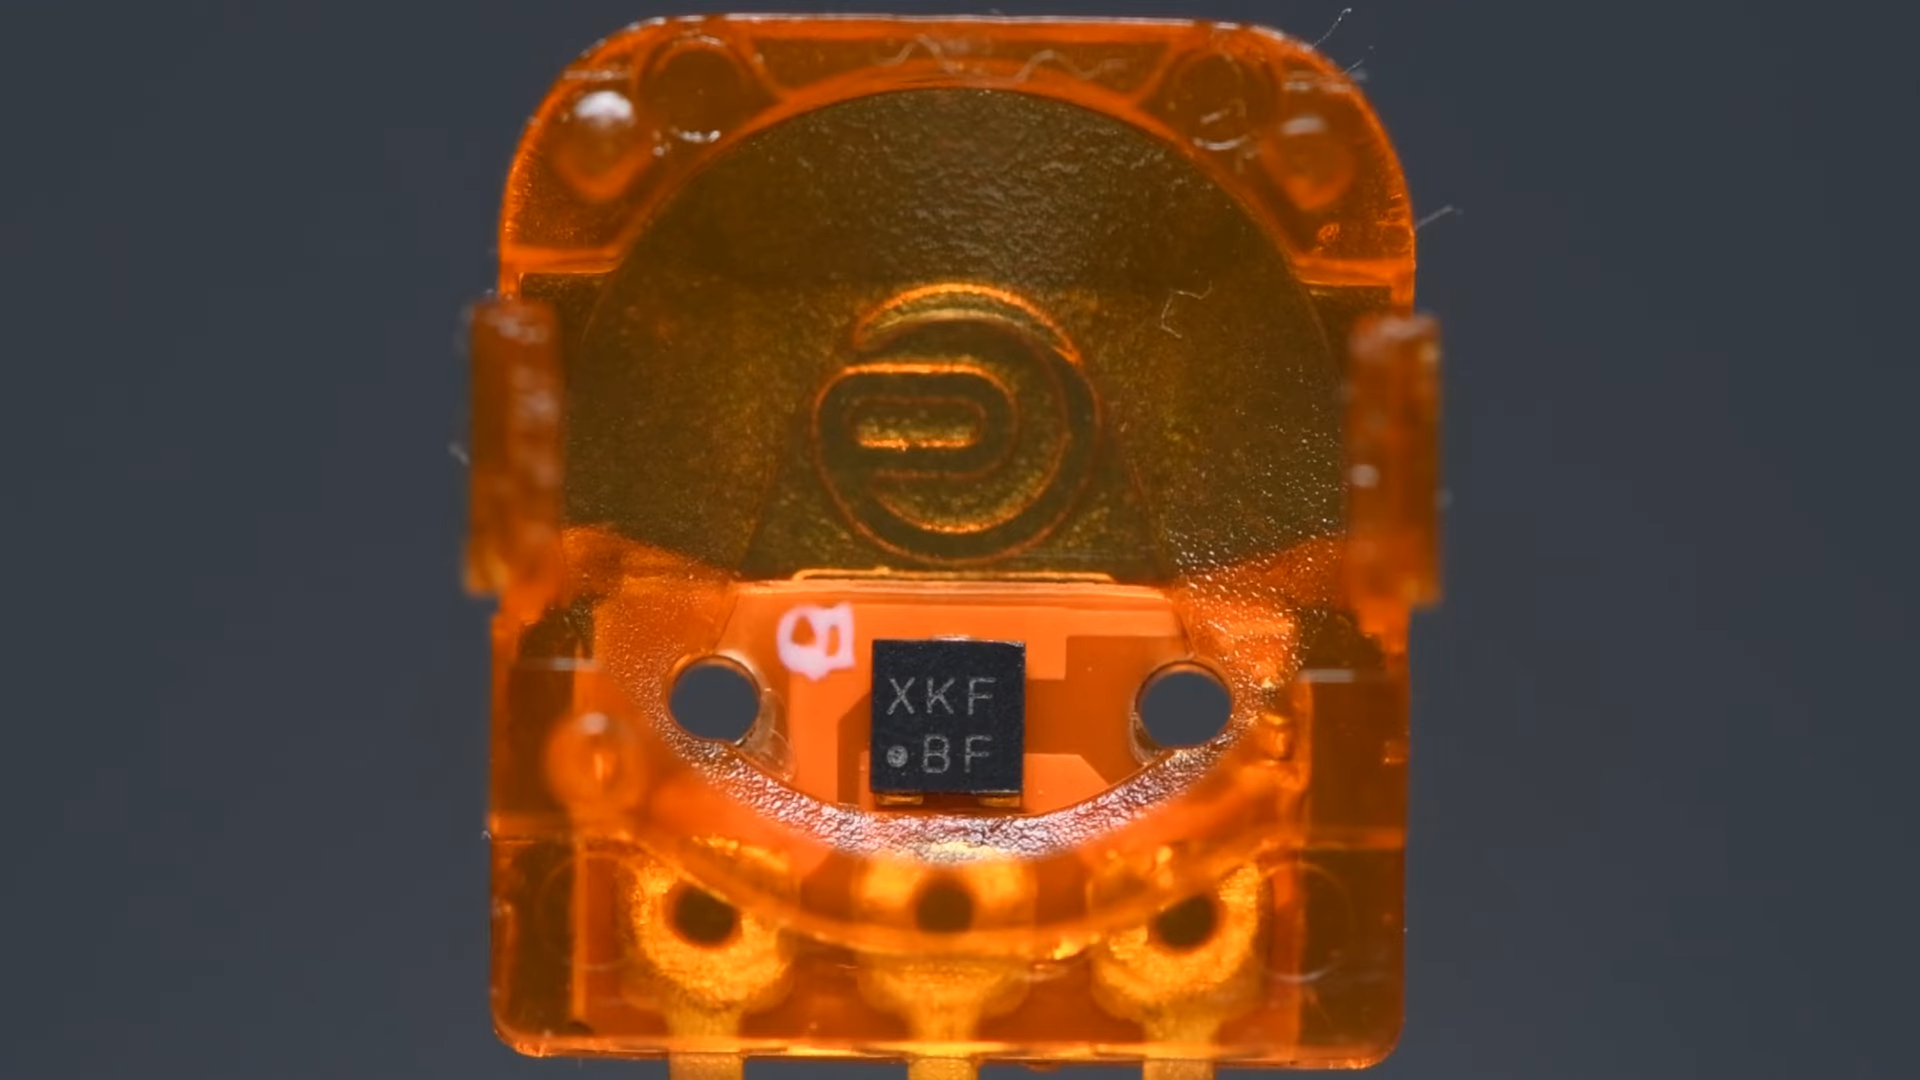
    MPE taking a close up shot of the new Ginfull TMR sensor.

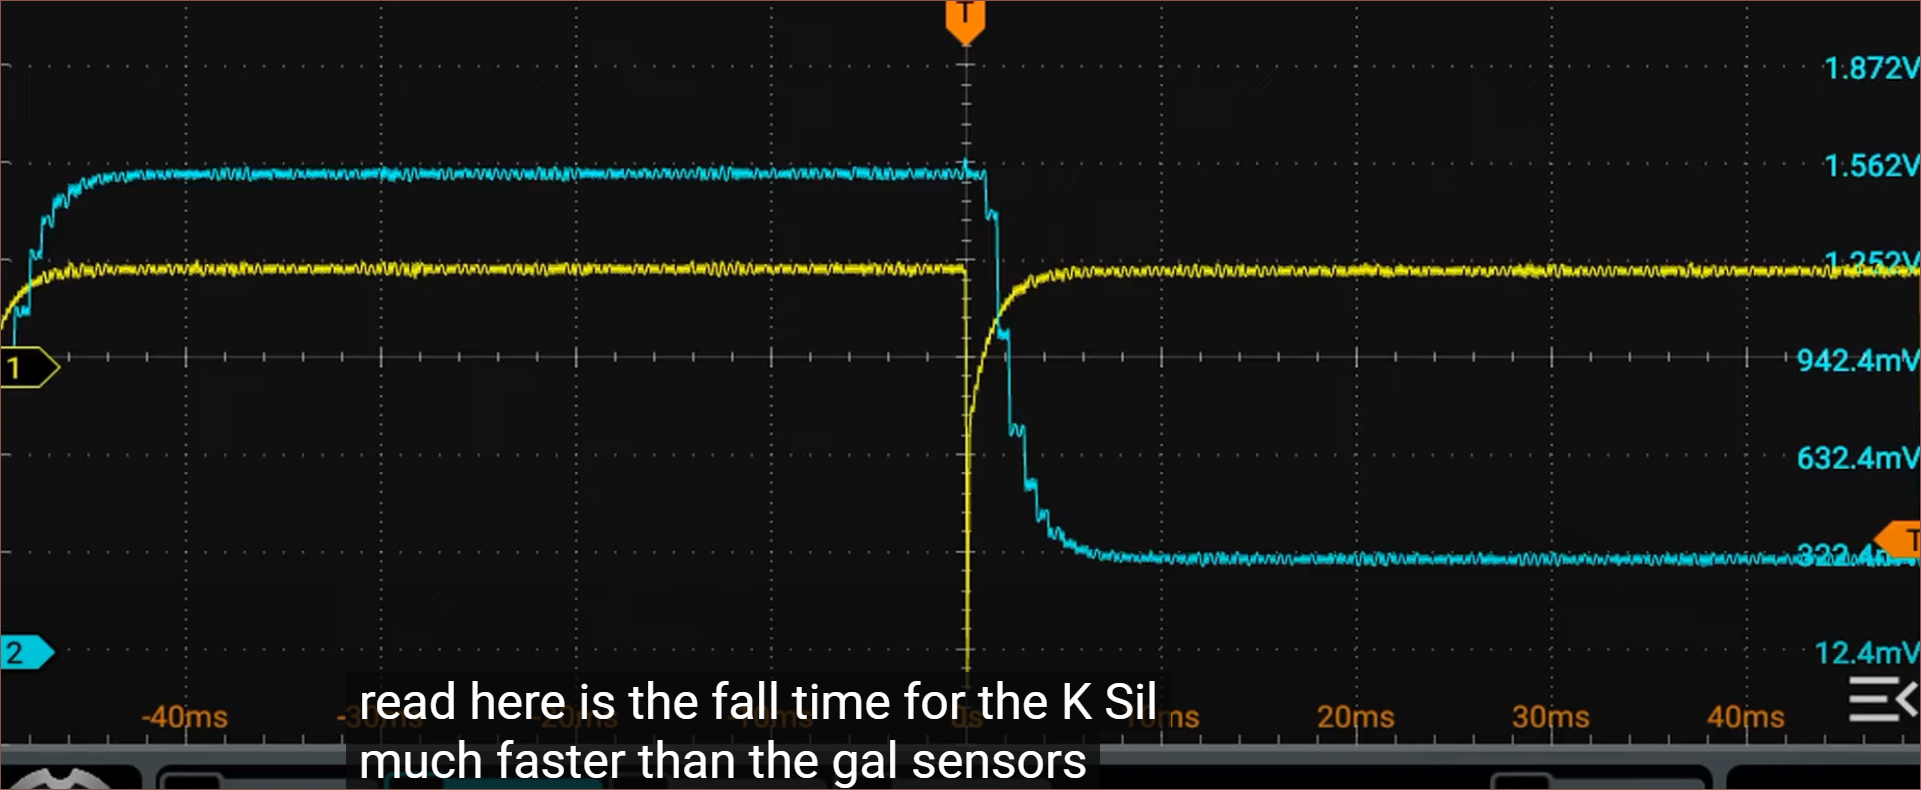
    They share similar components to earlier hall-stick designs, but they have all the benefits of TMR with none of the filtered output:

    Ginfull TMR: Rise
    Ginfull TMR: Fall

    The current draw is typically around 215uA, up to 375uA if the chip is outputting VCC (1.8V in his testing). 

    [Edit 1] MPE also heard from another commenter that the chips inside the TMR joystick may be the TMR2615x-AAC.

  • [B][R] PS5 Hall Joysticks and Espressif ADCs

    kelvinA01/11/2025 at 14:03 0 comments

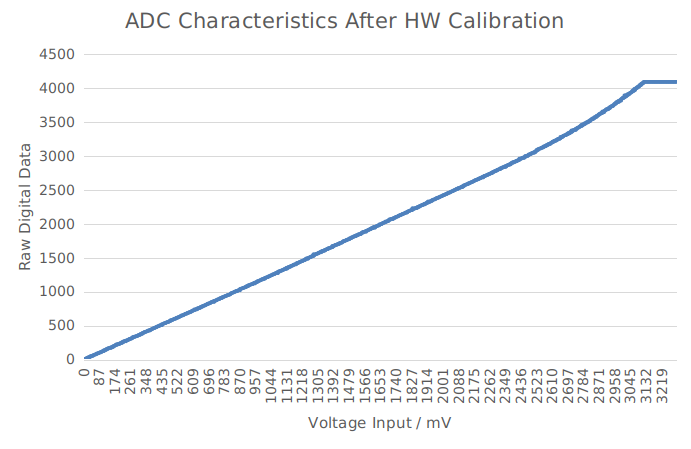
    For better or worse, I've been somewhat captivated into looking further into this, mainly because the Pro Micro used in the original projects are 5V, the PS5 joysticks are allegedly 5V, yet the Espressif chips are 3.3V. Additionally, while those ESP32 chips have the 16 channels I need, they don't have full range coverage:

    ADC conversion results after hardware calibration

    ESP32-S3: Seems it's nonlinear after about 2.5V and maxes out at 3.05V.

    Thus, I went on an expedition to find out more info on the joysticks. 

    From this video, I found a list which I believe is the voltage of the controller:

    • PS4 - 5V
    • XBox One - 2.4V (rechargeable) or 3.0V (non-rechargeable)
    • PS5 - 5V
    • Switch - 5V

    The notable one is the XBox One. While the various hall effect sticks have different colours depending on the polarity of the left/right pins, I couldn't find any reason that the chips used in them were any different, implying that these sticks might work at 2.5V. I also saw a reference to CC6501, and its family of chips seems to output between 10% and 90% of VCC.

    Then, looking around, it seems that it's cheaper and more configurable to use an ESP32-S2 for its DAC than it is to buy a separate voltage regulator. A slight drawback is that some purple pcb with only 27 GPIO pins took over the entire local ESP32-S2 market, meaning I'll have to AliExpress in the red board below:

    Someone has written up their testing here.

    This board seems to have everything I need and almost nothing I don't. The pins are neatly in clockwise order. Avoiding the 3 strapping and 2 USB pins, I can do the following arrangement without a single pin to spare:

    • West Side (when USBC port is north)
      • IO1-16: Analog inputs from sticks
      • IO17: DAC reference voltage to sticks
    • East Side
      • IO18: Neopixel
      • IO21, 26, 33-44: Keyboard Matrix
        • (this is a consecutive strip of 14 pins)
        • I'll likely pair the following, starting the index at 1:
          • IO21: COL1
          • IO26: COL2
          • IO3n: COLn (e.g. IO35 = COL5)
          • IO40: COL10
          • IO4n: ROWn (e.g. IO44 = ROW4)
    • Strapping / USB:
      • IO0, 19, 20, 45, 46

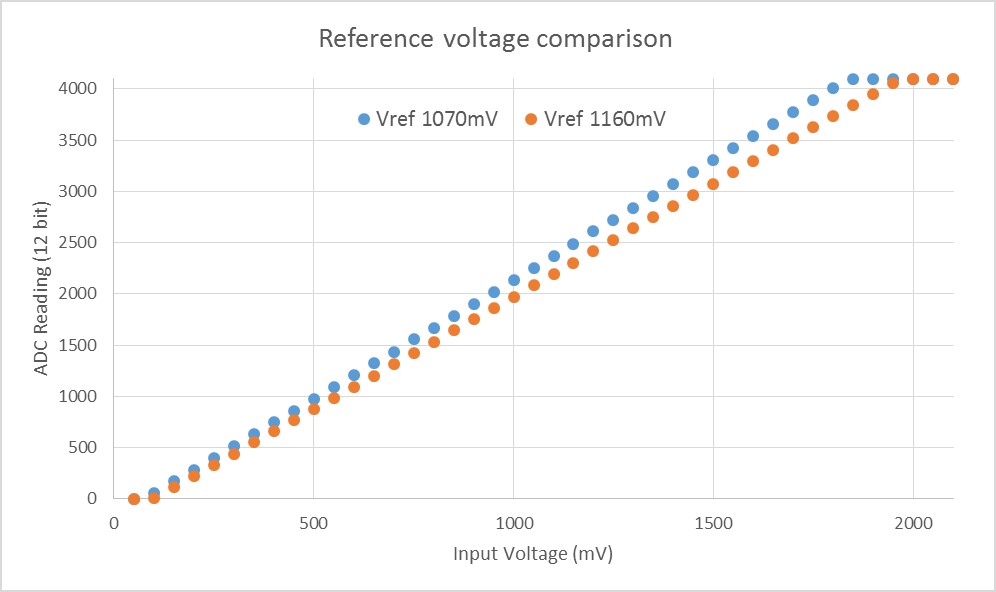
    The ADC in the S2 still seems kind of questionable:

    ADC reference voltage comparison

    The ADC reference voltage can range from 1.0V to 1.2V amongst different ESP32-S2's.

    This is one of the reasons why having the DAC is advantageous, since the voltage sent to the joysticks can be tuned to get the best range for the ADCs.

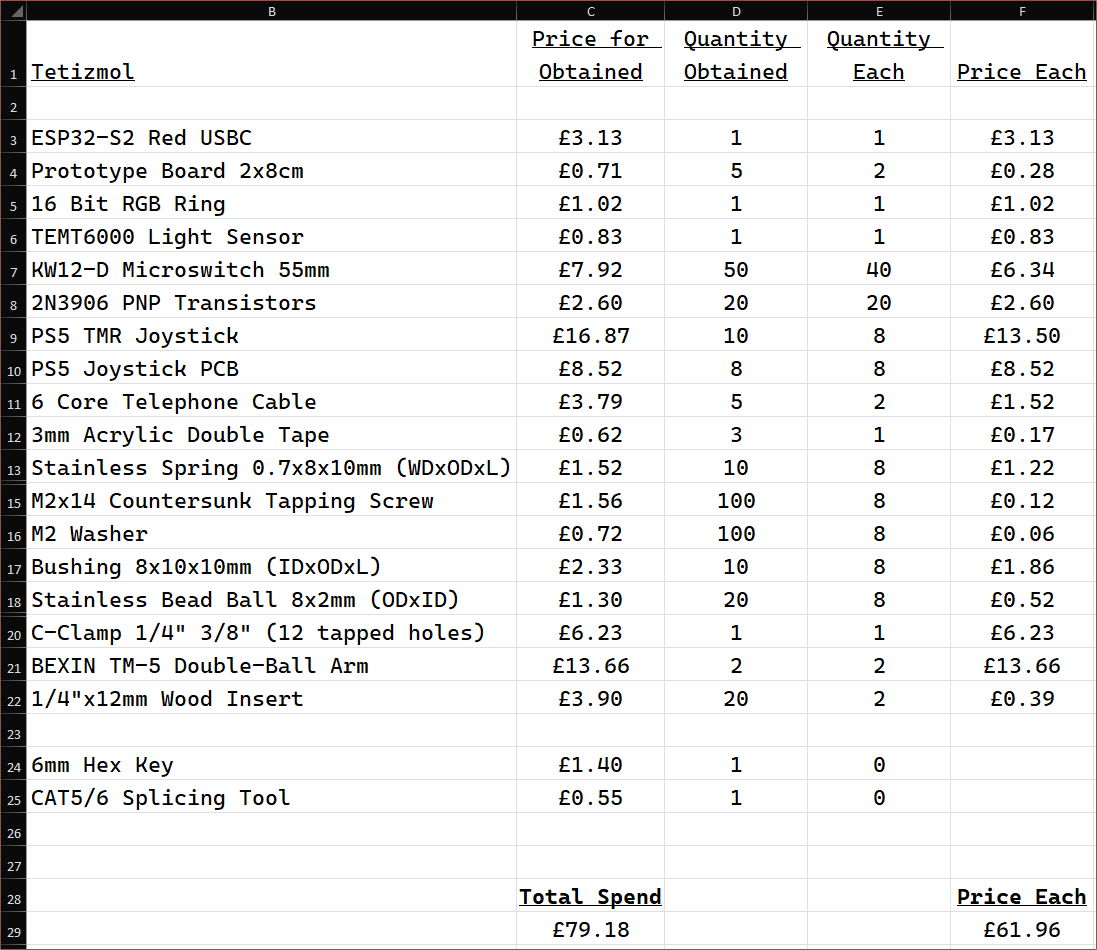
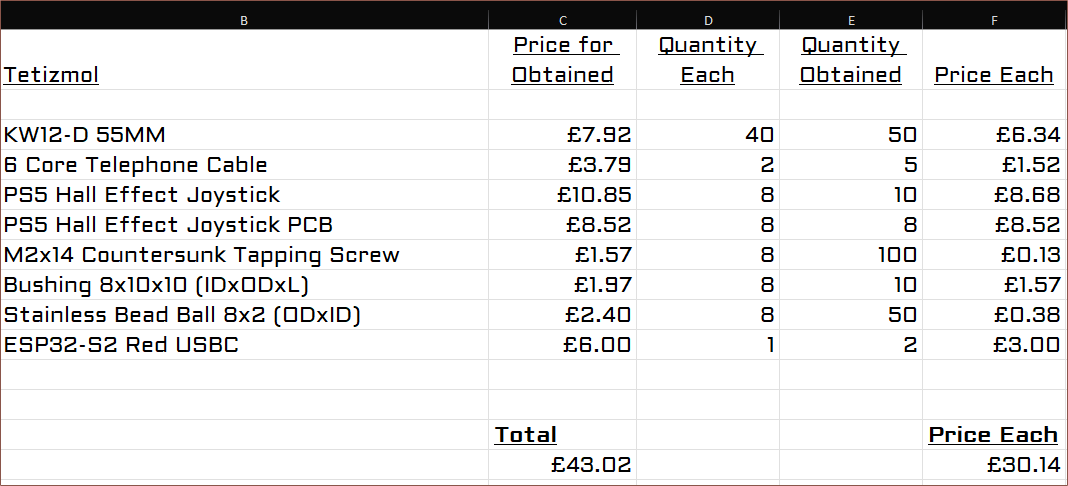
    To get over the £8-spend-for-free-delivery, I found a few other components (see below). The BOM is now down from £55 to £43.

    (not including the double sided tape or filament)

  • [E1][M][T] Dual spacemouse tube?

    kelvinA01/03/2025 at 15:15 0 comments

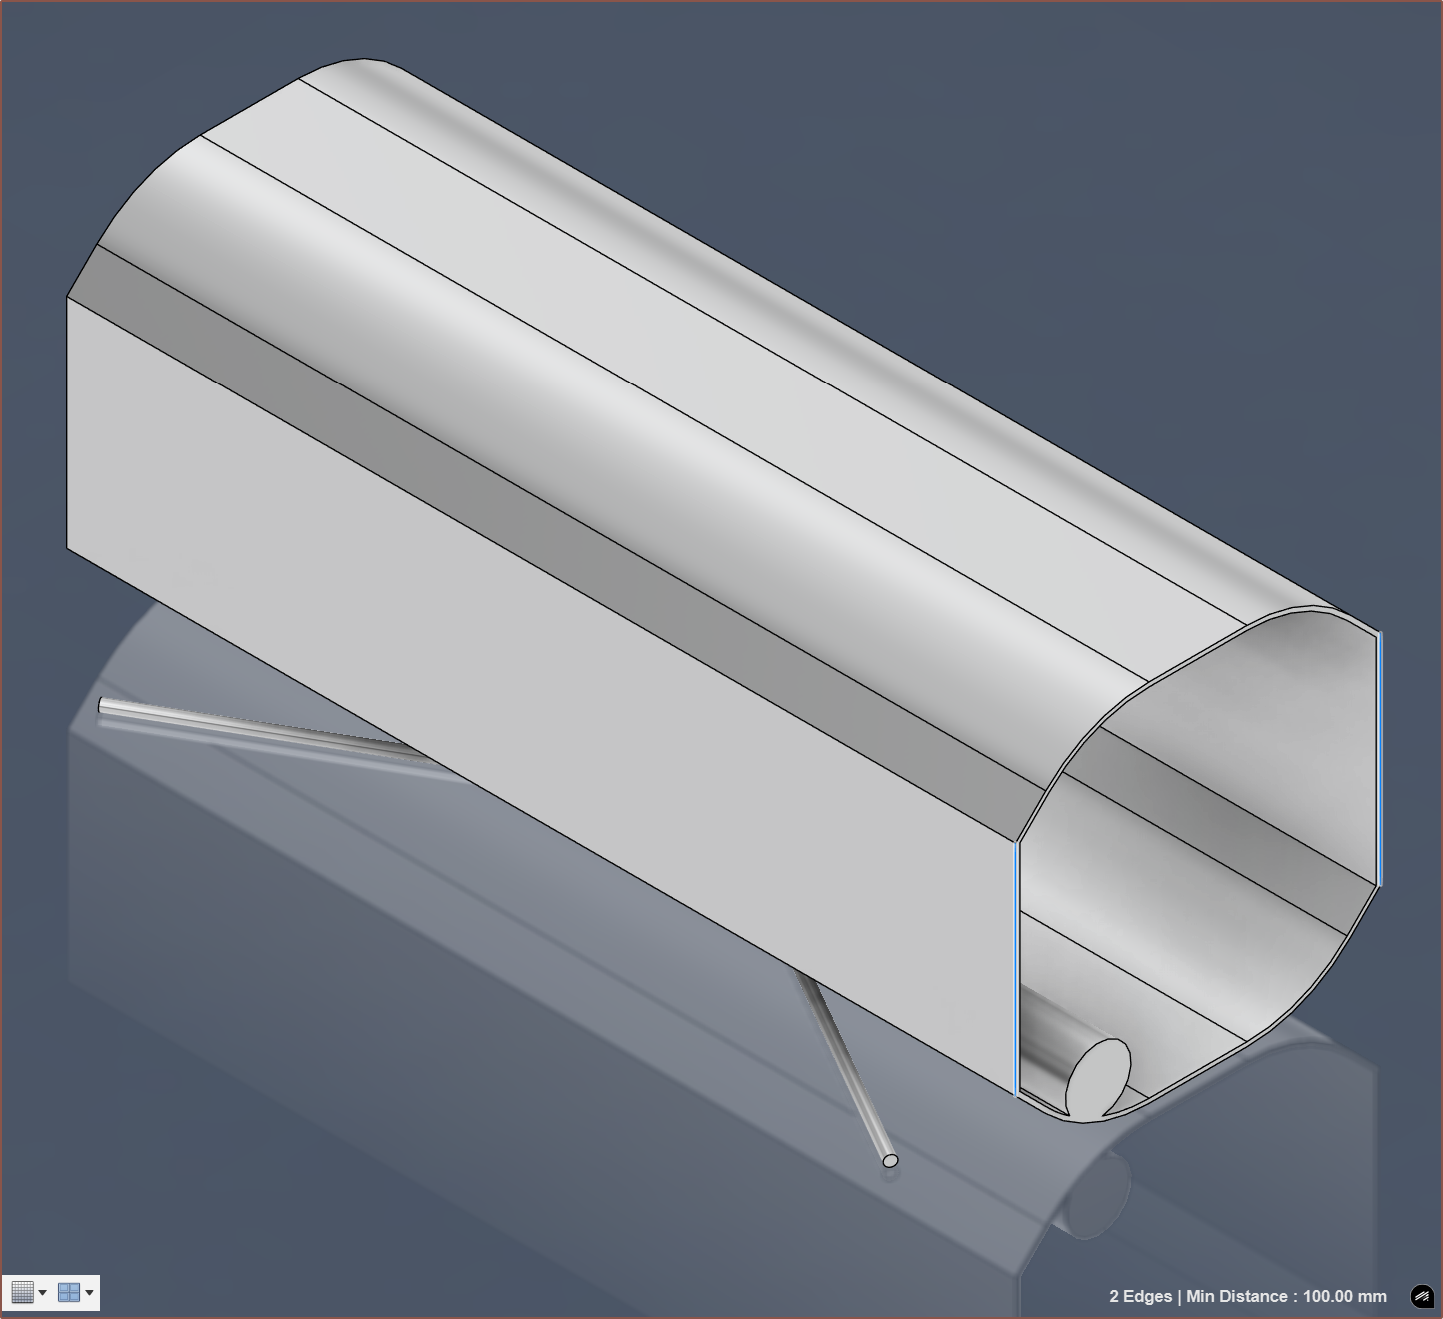
    I've been considering the potential options for the hand pose to use (e.g. like a glove, like holding a vertical mouse) and I've come to the conclusion of 2 sides of an extrusion that can rotate up to 45 degrees:

    The cylinder inside the tube is where I expect the rotational pivot point to be. The stick feet fold in during transport.
    The reasons are as follows:
    • The entire "keyboard" is sheathed in the tube seen above, allowing for easy transportation.
      • The tube also acts as a wind guard.
    • It allows good ergonomics from the range "crouched on the floor" at 0 degrees to "sitting at a desk" at 45 degrees rotation.
      • The edge of the desk acts as an armrest.
    • The hand pose is somewhat natural, like holding a cylinder from the top.

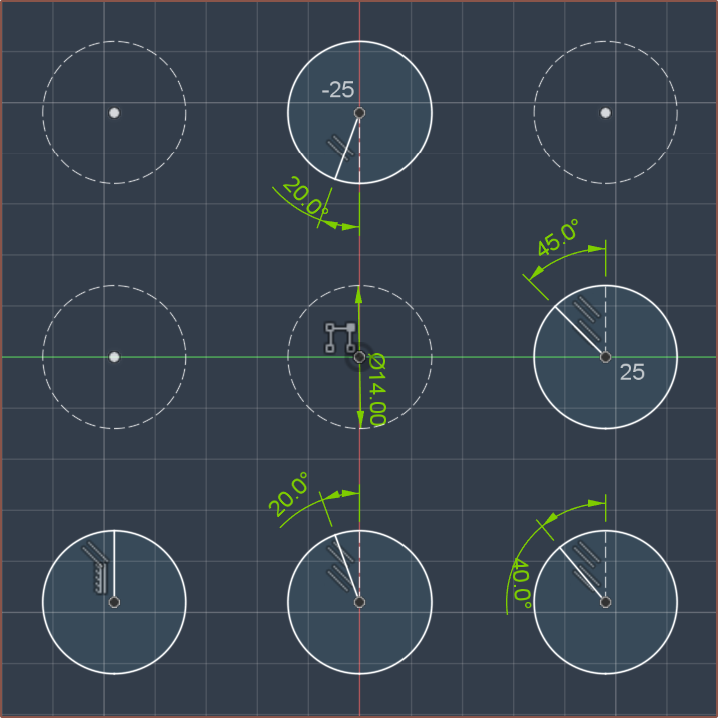
    A basic-looking arrangement of the right-hand fingers is shown below, shown with their angle of direction (aka towards touching all fingertips):

    Clockwise, it's Finger 0, 1, 2, 3, 4. Imagine you're trying to pick up a plate.

    The tube at the moment is 250mm long and 100x100mm squircle, which is approximately the diameter of a standard UK 2 litre bottle. Do you know what's also approx 100x100mm? Teaching Tech's Spacemouse (2nd Generation):

    I've been trying to rigidly fix the project goalposts, but it's hard to ignore creating a PC input device with no mouse-pointer or scrolling provisions whatsoever. Such provisions are in keyboards ranging from the most expensive to the cheapest: Svalboard, Naya Create, the WK-50 keyboard and generic wireless keyboard+trackpad combos. The below video reminded me that I really should consider something

    I probably spend just as much time scrolling through the web as actually typing anything, and if working outside, current standalone options (mice, trackpads, optical finger navigation) expose my fingers to the cold. That's why I'm wondering if it's possible to have an area slightly before/after the fingertip keys that the fingers could grip on and have the 5 keywells become the spacemouse knob:

    This would allow me to use a strategy like 3DxPoint to get mouse and scroll movement, and allow for full 6-axis control to be implemented at some future time. 
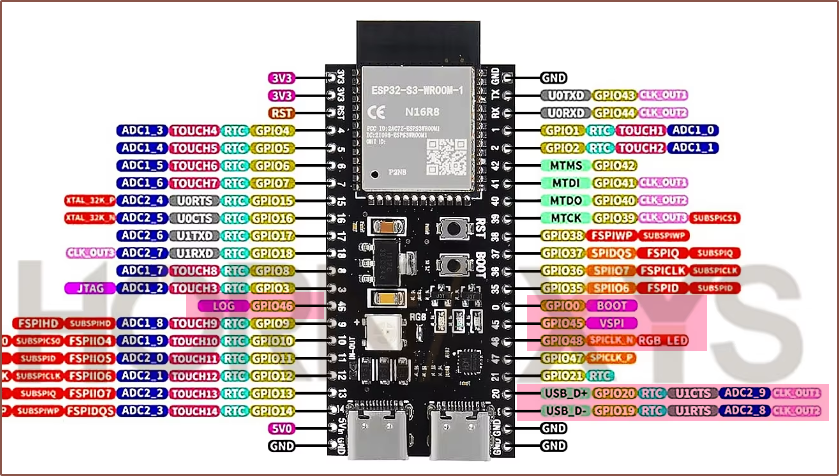
    Ergonomic limitations notwithstanding, the issues are the additional time it may take to implement and that, for the 8 joysticks, I'd need 16 analog pins. Technically, I should only need 6, but then I'd have to look into the computational issues TeachingTech faced and I'd rather not. Looking at the ESP32-S3 development board, it looks like there'd be just enough pins for the 16 joystick and 14 matrix pins.

    I've highlighted in red all the pins I'm going to try and avoid. I also wonder if anything cool could be done with the left USBC-OTG port, like act as a USB hub.

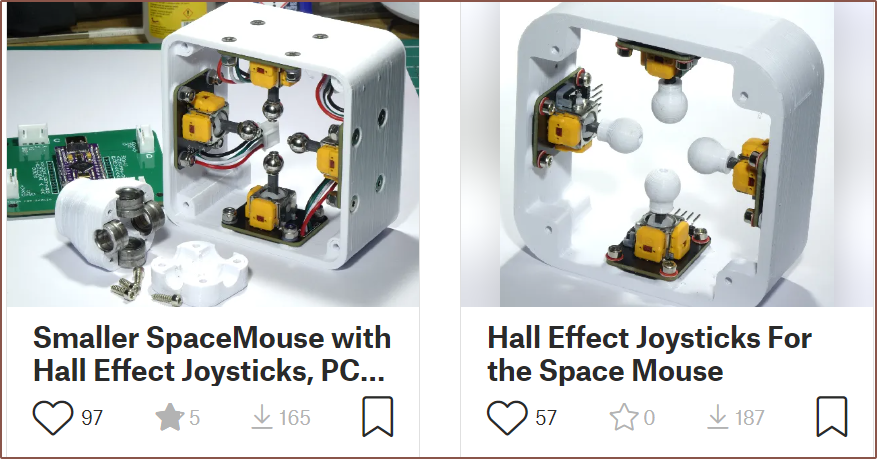
    I've looked into the remixes and a user called Kempy has decided to use PS5 hall-effect joysticks instead of the questionable PS2 resistor-based ones, minimising the deadzone and allowing for smoother control:

    They made the PCB available on ebay and it'll only be a one-time fee of about £9 to use the PS5 sticks:
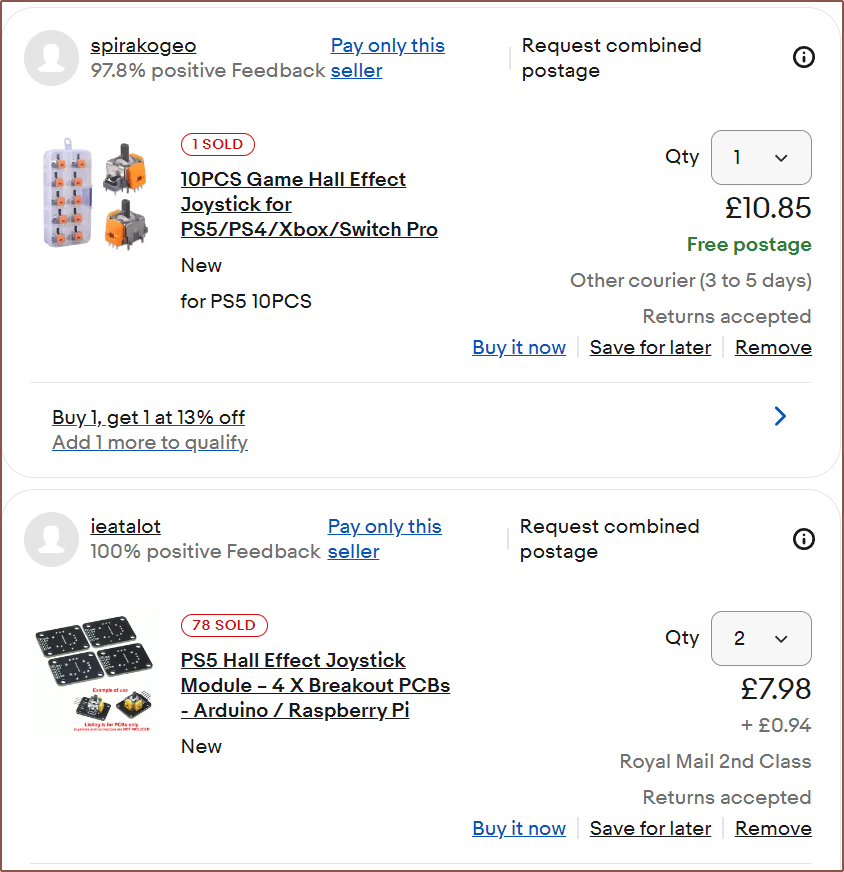
    PS5 joysticks + PCB
    PS2 joysticks already on PCB
    The author behind the DIY spacemouse code wrote a build log of a different remix and mentioned the amount of sanding that had to be done for smooth sliding. I assume Kempy experienced the same thing, spurring them to design the remix that uses 8mm steel balls and salvaged inner rings from 608 bearings. I've found the following search terms useful:
    • stainless
    • bead
    • ball spacer
    • 2mm hole
    In my search, I did also see acrylic and glass beads, but their roundness is likely questionable for this application. I may consider just printing using SLA printed ball ends for the joysticks.

    [Jan 05] I just had the great idea to simply keep chord 22 reserved for enabling mouse mode! I'll try and explain quickly:

    • The "directions" that a right-handed finger inside a keywell can go are numbered to reflect the numpad. The physical buttons are:
      • 1 - southwest
      • 3 - southeast
      • 9 - northeast...
    Read more »

  • [X] Keyboard PNP transistor matrix

    kelvinA12/11/2024 at 20:22 0 comments

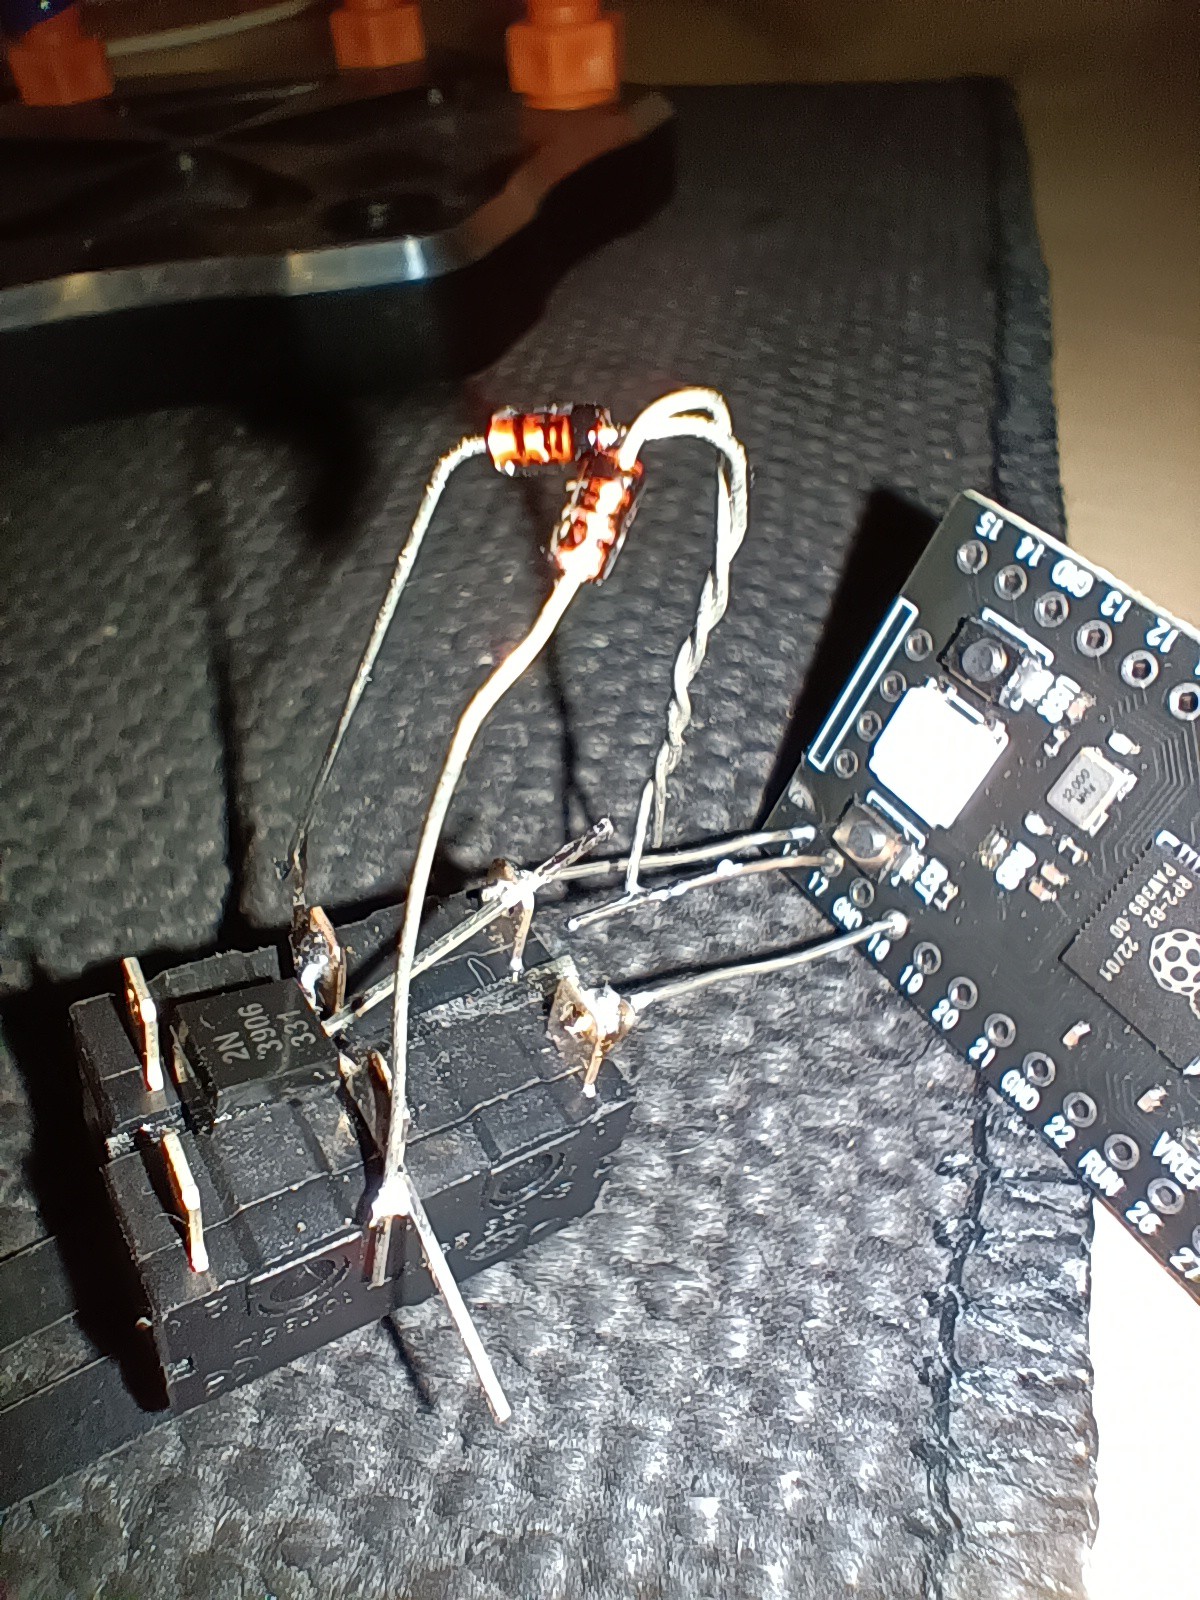
    As discovered in #WK-50 Trackball Keyboard, allegedly a keyboard designer could use PNP transistors as a "dual diode" package. If this works, it would be useful as I won't need to worry about diode polarity and will only have to "starter solder" half as many components (whereby starter solder means having a component that isn't held in place by a solder joint yet).

    I went to my uni and they happened to have some ZTX502 PNP that mouser said was discontinued so I looked on ebay and it seems that the 2N3906 is the cheapest and most abundant:

    Realistically, I only need 20pcs but for only an extra £1 I can get 50pcs.
    I looked at the datasheets compared to the ones on the WK-50 and the only real thing I noticed is that the SS8550 is "epitaxial" and that the values were negative:I did some looking into it and, from my understanding, I don't think that there would be any differences that should matter for this application. Hence I went back and the uni happened to have some 2N3906's that I proceeded to solder on:
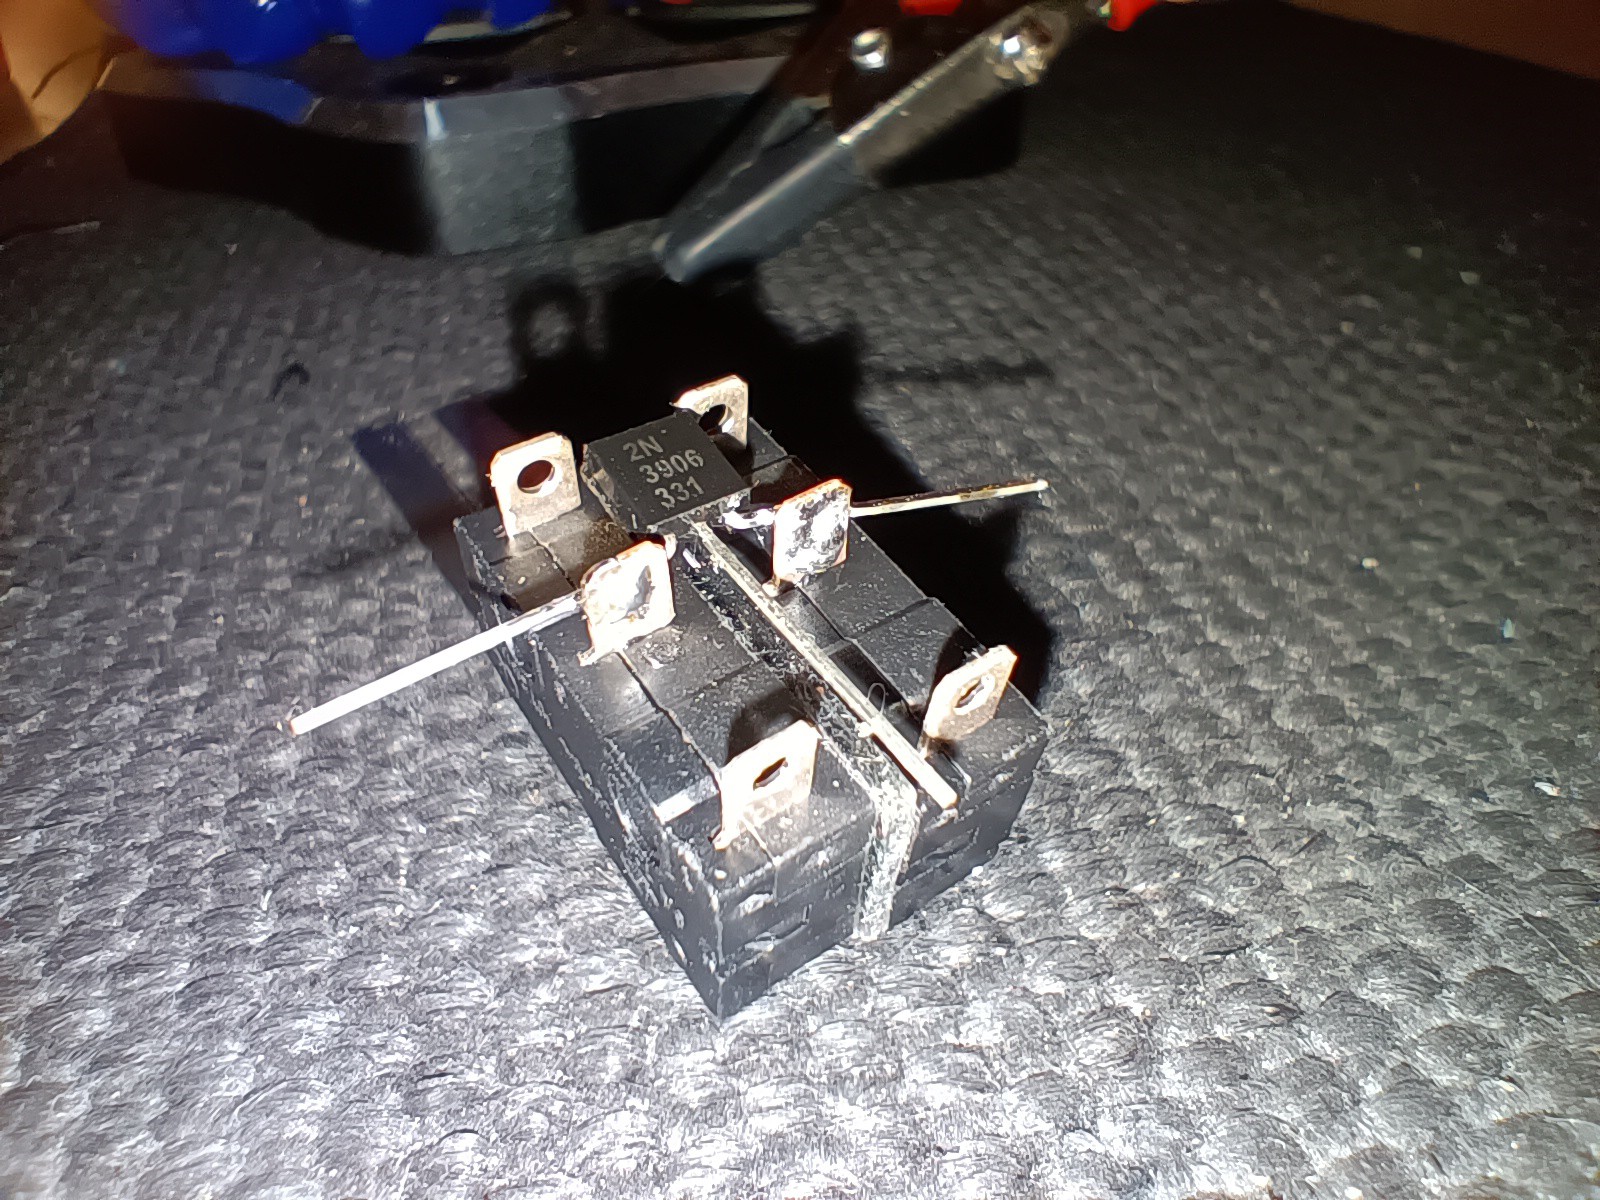
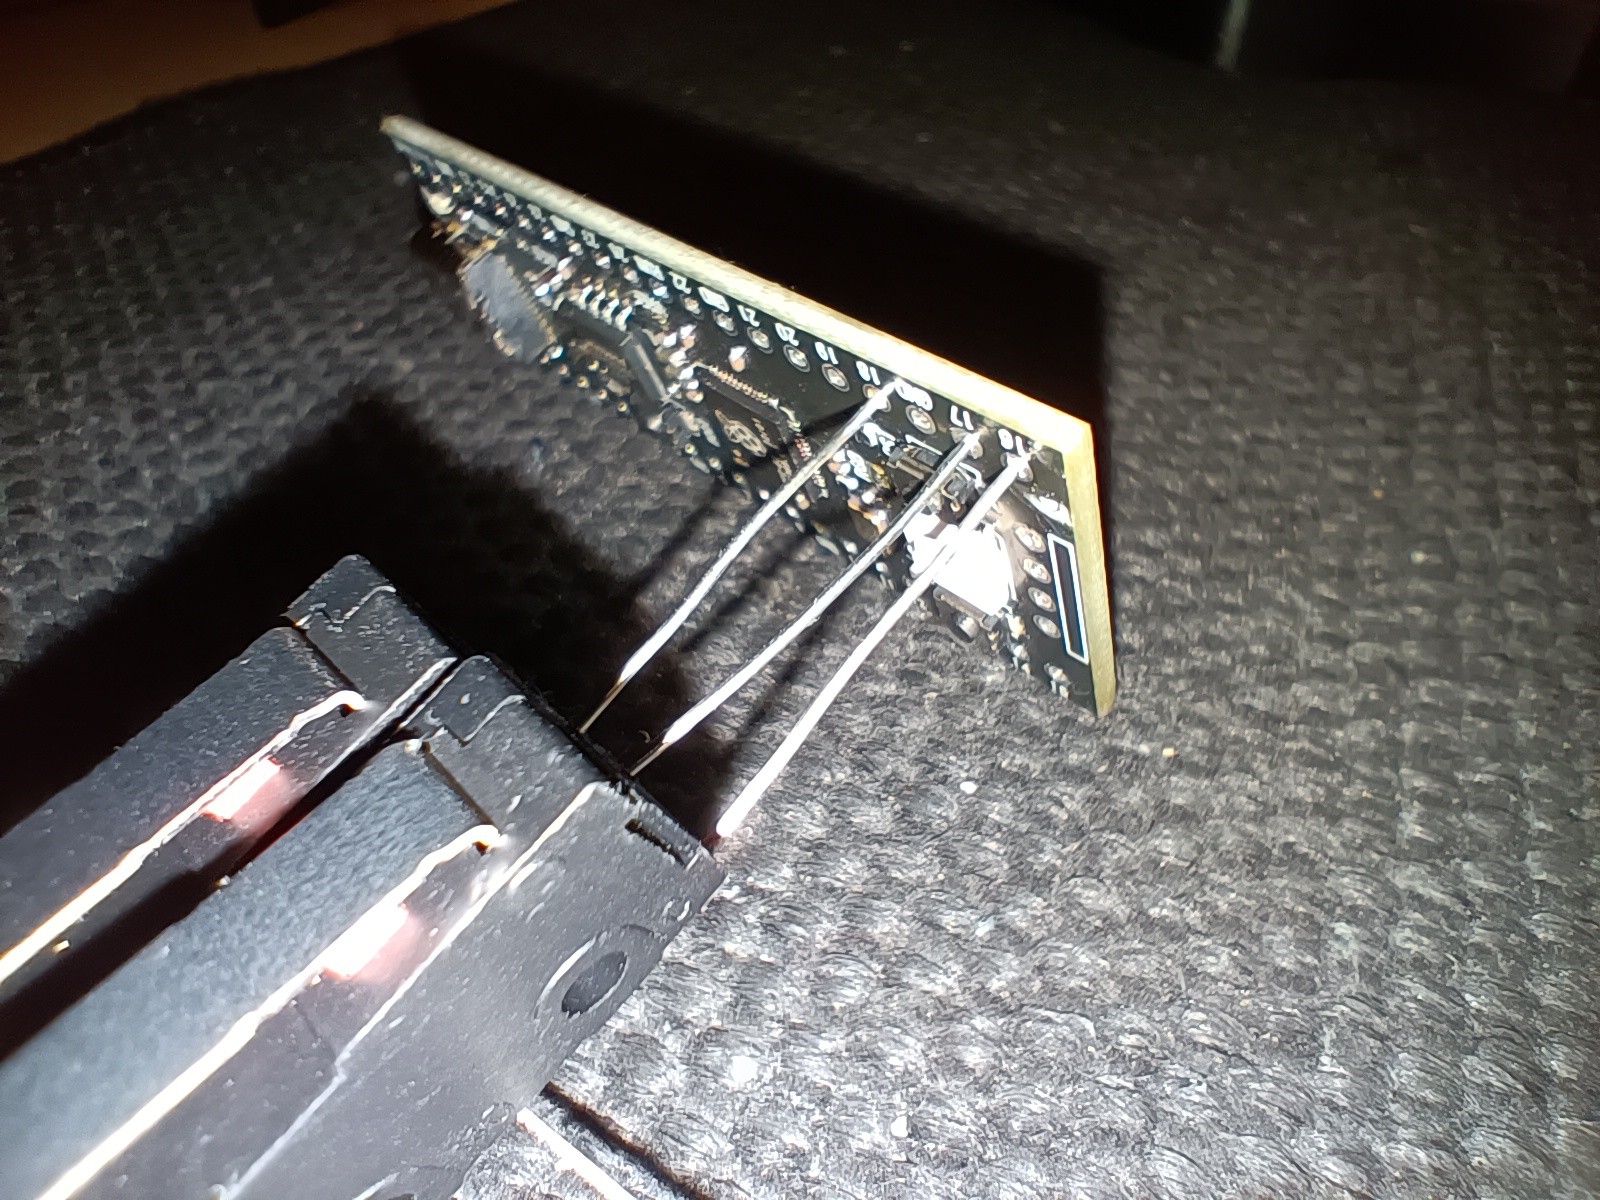
    For my First Attempt In Learning (FAIL) how to best solder the transistor on, I think it already looks rather good. Now I know:

    • not to try and solder with the iron on the opposite side, because the molten solder will be sucked in.
    • text facing up so that the pins are as far away from the switch enclosure as possible
    • orient like above so that the wiring can be 3 easy pins, as seen below.

    I decided to put them on this corner of the RP2040 board so that, if I couldn't easily desolder them, it wouldn't affect my plan of using the entire other side of pins for the matrix. There's 16 GPIOs on that side and the matrix for Tetizmol should only need 14.

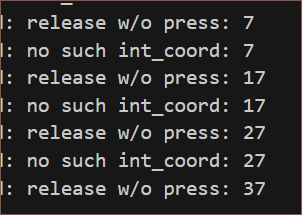
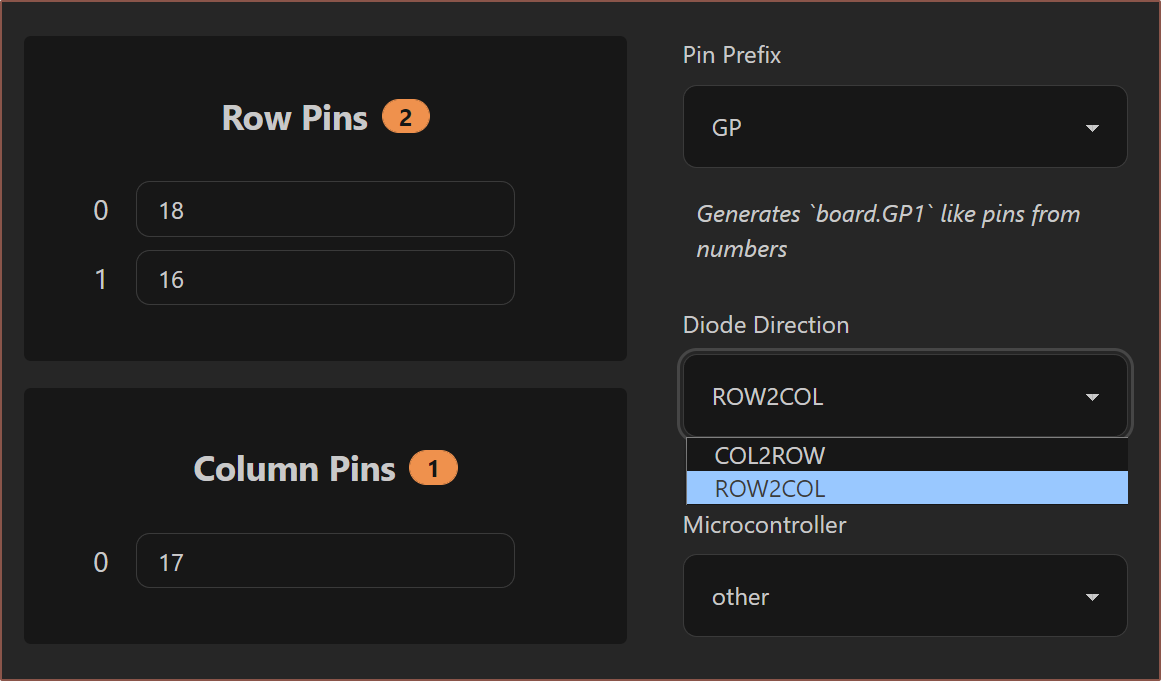
    I checked continuities and then I installed KMK/Pog and changed the diode direction to ROW2COL, since the "diodes" should be pointing towards the column, but I wasn't getting anything when pressing buttons but was when I manually shorted them, so I know my pins are correct:

    I also learned how to use the diode mode on my multimeter and I was getting .685 and .680 when the red lead was on pins 1 or 3 and black on pin 2, with 0L for anything else, so I know they're essentially acting like diodes. I did manage to get the neopixel working though by adding the neopixel.mpy into the lib folder and using GPIO23:

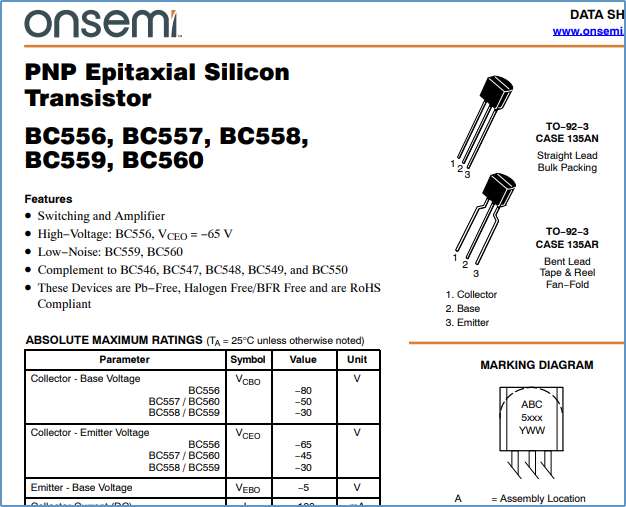
    So I slept on this and the next day I continued researching and went back to my uni and they happened to have a BC559C, which seems to be part of a range:
    At least the datasheet sounds like it's more similar to the S8550.

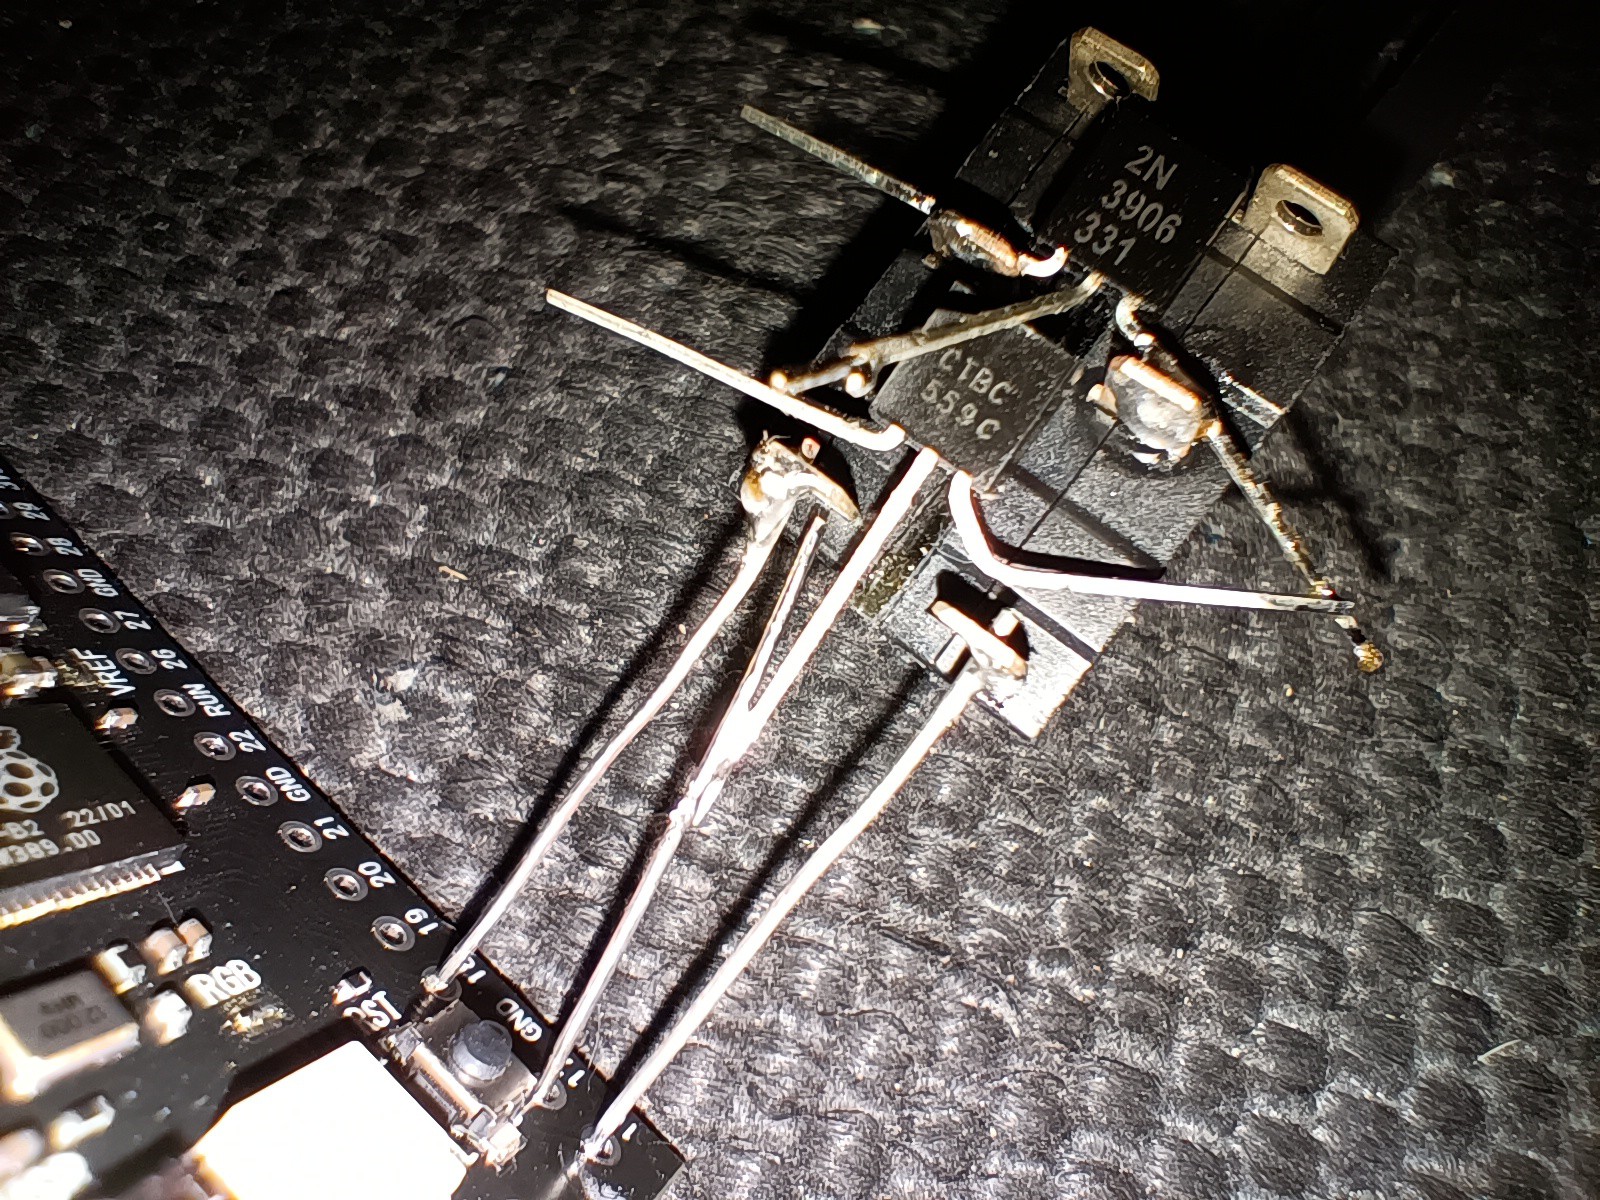
    So I tacked it on:

    I only wired a 1x1 matrix

    And the chordmap still didn't work. But now it also wasn't working for shorting pins so I closed Pog and decided to go into the serial port.

    I had a card up my sleeve. I had also asked for 2 diodes which obviously should work. Their voltage drops were .546 / .562V when I soldered them on:

    Can you see how much more work you'd have to do to use diodes instead of transistors?

    And as expected... wait, no! It's still not working!

    Opened Pog again to check settings, changed the diode orientation to COL2ROW and saved:

    So now I have a configuration I know works, so I desoldered the diodes and soldered the 3rd pin for the 2N3906:
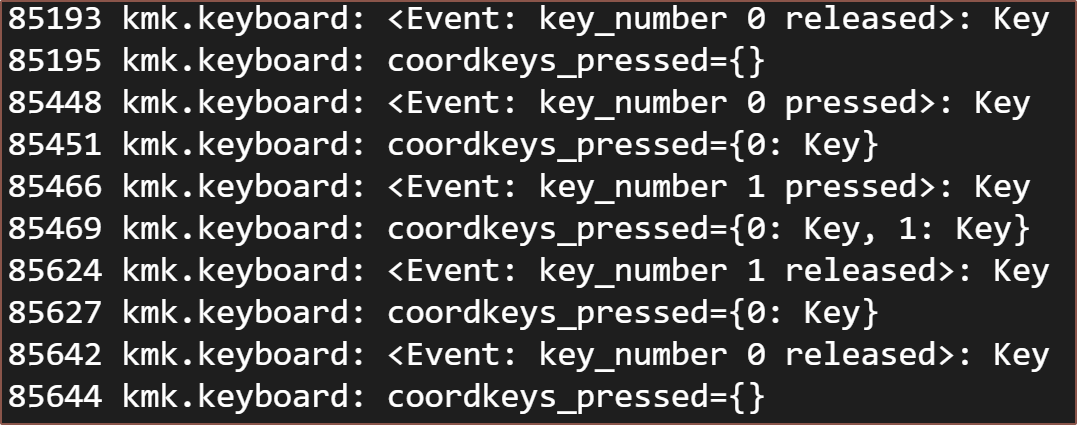
    So now it works???? 

    Not entirely sure what happened. The voltage drops are .687/.682 so it's not like the transistor has changed much. I can only assume that maybe Pog didn't save or maybe the chordmap finder isn't as reliable as I assumed for testing keys.

  • [P] Keycap test prints

    kelvinA12/10/2024 at 15:56 0 comments

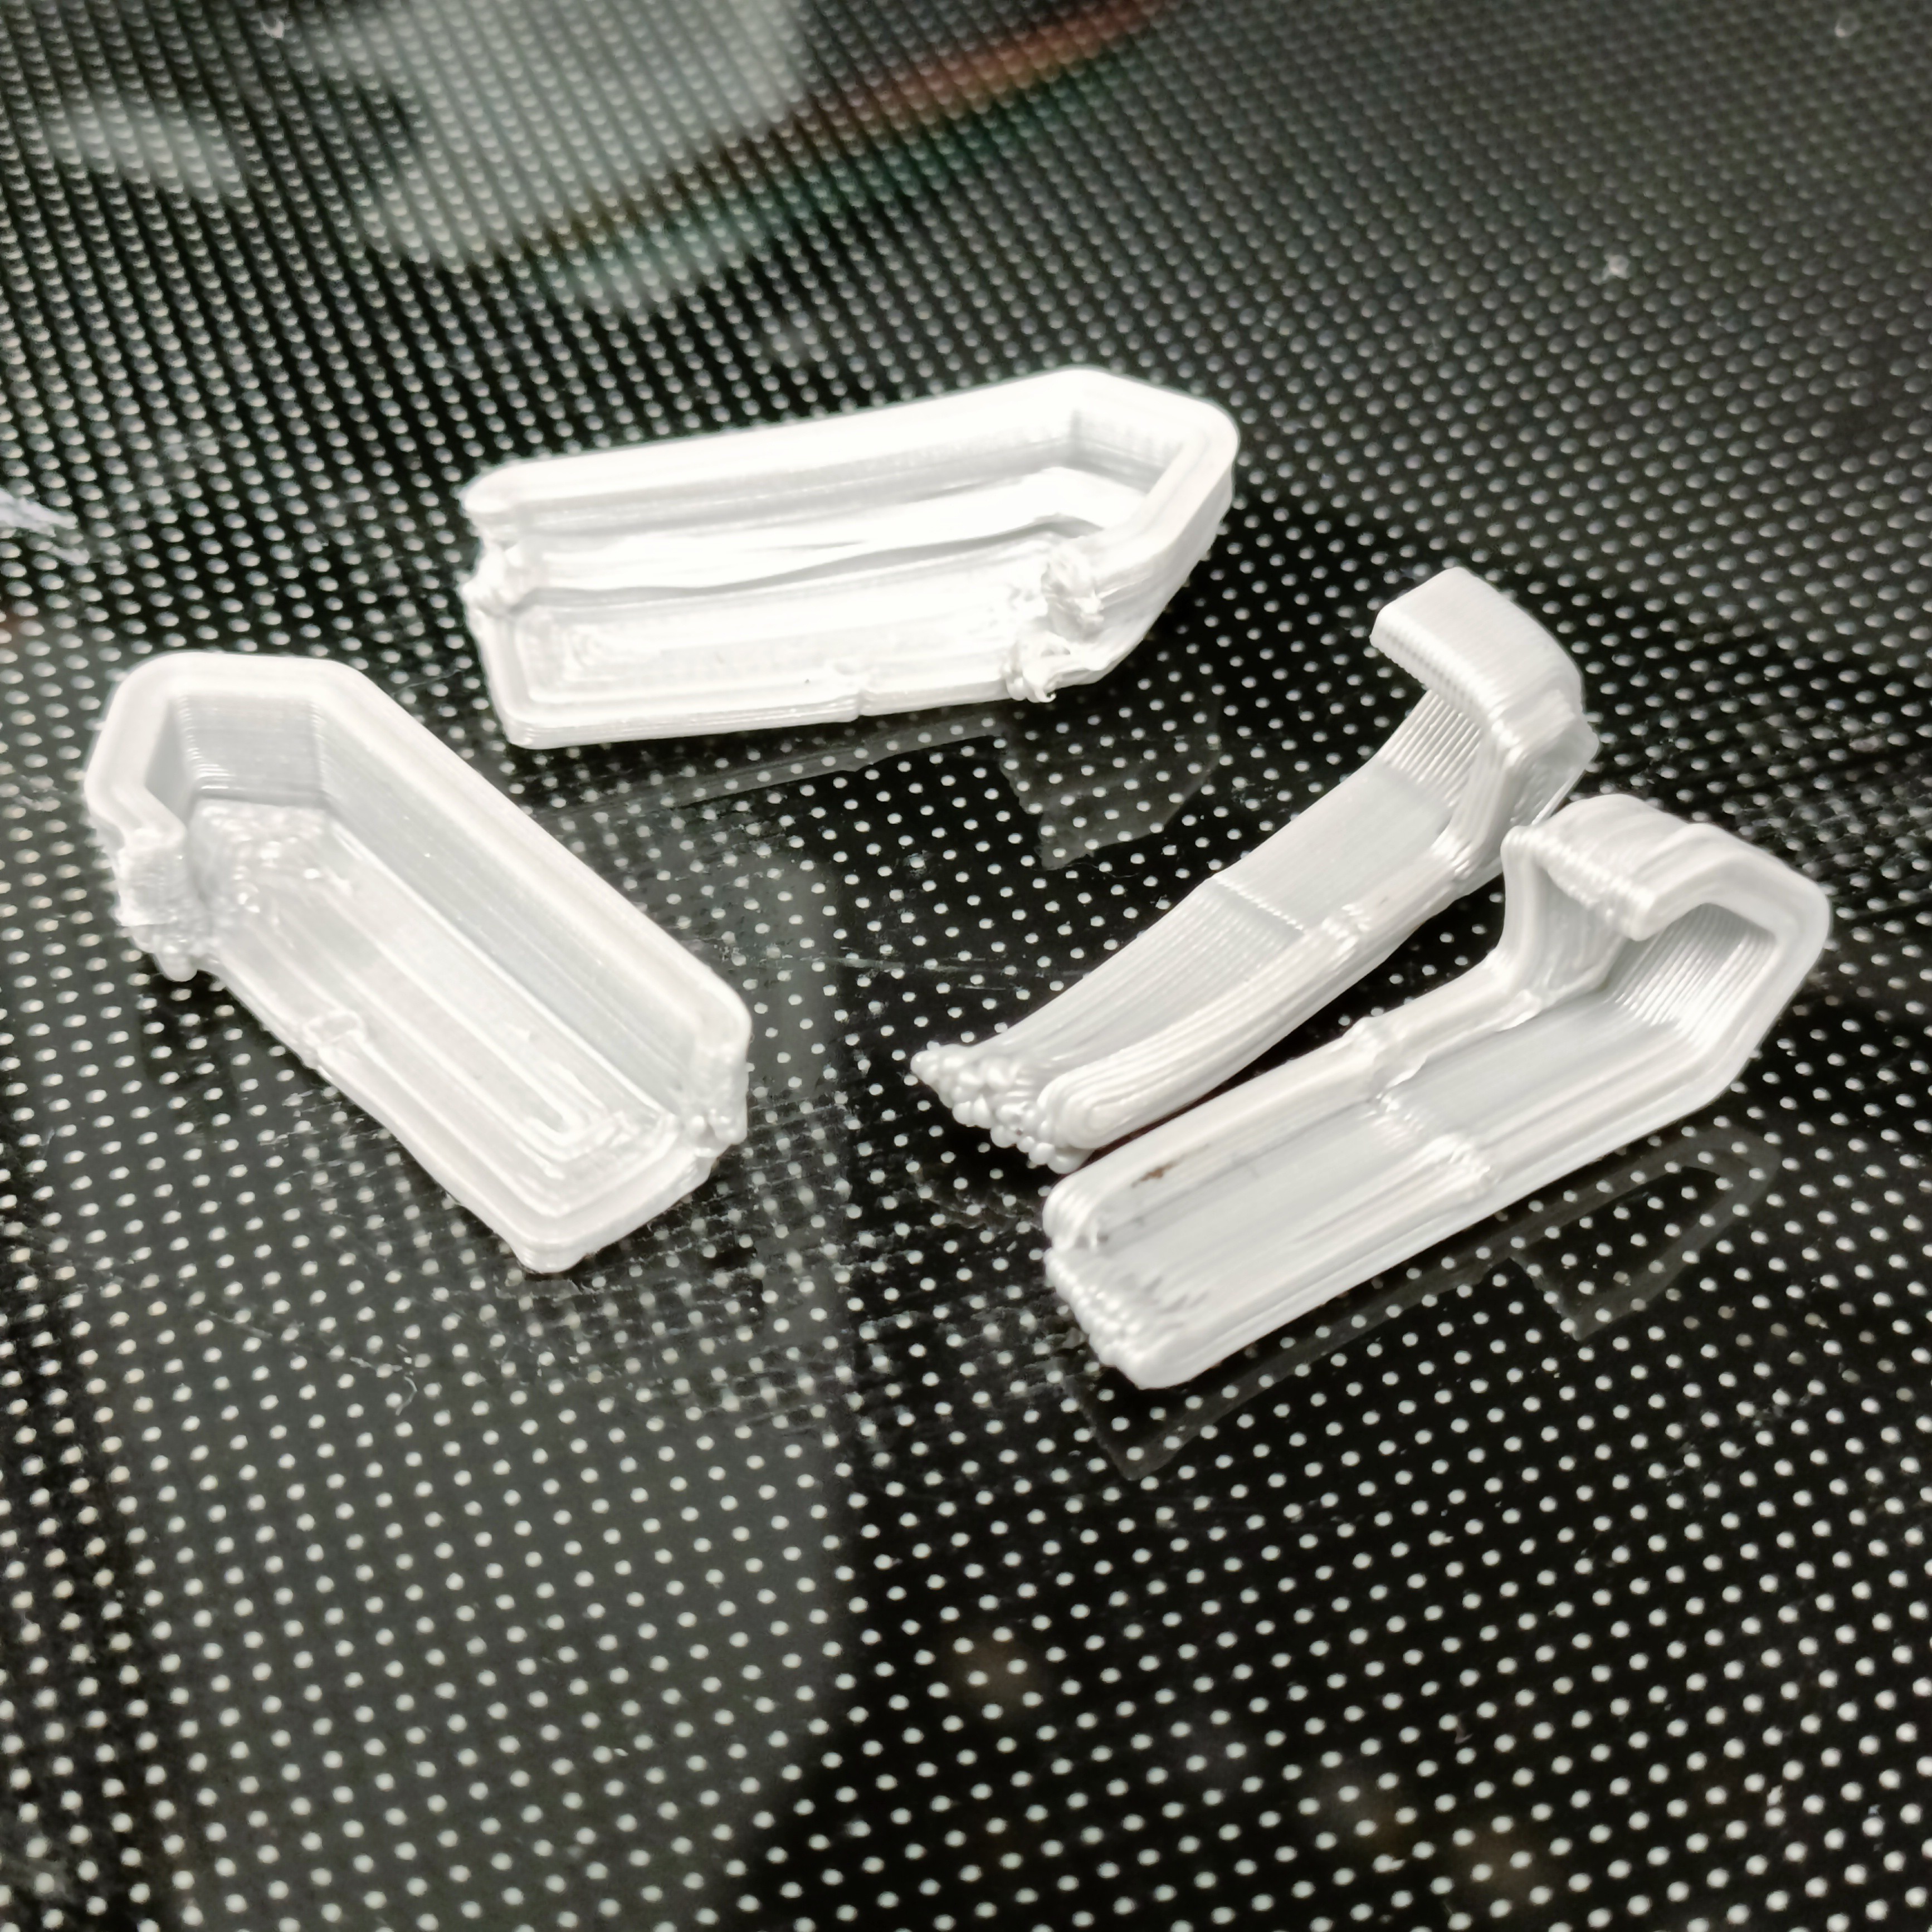
    I tried printing the keycaps as-is and a modification that has more surface area to see if they'd stick better. I think it's best to go with the original profile but use a raft. Due to the print orientation, they're somewhat grippy, which I believe is a positive as it should make it easier to press multiple keys with confidence.
  • [E1][M] Keycap

    kelvinA12/08/2024 at 17:19 0 comments

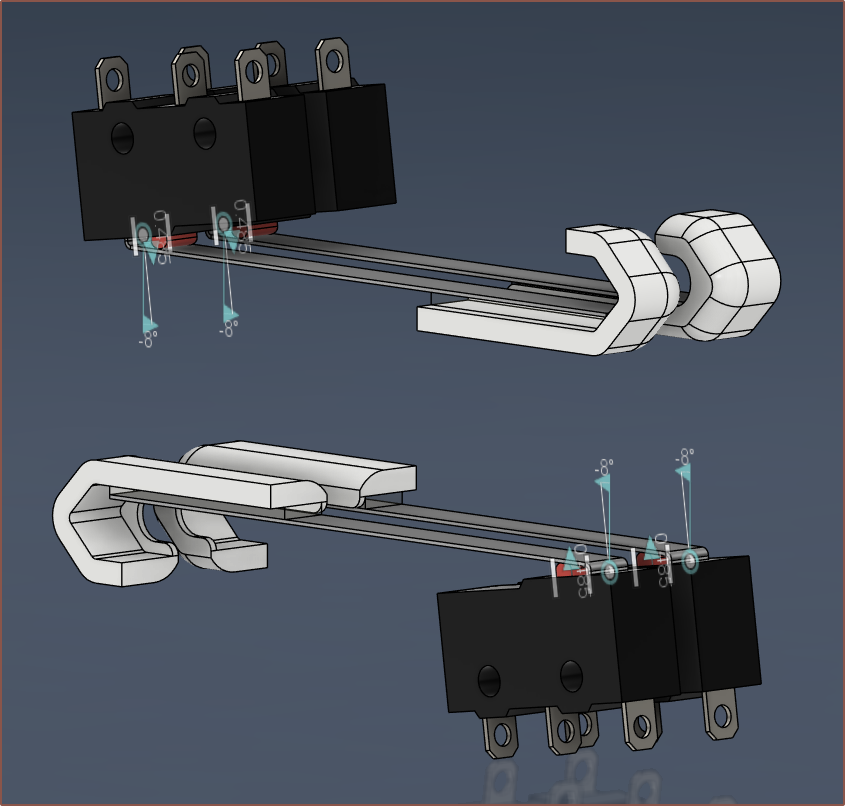
    To avoid the nail for the top switches whilst also avoiding the fingertip hitting the wrong end of the bottom switches, I've come up with this solution.
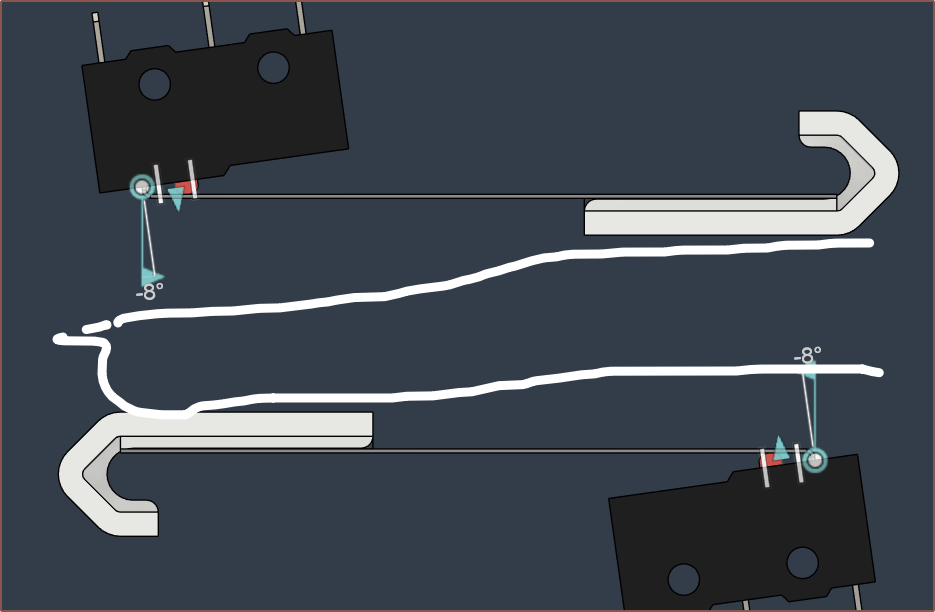
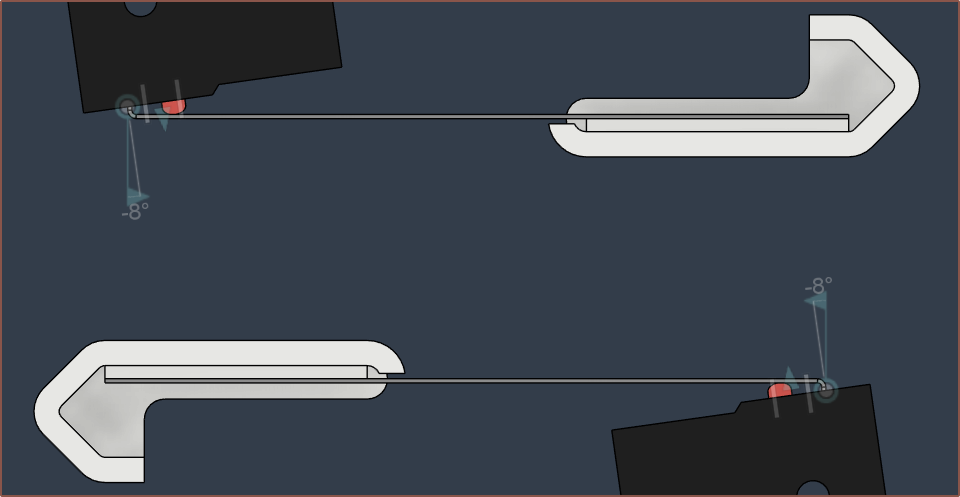
    Quick doodle of the finger in the well

    I've opted for a printed keycap that is stuck onto the lever with double-sided tape. The keycap hook will then catch on an overhang to prevent it springing back too far.

    I need to design some way of adjusting the gap between the switches. Ideally, this would be a tool-less solution (aka doesn't need a screwdriver / allen key).

    As I was writing this log after drawing the doodle, I noticed the sharp edges in the path of the finger, so I've tweaked the design a bit:

    [The Following Day]

    I just realised that the switches configured in this way allow both the bottom and top buttons to be pressed, allowing 3 more possible states. This increases the keymap space from 48 to 99. 

    The main necessity for this increase is for the modifiers (CTRL, ALT, WIN), but it also means that TeTwice would no longer need to place the following keys onto another layer:

    • FN 1 - 20
      • (Where FN20 will be the placeholder for FN0, which doesn't exist)
    • Arrow keys
    • Enter
    • Esc
    • Tab
    • Print Screen
    • Ins, Del, Home, End, PgUp, PgDown

    Just to make the modifier combos easier to remember, I'm going to allocate 10 spaces for them. Thus, the TeTwice layout is now 91 entries, which leaves some wriggle room to align groups of characters.

    It's starting to feel like I'm mining for copper and finding gold. Tetizmol is starting to approach my initial #Tetent [gd0090] concepts.

View all 13 project logs

Enjoy this project?

Share

Discussions

Morgan Venable wrote 11/28/2024 at 15:21 point

Fun hack!  The height seems like kind of a challenge, but I love anything that explores the frontier of what's possible with unusual finger and key configurations.  

Do you have any pics of how you envision this in use?  I've messed around with more N/S split key orientations on Svalboard prototypes, but haven't convinced myself of sufficient dexterity in the ring and pinkies especially -- the lateral movements on DH/Sval are not so difficult, as they're aided by wrist mobility and some specialized nuances of fit as well.

Anyway, super interested to see how this shapes up for you.  Nails are a challenge in so many different input contexts -- nails vs capacitive touch can be a real struggle!

  Are you sure? yes | no

kelvinA wrote 11/28/2024 at 15:46 point

"nails vs capacitive touch can be a real struggle" - Completely agree. I will say that I have tried conductive, thin finger sleeves for mobile gamers, upgrading the nail into a rather nice stylus. I'm waiting for a thin glove of the same material so it's faster to (un)equip.

My second log is going to be on how I envision using this with the chorded layout, but the general idea is a grip similar to a vertical mouse with 2 switches on the nail and fingerprint sides respectively. 

The microswitch lever length is mainly to reduce actuation forces to something manageable for chording, but I have seen some sub 30gf microswitches on Digikey.

  Are you sure? yes | no

Similar Projects

Does this project spark your interest?

Become a member to follow this project and never miss any updates