-
Playing with the I2C SAO Petal for Supercon 8
11/07/2024 at 23:55 • 0 commentsMy first tripup was that GPIO1 was not soldered on the badge, glad I caught it!
I also soldered an LED leg as a jumper for the programming pin on the SAO to be always connected to GPIO1.
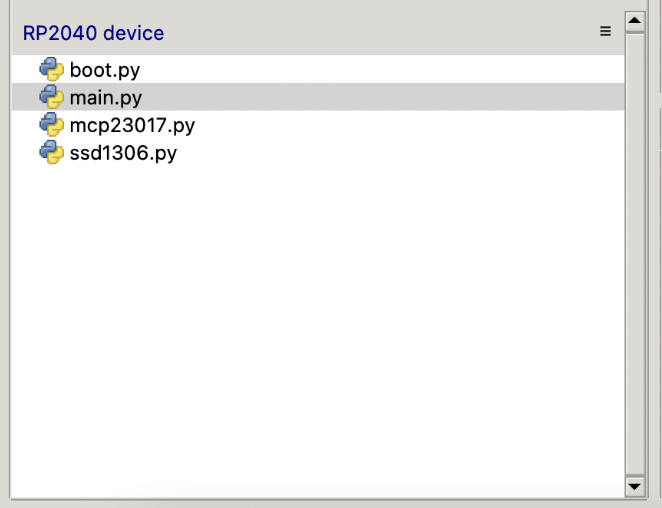
It seems like there's a little issue with the Supercon image and getting the programmer to run, but the programmer works with the vanilla RP2040 PICOW image. These are the files that are on the image to start with.

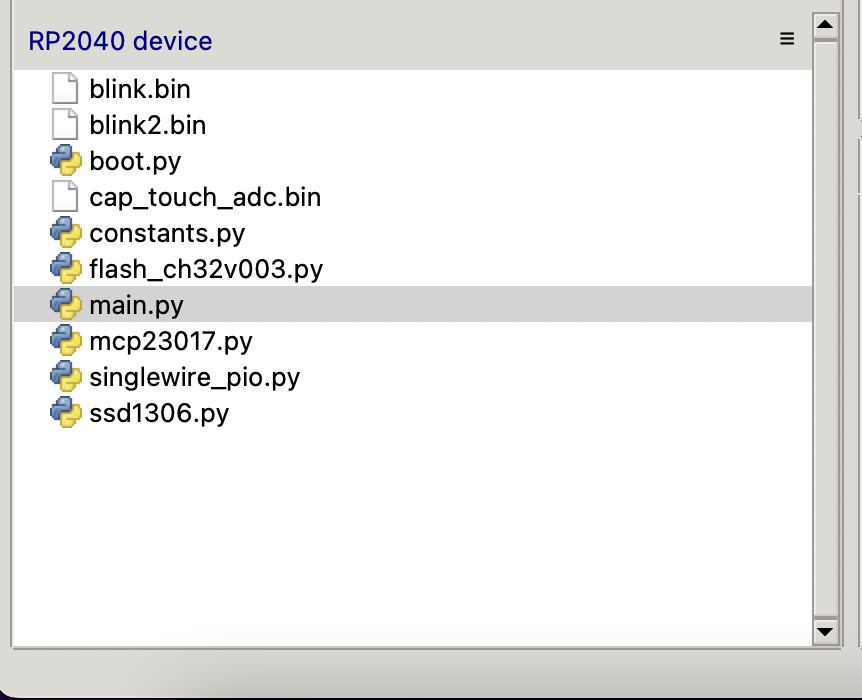
Followed by this file tree, when I upload the programmer onto the badge as well.

I create another file and copy in the example that is written in flash_ch32v003.py - note here that I have to comment out the "or" in between the example.
>>> %Run -c $EDITOR_CONTENT
Traceback (most recent call last):
  File "<stdin>", line 2, in <module>
  File "flash_ch32v003.py", line 35, in __init__
ValueError: StateMachine claimed by external resource
>>>
This is something that others have noticed before - by changing the used statemachine from 4 to 3, this error went away. When I run the program now, I get this output, but it is still blinking, instead of putting out touch values.
>>> %Run -c $EDITOR_CONTENT
Time spent: 545482
0x0 0x0
0x1 0x0
0x2 0x0
0x3 0x0
>>>
With the vanilla Micropython from https://micropython.org/download/RPI_PICO/ I also just copy the files onto the badge and run the code from REPL and it works. Therefore I doubt that it is a hardware issue and must have something to do with the supercon image.
It seems like just changing the state machine number in the "StateMachine" function is not enough, you also have to change the "unavoidable bit-twiddling" bit, If you want to use a statemachine smaller than zero, then you have to change the PI1_BASE value to PI0_BASE and add the correct state machine SM1_EXECCTRL. It seems like I2C on the PICO W leads to a different state machine being used, which then breaks the flasher.
Here's my pull request on github with the changes:
-
getting the pico usb host example compiled correctly
12/01/2022 at 19:51 • 2 commentsI couldn't find the picoprobe with openOCD until I flashed it with a pre compiled picoprobe.uf2 file instead of compiling it myself. If it works, it works - I guess.
found the related issue where I got the working picoprobe.uf2 got from: https://github.com/raspberrypi/openocd/issues/71
Basically pointing to this site where you can download the probe firmware:
So apparently there's a tinyusb bug that will break the usb hid example and throw something like this at you:assertion "ep->active" failed: file "~/Projects/pico/pico-sdk/lib/tinyusb/src/portable/raspberrypi/rp2040/hcd_rp2040.c", line 164, function: hw_trans_complete
This has something to do with the debug mode and you need a flag to run cmake first before compiling:
PICO_SDK_PATH=~/Projects/pico/pico-sdk cmake .. -DCMAKE_BUILD_TYPE=Release
make -j8
I have yet to find out what the difference between -j8 and -j4 means but hey, that up their worked.
link that helped: https://github.com/raspberrypi/pico-sdk/issues/649
video that helped:
-
Building openOCD for picoprobe on M1 mac
12/01/2022 at 12:35 • 0 commentsHad some trouble compiling the openOCD version for the picoprobe on the M1 macbook. This is based on a thread on github and the official guides, plus some blog posts that basically copied from each other.
https://github.com/raspberrypi/openocd/issues/7
#install additional brew libraries
brew install libtool automake texinfo wget gcc pkg-config libusb

# some path magic so compilers know where to look for stuff
export PATH="$(brew --prefix)/opt/texinfo/bin:$PATH"

# download openocd files with picoprobe branch
git clone https://github.com/raspberrypi/openocd.git \
  --branch picoprobe --depth=1

cd openocd
./bootstrap

# this enables the picoprobe and deactivates other modules that fail to compile otherwise
CAPSTONE_CFLAGS="-I$(brew --prefix)/include" \
  ./configure --prefix="$(brew --prefix)"  \
  --enable-picoprobe --disable-presto --disable-werror --disable-openjtag

make -j4

# this will probably overwrite your current installation
# and will break openjtag
make install

# optionally remove the installation folder
cd ~/git
rm -rf openocd
My Projects
Projects I Contribute To
My Hackerspaces
My Pages
Things I've Built
Tampermonkey scripts for hackaday.io
Some annoying things like the feedback button and design stuff. https://gist.github.com/davedarko/f6ef86c89c4d1df4cd36
Batman LED caps
Put a cap on a strawhat LED and you will get a small batman projector.
IKEA Expedit LED plug
Throw in some WS2812 LEDs and snap it on the crossings.
PiMac
3D printed case for the raspberry pi in a not so common but very known shape. Inspired by http://hackaday.com/2014/01/16/hackintosh-mac-pro-replica-using-a-trash-can/
Fubarino Contest: Game Boy Printer
A little library for the gameboy printer for an easy intergation into arduino sketches. Cross the serial streams (watchout Egon) on startup, it will print the had url. http://hackaday.com/2013/12/17/fubarino-contest-game-boy-printer/
Projects I Like & Follow
Share this profile
ShareBits
Become a Hackaday.io Member
Create an account to leave a comment. Already have an account? Log In.
Hey Dave :-)
Thanks for the skull and follow #Jacking Ampy, I hope its useful.
Hey Dave, thanks for another follow and skull #DECAL. This one's for the comp, and if DD likes it... :-D
Again, thanks for the follow! I'm planning a revision to the #Open Source IOT Platform, good time for suggestions.
Hey Dave, thanks for another $kull and follow, nice. #Origaime (Cardware-bis)
Sorry If I took a while to get back to you buddy. Wish you guys would keep still lol, you're getting hard to count. ;-p
Thanks for the Skull on #ULTiM8x8 , Dave! Please help spread the word.
Good evening Dave and thanks for following and liking my new IO project page :-)
definitely one of the "higher purpose" projects :) my #WIFI Game Boy Cartridge is just recycling and IoT stuff...
Thanks. I would like to think of it as useful AND fun. :P . Not as fun as a game boy... but fun building.
I was checking out the competition for my #WIFI Game Boy Cartridge and saw the boards you're using - did you design them?
You talk about input and relays boards ? these are old industrials boards from trash. Manufactured 20 years ago !
Thank you for liking my #LiFePO4wered/Pi+, #LiFePO4wered/Solar1 and #PTSprinkler projects!
Hey Dave, Cheers for following #Bendertech :-)
This calls for a party, baby. I'm ordering a hundred kegs, a hundred hookers, and a hundred Elvis impersonators who aren't above a little hooking, should the occasion arise.
Hey man - wow what a profile! Everything looks fantastic! Gonna enjoy checking out all these projects!
hehe, hey there :) thank you very much, feel free to leave some comments, some of those projects are on hold at the moment, I'm focusing on the Game Boy Cartridge project(s)
Hey, BTW: Do you remember who wanted to charge cells (?) in parallel and discharge in series or something?
Best regards, Stefan
*hust* I believe I do, can't find the project though - the caps never came and I got distracted multiple times ;)
Ah hah! We're on a new page of comments!
Thanks for the latest 'like'!
Hey, thanks for the like ("Norman, Coordinate").
I just now finished the instructions - there's a lot more there now than when you first looked.
Hey Dave. Thanks for the skull on Cardware, been so busy building and everything I hadnt got to everyone. :-)
Hey Dave. Thanks for the immediate follow on #Cardware. If you're interested drop me or Mark a line. This is for everyone, contributions are welcome. :-)


 davedarko
 Arya
Arya Tindie
 Aleksandar Bradic
 Ivan Lazarevic
 alpha_ninja

 Nicholas LaBonte
 Andrew Tudoroi
 alcor6502
 Sergey
 jackw01
 likeablob
 Steve Hernandez
 Jeremy
 Arnov Sharma
 jfries
 Kyle
Kyle Daniel
 Supplyframe DesignLab


Glad you like the #Robo-Dog . Thanks for the like & follow