Ken Yap
-
Blinky in Rust on AVR MCUs
08/06/2026 at 13:04 • 0 comments![]()
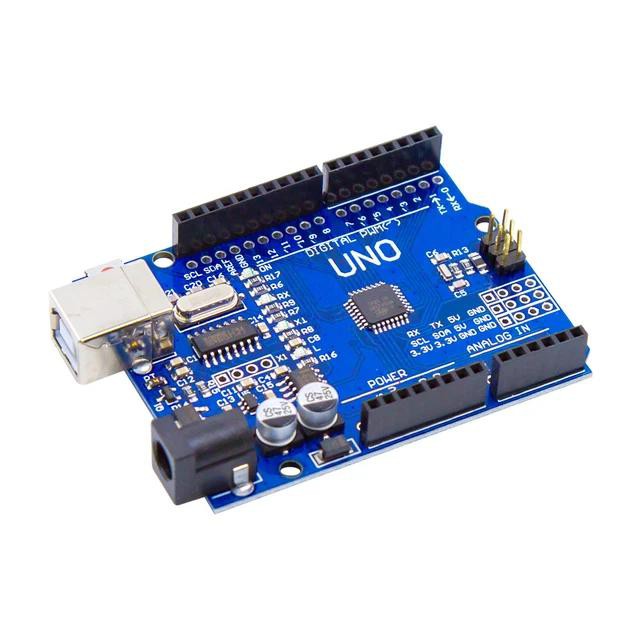
Just for kicks I decided to see if I could run blinky written in Rust on an Arduino, even though this is a digression from the main goal of this project. The Arduino model I have is a clone of the common UNO which has the ATMega328p MCU.
I found this guide which outlines the steps. From there I followed the link to the Github repo for avr-hal-template.
First of all, Rust on AVR chips doesn't use the LLVM compiler for the linking, but rather the gcc compiler. So you need to have this installed separately. If you have installed the Arduino IDE, then you already have it, but you have to make the commands avr-gcc and friends available from the command line. What I did was make symbolic links from /usr/local/bin to the actual executables.
$ ln -s -t /usr/local/bin ~/.arduino15/packages/arduino/tools/avr-gcc/7.3.0-atmel3.6.1-arduino7/bin/*The version of the avr-gcc package may differ, double check.
The other thing you need to do is install the nightly Rust toolchain. This will be taken care of in a step further down.
Now install two auxiliary tools like this:
$ cargo install cargo-generate
$ cargo install ravedude
Ravedude is a front-end to avrdude, which must also be on your $PATH. Now run:
$ cargo generate --git https://github.com/Rahix/avr-hal-template.gitThis will prompt you for the project name, and the type of Arduino you have and generate the standard Cargo project structure..
I had to make a couple of changes: In rust-toolchain.toml I changed the channel from nightly-2025-04-27 to just nightly. I also added port = "/dev/ttyUSB0" in the [general] section because autodetect didn't work.
Now you can do:
$ cargo buildIf you didn't have the nightly toolchain already installed, then a lot of downloading will happen. After that many crates will be downloaded and compiled, then linked with the blinky in src/main.rs.
Note that the sample blinky doesn't use the Embassy framework. So this is the blocking version, which looks like this:
#![no_std]
#![no_main]

use panic_halt as _;

#[arduino_hal::entry]
fn main() -> ! {
    let dp = arduino_hal::Peripherals::take().unwrap();
    let pins = arduino_hal::pins!(dp);

    /*
     * For examples (and inspiration), head to
     *
     *     https://github.com/Rahix/avr-hal/tree/main/examples
     *
     * NOTE: Not all examples were ported to all boards!  There is a good chance though, that code
     * for a different board can be adapted for yours.  The Arduino Uno currently has the most
     * examples available.
     */

    let mut led = pins.d13.into_output();

    loop {
        led.toggle();
        arduino_hal::delay_ms(500);
    }
}
I made one change, from 1000 ms to 500 ms. Otherwise it's a ½ Hz blinky, not a 1 Hz blinky. Now you can run the blinky:
$ cargo run
   Compiling avr-rust-blinky v0.1.0 (/home/ken/play/uC/avr/project/avr-rust-blinky)
    Finished `dev` profile [optimized + debuginfo] target(s) in 0.32s
     Running `ravedude target/avr-none/debug/avr-rust-blinky.elf`
       Board Arduino Uno
 Programming target/avr-none/debug/avr-rust-blinky.elf => /dev/ttyUSB0
Reading 262 bytes for flash from input file avr-rust-blinky.elf
Writing 262 bytes to flash
Writing | ################################################## | 100% 0.08 s
Reading | ################################################## | 100% 0.05 s
262 bytes of flash verified

Avrdude done.  Thank you.
  Programmed target/avr-none/debug/avr-rust-blinky.elf
     Console /dev/ttyUSB0 at 57600 baud
             CTRL+C to exit.
As you can see, the size of the executable isn't large at all, so there is very little overhead in this case.
-
What the bl**k have I learnt?
08/05/2026 at 11:28 • 0 comments![]()
Ferris the Rustacean
So what the bl**k have I learnt from implementing the Hello World app of the embedded world using Rust/Embassy on various MCU platforms? Here's list of what I can remember 😉:
- The Instruction Set Architecture (ISA) doesn't come into it at all. Rust is a high level language and as long as the target processor is decent, it can be available. In practice this means at least 32-bit wide, and sufficient registers, then LLVM can handle it, though some exceptions like AVR exist.
- Maturity of the implementation depends on available information and/or processor maker sponsorship. The RPi Pico, STM32 series, and Espressif MCUs are well supported. Support for the WCH32 series depends on hacker contributions.
- The implementations differ in their support for peripherals. Basic peripherals like GPIO, I2C, etc. are not an issue. But if you want to use say BLE, WiFi, etc. check that Embassy crates exist for them.
- Development status is fluid and documents on the Net can go out of date quickly so be prepared to question what you read. However you can pin your project to particular versions of the toolchain and crates.
- Rustup and Cargo are the fundamental tools for managing toolchains and projects from the CLI. GUIs exist, but I haven't explored those.
- The Embassy framework implements efficient embedded multitasking.
- You will need more code memory because the language is rich, but remember that implementing those features in another language will also cost code memory. In any case even entry level MCUs with adequate specs are cheap now.
- Probe-rs is a great tool for flashing and debugging and can be used for non-Rust projects too so if you can only take away one thing, let this be it.
-
Getting blinky working on the CH32VF003F4P6
08/05/2026 at 00:08 • 0 comments![]()
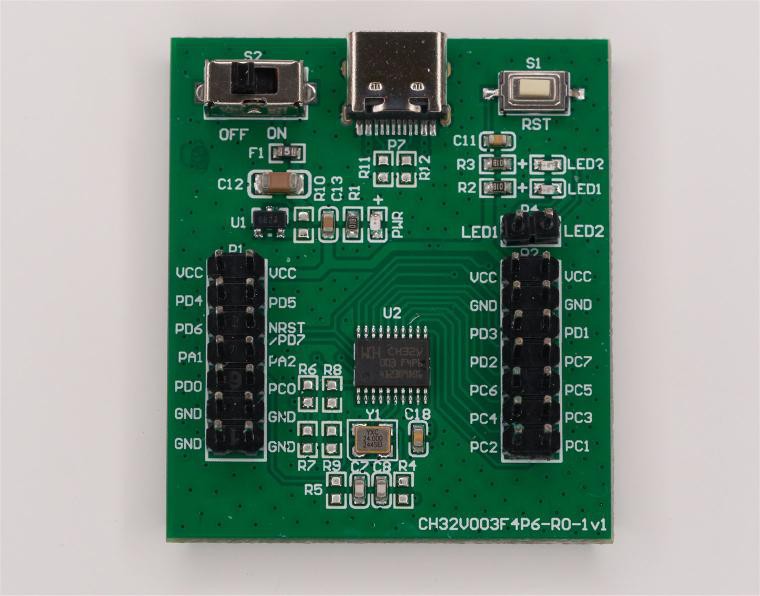
So now it's time to try to get a Rust/Embassy blinky working on my target MCU. This is the evaluation board I got just over 2 years ago, together with a WCH-LinkE flashing dongle. I got a C blinky working on that easily and then put it aside until I got a round tuit.
Searching reveals that there is a Rust/Embassy HAL for the WCH32 line of MCUs and it's a work in progress. Like the STM32 HAL, it caters to a wide range of MCU models by the use of a metapac, which is a database of MCUs and their characteristics. So I cloned the git repo and started looking through the examples, which are arranged by MCU model. The ones I want are under examples/ch32v003. There is a prototype cargo project there with the usual Cargo.toml which specifies the dependencies and build.rs which generates the build script. The src/ directory has a subdirectory called bin/ where all the example Rust apps are found. (This is an alternate structure for cargo projects, instead of a single src/main.rs, there is src/bin/ containing multiple apps to build.) In there I find src/bin/embassy_blinky,rs. So I copy Cargo.toml, build.rs, the hidden file .cargo/config.toml, and embassy_blinky.rs to a new project of mine, created by:
$ cargo new ch32v003-rust-blinkyWhat is the target tuple for this MCU though? The ESP32C3 was a riscv32imc-unknown-none. There is a file called riscv32ec-unknown-none-elf.json in the example project. What does it do? So the CH32V003 has a riscv32ec ISA? I try:
$ rustup target listbut this target doesn't exist. I try various cargo invocations using the JSON file, including the -Z flag but nothing works. What's going on?
At this point I found another useful resource, Getting Started with CH32V003 Firmware in Rust. In it I discover ch32-hal needs to be built with a nightly release of the toolchain because riscv32ec is not an accepted ISA yet. So a JSON file specifies the ISA characteristics and this feature exists only in the nightly toolchains.
$ rustup install nightly
$ rustup override set nightly
override changes the toolchain just for this project. .cargo/config.toml clarifies a few things:
[build]
target = "riscv32ec-unknown-none-elf.json"

[target.'cfg(all(target_arch = "riscv32", target_os = "none"))']
# runner = "riscv64-unknown-elf-gdb -q -x openocd.gdb"
# runner = "riscv-none-embed-gdb -q -x openocd.gdb"
# runner = "gdb -q -x openocd.gdb"
# runner = "wlink -v flash --enable-sdi-print --watch-serial"

# Flash and debug chip with probe-rs. https://probe.rs/
runner = "probe-rs run --chip ch32v003"

[unstable]
build-std = ["core"]
# build-std = ["core", "compiler_builtins"]
# build-std-features = ["compiler-builtins-mem"]
json-target-spec = true

[target.riscv32ec-unknown-none-elf]
#rustflags = [ "-C", "-Tlink.x" ]
At this point I run into a few glitches, not very enlightening, so what you see is the final config I ended up with. I tried enabling rustflags, but it turns out it's correct to leave it out, as the llvm-lld linker gets the option -Tlink.x elsewhere and specifying this option more than once causes an error. The other change I made is to use probe-rs as the flashing program. wlink does work but probe-rs is better. It's a very useful Swiss Army Knife for flashing that can be used even for non-Rust projects, as it knows a lot of flashing methods.
Now I try to build the blinky which looks like this:
#![no_std]
#![no_main]

use ch32_hal as hal;
use hal::Peri;
use embassy_executor::Spawner;
use embassy_time::Timer;
use hal::gpio::{AnyPin, Level, Output};
use hal::println;

#[embassy_executor::task(pool_size = 2)]
async fn blink(pin: Peri<'static, AnyPin>, interval_ms: u64) {
    let mut led = Output::new(pin, Level::Low, Default::default());

    loop {
        led.set_high();
        Timer::after_millis(interval_ms).await;
        led.set_low();
        Timer::after_millis(interval_ms).await;
    }
}

#[embassy_executor::main(entry = "qingke_rt::entry")]
async fn main(spawner: Spawner) -> ! {
    hal::debug::SDIPrint::enable();
    let mut config = hal::Config::default();
    config.rcc = hal::rcc::Config::SYSCLK_FREQ_48MHZ_HSI;
    let p = hal::init(config);

    println!("CHIP signature => {}", hal::signature::chip_id().name());
    println!("Clocks {:?}", hal::rcc::clocks());

    // let mut led = Output::new(p.PC4, Level::Low, Default::default());

    spawner.spawn(blink(p.PD6.into(), 110).unwrap());
    spawner.spawn(blink(p.PA2.into(), 270).unwrap());

    loop {
        Timer::after_millis(1000).await;
        println!("tick");
    }
}

#[panic_handler]
fn panic(info: &core::panic::PanicInfo) -> ! {
    let _ = hal::println!("\n\n\n{}", info);

    loop {}
}
When I tried to build this it couldn't find ch32-hal as it isn't a registered crate yet. It turns out that you can specify its location with the dependency option git= to specify the git repo, or the option path= to a local copy. I point it to my clone of the ch32-hal repo with:
...
[dependencies]
ch32-hal = { path = "../ch32-hal", features = [
    "ch32v003f4p6",
    "memory-x",
    "embassy",
    "time-driver-tim2",
    "rt",
] }
...
When I try to build this with cargo build, it tells me it won't fit in the 16 kB flash of the MCU. Is this MCU too small to handle Rust/Embassy? Damn, do I have to go back to C/C++?
I try various options to reduce the binary size. One that worked was to build for release rather than debug. But that still only leaves a tiny amount of flash space and I'll need the space for app features. Then, remembering that formatted output is a memory hog, I remove the println statements from the code. At the same time I simplify the code to be comparable to the other blinkies. The one above runs 3 tasks: 2 LED blink tasks and one wait task. This is the final code:
#![no_std]
#![no_main]

use ch32_hal as hal;
use embassy_executor::Spawner;
use embassy_time::{Duration,Timer};
use hal::gpio::{Level, Output};

#[panic_handler]
fn panic(_info: &core::panic::PanicInfo) -> ! {
    loop {}
}

#[embassy_executor::main(entry = "qingke_rt::entry")]
async fn main(_spawner: Spawner) -> ! {
    let mut config = hal::Config::default();
    config.rcc = hal::rcc::Config::SYSCLK_FREQ_48MHZ_HSI;
    let p = hal::init(config);

    let mut led = Output::new(p.PD0, Level::Low, Default::default());

    loop {
        led.set_high();
        Timer::after(Duration::from_millis(500)).await;
        led.set_low();
        Timer::after(Duration::from_millis(500)).await;
    }
}
$ cargo run Finished `dev` profile [optimized + debuginfo] target(s) in 0.08s Running `probe-rs run --chip ch32v003 target/riscv32ec-unknown-none-elf/debug/ch32v003-rust-blinky` Erasing ✔ 100% [####################] 4.00 KiB @ 9.80 KiB/s (took 0s) Finished in 2.36sI connected up the PD0 pin to one of the LED pins on the evaluation board, and the blue LED flashes, as expected.
How big is the binary?
$ cargo size
   text    data     bss     dec     hex filename
   3642      32     344    4018     fb2 target/riscv32ec-unknown-none-elf/debug/ch32v003-rust-blinky
Much better. This gives me over 10 kB for more application code. Incidentally I also had to do a rustup component add llvm-tools to be able to do a cargo size, as this is a nightly toolchain, different from the stable toolchain the other MCU blinkies used.
Great, now I know that I can develop with Rust/Embassy for the tiny board shown in this project's header.
-
Finally getting RISC-V blinky working
08/03/2026 at 11:18 • 0 comments![]()
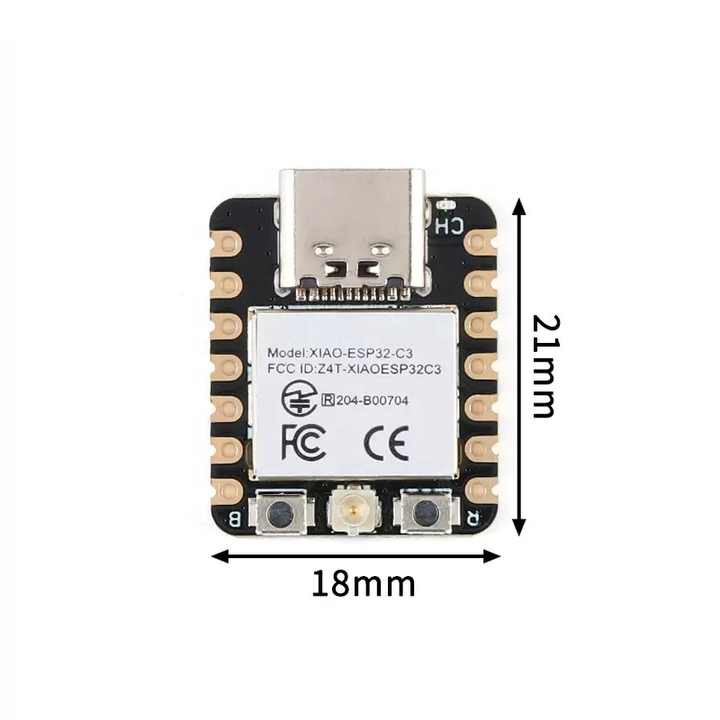
The Seeed Xiao ESP32C3 packs an incredible amount of features on a tiny board. The SOC MCU is an Espressif ESP32C3 running at up to 160 MHz. It comes with 400 kB SRAM and 4 MB flash, plus 2.4 GHz WiFi and BLE 5.0 Bluetooth. I got mine cheap when Seeed was promoting them. So why not try to get this working with Rust/Embassy and get one step closer to being able to build embedded apps for the tiny RISC-V MCU board in the cover picture?
Are you tired of blinky yet? I'm not. Blinky is not the point. If I wanted to flash an LED at 1 Hz, I could do it with any MCU, or even a 555 chip. The goal of all these blinky exercises is to work out how to use the Rust/Embassy toolchains to write async embedded apps.
I thought I had found a good tutorial at https://shanesnover.com/2025/01/28/bootstrap-embassy-esp32c3.html. But on trying out the steps and updating the versions of the crates used, it turns out it's out of date, and it's less than 2 years old. For one thing esp-hal-embassy is no longer maintained. Right at the top of the crate page it says:
🚧 This crate is no longer maintained 🚧

This crates functionality has been merged into esp-rtos, where further development will occur.
So I browse the esp-rtos crate which is maintained by Espressif. From there I find that Espressif has a book on programming with Rust on ESP products. So they are supporting Rust on their products. Under toolchain installation I find that I have to do:
$ rustup target add riscv32imc-unknown-none-elffor the C3. Under tooling installation I find that I have to do:
$ cargo install esp-generate --locked
$ cargo install espflash --locked
to install 2 auxiliary tools. Great, that should save me a lot of work. So I do:
$ esp-generate --chip=esp32c3 esp32c3-rust-blinky
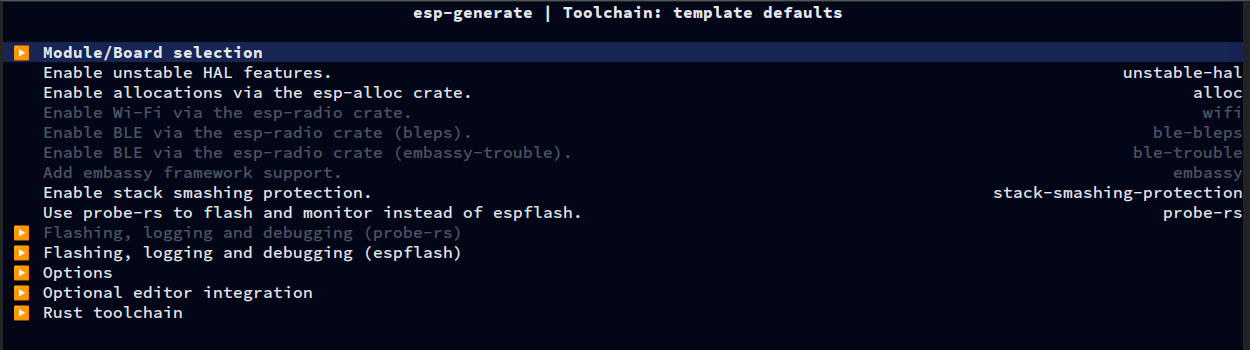
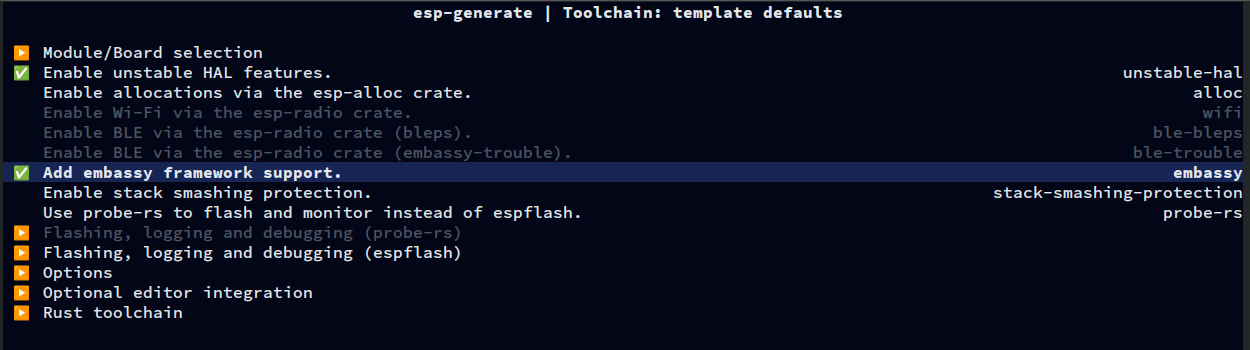
This brings up a ncurses configuration screen:
![]()
I save the setup with s, and it creates my project crate. Looking at src/bin/main.rs, I see:
#![no_std]
#![no_main]
#![deny(
    clippy::mem_forget,
    reason = "mem::forget is generally not safe to do with esp_hal types, especially those \
    holding buffers for the duration of a data transfer."
)]
#![deny(clippy::large_stack_frames)]

use esp_hal::clock::CpuClock;
use esp_hal::main;
use esp_hal::time::{Duration, Instant};

#[panic_handler]
fn panic(_: &core::panic::PanicInfo) -> ! {
    loop {}
}

// This creates a default app-descriptor required by the esp-idf bootloader.
// For more information see:
esp_bootloader_esp_idf::esp_app_desc!();

#[allow(
    clippy::large_stack_frames,
    reason = "it's not unusual to allocate larger buffers etc. in main"
)]
#[main]
fn main() -> ! {
    // generator version: 1.3.0
    // generator parameters: --chip esp32c3

    let config = esp_hal::Config::default().with_cpu_clock(CpuClock::max());
    let _peripherals = esp_hal::init(config);

    loop {
        let delay_start = Instant::now();
        while delay_start.elapsed() < Duration::from_millis(500) {}
    }

    // for inspiration have a look at the examples at https://github.com/esp-rs/esp-hal/tree/esp-hal-v1.1.0/examples
}
Ah no, this is not an async app. The MCU keeps polling the timer until 500 ms have elapsed. Looking again at the configuration screen, I should Add Embassy framework support. For that to be possible, I have to Enable unstable HAL features. Live dangerously I say. So the configuration screen is this:
![]()
Another esp-generate run and I get this for src/bin/main.rs:
#![no_std]
#![no_main]
#![deny(
    clippy::mem_forget,
    reason = "mem::forget is generally not safe to do with esp_hal types, especially those \
    holding buffers for the duration of a data transfer."
)]
#![deny(clippy::large_stack_frames)]

use embassy_executor::Spawner;
use embassy_time::{Duration, Timer};
use esp_hal::clock::CpuClock;
use esp_hal::timer::timg::TimerGroup;

#[panic_handler]
fn panic(_: &core::panic::PanicInfo) -> ! {
    loop {}
}

// This creates a default app-descriptor required by the esp-idf bootloader.
// For more information see:
esp_bootloader_esp_idf::esp_app_desc!();

#[allow(
    clippy::large_stack_frames,
    reason = "it's not unusual to allocate larger buffers etc. in main"
)]
#[esp_rtos::main]
async fn main(spawner: Spawner) -> ! {
    // generator version: 1.3.0
    // generator parameters: --chip esp32c3 -o unstable-hal -o embassy

    let config = esp_hal::Config::default().with_cpu_clock(CpuClock::max());
    let peripherals = esp_hal::init(config);

    let timg0 = TimerGroup::new(peripherals.TIMG0);
    let sw_interrupt =
        esp_hal::interrupt::software::SoftwareInterruptControl::new(peripherals.SW_INTERRUPT);
    esp_rtos::start(timg0.timer0, sw_interrupt.software_interrupt0);

    // TODO: Spawn some tasks
    let _ = spawner;

    loop {
        Timer::after(Duration::from_secs(1)).await;
    }

    // for inspiration have a look at the examples at https://github.com/esp-rs/esp-hal/tree/esp-hal-v1.1.0/examples
}
Much better, we have the familiar Timer::after().await which triggers task (coroutine) switching.
But this app does nothing. It may be async but it doesn't do any work in between awaits. So I modify the code, and I'll show just the differences. BTW, the TODO shows where you would spawn other tasks (coroutines).
@@ -10,6 +10,7 @@
 use embassy_executor::Spawner;
 use embassy_time::{Duration, Timer};
 use esp_hal::clock::CpuClock;
+use esp_hal::gpio::{Level, Output, OutputConfig};
 use esp_hal::timer::timg::TimerGroup;

 #[panic_handler]
@@ -41,8 +42,12 @@
     // TODO: Spawn some tasks
     let _ = spawner;

+    let mut led = Output::new(peripherals.GPIO10, Level::Low, OutputConfig::default());
     loop {
-        Timer::after(Duration::from_secs(1)).await;
+        led.set_high();
+        Timer::after(Duration::from_millis(500)).await;
+        led.set_low();
+        Timer::after(Duration::from_millis(500)).await;
     }

     // for inspiration have a look at the examples at https://github.com/esp-rs/esp-hal/tree/esp-hal-v1.1.0/examples
Does it work? I plunge ahead and do:
$ cargo run
    Finished `dev` profile [optimized + debuginfo] target(s) in 0.57s
     Running `espflash flash --monitor --chip esp32c3 target/riscv32imc-unknown-none-elf/debug/esp32c3-rust-blinky`
[2026-08-03T09:50:12Z INFO ] Serial port: '/dev/ttyACM0'
[2026-08-03T09:50:12Z INFO ] Connecting...
[2026-08-03T09:50:12Z INFO ] Using flash stub
Chip type:         esp32c3 (revision v0.4)
Crystal frequency: 40 MHz
Flash size:        4MB
Features:          WiFi, BLE
MAC address:       34:85:18:25:c3:20
App/part. size:    102,816/4,128,768 bytes, 2.49%
[00:00:00] [========================================]       1/1       0x0      Verifying... OK!                             [00:00:00] [========================================]       1/1       0x8000   Verifying... OK!                             [00:00:01] [========================================]       2/2       0x10000  Verifying... OK!                             [2026-08-03T09:50:14Z INFO ] Flashing has completed!
Commands:
    CTRL+R    Reset chip
    CTRL+C    Exit

ESP-ROM:esp32c3-api1-20210207
Build:Feb  7 2021
rst:0x15 (USB_UART_CHIP_RESET),boot:0x8 (SPI_FAST_FLASH_BOOT)
Saved PC:0x40380862
SPIWP:0xee
mode:DIO, clock div:2
load:0x3fcd5820,len:0x15c4
load:0x403cbf10,len:0xc84
load:0x403ce710,len:0x2fd0
entry 0x403cbf1a
I (24) boot: ESP-IDF v5.5.1-838-gd66ebb86d2e 2nd stage bootloader
I (25) boot: compile time Nov 26 2025 12:25:17
I (25) boot: chip revision: v0.4
I (26) boot: efuse block revision: v1.2
I (30) boot.esp32c3: SPI Speed      : 40MHz
I (34) boot.esp32c3: SPI Mode       : DIO
I (37) boot.esp32c3: SPI Flash Size : 4MB
I (41) boot: Enabling RNG early entropy source...
I (46) boot: Partition Table:
I (48) boot: ## Label            Usage          Type ST Offset   Length
I (54) boot:  0 nvs              WiFi data        01 02 00009000 00006000
I (61) boot:  1 phy_init         RF data          01 01 0000f000 00001000
I (67) boot:  2 factory          factory app      00 00 00010000 003f0000
I (74) boot: End of partition table
I (77) esp_image: segment 0: paddr=00010020 vaddr=3c000020 size=03b3ch ( 15164) map
I (88) esp_image: segment 1: paddr=00013b64 vaddr=3fc80dd8 size=005a4h (  1444) load
I (92) esp_image: segment 2: paddr=00014110 vaddr=40380000 size=00dd8h (  3544) load
I (100) esp_image: segment 3: paddr=00014ef0 vaddr=00000000 size=0b128h ( 45352)
I (117) esp_image: segment 4: paddr=00020020 vaddr=42010020 size=0915ch ( 37212) map
I (126) boot: Loaded app from partition at offset 0x10000
I (126) boot: Disabling RNG early entropy source...
One thing the Seeed Xiao ESP32C3 doesn't have is a builtin LED. That's probably a good thing. I have been annoyed by dev boards where you have to use the LED pin for another signal, and your resulting gadget flashes the LED, which is often blue and quite bright.
So because I'm lazy, instead of wiring up a LED and current limiting resistor between GPIO10 and GND, I put voltmeter probes on those pins, and it swings between 0 V and 3.3 V at 1 Hz. Success!
This wasn't quite as simple as I thought it would be for the RISC-V MCU. The reason is I'm dealing with a RISC-V based SOC which has quite a lot of features. So I will have to do another blinky, but for the simple CH32V003F4P6 dev board. Then I can summarise what I have learnt after all this blinking.
-
Getting another blinky to work
07/30/2026 at 11:19 • 0 comments![]()
Well that was fun, getting blinky in Rust working on a RPi Pico. But just so that I understand better the steps of building a Rust project using the Embassy framework, I'll try another MCU.
I would like to try the Espressif ESP32 MCUs. The RISC-V based members like the ESP32-C3 are supported, but the older Xtensa based MCUs require a hacked LLVM compiler as it's not a supported ISA yet. The changes are being merged with the main effort but it takes time. The ESP8266 family of MCUs are not supported at all for Rust HAL.
So instead I'll try the STM32 MCU family. It looks quite different from the RPi Pico, but it's also ARM based. For the instructions I turn to the Embassy book, specifically the section on the STM32 HAL. There I absorb the information that the STM32 family is very large, just as I noted when trying out the CubeMX IDE, so the variants are managed with a metapac that's a database of all the variants and is used to direct project generation. Ok, I'll stow that knowledge for later.
Looking for an easy way to start a project, I come across cargo-embassy, a tool that can be added to cargo. So I do:
$ cargo install cargo-embassythen cargo --list shows a new command: embassy.
$ cargo embassy init stm32-rust-blinky
error: the following required arguments were not provided:
  --chip

Usage: cargo embassy init --chip

For more information, try '--help'.
Ah, I have to specify the chip, makes sense. So:
$ probe-rs chip list | grep -i stm32f103
        STM32F103C4
        STM32F103C6
        STM32F103C8
        STM32F103CB
        STM32F103R4
        STM32F103R6
        STM32F103R8
        STM32F103RB
        STM32F103RC
        STM32F103RD
        STM32F103RE
        STM32F103RF
        STM32F103RG
        STM32F103T4
        STM32F103T6
        STM32F103T8
        STM32F103TB
        STM32F103V8
        STM32F103VB
        STM32F103VC
        STM32F103VD
        STM32F103VE
        STM32F103VF
        STM32F103VG
        STM32F103ZC
        STM32F103ZD
        STM32F103ZE
        STM32F103ZF
        STM32F103ZG
Ah, I have to be more specific:
$ probe-rs chip list | grep -i stm32f103c8
       STM32F103C8
Now:
$ cargo embassy init stm32-rust-blinky --chip stm32f103c8This gets me a Cargo project called stm32-rust-blinky. Nice when a metatool does a lot of work for you. I just plunge ahead and do:
$ cd stm32-rust-blinky
$ cargo build
info: syncing channel updates for 1.90-x86_64-unknown-linux-gnu
info: latest update on 2025-09-18 for version 1.90.0 (1159e78c4 2025-09-14)
info: downloading 8 components
No no, I didn't want that. 1.90 is an old release of Rust so I interrupt it. Looking at the directory, I see:
$ ls
build.rs  Cargo.lock  Cargo.toml  Embed.toml  rust-toolchain.toml  src
I look inside rust-toolchain.toml and see:
# This file was automatically generated.

[toolchain]
channel = "1.90"
components = ["rust-src", "rustfmt"]
targets = ["thumbv7m-none-eabi"]
Change that 1.90 to stable and retry:
$ cargo build
error: feature `debug` includes `embassy-executor/defmt`, but `embassy-executor` is not a dependency
  --> Cargo.toml:42:9
   |
42 |   debug = [
   |  _________^
43 | |     "defmt",
44 | |     "defmt-rtt",
45 | |     "panic-probe",
...  |
51 | |     "embassy-stm32/defmt",
52 | | ]
   | |_^
error: failed to parse manifest at `stm32-rust-blinky/Cargo.toml`
Much better, new error. Turns out that embassy-executor wasn't listed in the dependencies, so I add this line:
embassy-executor = { version = "0.10.0", features = ["platform-cortex-m", "executor-thread", "defmt"] }and try cargo build again. This time it failed because I didn't have the target thumb7m-none-eabi. The RPi Pico was a thumb6m-none-eabi. So I do:
$ rustup target add thumb7m-none-eabiand try cargo-build again. This time it succeeds and leaves an ELF binary in target/thumbv7m-none-eabi/debug/stm32-rust-blinky
$ cargo size
    Finished `dev` profile [optimized + debuginfo] target(s) in 0.05s
   text    data     bss     dec     hex filename
  11952      80    1132   13164    336c stm32-rust-blinky
But I look at the source code in src/main.rs.
#![no_std]
#![no_main]

mod fmt;

#[cfg(not(feature = "defmt"))]
use panic_halt as _;
#[cfg(feature = "defmt")]
use {defmt_rtt as _, panic_probe as _};

use embassy_executor::Spawner;
use embassy_stm32::gpio::{Level, Output, Speed};
use embassy_time::{Duration, Timer};
use fmt::info;

#[embassy_executor::main]
async fn main(_spawner: Spawner) {
    let p = embassy_stm32::init(Default::default());
    let mut led = Output::new(p.PB7, Level::High, Speed::Low);

    loop {
        info!("Hello, World!");
        led.set_high();
        Timer::after(Duration::from_millis(500)).await;
        led.set_low();
        Timer::after(Duration::from_millis(500)).await;
    }
}
Ok, the builtin LED is not on pin PB7, it's on PC13. Also I don't want Hello, World! printed on debug output every second, so I change the source to this:
#![no_std]
#![no_main]

mod fmt;

#[cfg(not(feature = "defmt"))]
use panic_halt as _;
#[cfg(feature = "defmt")]
use {defmt_rtt as _, panic_probe as _};

use embassy_executor::Spawner;
use embassy_stm32::gpio::{Level, Output, Speed};
use embassy_time::{Duration, Timer};
use fmt::info;

#[embassy_executor::main]
async fn main(_spawner: Spawner) {
    let p = embassy_stm32::init(Default::default());
    let mut led = Output::new(p.PC13, Level::High, Speed::Low);

    info!("Hello, World!");
    loop {
        led.set_high();
        Timer::after(Duration::from_millis(500)).await;
        led.set_low();
        Timer::after(Duration::from_millis(500)).await;
    }
}
and do cargo build again. Heck, I'll be reckless and do:
$ cargo run
    Finished `dev` profile [optimized + debuginfo] target(s) in 0.05s
     Running `probe-rs run --chip STM32F103C8 target/thumbv7m-none-eabi/debug/stm32-rust-blinky`
      Erasing ✔ 100% [####################]  12.00 KiB @  24.85 KiB/s (took 0s)                                               Programming ✔ 100% [####################]  12.00 KiB @  19.55 KiB/s (took 1s)                                                  Finished in 1.20s
0.000000 [TRACE] rcc: enabled 0x7:28 (embassy_stm32 src/rcc/mod.rs:363)
0.000000 [TRACE] rcc: enabled 0x5:4 (embassy_stm32 src/rcc/mod.rs:363)
0.000000 [TRACE] rcc: enabled 0x6:0 (embassy_stm32 src/rcc/mod.rs:363)
0.000000 [TRACE] BDCR configured: 00008200 (embassy_stm32 src/rcc/bd.rs:393)
0.000000 [DEBUG] rcc: Clocks { hclk1: MaybeHertz(8000000), pclk1: MaybeHertz(8000000), pclk1_tim: MaybeHertz(8000000), pclk2: MaybeHertz(8000000), pclk2_tim: MaybeHertz(8000000), rtc: MaybeHertz(40000), sys: MaybeHertz(8000000), usb: MaybeHertz(0) } (embassy_stm32 src/rcc/mod.rs:88)
0.000000 [TRACE] rcc: enabled 0x7:2 (embassy_stm32 src/rcc/mod.rs:363)
0.000061 [INFO ] Hello, World! (stm32_rust_blinky stm32-rust-blinky/src/fmt.rs:133)
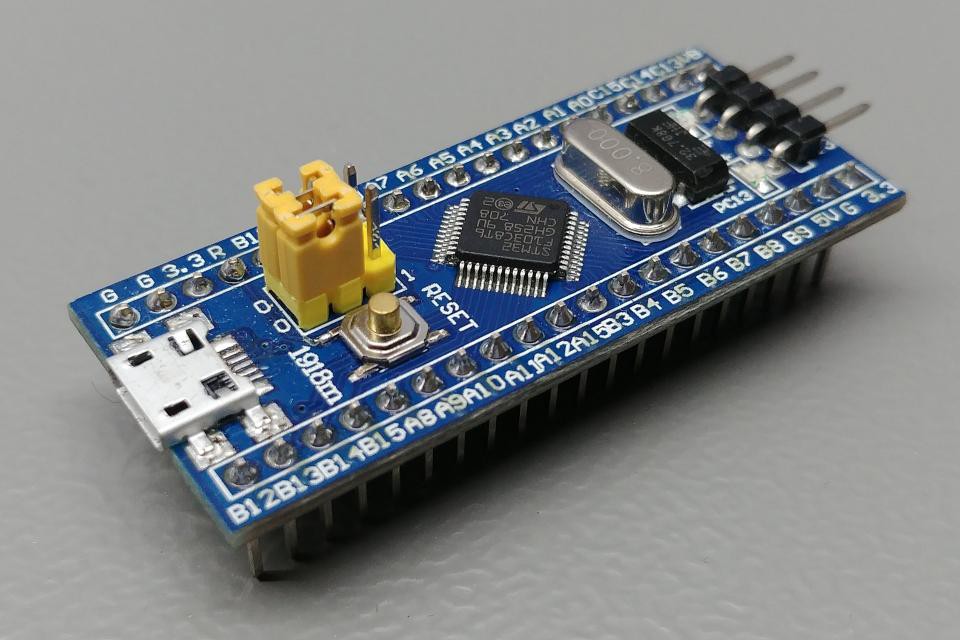
and voila, a blinking green LED on the Blue Pill. Woohoo! Also note that the log message was printed to the host, so debugging will be possible.
So the hitches stemmed from a metatool that was a bit out of date and wrong in places. This is due to the rapid pace of development in the Rust and Embassy worlds.
Now you might be asking, why all this effort for a blinky. Couldn't we avoid all the Embassy verbiage and write the inner loop like this:
loop {
        if led.is_set_low() {
            led.set_level(Level::High)?;
        } else {
            led.set_level(Level::Low)?;
        }

        // thread::sleep to make sure the watchdog won't trigger
        thread::sleep(Duration::from_millis(500));
    }
Sure you can do that if all you have is an LED to control, because this code blocks at the sleep(). The thing to grasp is that Rust/Embassy can create execution routines for various devices. They are actually coroutines. When one awaits, another routine will be run. If none are ready then the MCU will sleep, which can save power. You can do coroutines in other languages, but Rust with strict control over the ownership and lifetimes of objects makes it possible to guarantee that routines will not trample on each other, and also makes it possible to allocate fixed storage for routines, avoiding the issues with dynamically allocated memory. This makes Rust/Embassy a good fit for embedded software.
The coroutine mechanism is activated by the use of #![no_main] and #[embassy_executor::main] before the async function. Async is a trait. Functions can also block, and this is recommended when the wait is short and coroutine switching would cost more.
In large systems like embedded Linux, you can use process parallelism for handling multiple devices, but the context switching cost is high.
-
Getting a Rust blinky application to work
07/23/2026 at 11:56 • 0 commentsOk, let's get a blinky program to work. As the ARM based RP2040 implementation of embedded Rust is one of the more developed ones and it's easy for me to plug in my Pico to my USB port, I will start with this, and expect to readily be able to port it to the WCH32V platform later.
Here's a suggested blinky program in Rust. The core of the program is recognisable, you can easily guess what's happening. I forget where I got this example from. No matter, you will see many similar examples on the Internet, and I can tweak the code later as my understanding improves.
#![no_std]
#![no_main]

use defmt::info;
use embassy_executor::Spawner;
use embassy_rp::gpio::{Level, Output};
use embassy_time::Timer;
use {defmt_rtt as _, panic_probe as _};

#[embassy_executor::main]
async fn main(_spawner: Spawner) {
    let p = embassy_rp::init(Default::default());
    let mut led = Output::new(p.PIN_25, Level::Low);

    info!("blinky started");

    loop {
        led.set_high();
        Timer::after_millis(500).await;
        led.set_low();
        Timer::after_millis(500).await;
    }
}
In a project directory called rp2040-rust-blinky created with cargo new, or cargo init. I put the above code in src/main.rs. We also need a Cargo.toml at the top level which came from the example, which looks like this:
[package]
name = "rp2040-rust-blinky"
version = "0.1.0"
edition = "2021"

[dependencies]
defmt = "0.3"
defmt-rtt = "0.4"
panic-probe = { version = "0.3", features = ["print-defmt"] }
cortex-m-rt = "0.7"
#embassy-rp = { version = "0.4", features = ["rp2040","time-driver"] }
embassy-rp = { version = "0.10.0", features = ["rp2040","time-driver","critical-section-impl"] }
#embassy-time = { version = "0.4" }
embassy-time = "0.5.1"
#embassy-executor = { version = "0.6", features = ["arch-cortex-m","executor-thread","integrated-timers"] }
embassy-executor = { version = "0.10.0", features = ["platform-cortex-m","executor-thread"] }
# RP2040 HAL (Hardware Abstraction Layer)
#rp2040-hal = { version = "0.10", features = ["rt", "critical-section-impl"] }
rp2040-hal = { version = "0.12.0", features = ["rt", "critical-section-impl"] }
rp-pico = "0.9.0"
cortex-m = "0.7.7"

[profile.release]
debug = 2          # keep debug symbols for defmt
lto = true
codegen-units = 1
opt-level = "s"
This file states the dependency crates that are needed for this application. You can see that I updated some of the dependency versions as the example is 5 years old and many advances have been made.
There's another file called memory.x which contain ld instructions for the RP2040 layout. I won't explain it at this time.
MEMORY {
    BOOT2 : ORIGIN = 0x10000000, LENGTH = 0x100
    FLASH : ORIGIN = 0x10000100, LENGTH = 2048K - 0x100
    RAM   : ORIGIN = 0x20000000, LENGTH = 256K
}

EXTERN(BOOT2_FIRMWARE)

SECTIONS {
    .boot2 ORIGIN(BOOT2) :
    {
        KEEP(*(.boot2));
    } > BOOT2
} INSERT BEFORE .text;
Then I did cargo build.
After a huge amount of downloading of crates (dependencies pull in their dependencies recursively), then compiling, the result was an ELF binary in target/thumbv6m-none-eabi/debug/rp2040-rust-blinky.
The method I'm used to installing embedded programs on the RP2040 is by mounting it as USB storage and then copying a UF2 binary onto it. When you hold down reset button, plug the RP2040 in a USB port, and release the button, a new USB storage device appears and you can use your desktop manager to mount it at /run/media/<user>/RPI-RP2.
I found an ELF to UF2 converter. This also needs the libudev-devel package to build, just like probe-rs. I ran the converter on the ELF binary.
Once the RP2040 was mounted, I copied target/thumbv6m-none-eabi/debug/rp2040-rust-blinky.uf2 to it, and the onboard LED blinked. Note that the RP2040 will disappear as a USB device when the embedded blinky runs.
Update: Ok, I've figured out how to download the ELF directly to the RP2040. The recommended tool is picotool which is maintained by the Raspberry Pi project. It does a lot more than elf2uf2-rs so can replace it.
I had to change the target section in .cargo/config.toml to this
[target.'cfg(all(target_arch = "arm", target_os = "none"))']
runner = "picotool load --update --verify --execute -t elf"
rustflags = [
  "-C", "link-arg=--nmagic",
  "-C", "link-arg=-Tlink.x",
  "-C", "link-arg=-Tdefmt.x",
]
Then I held down the reset button on the RP2040, plugged it into the USB port, and released the reset button. This left the RP2040 in BOOTSEL mode. Then I did cargo run and this happened:
$ cargo run
    Finished `dev` profile [unoptimized + debuginfo] target(s) in 0.06s
    Running `picotool load --update --verify --execute -t elf target/thumbv6m-none-eabi/debug/rp2040-rust-blinky`
Loading into Flash:   [==============================]  100%
Verifying Flash:      [==============================]  100%
  OK

The device was rebooted to start the application.
Blinky works.
About the binary
So how big is our blinky binary?
$ ls -lh target/thumbv6m-none-eabi/debug/rp2040-rust-blinky
-rwxr-xr-x 2 me users 3.2M Jul 31 20:03 target/thumbv6m-none-eabi/debug/rp2040-rust-blinky
Arrgh, how is this going to fit into my MCU's memory?
$ cargo size
    Finished `dev` profile [unoptimized + debuginfo] target(s) in 0.06s
   text    data     bss     dec     hex filename
  57700      56    1400   59156    e714 rp2040-rust-blinky
Not to worry, most of the size consists of debug information which doesn't get downloaded to the MCU but is used by the debugger.
Unpacking the blinky program
Let's go through the program using line numbers:
     1  #![no_std]
     2  #![no_main]
     3
     4  use defmt::info;
     5  use embassy_executor::Spawner;
     6  use embassy_rp::gpio::{Level, Output};
     7  use embassy_time::Timer;
     8  use {defmt_rtt as _, panic_probe as _};
     9
    10  #[embassy_executor::main]
    11  async fn main(_spawner: Spawner) {
    12      let p = embassy_rp::init(Default::default());
    13      let mut led = Output::new(p.PIN_25, Level::Low);
    14
    15      info!("blinky started");
    16
    17      loop {
    18          led.set_high();
    19          Timer::after_millis(500).await;
    20          led.set_low();
    21          Timer::after_millis(500).await;
    22      }
    23  }
Line 1 is an attribute that tells the Rust compiler that we don't want the standard framework for programs on an OS, but we are going bare metal. Line 2 says that the entry point is not the usual main as in normal Rust programs. Hold your horses if you see the mains further down.
The use statements are like use or import in other languages. They bring the names in the named crate into the current namespace so that you don't have to use fully qualified paths to refer to them. defmt is a lightweight logging crate suited for embedded systems, and we will use the info macro from it.
Embassy is a Rust framework for async execution. If your embedded application is non-trivial you will have to deal with multi-tasking because you have real-world hardware that need attention, e.g. buttons, sensors, communication channels, displays. The simplest way is via a poll loop. Often the periods are quantised in ticks which is the heartbeat of the system. When it's not doing work the MCU waits for the next tick. This is acceptable for simple applications and also if your MCU is memory constrained. A more advanced solution is to use something like FreeRTOS and assign threads to the tasks. Embassy provides async capabilities for resource constrained MCUs. It also offers Hardware Abstraction Layers (HALs) for models of MCUs.
I won't explain Embassy but refer you to the online documentation. In lines 5-7 we are bringing in the embassy_executor crate which offers tasking, the embassy_rp crate specific to Raspberry Pi Picos and we will use the module gpio which has the structs Level and Output, the embassy_time crate and we'll use the Timer struct. Line 8 is bringing in two crates anonymously; ignore it for now.
Line 10 is how we tell Rust where to start the application. It says that the entry point is the next function starting line 11, and note that it's async, so is a thread, and other threads could be running in a more complex application. I actually didn't have to call it main(). In fact I renamed it to blinky() and that worked.
Line 12 initialises the Embassy system. Default::default() is a trait to say just give me the defaults for this argument.
Line 12 declares a mutable called led. Without mut it would be an immutable, and led wouldn't be allowed to change state. It's created from embassy_rp::gpio::Output (remember this is the fully qualified path) it's connected to PIN25 of the embassy_rp instance, and the starting state is Level::Low.
The loop in lines 17-22 needs one explanation. Timer::after_millis() is a function with the Future trait. This means the function holds state about where it's at. The await indicates a point where it will wait until the function completes, then continue. In the meantime, the Embassy scheduler will run other threads. So you get to write asynchronous code as if it were synchronous.
This is just a superficial analysis of a simple embedded Rust application. There's a whole field of rabbit holes you can dive into by following the documentation for the crates used, and of course, the Rust language.
-
Installing a Rust toolchain
07/04/2026 at 23:58 • 0 commentsThis log will be amended as I fill in details that I may have missed.
Your OS may have Rust available in their package repositories. But due to the rapid pace of development it's best to install a Rust toolchain outside of the package system. Rust developers have streamlined this task.
You need two important programs: rustup which is a toolchain installer (and maintainer), and cargo, installed by rustup, which is a project manager. The other programs like rustc, the compiler, will be installed by rustup.
Before you install rustup, you need to decide if you accept the standard location for the software, in the case of Linux, under your home directory in ~/.cargo, as explained here. If like me, you dislike lots of package files under home (unfortunately this is the norm these days with Arduino, PlatformIO, etc. etc.), you can change the directories. There are two environment variables, and I've set them thus:
export RUSTUP_HOME=/usr/local/lib/rustup CARGO_HOME=/usr/local/lib/cargo
If you choose to change them, edif your ~/.bash_profile to export these environment variables. Also put this command in ~/.bash_profile after so that the correct executables are found.
. "$CARGO_HOME/env"Logout and login again if necessary to ensure that these settings are in place before you install rustup following the instructions at the website.
The help text for rustup indicates what it does:
$ rustup --help
rustup 1.29.0 (28d1352db 2026-03-05)

The Rust toolchain installer

Usage: rustup[EXE] [OPTIONS] [+toolchain] [COMMAND]

Commands:
  install      Install or update the given toolchains, or by default the active toolchain
  uninstall    Uninstall the given toolchains
  toolchain    Install, uninstall, or list toolchains
  default      Set the default toolchain
  show         Show the active and installed toolchains or profiles
  update       Update Rust toolchains and rustup
  check        Check for updates to Rust toolchains and rustup
  target       Modify a toolchain's supported targets
  component    Modify a toolchain's installed components
  override     Modify toolchain overrides for directories
  run          Run a command with an environment configured for a given toolchain
  which        Display which binary will be run for a given command
  doc          Open the documentation for the current toolchain
  man          View the man page for a given command
  self         Modify the rustup installation
  set          Alter rustup settings
  completions  Generate tab-completion scripts for your shell
  help         Print this message or the help of the given subcommand(s)

Arguments:
  [+toolchain]  Release channel (e.g. +stable) or custom toolchain to set override

Options:
  -v, --verbose  Set log level to 'DEBUG' if 'RUSTUP_LOG' is unset
  -q, --quiet    Disable progress output, set log level to 'WARN' if 'RUSTUP_LOG' is unset
  -h, --help     Print help
  -V, --version  Print version

Discussion:
  Rustup installs The Rust Programming Language from the official
  release channels, enabling you to easily switch between stable,
  beta, and nightly compilers and keep them updated. It makes
  cross-compiling simpler with binary builds of the standard library
  for common platforms.

  If you are new to Rust consider running `rustup doc --book` to
  learn Rust.

Common commands:

  Update Rust toolchains and rustup

    $ rustup update

  Install the current stable release of Rust for your host platform

    $ rustup toolchain install stable
Toolchain means a release channel, e.g. default, nightly. If you are thinking about MCU targets, then the term is target.
Here's a relevant fact: gcc requires a different toolchain for each MCU family. That's why the toolchain for the classic Arduino starts with avr-, that for the STM32 starts with arm-, and for the WCH32V series riscv-. LLVM however uses the same compiler for all targets, and you can install a new target without installing another compiler. Here are the targets I have installed:
$ rustup target list | grep installed
riscv32i-unknown-none-elf (installed)
thumbv6m-none-eabi (installed)
x86_64-unknown-linux-gnu (installed)
Riscv32i is for the WCH32V MCUs, thumbv6m is for the RP2040, and x86_64 is for my Linux workhorse.
Now we come to cargo. This is a project manager which allows you to manage all aspects of a project, initialising the project directory structure, installing dependencies, building binaries, running them, debugging them, installing them, and so forth. It's modelled after the successful Ruby on Rails tool rails which triggered similar programs for other development environments, like gradle for Groovy (java). Here is the help text for cargo which gives you an idea of what it does:
$ cargo --help
Rust's package manager

Usage: cargo [+toolchain] [OPTIONS] [COMMAND]
       cargo [+toolchain] [OPTIONS] -Zscript <MANIFEST_RS> [ARGS]...

Options:
  -V, --version                  Print version info and exit
      --list                     List installed commands
      --explain <CODE>           Provide a detailed explanation of a rustc error message
  -v, --verbose...               Use verbose output (-vv very verbose/build.rs output)
  -q, --quiet                    Do not print cargo log messages
      --color <WHEN>             Coloring [possible values: auto, always, never]
  -C <DIRECTORY>                 Change to DIRECTORY before doing anything (nightly-only)
      --locked                   Assert that `Cargo.lock` will remain unchanged
      --offline                  Run without accessing the network
      --frozen                   Equivalent to specifying both --locked and --offline
      --config <KEY=VALUE|PATH>  Override a configuration value
  -Z <FLAG>                      Unstable (nightly-only) flags to Cargo, see 'cargo -Z help' for details
  -h, --help                     Print help

Commands:
    build, b    Compile the current package
    check, c    Analyze the current package and report errors, but don't build object files
    clean       Remove the target directory
    doc, d      Build this package's and its dependencies' documentation
    new         Create a new cargo package
    init        Create a new cargo package in an existing directory
    add         Add dependencies to a manifest file
    remove      Remove dependencies from a manifest file
    run, r      Run a binary or example of the local package
    test, t     Run the tests
    bench       Run the benchmarks
    update      Update dependencies listed in Cargo.lock
    search      Search registry for crates
    publish     Package and upload this package to the registry
    install     Install a Rust binary
    uninstall   Uninstall a Rust binary
    ...         See all commands with --list

See 'cargo help <command>' for more information on a specific command.
If you're thinking what does package have to do with my project, your project is a package too, and cargo is how you manage it. Crate is the Rust term for a standard package.
Fun fact: Look at the executables in $CARGO_HOME/bin. You'll see that a lot of them are just links to rustup, including cargo and rustc. Rustup is a chameleon program, playing different roles depending on how it's invoked.
When I did the initial install of the Rust toolchain, I was beset by one problem: I couldn't compile probe-rs-tools which comprise probe-rs, cargo-flash, and cargo-embed. The compile failed with not finding udev functions. An overview of the three tools is here and their functions explained here. So I installed them from a binary pacakge. I finally got around to figuring out why. Long story short, I needed the libudev-devel package which contains the details of the interface to the OS userland device handling. In other distros it could be called libudev-dev. But the catch was that in my distro, they have been merged into systemd-devel. After installing this RPM package, the compilation succeeded.
Installing additional tools
Now that we have the compiler, let's install some useful tools. A useful one is llvm-tools. We get this by:
$ rustup component add llvm-toolsWith this we get the usual complement of binutils tools for Rust LLVM such as rust-size, rust-nm, rust-objcopy, rust-objdump and so forth.
Next we install the crate cargo-binutils, which contain proxy tools for the llvm-tools. By proxy this means it supplies additional information to invoke the base llvm tool. For example when run in the project directory it supplies the target argument for the MCU you are building for.
$ cargo install cargo-binutils -
Toolchains
06/17/2026 at 02:34 • 0 comments![]()
Microcontrollers need firmware and toolchains used to develop them. This is an overview and will undergo revision as I will no doubt overlook some concepts at the time of writing.
Assemblers
Unless you have one of those educational kits where you toggle switches (or the equivalent thereof) to program the hardware, it's assumed the basic requirement is an assembler which will take assembly code and turn it into bits to be loaded into the MCU.
This is the case for the 8048/8042 MCUs I have mentioned. The toolchain is the ASxxxx cross assembler and linker. The MCU is too weak to support a HLL like C. Wikipedia claims that a PL/M compiler existed for the 8048 but I am dubious because the architecture is severely limited.
Compilers
I consider the basic requirement for a MCU toolchain to be a C compiler toolchain. This true of all the MCUs I have used from the 8051 onwards, although early PIC models had very restrictive architectures like for example a two-level stack which forces one to flatten out function calls.
CLI Development Environments
The first step up from a compiler is something to automate the repeated steps of a embedded app edit and build. You could do it with scripts, but I started off with a text editor and a Makefile which is very familiar from the desktop Linux environment..
This can be elaborated with any number of improved build tools like CMake, meson + ninja, etc.
It's worthwhile retaining CLI build facilities even if one is using an IDE, to have a reproducible means of creating production artifacts.
Integrated Development Environments
A great boon of a GUI IDE is multiple views. In one window you could be editing source code, another could be a command window, and of course you could have output and debugging windows. When editing, the IDE can help the programmer by suggesting completions for library calls, sparing having to look up the programming manual.
Many of IDEs are front-ends to traditional CLI programs, simply because that's how the tools are invoked. For example, when you use the Arduino IDE, possibly the best known, you can see the compile commands launched in response to firing off a build. Some IDEs like the Microchip MPLAB X even generate Makefiles to control the build process.
IDEs can be specific to a platform, e.g. Window, or could be cross-platform. The preference these days is for cross-platform IDEs to capture a large audience. Traditionally cross-platform IDEs relied technology like Java e.g. in the form of the Eclipse platform. Many IDEs, for example Moun River are based on this. But these days cross-platform GUI toolkits are not a big deal, so an IDE like Arduino has support for the main OSes. Java GUIs these days look square and quaint.
IDEs can also be multi-target. Arduino started off supporting the AVR MCUs, but these days the Espressif, ARM, and RISC-V MCUs are transparently supported. The compiler toolchains moved from the Arduino application package to optional library packages.
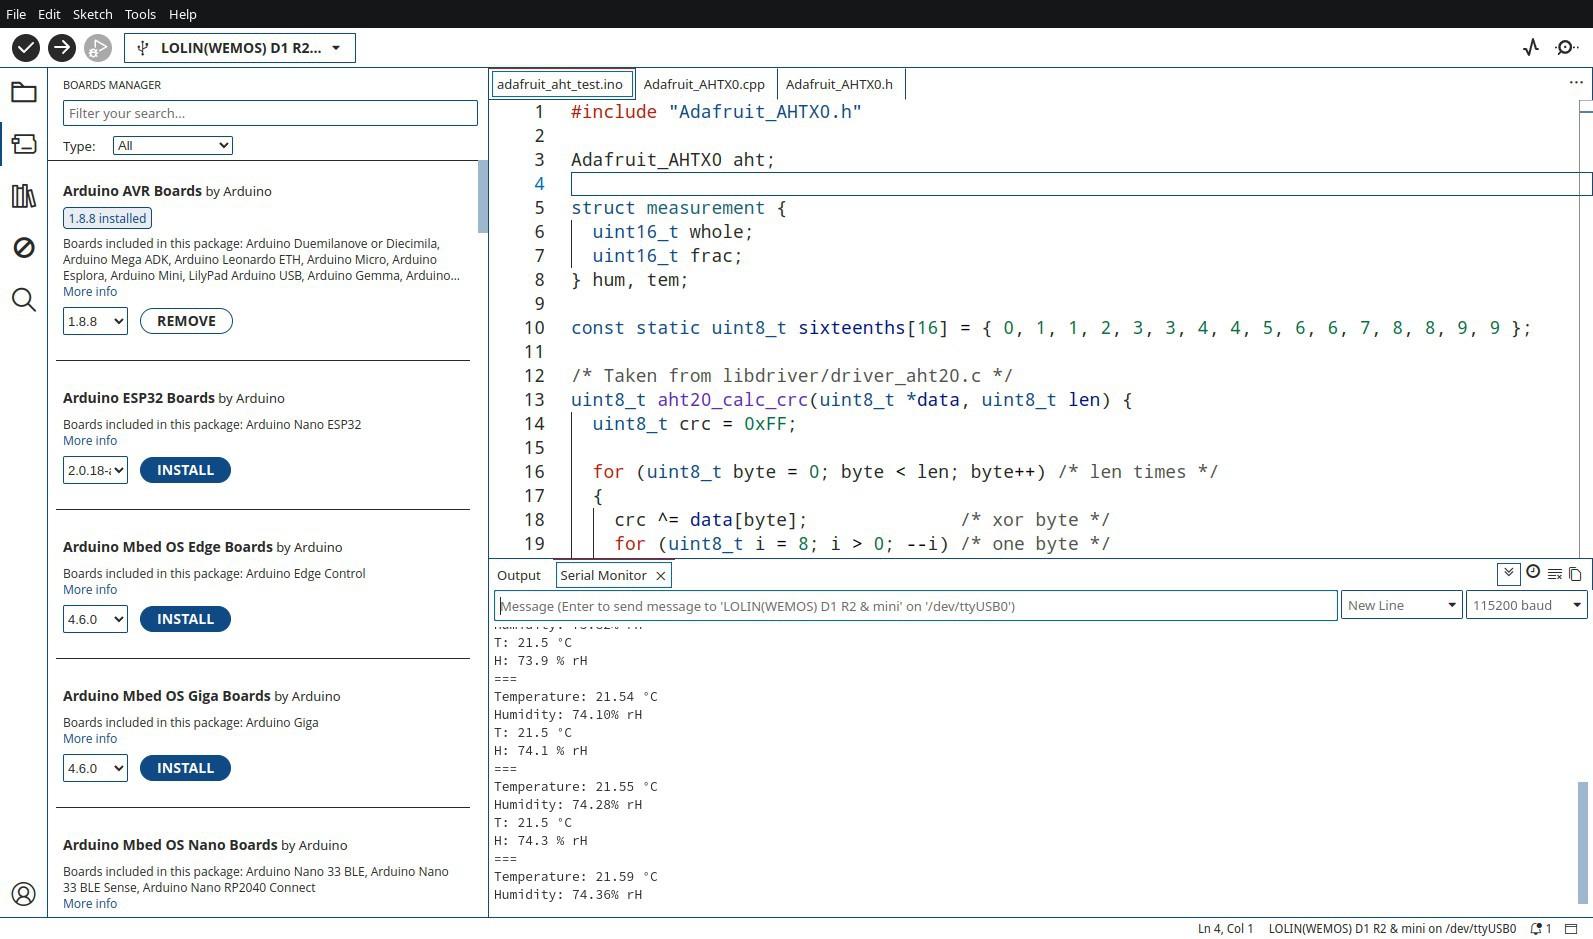
But one great aid that IDEs provide is configuration for multiple models of MCUs. Unlike desktop CPUs where generations of processors can be accomodated in the kernel and runtime libraries, and it's all hidden from you, a Linux app works the same whether you are using a 10 year-old processor, or this year's, MCUs come in a huge variety of models targeted for various fields, e.g. consumer, automotive, instrumentation, with differences in peripherals. It's expensive and unnecessary to make embedded programs work on many models, so builds are configured for just the intended target. You can see this in the Arduino IDE where you have to select the board you are working with.
![]()
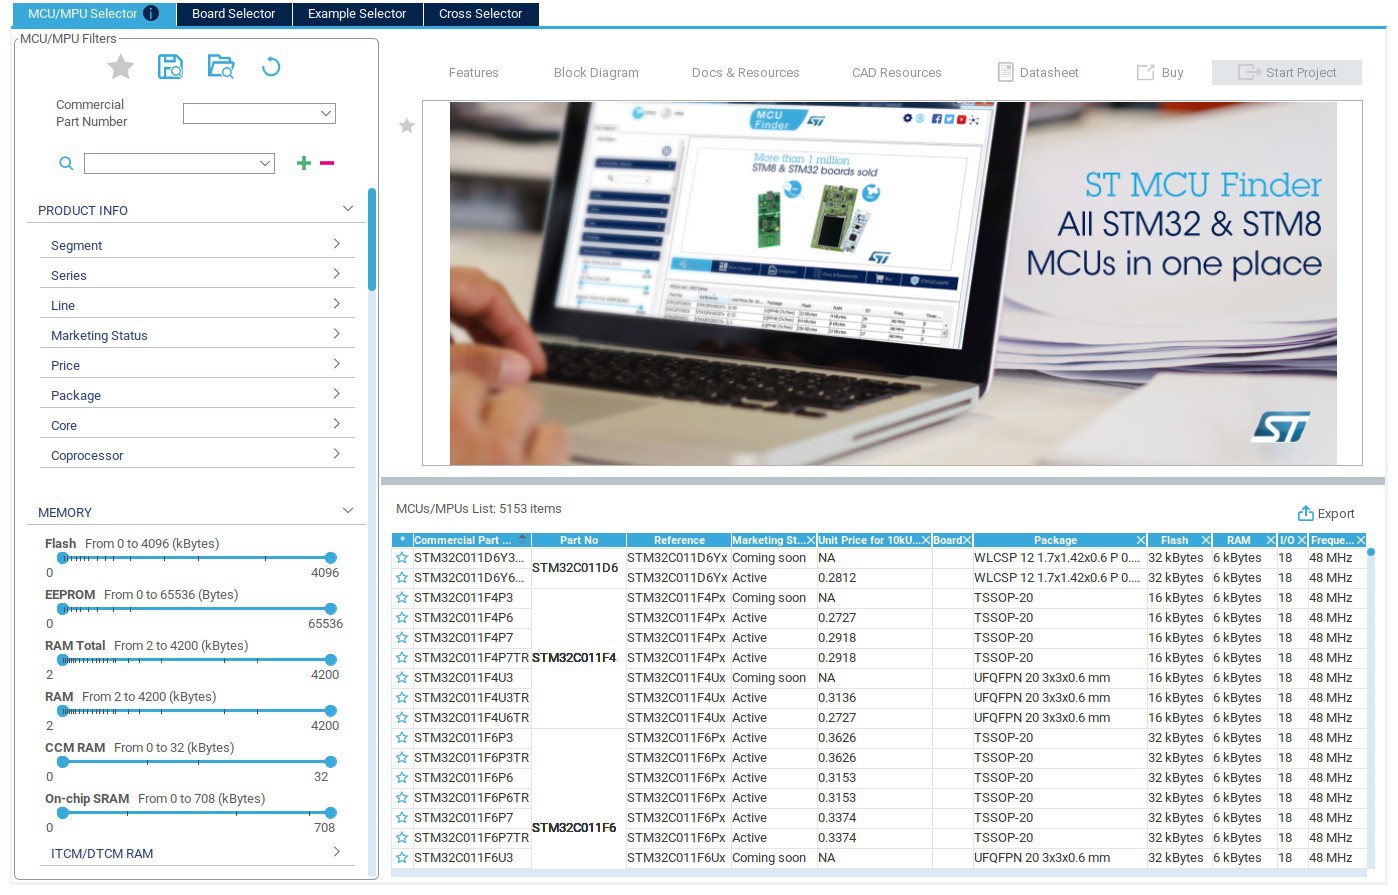
This customisation is extensive in IDEs like the ARM CubeMX IDE for STMicro's line of STM32 processors. A separate GUI program takes you through the selection of the company's MCU models and generates a configuration file which is used to influence build configuration.
![]()
Another dimension of IDEs is proprietary vs generic. Configurable IDEs like Codium, which is a general-purpose development environment, can also support embedded development using frameworks like PlatformIO.
Other Language Environments
Some development environments are based on a particular programming language, e.g. MicroPython, Lua, Forth, Rust. These will impose their own requirements on the development tools.
Hardware Adaptation Layer
Taking things further, a toolchain can present a higher level view of a hardware peripheral to the programmer. Instead of dealing with peripheral registers, constants, bit positions and so forth, the interface provides a resource with functions = operations on it. This fits well with an object-oriented view of resources, with instances, and lifecycle, of objects representing the peripheral. For example a Real Time Clock class can be used to represent many instances of RTC chips, and expose operations such as initialisation, setting the time, reading the time, setting and reacting to alarms. This is impetus to support C++ say by using the g++ compiler in the GCC tools. This is the reason that when GCC is not supported but SDCC is for a MCU like the 8051 family, the libraries cannot support OO features.
Sometimes the HAL imposes limitations. The paradigm of a setup() routine and a loop() routine in Arduino sketches differs from the familar pattern of a C or C++ main() as the start point of a program.
Standardised file hierarchy
Often the toolchain will impose a particular hierarchy for the files and resources for a build. A typical structure might be:
root
    source
    libraries
    resources (e.g. sound files, icons)
    build
    documentation
build is where the results end up. It might be further split into debugging and production folders.
Often the structure is based on an existing layout, such as the one popularised by Ruby on Rails. There using the rails tool, one can create a project, populate it with a standard template, and then various operations are immediately available for building and testing. The Rust cargo tool works like this. Other IDEs have their preferred folder structure.
Downloading the executable to the MCU
About the only thing that can certainly be said is that there is no standardised way of doing this. Back in the days of the 8048s and 8051s you might program an UV-EPROM version of the MCU, or use an external (E)EPROM to test the executable. You usually needed an (E)EPROM programmer for this.
Then MCUs acquired flash memory, which obsoleted (E)EPROMs and shortened the develop/test cycle. Next manufacturers starting putting bootloaders in a read-only part of the flash memory. The bootloader might use serial interface pins to receive the download from a desktop computer. This was the case for the STC89C52 I used. Sometimes you needed a special dongle (in many cases containing another MCU) for the download. This was the case for the STM8 and STM32 families. These dongles could also be used for debugging, to single-step the processor through instructions, and show the state of internal registers and RAM. Some MCU families had a proprietary trap where you had to buy a specific dongle, like the Nuvoton 8051 family MCUs. It could make development expensive.
MCU development boards that could receive their programs via the USB interface started appearing. This allowed a single interface to provide power and data. And to be sure, many of the MCUs programmed by a serial port relied on a USB to serial interface chip.
The MCU can also act as a USB peripheral and respond to USB commands instead of emulating a serial interface device.
Since USB devices can also be storage devices, MCUs like the RP2040 were designed to look like a USB fiash drive to the desktop host, and you downloaded a program by coping a executable file into the storage area.
WiFi capable MCUs have not surprisingly acquired the ability of OTA (Over The Air) downloading. Very useful if the MCU is inside equipment; you don't have to open the case to connect downloading cables.
You should check the cost of any hardware required to flash the program and data to the MCU. For recent MCUs like the Espressif and Raspberry Pi families; the USB connection is the flashing and debugging channel. Otherwise a cheap USB dongle may be needed, for example for the STM8, STM32, and WCH32V families, but some families of MCUs require a more expensive dongle. I'm looking at you, Nuvoton MCUs.
AI
Recent IDEs include support for AI assistance. I'm not going there in this overview. No doubt somebody else can.
An Abundance of Choice
All this means one is spoilt for choice where toolchains are concerned. Often constraints such as MCU model and memory will lead to particular tools.
My preference is to use whatever is most suitable and convenient for my project. I have no qualms switching to a different tool if it makes life easier.
It's very difficult to provide specific recommendation in a general overview log such as this. When I discuss the development board I'll be using, things will get more concrete.
-
Which 32-bit MCU family should I pick?
05/27/2026 at 14:55 • 2 comments![]()
My early attempt at a 32-bit CPU. No, just kidding.
Having decided to move on from the MCUs I am using, now that 32-bit MCUs are cheap commodities what are the candidates?
Before that, one advantage is clear: going to 32-bit gets decent HLL support. You can have a gcc/g++ toolchain, or one based on the up and coming rival, LLVM. You can also have other languages like Rust.
ARM
ARM is everywhere. A lot of hobbyists got introduced to ARM via Raspberry Pi. But the range extends from small MCU boards like the STM32 Blue Pill, to smartphones and tablets, to desktops, and to 64-bit servers in the datacentres. The PlasticARM project put a minimal Cortex-M0 on a flexible substrate, providing more areas for IoT to colonise.
ARM will be around for a long time. It should be noted here that the core architecture is licensed but the MCU chip manufacturer has absorbed that cost for you.
In practical terms, I could develop with the STM32 family or the RP series. I probably will for high performance uses.
RISC-V
RISC-V is an open architecture, there is no licensing to deploy it, so it has become attractive to chip makers as an alternative to ARM. I have a GigaDevice 32V dev board, but it's really the WCH series of 32V chips that are challenging the low-end uses of ARM. This makes them attractive to me.
Xtensa
Xtensa is the MCU architecture that Espressif Systems used in their popular series of WiFi and Bluetooth capable modules, such as the ESP8266 and ESP32. It's very popular due to the wireless capabilities, just look at the number of projects on Hackaday. I have several Espressif modules that badly need a few round tuits from me, so I will also develop with these.
But here's the rub: Espressif is shifting their product lines to RISC-V cores. The Xtensa based MCUs will be around for a while, if only because there's so much stock around.
Also the RP2350 has an interesting design: two ARM cores and two RISC-V cores, the first use of RISC-V in the RP series.
Which will it be?
Actually, with a good toolchain, I don't have to stick exclusively to one family. I'll just let the project, the available MCUs, and my wallet provide the decision parameters. More about toolchains in another log.
-
My personal history with MCUs
05/25/2026 at 11:26 • 0 comments![]()
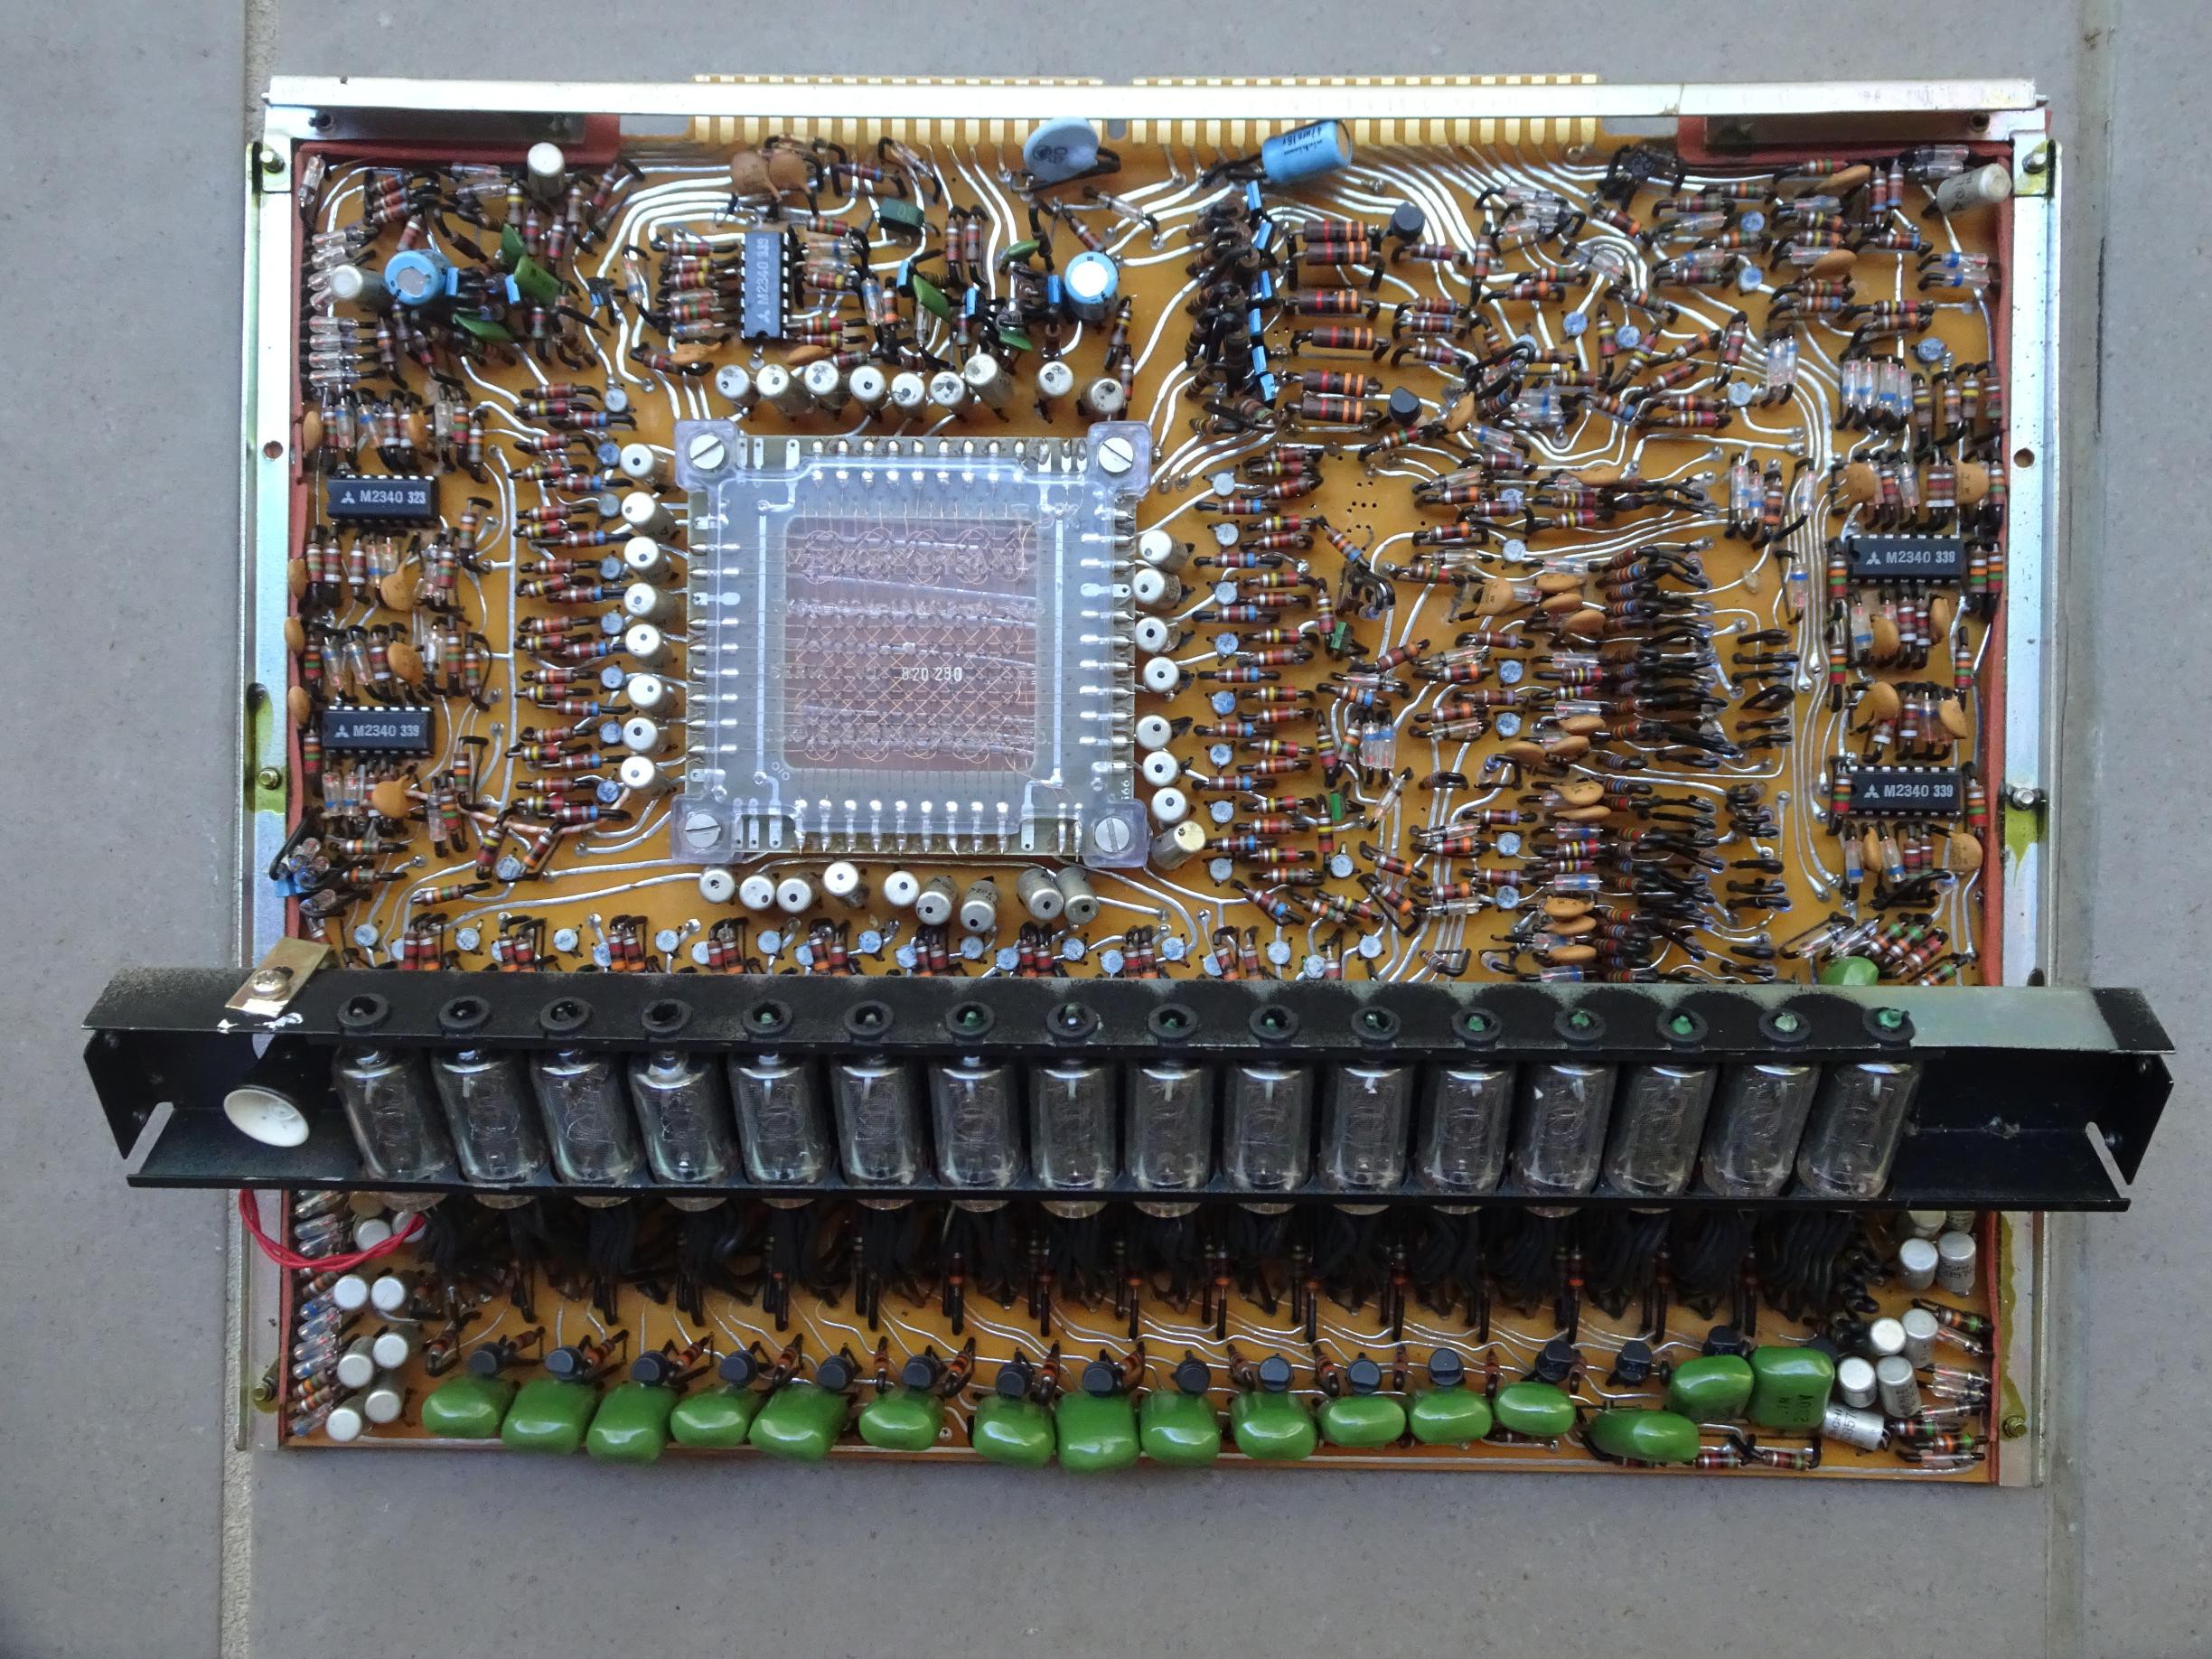
This project #Restoring a Beckman neon display clock is what got me started on MCUs several years ago. It contained an 8048 family MCU and I wrote code to replace the original firmware. I managed to live within the limitations of assembly language, 1kB code space, 64B RAM, and 13 I/O pins, several lost to using external ROM. Definitely no high level language.
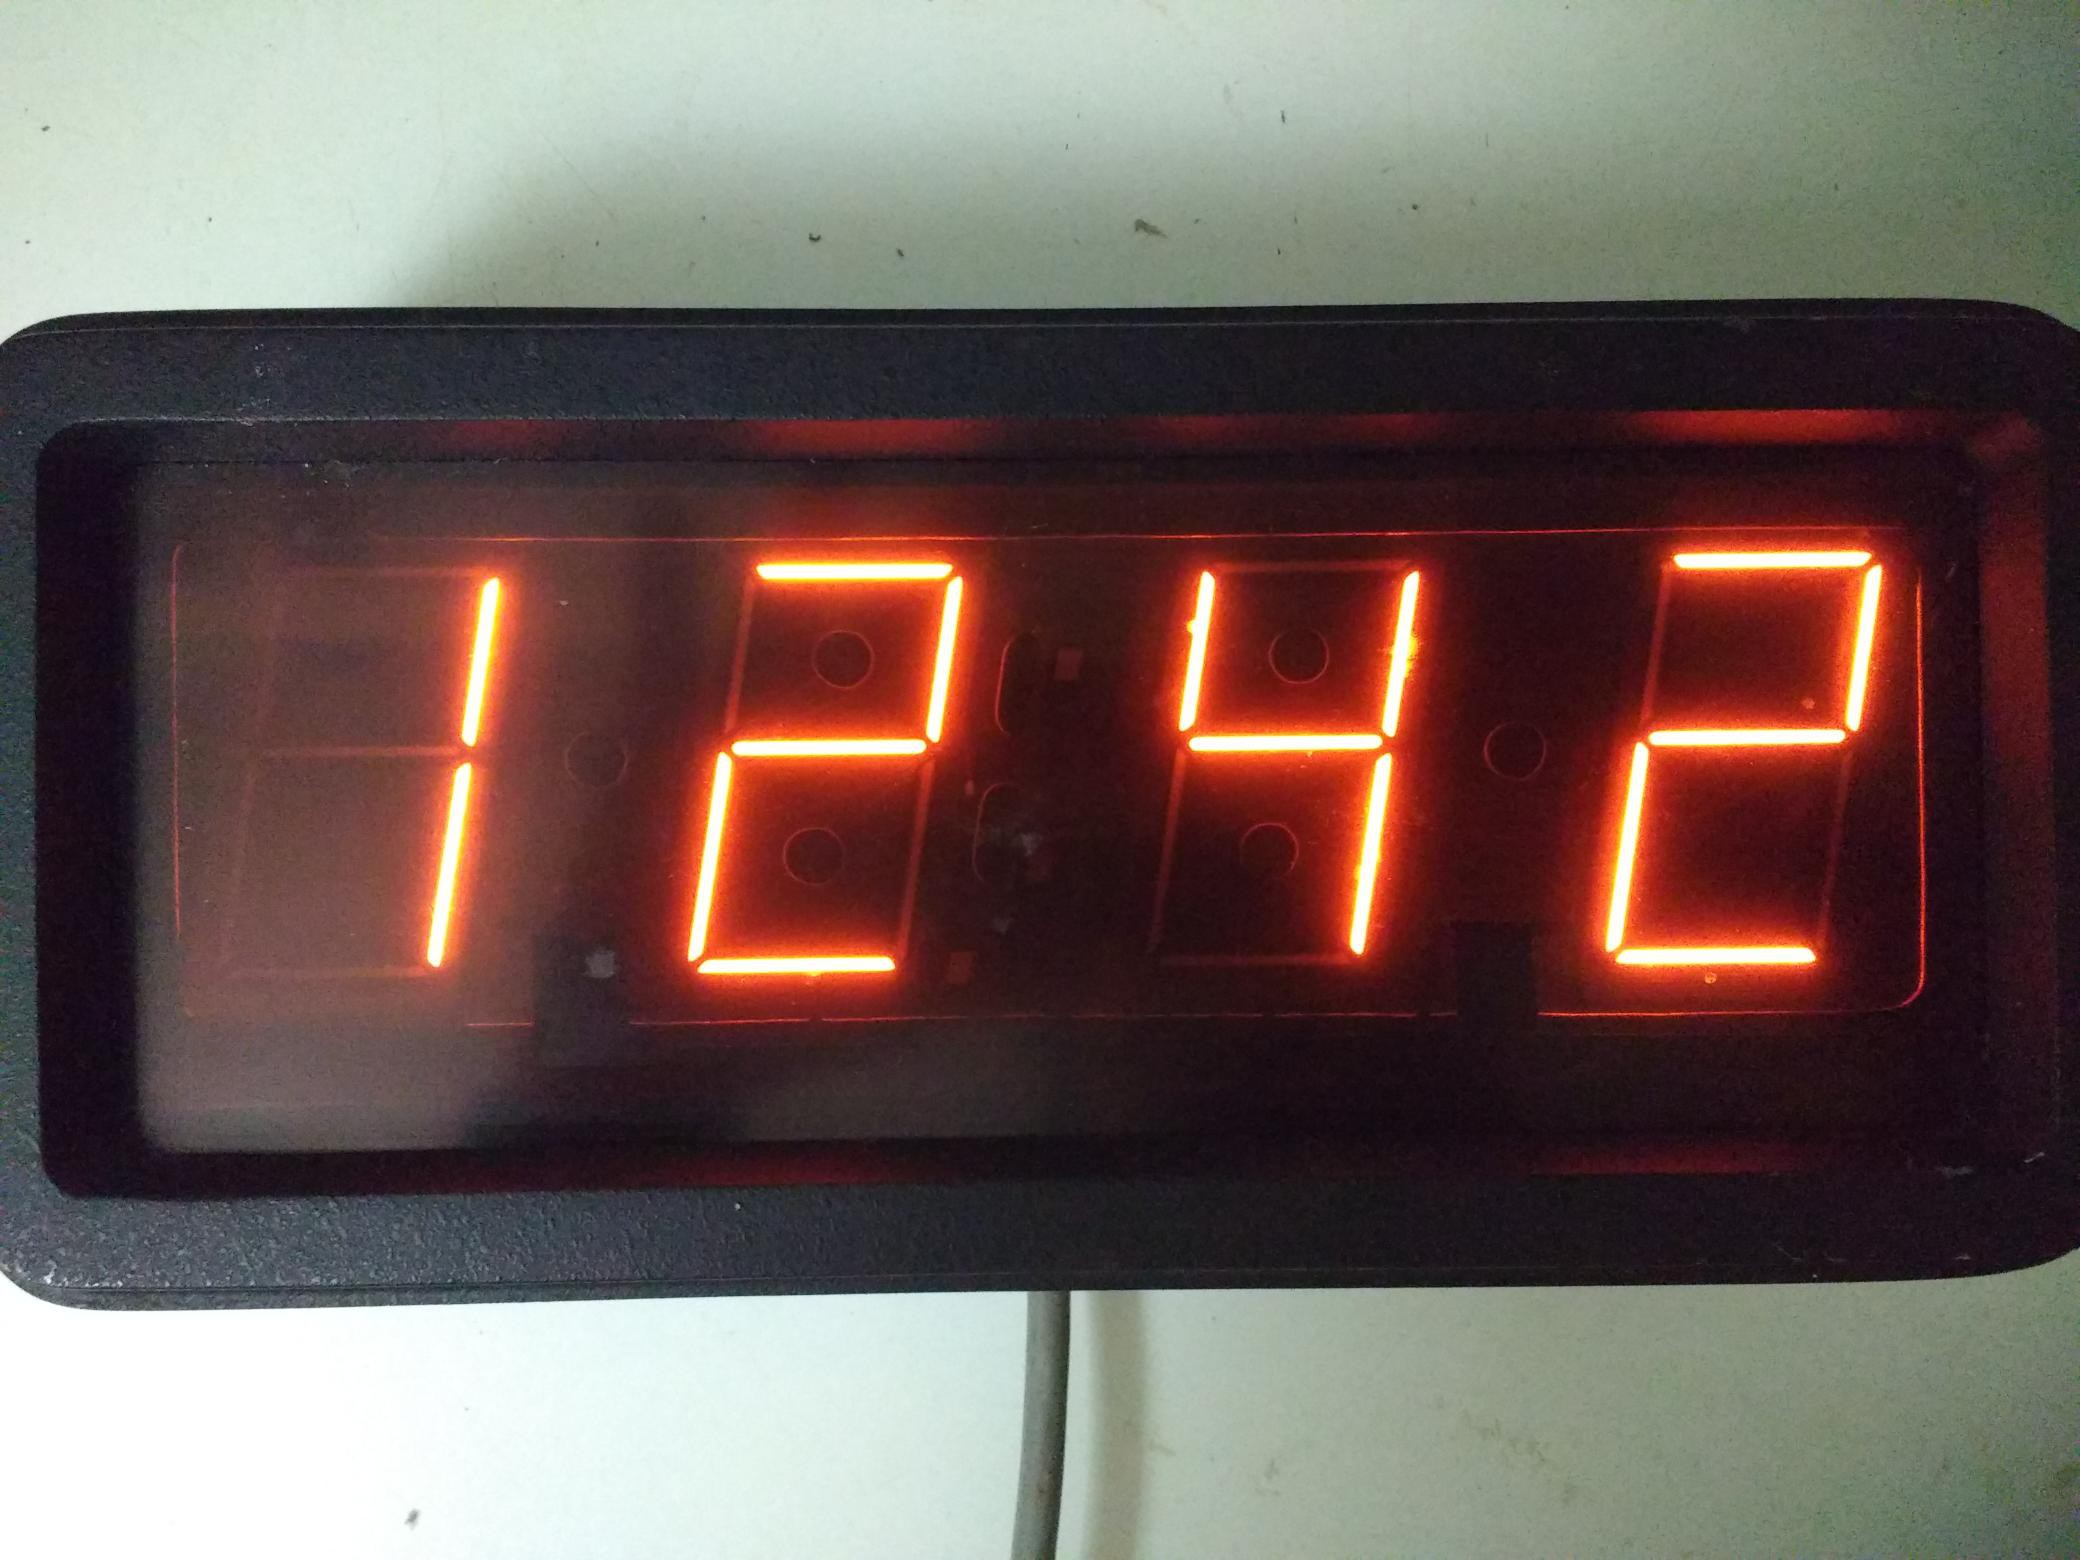
As it turned out I had quite a few of the 8048 family, and the related 8041/2 family chips in my junk box. I think the '48s came from full height 5¼ inch floppy drives, and the '42s came from PC keyboard controllers. I put them to use in projects like #8042 clock #8042 metronome and 8048 clock. No that last link is not a mistake, the instruction set is almost the same for the '48 and the '42 so the code is usable for both.
Well that was a good way to use up those chips. I have to say there are quite hardy and resisted many accidents. But boy were they power hogs.
![]()
As we know Intel came out with the 8051, the successor to the 8048. The breakthrough improvement was putting peripherals in the I/O address space rather than having specific instructions for each I/O port. The '51 has gone on to be probably the most durable MCU family and descendants live on as programmable cores for many chips.
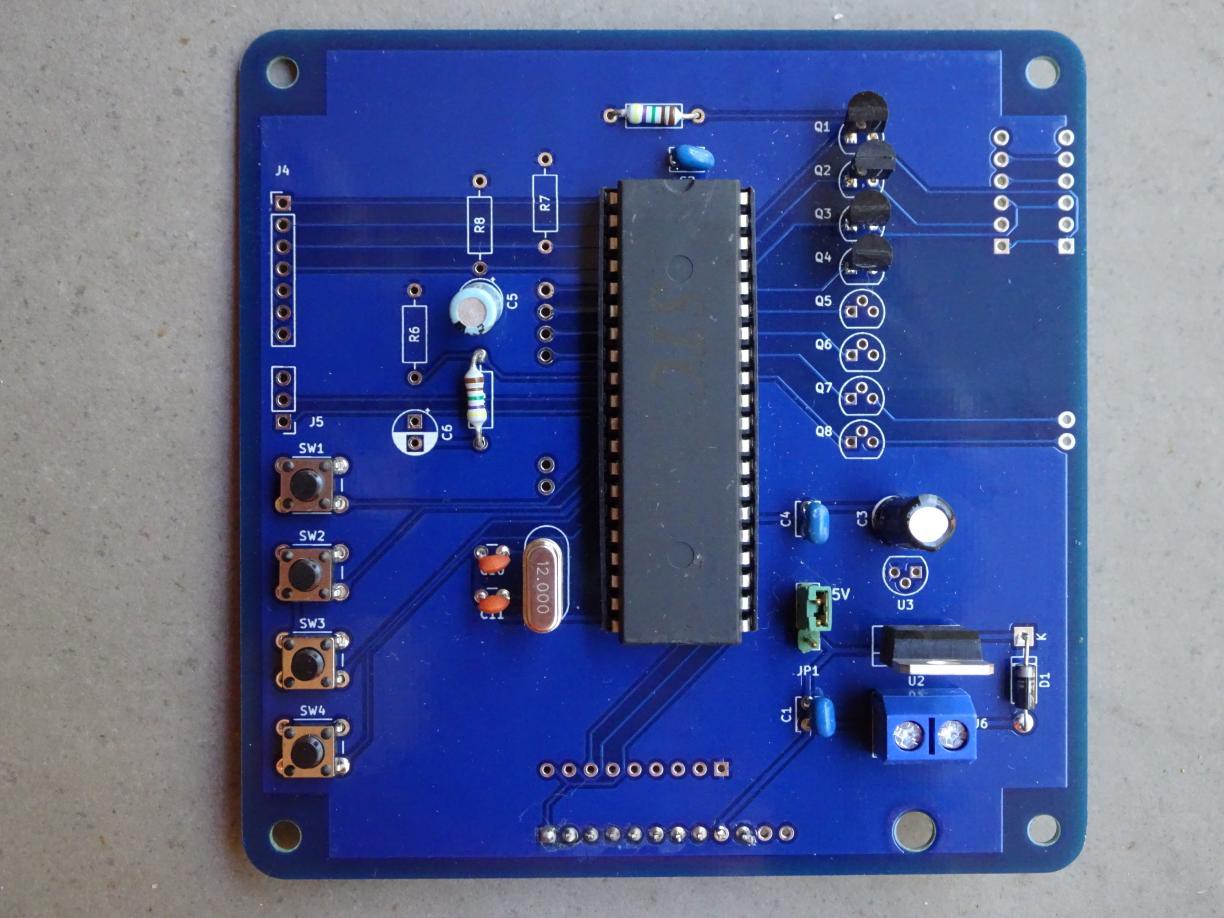
It actually is a fairly decent MCU to learn on. The hardware and instruction set are easy to understand and there is even C language support in the form of the GPL Small Device C Compiler (SDCC) and commercial offerings. Descendants have increased the clock rate to be tens of times faster than the original. Some are one-chip wonders only needing a handful of passives for a working system like this. The one above is a STC89C52 workalike for the 8052 with flash ROM for code, but otherwise a drop-in equivalent, used in #89C52 clock board. I used this dev board with them: #Adventures with a STC89C52 development board. Other projects using a '51 include #Ancient 12 hour display and #Modularnixie.
But ultimately, it's an 8-bit MCU with all the attendant limitations. (Some expanded architectures like the '251 were developed.) So I used up the handful of MCUs and dev boards I bought and bade them farewell.
![]()
Next cab off the rank was the STM8 which I got interested in thanks to #eForth for cheap STM8S gadgets. They appear in the millions if not billions in small gadgets. You probably have a few around the house. (An interesting development was that 8051 derivatives started to muscle in on the STM8 based gadgets by coming out with pin (but not architecture) compatible models, presumably because the '51 core architecture was free to reimplement.) Modules are readily available from AliExpress and the per MCU price was between 10 and 20¢, although it was a while before my SMD soldering skills were up to doing TSSOP-20.
This has a decent architecture and is also well supported by SDCC. It has a good selection of on-chip peripherals including standards like I2C which wasn't in the '51 descendants until well into its reign. The GPIO pins can do true bidirectional and true push-pull in addition to other modes like hi-Z and open drain, unlike the 8051's weak pullup. The HAL takes a bit of getting used to but it is worth it.
I liked this MCU and used it in #Repurposing an old nixie thermometer, #Third life for a radio alarm clock, and the driver for #Vertical LED digit display boards. I still have a few chips but won't be starting any new projects with them.
![]()
The AVR family is represented by the Arduino models I have. Strangely I haven't done any projects with them because I think of them as test equipment which I used frequently, as a driver in the above photo. One drawback is that they have 5 V GPIO which means I have to turn to the ESP32 Arduino lookalikes that work with 3.3 V logic.
I did have a couple of early DIP AVR chips for which I managed to nut out the details of to use in this project, and this project. The architecture is decent, it manages to get gcc support but it's still basically an 8-bit MCU.
![]()
A couple of ancient PIC MCUs in my junk box caused me to look for projects to use them in, but ultimately I decided this family wasn't worth getting involved with. I know that the family is very broad and there are many models specialised for niches, but somehow I can't bring myself to like them.
To finish off
I should mention some CPU families that I have. CPUs are more trouble to use in projects than MCUs because you have to add peripheral chips to make them useful which adds to parts count and board space. And besides, I am not nostalgic about retro boxes. If I want to have the feel of CP/M or DOS, I can fire up an emulator.
I have 8085s and Z80s which I have developed SBCs for but haven't tested yet. Similarly many 8088s. I may need a few round tuits to proceed with them.
I was tempted to delve into the 6502 family as I have memories of the KIM-1, but I don't actually have any CPU chips. I was tempted to dip my toes with the WDC 65C816 which I like the look of, but decided not to go there.
I had some 68000 CPUs but gave them away to not have to ponder what to do with them.
In a following log I will describe the current 32-bit MCUs I have and how I hope to use them.